

dough Xpress TXM-SS Owner's Manual

TXM-SS
Manual Tortilla Press
OWNER’S MANUALOWNER’S MANUALOWNER’S MANUAL
TXM-SS shown
For Customer Service, Call 1-800-835-0606 ext. 205
or Visit www.doughXpress.com
CONTENTS
Unpacking / Inspection / Installation 2
Operation 3-4
Cleaning / Maintenance 5
Specifi cations 6
Warranty 8
BEFORE warranty repair you MUST get Prior Authorization:
70613 RV B_030711

RECEIVING & INSTALLATION
Please read this manual in its entirety before operating
your press.
UNPACKING
Remember to save all packing materials - including any crating,
boxes, liners and boards. You may need these for shipping your
machine or should a repair be necessary in the future.
INSPECTION
Inspect your machine for hidden shipping damage. Contact the
delivery company immediately, should you fi nd damage.
INSTALLATION
1. Lift press from box and place on cart, if you purchased one with
the press. Align legs with holes in top of cart and bolts (supplied)
fasten to cart. You will need a 9/16 wrench.
2. If press is to be placed on counter top stick plastic end caps on
the bottom of the legs.
3. Plug the press into a standard single phase, 220 volt, 30 amp
range plug.
WARNING: Do not use an extension cord to supply power to
your press.
2
INITIAL SETUP
SETTING UP YOUR PRESS
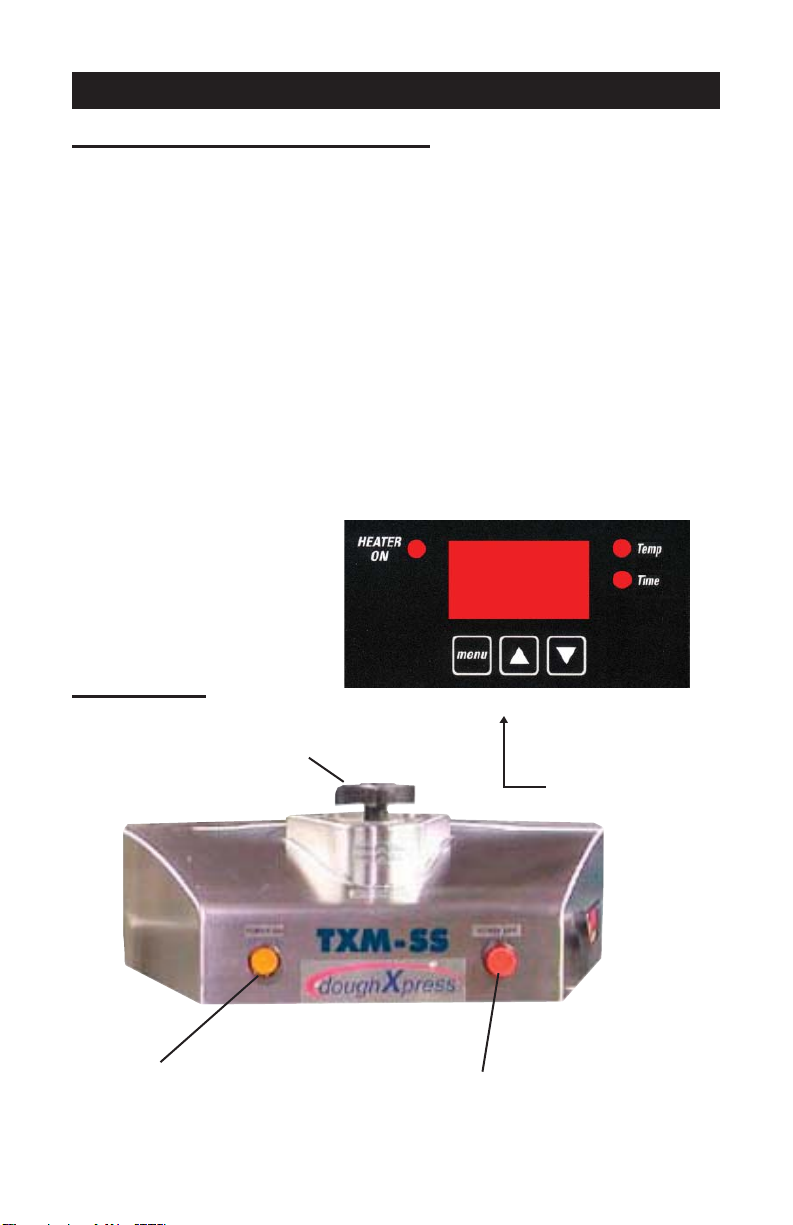
1. Push the power on button located on the front right face of the
press. This is the master power on/off button. The yellow on/
off button on the left gives you the option of turning the heat on/
off the lower platen. If it is lighted the power is on to the lower
platen.
2. To change or set the temperature, press the menu button on
the digital control on the right of the press. The green light next
to “Temp” will light. Adjust temperature to the desired setting
by pressing the up or down arrows until the indicator shows
the correct temperature. Press the menu button once more to
program the control. The yellow light next to “Heater On” will
begin fl ashing. This indicates the press is heating.
CONTROL
DIAGRAM
Thickness Control Knob
Lower Platen
On/Off
Digital
Temperature
Control
Power On
Press Once To Turn On
3
 Loading...