

DOUGHXPRESS TXM-20 Owner's Manual

For Customer Service, Call 1-800-835-0606 ext. 205
or Visit www.doughXpress.com
TXM-20
Manual Dough Press
70612 RV D 040715
OWNER’S MANUAL
Receiving & Setup ............................................................................................ 2
Operation .......................................................................................................... 3
Setting Temperature & Time ............................................................................. 4
Preference Settings .......................................................................................... 5
Machine Presets ............................................................................................6-7
Cycle Count ...................................................................................................... 8
Temperature & Time Modes .............................................................................9
Pressing Dough ......................................................................................... 10-11
Dough Weights & Shrinkage ..........................................................................12
FAQs...............................................................................................................13
Troubleshooting ..............................................................................................14
Cleaning & Maintenance ................................................................................15
Warranty .........................................................................................................16
CONTENTS
BEFORE warranty repair you MUST get Prior Authorization:

2
RECEIVING & SETUP
PLEASE READ THIS MANUAL IN ITS ENTIRETY
BEFORE OPERATING YOUR TORTILLA PRESS.
INSPECTION
Inspect your box and machine for hidden shipping damage. Contact the
delivery company immediately, should you nd damage.
PLATEN SURFACE
Slight surface imperfections are a normal part of the aluminum casting
process for the platens on your press. These are not considered a defect
and do not affect the functionality of the machine in any way.
SHIPPING OR RETURNS
NOTE: Save all of your shipping/packing materials.
DO NOT RISK COSTLY SHIPPING DAMAGE!
SHIP ONLY IN ORIGINAL BOX.
1. Fasten machine to plywood shipping base with bolts provided.
2. Make sure handle is pressed down so that the heat platen will not swing
around during shipment.
3. Place in original box, and put side liner and top liner in place. Fold in
aps and seal the box.
*Additional bottom boards, box and liners may be obtained from your
supplier for a nominal cost.
INSTALLATION
1. Lift press from box and place on cart or counter top.
2. Remove plywood shipping base from press.
CAUTION: Heavy lifting can cause injury. We recommend two person
lifting or use of a mechanical aid when handling this press.
Remember to always maintain natural curves of back and
bend knees to lift.
3. Plug the cord of the press into a correctly grounded electrical outlet. The
correct voltage is indicated on the identication tag of the press.
4. Remove wrap from handle and platens.
WARNING: When using an extension cord, use 12 or 14 ga.-3
conductor. Maximum length, 25’ (7.62 m).
This machine is designed in accordance with the NSF-8 sanitation standard
to be sealed to the countertop to prevent the harborage of vermin and
the accumulation of dirt and debris. To comply with this standard the end
customer must seal around the perimeter of the base of the machine to the
countertop with a food grade RTV silicone sealant that is certied to the
NSF/ANSI 51 standard such as Dow Corning #732 Multipurpose Sealant.

3
OPERATION
PREPARATION
1. Turn on the machine by pushing the on/off switch.
Startup/Splash screen is displayed as the controller boots up.
NOTE: The current program number and the software revision of the control-
ler are displayed at startup. (The default settings are program number
P 11 for °F, P 12 for °C and software revision RV 1.0)
After boot up, the home screen is displayed showing the current heat platen
temperature and set cycle time. The heat indicating lamp is represented
by the snowake in the upper left corner of the display. The heat indicating
lamp will display anytime the heating element is heating and will cycle on
and off after the set temperature is reached to maintain set temperature.
Startup/Splash Screen
MACHINE PRESET
BUTTONS
ACCESS
SETTINGS MENU
TEMPERATURE
READOUT/SETTING
HEAT INDICATING
LAMP
TEMPERATURE
MODE
TIME
READOUT/SETTING
TIME SCALE
HOME MENU SCREEN
4
SETTING TEMPERATURE & TIME
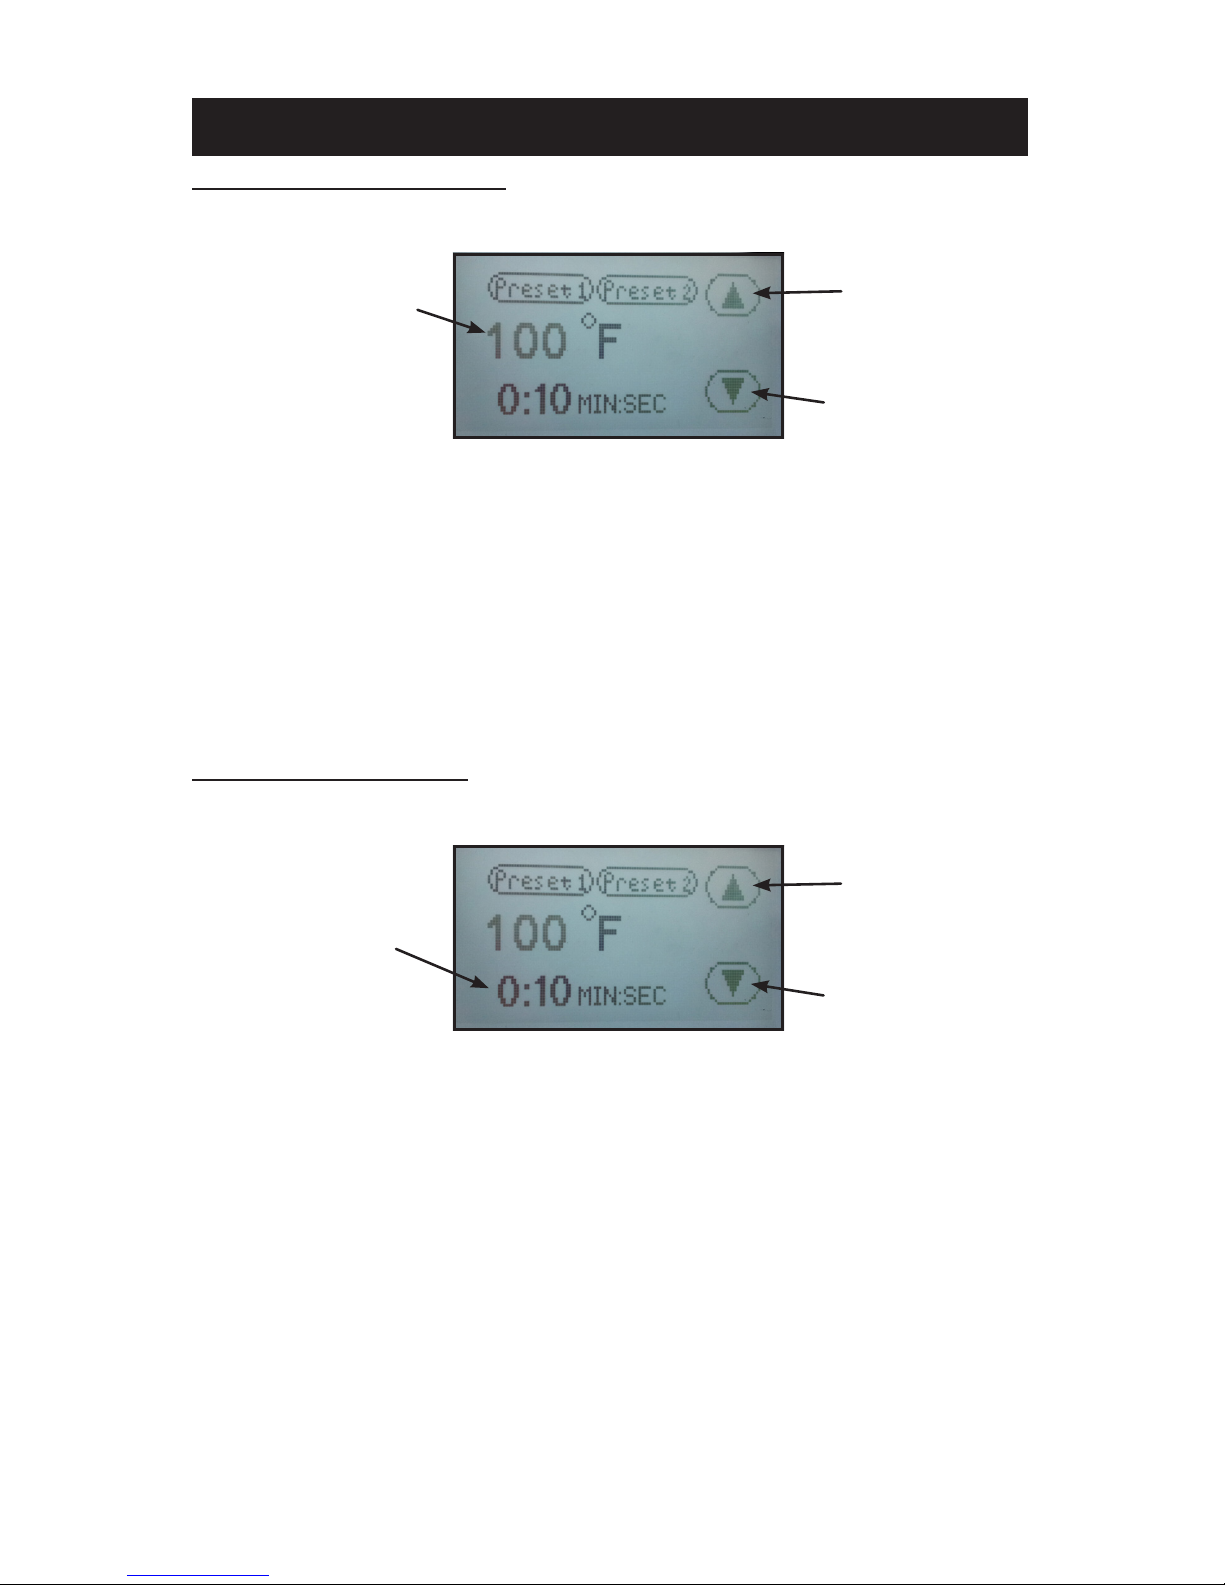
ADJUST TEMPERATURE:
1. Touch the temperature readout on the display. “UP” ▲ and “DOWN” ▼
arrows will appear on the right side of the display and the temperature
value will start ashing and to indicate it is in set mode.
2. Press the “UP” ▲ or “DOWN” ▼ arrow to change the temperature
value. Holding down on an arrow will change the temperature in 1 degree increments for 10 values; then change to 10 degrees incremental
changes.
3. Once the desired temperature value is set, either press the temperature
value to lock the set temperature or simply wait for 2 seconds and it
will lock in the new value automatically.
ADJUST CYCLE TIME:
1. Touch the time readout on the display. “UP” ▲ and “DOWN” ▼ arrows
will appear on the right side of the display and the cycle time value will
start ashing and to indicate it is in set mode.
2. Press the “UP” ▲ or “DOWN” ▼ arrow to change the cycle time value.
Holding down on an arrow will change the time in 1 second increments
for 5 values; then change to 10 seconds incremental changes.
3. Once the desired cycle time value is set, either press the time readout
to lock the cycle time or simply wait for 2 seconds and it will lock in the
new value automatically.
TEMPERATURE ADJUSTMENT SCREEN
TEMPERATURE
READOUT/SETTING
UP ARROW
DOWN ARROW
TEMPERATURE ADJUSTMENT SCREEN
UP ARROW
DOWN ARROW
TIME
READOUT/SETTING

5
PREFERENCE SETTINGS
SETTINGS:
1. Press the “?” on the upper right corner of the display on the Home
Menu Screen to access the settings menu.
2. Press the settings sub menu title to be adjusted.
SHUTDOWN TIMEOUT
The shutdown feature shuts off the heat to the press after a period of inactivity.
NOTE: The factory default is set at 3.0 hours.
1. From the settings menu press the “Shutdown Timeout” sub menu
title.
2. Press the “UP” ▲ and/or “DOWN” ▼ arrows to set the desired shutdown time.
NOTE: Shutdown time adjusts in 1/2 hour intervals. Press the “Down” ▼
button until “Disable” is displayed will deactivate this setting.
3. Press “Save” to save the setting.
4. Press “Back” to return to the previous screen.
NOTE: After the shutdown time has elapsed with the press idle, the heating
element will stop cycling to maintain the set temperature and the
home screen will display “SHUTDOWN.” Touching the display or
closing the press will take the machine out of shutdown mode.
SETTINGS MENU SCREEN
RETURN TO
PREVIOUS
SCREEN
ADJUST SHUTDOWN TIMEOUT
SETTING
SET QUANTITY OF PRESETS
DISPLAYED
VIEW/RESET CYCLE COUNT
SET TEMPERATURE SCALE
PREFERENCE
SET TIME SCALE PREFERENCE
SHUTDOWN TIMEOUT ADJUSTMENT SCREEN
UP ARROW
DOWN ARROW
SHUTDOWN TIMEOUT
SETTING
SAVE SETTINGS RETURN TO PREVIOUS SCREEN
 Loading...