

Page 1

AssuredSAN 6004
CLI Reference Guide
For firmware release GF101 or later
Abstract
This guide provides information about managing a Dot Hill AssuredSAN 6004 storage system by using its command-line interface
(CLI).
P/N 83-00006818-11-01
Revision A
May 2015
Page 2

Copyright © 2015 Dot Hill Systems Corp. All rights reserved. Dot Hill Systems Corp., Dot Hill, the Dot Hill logo, AssuredSAN,
EcoStor, and SimulCache are trademarks of Dot Hill Systems Corp. All other trademarks and registered trademarks are proprietary
to their respective owners.
The material in this document is for information only and is subject to change without notice. While reasonable efforts have been
made in the preparation of this document to assure its accuracy, changes in the product design can be made without reservation
and without notification to its users.
Page 3

Contents
About this guide. . . . . . . . . . . . . . . . . . . . . . . . . . . . . . . . . . . . . . . . . . . . . . . . . . . . . . 10
Intended audience . . . . . . . . . . . . . . . . . . . . . . . . . . . . . . . . . . . . . . . . . . . . . . . . . . . . . . . . . . . . . . 10
Prerequisites. . . . . . . . . . . . . . . . . . . . . . . . . . . . . . . . . . . . . . . . . . . . . . . . . . . . . . . . . . . . . . . . . . . 10
Document conventions and symbols . . . . . . . . . . . . . . . . . . . . . . . . . . . . . . . . . . . . . . . . . . . . . . . . . . 10
1 Using the CLI . . . . . . . . . . . . . . . . . . . . . . . . . . . . . . . . . . . . . . . . . . . . . . . . . . . . . . 12
Accessing the CLI . . . . . . . . . . . . . . . . . . . . . . . . . . . . . . . . . . . . . . . . . . . . . . . . . . . . . . . . . . . . . . . 12
CLI output formats . . . . . . . . . . . . . . . . . . . . . . . . . . . . . . . . . . . . . . . . . . . . . . . . . . . . . . . . . . . . . . . 12
Using CLI interactively . . . . . . . . . . . . . . . . . . . . . . . . . . . . . . . . . . . . . . . . . . . . . . . . . . . . . . . . . . . . 13
Using a script to access the CLI . . . . . . . . . . . . . . . . . . . . . . . . . . . . . . . . . . . . . . . . . . . . . . . . . . . . . 13
Using the XML API . . . . . . . . . . . . . . . . . . . . . . . . . . . . . . . . . . . . . . . . . . . . . . . . . . . . . . . . . . . . . . 16
Scripting guidelines . . . . . . . . . . . . . . . . . . . . . . . . . . . . . . . . . . . . . . . . . . . . . . . . . . . . . . . . . . . 17
XML API examples . . . . . . . . . . . . . . . . . . . . . . . . . . . . . . . . . . . . . . . . . . . . . . . . . . . . . . . . . . . . 17
XML API optimization . . . . . . . . . . . . . . . . . . . . . . . . . . . . . . . . . . . . . . . . . . . . . . . . . . . . . . . . . . 18
Command syntax . . . . . . . . . . . . . . . . . . . . . . . . . . . . . . . . . . . . . . . . . . . . . . . . . . . . . . . . . . . . . . . 18
General rules for specifying commands . . . . . . . . . . . . . . . . . . . . . . . . . . . . . . . . . . . . . . . . . . . . . 18
Specifying drawers . . . . . . . . . . . . . . . . . . . . . . . . . . . . . . . . . . . . . . . . . . . . . . . . . . . . . . . . . . . 19
Specifying disks. . . . . . . . . . . . . . . . . . . . . . . . . . . . . . . . . . . . . . . . . . . . . . . . . . . . . . . . . . . . . . 19
Specifying vdisks . . . . . . . . . . . . . . . . . . . . . . . . . . . . . . . . . . . . . . . . . . . . . . . . . . . . . . . . . . . . . 19
Specifying disk groups . . . . . . . . . . . . . . . . . . . . . . . . . . . . . . . . . . . . . . . . . . . . . . . . . . . . . . . . . 19
Specifying volumes . . . . . . . . . . . . . . . . . . . . . . . . . . . . . . . . . . . . . . . . . . . . . . . . . . . . . . . . . . . 19
Specifying ports. . . . . . . . . . . . . . . . . . . . . . . . . . . . . . . . . . . . . . . . . . . . . . . . . . . . . . . . . . . . . . 20
Specifying initiators and hosts . . . . . . . . . . . . . . . . . . . . . . . . . . . . . . . . . . . . . . . . . . . . . . . . . . . . 20
Specifying fan modules . . . . . . . . . . . . . . . . . . . . . . . . . . . . . . . . . . . . . . . . . . . . . . . . . . . . . . . . 20
User password rules . . . . . . . . . . . . . . . . . . . . . . . . . . . . . . . . . . . . . . . . . . . . . . . . . . . . . . . . . . . 20
Command completion, editing, and history . . . . . . . . . . . . . . . . . . . . . . . . . . . . . . . . . . . . . . . . . . . . . 21
Viewing help . . . . . . . . . . . . . . . . . . . . . . . . . . . . . . . . . . . . . . . . . . . . . . . . . . . . . . . . . . . . . . . . . . 21
Size representations . . . . . . . . . . . . . . . . . . . . . . . . . . . . . . . . . . . . . . . . . . . . . . . . . . . . . . . . . . . . . 21
Event log . . . . . . . . . . . . . . . . . . . . . . . . . . . . . . . . . . . . . . . . . . . . . . . . . . . . . . . . . . . . . . . . . . . . . 22
2 Categorical list of commands. . . . . . . . . . . . . . . . . . . . . . . . . . . . . . . . . . . . . . . . . . . 23
3 Alphabetical list of commands . . . . . . . . . . . . . . . . . . . . . . . . . . . . . . . . . . . . . . . . . . 24
abort scrub . . . . . . . . . . . . . . . . . . . . . . . . . . . . . . . . . . . . . . . . . . . . . . . . . . . . . . . . . . . . . . . . . . . 25
abort verify . . . . . . . . . . . . . . . . . . . . . . . . . . . . . . . . . . . . . . . . . . . . . . . . . . . . . . . . . . . . . . . . . . . 26
add global-spare (Deprecated). . . . . . . . . . . . . . . . . . . . . . . . . . . . . . . . . . . . . . . . . . . . . . . . . . . . . . 26
add spares . . . . . . . . . . . . . . . . . . . . . . . . . . . . . . . . . . . . . . . . . . . . . . . . . . . . . . . . . . . . . . . . . . . 27
add vdisk-spare (Deprecated). . . . . . . . . . . . . . . . . . . . . . . . . . . . . . . . . . . . . . . . . . . . . . . . . . . . . . . 27
check firmware-upgrade-health. . . . . . . . . . . . . . . . . . . . . . . . . . . . . . . . . . . . . . . . . . . . . . . . . . . . . . 28
clear cache . . . . . . . . . . . . . . . . . . . . . . . . . . . . . . . . . . . . . . . . . . . . . . . . . . . . . . . . . . . . . . . . . . . 30
clear degraded-disk . . . . . . . . . . . . . . . . . . . . . . . . . . . . . . . . . . . . . . . . . . . . . . . . . . . . . . . . . . . . . 31
clear disk-metadata. . . . . . . . . . . . . . . . . . . . . . . . . . . . . . . . . . . . . . . . . . . . . . . . . . . . . . . . . . . . . . 32
clear events . . . . . . . . . . . . . . . . . . . . . . . . . . . . . . . . . . . . . . . . . . . . . . . . . . . . . . . . . . . . . . . . . . . 33
clear expander-status . . . . . . . . . . . . . . . . . . . . . . . . . . . . . . . . . . . . . . . . . . . . . . . . . . . . . . . . . . . . 34
create certificate. . . . . . . . . . . . . . . . . . . . . . . . . . . . . . . . . . . . . . . . . . . . . . . . . . . . . . . . . . . . . . . . 35
create host (Deprecated) . . . . . . . . . . . . . . . . . . . . . . . . . . . . . . . . . . . . . . . . . . . . . . . . . . . . . . . . . . 36
create schedule . . . . . . . . . . . . . . . . . . . . . . . . . . . . . . . . . . . . . . . . . . . . . . . . . . . . . . . . . . . . . . . . 36
create task . . . . . . . . . . . . . . . . . . . . . . . . . . . . . . . . . . . . . . . . . . . . . . . . . . . . . . . . . . . . . . . . . . . . 38
create user. . . . . . . . . . . . . . . . . . . . . . . . . . . . . . . . . . . . . . . . . . . . . . . . . . . . . . . . . . . . . . . . . . . . 39
create vdisk . . . . . . . . . . . . . . . . . . . . . . . . . . . . . . . . . . . . . . . . . . . . . . . . . . . . . . . . . . . . . . . . . . . 43
create volume. . . . . . . . . . . . . . . . . . . . . . . . . . . . . . . . . . . . . . . . . . . . . . . . . . . . . . . . . . . . . . . . . . 45
create volume-set . . . . . . . . . . . . . . . . . . . . . . . . . . . . . . . . . . . . . . . . . . . . . . . . . . . . . . . . . . . . . . . 47
delete global-spare (Deprecated) . . . . . . . . . . . . . . . . . . . . . . . . . . . . . . . . . . . . . . . . . . . . . . . . . . . . 48
delete host (Deprecated) . . . . . . . . . . . . . . . . . . . . . . . . . . . . . . . . . . . . . . . . . . . . . . . . . . . . . . . . . . 48
Contents 3
Page 4

delete initiator-nickname . . . . . . . . . . . . . . . . . . . . . . . . . . . . . . . . . . . . . . . . . . . . . . . . . . . . . . . . . . 49
delete schedule . . . . . . . . . . . . . . . . . . . . . . . . . . . . . . . . . . . . . . . . . . . . . . . . . . . . . . . . . . . . . . . . 50
delete task . . . . . . . . . . . . . . . . . . . . . . . . . . . . . . . . . . . . . . . . . . . . . . . . . . . . . . . . . . . . . . . . . . . . 51
delete user. . . . . . . . . . . . . . . . . . . . . . . . . . . . . . . . . . . . . . . . . . . . . . . . . . . . . . . . . . . . . . . . . . . . 52
delete vdisks . . . . . . . . . . . . . . . . . . . . . . . . . . . . . . . . . . . . . . . . . . . . . . . . . . . . . . . . . . . . . . . . . . 53
delete vdisk-spare (Deprecated) . . . . . . . . . . . . . . . . . . . . . . . . . . . . . . . . . . . . . . . . . . . . . . . . . . . . . 53
delete volumes . . . . . . . . . . . . . . . . . . . . . . . . . . . . . . . . . . . . . . . . . . . . . . . . . . . . . . . . . . . . . . . . . 54
dequarantine . . . . . . . . . . . . . . . . . . . . . . . . . . . . . . . . . . . . . . . . . . . . . . . . . . . . . . . . . . . . . . . . . . 55
down disk . . . . . . . . . . . . . . . . . . . . . . . . . . . . . . . . . . . . . . . . . . . . . . . . . . . . . . . . . . . . . . . . . . . . 57
exit . . . . . . . . . . . . . . . . . . . . . . . . . . . . . . . . . . . . . . . . . . . . . . . . . . . . . . . . . . . . . . . . . . . . . . . . . 58
expand vdisk . . . . . . . . . . . . . . . . . . . . . . . . . . . . . . . . . . . . . . . . . . . . . . . . . . . . . . . . . . . . . . . . . . 59
expand volume . . . . . . . . . . . . . . . . . . . . . . . . . . . . . . . . . . . . . . . . . . . . . . . . . . . . . . . . . . . . . . . . 61
fail . . . . . . . . . . . . . . . . . . . . . . . . . . . . . . . . . . . . . . . . . . . . . . . . . . . . . . . . . . . . . . . . . . . . . . . . . 62
help . . . . . . . . . . . . . . . . . . . . . . . . . . . . . . . . . . . . . . . . . . . . . . . . . . . . . . . . . . . . . . . . . . . . . . . . 62
map volume. . . . . . . . . . . . . . . . . . . . . . . . . . . . . . . . . . . . . . . . . . . . . . . . . . . . . . . . . . . . . . . . . . . 63
meta . . . . . . . . . . . . . . . . . . . . . . . . . . . . . . . . . . . . . . . . . . . . . . . . . . . . . . . . . . . . . . . . . . . . . . . . 65
ping . . . . . . . . . . . . . . . . . . . . . . . . . . . . . . . . . . . . . . . . . . . . . . . . . . . . . . . . . . . . . . . . . . . . . . . . 66
release volume . . . . . . . . . . . . . . . . . . . . . . . . . . . . . . . . . . . . . . . . . . . . . . . . . . . . . . . . . . . . . . . . . 67
remove spares . . . . . . . . . . . . . . . . . . . . . . . . . . . . . . . . . . . . . . . . . . . . . . . . . . . . . . . . . . . . . . . . . 68
rescan. . . . . . . . . . . . . . . . . . . . . . . . . . . . . . . . . . . . . . . . . . . . . . . . . . . . . . . . . . . . . . . . . . . . . . . 69
reset all-statistics . . . . . . . . . . . . . . . . . . . . . . . . . . . . . . . . . . . . . . . . . . . . . . . . . . . . . . . . . . . . . . . . 70
reset controller-statistics . . . . . . . . . . . . . . . . . . . . . . . . . . . . . . . . . . . . . . . . . . . . . . . . . . . . . . . . . . . 71
reset disk-error-statistics . . . . . . . . . . . . . . . . . . . . . . . . . . . . . . . . . . . . . . . . . . . . . . . . . . . . . . . . . . . 72
reset disk-statistics. . . . . . . . . . . . . . . . . . . . . . . . . . . . . . . . . . . . . . . . . . . . . . . . . . . . . . . . . . . . . . . 73
reset host-link . . . . . . . . . . . . . . . . . . . . . . . . . . . . . . . . . . . . . . . . . . . . . . . . . . . . . . . . . . . . . . . . . . 74
reset host-port-statistics. . . . . . . . . . . . . . . . . . . . . . . . . . . . . . . . . . . . . . . . . . . . . . . . . . . . . . . . . . . . 75
reset vdisk-statistics . . . . . . . . . . . . . . . . . . . . . . . . . . . . . . . . . . . . . . . . . . . . . . . . . . . . . . . . . . . . . . 76
reset volume-statistics . . . . . . . . . . . . . . . . . . . . . . . . . . . . . . . . . . . . . . . . . . . . . . . . . . . . . . . . . . . . 77
restart mc . . . . . . . . . . . . . . . . . . . . . . . . . . . . . . . . . . . . . . . . . . . . . . . . . . . . . . . . . . . . . . . . . . . . 78
restart sc . . . . . . . . . . . . . . . . . . . . . . . . . . . . . . . . . . . . . . . . . . . . . . . . . . . . . . . . . . . . . . . . . . . . . 79
restore defaults. . . . . . . . . . . . . . . . . . . . . . . . . . . . . . . . . . . . . . . . . . . . . . . . . . . . . . . . . . . . . . . . . 80
scrub vdisk . . . . . . . . . . . . . . . . . . . . . . . . . . . . . . . . . . . . . . . . . . . . . . . . . . . . . . . . . . . . . . . . . . . 81
scrub volume . . . . . . . . . . . . . . . . . . . . . . . . . . . . . . . . . . . . . . . . . . . . . . . . . . . . . . . . . . . . . . . . . . 82
set advanced-settings . . . . . . . . . . . . . . . . . . . . . . . . . . . . . . . . . . . . . . . . . . . . . . . . . . . . . . . . . . . . 83
set auto-write-through-trigger (Deprecated) . . . . . . . . . . . . . . . . . . . . . . . . . . . . . . . . . . . . . . . . . . . . . . 87
set awt (Deprecated) . . . . . . . . . . . . . . . . . . . . . . . . . . . . . . . . . . . . . . . . . . . . . . . . . . . . . . . . . . . . . 87
set cache-parameters . . . . . . . . . . . . . . . . . . . . . . . . . . . . . . . . . . . . . . . . . . . . . . . . . . . . . . . . . . . . 88
set cli-parameters . . . . . . . . . . . . . . . . . . . . . . . . . . . . . . . . . . . . . . . . . . . . . . . . . . . . . . . . . . . . . . . 90
set controller-date . . . . . . . . . . . . . . . . . . . . . . . . . . . . . . . . . . . . . . . . . . . . . . . . . . . . . . . . . . . . . . . 92
set debug-log-parameters. . . . . . . . . . . . . . . . . . . . . . . . . . . . . . . . . . . . . . . . . . . . . . . . . . . . . . . . . . 94
set degraded-disk-policy . . . . . . . . . . . . . . . . . . . . . . . . . . . . . . . . . . . . . . . . . . . . . . . . . . . . . . . . . . 95
set degraded-disk-threshold . . . . . . . . . . . . . . . . . . . . . . . . . . . . . . . . . . . . . . . . . . . . . . . . . . . . . . . . 96
set disk-parameters . . . . . . . . . . . . . . . . . . . . . . . . . . . . . . . . . . . . . . . . . . . . . . . . . . . . . . . . . . . . . . 99
set email-parameters . . . . . . . . . . . . . . . . . . . . . . . . . . . . . . . . . . . . . . . . . . . . . . . . . . . . . . . . . . . . 100
set enclosure . . . . . . . . . . . . . . . . . . . . . . . . . . . . . . . . . . . . . . . . . . . . . . . . . . . . . . . . . . . . . . . . . 101
set expander-fault-isolation. . . . . . . . . . . . . . . . . . . . . . . . . . . . . . . . . . . . . . . . . . . . . . . . . . . . . . . . 102
set expander-phy . . . . . . . . . . . . . . . . . . . . . . . . . . . . . . . . . . . . . . . . . . . . . . . . . . . . . . . . . . . . . . 103
set global-spare (Deprecated). . . . . . . . . . . . . . . . . . . . . . . . . . . . . . . . . . . . . . . . . . . . . . . . . . . . . . 104
set host-name (Deprecated) . . . . . . . . . . . . . . . . . . . . . . . . . . . . . . . . . . . . . . . . . . . . . . . . . . . . . . . 104
set initiator. . . . . . . . . . . . . . . . . . . . . . . . . . . . . . . . . . . . . . . . . . . . . . . . . . . . . . . . . . . . . . . . . . . 105
set job-parameters (Deprecated) . . . . . . . . . . . . . . . . . . . . . . . . . . . . . . . . . . . . . . . . . . . . . . . .
. . . . 105
set led. . . . . . . . . . . . . . . . . . . . . . . . . . . . . . . . . . . . . . . . . . . . . . . . . . . . . . . . . . . . . . . . . . . . . . 106
set network-parameters . . . . . . . . . . . . . . . . . . . . . . . . . . . . . . . . . . . . . . . . . . . . . . . . . . . . . . . . . . 108
set ntp-parameters . . . . . . . . . . . . . . . . . . . . . . . . . . . . . . . . . . . . . . . . . . . . . . . . . . . . . . . . . . . . . 110
set password . . . . . . . . . . . . . . . . . . . . . . . . . . . . . . . . . . . . . . . . . . . . . . . . . . . . . . . . . . . . . . . . . 111
set prompt . . . . . . . . . . . . . . . . . . . . . . . . . . . . . . . . . . . . . . . . . . . . . . . . . . . . . . . . . . . . . . . . . . . 112
set protocols . . . . . . . . . . . . . . . . . . . . . . . . . . . . . . . . . . . . . . . . . . . . . . . . . . . . . . . . . . . . . . . . . 113
set schedule . . . . . . . . . . . . . . . . . . . . . . . . . . . . . . . . . . . . . . . . . . . . . . . . . . . . . . . . . . . . . . . . . . 115
set snmp-parameters . . . . . . . . . . . . . . . . . . . . . . . . . . . . . . . . . . . . . . . . . . . . . . . . . . . . . . . . . . . . 116
4Contents
Page 5

set spares (Deprecated) . . . . . . . . . . . . . . . . . . . . . . . . . . . . . . . . . . . . . . . . . . . . . . . . . . . . . . . . . . 117
set syslog-parameters . . . . . . . . . . . . . . . . . . . . . . . . . . . . . . . . . . . . . . . . . . . . . . . . . . . . . . . . . . . 117
set system . . . . . . . . . . . . . . . . . . . . . . . . . . . . . . . . . . . . . . . . . . . . . . . . . . . . . . . . . . . . . . . . . . . 118
set user . . . . . . . . . . . . . . . . . . . . . . . . . . . . . . . . . . . . . . . . . . . . . . . . . . . . . . . . . . . . . . . . . . . . . 119
set vdisk . . . . . . . . . . . . . . . . . . . . . . . . . . . . . . . . . . . . . . . . . . . . . . . . . . . . . . . . . . . . . . . . . . . . 122
set vdisk-spare (Deprecated). . . . . . . . . . . . . . . . . . . . . . . . . . . . . . . . . . . . . . . . . . . . . . . . . . . . . . . 122
set volume . . . . . . . . . . . . . . . . . . . . . . . . . . . . . . . . . . . . . . . . . . . . . . . . . . . . . . . . . . . . . . . . . . . 123
show advanced-settings . . . . . . . . . . . . . . . . . . . . . . . . . . . . . . . . . . . . . . . . . . . . . . . . . . . . . . . . . . 124
show auto-write-through-trigger (Deprecated) . . . . . . . . . . . . . . . . . . . . . . . . . . . . . . . . . . . . . . . . . . . 127
show awt (Deprecated) . . . . . . . . . . . . . . . . . . . . . . . . . . . . . . . . . . . . . . . . . . . . . . . . . . . . . . . . . . 127
show cache-parameters . . . . . . . . . . . . . . . . . . . . . . . . . . . . . . . . . . . . . . . . . . . . . . . . . . . . . . . . . . 128
show certificate . . . . . . . . . . . . . . . . . . . . . . . . . . . . . . . . . . . . . . . . . . . . . . . . . . . . . . . . . . . . . . . 130
show channels (Deprecated) . . . . . . . . . . . . . . . . . . . . . . . . . . . . . . . . . . . . . . . . . . . . . . . . . . . . . . 130
show cli-parameters . . . . . . . . . . . . . . . . . . . . . . . . . . . . . . . . . . . . . . . . . . . . . . . . . . . . . . . . . . . . 131
show configuration . . . . . . . . . . . . . . . . . . . . . . . . . . . . . . . . . . . . . . . . . . . . . . . . . . . . . . . . . . . . . 133
show controller-date . . . . . . . . . . . . . . . . . . . . . . . . . . . . . . . . . . . . . . . . . . . . . . . . . . . . . . . . . . . . 134
show controllers . . . . . . . . . . . . . . . . . . . . . . . . . . . . . . . . . . . . . . . . . . . . . . . . . . . . . . . . . . . . . . . 135
show controller-statistics. . . . . . . . . . . . . . . . . . . . . . . . . . . . . . . . . . . . . . . . . . . . . . . . . . . . . . . . . . 138
show debug-log-parameters . . . . . . . . . . . . . . . . . . . . . . . . . . . . . . . . . . . . . . . . . . . . . . . . . . . . . . . 140
show degraded-disk-policy. . . . . . . . . . . . . . . . . . . . . . . . . . . . . . . . . . . . . . . . . . . . . . . . . . . . . . . . 141
show degraded-disk-thresholds . . . . . . . . . . . . . . . . . . . . . . . . . . . . . . . . . . . . . . . . . . . . . . . . . . . . . 142
show disk-parameters . . . . . . . . . . . . . . . . . . . . . . . . . . . . . . . . . . . . . . . . . . . . . . . . . . . . . . . . . . . 144
show disks . . . . . . . . . . . . . . . . . . . . . . . . . . . . . . . . . . . . . . . . . . . . . . . . . . . . . . . . . . . . . . . . . . . 145
show disk-statistics . . . . . . . . . . . . . . . . . . . . . . . . . . . . . . . . . . . . . . . . . . . . . . . . . . . . . . . . . . . . . 150
show email-parameters . . . . . . . . . . . . . . . . . . . . . . . . . . . . . . . . . . . . . . . . . . . . . . . . . . . . . . . . . . 154
show enclosures . . . . . . . . . . . . . . . . . . . . . . . . . . . . . . . . . . . . . . . . . . . . . . . . . . . . . . . . . . . . . . . 155
show events . . . . . . . . . . . . . . . . . . . . . . . . . . . . . . . . . . . . . . . . . . . . . . . . . . . . . . . . . . . . . . . . . . 157
show expander-status . . . . . . . . . . . . . . . . . . . . . . . . . . . . . . . . . . . . . . . . . . . . . . . . . . . . . . . . . . . 159
show fans . . . . . . . . . . . . . . . . . . . . . . . . . . . . . . . . . . . . . . . . . . . . . . . . . . . . . . . . . . . . . . . . . . . 161
show frus. . . . . . . . . . . . . . . . . . . . . . . . . . . . . . . . . . . . . . . . . . . . . . . . . . . . . . . . . . . . . . . . . . . . 163
show host-maps (Deprecated). . . . . . . . . . . . . . . . . . . . . . . . . . . . . . . . . . . . . . . . . . . . . . . . . . . . . . 164
show host-parameters (Deprecated). . . . . . . . . . . . . . . . . . . . . . . . . . . . . . . . . . . . . . . . . . . . . . . . . . 164
show host-phy-statistics . . . . . . . . . . . . . . . . . . . . . . . . . . . . . . . . . . . . . . . . . . . . . . . . . . . . . . . . . . 165
show host-port-statistics . . . . . . . . . . . . . . . . . . . . . . . . . . . . . . . . . . . . . . . . . . . . . . . . . . . . . . . . . . 166
show hosts (Deprecated) . . . . . . . . . . . . . . . . . . . . . . . . . . . . . . . . . . . . . . . . . . . . . . . . . . . . . . . . . 167
show initiators . . . . . . . . . . . . . . . . . . . . . . . . . . . . . . . . . . . . . . . . . . . . . . . . . . . . . . . . . . . . . . . . 168
show inquiry . . . . . . . . . . . . . . . . . . . . . . . . . . . . . . . . . . . . . . . . . . . . . . . . . . . . . . . . . . . . . . . . . 169
show job-parameters (Deprecated) . . . . . . . . . . . . . . . . . . . . . . . . . . . . . . . . . . . . . . . . . . . . . . . . . . 169
show maps . . . . . . . . . . . . . . . . . . . . . . . . . . . . . . . . . . . . . . . . . . . . . . . . . . . . . . . . . . . . . . . . . . 170
show network-parameters . . . . . . . . . . . . . . . . . . . . . . . . . . . . . . . . . . . . . . . . . . . . . . . . . . . . . . . . 172
show ntp-status . . . . . . . . . . . . . . . . . . . . . . . . . . . . . . . . . . . . . . . . . . . . . . . . . . . . . . . . . . . . . . . . 173
show ports . . . . . . . . . . . . . . . . . . . . . . . . . . . . . . . . . . . . . . . . . . . . . . . . . . . . . . . . . . . . . . . . . . . 174
show power-supplies . . . . . . . . . . . . . . . . . . . . . . . . . . . . . . . . . . . . . . . . . . . . . . . . . . . . . . . . . . . . 176
show protocols . . . . . . . . . . . . . . . . . . . . . . . . . . . . . . . . . . . . . . . . . . . . . . . . . . . . . . . . . . . . . . . . 177
show provisioning. . . . . . . . . . . . . . . . . . . . . . . . . . . . . . . . . . . . . . . . . . . . . . . . . . . . . . . . . . . . . . 178
show redundancy-mode. . . . . . . . . . . . . . . . . . . . . . . . . . . . . . . . . . . . . . . . . . . . . . . . . . . . . . . . . . 181
show refresh-counters . . . . . . . . . . . . . . . . . . . . . . . . . . . . . . . . . . . . . . . . . . . . . . . . . . . . . . . . . . . 182
show sas-link-health. . . . . . . . . . . . . . . . . . . . . . . . . . . . . . . . . . . . . . . . . . . . . . . . . . . . . . . . . . . . . 183
show schedule-details (Deprecated). . . . . . . . . . . . . . . . . . . . . . . . . . . . . . . . . . . . . . . . . . . . . . . . . . 183
show schedules . . . . . . . . . . . . . . . . . . . . . . . . . . . . . . . . . . . . . . . . . . . . . . . . . . . . . . . . . . . . . . . 184
show sensor-status. . . . . . . . . . . . . . . . . . . . . . . . . . . . . . . . . . . . . . . . . . . . . . . . . . . . . . .
. . . . . . . 185
show shutdown-status . . . . . . . . . . . . . . . . . . . . . . . . . . . . . . . . . . . . . . . . . . . . . . . . . . . . . . . . . . . 186
show snmp-parameters . . . . . . . . . . . . . . . . . . . . . . . . . . . . . . . . . . . . . . . . . . . . . . . . . . . . . . . . . . 187
show syslog-parameters. . . . . . . . . . . . . . . . . . . . . . . . . . . . . . . . . . . . . . . . . . . . . . . . . . . . . . . . . . 188
show system. . . . . . . . . . . . . . . . . . . . . . . . . . . . . . . . . . . . . . . . . . . . . . . . . . . . . . . . . . . . . . . . . . 189
show system-parameters . . . . . . . . . . . . . . . . . . . . . . . . . . . . . . . . . . . . . . . . . . . . . . . . . . . . . . . . . 191
show task-details (Deprecated) . . . . . . . . . . . . . . . . . . . . . . . . . . . . . . . . . . . . . . . . . . . . . . . . . . . . . 191
show tasks . . . . . . . . . . . . . . . . . . . . . . . . . . . . . . . . . . . . . . . . . . . . . . . . . . . . . . . . . . . . . . . . . . . 192
show unwritable-cache . . . . . . . . . . . . . . . . . . . . . . . . . . . . . . . . . . . . . . . . . . . . . . . . . . . . . . . . . . 194
Contents 5
Page 6

show users. . . . . . . . . . . . . . . . . . . . . . . . . . . . . . . . . . . . . . . . . . . . . . . . . . . . . . . . . . . . . . . . . . . 195
show vdisks . . . . . . . . . . . . . . . . . . . . . . . . . . . . . . . . . . . . . . . . . . . . . . . . . . . . . . . . . . . . . . . . . . 197
show vdisk-statistics. . . . . . . . . . . . . . . . . . . . . . . . . . . . . . . . . . . . . . . . . . . . . . . . . . . . . . . . . . . . . 200
show versions . . . . . . . . . . . . . . . . . . . . . . . . . . . . . . . . . . . . . . . . . . . . . . . . . . . . . . . . . . . . . . . . 204
show volume-maps (Deprecated) . . . . . . . . . . . . . . . . . . . . . . . . . . . . . . . . . . . . . . . . . . . . . . . . . . . 204
show volume-names . . . . . . . . . . . . . . . . . . . . . . . . . . . . . . . . . . . . . . . . . . . . . . . . . . . . . . . . . . . . 205
show volume-reservations . . . . . . . . . . . . . . . . . . . . . . . . . . . . . . . . . . . . . . . . . . . . . . . . . . . . . . . . 206
show volumes . . . . . . . . . . . . . . . . . . . . . . . . . . . . . . . . . . . . . . . . . . . . . . . . . . . . . . . . . . . . . . . . 208
show volume-statistics . . . . . . . . . . . . . . . . . . . . . . . . . . . . . . . . . . . . . . . . . . . . . . . . . . . . . . . . . . . 210
shutdown. . . . . . . . . . . . . . . . . . . . . . . . . . . . . . . . . . . . . . . . . . . . . . . . . . . . . . . . . . . . . . . . . . . . 211
start drawer . . . . . . . . . . . . . . . . . . . . . . . . . . . . . . . . . . . . . . . . . . . . . . . . . . . . . . . . . . . . . . . . . . 212
stop drawer . . . . . . . . . . . . . . . . . . . . . . . . . . . . . . . . . . . . . . . . . . . . . . . . . . . . . . . . . . . . . . . . . . 213
test . . . . . . . . . . . . . . . . . . . . . . . . . . . . . . . . . . . . . . . . . . . . . . . . . . . . . . . . . . . . . . . . . . . . . . . . 214
trust . . . . . . . . . . . . . . . . . . . . . . . . . . . . . . . . . . . . . . . . . . . . . . . . . . . . . . . . . . . . . . . . . . . . . . . 215
unfail controller . . . . . . . . . . . . . . . . . . . . . . . . . . . . . . . . . . . . . . . . . . . . . . . . . . . . . . . . . . . . . . . 218
unmap volume . . . . . . . . . . . . . . . . . . . . . . . . . . . . . . . . . . . . . . . . . . . . . . . . . . . . . . . . . . . . . . . . 219
verify vdisk . . . . . . . . . . . . . . . . . . . . . . . . . . . . . . . . . . . . . . . . . . . . . . . . . . . . . . . . . . . . . . . . . . 220
versions (Deprecated) . . . . . . . . . . . . . . . . . . . . . . . . . . . . . . . . . . . . . . . . . . . . . . . . . . . . . . . . . . . 220
4 XML API basetype properties . . . . . . . . . . . . . . . . . . . . . . . . . . . . . . . . . . . . . . . . . 221
advanced-settings-table . . . . . . . . . . . . . . . . . . . . . . . . . . . . . . . . . . . . . . . . . . . . . . . . . . . . . . . . . . 222
cache-parameter . . . . . . . . . . . . . . . . . . . . . . . . . . . . . . . . . . . . . . . . . . . . . . . . . . . . . . . . . . . . . . 227
cache-settings. . . . . . . . . . . . . . . . . . . . . . . . . . . . . . . . . . . . . . . . . . . . . . . . . . . . . . . . . . . . . . . . . 229
certificate-status . . . . . . . . . . . . . . . . . . . . . . . . . . . . . . . . . . . . . . . . . . . . . . . . . . . . . . . . . . . . . . . 230
cli-parameters . . . . . . . . . . . . . . . . . . . . . . . . . . . . . . . . . . . . . . . . . . . . . . . . . . . . . . . . . . . . . . . . 231
code-load-readiness . . . . . . . . . . . . . . . . . . . . . . . . . . . . . . . . . . . . . . . . . . . . . . . . . . . . . . . . . . . . 234
code-load-readiness-reasons. . . . . . . . . . . . . . . . . . . . . . . . . . . . . . . . . . . . . . . . . . . . . . . . . . . . . . . 235
compact-flash. . . . . . . . . . . . . . . . . . . . . . . . . . . . . . . . . . . . . . . . . . . . . . . . . . . . . . . . . . . . . . . . . 236
controller-cache-parameters . . . . . . . . . . . . . . . . . . . . . . . . . . . . . . . . . . . . . . . . . . . . . . . . . . . . . . . 237
controllers . . . . . . . . . . . . . . . . . . . . . . . . . . . . . . . . . . . . . . . . . . . . . . . . . . . . . . . . . . . . . . . . . . . 239
controller-statistics. . . . . . . . . . . . . . . . . . . . . . . . . . . . . . . . . . . . . . . . . . . . . . . . . . . . . . . . . . . . . . 243
debug-log-parameters . . . . . . . . . . . . . . . . . . . . . . . . . . . . . . . . . . . . . . . . . . . . . . . . . . . . . . . . . . . 245
degraded-disk-policy. . . . . . . . . . . . . . . . . . . . . . . . . . . . . . . . . . . . . . . . . . . . . . . . . . . . . . . . . . . . 249
degraded-disk-thresholds . . . . . . . . . . . . . . . . . . . . . . . . . . . . . . . . . . . . . . . . . . . . . . . . . . . . . . . . . 250
disk-hist-statistics . . . . . . . . . . . . . . . . . . . . . . . . . . . . . . . . . . . . . . . . . . . . . . . . . . . . . . . . . . . . . . . 251
disk-statistics . . . . . . . . . . . . . . . . . . . . . . . . . . . . . . . . . . . . . . . . . . . . . . . . . . . . . . . . . . . . . . . . . 253
drawer-sensors . . . . . . . . . . . . . . . . . . . . . . . . . . . . . . . . . . . . . . . . . . . . . . . . . . . . . . . . . . . . . . . . 255
drawers. . . . . . . . . . . . . . . . . . . . . . . . . . . . . . . . . . . . . . . . . . . . . . . . . . . . . . . . . . . . . . . . . . . . . 257
drive-parameters. . . . . . . . . . . . . . . . . . . . . . . . . . . . . . . . . . . . . . . . . . . . . . . . . . . . . . . . . . . . . . . 259
drive-summary . . . . . . . . . . . . . . . . . . . . . . . . . . . . . . . . . . . . . . . . . . . . . . . . . . . . . . . . . . . . . . . . 260
drives . . . . . . . . . . . . . . . . . . . . . . . . . . . . . . . . . . . . . . . . . . . . . . . . . . . . . . . . . . . . . . . . . . . . . . 261
email-parameters . . . . . . . . . . . . . . . . . . . . . . . . . . . . . . . . . . . . . . . . . . . . . . . . . . . . . . . . . . . . . . 268
enclosure-fru . . . . . . . . . . . . . . . . . . . . . . . . . . . . . . . . . . . . . . . . . . . . . . . . . . . . . . . . . . . . . . . . . 269
enclosure-list . . . . . . . . . . . . . . . . . . . . . . . . . . . . . . . . . . . . . . . . . . . . . . . . . . . . . . . . . . . . . . . . . 271
enclosures . . . . . . . . . . . . . . . . . . . . . . . . . . . . . . . . . . . . . . . . . . . . . . . . . . . . . . . . . . . . . . . . . . . 272
events . . . . . . . . . . . . . . . . . . . . . . . . . . . . . . . . . . . . . . . . . . . . . . . . . . . . . . . . . . . . . . . . . . . . . . 275
eventsLogs . . . . . . . . . . . . . . . . . . . . . . . . . . . . . . . . . . . . . . . . . . . . . . . . . . . . . . . . . . . . . . . . . . . 276
expander-ports . . . . . . . . . . . . . . . . . . . . . . . . . . . . . . . . . . . . . . . . . . . . . . . . . . . . . . . . . . . . . . . . 277
fan . . . . . . . . . . . . . . . . . . . . . . . . . . . . . . . . . . . . . . . . . . . . . . . . . . . . . . . . . . . . . . . . . . . . . . . . 278
host-port-statistics . . . . . . . . . . . . . . . . . . . . . . . . . . . . . . . . . . . . . . . . . . . . . . . . . . . . . . . . . . . . . . 280
hosts . . . . . . . . . . . . . . . . . . . . . . . . . . . . . . . . . . . . . . . . . . . . . . . . . . . . . . . . . . . . . . . . . . . . . . . 281
host-view . . . . . . . . . . . . . . . . . . . . . . . . . . . . . . . . . . . . . . . . . . . . . . . . . . . . . . . . . . . . . . . . . . . . 282
host-view-mappings. . . . . . . . . . . . . . . . . . . . . . . . . . . . . . . . . . . . . . . . . . . . . . . . . . . . . . . . . . . . . 283
initiator . . . . . . . . . . . . . . . . . . . . . . . . . . . . . . . . . . . . . . . . . . . . . . . . . . . . . . . . . . . . . . . . . . . . . 284
initiator-view . . . . . . . . . . . . . . . . . . . . . . . . . . . . . . . . . . . . . . . . . . . . . . . . . . . . . . . . . . . . . . . . . 285
inquiry . . . . . . . . . . . . . . . . . . . . . . . . . . . . . . . . . . . . . . . . . . . . . . . . . . . . . . . . . . . . . . . . . . . . . 286
io-modules . . . . . . . . . . . . . . . . . . . . . . . . . . . . . . . . . . . . . . . . . . . . . . . . . . . . . . . . . . . . . . . . . . . 287
log-header-table . . . . . . . . . . . . . . . . . . . . . . . . . . . . . . . . . . . . . . . . . . . . . . . . . . . . . . . . . . . . . . . 289
network-parameters . . . . . . . . . . . . . . . . . . . . . . . . . . . . . . . . . . . . . . . . . . . . . . . . . . . . . . . . . . . . 290
6Contents
Page 7

ntp-status . . . . . . . . . . . . . . . . . . . . . . . . . . . . . . . . . . . . . . . . . . . . . . . . . . . . . . . . . . . . . . . . . . . . 292
port. . . . . . . . . . . . . . . . . . . . . . . . . . . . . . . . . . . . . . . . . . . . . . . . . . . . . . . . . . . . . . . . . . . . . . . . 293
power-supplies . . . . . . . . . . . . . . . . . . . . . . . . . . . . . . . . . . . . . . . . . . . . . . . . . . . . . . . . . . . . . . . . 295
product-info . . . . . . . . . . . . . . . . . . . . . . . . . . . . . . . . . . . . . . . . . . . . . . . . . . . . . . . . . . . . . . . . . . 297
provisioning. . . . . . . . . . . . . . . . . . . . . . . . . . . . . . . . . . . . . . . . . . . . . . . . . . . . . . . . . . . . . . . . . . 298
redundancy . . . . . . . . . . . . . . . . . . . . . . . . . . . . . . . . . . . . . . . . . . . . . . . . . . . . . . . . . . . . . . . . . . 299
refresh-counters . . . . . . . . . . . . . . . . . . . . . . . . . . . . . . . . . . . . . . . . . . . . . . . . . . . . . . . . . . . . . . . 301
sas-host-phy-statistics . . . . . . . . . . . . . . . . . . . . . . . . . . . . . . . . . . . . . . . . . . . . . . . . . . . . . . . . . . . . 302
sas-port . . . . . . . . . . . . . . . . . . . . . . . . . . . . . . . . . . . . . . . . . . . . . . . . . . . . . . . . . . . . . . . . . . . . . 303
sas-status-controller-a . . . . . . . . . . . . . . . . . . . . . . . . . . . . . . . . . . . . . . . . . . . . . . . . . . . . . . . . . . . . 304
sas-status-drawer. . . . . . . . . . . . . . . . . . . . . . . . . . . . . . . . . . . . . . . . . . . . . . . . . . . . . . . . . . . . . . . 308
schedules. . . . . . . . . . . . . . . . . . . . . . . . . . . . . . . . . . . . . . . . . . . . . . . . . . . . . . . . . . . . . . . . . . . . 308
security-communications-protocols . . . . . . . . . . . . . . . . . . . . . . . . . . . . . . . . . . . . . . . . . . . . . . . . . . . 309
sensors . . . . . . . . . . . . . . . . . . . . . . . . . . . . . . . . . . . . . . . . . . . . . . . . . . . . . . . . . . . . . . . . . . . . . 311
show-other-mc-status . . . . . . . . . . . . . . . . . . . . . . . . . . . . . . . . . . . . . . . . . . . . . . . . . . . . . . . . . . . . 313
shutdown-status . . . . . . . . . . . . . . . . . . . . . . . . . . . . . . . . . . . . . . . . . . . . . . . . . . . . . . . . . . . . . . . 314
snmp-parameters . . . . . . . . . . . . . . . . . . . . . . . . . . . . . . . . . . . . . . . . . . . . . . . . . . . . . . . . . . . . . . 315
status . . . . . . . . . . . . . . . . . . . . . . . . . . . . . . . . . . . . . . . . . . . . . . . . . . . . . . . . . . . . . . . . . . . . . . 316
syslog-parameters . . . . . . . . . . . . . . . . . . . . . . . . . . . . . . . . . . . . . . . . . . . . . . . . . . . . . . . . . . . . . . 317
system . . . . . . . . . . . . . . . . . . . . . . . . . . . . . . . . . . . . . . . . . . . . . . . . . . . . . . . . . . . . . . . . . . . . . . 318
system-parameters-table. . . . . . . . . . . . . . . . . . . . . . . . . . . . . . . . . . . . . . . . . . . . . . . . . . . . . . . . . . 320
tasks . . . . . . . . . . . . . . . . . . . . . . . . . . . . . . . . . . . . . . . . . . . . . . . . . . . . . . . . . . . . . . . . . . . . . . . 323
time-settings-table . . . . . . . . . . . . . . . . . . . . . . . . . . . . . . . . . . . . . . . . . . . . . . . . . . . . . . . . . . . . . . 324
unhealthy-component . . . . . . . . . . . . . . . . . . . . . . . . . . . . . . . . . . . . . . . . . . . . . . . . . . . . . . . . . . . 325
unwritable-cache . . . . . . . . . . . . . . . . . . . . . . . . . . . . . . . . . . . . . . . . . . . . . . . . . . . . . . . . . . . . . . 327
users . . . . . . . . . . . . . . . . . . . . . . . . . . . . . . . . . . . . . . . . . . . . . . . . . . . . . . . . . . . . . . . . . . . . . . . 328
vdisk-hist-statistics . . . . . . . . . . . . . . . . . . . . . . . . . . . . . . . . . . . . . . . . . . . . . . . . . . . . . . . . . . . . . . 331
vdisk-statistics . . . . . . . . . . . . . . . . . . . . . . . . . . . . . . . . . . . . . . . . . . . . . . . . . . . . . . . . . . . . . . . . . 332
versions. . . . . . . . . . . . . . . . . . . . . . . . . . . . . . . . . . . . . . . . . . . . . . . . . . . . . . . . . . . . . . . . . . . . . 333
virtual-disk-summary . . . . . . . . . . . . . . . . . . . . . . . . . . . . . . . . . . . . . . . . . . . . . . . . . . . . . . . . . . . . 334
virtual-disks . . . . . . . . . . . . . . . . . . . . . . . . . . . . . . . . . . . . . . . . . . . . . . . . . . . . . . . . . . . . . . . . . . 335
volume-names . . . . . . . . . . . . . . . . . . . . . . . . . . . . . . . . . . . . . . . . . . . . . . . . . . . . . . . . . . . . . . . . 340
volume-reservations. . . . . . . . . . . . . . . . . . . . . . . . . . . . . . . . . . . . . . . . . . . . . . . . . . . . . . . . . . . . . 341
volumes. . . . . . . . . . . . . . . . . . . . . . . . . . . . . . . . . . . . . . . . . . . . . . . . . . . . . . . . . . . . . . . . . . . . . 342
volume-statistics . . . . . . . . . . . . . . . . . . . . . . . . . . . . . . . . . . . . . . . . . . . . . . . . . . . . . . . . . . . . . . . 346
volume-view . . . . . . . . . . . . . . . . . . . . . . . . . . . . . . . . . . . . . . . . . . . . . . . . . . . . . . . . . . . . . . . . . . 348
volume-view-mappings . . . . . . . . . . . . . . . . . . . . . . . . . . . . . . . . . . . . . . . . . . . . . . . . . . . . . . . . . . 349
A Settings changed by restore defaults . . . . . . . . . . . . . . . . . . . . . . . . . . . . . . . . . . . . . 350
Glossary . . . . . . . . . . . . . . . . . . . . . . . . . . . . . . . . . . . . . . . . . . . . . . . . . . . . . . . . . . 352
Index . . . . . . . . . . . . . . . . . . . . . . . . . . . . . . . . . . . . . . . . . . . . . . . . . . . . . . . . . . . . 358
Contents 7
Page 8

Tables
1 Document conventions . . . . . . . . . . . . . . . . . . . . . . . . . . . . . . . . . . . . . . . . . . . . . . . . . . . . . . . . . 10
2 Default usernames and passwords . . . . . . . . . . . . . . . . . . . . . . . . . . . . . . . . . . . . . . . . . . . . . . . . . 12
3 XML API elements . . . . . . . . . . . . . . . . . . . . . . . . . . . . . . . . . . . . . . . . . . . . . . . . . . . . . . . . . . . . 16
4 Keyboard shortcuts for command completion, editing, and history . . . . . . . . . . . . . . . . . . . . . . . . . . . 21
5 Size representations in base 2 and base 10 . . . . . . . . . . . . . . . . . . . . . . . . . . . . . . . . . . . . . . . . . . 22
6 Decimal (radix) point character by locale . . . . . . . . . . . . . . . . . . . . . . . . . . . . . . . . . . . . . . . . . . . . 22
7 Commands by category . . . . . . . . . . . . . . . . . . . . . . . . . . . . . . . . . . . . . . . . . . . . . . . . . . . . . . . . 23
8 advanced-settings-table properties . . . . . . . . . . . . . . . . . . . . . . . . . . . . . . . . . . . . . . . . . . . . . . . . 222
9 cache-parameter properties. . . . . . . . . . . . . . . . . . . . . . . . . . . . . . . . . . . . . . . . . . . . . . . . . . . . . 227
10 cache-settings properties. . . . . . . . . . . . . . . . . . . . . . . . . . . . . . . . . . . . . . . . . . . . . . . . . . . . . . . 229
11 certificate-status properties . . . . . . . . . . . . . . . . . . . . . . . . . . . . . . . . . . . . . . . . . . . . . . . . . . . . . 230
12 cli-parameters properties. . . . . . . . . . . . . . . . . . . . . . . . . . . . . . . . . . . . . . . . . . . . . . . . . . . . . . . 231
13 code-load-readiness properties . . . . . . . . . . . . . . . . . . . . . . . . . . . . . . . . . . . . . . . . . . . . . . . . . . 234
14 code-load-readiness-reasons properties. . . . . . . . . . . . . . . . . . . . . . . . . . . . . . . . . . . . . . . . . . . . . 235
15 compact-flash properties . . . . . . . . . . . . . . . . . . . . . . . . . . . . . . . . . . . . . . . . . . . . . . . . . . . . . . . 236
16 controller-cache-parameters properties . . . . . . . . . . . . . . . . . . . . . . . . . . . . . . . . . . . . . . . . . . . . . 237
17 controllers properties . . . . . . . . . . . . . . . . . . . . . . . . . . . . . . . . . . . . . . . . . . . . . . . . . . . . . . . . . 239
18 controller-statistics properties . . . . . . . . . . . . . . . . . . . . . . . . . . . . . . . . . . . . . . . . . . . . . . . . . . . . 243
19 debug-log-parameters properties . . . . . . . . . . . . . . . . . . . . . . . . . . . . . . . . . . . . . . . . . . . . . . . . . 245
20 degraded-disk-policy properties . . . . . . . . . . . . . . . . . . . . . . . . . . . . . . . . . . . . . . . . . . . . . . . . . . 249
21 degraded-disk-thresholds properties . . . . . . . . . . . . . . . . . . . . . . . . . . . . . . . . . . . . . . . . . . . . . . . 250
22 disk-hist-statistics properties . . . . . . . . . . . . . . . . . . . . . . . . . . . . . . . . . . . . . . . . . . . . . . . . . . . . . 251
23 disk-statistics properties. . . . . . . . . . . . . . . . . . . . . . . . . . . . . . . . . . . . . . . . . . . . . . . . . . . . . . . . 253
24 drawer-sensors properties . . . . . . . . . . . . . . . . . . . . . . . . . . . . . . . . . . . . . . . . . . . . . . . . . . . . . . 255
25 drawers properties. . . . . . . . . . . . . . . . . . . . . . . . . . . . . . . . . . . . . . . . . . . . . . . . . . . . . . . . . . . 257
26 drive-parameters properties. . . . . . . . . . . . . . . . . . . . . . . . . . . . . . . . . . . . . . . . . . . . . . . . . . . . . 259
27 drive-summary properties . . . . . . . . . . . . . . . . . . . . . . . . . . . . . . . . . . . . . . . . . . . . . . . . . . . . . . 260
28 drives properties . . . . . . . . . . . . . . . . . . . . . . . . . . . . . . . . . . . . . . . . . . . . . . . . . . . . . . . . . . . . 261
29 email-parameters properties . . . . . . . . . . . . . . . . . . . . . . . . . . . . . . . . . . . . . . . . . . . . . . . . . . . . 268
30 enclosure-fru properties. . . . . . . . . . . . . . . . . . . . . . . . . . . . . . . . . . . . . . . . . . . . . . . . . . . . . . . . 269
31 enclosure-list properties . . . . . . . . . . . . . . . . . . . . . . . . . . . . . . . . . . . . . . . . . . . . . . . . . . . . . . . 271
32 enclosures properties . . . . . . . . . . . . . . . . . . . . . . . . . . . . . . . . . . . . . . . . . . . . . . . . . . . . . . . . . 272
33 events properties . . . . . . . . . . . . . . . . . . . . . . . . . . . . . . . . . . . . . . . . . . . . . . . . . . . . . . . . . . . . 275
34 eventsLogs properties . . . . . . . . . . . . . . . . . . . . . . . . . . . . . . . . . . . . . . . . . . . . . . . . . . . . . . . . . 276
35 expander-ports properties . . . . . . . . . . . . . . . . . . . . . . . . . . . . . . . . . . . . . . . . . . . . . . . . . . . . . . 277
36 fan properties . . . . . . . . . . . . . . . . . . . . . . . . . . . . . . . . . . . . . . . . . . . . . . . . . . . . . . . . . . . . . . 278
37 host-port-statistics properties . . . . . . . . . . . . . . . . . . . . . . . . . . . . . . . . . . . . . . . . . . . . . . . . . . . . 280
38 hosts properties . . . . . . . . . . . . . . . . . . . . . . . . . . . . . . . . . . . . . . . . . . . . . . . . . . . . . . . . . . . . . 281
39 host-view properties . . . . . . . . . . . . . . . . . . . . . . . . . . . . . . . . . . . . . . . . . . . . . . . . . . . . . . . . . . 282
40 host-view-mappings properties. . . . . . . . . . . . . . . . . . . . . . . . . . . . . . . . . . . . . . . . . . . . . . . . . . . 283
41 initiator properties . . . . . . . . . . . . . . . . . . . . . . . . . . . . . . . . . . . . . . . . . . . . . . . . . . . . . . . . . . . 284
42 initiator-view properties . . . . . . . . . . . . . . . . . . . . . . . . . . . . . . . . . . . . . . . . . . . . . . . . . . . . . . . 285
43 inquiry properties . . . . . . . . . . . . . . . . . . . . . . . . . . . . . . . . . . . . . . . . . . . . . . . . . . . . . . . . . . . 286
44 io-modules properties . . . . . . . . . . . . . . . . . . . . . . . . . . . . . . . . . . . . . . . . . . . . . . . . . . . . . . . . . 287
45 log-header-table properties . . . . . . . . . . . . . . . . . . . . . . . . . . . . . . . . . . . . . . . . . . . . . . . . . . . . . 289
46 network-parameters properties. . . . . . . . . . . . . . . . . . . . . . . . . . . . . . . . . . . . . . . . . . . . . . . . . . . 290
47 ntp-status properties . . . . . . . . . . . . . . . . . . . . . . . . . . . . . . . . . . . . . . . . . . . . . . . . . . . . . . . . . . 292
48 port properties. . . . . . . . . . . . . . . . . . . . . . . . . . . . . . . . . . . . . . . . . . . . . . . . . . . . . . .
49 power-supplies properties . . . . . . . . . . . . . . . . . . . . . . . . . . . . . . . . . . . . . . . . . . . . . . . . . . . . . . 295
50 product-info properties . . . . . . . . . . . . . . . . . . . . . . . . . . . . . . . . . . . . . . . . . . . . . . . . . . . . . . . . 297
51 provisioning properties. . . . . . . . . . . . . . . . . . . . . . . . . . . . . . . . . . . . . . . . . . . . . . . . . . . . . . . . 298
52 redundancy properties . . . . . . . . . . . . . . . . . . . . . . . . . . . . . . . . . . . . . . . . . . . . . . . . . . . . . . . . 299
53 refresh-counters properties . . . . . . . . . . . . . . . . . . . . . . . . . . . . . . . . . . . . . . . . . . . . . . . . . . . . . 301
54 sas-host-phy-statistics properties . . . . . . . . . . . . . . . . . . . . . . . . . . . . . . . . . . . . . . . . . . . . . . . . . . 302
55 sas-port properties . . . . . . . . . . . . . . . . . . . . . . . . . . . . . . . . . . . . . . . . . . . . . . . . . . . . . . . . . . . 303
. . . . . . . 293
8Tables
Page 9

56 sas-status-controller-a properties . . . . . . . . . . . . . . . . . . . . . . . . . . . . . . . . . . . . . . . . . . . . . . . . . . 304
57 schedules properties. . . . . . . . . . . . . . . . . . . . . . . . . . . . . . . . . . . . . . . . . . . . . . . . . . . . . . . . . . 308
58 security-communications-protocols properties . . . . . . . . . . . . . . . . . . . . . . . . . . . . . . . . . . . . . . . . .309
59 sensors properties . . . . . . . . . . . . . . . . . . . . . . . . . . . . . . . . . . . . . . . . . . . . . . . . . . . . . . . . . . . 311
60 show-other-mc-status properties . . . . . . . . . . . . . . . . . . . . . . . . . . . . . . . . . . . . . . . . . . . . . . . . . . 313
61 shutdown-status properties. . . . . . . . . . . . . . . . . . . . . . . . . . . . . . . . . . . . . . . . . . . . . . . . . . . . . . 314
62 snmp-parameters properties . . . . . . . . . . . . . . . . . . . . . . . . . . . . . . . . . . . . . . . . . . . . . . . . . . . . 315
63 status properties. . . . . . . . . . . . . . . . . . . . . . . . . . . . . . . . . . . . . . . . . . . . . . . . . . . . . . . . . . . . . 316
64 syslog-parameters properties . . . . . . . . . . . . . . . . . . . . . . . . . . . . . . . . . . . . . . . . . . . . . . . . . . . . 317
65 system properties . . . . . . . . . . . . . . . . . . . . . . . . . . . . . . . . . . . . . . . . . . . . . . . . . . . . . . . . . . . . 318
66 system-parameters-table properties . . . . . . . . . . . . . . . . . . . . . . . . . . . . . . . . . . . . . . . . . . . . . . . . 320
67 tasks properties . . . . . . . . . . . . . . . . . . . . . . . . . . . . . . . . . . . . . . . . . . . . . . . . . . . . . . . . . . . . . 323
68 time-settings-table properties . . . . . . . . . . . . . . . . . . . . . . . . . . . . . . . . . . . . . . . . . . . . . . . . . . . . 324
69 unhealthy-component properties. . . . . . . . . . . . . . . . . . . . . . . . . . . . . . . . . . . . . . . . . . . . . . . . . . 325
70 unwritable-cache properties . . . . . . . . . . . . . . . . . . . . . . . . . . . . . . . . . . . . . . . . . . . . . . . . . . . . 327
71 users properties . . . . . . . . . . . . . . . . . . . . . . . . . . . . . . . . . . . . . . . . . . . . . . . . . . . . . . . . . . . . . 328
72 vdisk-hist-statistics properties . . . . . . . . . . . . . . . . . . . . . . . . . . . . . . . . . . . . . . . . . . . . . . . . . . . . 331
73 vdisk-statistics properties . . . . . . . . . . . . . . . . . . . . . . . . . . . . . . . . . . . . . . . . . . . . . . . . . . . . . . . 332
74 versions properties . . . . . . . . . . . . . . . . . . . . . . . . . . . . . . . . . . . . . . . . . . . . . . . . . . . . . . . . . . . 333
75 virtual-disk-summary properties . . . . . . . . . . . . . . . . . . . . . . . . . . . . . . . . . . . . . . . . . . . . . . . . . . 334
76 virtual-disks properties . . . . . . . . . . . . . . . . . . . . . . . . . . . . . . . . . . . . . . . . . . . . . . . . . . . . . . . . 335
77 volume-names properties. . . . . . . . . . . . . . . . . . . . . . . . . . . . . . . . . . . . . . . . . . . . . . . . . . . . . . . 340
78 volume-reservations properties . . . . . . . . . . . . . . . . . . . . . . . . . . . . . . . . . . . . . . . . . . . . . . . . . . . 341
79 volumes properties . . . . . . . . . . . . . . . . . . . . . . . . . . . . . . . . . . . . . . . . . . . . . . . . . . . . . . . . . . . 342
80 volume-statistics properties . . . . . . . . . . . . . . . . . . . . . . . . . . . . . . . . . . . . . . . . . . . . . . . . . . . . . 346
81 volume-view properties . . . . . . . . . . . . . . . . . . . . . . . . . . . . . . . . . . . . . . . . . . . . . . . . . . . . . . . . 348
82 volume-view-mappings properties. . . . . . . . . . . . . . . . . . . . . . . . . . . . . . . . . . . . . . . . . . . . . . . . . 349
83 Settings changed by restore defaults . . . . . . . . . . . . . . . . . . . . . . . . . . . . . . . . . . . . . . . . . . . . . . 350
Tables 9
Page 10
About this guide
This guide provides information about managing a Dot Hill AssuredSAN™ storage system by using its
command-line interface (CLI).
Intended audience
This guide is intended for storage system administrators.
Prerequisites
Prerequisites for using this product include knowledge of:
• Network administration
• Storage system configuration
• Storage area network (SAN) management and direct attach storage (DAS)
• Serial Attached SCSI (SAS) and Ethernet protocols
For additional information, see Dot Hill's Customer Resource Center web site: http://crc.dothill.com
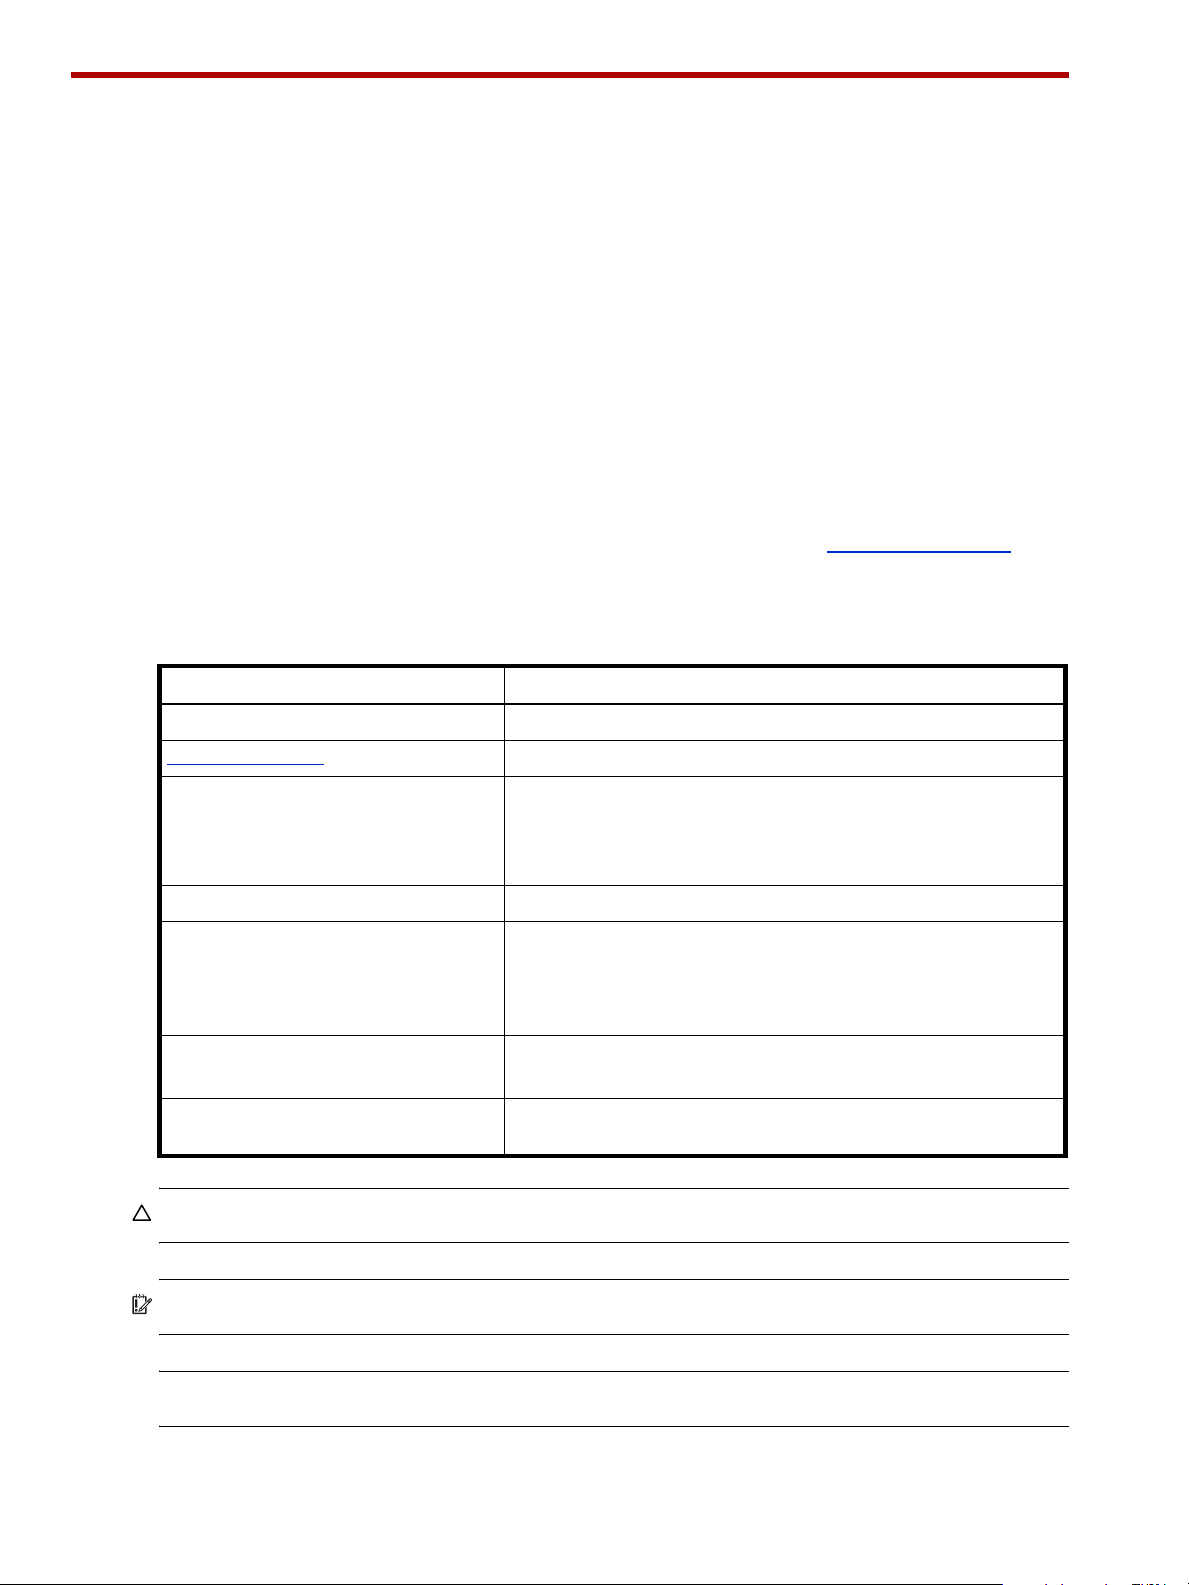
Document conventions and symbols
Table 1 Document conventions
Convention Element
Blue text Cross-reference links and e-mail addresses
Blue, underlined text Web site add resses
Bold font • Key names
• Text typed into a GUI element, such as into a box
• GUI elements that are clicked or selected, such as menu and list
Italics font Text emphasis
Monospace font • File and directory names
• System output
• Code
• Text typed at the command-line
Monospace, italic font • Code variables
• Command-line variables
Monospace, bold font Emphasis of file and directory names, system output, code, and text
typed at the command line
.
items, buttons, and check boxes
CAUTION: Indicates that failure to follow directions could result in damage to equipment or data.
IMPORTANT: Provides clarifying information or specific instructions.
NOTE: Provides additional information.
10 About this guide
Page 11

TIP: Provides helpful hints and shortcuts.
Document conventions and symbols 11
Page 12
1 Using the CLI
This chapter introduces the AssuredSAN 6004 command-line interface (CLI).
In this guide:
• The term disk group refers to a vdisk for linear storage.
• The term pool refers to a single vdisk for linear storage.
Accessing the CLI
The CLI software embedded in the controller modules enables you to manage and monitor storage-system
operation. You can access the CLI in two ways:
• By using HTTP, HTTPS, Telnet, an SSH application, or a terminal emulator on a management host that is
remotely connected through a LAN to a controller module’s network port.
• By using a terminal emulator on a management host that is directly connected to a controller module’s
serial CLI port.
For information about accessing the CLI and obtaining IP values for storage-system management, see your
product’s Setup Guide.
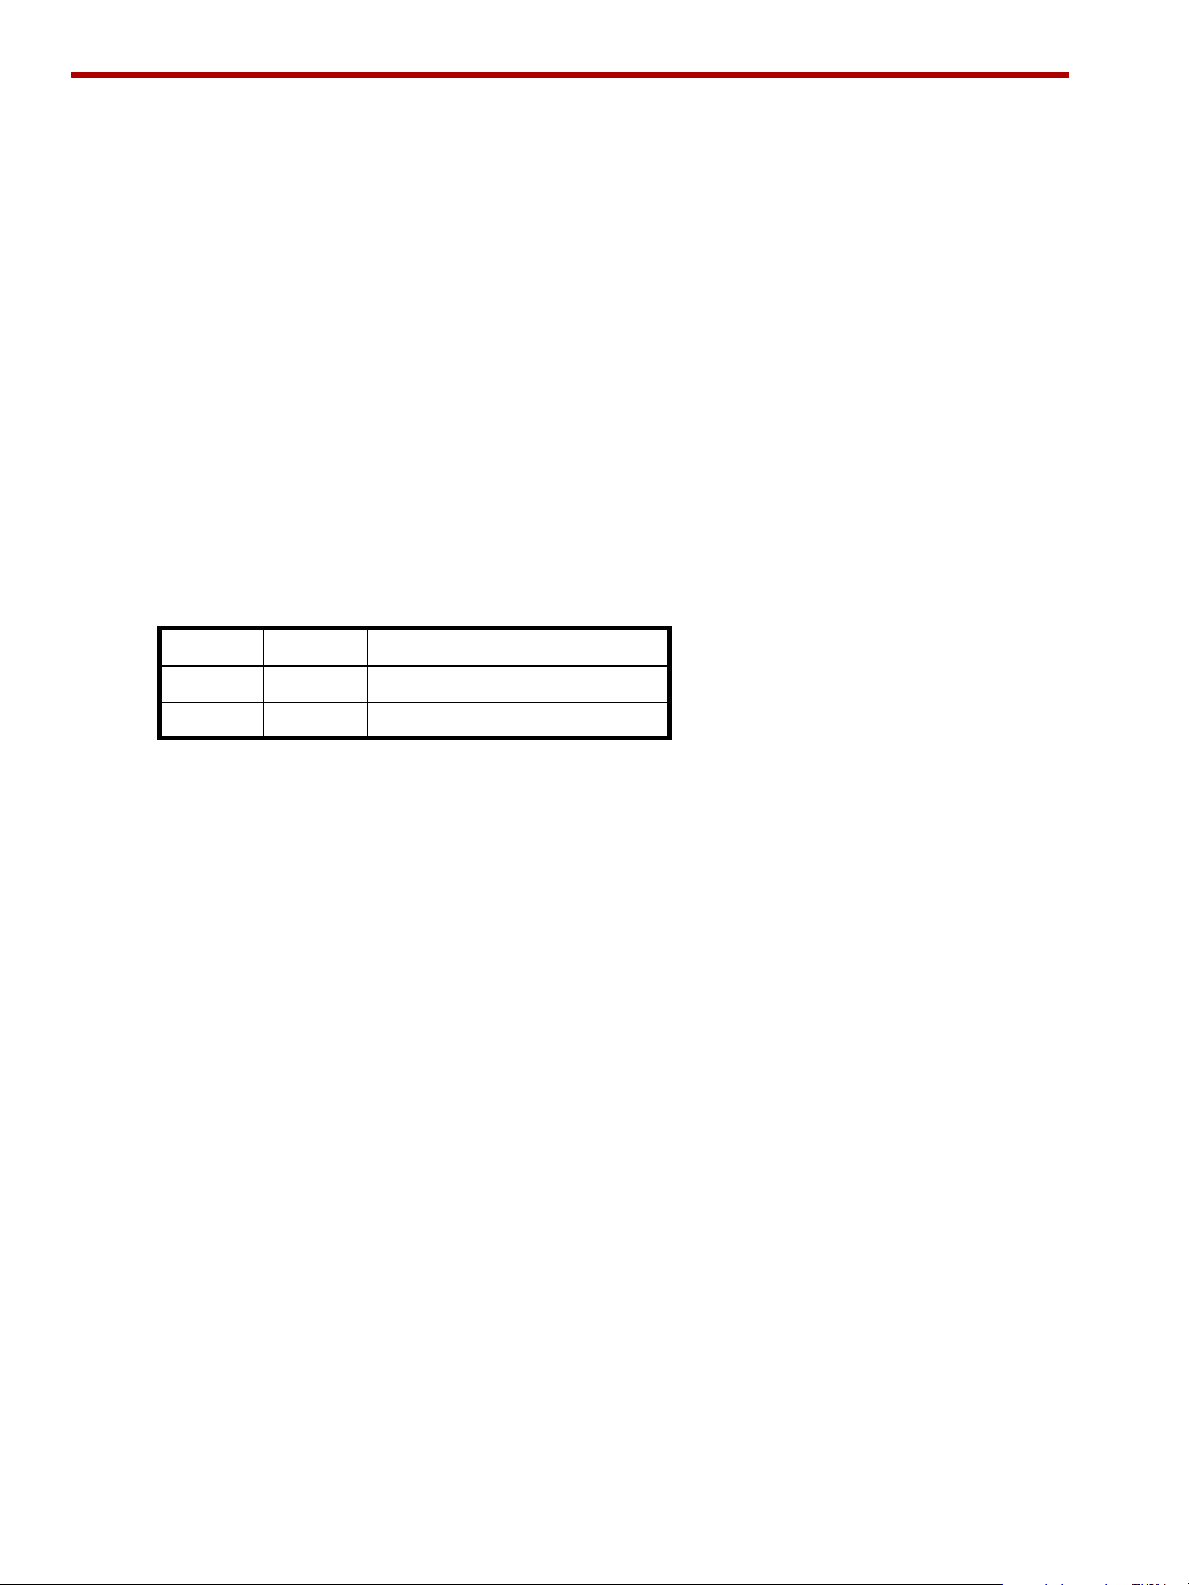
Table 2 Default usernames and passwords
Username Password Roles
monitor !monitor Monitor (view only)
manage !manage Monitor, Manage (view and change)
CLI output formats
The CLI has two output formats:
• Console format, which is the human-to-computer interface (HCI).
• XML API format, which is the computer-to-computer interface (CCI).
Console format enables users to interact with the CLI and obtain easily readable information. This format
automatically sizes fields according to content and adjusts content to window resizes. These capabilities
would present problems for a CCI in the form of scripts or other client software.
XML API format enables any external application to interact with the storage system. The XML format is
constructed to permit new fields to be added without impacting existing clients if they follow standard XML
parsing conventions.
Scripting is not supported using console format because labels, field sizes, and order of fields may change
in future firmware releases. To properly script CLI commands use XML API format, which is expected to
remain consistent from release to release; field names will be consistent and new functionality will be
added as new fields. These types of changes in XML output will not impact a conventional XML parsing
engine.
You can change the CLI output format by using the set cli-parameters command; see "Example" (page 91).
12 Using the CLI
Page 13

Using CLI interactively
By default the CLI is an interactive application. When you are logged into the CLI, the CLI waits for a
command to be entered and then responds to it.
The following example shows interactively starting a Telnet session, logging into the CLI, executing a
command to show volumes, and exiting the CLI:
$: telnet IP-address
IP-address
System Version: version
MC Version: version
Serial Number: SN
172.22.5.55 login: monitor
Password:
product
System Name: Test
System Location: Lab
Version: version
# show volumes
Pool Name Total Size Alloc Size Class Type
Health Reason Action
-------------------------------------------------------------------------------dg0001 dg0001_v0001 100.7GB 100.7GB Linear standard
OK
-------------------------------------------------------------------------------Success: Command completed successfully. (2014-07-10 13:43:36)
# exit
Using a script to access the CLI
The following example shows how to construct a Perl script to communicate with the CLI via Telnet. cLogin
is called at the start of the script to log a user into the CLI. The script uses the command-line parameters
specified as the IP address, username, and password. After the user has been logged in, other commands
can be sent to the CLI.
use Net::Telnet;
sub cLogin {
$telnet->open($_[0]);
$telnet->waitfor(/(login|username)[: ]*$/i);
$telnet->print("$_[1]");
$telnet->waitfor(/password[: ]*$/i);
$telnet->print("$_[2]");
# either got a login or a prompt
@ok = $telnet->waitfor(/(#|login:*) /i);
if ($debug_commands == 1) { print "-"; print @ok; print "-\n"; }
if ($ok[1] =~ m/login/gi)
{
return 0;
}
else
{
return 1;
}
}
$ipAddr = $ARGV[0];
$username = $ARGV[1];
$password = $ARGV[2];
Using CLI interactively 13
Page 14

$telnet = new Net::Telnet ( Timeout=>10,
Errmode=>'die',
Prompt => '/\# $/i');
if ( !cLogin($ipAddr, $username, $password) == 1 )
{
print("Error: $username user failed to log in. Exiting.\n");
$telnet->close;
exit(0);
}
For scripting support, the following command can be used to access the XML API and to disable the
paging mode that pauses for each full screen of command output.
$telnet->cmd("set cli-parameters api-embed pager disabled");
The following code segment shows how to get the entire configuration information from the CLI and print
the output. The output can easily be redirected to a file for archiving.
@sV = $telnet->cmd("show configuration");
for ($i=0; $i<scalar(@sV); $i++)
{
print ("@sV[ $i ]");
}
Because basic command-line semantics provide prompts for user input and response time is indeterminate,
scripts must use an “expect”-type mechanism to scan output for prompts. It is more efficient to use the HTTP
interface to access the XML API. The following example shows how to construct a Perl script to
communicate with the XML API via HTTP.
use LWP::UserAgent;
use Digest::MD5 qw(md5_hex);
use XML::LibXML;
# generate MD5 hash using default username/password
my $md5_data = "manage_!manage";
my $md5_hash = md5_hex( $md5_data );
print "$md5_hash\n";
# create the URL and send an http GET request
$ua = LWP::UserAgent->new;
$url = 'http://10.0.0.2/api/login/' . $md5_hash;
print ("Sending to $url\n");
$req = HTTP::Request->new(GET => $url);
$res = $ua->request($req);
# Parse the XML content using LibXML to obtain the session key
print $res->content;
my $parser = XML::LibXML->new();
my $doc = $parser->parse_string( $res->content );
my $root = $doc->getDocumentElement;
my @objects = $root->getElementsByTagName('OBJECT');
my @props = $objects[0]->getElementsByTagName('PROPERTY');
my $sessionKey;
foreach my $prop ( @props ) {
my $name = $prop->getAttribute('name');
14 Using the CLI
Page 15

print "Property = " . $name . "\n";
if( $name eq 'response' ) {
$sessionKey = $prop->textContent;
}
}
print "Session Key = $sessionKey\n";
# Run a sample command to obtain the disks in the system.
$url = 'http://10.0.0.2/api/show/disks';
$req = HTTP::Request->new(GET => $url);
$req->header('sessionKey' => $sessionKey );
$req->header('dataType' => 'ipa' );
$res = $ua->request($req);
$url2 = 'http://10.0.0.2/api/exit';
$req2 = HTTP::Request->new(GET => $url3);
$req2->header('sessionKey' => $sessionKey );
$req2->header('dataType' => 'api' );
$res2 = $ua->request($req2);
print $res->content;
The next section provides more information about using the XML API.
Using a script to access the CLI 15
Page 16

Using the XML API
The Management Controller provides access for monitoring and management via the Telnet and SSH
protocols for command-line interface semantics, or via the HTTP and HTTPS protocols for XML API
request/response semantics.
You can use an XML parser, such as XML::Parser in Perl, to process the XML output and store this
information as objects.
The output of each CLI command is composed of valid XML data until the CLI prompt (typically #) is
encountered. The output contains a valid XML header followed by the XML elements described in the
following table.
Table 3 XML API elements
Element Description and attributes
RESPONSE The RESPONSE element is the top-level element, which contains all data output for the CLI command
that was issued. The response includes:
• A number of OBJECT elements, which varies by command.
• A status object that provides a message and return code. A return code of 0 indicates that the
command succeeded. Any other return code is an error code.
There is only one RESPONSE element per issued command.
OBJECT In general, an OBJECT element describes a storage-system component such as a disk or a volume. An
object has these attributes:
• basetype. This attribute allows output in brief mode to be correlated with metadata to reduce the
overhead of each command, as described in XML API optimization. This is also a good field to use
to detect the type of the object (e.g., a disk, a volume, etc.).
• name. The name of the object.
• oid. The unique identifier for the object in the scope of the response.
The OBJECT element can contain PROPERTY elements.
PROPERTY A PROPERTY element provides detail about the attributes of an OBJECT. A property has these
attributes:
• name. The unique name for the property within the object.
• key. Indicates whether this property is a key value to identify this object.
• type. The type of data represented by the element data.
• size. Typically the maximum size of the output. Usually only important if the console output is
displayed in rows.
• draw. Whether to show or hide this data in console format.
• sort. The type of sorting that can be applied to this property.
• display-name. The label for this data to show in user interfaces.
COMP A COMP (composition) element associates nested objects, such as a task object within a schedule
object. A composition element has these attributes:
• P. The oid of the part component.
• G. The oid of the group component.
An alternative to using COMP elements is described in XML API optimization.
ASC The association element provides a simple association description between two objects in the response.
• A. First object.
• B. Second object.
16 Using the CLI
Page 17

Scripting guidelines
When scripting command input, use CLI syntax as defined in this guide. For use with Telnet or SSH, use a
space character between command names, parameters, and their values (as shown throughout this guide).
For use with the HTTP interface, use a ’/’ character instead of a space character between command
names, parameters, and their values.
When writing scripts to parse XML API output, use an XML library to parse the data. For parsing, a script
should not rely on ordering, spacing, or column position. To find a specific property, a script should
compare property names as it searches through the data. This allows the script to be compatible with future
versions that could potentially add new fields to the output.
The output of show commands is intended for monitoring or obtaining the current configuration. Other
commands provide configuration data and display one or more status objects that specify the status of
command processing. The last status object specifies the overall status of the command; other status objects
indicate intermediate processing status.
The following example shows the XML API status object:
<OBJECT basetype="status" name="status" oid="1">
<PROPERTY name="response-type" type="string" size="12" draw="false"
sort="nosort" display-name="Response Type">Success</PROPERTY>
<PROPERTY name="response-type-numeric" type="uint32" size="12" draw="false"
sort="nosort" display-name="Response Type">0</PROPERTY>
<PROPERTY name="response" type="string" size="180" draw="true" sort="nosort"
display-name="Response">Command completed successfully. (2014-07-10
13:52</PROPERTY>
<PROPERTY name="return-code" type="sint32" size="15" draw="false"
sort="nosort" display-name="Return Code">0</PROPERTY>
<PROPERTY name="component-id" type="string" size="80" draw="false"
sort="nosort" display-name="Component ID"></PROPERTY>
<PROPERTY name="time-stamp" type="string" size="25" draw="false"
sort="datetime" display-name="Time">2014-07-10 13:52:45</PROPERTY>
<PROPERTY name="time-stamp-numeric" type="uint32" size="25" draw="false"
sort="datetime" display-name="Time">1405000365</PROPERTY>
</OBJECT>
In a script, each command should check the previous command’s status before proceeding. If the value of
the status object’s return-code property is 0, the command succeeded; any other value means that
the command failed.
XML API examples
The following example shows a command formatted for use with the command-line interface and for use
with the HTTPS interface, and its XML API output.
• Command-line interface format:
• HTTP interface format: create/user/JSmith/interfaces/wbi/password/Abc#1379
<?xml version="1.0" encoding="UTF-8" standalone="yes"?>
<RESPONSE VERSION="L100">
<OBJECT basetype="status" name="status" oid="1">
<PROPERTY name="response-type" type="string" size="12" draw="false"
sort="nosort" display-name="Response Type">Success</PROPERTY>
<PROPERTY name="response-type-numeric" type="uint32" size="12" draw="false"
sort="nosort" display-name="Response Type">0</PROPERTY>
<PROPERTY name="response" type="string" size="180" draw="true" sort="nosort"
display-name="Response">Command completed successfully. (JSmith) - The new user
was created. (2014-07-10 14:16:29)</PRO
PERTY>
<PROPERTY name="return-code" type="sint32" size="15" draw="false"
sort="nosort" display-name="Return Code">0</PROPERTY>
<PROPERTY name="component-id" type="string" size="80" draw="false"
sort="nosort" display-name="Component ID">JSmith</PROPERTY>
<PROPERTY name="time-stamp" type="string" size="25" draw="false"
sort="datetime" display-name="Time">2014-07-10 14:16:29</PROPERTY>
create user JSmith interfaces wbi password Abc#1379
Using the XML API 17
Page 18

<PROPERTY name="time-stamp-numeric" type="uint32" size="25" draw="false"
sort="datetime" display-name="Time">1405001789</PROPERTY>
</OBJECT>
</RESPONSE>
XML API optimization
The following are two ways to optimize XML API performance:
• Use embedded objects. This allows one object to contain not only properties but also other objects. In
general, parsing a structure such as this is easier as the association between objects is simpler. This is
an alternative to using COMP elements.
• Use brief mode. In brief mode, which is disabled by default, returns a subset of attributes of object
properties. The name and type attributes are always returned. Other properties can be obtained by
using the meta command with the basetype of the object. This optimization reduces the number of bytes
transmitted for each request and allows caching of CLI metadata. Brief mode can be enabled or
disabled by using the set cli-parameters command.
In the following example, which uses brief mode, embedded objects contain media-specific detail for ports:
# show ports
<?xml version="1.0" encoding="UTF-8" standalone="yes"?>
<RESPONSE VERSION="L100" REQUEST="show ports">
<OBJECT basetype="port" name="ports" oid="1" format="rows">
<PROPERTY name="durable-id" type="string">hostport_A0</PROPERTY>
<PROPERTY name="controller" key="true" type="string">A</PROPERTY>
<PROPERTY name="controller-numeric" key="true" type="string">1</PROPERTY>
<PROPERTY name="port" key="true" type="string">A0</PROPERTY>
...
<PROPERTY name="health-recommendation" type="string"></PROPERTY>
<OBJECT basetype="sas-port" name="port-details" oid="2" format="rows">
...
</OBJECT>
</OBJECT>
...
<OBJECT basetype="status" name="status" oid="17">
<PROPERTY name="response-type" type="string">Success</PROPERTY>
<PROPERTY name="response-type-numeric" type="string">0</PROPERTY>
<PROPERTY name="response" type="string">Command completed successfully.
(2014-07-10 14:23:23)</PROPERTY>
<PROPERTY name="return-code" type="sint32">0</PROPERTY>
<PROPERTY name="component-id" type="string"></PROPERTY>
<PROPERTY name="time-stamp" type="string">2014-07-10 14:23:23</PROPERTY>
<PROPERTY name="time-stamp-numeric" type="string">1405002203</PROPERTY>
</OBJECT>
</RESPONSE>
Command syntax
General rules for specifying commands
Command names and parameter names are not case sensitive.
Parameters enclosed in square brackets ([]) are optional. Do not type the bracket characters.
Parameter values separated by ’|’ characters are options. Enter only one of the values. Unless specified
otherwise, enumerated values are not case sensitive.
Parameter values in italics are variables. Substitute text that is appropriate for the task you want to perform.
Unless specified otherwise, variable values such as names of users and volumes are case sensitive and
have a maximum length in bytes. ASCII characters are 1 byte; most Latin (Western European) characters
with diacritics are 2 bytes; most Asian characters are 3 bytes.
18 Using the CLI
Page 19

Unless otherwise specified, a parameter value can include spaces and printable UTF-8 characters except:
" , < \
A parameter value that includes a space must be enclosed in double quotes.
Parameters can be entered in any order. However, for a parameter with no keyword, if you want to specify
a value that is partially or entirely the same as the keyword of an optional parameter, you must specify the
optional parameter before the value. For example, to create a user named base you must specify the
optional base parameter before the name base: create user base 2 base
Specifying drawers
In an enclosure with drawers:
• Disk drawers are specified by enclosure ID and drawer number. Enclosure IDs increment from 0.
Drawer IDs increment from 0 in each enclosure. Example: 2.1
• Disks are specified without the drawer number, as described below.
Specifying disks
Disks are specified by enclosure ID and slot number. Enclosure IDs increment from 0. Disk IDs increment
from 0 in each enclosure. You can specify:
• A disk. Example: 1.4
• A hyphenated range of disks. Example: 1.4-7
• A comma-separated list of individual disks, ranges, or both (with no spaces). Example: 1.4,1.6-9
• For linear storage, a RAID 10 or 50 vdisk with disks in sub-vdisks separated by colons (with no spaces).
RAID-50 example: 1.1-3:1.4-6:1.7,1.10-11
Specifying vdisks
You can specify:
• A vdisk by its name or serial number. A unique serial number is automatically assigned when a vdisk is
created, and does not change for the life of the vdisk.
• A list of vdisk names or serial numbers separated by commas (with no spaces). Not all commands
support lists. List example: vd1,"My vdisk"
Specifying disk groups
You can specify:
• A disk group by its name or serial number.
• A list of disk-group names or serial numbers separated by commas (with no spaces). Not all commands
support lists. Example: dg1,"Disk group 1"
Specifying volumes
You can specify:
• A volume by its name or serial number. A unique serial number is automatically assigned when a
volume is created, and does not change for the life of the volume.
• A list of volume names or serial numbers separated by commas (with no spaces). Not all commands
support lists. List example: vd1_v1,"Vol #1"
Command syntax 19
Page 20

Specifying ports
Controller module host ports are specified by port number only (to use the same port in both controllers) or
by controller ID and port number (to specify a port in one controller). Controller IDs are A for the upper
controller and B for the lower controller, and are not case sensitive. Port IDs increment from 0 in each
controller module. You can specify:
• A port ID in both controllers. Example: 1
• A port ID in one controller. Example: A1
• A hyphenated range of IDs. Do not mix controller IDs in a range. Example: b0-b1 or 0-1
• A comma-separated list of IDs, ranges, or both (with no spaces). Example: A0,b0-b1 or A0,1
Specifying initiators and hosts
You can specify:
• A SAS initiator by its nickname or 16-hex-digit WWPN.
• A host by name in the format host-name.*, where * represents all initiators in the host. Example:
Mail_Server.*
Specifying fan modules
In a 4U56 enclosure:
• Fan modules are specified by enclosure ID and module number. Enclosure IDs increment from 0.
Module IDs increment from 0 in each enclosure. Example: 1.1
User password rules
• The value is case sensitive.
• The value can have 8-32 characters.
• The value can include printable UTF-8 characters except a space or: " ' , < > \
• A value that includes only printable ASCII characters must include at least one uppercase character,
one lowercase character, and one non-alphabetic character. This rule does not apply if the password
contains UTF-8 characters that are outside the range of printable ASCII characters.
20 Using the CLI
Page 21

Command completion, editing, and history
The CLI supports command completion, command editing, and command history.
When entering commands interactively you can abbreviate their names and keywords. For example, you
can enter sho cl to run the show cli-parameters command. If you press Tab or Ctrl+i after typing
sufficient characters to uniquely identify the command or keyword, the remainder of the command or
keyword is displayed so you can confirm your intent. If you enter too few letters to uniquely identify a
keyword, pressing Tab or Ctrl+i will list commands or keywords that match the entered string and
redisplays the string so you can complete it.
When scripting commands, type commands in full to aid readability.
The history contains commands entered in the active CLI session. You can recall a command from the
history, edit it, and run it.
Table 4 Keyboard shortcuts for command completion, editing, and history
To Press
Complete a partially entered keyword Tab or Ctrl+i
Show command history F6
Get previous command from history Up Arrow
Get next command from history Down Arrow
Move cursor left Left Arrow
Move cursor right Right Arrow
Delete previous character Backspace
Viewing help
To view brief descriptions of all commands that are available to the user role you logged in as, enter:
help
To view full help for a command name, enter:
help command-name
To view the information shown in Command syntax above, enter:
help syntax
To view the information shown in this topic and in Command completion, editing, and history above, enter:
help help
Size representations
Parameters such as names of users and volumes have a maximum length in bytes. ASCII characters are 1
byte; most Latin (Western European) characters with diacritics are 2 bytes; most Asian characters are 3
bytes.
Operating systems usually show volume size in base 2. Disk drives usually show size in base 10. Memory
(RAM and ROM) size is always shown in base 2.
In the CLI, the base for entry and display of storage-space sizes can be set per user or per session; see
create user and set cli-parameters. When entering storage-space sizes only, either base-2 or base-10 units
can be specified.
Command completion, editing, and history 21
Page 22

Table 5 Size representations in base 2 and base 10
Base 2 Base 10
Unit Size in bytes Unit Size in bytes
KiB (kibibyte) 1,024 KB (kilobyte) 1,000
MiB (mebibyte) 1,024
GiB (gibibyte) 1,024
TiB (tebibyte) 1,024
PiB (pebibyte) 1,024
EiB (exbibyte) 1,024
2
3
4
5
6
MB (megabyte) 1,000
GB (gigabyte) 1,000
TB (terabyte) 1,000
PB (petabyte) 1,000
EB (exabyte) 1,000
2
3
4
5
6
The locale setting determines the character used for the decimal (radix) point, as shown below.
Table 6 Decimal (radix) point character by locale
Language Character Examples
English, Chinese, Japanese, Korean Period (.) 146.81 GB
3.0 Gb/s
Dutch, French, German, Italian, Spanish Comma (,) 146,81 GB
3,0 Gb/s
Event log
A controller enclosure’s event log records all events that have occurred in or been detected by the controller
modules and encompasses all field-replaceable units (FRUs) in the storage system.
Each event has one of the following levels, in decreasing severity:
• Critical. A failure occurred that may cause a controller to shut down. Correct the problem immediately.
• Error. A failure occurred that may affect data integrity or system stability. Correct the problem as soon
• Warning. A problem occurred that may affect system stability but not data integrity. Evaluate the
• Informational. A configuration or state change occurred, or a problem occurred that the system
For information about viewing events, see the show events command.
as possible.
problem and correct it if necessary.
corrected. No action is required.
22 Using the CLI
Page 23

2 Categorical list of commands
The following table helps you find a command within a category of functionally related commands. A
command might appear in more than one category.
Table 7 Commands by category
Category Commands
CLI and users create user, delete user, exit, help, set cli-parameters, set password, set prompt, set user, show
cli-parameters, show users
Disks, disk
groups, and
spares
Volumes,
initiators,
hosts, and
mapping
Scheduled
tasks
Event
notification
System
configuration
and utilities
Service
utilities
abort scrub, abort verify, add spares, clear degraded-disk, clear disk-metadata, create vdisk, delete
vdisks, dequarantine, down disk, expand vdisk, remove spares, rescan, scrub vdisk, set
degraded-disk-policy, set degraded-disk-threshold, set expander-fault-isolation, set led, show
degraded-disk-policy, show degraded-disk-thresholds, show disks, show vdisks, trust, verify vdisk
create volume, create volume-set, delete initiator-nickname, delete volumes, expand volume, map
volume, release volume, scrub volume, set cache-parameters, set initiator set volume, show
cache-parameters,
volume-names, show volume-reservations, show volumes, unmap volume
create schedule, create task, delete schedule, delete task, set schedule, show schedules, show tasks
set email-parameters, set snmp-parameters, set syslog-parameters, show email-parameters, show
events, show snmp-parameters, show syslog-parameters, test
check firmware-upgrade-health, clear cache, create certificate, ping, reset host-link, restart mc, restart
sc, set advanced-settings, set cache-parameters,set controller-date, set disk-parameters, set enclosure,
set expander-fault-isolation, set expander-phy, set led, set network-parameters, set ntp-parameters, set
protocols, set system, show advanced-settings, show cache-parameters, show certificate, show
configuration,
expander-status, show fans, show frus, show inquiry, show maps, show network-parameters, show
ntp-status, show ports, show power-supplies, show provisioning, show protocols, show
redundancy-mode, show sas-link-health, show sensor-status, show shutdown-status, show system,
show system-parameters, show versions, shutdown
clear events, clear expander-status, fail, restore defaults, set debug-log-parameters, set
expander-fault-isolation, set expander-phy, show debug-log-parameters, show expander-status, unfail
controller
show initiators, show maps, show ports, show unwritable-cache, show
show controller-date, show controllers, show disk-parameters, show enclosures, show
API specific meta, show refresh-counters
Statistics reset all-statistics, reset controller-statistics, reset disk-error-statistics, reset disk-statistics, reset
host-port-statistics, reset vdisk-statistics, reset volume-statistics, show controller-statistics, show
disk-statistics, show host-port-statistics, show vdisk-statistics, show volume-statistics
23
Page 24

3 Alphabetical list of commands
This chapter is organized to help you find a command by name. Each command topic includes one or
more of the following sections:
Description The command's purpose and notes about its usage
Min. role The minimum user role required to use the command
Syntax The command's syntax
Parameters Descriptions of the command's parameters
Output Descriptions of fields shown in console format
Example One or more examples of the command's usage in console format
Basetypes References to descriptions of basetype properties shown in XML API format
See also References to commands that are used with the command
24 Alphabetical list of commands
Page 25

abort scrub
Description Aborts a media scrub operation. You can abort scrub of specified disk groups, vdisks, or volumes.
Min. role
Syntax
manage
abort scrub
[vdisk vdisks]
[volume volumes]
Parameters Specify only one of the following parameters.
vdisk vdisks
Optional. A comma-separated list of the names or serial numbers of the vdisks to stop scrubbing. A
name that includes a space must be enclosed in double quotes.
volume volumes
Optional. A comma-separated list of the names or serial numbers of the volumes to stop scrubbing.
A name that includes a space must be enclosed in double quotes.
Example Abort scrubbing vdisk vd1.
# abort scrub vdisk vd1
Abort scrubbing volume vol1.
# abort scrub volume vol1
See also • scrub vdisk
• scrub volume
• show vdisks
• show volumes
abort scrub 25
Page 26

abort verify
Description Aborts a media verify operation. You can abort verification of specified disk groups or vdisks.
Min. role
Syntax
Parameters vdisk vdisks
Example Abort verifying vdisk vd1.
See also • show vdisks
manage
abort verify
[vdisk vdisks]
Optional. A comma-separated list of the names or serial numbers of the vdisks to stop verifying. A
name that includes a space must be enclosed in double quotes.
# abort verify vdisk vd1
• verify vdisk
add global-spare (Deprecated)
Use add spares.
26 Alphabetical list of commands
Page 27

add spares
Description Designates specified available disks to be spares. A spare can replace a failed disk of the same
type (enterprise SAS, for example) and the same or lower capacity in a disk group with a
fault-tolerant RAID level (1, 3, 5, 6, 10, 50).
For linear storage, you can add global spares or dedicated spares:
• A global spare is available to any fault-tolerant vdisk with the same disk type. The system can
have 16 global spares.
• A dedicated spare is assigned to a fault-tolerant vdisk with the same disk type. A vdisk can have
4 dedicated spares.
Min. role
Syntax
Parameters vdisk vdisk
Example Designate disk 1.2 as a global spare.
See also • remove spares
manage
add spares
[vdisk vdisk]
disks
Optional. The name or serial number of the vdisk to assign the disks to as dedicated spares. A name
that includes a space must be enclosed in double quotes. If this parameter is omitted, the disks will
be global spares.
disks
The IDs of the disks to designate as spares. For disk syntax, see "Command syntax" (page 18).
# add spares 1.2
Designate disk 1.3 as a dedicated spare for vdisk VD1.
# add spares vdisk VD1 1.3
• show disks
• show vdisks
add vdisk-spare (Deprecated)
Use add spares.
add spares 27
Page 28

check firmware-upgrade-health
Description Checks that the system is ready for a firmware upgrade.
Under normal conditions, firmware upgrade can be performed safely without risk to data availability
or integrity. However, when the system is degraded—for example, because of failed or missing
components or lack of multi-pathing to disks—upgrade failure or loss of availability can occur.
This command performs a series of health checks to determine whether any conditions exist that
need to be resolved before upgrading firmware. Any conditions that are detected are listed with their
potential risks. You can use commands in the “See also” section to determine which components
have health problems to be resolved.
Min. role
Syntax
manage
check firmware-upgrade-health
Output Upgrade Health
• Pass: There are no risks to performing firmware upgrade.
• Fail: At least one condition exists that presents a risk of upgrade failure or loss of availability.
Condition Detected
The condition that was detected.
Risks
The problems that are likely to result if you do not resolve the conditions before performing a
firmware upgrade.
Example Check firmware upgrade health for a system that is ready for upgrade.
# check firmware-upgrade-health
Upgrade Health
--------------------------------Pass
--------------------------------Success: Command completed successfully. (2014-06-07 15:14:33)
28 Alphabetical list of commands
Page 29

Check firmware upgrade health for a system that has problems to be resolved before upgrade.
# check firmware-upgrade-health
Upgrade Health
--------------------------------Fail
Condition Detected
Risks
--------------------------------------------------------------------------- One or more disks are currently single ported.
Data unavailability
At least one controller is not up.
Data unavailability
One or more temperature sensors indicate a critical temperature.
Code load failure
At least one controller contains unwritten cache data.
Data corruption, data loss
One or more supercapacitors have failed.
Code load failure
One or more power supplies are not functioning.
Code load failure
One or more fans are not functioning.
Code load failure
--------------------Success: Command completed successfully. (2014-06-7 17:13:07)
Basetypes • code-load-readiness
• code-load-readiness-reasons
• status
See also • show controllers
• show disks
• show enclosures
• show fans
• show power-supplies
• show sensor-status
• show system
check firmware-upgrade-health 29
Page 30

clear cache
Description Clears unwritable cache data from both controllers. This data cannot be written to disk because it is
associated with a volume that no longer exists or whose disks are not online. If the data is needed,
the volume's disks must be brought online. If the data is not needed it can be cleared, in which case
it will be lost and data will differ between the host and disk. Unwritable cache is also called orphan
data.
CAUTION: Only use this command when all disk groups are online. Improper use of this command
may result in data loss.
You can clear unwritable cache data for a specified volume or for all volumes.
Min. role
Syntax
Syntax
Parameters volume volume
Example Clear unwritable cache data for volume V1 from both controllers.
See also • show unwritable-cache
manage
clear cache
clear cache
[volume volume]
Optional. The name or serial number of a specific volume for which to clear unwritable cache data.
A name that includes a space must be enclosed in double quotes. If this parameter is omitted,
unwritable cache data is cleared for all volumes.
# clear cache volume v1
• show volumes
30 Alphabetical list of commands
Page 31

clear degraded-disk
Description Sets a degraded disk’s health to OK and clears the disk’s error count. For a disk that has been failed
by the degraded-disk policy, this command also clears the disk’s metadata.
After this command is run, error counts used to measure disk medium errors are restarted.
Min. role
Syntax
Parameters disks
Example Clear metadata from a disk that has been failed by the degraded-policy.
See also • set degraded-disk-policy
manage
clear degraded-disk
disks
The IDs of the disks to operate on. For disk syntax, see "Command syntax" (page 18).
# clear degraded-disk 1.2
• set degraded-disk-threshold
• show degraded-disk-policy
• show degraded-disk-thresholds
• show disks
clear degraded-disk 31
Page 32

clear disk-metadata
Description Clears metadata from leftover disks. For a leftover disk, the show disks command shows the Usage
value LEFTOVR.
CAUTION:
• Only use this command when all vdisks are online and leftover disks exist. Improper use of this
command may result in data loss.
• Do not use this command when a vdisk is offline and one or more leftover disks exist.
If you are uncertain whether to use this command, contact technical support for further assistance.
Each disk in a vdisk has metadata that identifies the owning vdisk, the other members of the vdisk,
and the last time data was written to the vdisk. The following situations cause a disk to become a
leftover:
• Vdisk members’ timestamps do not match so the system designates members having an older
timestamp as leftovers.
• A disk is not detected during a rescan, then is subsequently detected.
When a disk becomes a leftover, the following changes occur:
• The disk's health becomes Degraded and its How Used state becomes LEFTOVR.
• The disk is automatically excluded from the vdisk, causing the vdisk's health to become
Degraded or Fault, depending on the RAID level.
• The disk's fault LED becomes illuminated.
If spares are available, and the health of the vdisk is Degraded, the vdisk will use them to start
reconstruction. When reconstruction is complete, you can clear the leftover disk's metadata. Clearing
the metadata will change the disk's health to OK and its How Used state to AVAIL, making the disk
available for use in a new vdisk or as a spare.
If spares are not available to begin reconstruction, or reconstruction has not completed, keep the
leftover disk so that you'll have an opportunity to recover its data.
This command clears metadata from leftover disks only. If you specify disks that are not leftovers, the
disks are not changed.
Min. role
Syntax
Parameters disks
Example Clear metadata from leftover disk1.1.
See also • show disks
manage
clear disk-metadata
disks
The IDs of the leftover disks from which to clear metadata. For disk syntax, see "Command syntax"
(page 18).
# clear disk-metadata 1.1
32 Alphabetical list of commands
Page 33

clear events
Description Clears the event log in controller A, B, or both. For use by or with direction from technical support.
Min. role
Syntax
Parameters a|b|both
Example Clear the event log for controller A.
See also • show events
manage
clear events
[a|b|both]
Optional. The controller event log to clear. If this parameter is omitted, both event logs are cleared.
# clear events a
clear events 33
Page 34

clear expander-status
Description Clears the counters and status for SAS expander lanes. For use by or with direction from technical
support.
Counters and status can be reset to a good state for all enclosures, or for a specific enclosure whose
status is Error as shown by the show expander-status command.
NOTE: If a rescan is in progress, the clear operation will fail with an error message saying that an
EMP does exist. Wait for the rescan to complete and then retry the clear operation.
Min. role
Syntax
Parameters enclosure ID
Example Clear the expander status for the enclosure with ID 1.
See also • show expander-status
manage
clear expander-status
[enclosure ID]
Optional. The enclosure number. If this parameter is omitted, the command clears the counters and
status of all enclosures.
# clear expander-status enclosure 1
34 Alphabetical list of commands
Page 35

create certificate
Description Creates or removes a custom security certificate.
The storage system supports use of unique certificates for secure data communications, to
authenticate that the expected storage systems are being managed. Use of authentication certificates
applies to the HTTPS protocol, which is used by the web server in each controller module.
After using this command you must restart the system's Management Controllers to have the change
take effect.
Min. role
Syntax
manage
create certificate
[a|b|both]
[contents content-string]
[noprompt]
[restore]
[unique]
Parameters a|b|both
Optional. Specifies whether to apply the change to controller A, B, or both. If this parameter is
omitted, the change is applied to the controller being accessed.
contents content-string
Optional. A security certificate is generated based on the supplied content. The content becomes the
subject of the certificate creation request and must be formatted as
/type0=value0/type1=value1/type2=..., where types include CO for country, ST for state
or province, L for location, CN for common name, and O for organization. The content string cannot
exceed 1024 characters and can include printable UTF-8 characters except space or semicolon. An
example is /CO=US/ST=CO/O=MyOrganization/CN=www.mysite.com. You must specify
either this parameter or the restore parameter or the unique parameter.
noprompt
Optional in console format; required for XML API format. Suppresses the confirmation prompt, which
requires a response. Specifying this parameter allows the command to proceed without user
interaction.
restore
Optional. The system-generated certificate is restored and the custom certificate is discarded. The
custom certificate may have been created with this CLI command or uploaded using FTP. You must
specify either this parameter or the contents parameter or the unique parameter.
unique
Optional. A security certificate is generated based on the system's serial number and other standard
values. This certificate is installed, and the original certificate is archived. You must specify either this
parameter or the contents parameter or the restore parameter.
Example Regenerate the system certificate with a new private key.
# create certificate unique
Create a custom certificate using a content string.
# create certificate contents /CO=US/ST=CO/L=NewYork/O=MyCompany/CN=
www.mycompany.com
Restore the system-generated certificate and remove the custom certificate.
# create certificate restore
See also • restart mc
• restart sc
• show certificate
create certificate 35
Page 36

create host (Deprecated)
Use set initiator.
create schedule
Description Schedules a task to run automatically.
Min. role
Syntax
Parameters schedule-specification "specification"
manage
create schedule
schedule-specification "specification"
task-name task-name
schedule-name
Defines when the task will first run, and optionally when it will recur and expire. You can use a
comma to separate optional conditions. Dates cannot be in the past. For times, if neither AM nor PM
is specified, a 24-hour clock is used.
• start yyyy-mm-dd hh:mm [AM|PM]
Specifies a date and a time in the future to be the first instance when the scheduled task will run,
and to be the starting point for any specified recurrence.
• [every # minutes|hours|days|weeks|months|years]
Specifies the interval at which the task will run.
• [between hh:mm [AM|PM] and hh:mm [AM|PM]]
Constrains the time range during which the task is permitted to run. Ensure that the start time is
within the specified time range.
• [only any|first|second|third|fourth|fifth|last|#st|#nd|#rd|#th
weekday|weekendday|Sunday|Monday|Tuesday|Wednesday|Thursday|Friday
|Saturday of year|month|January|February|March|April|May|June|July |
August|September|October|November|December]
Constrains the days or months when the task is permitted to run. Ensure that this constraint
includes the start date.
• [count #]
Constrains the number of times the task is permitted to run.
• [expires yyyy-mm-dd hh:mm [AM|PM]]
Specifies when the schedule expires, after which the task will no longer run.
task-name task-name
The name of an existing task to run. The name is case sensitive. A name that includes a space must
be enclosed in double quotes.
schedule-name
A name for the new schedule. Input rules:
• The value is case sensitive.
• The value can have a maximum of 32 bytes, where ASCII characters are 1 byte, most Latin
(Western European) characters with diacritics are 2 bytes, and most Asian characters are 3
bytes.
• The value can include spaces and printable UTF-8 characters except: " , < \
• A value that includes a space must be enclosed in double quotes.
Example Create schedule Sched1 that runs Task1 for the first time on March 1, 2014, runs daily between
midnight and 1:00 AM, and runs for the last time in the morning of January 1, 2015.
# create schedule schedule-specification "start 2014-03-01 00:01, every 1 days,
between 12:00 AM and 1:00 AM, expires 2015-01-01 1:00 AM" task-name Task1 Sched1
36 Alphabetical list of commands
Page 37

Create schedule Sched2 that runs Task2 for the first time on March 1, 2014, and on the first
weekday of each month, with no expiration.
# create schedule schedule-specification "start 2012-03-01 00:01 only first
weekday of month" task-name Task2 Sched2
See also • delete schedule
• set schedule
• show schedules
• show tasks
create schedule 37
Page 38

create task
Description Creates a task that can be scheduled. You can create a task to enable or disable drive spin down.
Min. role
manage
Syntax To create a task to enable spin down for all disks:
create task
type EnableDSD
name
To create a task to disable spin down for all disks:
create task
type DisableDSD
name
Parameters type EnableDSD|DisableDSD
The task type:
• EnableDSD: Enables spin down for all disks. You can use this to enable or resume spin down
during hours of infrequent activity.
• DisableDSD: Disables spin down for all disks. You can use this to disable or suspend spin
down during hours of frequent activity.
name
A name for the new task. Input rules:
• The value is case sensitive.
• The value can have a maximum of 32 bytes, where ASCII characters are 1 byte, most Latin
(Western European) characters with diacritics are 2 bytes, and most Asian characters are 3
bytes.
• The value can include spaces and printable UTF-8 characters except: " , < \
• A value that includes a space must be enclosed in double quotes.
Example Create a task to enable or resume spin down for all disks.
# create task type EnableDSD taskDSDresume
Create a task to disable or suspend spin down for all disks.
# create task type DisableDSD taskDSDsuspend
See also • create schedule
• delete task
• show tasks
• show volumes
38 Alphabetical list of commands
Page 39

create user
Description Creates a user account. The system supports 12 user accounts. You can create a general user that
can access the WBI, CLI, or FTP interface, or an SNMPv3 user that can access the MIB or receive
trap notifications. SNMPv3 user accounts support SNMPv3 security features such as authentication
and encryption.
Min. role
Syntax
manage
create user
[authentication-type MD5|SHA|none]
[base 2|10]
[interfaces interfaces]
[locale English|en|Spanish|es|French|fr|German|de|Italian|it|Japanese|ja
|Korean|ko|Dutch|nl|Chinese-simplified|zh-s|Chinese-traditional|zh-t]
[password password]
[precision #]
[privacy-password encryption-password]
[privacy-type DES|AES|none]
[roles roles]
[storage-size-base 2|10]
[storage-size-precision #]
[storage-size-units auto|MB|GB|TB]
[temperature-scale celsius|c|fahrenheit|f]
[timeout #]
[trap-host IP-address]
[type novice|standard|advanced|diagnostic]
[units auto|MB|GB|TB]
name
Parameters authentication-type MD5|SHA|none
Optional. For an SNMPv3 user, this specifies whether to use a security authentication protocol.
Authentication uses the user password.
• MD5: MD5 authentication. This is the default.
• SHA: SHA (Secure Hash Algorithm) authentication.
• none: No authentication.
base 2|10
Optional. Sets the base for entry and display of storage-space sizes:
• 2: Sizes are shown as powers of 2, using 1024 as a divisor for each magnitude. In base 2 when
you set a size, whether you specify a base-2 or base-10 size unit, the resulting size will be in
base 2.
• 10: Sizes are shown as powers of 10, using 1000 as a divisor for each magnitude. In base 10
when you set a size, the resulting size will be in the specified unit. This option is the default.
Operating systems usually show volume size in base 2. Disk drives usually show size in base 10.
Memory (RAM and ROM) size is always shown in base 2.
create user 39
Page 40

interfaces interfaces
Optional. Specifies the interfaces that the user can access. Multiple values must be separated by
commas and no spaces. A command that specifies snmpuser or snmptarget cannot also specify
a non-SNMP interface.
• cli: Command-line interface. This is enabled by default.
• wbi: Web-browser interface. This is enabled by default.
• ftp: FTP interface.
• snmpuser: Allows an SNMPv3 user to view the SNMP MIB.
• snmptarget: Allows an SNMPv3 user to receive SNMP trap notifications. This option requires
the trap-host parameter.
• none: No interfaces.
locale English|en|Spanish|es|French|fr|German|de|Italian|it|Japanese|ja
|Korean|ko|Dutch|nl|Chinese-simplified|zh-s|Chinese-traditional|zh-t
Optional. The display language. The default is English.
password password
Optional in console format; required for XML API format. Sets a new password for the user. Password
rules:
• The value is case sensitive.
• The value can have 8–32 characters.
• The value can include printable UTF-8 characters except a space or: " ' , < > \
• A value that includes only printable ASCII characters must include at least one uppercase
character, one lowercase character, and one non-alphabetic character.
If this parameter is omitted, the command prompts you to enter and re-enter a value, which is
displayed obscured for security reasons. For an SNMPv3 user whose authentication-type
parameter is set to use authentication, this specifies the authentication password.
precision #
Optional. Sets the number of decimal places (1–10) for display of storage-space sizes.
privacy-password encryption-password
Optional. For an SNMPv3 user whose privacy-type parameter is set to use encryption, this
specifies the encryption password. Password rules:
• The value is case sensitive.
• The value can have 8–32 characters.
• The value can include printable UTF-8 characters except a space or: " ' , < > \
• A value that includes only printable ASCII characters must include at least one uppercase
character, one lowercase character, and one non-alphabetic character.
privacy-type DES|AES|none
Optional. For an SNMPv3 user, this specifies whether to use a security encryption protocol. This
parameter requires the privacy-password parameter and the authentication-type
parameter.
• DES: Data Encryption Standard.
• AES: Advanced Encryption Standard.
• none: No encryption. This is the default.
40 Alphabetical list of commands
Page 41

roles roles
Optional. Specifies the user’s roles as one or more of the following values:
• monitor: User can view but not change system settings. This is the default.
• manage: User can view and change system settings.
• diagnostic: User can view and change system settings.
Multiple values must be separated with a comma (with no spaces). If multiple values are specified,
the user’s access to commands will be determined by the highest role specified.
storage-size-base 2|10
Optional. Alias for base.
storage-size-precision #
Optional. Alias for precision.
storage-size-units auto|MB|GB|TB
Optional. Alias for units.
temperature-scale celsius|c|fahrenheit|f
Optional. Sets the scale for display of temperature values:
• fahrenheit or f: Temperatures are shown in degrees Fahrenheit.
• celsius or c: Temperatures are shown in degrees Celsius. This is the default.
timeout #
Optional. Sets the timeout value in seconds for the login session. Valid values are 120–43200
seconds (2–720 minutes). The default is 1800 seconds (30 minutes).
trap-host IP-address
Optional. For an SNMPv3 user whose interface parameter is set to snmptarget, this specifies
the IP address of the host that will receive SNMP traps.
type novice|standard|advanced|diagnostic
Optional. Identifies the user’s experience level. This parameter is informational only and does not
affect access to commands. The default is standard.
units auto|MB|GB|TB
Optional. Sets the unit for display of storage-space sizes:
• auto: Sizes are shown in units determined by the system. This is the default.
• MB: Sizes are shown in megabytes.
• GB: Sizes are shown in gigabytes.
• TB: Sizes are shown in terabytes.
Based on the precision setting, if a size is too small to meaningfully display in the selected unit,
the system uses a smaller unit for that size. For example, if units is set to TB, precision is set to
1, and base is set to 10, the size 0.11709 TB is instead shown as 117.1 GB.
name
A name for the new user, which cannot already exist in the system. Input rules:
• The value is case sensitive.
• The value can have a maximum of 29 bytes, where ASCII characters are 1 byte, most Latin
(Western European) characters with diacritics are 2 bytes, and most Asian characters are 3
bytes.
• The value can include printable UTF-8 characters except a spare or: " , < \
• A value that includes a space must be enclosed in double quotes.
Example Create user John who will view system information using base 2 in the WBI.
# create user base 2 interfaces wbi roles monitor John
Enter new password: ********
Re-enter new password: ********
create user 41
Page 42

Create user MIB that can view the SNMP MIB, using authentication and encryption.
# create user interfaces snmpuser password Abcd1234 authentication-type SHA
privacy-type AES privacy-password Abcd5678 MIB
Create user Traps that can receive SNMP trap notifications, using authentication without
encryption.
# create user interfaces snmptarget authentication-type MD5 trap-host
172.22.4.171 Traps
Enter new password: ********
Re-enter new password: ********
See also • delete user
• set snmp-parameters
• set user
• show users
42 Alphabetical list of commands
Page 43

create vdisk
Description Creates a vdisk using the specified RAID level, disks, and spares. This command applies to linear
storage only.
All disks in the vdisk must be the same type (enterprise SAS, for example).
For each RAID level, the minimum and maximum numbers of disks supported are:
• RAID 5: 3–16
• RAID 6: 4–16
• RAID 10: 4–16
• RAID 50: 6–32
Min. role
Syntax
• NRAID: 1
• RAID 0: 2–16
• RAID 1: 2
• RAID 3: 3–16
manage
create vdisk
[assigned-to a|b|auto]
[chunk-size 16k|32k|64k|128k|256k|512k]
disks disks
level nraid|raid0|r0|raid1|r1|raid3|r3|raid5|r5|raid6|r6|raid10|r10
|raid50|r50
[mode online|offline]
[spare disks]
name
Parameters assigned-to a|b|auto
Optional. For a system operating in Active-Active ULP mode, this specifies the controller to own the
vdisk. To let the system automatically load-balance vdisks between controllers, use auto or omit this
parameter. In Single Controller mode, this parameter is ignored; the system automatically
load-balances vdisks in anticipation of the insertion of a second controller in the future.
chunk-size 16k|32k|64k|128k|256k|512k
Optional. The amount of contiguous data, in KB, that is written to a vdisk member before moving to
the next member of the vdisk. For RAID 50, this option sets the chunk size of each RAID-5 subvdisk.
The chunk size of the RAID-50 vdisk is calculated as: configured-chunk-size x (subvdisk-members - 1).
For NRAID and RAID 1, chunk-size has no meaning and is therefore not applicable. The default
size is 512k.
disks disks
The IDs of the disks to include in the vdisk. RAID 10 requires a minimum of two RAID-1 sub-vdisks
each having two disks. RAID 50 requires a minimum of two RAID-5 sub-vdisks each having three
disks. For disk syntax, see "Command syntax" (page 18).
level nraid|raid0|r0|raid1|r1|raid3|r3|raid5|r5|raid6|r6|raid10|r10
|raid50|r50
Specifies the RAID level.
mode online|offline
Optional. Specifies whether the vdisk is initialized online or offline.
• online: Enables you to use the vdisk immediately after creating it while it is initializing.
Because online uses the verify method to create the vdisk, it takes longer to complete initializing
than offline. Online initialization is fault-tolerant. This option is the default.
• offline: You must wait for the vdisk initialization process to finish before using the vdisk.
However, offline takes less time to complete initializing than online.
spare disks
Optional. The IDs of 1–4 dedicated spares to assign to a RAID 1, 3, 5, 6, 10, or 50 vdisk. For disk
syntax, see "Command syntax" (page 18).
create vdisk 43
Page 44

name
A name for the new vdisk. Input rules:
• The value is case sensitive.
• The value can have a maximum of 32 bytes, where ASCII characters are 1 byte, most Latin
(Western European) characters with diacritics are 2 bytes, and most Asian characters are 3
bytes.
• The value can include spaces and printable UTF-8 characters except: " , < \
• A value that includes a space must be enclosed in double quotes.
Example Create the RAID-1 vdisk VD1 using two disks in the first enclosure.
# create vdisk level raid1 disks 0.1,0.3 VD1
Create the RAID-50 vdisk VD2 having three RAID-5 sub-vdisks, each having three disks.
# create vdisk level r50 disks 0.1-3:0.4-6:0.7-9 VD2
Create the RAID-6 vdisk vdR6 using four disks.
# create vdisk level r6 disks 2.3-4,2.8-9 vdR6
See also • delete vdisks
• set vdisk
• show disks
• show vdisks
44 Alphabetical list of commands
Page 45

create volume
Description Creates a volume in a vdisk. You must specify a size for the volume. You can create the volume
unmapped or set its default mapping. Default mapping settings apply to all hosts, unless overridden
by an explicit mapping between a host and the volume. You can later change the mapping by using
the map volume and unmap volume commands. By default, this command will not map the created
volume.
Volume sizes are aligned to 4-MB boundaries. When a volume is created or expanded, if the
resulting size would be less than 4 MB it will be increased to 4 MB; if the resulting size would be
greater than 4 MB it will be decreased to the nearest 4-MB boundary.
To create multiple volumes at once, use the create volume-set command.
Min. role
Syntax
manage
create volume
[access read-write|rw|read-only|ro|no-access]
[lun LUN]
[ports ports]
size size[B|KB|MB|GB|TB|KiB|MiB|GiB|TiB]
vdisk vdisk
name
Parameters access read-write|rw|read-only|ro|no-access
Optional. The access permission to use for the mapping: read-write (rw), read-only (ro), or
no-access. If no-access is specified, the volume is not mapped. The default is read-write.
lun LUN
Optional if the access parameter is set to no-access. Specifies the LUN to assign to the mapping
on all ports.
ports ports
Optional. The ports through which the host can access the volume. All specified ports must be the
same type. For port syntax, see "Command syntax" (page 18). If this parameter is omitted, all ports
are selected.
size size[B|KB|MB|GB|TB|KiB|MiB|GiB|TiB]
Sets the volume size. The unit is optional (B represents bytes). If base 2 is in use, whether you specify
a base-2 or base-10 unit, the resulting size will be in base 2. If no unit is specified, the default is
512- b y t e b l o ck s .
A value less than 4 MB (3.8 MiB) will be rounded up to that size. Any larger value will be rounded
down to the next multiple of that size. The maximum volume size is 140 TB (128 TiB).
vdisk vdisk
Optional; required for linear volumes. The name or serial number of the vdisk in which to create the
volume. A name that includes a space must be enclosed in double quotes.
name
A name for the new volume. The name must be unique system-wide. Input rules:
• The value is case sensitive.
• The value can have a maximum of 32 bytes, where ASCII characters are 1 byte, most Latin
(Western European) characters with diacritics are 2 bytes, and most Asian characters are 3
bytes.
• The value can include spaces and printable UTF-8 characters except: " , < \
• A value that includes a space must be enclosed in double quotes.
Example Create the 20-GB volume V1 in vdisk VD1, and map it to ports A1 and B1 using LUN 5.
# create volume vdisk VD1 size 20GB ports a1,b1 lun 5 V1
create volume 45
Page 46

See also • create volume-set
• delete volumes
• set volume
• show ports
• show vdisks
• show volumes
46 Alphabetical list of commands
Page 47

create volume-set
Description Creates a specified number of volumes in a vdisk. You must specify a base name and a size for the
volumes. You can create the volumes unmapped or set their default mapping. Default mapping
settings apply to all hosts, unless overridden by an explicit mapping between a host and the volume.
You can later change mappings by using the map volume and unmap volume commands. By
default, this command will not map the created volumes.
Volume sizes are aligned to 4-MB boundaries. When a volume is created or expanded, if the
resulting size would be less than 4 MB it will be increased to 4 MB; if the resulting size would be
greater than 4 MB it will be decreased to the nearest 4-MB boundary.
Min. role
Syntax
manage
create volume-set
[access read-write|rw|read-only|ro|no-access]
[baselun base-LUN]
basename base-name
count #
[ports ports]
size size[B|KB|MB|GB|TB|KiB|MiB|GiB|TiB]
[vdisk vdisk]
Parameters access read-write|rw|read-only|ro|no-access
Optional. The access permission to use for the mapping: read-write (rw), read-only (ro), or
no-access. If no-access is specified, the volume is not mapped. The default is read-write.
baselun base-LUN
Optional. The first in a sequence of LUNs to assign to map the volumes through ports specified by
the ports parameter. If the baselun and ports parameters are omitted, the volumes are not
mapped. If a LUN to be assigned to a volume is already in use, an error message is displayed and
that volume and any subsequent volumes are not mapped.
basename base-name
A name to which a number will be appended to generate a different name for each volume. Volume
names must be unique system-wide. Input rules:
• The value is case sensitive.
• The value can have a maximum of 16 bytes, where ASCII characters are 1 byte, most Latin
(Western European) characters with diacritics are 2 bytes, and most Asian characters are 3
bytes.
• The value can include spaces and printable UTF-8 characters except: " , < \
• A value that includes a space must be enclosed in double quotes.
Resulting volumes are numbered sequentially starting with 0000. If volumes with the specified
basename already exist, names of new volumes start with the first available name in the sequence.
For example: for basename vd1_v, if vd1_v0000 and vd1_v0002 exist, the next volumes created
will be vd1_v0001 and vd1_v0003.
count #
The number of volumes to create, from 1 to 128. Volumes will be created up to the maximum number
supported per vdisk.
ports ports
Optional. The controller ports to use for the mapping. All ports must be the same type. For port
syntax, see "Command syntax" (page 18). If not all ports are specified, the unspecified ports are not
mapped. If the ports and baselun parameters are omitted, the volumes are not mapped.
create volume-set 47
Page 48

size size[B|KB|MB|GB|TB|KiB|MiB|GiB|TiB]
Sets the volume size. The unit is optional (B represents bytes). If base 2 is in use, whether you specify
a base-2 or base-10 unit, the resulting size will be in base 2. If no unit is specified, the default is
512-byte blocks. If the combined size of the volumes exceeds the capacity of the vdisk, an error
message is displayed and no volumes are created.
A value less than 4 MB (3.8 MiB) will be rounded up to that size. Any larger value will be rounded
down to the next multiple of that size. The maximum volume size is 140 TB (128 TiB).
vdisk vdisk
Optional; required for linear volumes. The name or serial number of the vdisk in which to create the
volumes. A name that includes a space must be enclosed in double quotes.
Example Create two unmapped, 100-GB volumes with base name data- in vdisk data.
# create volume-set count 2 size 100GB vdisk data basename data-
Create ten 20-GB volumes with the base name vd1_v in vdisk vd1, mapped starting with LUN 5
with read-only access through port A1.
# create volume-set count 10 size 20GB vdisk vd1 basename vd1_v baselun 5
access ro ports a1
See also • create volume
• delete volumes
• map volume
• set volume
• show maps
• show vdisks
• show volumes
• unmap volume
delete global-spare (Deprecated)
Use remove spares.
delete host (Deprecated)
Use delete initiator-nickname.
48 Alphabetical list of commands
Page 49

delete initiator-nickname
Description Deletes manually created initiators or the nickname of discovered initiators.
Volume maps continue to apply to the initiators in the host that is deleted. If you delete the nickname
of a discovered initiator, commands will show the initiator by its ID.
Min. role
Syntax
Parameters initiators
Example Delete the manually created initiator named Init1.
See also • set initiator
manage
delete initiator-nickname
initiators
A comma-separated list of the nicknames or IDs of initiators to delete.
# delete initiator-nickname Init1
Delete the nickname of discovered initiator Init2.
# delete initiator-nickname Init2
• show initiators
delete initiator-nickname 49
Page 50

delete schedule
Description Deletes a task schedule. If you no longer want a scheduled task to occur, you can delete the
schedule. When a volume is deleted, its schedules and tasks are also deleted.
If the schedule uses a task that is not used by any other schedule, a confirmation prompt will ask
whether you want to delete the schedule and the task. Reply yes to delete both, or no to delete only
the schedule.
Min. role
Syntax
manage
delete schedule
[prompt yes|no]
schedule
Parameters prompt yes|no
Optional. For scripting, this specifies whether to automatically reply yes or no to confirmation
prompts. If this parameter is omitted, you must manually reply to confirmation prompts.
schedule
The name of the schedule to delete.
Example Delete schedule Sched1, whose task is used by another schedule.
# delete schedule Sched1
Delete schedule Sched2, whose task is not used by another schedule.
# delete schedule Sched2
This schedule uses a task (Task1) that is not used by any other schedule.
Do you want to delete this task, also? (y/n) yes
See also • create schedule
• set schedule
• show schedules
50 Alphabetical list of commands
Page 51

delete task
Description Deletes a task. If the task is scheduled, a confirmation prompt will ask whether you want to delete the
task and its schedules. Reply yes to delete both, or no to cancel the command.
Min. role
Syntax
manage
delete task
[prompt yes|no]
task
Parameters prompt yes|no
Optional. For scripting, this specifies whether to automatically reply yes or no to confirmation
prompts. If this parameter is omitted, you must manually reply to confirmation prompts.
task
The name of the task to delete.
Example Delete unscheduled task Task1.
# delete task Task1
Delete scheduled task Task2.
# delete task Task2
Task Task2 has 2 schedules associated with it that will also be deleted.
Do you want to continue? (y/n) no
See also • create task
• delete schedule
• show schedules
• show tasks
delete task 51
Page 52

delete user
Description Deletes a user account. Except for the user you are logged in as, you can delete any user, including
the default users. However, the system requires at least one CLI user with the manage role to exist.
When a user is deleted, any sessions associated with that user name are terminated.
Min. role
Syntax
manage
delete user
[noprompt]
name
Parameters noprompt
Optional in console format; required for XML API format. Suppresses the confirmation prompt, which
requires a yes or no response. Specifying this parameter allows the command to proceed without
user interaction.
name
The user to delete. Names are case sensitive.
Example Delete user jsmith.
# delete user jsmith
Are you sure you want to delete user jsmith? (y/n) yes
Delete user Kim and suppress the confirmation prompt.
# delete user noprompt Kim
See also • create user
• show users
52 Alphabetical list of commands
Page 53

delete vdisks
Description Deletes specified vdisks. This command applies to linear storage only.
This unmaps and deletes all volume in the vdisks and makes all the disks available.
CAUTION: Deleting a vdisk will delete all data it contains.
NOTE: If you delete a quarantined vdisk and its missing disks are later found, the vdisk will
reappear as quarantined or offline and you must delete it again (to clear those disks).
Min. role
Syntax
Parameters prompt yes|no
Example Delete vdisks VD1 and VD2.
See also • create vdisk
manage
delete vdisks
[prompt yes|no]
vdisks
Optional. For scripting, this specifies an automatic reply to the confirmation prompt that appears if a
utility is running on the vdisk:
• yes: Stop the utility and allow the command to proceed.
• no: Cancel the command.
If this parameter is omitted, you must manually reply to the prompt.
vdisks
A comma-separated list of the names or serial numbers of the vdisks to delete. A name that includes
a space must be enclosed in double quotes.
# delete vdisks VD1,VD2
Delete vdisk VD3 on which a utility is running.
# delete vdisks VD3
Vdisk VD3 has a job running. Do you want to continue? yes
• show vdisks
delete vdisk-spare (Deprecated)
Use remove spares.
delete vdisks 53
Page 54

delete volumes
Description Deletes specified volumes.
CAUTION: Deleting a volume will delete all data it contains and its schedules.
Min. role
Syntax
Parameters volumes
Example Delete volumes V1 and V2.
See also • create volume
manage
delete volumes
volumes
A comma-separated list of the names or serial numbers of the volumes to delete. A name that
includes a space must be enclosed in double quotes.
# delete volumes V1,V2
• show volumes
54 Alphabetical list of commands
Page 55

dequarantine
Description Removes a disk group from quarantine.
CAUTION: Carefully read this topic to determine whether to use the dequarantine command to
manually remove a disk group from quarantine. The dequarantine command should only be used
as part of the emergency procedure to attempt to recover data and is normally followed by use of the
CLI trust command. If a disk group is manually dequarantined and does not have enough disks to
continue operation, its status will change to OFFL and its data may or may not be recoverable
through use of the trust command. It is recommended that you contact technical support for
assistance in determining if the recovery procedure that makes use of the dequarantine and trust
commands is applicable to your situation and for assistance in performing it. Also, see the help for
the trust command.
To continue operation and not go to quarantined status, a RAID-3 or RAID-5 disk group can have
only one inaccessible disk, a RAID-6 disk group can have only one or two inaccessible disks, and a
RAID-10 or RAID-50 disk group can have only one inaccessible disk per subgroup. For example, a
16-disk RAID-10 disk group can remain online (critical) with 8 inaccessible disks if one disk per
mirror is inaccessible.
The system will automatically quarantine a disk group having a fault-tolerant RAID level if one or
more of its disks becomes inaccessible, or to prevent invalid (“stale”) data that may exist in the
controller from being written to the disk group. Quarantine will not occur if a known-failed disk
becomes inaccessible or if a disk becomes inaccessible after failover or recovery. The system will
automatically quarantine an NRAID or RAID-0 disk group to prevent invalid data from being written
to the disk group. If quarantine occurs because of an inaccessible disk, event 172 is logged. If
quarantine occurs to prevent writing invalid data, event 485 is logged. For recommended actions for
these events, see the Event Descriptions Reference Guide.
Examples of when quarantine can occur are:
• At system power-up, a disk group has fewer disks online than at the previous power-up. This may
happen because a disk is slow to spin up or because an enclosure is not powered up. The disk
group will be automatically dequarantined if the inaccessible disks come online and the disk
group status becomes FTOL (fault tolerant and online), or if after 60 seconds the disk group
status is QTCR or QTDN.
• During system operation, a disk group loses redundancy plus one more disk. For example, three
disks are inaccessible in a RAID-6 disk group or two disks are inaccessible for other fault-tolerant
RAID levels. The disk group will be automatically dequarantined if after 60 seconds the disk
group status is FTOL, FTDN, or CRIT.
Quarantine isolates the disk group from host access and prevents the system from changing the disk
group status to OFFL (offline). The number of inaccessible disks determines the quarantine status.
From least to most severe:
• QTDN (quarantined with a down disk): The RAID-6 disk group has one inaccessible disk. The disk
group is fault tolerant but degraded. If the inaccessible disks come online or if after 60 seconds
from being quarantined the disk group is QTCR or QTDN, the disk group is automatically
dequarantined.
• QTCR (quarantined critical): The disk group is critical with at least one inaccessible disk. For
example, two disks are inaccessible in a RAID-6 disk group or one disk is inaccessible for other
fault-tolerant RAID levels. If the inaccessible disks come online or if after 60 seconds from being
quarantined the disk group is QTCR or QTDN, the disk group is automatically dequarantined.
• QTOF (quarantined offline): The disk group is offline with multiple inaccessible disks causing user
data to be incomplete, or is an NRAID or RAID-0 disk group.
dequarantine 55
Page 56

When a disk group is quarantined, its disks become write-locked, its volumes become inaccessible,
and it is not available to hosts until it is dequarantined. If there are interdependencies between the
quarantined disk group’s volumes and volumes in other disk groups, quarantine may temporarily
impact operation of those other volumes.
Depending on the operation, the length of the outage, and the settings associated with the
operation, the operation may automatically resume when the disk group is dequarantined or may
require manual intervention. A disk group can remain quarantined indefinitely without risk of data
loss.
A disk group is dequarantined when it is brought back online, which can occur in three ways:
• If the inaccessible disks come online, making the disk group FTOL, the disk group is
automatically dequarantined.
• If after 60 seconds from being quarantined the disk group is QTCR or QTDN, the disk group is
automatically dequarantined. The inaccessible disks are marked as failed and the disk group
status changes to CRIT (critical) or FTDN (fault tolerant with a down disk). If the inaccessible
disks later come online, they are marked as LEFTOVR (leftover).
• The dequarantine command is used to manually dequarantine the disk group. If the
inaccessible disks later come online, they are marked as LEFTOVR (leftover). If event 172 was
logged, do not use the dequarantine command. Instead follow the event’s
recommended-action text. If event 485 was logged, use the dequarantine command only as
specified by the event’s recommended-action text to avoid data corruption or loss.
When a disk group is dequarantined, event 173 is logged.
A quarantined disk group can be fully recovered if the inaccessible disks are restored. Make sure
that all disks are properly seated, that no disks have been inadvertently removed, and that no cables
have been unplugged. Sometimes not all disks in the disk group power up. Check that all enclosures
have restarted after a power failure. If these problems are found and then fixed, the disk group
recovers and no data is lost.
If the inaccessible disks cannot be restored (for example, they failed), and the disk group’s status is
FTDN or CRIT, and compatible spares are available to replace the inaccessible disks, reconstruction
will automatically begin.
If a replacement disk (reconstruct target) is inaccessible at power up, the disk group becomes
quarantined. When the disk is found, the disk group is dequarantined and reconstruction starts. If
reconstruction was in process, it continues where it left off.
NOTE: The only commands allowed for a quarantined disk group are dequarantine and delete
vdisks. If you delete a quarantined disk group and its inaccessible disks later come online, the disk
group will reappear as quarantined or offline and you must delete it again (to clear those disks).
Min. role
Syntax
manage
dequarantine
vdisk vdisk
Parameters vdisk vdisk
The name or serial number of the disk group to remove from quarantine. A name that includes a
space must be enclosed in double quotes.
56 Alphabetical list of commands
Page 57

Example After determining that vdisk VD1 is quarantined, remove it from quarantine and re-check its status.
# show vdisks
Name ... Status ...
------------------VD1 ... QTDN ... (RAID 6 quarantined with a down disk)
-------------------
# dequarantine vdisk VD1
Info: Vdisk VD1 was dequarantined. (VD1)
Success: Command completed successfully. (2013-08-01 14:06:09)
# show vdisks
Name ... Status ...
------------------VD1 ... FTDN ... (RAID 6 fault tolerant with a down disk)
-------------------
See also • show vdisks
• trust
down disk
Description Simulates vdisk degradation due to loss of a disk. This command is not supported.
down disk 57
Page 58

exit
Description Log off and exit the CLI session.
Min. role
Syntax
monitor
exit
58 Alphabetical list of commands
Page 59

expand vdisk
Description Adds disks to a vdisk to expand its storage capacity. This command applies to linear storage only.
The new disks must be the same type as disks already in the vdisk and should also have the same
capacity.
NOTE: If you upgraded from an earlier release that did not distinguish between enterprise and
midline SAS disks, you might have vdisks that contain both types of disks. For those vdisks, you can
designate either or both types of disks for expansion. If—through replacement of spares or failed
disks—the vdisk is changed to contain only one type of disk, you will only be able to add disks of
that type to the vdisk.
The expansion capability for each supported RAID level is:
RAID level Expansion capability Maximum disks
Min. role
Syntax
NRAID
0, 3, 5, 6
1
10
50
Cannot expand.
Can add 1–4 disks at a time.
Cannot expand.
Can add 2 or 4 disks at a time.
Can expand the vdisk one RAID-5 sub-vdisk at a
1
16
2
16
32
time. The added RAID-5 sub-vdisk must contain
the same number of disks as each original
sub-vdisk.
IMPORTANT: Vdisk expansion cannot be stopped and can take days to complete, depending on
disk type, RAID level, and other factors.
Before starting the expansion, ensure no other vdisk utilities are running on the vdisk. If another
operation is in progress, the expansion cannot start.
manage
expand vdisk
disks disks
[prompt yes|no]
vdisk
Parameters disks disks
The IDs of the disks to add. For disk syntax, see "Command syntax" (page 18).
prompt yes|no
Optional. For scripting, this specifies an automatic reply to the confirmation prompts:
• yes: Allow the command to proceed.
• no: Cancel the command.
If this parameter is omitted, you must manually reply to the prompt.
vdisk
The name or serial number of the vdisk to expand. A name that includes a space must be enclosed
in double quotes.
Example Expand vdisk VD1 to include disk 1.11.
# expand vdisk disks 1.11 VD1
expand vdisk 59
Page 60

Expand RAID-10 vdisk R10 to include an additional mirror pair.
# expand vdisk disks 2.9-10 R10
Expand RAID-50 vdisk R50, which has four 3-disk sub-vdisks, to include an additional 3-disk
sub-vdisk.
# expand vdisk disks 2.1-2,2.5 R50
See also • show disks
• show vdisks
60 Alphabetical list of commands
Page 61

expand volume
Description Expands a standard volume.
Volume sizes are aligned to 4-MB boundaries. When a volume is created or expanded, if the
resulting size would be less than 4 MB it will be increased to 4 MB; if the resulting size would be
greater than 4 MB it will be decreased to the nearest 4-MB boundary.
If insufficient space is available for expansion on the vdisk, first expand the vdisk by using expand
vdisk.
Min. role
Syntax
Parameters size size[B|KB|MB|GB|TB|KiB|MiB|GiB|TiB]
Example Expand standard volume V1 by 100 GB.
See also • expand vdisk
manage
expand volume
size
size[B|KB|MB|GB|TB|KiB|MiB|GiB|TiB] | max
volume
Specifies either:
• The amount of space to add the volume. The unit is optional (B represents bytes). If base 2 is in
use, whether you specify a base-2 or base-10 unit, the resulting size will be in base 2. If no unit is
specified, the default is 512-byte blocks.
• max: Expand the volume to fill the available space in the vdisk.
volume
The name or serial number of the volume to expand. A name that includes a space must be enclosed
in double quotes.
# expand volume size 100GB V1
• show volumes
expand volume 61
Page 62

fail
Description Forces the partner controller module to crash for a non-maskable interrupt. The command causes the
crash by issuing an internal kill command to the Storage Controller in the partner controller module.
This might be helpful to gather debug information that is only available via a crash dump.
CAUTION: Do not use this command in a production system. Use only for testing. This command
will interfere with the operation of volumes in vdisks owned by the failed controller, potentially
causing data loss.
Min. role
Syntax
Parameters controller a|b
Example From controller A, fail controller B.
See also • unfail controller
manage
fail
controller a|b
Specifies whether to kill controller A or B. You cannot kill the controller on which the command is
issued.
# fail controller b
help
See "Viewing help" (page 21).
62 Alphabetical list of commands
Page 63

map volume
Description Maps specified volumes using settings that override the volumes’ default mapping.
When a volume is created, if no mapping settings are specified the volume is not mapped.
Otherwise, those settings become its default mapping, which specifies the controller host ports and
access level that all connected initiators have to the volume, and the LUN presented to all initiators to
identify the volume. The default mapping’s LUN is known as the volume’s default LUN.
The map volume command creates mappings with different settings for different initiators.
Optionally, you can specify the LUN, ports, and access level for a mapping. A mapping can make a
volume accessible to initiators, or inaccessible to initiators (known as masking). For example, assume
a volume’s default mapping allows read-only access using LUN 5. You can give one initiator
read-write access using LUN 6, and you can give a second initiator no access to the volume.
NOTE: When mapping a volume to an initiator using the Linux ext3 file system, specify read-write
access. Otherwise, the file system will be unable to mount/present/map the volume and will report
an error such as “unknown partition table.”
Min. role
Syntax
manage
map volume
[access read-write|rw|read-only|ro|no-access]
[host hosts]
initiator initiators
[lun LUN]
[ports ports]
volumes
Parameters access read-write|rw|read-only|ro|no-access
Optional. The access permission to use for the mapping: read-write (rw), read-only (ro), or
no-access. If the access parameter is specified as read-write or read-only, the lun parameter must
be specified. For an explicit mapping, no-access causes the volume to be masked from specified
initiators. If the access parameter is omitted, access is set to read-write.
host hosts
Deprecated—use the initiator parameter instead.
initiator initiators
Optional. A comma-separated list of initiators to which to map the volumes. For initiator syntax, see
"Command syntax" (page 18). If the initiator parameter is specified, the lun and ports
parameters must be specified. If the initiator parameter is omitted, the mapping applies to all
initiators that are not explicitly mapped.
lun LUN
Optional. The LUN to use for the mapping. If a single volume and multiple initiators are specified,
the same LUN is used for each initiator. If multiple volumes and a single initiator are specified, the
LUN will increment for the second and subsequent volumes. If multiple volumes and initiators are
specified, each initiator will have the same LUN for the first volume, the next LUN for the second
volume, and so on. The lun parameter is ignored if access is set to no-access. If the lun
parameter is omitted, the default LUN is presented.
ports ports
Optional. The controller host ports to use for the mapping. Any unspecified ports become
unmapped. All specified ports must be the same type. For port syntax, see "Command syntax"
(page 18). If the ports parameter is specified, the lun parameter must also be specified. The
ports parameter is ignored if access is set to no-access. If the ports parameter is omitted, all
ports are mapped.
map volume 63
Page 64

volumes
A comma-separated list of the names or serial numbers of the volumes to map. For volume syntax,
see "Command syntax" (page 18).
Example Map volume v2 with read-only access to initiator Init1, using port A1 and LUN 100.
# map volume access ro ports a1 lun 100 initiator Init1 v2
Map volumes v2 and v3 with read-write access for Init2, using ports A1 and B1 and LUN 101.
# map volume access rw ports a1,b1 lun 101 initiator Init2 v2,v3
Mask volume v4 from Init1 and Init3.
# map volume v4 access no-access initiator Init1,Init3
Map volumes v1 and v2 to initiators Init1 and Init2, using ports A1 and B1 starting with LUN
6, and view the results.
# map volume ports a1,b1 lun 6 initiator Init1,Init2 v1,v2
See also • show initiators
• show maps
• show ports
• show volumes
• unmap volume
64 Alphabetical list of commands
Page 65

meta
Description In XML API format only, shows all property metadata for objects. This includes data not shown in
brief mode.
Min. role
Syntax
Parameters basetypes
Example Show all metadata for objects returned by the show disks command:
See also • set cli-parameters
monitor
meta basetypes
A basetype or a list of basetypes separated by commas (with no spaces) to specify the objects for
which to show metadata. For names and descriptions of supported basetypes, see "XML API
basetype properties" (page 221).
# meta drives
meta 65
Page 66

ping
Description Tests communication with a remote host. The remote host is specified by IP address. Ping sends ICMP
echo response packets and waits for replies.
Min. role
Syntax
Parameters host-address
Example Send two packets to the remote computer at 10.134.50.6.
monitor
ping
host-address
[count]
The remote host’s IP address in dotted decimal form.
count
Optional. The number of packets to send. The default is 4 packets. Use a small count because the
command cannot be interrupted. The default is 4 packets.
# ping 10.134.50.6 2
66 Alphabetical list of commands
Page 67

release volume
Description Clears initiator registrations and releases persistent reservations for all or specified volumes.
Normally, reservations placed on volumes by initiators accessing those volumes can be released by
host software. This command should be used only when the system is in an abnormal state, perhaps
due to a configuration problem, and you need to remove all reservations for specified volumes and
return them to a “clean” state.
CAUTION: Releasing reservations for volumes may allow unintended access to those volumes by
other initiators, which may result in data corruption. Before issuing this command, quiesce all
initiators that have visibility to the volumes whose reservations will be released.
Min. role
Syntax
Parameters all|volumes
Example Release reservations for a specific volume.
See also • show volume-reservations
manage
release volume
all|volumes
Specifies all volumes, or a comma-separated list of the names or serial numbers of specific volumes.
A name that includes a space must be enclosed in double quotes.
# release volume vd04_v0002
• show volumes
release volume 67
Page 68

remove spares
Description Removes specified spares. You can remove global spares and dedicated spares (linear storage only)
in the same command.
Min. role
Syntax
Parameters disks
Example Remove dedicated spare 1.21 and global spare 1.22.
See also • add spares
manage
remove spares
disks
The IDs of the spares to remove. For disk syntax, see "Command syntax" (page 18).
# remove spares 1.21-22
Remove global spare 1.22.
# remove spares 1.22
• show disks
68 Alphabetical list of commands
Page 69

rescan
Description This command forces rediscovery of disks and enclosures in the storage system. If both Storage
Controllers are online and able to communicate with both expansion modules in each connected
enclosure, this command rebuilds the internal SAS layout information, reassigns enclosure IDs based
on controller A’s enclosure cabling order, and ensures that the enclosures are displayed in the proper
order. A manual rescan temporarily pauses all I/O processes, then resumes normal operation. It can
take up to two minutes for the enclosure IDs to be corrected.
A manual rescan may be needed after system power-up to display enclosures in the proper order.
Whenever you replace a drive chassis or controller chassis, perform a manual rescan to force fresh
discovery of all drive enclosures connected to the controller enclosure.
A manual rescan is not needed after inserting or removing disks because the controllers
automatically detect these changes. When disks are inserted they are detected after a short delay,
which allows the disks to spin up
Min. role
Syntax
Example Scan for device changes and re-evaluate enclosure IDs.
manage
rescan
# rescan
rescan 69
Page 70

reset all-statistics
Description Resets performance statistics for both controllers. You can specify either to reset all live statistics to
zero, or to reset (clear) all historical performance statistics for all disks. If you reset historical statistics,
an event will be logged and new data samples will continue to be stored every quarter hour.
Min. role
Syntax
manage
reset all-statistics
[historical]
[prompt yes|no]
Parameters historical
Optional. Specifies to reset historical statistics instead of live statistics. If this parameter is omitted, the
command will reset live statistics instead of historical statistics.
prompt yes|no
Optional. For scripting, this specifies an automatic reply to the confirmation prompt that will appear
if the historical parameter is specified:
• yes: Allow the command to proceed.
• no: Cancel the command.
If the historical parameter is specified and the prompt parameter is omitted, you must manually reply
to the prompt. If the historical parameter is omitted, the prompt parameter has no effect. There is no
confirmation prompt for live statistics.
Example Reset all live statistics for both controllers.
# reset all-statistics
Reset all historical disk-performance statistics for both controllers.
# reset all-statistics historical
This command will reset all historical disk statistics.
Do you want to reset? (y/n) yes
See also • reset controller-statistics
• reset disk-error-statistics
• reset disk-statistics
• reset host-port-statistics
• reset vdisk-statistics
• reset volume-statistics
• show controller-statistics
70 Alphabetical list of commands
Page 71

reset controller-statistics
Description Resets performance statistics for controllers.
This command resets all controller statistics except Power On Time. To reset this, restart or power
cycle a controller.
Min. role
Syntax
Parameters a|b|both
Example Reset statistics for both controllers.
See also • reset all-statistics
manage
reset controller-statistics
[a|b|both]
Optional. Specifies whether to reset statistics for controller A, B, or both. If this parameter is omitted,
statistics are reset for both controllers.
# reset controller-statistics
• reset disk-error-statistics
• reset disk-statistics
• reset host-port-statistics
• reset vdisk-statistics
• reset volume-statistics
• show controller-statistics
reset controller-statistics 71
Page 72

reset disk-error-statistics
Description Resets error statistics for all or specified disks. Statistics that are reset include:
• Number of SMART events recorded
• Number of I/O timeouts accessing the disk
• Number of times the disk did not respond
• Number of attempts by the controllers to spin up the disk
• Number of media errors (errors generated by the disk as specified by its manufacturer)
• Number of non-media errors (errors generated by the controllers or by the disk and not
categorized as media errors)
• Number of block reassignments
• Number of bad blocks found
To reset other disk statistics, use the reset disk-statistics command.
Min. role
Syntax
Parameters disks
Example Reset error statistics for disks 1.1 and 2.1.
See also • reset all-statistics
manage
reset disk-error-statistics
[disks]
Optional. The IDs of the disks for which to reset statistics. For disk syntax, see "Command syntax"
(page 18). If this parameter is omitted, statistics are reset for all disks.
# reset disk-error-statistics 1.1,2.1
• reset controller-statistics
• reset disk-statistics
• reset host-port-statistics
• reset vdisk-statistics
• reset volume-statistics
• show disk-statistics
• show disks
72 Alphabetical list of commands
Page 73

reset disk-statistics
Description Resets performance statistics for disks.
This command resets basic disk statistics but not disk error statistics. To reset these, use the reset
disk-error-statistics command.
Min. role
Syntax
Example Reset statistics for all disks.
See also • reset all-statistics
manage
reset disk-statistics
# reset disk-statistics
• reset controller-statistics
• reset disk-error-statistics
• reset host-port-statistics
• reset vdisk-statistics
• reset volume-statistics
• show disk-statistics
reset disk-statistics 73
Page 74

reset host-link
Description Resets specified controller host ports (channels).
For SAS, you can reset a port pair (either the first and second ports or the third and fourth ports).
Resetting a host port issues a COMINIT/COMRESET sequence and might reset other ports.
Min. role
Syntax
Parameters ports ports
Example Reset the host link on port A1.
See also • show ports
manage
reset host-link
ports ports
A controller host port ID, a comma-separated list of IDs, a hyphenated range of IDs, or a
combination of these. A port ID is a controller ID and port number, and is not case sensitive. Do not
mix controller IDs in a range.
# reset host-link ports A1
74 Alphabetical list of commands
Page 75

reset host-port-statistics
Description Resets performance statistics for controller host ports.
Min. role
Syntax
Parameters ports ports
Example Reset statistics for all controller host ports.
See also • reset all-statistics
manage
reset host-port-statistics
[ports ports]
Optional. The controller ID and port number of ports for which to reset statistics. For port syntax, see
"Command syntax" (page 18). If this parameter is omitted, statistics are reset for all controller host
ports.
# reset host-port-statistics
• reset controller-statistics
• reset disk-error-statistics
• reset disk-statistics
• reset vdisk-statistics
• reset volume-statistics
• show host-port-statistics
• show ports
reset host-port-statistics 75
Page 76

reset vdisk-statistics
Description Resets performance statistics for all or specified vdisks. This command applies to linear storage only.
Min. role
Syntax
Parameters vdisks
Example Reset statistics for vdisks VD1 and MyVdisk.
See also • reset all-statistics
manage
reset vdisk-statistics
[vdisks]
Optional. A comma-separated list of the names or serial numbers of the vdisks for which to reset
statistics. A name that includes a space must be enclosed in double quotes. If this parameter is
omitted, statistics are reset for all vdisks.
# reset vdisk-statistics VD1,MyVdisk
• reset controller-statistics
• reset disk-error-statistics
• reset disk-statistics
• reset host-port-statistics
• reset volume-statistics
• show vdisk-statistics
• show vdisks
76 Alphabetical list of commands
Page 77

reset volume-statistics
Description Resets performance statistics for all or specified volumes.
Min. role
Syntax
Parameters volumes
Example Reset statistics for volume vd1_v0001.
See also • reset all-statistics
manage
reset volume-statistics
[volumes]
Optional. A comma-separated list of the names or serial numbers of the volumes for which to reset
statistics. A name that includes a space must be enclosed in double quotes. If this parameter is
omitted, statistics are reset for all volumes.
# reset volume-statistics vd1_v0001
• reset controller-statistics
• reset disk-error-statistics
• reset disk-statistics
• reset host-port-statistics
• reset vdisk-statistics
• show volume-statistics
• show volumes
reset volume-statistics 77
Page 78

restart mc
Description Restarts the Management Controller in a controller module.
When you restart a Management Controller, communication with it is lost until it successfully restarts.
If the restart fails, the partner Management Controller remains active with full ownership of
operations and configuration information.
Min. role
Syntax
manage
restart mc
[a|b|both]
[noprompt]
Parameters a|b|both
Optional. The controller module containing the controller to restart. If this parameter is omitted, the
command affects the controller being accessed.
noprompt
Optional in console format; required for XML API format. Suppresses the confirmation prompt, which
requires a yes or no response. Specifying this parameter allows the command to proceed without
user interaction.
Output Messages are displayed when the controller shut down, when failover is initiated, and when the
controller has restarted.
Example Restart the Management Controller in controller A, to which you are logged in.
# restart mc a
During the restart process you will briefly lose communication with the
specified Management Controller(s).
Do you want to continue? (y/n) yes
See also • restart sc
• shutdown
78 Alphabetical list of commands
Page 79

restart sc
Description Restarts the Storage Controller in a controller module.
When you restart a Storage Controller, it attempts to shut down with a proper failover sequence,
which includes stopping all I/O operations and flushing the write cache to disk, and then the
Storage Controller restarts. Restarting a Storage Controller restarts the corresponding Management
Controller.
CAUTION: If you restart both Storage Controllers, both Management Controllers will also be
restarted so all hosts and users will lose access to the system and its data until the restart is complete.
NOTE: When a Storage Controller is restarted, live performance statistics that it recorded will be
reset. Historical performance statistics are not affected. In a dual-controller system, disk statistics may
be reduced but will not be reset to zero, because disk statistics are summed between the two
controllers. For more information, see help for commands that show statistics.
Min. role
Syntax
manage
restart sc
[a|b|both]
[noprompt]
Parameters a|b|both
Optional. The controller module containing the controller to restart. If this parameter is omitted, the
command affects the controller being accessed.
noprompt
Optional in console format; required for XML API format. Suppresses the confirmation prompt, which
requires a yes or no response. Specifying this parameter allows the command to proceed without
user interaction.
sc|mc
The controller to restart:
• sc: Storage Controller
• mc: Management Controller
Output Messages are displayed when the controller shut down, when failover is initiated, and when the
controller has restarted.
Example From controller A, restart the Storage Controller in controller B.
# restart sc b
Restart both Storage Controllers.
# restart sc both
While the specified Storage Controllers restart, communication will temporarily
be lost with the corresponding Management Controllers.
Restarting both controllers can cause a temporary loss of data availability.
Do you want to continue? (y/n) yes
See also • restart mc
• shutdown
restart sc 79
Page 80

restore defaults
Description Restores the default configuration to the controllers. For use by or with direction from a service
technician.
For details about which settings are restored see "Settings changed by restore defaults" (page 350).
If the system contains only one controller module when the command is issued, the system’s
redundancy mode will be set to Single Controller mode.
CAUTION: This command changes how the system operates and might require some
reconfiguration to restore host access to volumes.
Min. role
Syntax
manage
restore defaults
[noprompt]
[prompt yes|no]
Parameters noprompt
Optional in console format; required for XML API format. Suppresses the confirmation prompt, which
requires a yes or no response. Specifying this parameter allows the command to proceed without
user interaction.
prompt yes|no
Optional. For scripting, this specifies an automatic reply to confirmation prompts:
• yes: Allow the command to proceed.
• no: Cancel the command.
If this parameter is omitted, you must manually reply to the prompt.
Example Restore the controllers’ default configuration.
# restore defaults
WARNING: The configuration of the array controller will be reset to default
settings. The Management Controller will restart once this is completed. Do you
want to continue? (y/n) yes
See also • restart mc
• restart sc
80 Alphabetical list of commands
Page 81

scrub vdisk
Description Analyzes specified vdisks to find and fix disk errors.
This command acts on disks in a vdisk but not dedicated spares or leftover disks. This command will
fix parity mismatches for RAID 3, 5, 6, and 50; mirror mismatches for RAID 1 and 10; and media
errors for all RAID levels.
Vdisk scrub can last over an hour, depending on vdisk size, utility priority, and amount of I/O
activity. However, a “foreground” scrub performed with this command is typically faster than a
background scrub enabled with the set advanced-settings command. You can use a vdisk while it is
being scrubbed. To check the progress of a vdisk scrub (VRSC) job, use the show vdisks command.
When a vdisk scrub operation starts, event 206 is logged. When a vdisk scrub operation ends,
event 207 is logged and specifies whether errors were found and whether user action is required.
Min. role
Syntax
Parameters vdisks
Example Start scrubbing vdisk vd1.
See also • abort scrub (with the vdisk parameter)
manage
scrub vdisk
vdisks
A comma-separated list of the names or serial numbers of the vdisks to scrub. A name that includes
a space must be enclosed in double quotes.
# scrub vdisk vd1
• set advanced-settings
• show vdisks
scrub vdisk 81
Page 82

scrub volume
Description Analyzes specified volumes to find and fix disk errors. This command applies to linear storage only.
This command acts on the disk portions spanned by each volume, but it does not act on dedicated
spares or leftover disks. This command will fix parity mismatches for RAID 3, 5, 6, and 50; mirror
mismatches for RAID 1 and 10; and media errors for all RAID levels.
Volume scrub can last over an hour, depending on volume size, utility priority, and amount of I/O
activity. You can use a volume while it is being scrubbed. To check the progress of a volume scrub
job, use the show volumes command.
NOTE: Only one scrub operation can be running on a vdisk at a time. If a manual scrub is started
while a background scrub is in progress, the background scrub will terminate and will start over 24
hours after the manual scrub completes.
When a scrub is complete, event 207 is logged and specifies whether errors were found and
whether user action is required.
Min. role
Syntax
Parameters volumes
Example Start scrubbing volume vol1.
See also • abort scrub (with the volume parameter)
manage
scrub volume
volumes
The names or serial numbers of the volumes to scrub. A name that includes a space must be enclosed
in double quotes.
# scrub volume vol1
• set advanced-settings
• show volumes
82 Alphabetical list of commands
Page 83

set advanced-settings
Description Sets advanced system configuration parameters.
Min. role
Syntax
manage
set advanced-settings
[auto-stall-recovery enabled|disabled|on|off]
[auto-write-back enabled|disabled|on|off]
[background-disk-scrub enabled|disabled|on|off]
[background-scrub enabled|disabled|on|off]
[background-scrub-interval interval]
[compact-flash-failure enabled|disabled|on|off]
[controller-failure enabled|disabled|on|off]
[dynamic-spares enabled|disabled|on|off]
[emp-poll-rate rate]
[fan-failure enabled|disabled|on|off]
[host-cache-control enabled|disabled|on|off]
[independent-cache enabled|disabled|on|off]
[managed-logs enabled|disabled|on|off]
[missing-lun-response notready|illegal]
[partner-firmware-upgrade enabled|disabled|on|off]
[partner-notify enabled|disabled|on|off]
[power-supply-failure enabled|disabled|on|off]
[single-controller]
[smart enabled|disabled|on|off|detect-only]
[spin-down enabled|disabled|on|off]
[spin-down-delay delay]
[super-cap-failure enabled|disabled|on|off]
[sync-cache-mode immediate|flush]
[temperature-exceeded enabled|disabled|on|off]
[utility-priority low|medium|high]
Parameters auto-stall-recovery enabled|disabled|on|off
Optional. Detects situations where a controller stall is preventing I/O operations from completing,
and recovers the system so that at least one controller is operational, thus avoiding
data-unavailability situations. This feature focuses on Active-Active I/O stalls and failover/recovery
stalls. When a stall is detected, event 531 is logged.
• disabled or off: Auto-stall recovery is disabled. The system will constantly perform auto-stall
detection in the background but will not automatically perform recovery actions. This is the
default.
• enabled or on: Auto-stall recovery is enabled. The system will constantly perform auto-stall
detection in the background and automatically perform recovery actions.
auto-write-back enabled|disabled|on|off
Optional. Sets whether the cache mode will change from write-through to write-back when the
trigger condition is cleared.
• disabled or off: Auto-write-back is disabled.
• enabled or on: Auto-write-back is enabled. This is the default.
background-disk-scrub enabled|disabled|on|off
Optional. Sets whether disks that are not in vdisks are automatically checked for disk defects to
ensure system health. The interval between background disk scrub finishing and starting again is 72
hours. The first time you enable this parameter, background disk scrub will start with minimal delay.
If you disable and then re-enable this parameter, background disk scrub will start 72 hours after the
last background disk scrub completed.
• disabled or off: Background disk scrub is disabled. This is the default.
• enabled or on: Background disk scrub is enabled.
set advanced-settings 83
Page 84

background-scrub enabled|disabled|on|off
Optional. Sets whether disks in vdisks are automatically checked for disk defects to ensure system
health. The interval between background vdisk scrub finishing and starting again is specified by the
background-scrub-interval parameter.
• disabled or off: Background vdisk scrub is disabled. This is the default.
• enabled or on: Background vdisk scrub is enabled.
background-scrub-interval interval
Optional. Sets the interval in hours between background vdisk scrub finishing and starting again,
from 0 to 360 hours. The default is 24 hours.
compact-flash-failure enabled|disabled|on|off
Optional. Sets whether the cache policy will change from write-back to write-through when
CompactFlash memory is not detected during POST (Power-On Self-Test), fails during POST, or fails
during controller operation.
• disabled or off: The CompactFlash failure trigger is disabled.
• enabled or on: The CompactFlash failure trigger is enabled. This is the default.
controller-failure enabled|disabled|on|off
Optional. Sets whether the cache policy will change from write-back to write-through when a
controller fails.
• disabled or off: The controller failure trigger is disabled. This is the default.
• enabled or on: The controller failure trigger is enabled.
dynamic-spares enabled|disabled|on|off
Optional. Sets whether the storage system will automatically designate an available compatible disk
as a spare to replace a failed disk in a vdisk. A compatible disk has enough capacity to replace the
failed disk and is the same type.
• disabled or off: The dynamic spares feature is disabled. This is the default.
• enabled or on: The dynamic spares feature is enabled.
emp-poll-rate rate
Optional. Sets the interval at which the storage system will poll each enclosure's Enclosure
Management Processor (EMP) for status changes, from 5 to 3600 seconds. The default is 5 seconds.
fan-failure enabled|disabled|on|off
Optional. Sets whether the cache policy will change from write-back to write-through when a fan
fails.
• disabled or off: The fan failure trigger is disabled. This is the default.
• enabled or on: The fan failure trigger is enabled.
host-cache-control enabled|disabled|on|off
Optional. Sets whether hosts are allowed to use the SCSI MODE SELECT command to change the
storage system's write-back cache setting.
• disabled or off: Host control of caching is disabled. This is the default.
• enabled or on: Host control of caching is enabled.
84 Alphabetical list of commands
Page 85

independent-cache enabled|disabled|on|off
Optional. Sets the cache redundancy mode for a dual-controller storage system. For the change to
take effect, you must restart both Storage Controllers.
• disabled or off: Controller failover is enabled and data in a controller’s write-back cache is
mirrored to the partner controller. This is the default.
• enabled or on: The controllers use Independent Cache Performance Mode, in which controller
failover is disabled and data in a controller’s write-back cache is not mirrored to the partner
controller. This improves write performance at the risk of losing unwritten data if a controller
failure occurs while there is data in controller cache. You cannot enable this parameter if the
single-controller parameter is enabled.
managed-logs enabled|disabled|on|off
Optional. Enables or disables the managed logs feature, which allows log files to be transferred
from the storage system to a log collection system to avoid losing diagnostic data.
• disabled or off: The managed logs feature is disabled. This is the default.
• enabled or on: The managed logs feature is enabled.
missing-lun-response notready|illegal
Optional. Sets whether host drivers may probe for LUNs until the host drivers reach the LUN to which
they have access.
• notready: Sends a reply that there is a LUN where a gap has been created but that it’s “not
ready.” Sense data returned is sensekey = 2, code = 4, qualifier = 3. This option is the default.
• illegal: Sends a reply that there is a LUN but that the request is “illegal.” Sense data returned
is sensekey = 5, code = 25h, qualifier = 0.
partner-firmware-upgrade enabled|disabled|on|off
Optional. Sets whether component firmware versions are monitored and will be automatically
updated on the partner controller.
• disabled or off: Partner firmware upgrade is disabled.
• enabled or on: Partner firmware upgrade is enabled. This is the default.
partner-notify enabled|disabled|on|off
Optional. Sets whether to notify the partner controller that a trigger condition occurred. Enable this
option to have the partner also change to write-through mode for better data protection. Disable this
option to allow the partner continue using its current caching mode for better performance. The
default is disabled.
• disabled or off: Notification is disabled. This is the default.
• enabled or on: Notification is enabled.
power-supply-failure enabled|disabled|on|off
Optional. Sets whether the cache policy automatically changes to write-through when a power
supply fails.
• disabled or off: The power-supply failure trigger is disabled. This is the default.
• enabled or on: The power-supply failure trigger is enabled.
single-controller
Optional; for use by a service technician only. For a 2U12 or 2U24 system that had two controller
modules but now has only one and is intended to be used as a single-controller system, this
parameter changes the operating/redundancy mode to Single Controller. This prevents the system
from reporting the absent partner controller as an error condition. This parameter does not affect any
other system settings. Installing a second, functional controller module will change the mode to
Active-Active ULP. You cannot enable this parameter if the independent-cache parameter is
enabled.
set advanced-settings 85
Page 86

smart enabled|disabled|on|off|detect-only
Optional. Enables or disables SMART (Self-Monitoring Analysis and Reporting Technology)
monitoring for all disks in the storage system.
• disabled or off: Disables SMART for all disks in the system and for all disks added to the
system.
• enabled or on: Enables SMART for all disks in the system and for all disks added to the system.
This is the default.
• detect-only: Detects but does not change the SMART setting of each disk in the system, and
for each new disk added to the system.
spin-down enabled|disabled|on|off
Optional. Sets whether available disks and global spares will spin down after a period of inactivity
shown by the spin-down-delay parameter.
• disabled or off: Drive spin down for available disks and global spares is disabled. This is the
default. Disabling spin down will set the spin-down delay to 0.
• enabled or on: Drive spin down for available disks and global spares is enabled. If the
spin-down-delay parameter is not specified, the delay will be set to 15 minutes.
spin-down-delay delay
Optional. Sets the period of inactivity after which available disks and global spares will spin down.
Setting the delay to 1–360 minutes will enable spin down. Setting the delay to 0 will disable spin
down. The default is 15 minutes.
super-cap-failure enabled|disabled|on|off
Optional. Sets whether the cache policy will change from write-back to write-through when the
supercapacitor that provides backup power for cache is not fully charged or fails.
• disabled or off: The supercapacitor failure trigger is disabled.
• enabled or on: The supercapacitor failure trigger is enabled. This is the default.
sync-cache-mode immediate|flush
Optional. Sets how the SCSI SYNCHRONIZE CACHE command is handled.
• immediate: Good status is returned immediately and cache content is unchanged. This option
is the default.
• flush: Good status is returned only after all write-back data for the specified volume is flushed
to disk.
temperature-exceeded enabled|disabled|on|off
Optional. Sets whether the system will shut down a controller when its temperature exceeds the
critical operating range.
• disabled or off: The over-temperature trigger is disabled. This is the default.
• enabled or on: The over-temperature trigger is enabled.
utility-priority low|medium|high
Optional. Sets the priority at which data-redundancy utilities, such as vdisk verify and reconstruct,
run with respect to I/O operations competing for the system's processors. (This does not affect vdisk
background scrub, which always runs at “background” priority.)
• high: Utilities have higher priority than host I/O. Use when your highest priority is to return the
system to a fully fault-tolerant state. This can cause heavy I/O to be slower than normal. This is
the default.
• medium: Utility performance is balanced with host I/O performance.
• low: Utilities run at a slower rate with minimal effect on host I/O. Use when streaming data
without interruption, such as for a web server, is more important than data redundancy.
86 Alphabetical list of commands
Page 87

Example Enable partner firmware upgrade.
# set advanced-settings partner-firmware-upgrade enabled
Enable managed logs.
# set advanced-settings managed-logs enabled
Enable auto-stall recovery.
# set advanced-settings auto-stall-recovery enabled
See also • add spares
• remove spares
• scrub vdisk
• show advanced-settings
set auto-write-through-trigger (Deprecated)
Use set advanced-settings.
set awt (Deprecated)
Use set advanced-settings.
set auto-write-through-trigger (Deprecated) 87
Page 88

set cache-parameters
Description Sets a volume’s cache options. Settings you can change include:
NOTE: Only change the read-ahead cache settings if you fully understand how the host operating
system, application, and adapter move data so that you can adjust the settings accordingly. Be
prepared to monitor system performance and adjust read-ahead size until you find the optimal size
for your application.
Min. role
Syntax
manage
set cache-parameters
[optimization standard|no-mirror]
[read-ahead-size disabled|adaptive|stripe|512KB|1MB|2MB|4MB|8MB|16MB|32MB]
[write-policy write-back|write-through|wb|wt]
volume
Parameters optimization standard|no-mirror
Optional. Sets the cache optimization mode:
• standard: Optimizes cache for both sequential and random reads. This is the default.
• no-mirror: When this mode is enabled, each controller stops mirroring its cache metadata to
the partner controller. This improves write I/O response time but at the risk of losing data during
a failover. ULP behavior is not affected, with the exception that during failover any write data in
cache will be lost.
read-ahead-size disabled|adaptive|stripe|512KB|1MB|2MB|4MB|8MB|16MB
|32MB
Optional. Controls the use and size of read-ahead cache. You can optimize a volume for sequential
reads or streaming data by changing the amount of data read in advance. Read ahead is triggered
by sequential accesses to consecutive logical block address (LBA) ranges. Read ahead can be
forward (increasing LBAs) or reverse (decreasing LBAs). Increasing the read-ahead size can greatly
improve performance for multiple sequential read streams. However, increasing read-ahead size will
likely decrease random read performance.
• disabled: Disables read ahead.
• adaptive: Enables adaptive read-ahead, which allows the controller to dynamically calculate
the optimum read-ahead size for the current workload. This is the default.
• stripe: Sets the read-ahead size to one stripe. The controllers treat non-RAID and RAID-1 vdisks
internally as if they have a stripe size of 512 KB, even though they are not striped.
• 512KB, 1MB, 2MB, 4MB, 8MB, 16MB, or 32MB: Sets a specific read-ahead size.
write-policy write-back|write-through|wb|wt
Optional. Sets the cache write policy, which determines when cached data is written to the disks.
The ability to hold data in cache while it is being written to disk can increase storage device speed
during sequential reads.
• write-back or wb: Write-back caching does not wait for data to be completely written to disk
before signaling the host that the write is complete. This is the preferred setting for a fault-tolerant
environment because it improves the performance of write operations and throughput. This is the
default.
• write-through or wt: Write-through caching significantly impacts performance by waiting for
data to be completely written to disk before signaling the host that the write is complete. Use this
setting only when operating in an environment with low or no fault tolerance.
You can configure the write policy to automatically change from write-back to write-through when
certain environmental events occur, such as a fan failure. For details, see help for the set
advanced-settings command.
88 Alphabetical list of commands
Page 89

volume
The name or serial number of the volume to change. A name that includes a space must be enclosed
in double quotes.
Example Set the cache policy, optimization mode, and read-ahead size for volume V1.
# set cache-parameters write-policy wb optimization standard read-ahead-size
stripe V1
See also • show cache-parameters
• show volumes
set cache-parameters 89
Page 90

set cli-parameters
Description Sets options that control CLI behavior. If you are accessing the CLI through the network port, settings
apply to the current CLI session only. If you are accessing the CLI through the enclosure’s CLI port,
settings persist across sessions.
The base, locale, precision, temperature scale, timeout, and units settings are read from the user’s
account, and can be overridden by using this command.
Min. role
Syntax
manage
set cli-parameters
[base 2|10]
[console|api|api-embed|ipa|json]
[brief enabled|disabled|on|off]
[locale English|en|Spanish|es|French|fr|German|de|Italian|it|Japanese|ja
|Korean|ko|Dutch|nl|Chinese-simplified|zh-s|Chinese-traditional|zh-t]
[pager enabled|disabled|on|off]
[precision #]
[storage-size-base 2|10]
[storage-size-precision #]
[storage-size-units auto|MB|GB|TB]
[temperature-scale celsius|c|fahrenheit|f]
[timeout #]
[units auto|MB|GB|TB]
Parameters base 2|10
Optional. Sets the base for entry and display of storage-space sizes:
• 2: Sizes are shown as powers of 2, using 1024 as a divisor for each magnitude. In base 2 when
you set a size, whether you specify a base-2 or base-10 size unit, the resulting size will be in
base 2.
• 10: Sizes are shown as powers of 10, using 1000 as a divisor for each magnitude. This is the
default. In base 10 when you set a size, the resulting size will be in the specified size unit. This
option is the default.
Operating systems usually show volume size in base 2. Disk drives usually show size in base 10.
Memory (RAM and ROM) size is always shown in base 2.
console|api|api-embed|ipa|json
Optional. Sets the output format:
• console: Supports interactive use of the CLI by displaying command output in easily readable
format. This format automatically sizes fields according to content and adjusts content to window
resizes. This is the default.
• api: Supports scripting by displaying command output in XML. All objects are displayed at the
same level, related by COMP elements.
• api-embed: Alternate form of XML output which displays “child” objects embedded (indented)
under “parent” objects.
• ipa: Alternate form of XML output.
• json: Alternate data-interchange format.
brief enabled|disabled|on|off
Optional.
• enabled or on: In XML output, this setting shows a subset of attributes of object properties. The
name and type attributes are always shown.
• disabled or off: In XML output, this setting shows all attributes of object properties. This is the
default.
90 Alphabetical list of commands
Page 91

locale English|en|Spanish|es|French|fr|German|de|Italian|it|Japanese|
ja|Korean|ko|Dutch|nl|Chinese-simplified|zh-s|Chinese-traditional|zh-t
Optional. The display language. The default is English.
pager enabled|on|disabled|off
Optional.
• enabled or on: Halts output after each full screen to wait for keyboard input. This is the default.
• disabled or off: Output is not halted. When displaying output in XML API format, which is
intended for scripting, disable paging.
precision #
Optional. Sets the number of decimal places (1–10) for display of storage-space sizes. The default
is 1.
storage-size-base 2|10
Optional. Alias for base.
storage-size-precision #
Optional. Alias for precision.
storage-size-units auto|MB|GB|TB
Optional. Alias for units.
temperature-scale celsius|c|fahrenheit|f
Optional. Sets the scale for display of temperature values:
• fahrenheit or f: Temperatures are shown in degrees Fahrenheit.
• celsius or c: Temperatures are shown in degrees Celsius. This is the default.
timeout #
Optional. Sets the timeout value in seconds for the login session. Valid values are 120–43200
seconds (2–720 minutes). The default is 1800 seconds (30 minutes).
units auto|MB|GB|TB
Optional. Sets the unit for display of storage-space sizes:
• auto: Sizes are shown in units determined by the system. This is the default.
• MB: Sizes are shown in megabytes.
• GB: Sizes are shown in gigabytes.
• TB: Sizes are shown in terabytes.
Based on the precision setting, if a size is too small to meaningfully display in the selected unit,
the system uses a smaller unit for that size. For example, if units is set to TB, precision is set to
1, and base is set to 10, the size 0.11709 TB is instead shown as 117.1 GB.
Example Set CLI parameters.
# set cli-parameters timeout 600 console pager off precision 2 units GB
temperature-scale f
For scripting, display XML output in api-embed format and disable paging.
# set cli-parameters api-embed pager off
For scripting, display brief XML output in api-embed format and disable paging.
# set cli-parameters api-embed pager off brief on
Set the CLI to show output in console format.
# set cli-parameters console
See also • show cli-parameters
set cli-parameters 91
Page 92

set controller-date
Description Sets the date and time parameters for the system. You can set the date and time manually or
configure the system to communicate with a Network Time Protocol (NTP) server. Alternatively, you
can configure NTP by using the set ntp-parameters command.
NOTE: If you specify valid NTP parameters and manual date/time parameters in the same
command, the NTP parameters will take precedence. If the NTP server cannot be contacted, the date
and time will not be changed and no error message will be displayed.If you specify the timestamp
parameter and other manual date/time parameters in the same command, the timestamp
parameter will take precedence.
Min. role
manage
Syntax To set the date and time manually:
set controller-date
jan|feb|mar|apr|may|jun|jul|aug|sep|oct|nov|dec
day
hh:mm:ss
year
To set the date and time manually by specifying a timestamp:
set controller-date
timestamp timestamp
timezone +|-hh[:mm]
To configure use of NTP:
set controller-date
ntp enabled|disabled|on|off
ntpaddress IP-address
timezone +|-hh[:mm]
Parameters jan|feb|mar|apr|may|jun|jul|aug|sep|oct|nov|dec
The month.
day
The day number (1–31).
hh:mm:ss
The hour (0–23), the minutes (0–59), and the seconds (0–59).
year
The year as a four-digit number.
ntp enabled|disabled|on|off
Enables or disables use of NTP. When NTP is enabled and the specified NTP server is available,
each controller’s time is synchronized with the server.
ntpaddress IP-address
The network address of an available NTP server.
timezone +|-hh[:mm]
The system’s time zone as an offset in hours (-12 through +14) and optionally minutes (00–59) from
Coordinated Universal Time (UTC). To specify a positive offset, the '+' is optional. To specify a
negative offset, the '-' is required. The hour value can have one or two digits and can omit a leading
zero. If the minutes value is specified it must have two digits. If it is omitted, the minutes value is set to
00.
92 Alphabetical list of commands
Page 93

timestamp timestamp
The date and time represented as the number of seconds (not counting leap seconds) that have
elapsed since 1970-01-01 00:00:00 UTC. The resulting time will be in UTC, unless you also specify
the timezone parameter.
Example Manually set the system time and date to 1:45 PM on September 22, 2011.
# set controller-date sep 22 13:45:0 2011
Manually set the system date and time to 4:30:50 PM on November 2, 2011 by specifying a
timestamp and an offset for the Central Time zone.
# set controller-date timestamp 1320273050 timezone -6
Set the system to use NTP with an offset for the Mountain Time zone.
# set controller-date ntp enabled ntpaddress 69.10.36.3 timezone -7
Set the system to use NTP with an offset for the Bangalore, India, time zone.
# set controller-date ntp enabled ntpaddress 69.10.36.3 timezone +5:30
See also • set ntp-parameters
• show controller-date
• show ntp-status
set controller-date 93
Page 94

set debug-log-parameters
Description Sets the types of debug messages to include in the Storage Controller debug log. For use by or with
direction from technical support.
Min. role
Syntax
Parameters message-type+|-
manage
set debug-log-parameters
message-type+|- [...]
One of the following message types, followed by a plus (+) to enable or a minus (-) to disable
inclusion in the log:
• awt: Auto-write-through cache triggers debug messages. Disabled by default.
• bkcfg: Internal configuration debug messages. Enabled by default.
• cache: Cache debug messages. Enabled by default.
• capi: Internal Configuration API debug messages. Enabled by default.
• capi2: Internal Configuration API tracing debug messages. Disabled by default.
• disk: Disk interface debug messages. Enabled by default.
• dms: Not used
• emp: Enclosure Management Processor debug messages. Enabled by default.
• fo: Failover and recovery debug messages. Enabled by default.
• fruid: FRU ID debug messages. Enabled by default.
• hb: Not used.
• host: Host interface debug messages. Enabled by default.
• init: Not used.
• ioa: I/O interface driver debug messages (standard). Enabled by default.
• iob: I/O interface driver debug messages (resource counts). Disabled by default.
• ioc: I/O interface driver debug messages (upper layer, verbose). Disabled by default.
• iod: I/O interface driver debug messages (lower layer, verbose). Disabled by default.
• mem: Internal memory debug messages. Disabled by default.
• misc: Internal debug messages. Enabled by default.
• msg: Inter-controller message debug messages. Enabled by default.
• mui: Internal service interface debug messages. Enabled by default.
• ps: Not used.
• raid: RAID debug messages. Enabled by default.
• rcm: Removable-component manager debug messages. Disabled by default.
• res2: Internal debug messages. Disabled by default.
• resmgr: Reservation Manager debug messages. Disabled by default.
Example Include RAID and cache messages, exclude EMP messages, and leave other message types
unchanged.
# set debug-log-parameters raid+ cache+ emp-
See also • show debug-log-parameters
94 Alphabetical list of commands
Page 95

set degraded-disk-policy
Description Sets the action for the system to take when it determines that a disk is degraded. This determination
is made based on criteria configured with the set degraded-disk-threshold command.
A degraded-disk policy will never fail a disk that would result in the loss of data, such as failing a
disk in non-fault-tolerant vdisk.
Min. role
Syntax
manage
set degraded-disk-policy
[disk-error-notification informational|warning|none]
[disk-error-policy fail|none]
Parameters disk-error-notification informational|warning|none
Optional. Specifies the severity of event to generate when a disk is determined to be degraded due
to errors.
• informational: Generate an event with Informational severity.
• warning: Generate an event with Warning severity.
• none: Do not generate an event.
disk-error-policy fail|none
Optional. Specifies the action to take when a disk is determined to be degraded due to errors.
• fail: Fail the disk and log event 547. To set this option you must also set the
disk-error-notification parameter to warning.
• none: Do not fail the disk, and log event 534.
Example When a disk is determined to be degraded, have the system generate an event with Informational
severity.
# set degraded-disk-policy disk-error-notification informational
disk-error-policy none
When a disk is determined to be degraded, have the system fail the disk if doing so will not cause
data loss, and generate an event with Warning severity.
# set degraded-disk-policy disk-error-notification warning disk-error-policy
fail
See also • clear degraded-disk
• set degraded-disk-threshold
• show degraded-disk-policy
• show degraded-disk-thresholds
set degraded-disk-policy 95
Page 96

set degraded-disk-threshold
Description Sets criteria for the system to identify degraded disks based on a trend of degrading quality of
service. Degrading quality of service includes disks that demonstrate a consistent or increasing
number of recovered errors (sense key 1) or unrecovered errors (sense key 3).
When a configured threshold is reached, a degraded-disk policy is enacted. The policy is configured
with the set degraded-disk-policy command.
When a disk is identified as degraded, its health becomes Degraded, as does the enclosure health
and overall system health. If the disk is a member of a vdisk, the vdisk’s health will also become
Degraded.
If a disk accumulates errors before a threshold value is set, and the newly set value has already been
reached, an event will not be logged until the next time that threshold is reached.
Changing a threshold after a disk has been degraded will not automatically clear the degraded
status. The disk will remain degraded.
Before changing a threshold, run the clear degraded-disk command for all disks to reset their health
to OK and to clear their error counts.
A degraded-disk policy will never fail a disk that would result in the loss of data, such as failing a
disk in a non-fault-tolerant vdisk.
Min. role
Syntax
manage
set degraded-disk-threshold
name threshold-name
target recoverable-errors|unrecoverable-errors
[threshold-a period.duration.threshold-value | clear]
[threshold-b period.duration.threshold-value | clear]
[threshold-c period.duration.threshold-value | clear]
[threshold-lifetime threshold-value | clear]
96 Alphabetical list of commands
Page 97

Parameters name threshold-name
Specifies one of the following values that identifies the disk tier and RAID redundancy level:
• archive-single: Archive tier, single redundancy RAID.
• archive-dual: Archive tier, dual redundancy RAID.
• archive: Archive tier, any RAID level.
• standard-single: Standard tier, single redundancy RAID.
• standard-dual: Standard tier, dual redundancy RAID.
• standard: Standard tier, any RAID level.
• performance-single: Performance tier, single redundancy RAID.
• performance-dual: Performance tier, dual redundancy RAID.
• performance: Performance tier, any RAID level.
• all-single: All disks, single redundancy RAID.
• all-dual: All disks, dual redundancy RAID.
• all: All disks, any RAID level.
Disk tiers are defined as:
• archive: Disks with rotation speeds below 10K RPM. In this system, these are midline SAS
disks.
• standard: Disks with rotation speeds greater than or equal to 10K RPM. In this system, these
are enterprise SAS disks.
• performance: SAS SSDs.
• all: Disks are not differentiated by disk tier.
RAID redundancy levels are defined as:
• single: Disks used in a RAID type other than RAID 6.
• dual: Disks used in RAID 6.
target recoverable-errors|unrecoverable-errors
Specifies the type of errors that will increase the threshold count:
• recoverable-errors: Soft errors (sense key 1).
• unrecoverable-errors: Medium errors (sense key 3).
threshold-a period.duration.threshold-value | clear
Optional. Specifies the first of up to three disk-error thresholds, where:
• period: hour|day|week
• duration: A numeric value for the duration of the period.
• threshold-value: A numeric value for the threshold count.
• clear: Clear the threshold count and no longer degrade a disk.
threshold-b period.duration.threshold-value | clear
Optional. Specifies the second of up to three disk-error thresholds. See the description for
threshold-a, above.
threshold-c period.duration.threshold-value | clear
Optional. Specifies the third of up to three disk-error thresholds. See the description for
threshold-a, above.
threshold-lifetime threshold-value | clear
Optional. Specifies either:
• threshold-value: A numeric value for the lifetime threshold.
• clear: Clear the threshold count and no longer degrade a disk.
set degraded-disk-threshold 97
Page 98

Example Degrade any standard disk should it incur three unrecoverable-errors over the period of one day.
# set degraded-disk-threshold name standard target unrecoverable-errors
threshold-a day.1.3
Degrade any standard disk should it incur eight unrecoverable-errors over the period of the next
week. This command would overwrite the threshold set in the previous example.
# set degraded-disk-threshold name standard target unrecoverable-errors
threshold-a week.1.8
Degrade any archive disk should it incur six unrecoverable-errors over the period of the next two
days and degrade an archive disk should it incur seven unrecoverable-errors over the period of one
week.
# set degraded-disk-threshold name archive target unrecoverable-errors
threshold-a day.2.6 threshold-b week.1.7
Clear threshold-a and threshold-b and no longer degrade any archive disk.
# set degraded-disk-threshold name archive target recoverable-errors threshold-a
clear threshold-b clear
Degrade any archive disk should it incur five recoverable-errors over any period of time.
# set degraded-disk-threshold name archive target recoverable-errors
threshold-lifetime 5
See also • clear degraded-disk
• set degraded-disk-policy
• show degraded-disk-policy
• show degraded-disk-thresholds
98 Alphabetical list of commands
Page 99

set disk-parameters
Description Sets parameters that affect disk operation. Two features controlled by these parameters are disk
Self-Monitoring Analysis and Reporting Technology (SMART) and drive spin down.
• Disks equipped with SMART technology can alert the controller of impending disk failure. When
SMART is enabled, the system checks for SMART events one minute after a restart and every five
minutes thereafter. SMART events are recorded in the event log. Changes to the SMART setting
take effect after a rescan or a controller restart.
• The drive spin down feature monitors disk activity within system enclosures and spins down
inactive disks, based on user-specified settings. This command sets spin-down parameters for
available disks and global spares. To set spin-down parameters for a vdisk, use set vdisk.
Drive spin down affects disk operations as follows:
• Spun-down disks are not polled for SMART events.
• Operations requiring access to disks may be delayed while the disks are spinning back up.
Min. role
Syntax
manage
set disk-parameters
[smart enabled|disabled|on|off|detect-only]
[spin-down enabled|disabled|on|off]
[spin-down-delay delay]
Parameters smart enabled|disabled|on|off|detect-only
Optional. Sets whether SMART is enabled or disabled for disks:
• disabled or off: Disables SMART for all disks in the system and for all disks added to the
system.
• enabled or on: Enables SMART for all disks in the system and for all disks added to the system.
This is the default.
• detect-only: Detects but does not change the SMART setting of each disk in the system, and
for each new disk added to the system.
spin-down enabled|disabled|on|off
Optional. Sets whether available disks and global spares will spin down after a period of inactivity
shown by the spin-down-delay parameter.
• disabled or off: Drive spin down for available disks and global spares is disabled. This is the
default. Disabling spin down will set the spin-down delay to 0.
• enabled or on: Drive spin down for available disks and global spares is enabled. If the
spin-down-delay parameter is not specified, the delay will be set to 15 minutes.
spin-down-delay delay
Optional. Sets the period of inactivity after which available disks and global spares will spin down.
Setting the delay to 1–360 minutes will enable spin down. Setting the delay to 0 will disable spin
down. The default is 15 minutes.
Example Enable SMART and drive spin down, and set the spin-down delay to 10 minutes.
# set disk-parameters smart on spin-down on spin-down-delay 10
See also • show disk-parameters
set disk-parameters 99
Page 100

set email-parameters
Description Sets SMTP notification parameters for events and managed logs.
Min. role
Syntax
manage
set email-parameters
domain domain
email-list email-addresses
[include-logs enabled|disabled|on|off]
notification-level crit|error|warn|info|none
sender sender
server server
Parameters domain domain
The domain name that is joined with an @ symbol to the sender name to form the “from” address for
remote notification. The domain name can have a maximum of 255 bytes. Because this name is used
as part of an email address, do not include spaces. For example: MyDomain.com. If the domain
name is not valid, some email servers will not process the mail.
email-list email-addresses
Enter up to four comma-separated email addresses for recipients of event notifications. Each email
address can have a maximum of 320 bytes. The first three email addresses are used as destinations
for events. If the managed logs feature is enabled, you can set the fourth email-address to the
address of the log collection system. For example:
include-logs enabled|disabled|on|off
Optional. When the managed logs feature is enabled, this option activates the “push” mode,
automatically attaching system log files to managed-logs email notifications that are sent to the log
collection system. This option is disabled by default.
notification-level crit|error|warn|info|none
The minimum severity for which the system should send notifications:
• crit: Sends notifications for Critical events only.
• error: Sends notifications for Error and Critical events.
• warn: Sends notifications for Warning, Error, and Critical events.
• info: Sends notifications for all events.
• none: Disables email notification. If this option is specified, no other parameters are required
and their current values are not changed.
sender sender
The sender name that is joined with an @ symbol to the domain name to form the “from” address for
remote notification. This name provides a way to identify the system that is sending the notification.
The sender name can have a maximum of 64 bytes. The value cannot include a space or: " , < > \
For example: Storage-1.
server server
The IP address of the SMTP mail server to use for the email messages.
and to send an email with attached logs to [email protected] when logs need to
be transferred.
# set email-parameters server 10.1.1.10 sender RAIDsystem domain mydomain.com
notification-level warn include-logs enabled email-list
[email protected],[email protected],,[email protected]
See also • show email-parameters
• test (with the email parameter)
100 Alphabetical list of commands
 Loading...