Donper USA BH7480 Service Manual

Donper
Model: BH7480
Soft Serve Freezer
Technical Service Manual
1

(This page intentionally left blank)
2

Technical Service Manual
For Donper BH7480 Soft Serve Machine
Gravity-Fed, Air-cooled, Floor Model
This manual provides detailed technical information about the machine. Instructions and suggestions are provided for basic operation, maintenance, and care.
The illustrations and specifications are not binding in detail. We reserve the right to make changes to the machine without notice, and without incurring any obligation to modify or provide new parts for the machines built prior to date of change.
The following information provided within this Technical Service Manual is intended for qualified commercial refrigeration repair technicians and service providers. Work should only be performed by qualified commercial refrigeration repair personnel.
3

Symbol Convention
Informational Notice. General information or tip.
Warning. General warning regarding the safety of the operator and the machine.
Warning. Warning regarding the safety of the operator. Failure to follow this warning may result in injury.
4

Table of Contents
Section |
Description |
Page |
|
|
|
1 |
Description and Specification |
|
|
|
|
1.1 |
Description |
|
|
|
|
1.2 |
Specification |
|
|
|
|
2 |
Installation Instructions |
|
|
|
|
2.1 |
Safety Precautions |
|
|
|
|
2.2 |
Shipment and Transit |
|
|
|
|
2.3 |
Machine Installation |
|
|
|
|
3 |
Maintenance and Adjustments |
|
|
|
|
3.1 |
Product Temperature Adjustment |
|
|
|
|
3.2 |
Drive Belt Tension Adjustment |
|
|
|
|
3.2 |
Preventative Maintenance |
|
|
|
|
3.3 |
Extended Storage |
|
|
|
|
4 |
Refrigeration System |
|
|
|
|
4.1 |
Refrigeration System |
|
|
|
|
4.2 |
Refrigerant Recovery and Evacuation |
|
|
|
|
4.3 |
Refrigerant Charging |
|
|
|
|
4.4 |
Compressor |
|
|
|
|
4.5 |
Condenser |
|
|
|
|
4.6 |
High Pressure Cutout Switch |
|
|
|
|
4.7 |
Capillary Tube |
|
|
|
|
4.8 |
Filter Drier |
|
|
|
|
5 |
Electrical System |
|
|
|
|
5.1 |
Main Control Board |
|
|
|
|
5.2 |
AC Contactor |
|
|
|
|
5.3 |
Limit Switch |
|
|
|
|
5.4 |
Capacitors |
|
|
|
|
5.5 |
Proximity Switch |
|
|
|
|
|
5 |
|

5.6Control Panel Circuit Board
5.7Condenser Fans Motors
6 Mechanical System
6.1Drive Motor
6.2Gearbox Speed Reducer
7 Troubleshooting
7.1Symbol Description
8 Appendix
8.1Electrical Schematic
8.2Refrigeration Schematic
6

Section 1 Description and Specification
1.1 Description
The Donper BH7480 soft serve machine is an air-cooled, gravity-fed soft serve machine. The BH7480 model is compatible for ice cream, frozen yogurt, sorbet, and custard. This manual is designed to help qualified service personnel and technicians with installation, operation, service, and maintenance.
1.2 Specification
|
|
|
|
|
|
|
Model BH7480 |
|
|
|
|
|
Dimensions |
|
Machine |
|
height |
|
56.5” (1435 mm) |
|
width |
|
21.3” (540 mm) |
|
depth |
|
25.6” (650 mm) |
|
Weight |
|
397 lbs (180 kg) |
|
Electrical |
|
230V, 1 Phase, 60Hz |
|
Breaker Type |
|
20A, Double Pole |
|
Connection |
|
NEMA L6-20P power cord provided |
|
Compressor |
|
6,452 Btu/hr |
|
Drive Motor |
|
1 HP, TEFC, 1 Phase, 1720 RPM, Start-Run Capacitors |
|
Air Flow |
|
Air-cooled units require a minimum of 5” (127 mm) of clearance |
|
|
|
around all sides of the machine. |
|
|
|
|
|
Hopper Volume |
|
Two-9.5 quarts (9 liters) |
|
Freezing Cylinder Volume |
|
Two-2 quarts (1.9 liters) |
|
|
||
|
|
|
|
7

Section 2 Installation Instructions
2.1 Safety Precautions
Failure to adhere to the following safety precautions may result in severe personal injury or death. Failure to comply with these warnings may damage the machine and its components. Component damage will result in part replacement expense and service repair expense.
Do not operate the soft serve machine without reading this Users Guide. Failure to follow this instruction may result in equipment damage, poor freezing performance, health hazards, or personal injury.
Do not operate the freezer unless it is properly grounded. Failure to follow this instruction may result in electrocution.
Do not attempt any repairs unless the main power supply to the soft serve machine has been disconnected. Failure to follow this instruction may result in electrocution.
Do not operate the soft serve machine with larger fuses than specified on your specification sheet. Failure to follow this instruction may result in electrocution or damage to the machine. Consult your electrician.
Do not allow untrained personnel to operate this machine. Failure to follow this instruction may result in severe personal injury to fingers or hands from moving parts.
Do not operate the machine while the stainless steel panels are removed from the unit. Loose garments and/or long hair can get caught in the moving parts resulting in serious personal injury.
Do not obstruct the air intake and discharge openings on all sides of the machine. Failure to follow this instruction may cause poor performance and damage to the machine.
8

2.2 Shipment and Transit
The machine has been assembled, operated, and inspected at the factory. Upon arrival at the final destination, the entire machine must be checked for any damage which may have occurred during transit.
2.3 Machine Installation
Installation of the machine involves moving the machine close to its permanent location, removing all crating, setting in place, assembling parts, and cleaning.
A)Uncrate the machine. Using a 13mm ratchet, carefully remove the four (4) brackets that secure the machine to the bottom of the crate. Use caution when removing the machine from the base. Assistance will be needed.
B)Accurate leveling is necessary for correct drainage and overrun. Place a bubble level on top of the machine at each corner to check for level condition.
C)Correct ventilation is required. Allow 8” (203 mm) clearance around all sides to allow for adequate air flow.
D)Connect the power cord to the proper power supply. The plug on the BH7480 is designed for 230 volt / 20 amp duty. The unit must be connected to a properly grounded receptacle. The electrical cord furnished with your unit has a three prong grounding type plug. The use of an extension cord is not recommended. Do not use an adapter to circumvent the grounding requirement.
Do not alter or deform the electrical plug in any way. Altering the plug to fit into an outlet of different configuration may cause fire, risk of electrical shock, product damage, and will void warranty.
9

Section 3 Maintenance and Adjustments
3.1 Product Firmness Adjustment
5 Second Setting
The up(↑) and down(↓) buttons on the control panel are used to adjust the product firmness level. With the control panel powered ON, press and hold the up and down buttons simultaneously for 5 seconds for the side you wish to adjust. The LCD display will flash a numerical value from 1 to 10. You can now use the up and down buttons to adjust the level of firmness. This value can be adjusted from 1 to 10 (10 being a very firm consistency and 1 being a very soft consistency). The control panel will automatically return back to “00” after the numerical value is set.
15 Second Setting
With Press and hold the up(↑) and down(↓) buttons simultaneously for 15 seconds for the corresponding side. The LCD will now flash -1, -2, -3, or -4. Select the appropriate number based on the type of product you are using from the table below.
As a guide to determine the appropriate firmness level setting, the LCD should display a value between 84 to 87 when the Auto button is first pressed when the product inside the freezing cylinder is in a liquid state.
|
|
|
5 Second Setting |
|
|
||||
|
|
|
|
|
|
|
|
||
Softer |
|
|
|
|
|
|
Firmer |
||
|
|
|
|
|
|
|
|
|
|
1 |
2 |
3 |
4 |
5 |
6 |
7 |
8 |
9 |
10 |
|
|
|
|
|
|
|
|
|
|
15 Second Setting
Firmer |
|
Softer |
|
|
|
|
|
-1 |
-2 |
-3 |
-4 |
Recommended Default Settings: 9 and -3
10

3.2 Drive Belt Tension Adjustment
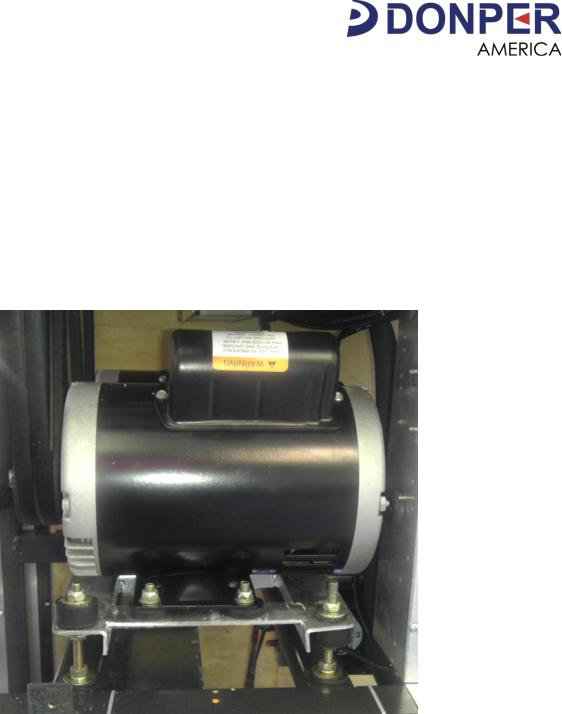
To check belt tension, refer to Figure 3-2 and follow the steps below:
Remove the side panel by unscrewing the six (6) screws with a Phillips head screw driver
Now that both panels are removed you will need the following tools to adjust the belt tension.
13mm socket
13mm wrench
Use a Burroughs Belt Tension Gauge to set the tension for the drive belt. Set the belt tension to 2 lbs.
Figure 3.2
11
 Loading...