

Dometic Heki de Luxe Installation Manual

Heki Accessory
1
2
5
6
7
3
4
8
1
2
3
4
1
9
0
c
a
b
Dometic WAECO International GmbH
Hollefeldstrasse 63
D-48282 Emsdetten
www.dometic-waeco.com
4445101309 F MO1137 06/2015
2
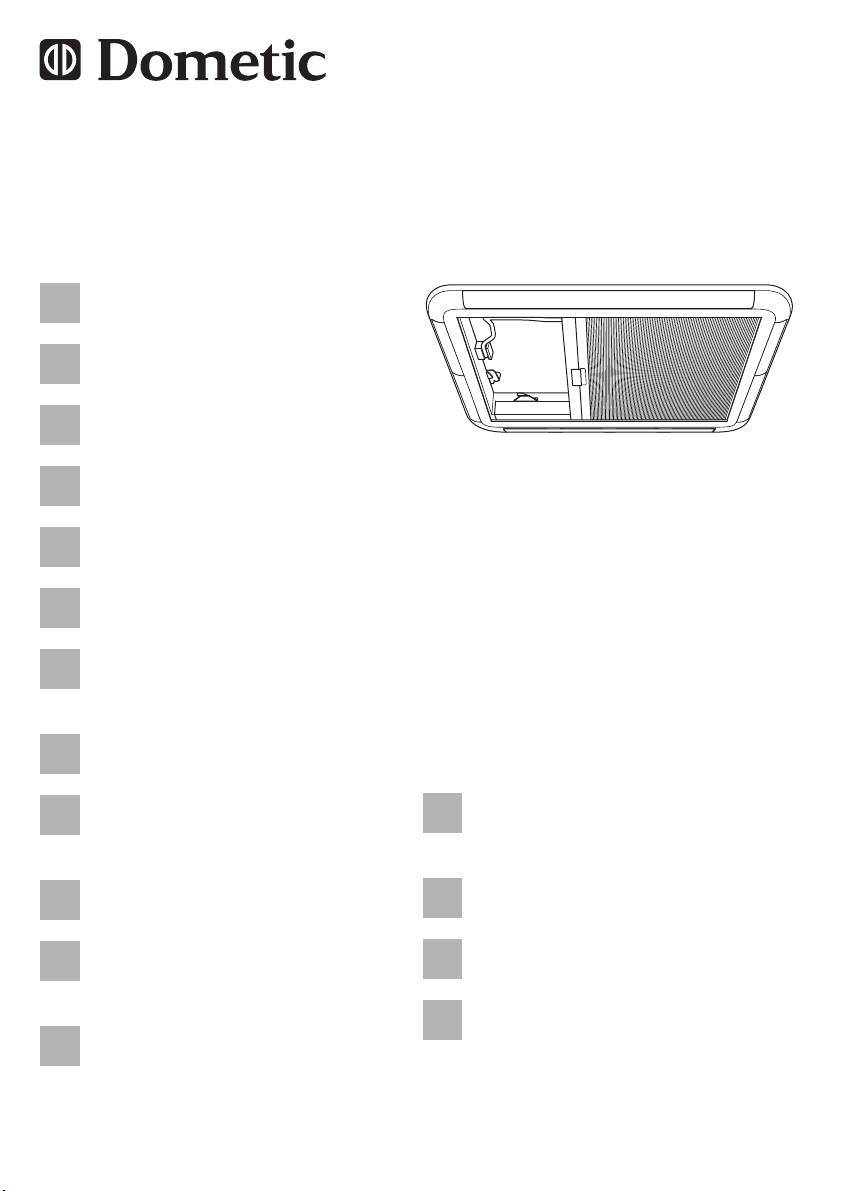
Inner frame Heki 2 de Luxe
EN
DE
FRESIT
NLDASVNOFI
PT
RU
PL
CS
SK
HU
Installation Manual. . . . . . . . . . . . . . . 3
Innenrahmen Heki 2 de Luxe
Montageanleitung . . . . . . . . . . . . . . . 8
Cadre intérieur Heki 2 de Luxe
Instructions de montage . . . . . . . . . 13
Marco interior Heki 2 de Luxe
Instrucciones de montaje. . . . . . . . . 18
Telaio interno Heki 2 de Luxe
Indicazioni di montaggio . . . . . . . . . 23
Binnenframe Heki 2 de Luxe
Montagehandleiding . . . . . . . . . . . . 28
Indvendig ramme Heki 2
de Luxe
Monteringsvejledning. . . . . . . . . . . . 33
Innerram Heki 2 de Luxe
Monteringsanvisning . . . . . . . . . . . . 38
Heki Accessory
Innvendig ramme Heki 2
de Luxe
Monteringsanvisning . . . . . . . . . . . . 43
Heki 2 de Luxen sisäkehys
Asennusohje . . . . . . . . . . . . . . . . . . 48
Armação interior Heki 2
de Luxe
Instruções de montagem . . . . . . . . . 53
Внутренняя рама Heki 2
de Luxe
Инструкция по монтажу . . . . . . . . . 58
Rama wewnętrzna Heki 2
de Luxe
Instrukcja montażu . . . . . . . . . . . . . 63
Vnitřní rám Heki 2 de Luxe
Návod k montáži . . . . . . . . . . . . . . . 68
Vnútorný rám Heki 2 de Luxe
Návod na montáž . . . . . . . . . . . . . . 73
Heki 2 de Luxe belső keret
Szerelési útmutató . . . . . . . . . . . . . 78


EN
Heki Accessory Explanation of symbols
Please read this instruction manual carefully before installation and
first use, and store it in a safe place. If you pass on the product to
another person, hand over this instruction manual along with it.
Table of contents
1 Explanation of symbols . . . . . . . . . . . . . . . . . . . . . . . . . . . . . . . . . . . 3
2 Safety and installation instructions. . . . . . . . . . . . . . . . . . . . . . . . . . . 4
3 Scope of delivery . . . . . . . . . . . . . . . . . . . . . . . . . . . . . . . . . . . . . . . . 4
4 Intended use . . . . . . . . . . . . . . . . . . . . . . . . . . . . . . . . . . . . . . . . . . . 5
5 Instructions before installation . . . . . . . . . . . . . . . . . . . . . . . . . . . . . . 5
6 Installing the inner frame . . . . . . . . . . . . . . . . . . . . . . . . . . . . . . . . . . 5
7 Warranty . . . . . . . . . . . . . . . . . . . . . . . . . . . . . . . . . . . . . . . . . . . . . . 6
8 Disposal . . . . . . . . . . . . . . . . . . . . . . . . . . . . . . . . . . . . . . . . . . . . . . . 7
9 Technical data . . . . . . . . . . . . . . . . . . . . . . . . . . . . . . . . . . . . . . . . . . 7
1 Explanation of symbols
NOTICE!
A
I
➤ Action: This symbol indicates that action is required on your part. The
required action is described step-by-step.
✓ This symbol describes the result of an action.
Fig. 1 5, page 3: This refers to an element in an illustration. In this case,
item 5 in figure 1 on page 3.
Failure to observe this instruction can cause material damage and
impair the function of the product.
NOTE
Supplementary information for operating the product.
3

EN
Safety and installation instructions Heki Accessory
2 Safety and installation instructions
Please observe the prescribed safety instructions and stipulations
from the vehicle manufacturer and service workshops.
The manufacturer accepts no liability for damage in the following cases:
Damage to the product resulting from mechanical influences
Alterations to the product without express permission from the manu-
facturer
Use for purposes other than those described in the operating manual
NOTE
I
Please note the following:
If faults or disturbances occur, consult a specialist workshop immediately.
Risk of breakage! Do not tread on the glass dome.
Keep the roof light free of snow and ice.
The electrical connections should only be performed by an electrician.
Replace the defective lights using ones of the same type which have the
same technical data (12 V, 5 W).
If you do not have sufficient technical knowledge for installing
components in vehicles, you should have a specialist install the
inner frame in your vehicle.
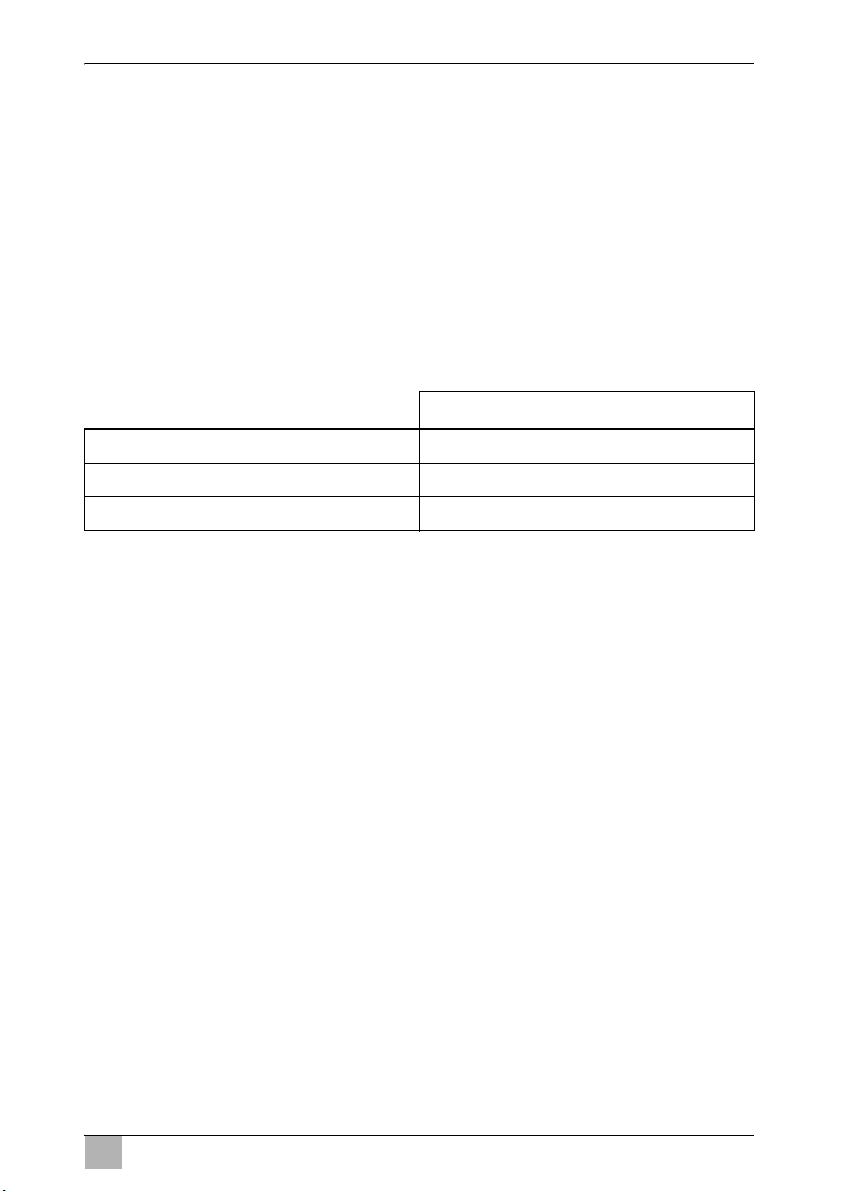
3 Scope of delivery
No. in
fig. 1
1 10 Ventilation grille
24Lamp covers
3 16 Fastening bolt ∅ 2.5 x 12 mm
4 1 Inner frame
4
Quantity Description

EN
Heki Accessory Intended use
4 Intended use
The Heki 2 de Luxe inner frame (item no. 9104100241) is used to retrofit an
existing Heki 2 roof light in a camper or caravan with blackout, insect screen
and lighting. The four lights cannot be dimmed.
5 Instructions before installation
➤ Make sure that the power supply line and a switch are available for the
Heki 2 de Luxe inner frame lighting (12 V, 4 x 5 W) in the vehicle.
➤ Make sure that the power supply line is suitably arranged and protected.
If you do not want lighting, the bulb holder must be removed before installation, and after mounting the ventilation grille must be inserted instead of the
lamp cover.
6 Installing the inner frame
NOTE
I
Get another person to assist you in removing the old inner frame
and installing the new inner frame.
➤ If you do not want to use the lighting: Remove the bulb holder in the new
inner frame.
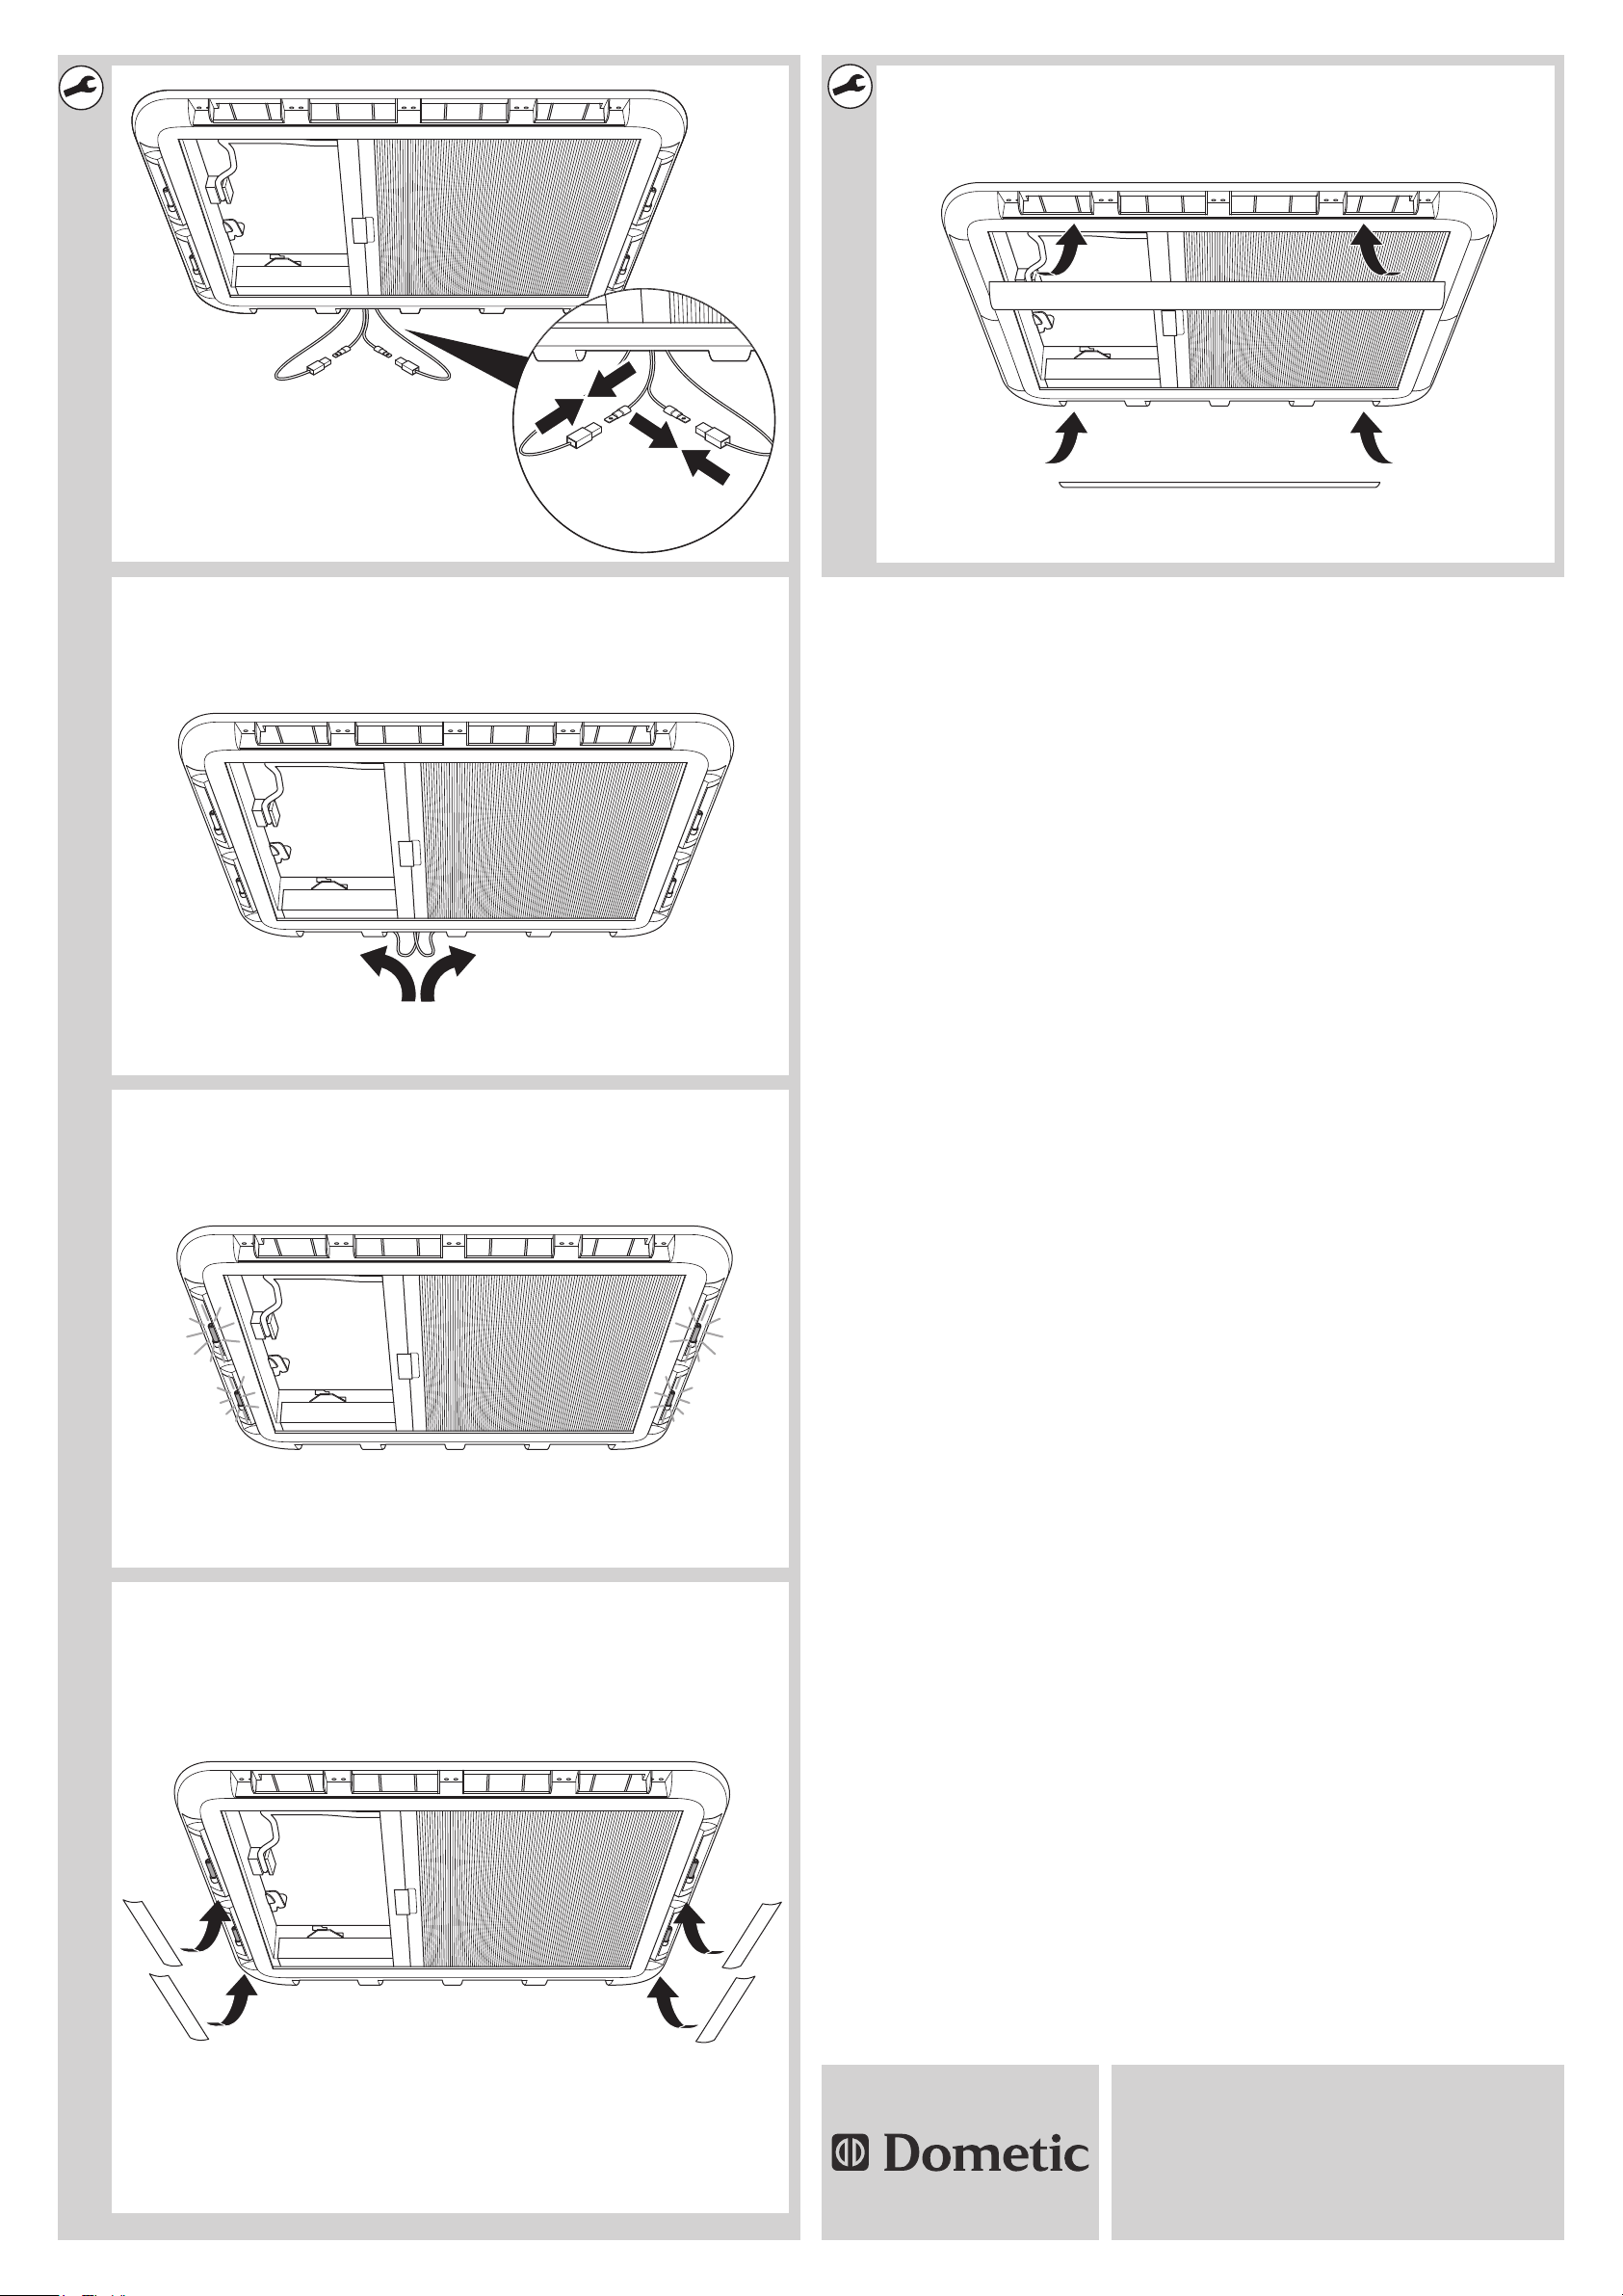
➤ Remove the inner frame of the existing Heki 2 roof light (fig. 2 –fig.4).
➤ Lay the power supply line in the middle onto one of the two long sides.
➤ Allow the power supply line to protrude about 25 cm between the roof
opening and the outer frame (fig. 5).
NOTICE!
A
I
➤ Place the inner frame from inside onto the outer frame and align it
centrally (fig. 6).
Connect the lighting on only one side.
NOTE
The connection is designed for an insulated flat plug which is
4.8 mm wide and 0.8 mm thick.
5

EN
Warranty Heki Accessory
➤ Secure the inner frame with the 16 fastening bolts (fig. 7).
Screw on the inner frame only slightly.
➤ Check that the roller blinds can move freely (fig. 8).
➤ If they cannot move freely, loosen the screws slightly.
➤ Connect the power supply lines to an available socket (fig. 9).
➤ Plug the cable carefully into the inner frame (fig. 0).
➤ Check the function of the lighting (fig. a).
➤ Clip the light covers onto the short sides (fig. b).
They need to click in.
NOTICE!
A
➤ If you do not want to use the lighting: Insert the ventilation grille into the
openings.
➤ Clip the ventilation grille onto the long sides (fig. c).
It needs to click in.
Do not use the ventilation grille to cover the lamps.
7Warranty
The statutory warranty period applies. If the product is defective, please
contact the service partner in your country (addresses on the back on the
instruction manual).
Our experts will be happy to help you and will discuss the warranty process
with you in more detail.
6
EN
Heki Accessory Disposal
8 Disposal
➤ Place the packaging material in the appropriate recycling waste bins
wherever possible.
If you wish to finally dispose of the product, ask your local recycling
centre or specialist dealer for details about how to do this in
M
accordance with the applicable disposal regulations.
9 Technical data
Heki Accessory
Item no.: 9104100241
Connection voltage of the lighting: 12 Vg
Power consumption of the lighting: 4 x 5 W
7

DE
Erklärung der Symbole Heki Accessory
Bitte lesen Sie diese Anleitung vor Einbau und Inbetriebnahme sorgfältig durch und bewahren Sie sie auf. Geben Sie sie im Falle einer
Weitergabe des Produktes an den Nutzer weiter.
Inhaltsverzeichnis
1 Erklärung der Symbole . . . . . . . . . . . . . . . . . . . . . . . . . . . . . . . . . . . 8
2 Sicherheits- und Einbauhinweise. . . . . . . . . . . . . . . . . . . . . . . . . . . . 9
3 Lieferumfang . . . . . . . . . . . . . . . . . . . . . . . . . . . . . . . . . . . . . . . . . . . 9
4 Bestimmungsgemäßer Gebrauch . . . . . . . . . . . . . . . . . . . . . . . . . . 10
5 Hinweise vor dem Einbau . . . . . . . . . . . . . . . . . . . . . . . . . . . . . . . . 10
6 Innenrahmen montieren. . . . . . . . . . . . . . . . . . . . . . . . . . . . . . . . . . 10
7 Gewährleistung . . . . . . . . . . . . . . . . . . . . . . . . . . . . . . . . . . . . . . . . 11
8 Entsorgung. . . . . . . . . . . . . . . . . . . . . . . . . . . . . . . . . . . . . . . . . . . . 12
9 Technische Daten . . . . . . . . . . . . . . . . . . . . . . . . . . . . . . . . . . . . . . 12
1 Erklärung der Symbole
ACHTUNG!
A
I
➤ Handlung: Dieses Symbol zeigt Ihnen, dass Sie etwas tun müssen. Die
erforderlichen Handlungen werden Schritt für Schritt beschrieben.
✓ Dieses Symbol beschreibt das Ergebnis einer Handlung.
Abb. 1 5, Seite 3: Diese Angabe weist Sie auf ein Element in einer Abbildung hin, in diesem Beispiel auf „Position 5 in Abbildung 1 auf Seite 3“.
8
Nichtbeachtung kann zu Materialschäden führen und die
Funktion des Produktes beeinträchtigen.
HINWEIS
Ergänzende Informationen zur Bedienung des Produktes.
DE
Heki Accessory Sicherheits- und Einbauhinweise
2 Sicherheits- und Einbauhinweise
Beachten Sie die vom Fahrzeughersteller und vom Kfz-Handwerk vorgeschriebenen Sicherheitshinweise und Auflagen!
Der Hersteller übernimmt in folgenden Fällen keine Haftung für Schäden:
Beschädigungen am Produkt durch mechanische Einflüsse
Veränderungen am Produkt ohne ausdrückliche Genehmigung vom
Hersteller
Verwendung für andere als die in der Anleitung beschriebenen Zwecke
HINWEIS
I
Beachten Sie folgende Hinweise:
Suchen Sie umgehend eine Fachwerkstatt auf, wenn Fehler oder
Störungen auftreten.
Einbruchgefahr! Betreten Sie die Glaskuppel nicht.
Halten Sie das Dachfenster schnee- und eisfrei.
Lassen Sie elektrische Anschlüsse nur von fachkundigem Personal
ausführen.
Ersetzen Sie defekte Lampen durch Lampen gleicher Bauart und mit
denselben technischen Daten (12 V, 5 W).
Wenn Sie nicht über ausreichende technische Kenntnisse zum
Einbauen von Komponenten in Fahrzeugen verfügen, sollten Sie
sich den Innenrahmen von einem Fachmann ins Fahrzeug einbauen lassen.
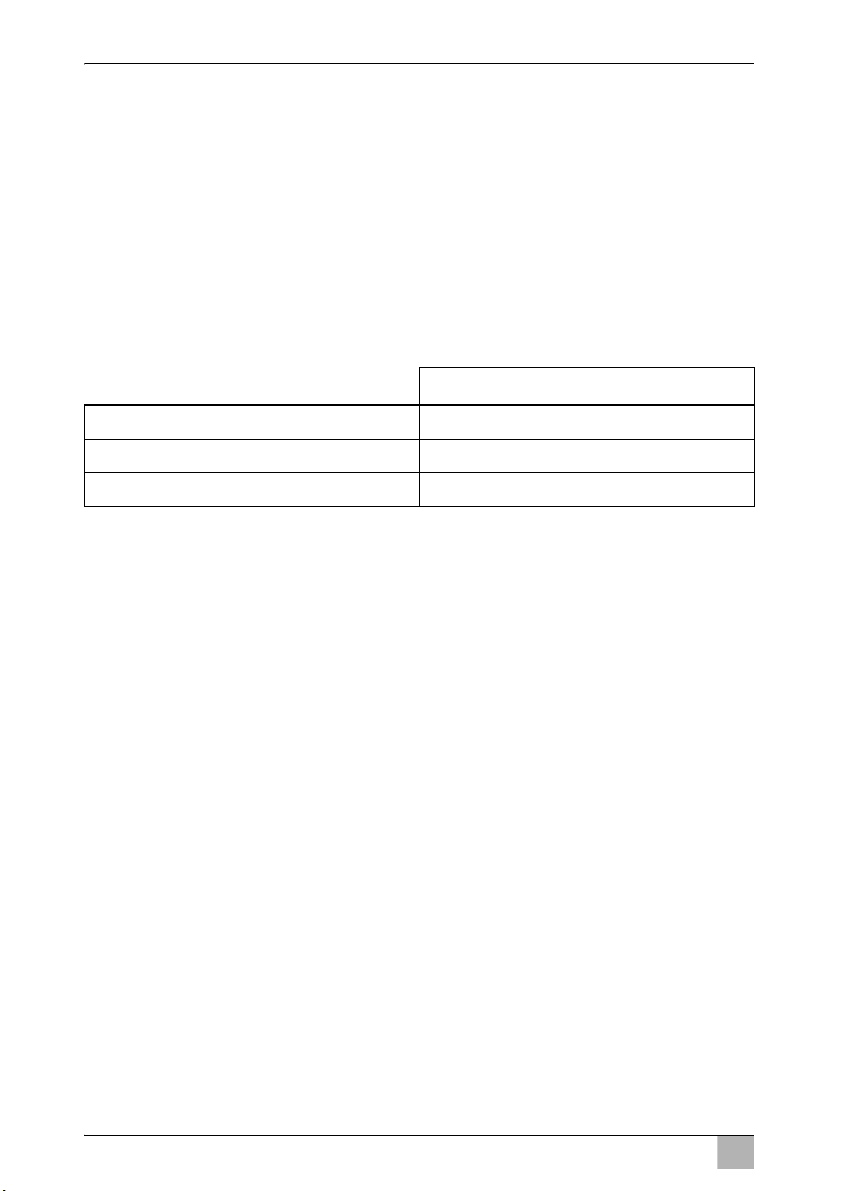
3Lieferumfang
Nr. in
Abb. 1
1 10 Lüftungsgitter
2 4 Lampenabdeckungen
3 16 Befestigungsschraube ∅ 2,5 x 12 mm
4 1 Innenrahmen
Menge Bezeichnung
9

DE
Bestimmungsgemäßer Gebrauch Heki Accessory
4 Bestimmungsgemäßer Gebrauch
Der Innenrahmen Heki 2 de Luxe (Art.-Nr. 9104100241) dient dazu, ein vorhandenes Dachfenster Heki 2 in einem Wohnmobil oder Wohnwagen nachträglich mit plissierter Verdunklung, Insektenschutz und Beleuchtung zu
versehen. Die vier Lampen sind nicht dimmbar.
5 Hinweise vor dem Einbau
➤ Stellen Sie sicher, dass eine Zuleitung und ein Schalter für die
Beleuchtung des Innenrahmens Heki 2 de Luxe (12 V, 4 x 5 W) am Fahrzeug vorhanden sind.
➤ Stellen Sie sicher, dass die Zuleitung entsprechend ausgelegt und abge-
sichert ist.
Wenn Sie keine Beleuchtung wünschen, muss vor der Montage der Lampenträger entfernt werden, und nach der Montage müssen Lüftungsgitter statt
Lampenabdeckungen eingesetzt werden.
6 Innenrahmen montieren
HINWEIS
I
➤ Falls Sie die Beleuchtung nicht verwenden möchten: Entfernen Sie die
Lampenträger am neuen Innenrahmen.
➤ Demontieren Sie den Innenrahmen des vorhandenen Dachfensters
Heki 2 (Abb. 2 – Abb. 4).
➤ Verlegen Sie die Zuleitung mittig auf eine der beiden Längsseiten.
➤ Lassen Sie die Zuleitung ca. 25 cm zwischen Dachausschnitt und Außen-
rahmen vorstehen (Abb. 5).
A
10
Ziehen Sie zum Ausbau des alten Innenrahmens und zur
Montage des neuen Innenrahmens eine zweite Person als
Helfer hinzu.
ACHTUNG!
Schließen Sie die Beleuchtung nur auf einer Seite an.

DE
Heki Accessory Gewährleistung
HINWEIS
I
➤ Setzen Sie den Innenrahmen von innen auf den Außenrahmen auf und
richten Sie ihn mittig aus (Abb. 6).
➤ Verschrauben Sie den Innenrahmen mit den 16 Befestigungsschrauben
(Abb. 7).
Schrauben Sie den Innenrahmen nur leicht an.
➤ Prüfen Sie, ob die Rollos frei bewegbar sind (Abb. 8).
➤ Falls die Rollos nicht frei bewegbar sind, lösen Sie die Schrauben etwas.
➤ Schließen Sie die Zuleitungen an den vorhandenen Buchsen an
(Abb. 9).
➤ Stecken Sie die Kabel vorsichtig in den Innenrahmen ein (Abb. 0).
➤ Kontrollieren Sie die Funktion der Beleuchtung (Abb. a).
➤ Klinken Sie die Lampenabdeckungen auf den kurzen Seiten ein
(Abb. b).
Sie müssen hörbar einrasten.
Der Anschluss ist für isolierte Flachstecker mit einer Breite von
4,8 mm und einer Dicke von 0,8 mm ausgelegt.
ACHTUNG!
A
➤ Falls Sie die Beleuchtung nicht verwenden möchten: Setzen Sie
Lüftungsgitter in die Öffnungen ein.
➤ Klinken Sie die Lüftungsgitter auf den langen Seiten ein (Abb. c).
Sie müssen hörbar einrasten.
Verwenden Sie nicht die Lüftungsgitter, um die Lampen
abzudecken.
7 Gewährleistung
Es gilt die gesetzliche Gewährleistungsfrist. Sollte das Produkt defekt sein,
wenden Sie sich bitte an einen Service-Partner in Ihrem Land (Adressen
siehe Rückseite der Anleitung).
Unsere Spezialisten helfen Ihnen gerne weiter und besprechen mit Ihnen
den weiteren Verlauf der Gewährleistung.
11

DE
Entsorgung Heki Accessory
8 Entsorgung
➤ Geben Sie das Verpackungsmaterial möglichst in den entsprechenden
Recycling-Müll.
Wenn Sie das Produkt endgültig außer Betrieb nehmen, informieren Sie sich bitte beim nächsten Recyclingcenter oder bei
M
Ihrem Fachhändler über die zutreffenden Entsorgungsvorschriften.
9 Technische Daten
Heki Accessory
Art.-Nr.: 9104100241
Anschlussspannung Beleuchtung: 12 Vg
Leistungsaufnahme Beleuchtung: 4 x 5 W
12

FR
Heki Accessory Explication des symboles
Veuillez lire attentivement cette notice avant le montage et la mise en
service. Veuillez ensuite la conserver. En cas de passer le produit,
veuillez le transmettre au nouvel acquéreur.
Sommaire
1 Explication des symboles. . . . . . . . . . . . . . . . . . . . . . . . . . . . . . . . . 13
2 Consignes de sécurité et instructions de montage . . . . . . . . . . . . . 14
3 Contenu de la livraison . . . . . . . . . . . . . . . . . . . . . . . . . . . . . . . . . . 14
4 Usage conforme. . . . . . . . . . . . . . . . . . . . . . . . . . . . . . . . . . . . . . . . 15
5 Consignes préalables au montage . . . . . . . . . . . . . . . . . . . . . . . . . 15
6 Montage du cadre intérieur . . . . . . . . . . . . . . . . . . . . . . . . . . . . . . . 15
7 Garantie . . . . . . . . . . . . . . . . . . . . . . . . . . . . . . . . . . . . . . . . . . . . . . 16
8 Retraitement . . . . . . . . . . . . . . . . . . . . . . . . . . . . . . . . . . . . . . . . . . 17
9 Caractéristiques techniques. . . . . . . . . . . . . . . . . . . . . . . . . . . . . . . 17
1 Explication des symboles
AVIS !
A
I
➤ Manipulation : ce symbole vous indique une action à effectuer. Les
manipulations à effectuer sont décrites étape par étape.
✓ Ce symbole décrit le résultat d’une manipulation.
Fig. 1 5, page 3 : cette information renvoie à un élément figurant sur une
illustration, dans cet exemple à la « position 5 de l'illustration 1 à la page 3 ».
Le non-respect de ces consignes peut entraîner des dommages
matériels et des dysfonctionnements du produit.
REMARQUE
Informations complémentaires sur l'utilisation du produit.
13

FR
Consignes de sécurité et instructions de montage Heki Accessory
2 Consignes de sécurité et instructions
de montage
Respectez les consignes de sécurité et autres prescriptions imposées
par le constructeur du véhicule et par les professionnels de
l’automobile !
Le fabricant décline toute responsabilité pour des dommages dans les cas
suivants :
des influences mécaniques ayant endommagé le matériel
des modifications apportées au produit sans autorisation explicite de la
part du fabricant
une utilisation différente de celle décrite dans la notice
REMARQUE
I
Tenez compte des remarques suivantes :
Contactez immédiatement une entreprise spécialisée si des pannes ou
des dysfonctionnements surviennent.
Risque de rupture ! Ne marchez pas sur le dôme de toit.
Protégez le dôme de toit de la neige et de la glace.
Seul un personnel spécialisé doit être autorisé à effectuer les raccorde-
ments électriques.
Remplacez les lampes défectueuses par des lampes de même type et de
mêmes caractéristiques techniques (12 V, 5 W).
Si vos connaissances techniques en matière d'installation
d'éléments dans un véhicule sont insuffisantes, nous vous recommandons de faire installer le cadre intérieur par un spécialiste.
3 Contenu de la livraison
N° dans
fig. 1
1 10 Grilles d'aération
2 4 Caches des lampes
3 16 Vis de fixation ∅ 2,5 x 12 mm
4 1 Cadre intérieur
14
Quantité Désignation

FR
Heki Accessory Usage conforme
4 Usage conforme
Le cadre intérieur Heki 2 de Luxe (Nº de produit 9104100241) permet d'équiper ultérieurement un dôme de toit Heki 2 monté dans un camping-car ou
une caravane d'un pare-soleil, d'une moustiquaires et d'un éclairage. L'intensité des quatre lampes n'est pas réglable.
5 Consignes préalables au montage
➤ Assurez-vous que vous disposez dans le véhicule d'une ligne
d'alimentation et d'un commutateur pour l'éclairage du cadre intérieur
Heki2 deLuxe (12V, 4x5W).
➤ Assurez-vous que la ligne est conçue en conséquence et protégée par un
fusible adéquat.
Si vous ne souhaitez pas d'éclairage, le porte-lampes doit être retiré avant le
montage et des grilles d'aération doivent être posées à la place des caches
des lampes après le montage.
6 Montage du cadre intérieur
REMARQUE
I
➤ Si vous ne souhaitez pas utiliser l'éclairage : retirez les porte-lampes du
nouveau cadre intérieur.
➤ Démontez le cadre intérieur du dôme de toit Heki 2 en place
(fig. 2 –fig.4).
➤ Posez la ligne d'alimentation au milieu de l'un des deux grands côtés.
➤ Faites dépasser la ligne d'alimentation de 25 cm environ entre la découpe
de toit et le cadre extérieur (fig. 5).
A
Demandez l'aide d'une autre personne pour démonter l'ancien
cadre intérieur et monter le nouveau.
AVIS !
Ne raccordez l'éclairage que d'un seul côté.
15

FR
Garantie Heki Accessory
REMARQUE
I
➤ Posez de l'intérieur le cadre intérieur contre le cadre extérieur et
centrez-le (fig. 6).
➤ Vissez le cadre intérieur à l'aide des 16 vis de fixation (fig. 7).
Ne vissez le cadre intérieur que légèrement.
➤ Vérifiez si vous pouvez bouger facilement les stores (fig. 8).
➤ Si ce n'est pas le cas, dévissez un peu les vis.
➤ Raccordez les câbles aux douilles existantes (fig. 9).
➤ Insérez les câbles avec précaution dans le cadre intérieur (fig. 0).
➤ Contrôlez le fonctionnement de l'éclairage (fig. a).
➤ Enclenchez les caches des lampes sur les petits côtés (fig. b).
Ils doivent s'enclencher de manière audible.
A
➤ Si vous ne souhaitez pas utiliser l'éclairage : insérez des grilles d'aération
dans les ouvertures.
Le raccordement est prévu pour des connecteurs plats isolés
d'une largeur de 4,8 mm et d'une épaisseur de 0,8 mm.
AVIS !
N'utilisez pas les grilles d'aération pour couvrir les lampes.
➤ Enclenchez les grilles d'aération sur les grands côtés (fig. c).
Elles doivent s'enclencher de manière audible.
7 Garantie
Le délai légal de garantie s'applique. Si le produit s'avérait défectueux,
veuillez vous adresser à un de nos partenaires de service présent dans votre
pays (voir adresses au dos du présent manuel).
Nos spécialistes vous aideront avec plaisir et répondront à vos questions
concernant la suite de la procédure pour la garantie.
16
FR
Heki Accessory Retraitement
8 Retraitement
➤ Jetez les emballages dans les conteneurs de déchets recyclables prévus
à cet effet.
Lorsque vous mettrez votre produit définitivement hors service,
informez-vous auprès du centre de recyclage le plus proche ou
M
auprès de votre revendeur spécialisé sur les prescriptions relatives
au retraitement des déchets.
9 Caractéristiques techniques
Heki Accessory
Nº de produit : 9104100241
Tension de raccordement de l'éclairage : 12 Vg
Puissance absorbée par l'éclairage : 4 x 5 W
17

ES
Explicación de los símbolos Heki Accessory
Lea detenidamente estas instrucciones antes de llevar a cabo la instalación y puesta en funcionamiento, y consérvelas en un lugar seguro.
En caso de vender o entregar el producto a otra persona, entregue
también estas instrucciones.
Índice
1 Explicación de los símbolos. . . . . . . . . . . . . . . . . . . . . . . . . . . . . . . 18
2 Indicaciones de seguridad y montaje. . . . . . . . . . . . . . . . . . . . . . . . 19
3 Suministro de entrega . . . . . . . . . . . . . . . . . . . . . . . . . . . . . . . . . . . 19
4 Uso adecuado . . . . . . . . . . . . . . . . . . . . . . . . . . . . . . . . . . . . . . . . . 20
5 Indicaciones previas al montaje. . . . . . . . . . . . . . . . . . . . . . . . . . . . 20
6 Montaje del marco interior . . . . . . . . . . . . . . . . . . . . . . . . . . . . . . . . 20
7 Garantía legal . . . . . . . . . . . . . . . . . . . . . . . . . . . . . . . . . . . . . . . . . 21
8 Gestión de residuos . . . . . . . . . . . . . . . . . . . . . . . . . . . . . . . . . . . . . 22
9 Datos técnicos . . . . . . . . . . . . . . . . . . . . . . . . . . . . . . . . . . . . . . . . . 22
1 Explicación de los símbolos
¡AVISO!
A
I
➤ Paso a seguir: este símbolo le indica que debe realizar un paso. Todos
los procedimientos necesarios se describen paso a paso.
✓ Este símbolo describe el resultado de un paso realizado.
Fig. 1 5, página 3: esta indicación hace referencia a un elemento de una
figura, en este ejemplo a la “Posición 5 en la figura 1 de la página 3”.
18
Su incumplimiento puede acarrear daños materiales y perjudicar
el correcto funcionamiento del producto.
NOTA
Información adicional para el manejo del producto.

ES
Heki Accessory Indicaciones de seguridad y montaje
2 Indicaciones de seguridad y montaje
Tenga en cuenta las indicaciones de seguridad y la documentación
suministrada por el fabricante del vehículo y por el taller.
El fabricante declina toda responsabilidad ante daños ocurridos en los
siguientes casos:
daños en el producto debido a influencias mecánicas
modificaciones realizadas en el producto sin el expreso consentimiento
del fabricante
utilización del aparato para fines distintos a los descritos en las
instrucciones
NOTA
I
Tenga en cuenta las siguientes indicaciones:
En caso de fallos o averías, diríjase inmediatamente a un taller
especializado.
Peligro de hundimiento. No pise la cúpula de vidrio.
Mantenga la claraboya libre de nieve y hielo.
Las conexiones eléctricas sólo las puede realizar personal especializado.
Cambie las lámparas defectuosas por otras del mismo tipo y con los
mismos datos técnicos (12 V, 5 W).
Si no dispone de conocimientos técnicos suficientes para llevar a
cabo el montaje y las conexiones de componentes en el vehículo,
encargue el montaje de la protección contra insectos a personal
técnico cualificado.
3 Suministro de entrega
N.º en
fig. 1
1 10 Rejilla de ventilación
2 4 Cubiertas de las lámparas
3 16 Tornillos de fijación ∅ 2,5 x 12 mm
4 1 Marco interior
Cantidad Denominación
19

ES
Uso adecuado Heki Accessory
4 Uso adecuado
El marco interior Heki 2 de Luxe (N.° de art. 9104100241) sirve para equipar
a posteriori a la claraboya Heki 2 presente en una caravana o autocaravana
con oscurecimiento, protección contra insectos e iluminación. Las cuatro
lámparas no son de intensidad regulable.
5 Indicaciones previas al montaje
➤ Asegúrese de que en el vehículo haya disponible un cable de alimenta-
ción y un interruptor para la iluminación del marco interior Heki 2 de Luxe
(12V, 4x5W).
➤ Asegúrese de que el cable de alimentación esté dimensionado y prote-
gido correctamente.
Si no desea ninguna iluminación, antes del montaje deberá retirar los portalámparas, y después del montaje colocar rejillas de ventilación, en lugar de
las tapas de las lámparas.
6 Montaje del marco interior
NOTA
I
➤ En caso de que no desee usar la iluminación: Retire los portalámparas
del nuevo marco interior.
➤ Desmonte el marco interior de la claraboya Heki 2 (fig. 2 – fig. 4)
presente.
➤ Tienda el cable de alimentación centrado en uno de ambos lados
longitudinales.
➤ Deje sobresalir el cable de alimentación aprox. 25 cm entre la abertura
del techo y el marco exterior (fig. 5).
A
20
Tire del antiguo marco interior para su desmontaje y para el
montaje del nuevo marco interior pida ayuda a una segunda
persona.
¡AVISO!
Conecte la iluminación solamente en un lado.

ES
Heki Accessory Garantía legal
NOTA
I
➤ Coloque el marco interior desde el interior sobre el marco exterior y
alinearlo de forma centralizada (fig. 6).
➤ Atornille el marco interior con los 16 tornillos de sujeción (fig. 7).
Atornille el marco interior ligeramente.
➤ Compruebe que las persianas se puedan mover libremente (fig. 8).
➤ En caso de que las persianas no se puedan mover, afloje un poco los
tornillos.
➤ Conecte los cables de alimentación a los enchufes disponibles (fig. 9).
➤ Introduzca el cable cuidadosamente en el marco interior (fig. 0).
➤ Controle el funcionamiento de la iluminación (fig. a).
➤ Enganche las cubiertas de las lámparas en los lados cortos(fig. b).
Debe oírse como encajan.
A
➤ En caso de que no desee usar la iluminación: Coloque las rejillas de
ventilación en las aberturas.
La conexión está dimensionada para una clavija plana con una
anchura de 4,8 mm y un grosor de 0,8 mm.
¡AVISO!
No utilice las rejillas de ventilación para cubrir las lámparas.
➤ Enganche las rejillas de ventilación en los lados longitudinales (fig. c).
Debe oírse como encajan.
7 Garantía legal
Rige el plazo de garantía legal. Si el producto presenta algún defecto,
diríjase a nuestro socio de servicio en su país (ver direcciones en el dorso
de este manual).
Nuestros especialistas estarán encantados de poder ayudarle y de poder
orientarle en los siguientes pasos a dar respecto a la garantía.
21
ES
Gestión de residuos Heki Accessory
8 Gestión de residuos
➤ Deseche el material de embalaje en el contenedor de reciclaje correspon-
diente.
Cuando vaya a desechar definitivamente el producto, infórmese en
el centro de reciclaje más cercano o en un comercio especializado
M
sobre las normas pertinentes de eliminación de materiales.
9 Datos técnicos
Accesorios Heki
N.° de art.: 9104100241
Tensión de conexión de la iluminación: 12 Vg
Consumo de potencia de la iluminación: 4 x 5 W
22

IT
Heki Accessory Spiegazione dei simboli
Prima di effettuare il montaggio e la messa in funzione leggere
accuratamente questo manuale di istruzioni, conservarlo e in caso di
trasmissione del prodotto, consegnarlo all'utente successivo.
Indice
1 Spiegazione dei simboli . . . . . . . . . . . . . . . . . . . . . . . . . . . . . . . . . . 23
2 Indicazioni di sicurezza e di montaggio . . . . . . . . . . . . . . . . . . . . . . 24
3 Dotazione. . . . . . . . . . . . . . . . . . . . . . . . . . . . . . . . . . . . . . . . . . . . . 24
4 Uso conforme alla destinazione. . . . . . . . . . . . . . . . . . . . . . . . . . . . 25
5 Indicazioni prima del montaggio . . . . . . . . . . . . . . . . . . . . . . . . . . . 25
6 Montaggio del telaio interno. . . . . . . . . . . . . . . . . . . . . . . . . . . . . . . 25
7 Garanzia . . . . . . . . . . . . . . . . . . . . . . . . . . . . . . . . . . . . . . . . . . . . . 26
8 Smaltimento . . . . . . . . . . . . . . . . . . . . . . . . . . . . . . . . . . . . . . . . . . . 27
9 Specifiche tecniche . . . . . . . . . . . . . . . . . . . . . . . . . . . . . . . . . . . . . 27
1 Spiegazione dei simboli
AVVISO!
A
I
➤ Modalità di intervento: questo simbolo indica all'utente che è necessario
un intervento. Le modalità di intervento necessarie saranno descritte
passo dopo passo.
✓ Questo simbolo descrive il risultato di un intervento.
Fig. 1 5, pagina 3: questi dati si riferiscono ad un elemento in una figura,
in questo caso alla “posizione 5 nella figura 1 a pagina 3”.
La mancata osservanza di questa nota può causare danni materiali e compromettere il funzionamento del prodotto.
NOTA
Informazioni integranti relative all'impiego del prodotto.
23

IT
Indicazioni di sicurezza e di montaggio Heki Accessory
2 Indicazioni di sicurezza e di
montaggio
Osservare le indicazioni di sicurezza e le direttive previste dal
produttore del veicolo e degli specialisti del settore!
Il produttore non si assume nessuna responsabilità per danni nei seguenti
casi:
danni al prodotto dovuti a influenze meccaniche
modifiche al prodotto senza esplicita autorizzazione del produttore
impiego per altri fini rispetto a quelli descritti nel manuale di istruzioni
NOTA
I
Osservare le seguenti avvertenze:
Se si verificano errori o guasti, rivolgersi immediatamente a un’officina
specializzata.
Pericolo di rottura! È vietato camminare sulla cupola di vetro.
Tenere sempre l'oblò libero da tracce di neve e ghiaccio.
Fare eseguire i collegamenti elettrici solo da personale competente.
Sostituire le lampade difettose con lampade della stessa tipologia
costruttiva e con le stesse specifiche tecniche (12 V, 5 W).
Nel caso in cui non si disponga di sufficienti conoscenze tecniche
per installare i componenti nei veicoli è necessario farsi montare
il telaio interno nel veicolo da un tecnico.
3Dotazione
N. in
fig. 1
1 10 Griglie di aerazione
2 4 Coperture per lampade
3 16 Vite di fissaggio ∅ 2,5 x 12 mm
4 1 Telaio interno
24
Quantità Denominazione
 Loading...