

Dometic RH440LDC, RH440LGC, CL440 LDC, CL460 LDC, CL460 LGC Instructions For Use Manual
...Page 1
English
GB
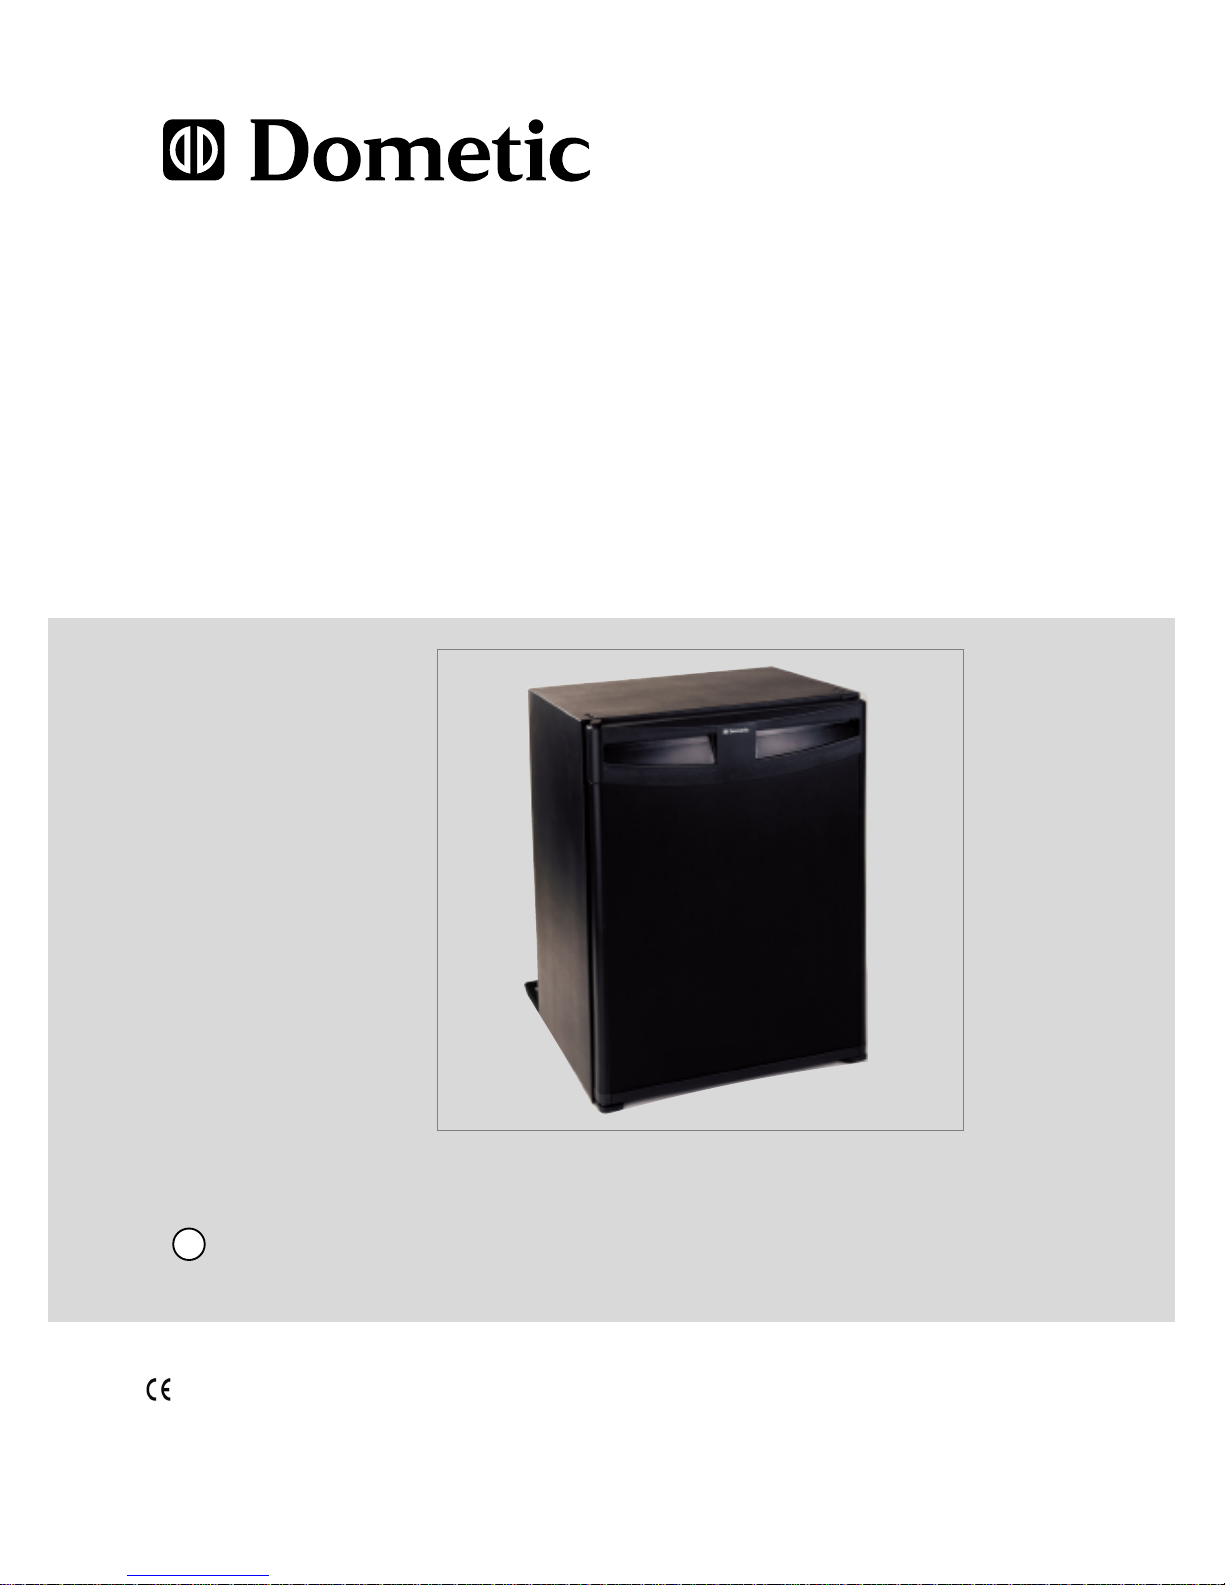
INSTRUCTION FOR USE / INSTALLATION INSTRUCTION
COMPRESSOR - REFRIGERATOR
RH440LDC
RH440LGC
CL440 LDC
CL460 LDC
CL440 LGC
CL460 LGC
Page 2
2
1.0 INTRODUCTION 3
2.0 FOR YOUR SAFETY 3
CUSTOMER SERVICE
Electricity Supply
TABLE OF CONTENTS
Model No.
Product No.
Serial No.
These operating instructions should be kept in a safe place.
If this device is passed on, please include these operating instructions with it.
Warning
Attention
Information
Environmental
Advice
2.1 General safety
2.2 Operating the device safely
5.5
5.6
5.7
5.8
5.9
3.0 WARRANTY AND 4
4.0 INSTALLATION 4
4.1 The Purpose of this Manual 4
4.2 Tools/Materials Required 4
4.3 Unpacking 4
4.4 Cleaning 4
4.5 Installation 5
4.6 Securing 6
9
10
10
9
4.7 Connecting the Device to the 6
4.9 Changing the Doorhang 7
4.8 Changing the Sliding Hinge 6
5.1 Initial Operation 8
5.2 Temperature Control 8
Interior Light
Environmental Advice
Disposal
Energy Saving Tips
5.3 8
5.4
Lock of the door
Trouble shooting
10
Technical Data
11
2.3 Operating the device safely with 220-240V
5.0 INSTRUCTION FOR USE 8
Page 3
INTRODUCTION
You have made an excellent choice by choosing the Dometic miniBar.
We are convinced that you will be satisfied with your new appliance in every way.
This miniBar fulfils high quality standards and guarantees
an efficient use of resources and energy during its entire working life, i.e.
during manufacturing, use and disposal.
Please study the installation and operating instructions carefully before
attempting to operate the miniBar.
FOR YOUR SAFETY
General safety
Do not operate the device if it is visibly damaged.
Do not damage the cooling system
Do not place any electrical devices inside the miniBar.
Ensure that the ventilation slots are not covered.
materials containing solvents.
Pull out the connection cable for maintenance
Operating the device safely
Only use the device in well ventilated areas.
The device may give off a smell for a short time when it is first operated.
1.0
2.0
2.1
2.2
The cooling device is not suitable for transporting caustic materials or
This device may only be repaired by qualified personnel.
Inadequate repairs can lead to considerable hazards.
Electronic devices are not toys.
Always keep and use the device well out of the reach of children.
Danger of fatal injury.
applies when operating the device with an AC mains power supply.
Never immerse the device in water.Never expose the device to rain or moisture.
Do not touch exposed cables with your bare hands. This especially
instruction by a responsible person.
Persons (including children) whose physical, sensory or mental capabilities
or lack of experience and knowledge prevents them from using the
appliance safely should not use this appliance without initial supervision or
Do not fill the inner container with ice or fluid.
direct sunlight, gas ovens etc.).
Do not place the device near naked flames or other heat sources (heaters,
Dometic cannot be held liable for damage resulting from improper usage
or incorrect operation.
3
2.3
Never pull the plug out of the socket by the cable.
Operating the device safely with 220-240V
Only use the connection cable supplied to connect the device to the AC mains.
If the cable is damaged, it must be replaced by a cable with the same
technical specifications to prevent possible electrical hazards.
Do not damage the refrigerant circuit.
Do not use electrical appliances inside the food storage compartments of
the appliance, unless they are of the type recommended by the manufacturer.
Instruction shall include the method of replacing illuminating lamps.
Page 4
3.0
WARRANTY AND CUSTOMER SERVICE
Warranty arrangements are in accordance with
EC Directive 44/1999/CE and
the
normal conditions applicable for the country concerned.
For warranty or other servicing, please contact our Dometic Service department.
Any damage due to improper use is not covered by the warranty. The warranty
does not cover any modifications to the appliance or the use of non-original
Dometic parts; the warranty does not apply if the installation and operating
When contacting customer service, please always state model, product,
Model and serial number! You can find this information on the model
label inside the device.
4
e.g.
plug are dry.
that of the energy supply.
Check that the voltage specification on the type plate corresponds to
Before starting the device, ensure that the power supply line and the
INSTALLATION
The Purpose of this Manual
The manual shows you how to:
install the miniBar correctly.
operate the miniBar correctly.
guarantee the miniBar´s correct maintenance and functioning.
deal with faults by yourself.
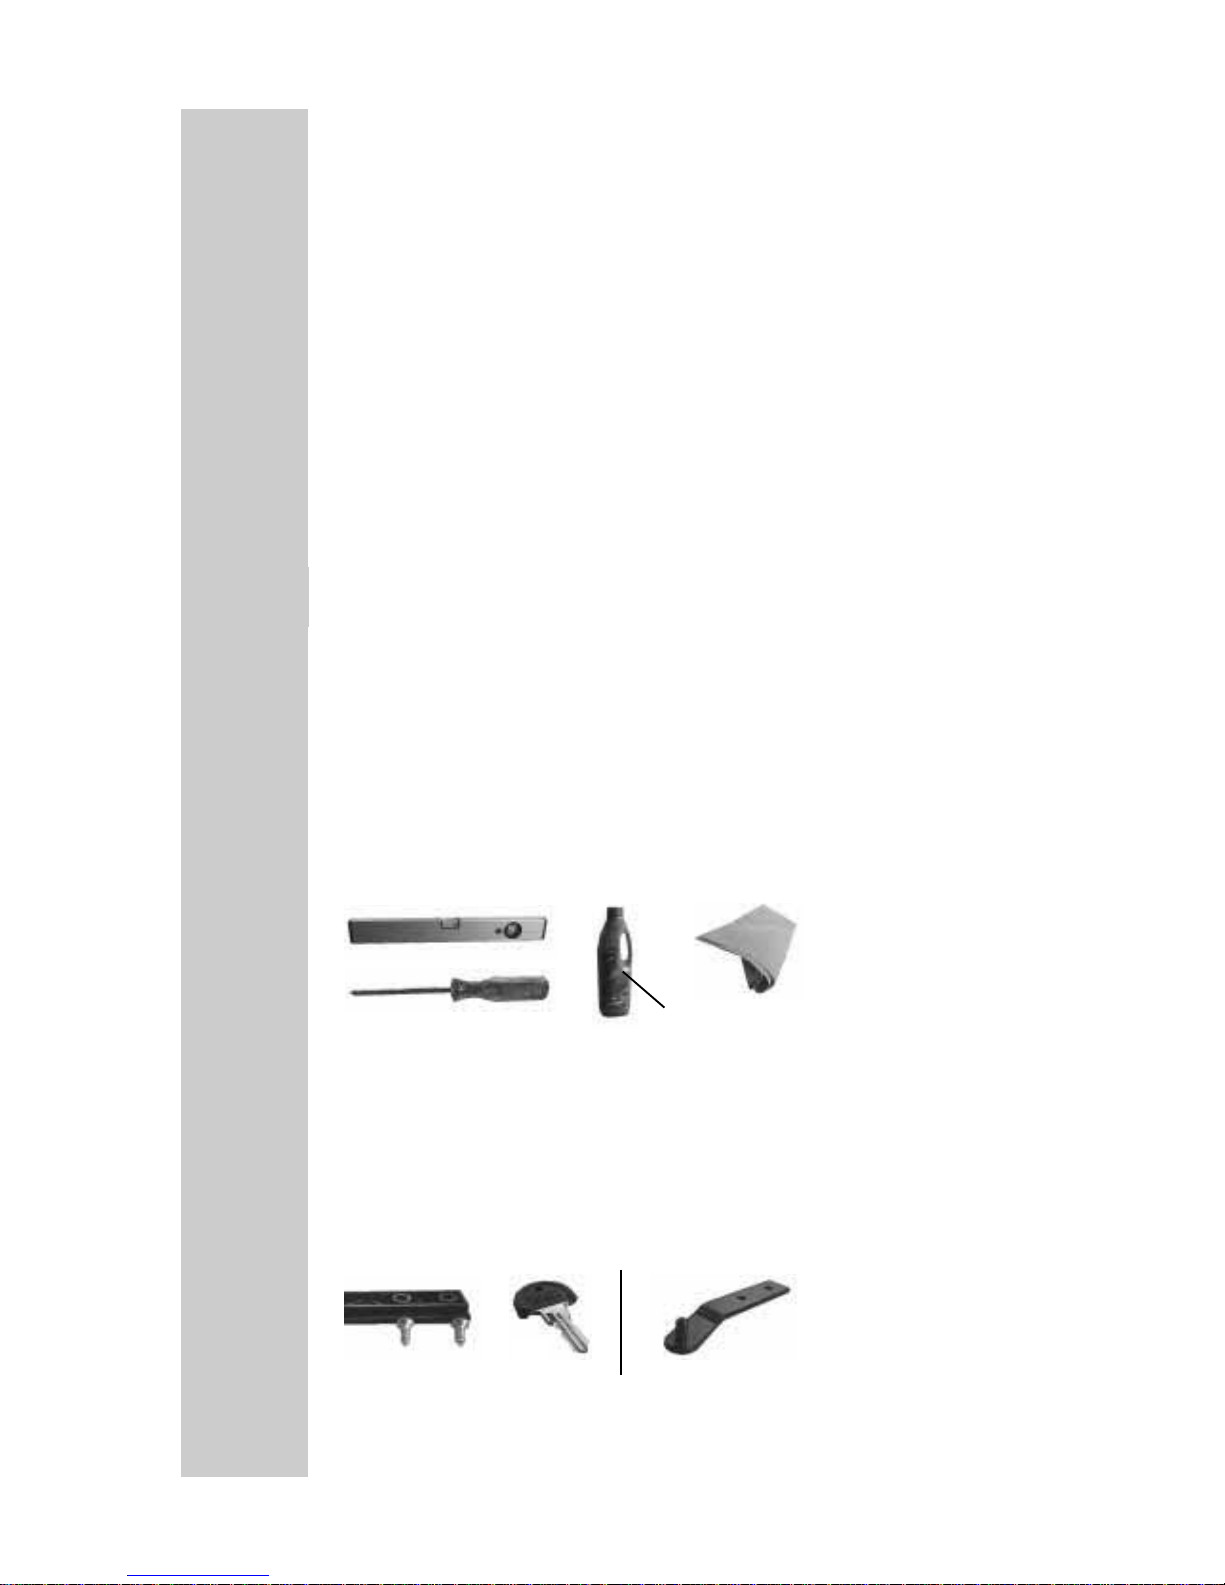
Tools / Materials Required
You will need the following tools for initial operation:
Unpacking
Check during unpacking that the device is defect-free.
Report transport damage to the transport company within 48 hours.
Check that the voltage noted on the model label corresponds to the
mains voltage.
Depending on the model, the following parts can be found in the
miniBar :
4.1
4.2
4.0
4.3
mild detergent
2x
Cleaning
Before operating the miniBar, we recommend you clean it both inside and
outside.
4.4
optional
instructions are not adhered to and no liability shall be entertained.
Model:RH440LDC Series-No.:MB YWWXXXXX
Page 5

At annual intervals, remove dust from fridge aggregate using a brush or
soft cloth.
ATTENTION
To prevent material damage:
Do not use soap or detergents which are harsh, coarse or
which contain soda.
Keep the door seal free from oil and grease.
5
Installation4.5
Use a soft cloth, lukewarm water and a mild detergent.
Following this, wash out the miniBar using clean water and dry
thoroughly.
Please follow the installation details below
carefully. Guarantee is valid for products
installed as described only.
IMPORTANT:
1. The refrigerator must be level both directions
2. There should be 20mm clearance to the wall
3. Ventilation must be provided as shown in
alternatives A,B,C or D
4. The ventilation duct must at least measure
105mm x the wi
dth of the refrigerator
5. Only the entire cooling unit must project into
the duct as shown
6 Air p
assing through the duct must not be
preheated by any source of heat
7. Ventilation grills, if used, must have openings
AB C
D
of at least 200cm ² each
8. For glass door version,when ambient humidity
is above 65 percent in 25 degree ambient
temperature,the fog will emerge.
Note:no front cabinet door for glass door version.
Page 6

6
Securing
The miniBar must be screwed onto the cupboard using the lower hinges.
4.6
1. Tighten screw.
2. Put on cap.
Connecting the Device to the Electricity Supply
The device must be connected to a properly earthed socket in line with
the relevant valid country regulations.
Check prior to initial operation that the voltage
noted on the model label corresponds to the
mains voltage.
If this is not the case, do not connect the
device and contact your dealer!
4.7
Where a socket outlet is used for the mains connection lead, the
outlet must be freely accessible.
Changing the Sliding Hinge
4.8
(Note:Not applicable for glass cloor.)
37L
AC 240V - 50Hz
240Vac.0.7Amps
R134a/0.85Oz(24grams)
For illustration purposes only,please make
the model you purchased as the standard.
The length of the hinge stretching out of
the refrigerator door must be 80mm.
Damaged supply cords to be replaced by the manufacturer,sevice
agent or similarly qualified person to avoid hazard.
Page 7

1. When closed, the furniture door (A)
must not lie against the rest of the
surrounding furniture area
(distance 1-2mm).
2. There must be a distance of 6-8mm
between the furniture door and the
miniBar.
Changing the Doorhang
1.
2.
3.
4.
5. 6.
7.
R
L
4.9
1.
2.
7
Distance to furniture door (A)
Page 8

8
8. 9.
10.
11.
12.
13.
R
L
1.
2.
5.1
5.3
max.
5.0
5.2
min.
Initial Operation
The device must be plugged into a properly
earthed socket.
The miniBar achieves its operating
temperature after several hours.
INSTRUCTION FOR USE
Temperature Control
The miniBar is fitted with an electronic
temperature control. The thermostat control
button is situated in the inside rear area.
Lock of the door (optional)
open
locked
max:The max is Representation the lowest
tempera ture.
min:The min is Representation the highest
temperature.
Page 9

5.4
9
Interior Light
When the door is opened, the interior light is switched on
via a sensor.
5.5
Changing the LED-board:
To obtain spare electronic boards please contact
your Dometic Service Centre.
1. Pull out the
mains plug.
2. Remove the reflector
disk. with screwdriver.
3. Remove the screws
4. Pull out the case, then
press the buckles and
pull out the bracket.
5. Insert new bulb.
6. Fix the screws
with screwdriver.
7.
into the socket.
8. 9. Clip reflector disk.Accomplished
condition.
Slide the bracket
Environmental Advice
miniBars manufactured by Dometic are free from CFCs / HCFCs and fluorinated
hydrocarbons.Cyclopentane, which does not damage the ozone layer, is used
as propellant for the insulation made from PU-foam.
Page 10

10
Disposal
In order to ensure the re-use of recyclable packaging materials, these must
be disposed of using local collection systems. The device itself must be
handed over to a disposal company or local council which will guarantee
the correct use of recyclable materials and the proper disposal of the rest.
Energy Saving Tips
If possible, always store pre-cooled goods.
Do not expose the miniBar to direct sunlight and do not place it close
to a source of heat.
5.6
5.7
Appliances bearing this symbol must
be deposited at the designated local
reception point for the disposal of electrical and electronic equipment.
It is not permitted that this product be
disposed of by way of the normal
household refuse collection system.
Dometic refrigerators bear this symbol
on the data plate to be found in the
interior of the unit.
An unobstructed air circulation must be ensured.
When removing goods, only open the miniBar briefly.
Trouble shooting
Failure: No voltage
Possible Cause Self Help Authorised Service
b.) Main switch faulty (if stalled)
a.) Establish a connection
b.) Replace the main switch
c.) Replace the supply line fuse
Failure: Voltage is present but the compressor doesn't run (connected to AC supply)
Possible Cause Self Help Authorised Service
a.) Ambient temperature too high
air supply
c.) Condenser is dirty
c.) Clear the condenser
another location
compressor
Failure: Poor cooling, and compressor running for a long time /continuously
Possible Cause Self Help Authorised Service
a.) Ambient temperature too high
air supply
c.) Condenser is dirty
another location
c.) Clear the condenser
b.) Insufficient ventilation and/or b.) Move the refrigerator to
b.) Insufficient ventilation and/or
d.) Defective compressor
b.) Move the refrigerator to
d.) Replace the
a.) Interruption in the supply
cable
c.) Additional supply line fuse
has blown (if installed)
5.8
Failure: Too cold or a great temperature deviation
Possible Cause Self Help Authorised Service
a.) Default thermostat
a.) Replace.
compressor
d.) Defective compressor
d.) Replace the
Page 11

11
Technical Data
* Power consumption measured at an average ambient temperature of 25°C as an average
annual value and at a cooling compartment temperature of 7°C in line with DIN/EN153.
We reserve the right to make technical modifications to our products without notice!
5.9
The picture is for illustration purposes only.
Model
RH440LGC RH440LDC CL440LGC CL440LDC CL460LGC CL460LDC
Panel Class
Iron coated with
plastic
Class
Iron coated with
plastic
Class
Iron coated with
plastic
Gross volune (L)
Usable capacity (L)
37 36 35.5 34.5 50 49
Category 2 (Cellar)
1 (Fresh food
storage)
2 (Cellar)
1 (Fresh food
storage)
2 (Cellar)
1 (Fresh food
storage)
Temperature range
Energy consumption
(kWh/24h)
0.2657 0.2766 0.2603 0.2710 0.2630 0.2771
Energy efficiency class
Energy consumption
(kWh/annual)
97 101 95 99 96 101
Ambient temperature
Climate class
Refrigerant
Noise emission (dB(A))
Dimensions (H×W×D)
554×401×519 mm 554×401×509 mm 554×401× 450 mm 554×401×440 mm 562×485×485 mm 562× 485×475 mm
Weight (KG)
19.0 17.3 18.9 17.2 21.5 19.5
Test/Certificates
+16°C ~ + 32 °C
A+
4~12 °C
40
42
N
R134a / 30g R134a / 27g R134a / 35g
38 60
Page 12

Subject to change without notice.
Suites 2207-2211,22/F,Tower1,
Fax: (+852)2466 5553
2461 1386
www.dometic.com
54-193-MAM01B
 Loading...