

Page 1
Compressor Cooler
Operating manual . . . . . . . . . . . . . . . 6
Kompressor-Kühlbox
Bedienungsanleitung. . . . . . . . . . . . 28
Glacière à compression
Notice d’utilisation . . . . . . . . . . . . . . 51
Nevera por compresor
Instrucciones de uso . . . . . . . . . . . . 75
Frigorifero a compressore
Istruzioni per l’uso . . . . . . . . . . . . . 100
Compressorkoelbox
Gebruiksaanwijzing . . . . . . . . . . . . 124
Kompressor-køleboks
Betjeningsvejledning . . . . . . . . . . . 147
Kylbox med kompressor
Bruksanvisning . . . . . . . . . . . . . . . 169
Kjøleboks med kompressor
Bruksanvisning . . . . . . . . . . . . . . . 191
Kompressori-kylmälaatikko
Käyttöohje . . . . . . . . . . . . . . . . . . . 213
Geleira com compressor
Manual de instruções. . . . . . . . . . . 235
Ʉɨɦɩɪɟɫɫɨɪɧɵɣ
ɯɨɥɨɞɢɥɶɧɢɤ
ɂɧɫɬɪɭɤɰɢɹ ɩɨ ɷɤɫɩɥɭɚɬɚɰɢɢ. . . . 260
PrzenoĞna lodówka
kompresorowa
Instrukcja obsáugi. . . . . . . . . . . . . . 285
EN
DE
FR
ES
IT
NL
DA
SV
NO
FI
PT
RU
PL
Kompresorový chladicí box
Návod k obsluze . . . . . . . . . . . . . . 309
Chladiaci box s kompresorom
Návod na obsluhu. . . . . . . . . . . . . 331
Kompresszor hĦtĘláda
Használati utasítás . . . . . . . . . . . . 353
CS
SK
HU
CoolFreeze
CFX95DZ2
Page 2

Page 3
CFX95DZ2
3
1
2
3
1
2
1
SET
+
–
° °
1 2 3 4 5 6 7 8 9 10
3
Page 4
CFX95DZ2
4
EMERGENCY
OVERRIDE
NORMAL
USE
100-240V~AC
12/24V DC
2 3 4 51
4
A
B
5
Page 5
CFX95DZ2
5
A
B
C
D
6
1 2 3
7
A
B
C
8
Page 6

EN
CFX95DZ2
6
Please read this operating manual carefully before starting the device.
Keep it in a safe place for future reference. If the device is passed on to
another person, this operating manual must be handed over to the user
along with it.
The manufacturer cannot be held liable for damage resulting from
improper usage or incorrect operation.
Contents
1 Explanation of symbols. . . . . . . . . . . . . . . . . . . . . . . . . . . . . . . . . . 7
2 Safety instructions. . . . . . . . . . . . . . . . . . . . . . . . . . . . . . . . . . . . . . 8
2.1 General safety . . . . . . . . . . . . . . . . . . . . . . . . . . . . . . . . . . . . . 8
2.2 Operating the device safely . . . . . . . . . . . . . . . . . . . . . . . . . . . 9
3 Scope of delivery . . . . . . . . . . . . . . . . . . . . . . . . . . . . . . . . . . . . . . 10
4 Accessories . . . . . . . . . . . . . . . . . . . . . . . . . . . . . . . . . . . . . . . . . . 10
5 Intended use. . . . . . . . . . . . . . . . . . . . . . . . . . . . . . . . . . . . . . . . . . 11
6 Function description . . . . . . . . . . . . . . . . . . . . . . . . . . . . . . . . . . . 12
6.1 Scope of functions . . . . . . . . . . . . . . . . . . . . . . . . . . . . . . . . . 12
6.2 Operating and display elements . . . . . . . . . . . . . . . . . . . . . . 13
7Operation . . . . . . . . . . . . . . . . . . . . . . . . . . . . . . . . . . . . . . . . . . . . 14
7.1 Before initial use . . . . . . . . . . . . . . . . . . . . . . . . . . . . . . . . . . 14
7.2 Energy saving tips . . . . . . . . . . . . . . . . . . . . . . . . . . . . . . . . . 15
7.3 Connecting the cooler . . . . . . . . . . . . . . . . . . . . . . . . . . . . . . 15
7.4 Using the battery monitor. . . . . . . . . . . . . . . . . . . . . . . . . . . . 16
7.5 Using the cooler. . . . . . . . . . . . . . . . . . . . . . . . . . . . . . . . . . . 18
7.6 Setting the temperature . . . . . . . . . . . . . . . . . . . . . . . . . . . . . 19
7.7 Switching a compartment off or on . . . . . . . . . . . . . . . . . . . . 20
7.8 Enabling WiFi signal for optional app . . . . . . . . . . . . . . . . . . 21
7.9 Using the emergency switch . . . . . . . . . . . . . . . . . . . . . . . . . 22
7.10 USB port for power supply. . . . . . . . . . . . . . . . . . . . . . . . . . . 22
7.11 Switching off the cooler . . . . . . . . . . . . . . . . . . . . . . . . . . . . . 22
7.12 Defrosting the cooler . . . . . . . . . . . . . . . . . . . . . . . . . . . . . . . 23
7.13 Replacing the device fuse . . . . . . . . . . . . . . . . . . . . . . . . . . . 23
7.14 Replacing the plug fuse (DC). . . . . . . . . . . . . . . . . . . . . . . . . 24
7.15 Replacing the light PCB. . . . . . . . . . . . . . . . . . . . . . . . . . . . . 24
8 Cleaning and maintenance . . . . . . . . . . . . . . . . . . . . . . . . . . . . . . 24
Page 7

EN
CFX95DZ2 Explanation of symbols
7
9 Troubleshooting. . . . . . . . . . . . . . . . . . . . . . . . . . . . . . . . . . . . . . . 25
10 Guarantee . . . . . . . . . . . . . . . . . . . . . . . . . . . . . . . . . . . . . . . . . . . . 26
11 Disposal . . . . . . . . . . . . . . . . . . . . . . . . . . . . . . . . . . . . . . . . . . . . . 26
12 Technical data . . . . . . . . . . . . . . . . . . . . . . . . . . . . . . . . . . . . . . . . 27
1 Explanation of symbols
D
!
!
A
I
➤ Action: This symbol indicates that action is required on your part. The
required action is described step-by-step.
✓ This symbol describes the result of an action.
Fig. 1 5, page 3: This refers to an element in an illustration. In this case,
item 5 in figure 1 on page 3.
DANGER!
Safety instruction: Failure to observe this instruction will cause
fatal or serious injury.
WARNING!
Safety instruction: Failure to observe this instruction can cause
fatal or serious injury.
CAUTION!
Safety instruction: Failure to observe this instruction can lead to
injury.
NOTICE!
Failure to observe this instruction can cause material damage and
impair the function of the product.
NOTE
Supplementary information for operating the product.
Page 8

EN
Safety instructions CFX95DZ2
8
2 Safety instructions
2.1 General safety
!
WARNING!
z Do not operate the device if it is visibly damaged.
z If this device's power cable is damaged, it must be replaced by
the manufacturer, customer service or a similarly qualified
person in order to prevent safety hazards.
z This device may only be repaired by qualified personnel.
Improper repairs can lead to considerable hazards.
z This device can be used by children aged 8 years or over, as
well as by persons with diminished physical, sensory or mental
capacities or a lack of experience and/or knowledge, providing
they are supervised or have been taught how to use the device
safely and are aware of the resulting risks.
z Cleaning and user maintenance must not be carried out by
children without supervision.
z Children must not play with the device.
z Children must be supervised to ensure that they do not play with
the device.
z Always keep and use the device out of the reach of children
under the age of 8 years.
z Do not store any explosive substances such as spray cans with
a flammable propellant in the device.
!
CAUTION!
z Disconnect the device from the power supply
– before each cleaning and maintenance
– after every use
z Food may only be stored in its original packaging or in suitable
containers.
A
NOTICE!
z Check that the voltage specification on the type plate
corresponds to that of the energy supply.
Page 9

EN
CFX95DZ2 Safety instructions
9
z Only connect the device as follows:
– With the DC cable to a DC plug socket in the vehicle (e. g.
cigarette lighter)
– Or with the 230 V connection cable to the 230 V AC mains
supply
z Never pull the plug out of the socket by the cable.
z If the cooler is connected to the DC socket: Disconnect the
cooler and other power consuming devices from the battery
before connecting the quick charging device.
z If the cooler is connected to the DC socket: Disconnect the
cooler or switch it off when you turn off the engine. Otherwise
you may discharge the battery.
z The cooling device is not suitable for transporting caustic
materials or materials containing solvents.
z The cooling device contains inflammable cyclopentane in the
insulation. The gases in the insulation material require special
disposal procedures. Deliver the device at the end of its lifecycle to an appropriate recycling.
2.2 Operating the device safely
!
CAUTION!
z Before starting the device, ensure that the power supply line
and the plug are dry.
A
NOTICE!
z Do not use electrical devices inside the cooler unless they are
recommended by the manufacturer for the purpose.
z Do not place the device near naked flames or other heat
sources (heaters, direct sunlight, gas ovens etc.).
z Danger of overheating!
Ensure at all times that there is sufficient ventilation so that the
heat that arises during operation does not build up. Make sure
that the device is sufficiently far away from walls and other
objects so that the air can circulate.
z Ensure that the ventilation openings are not covered.
z Do not fill the inner container with ice or fluid.
z Never immerse the device in water.
z Protect the device and the cable against heat and moisture.
Page 10
EN
Scope of delivery CFX95DZ2
10
3 Scope of delivery
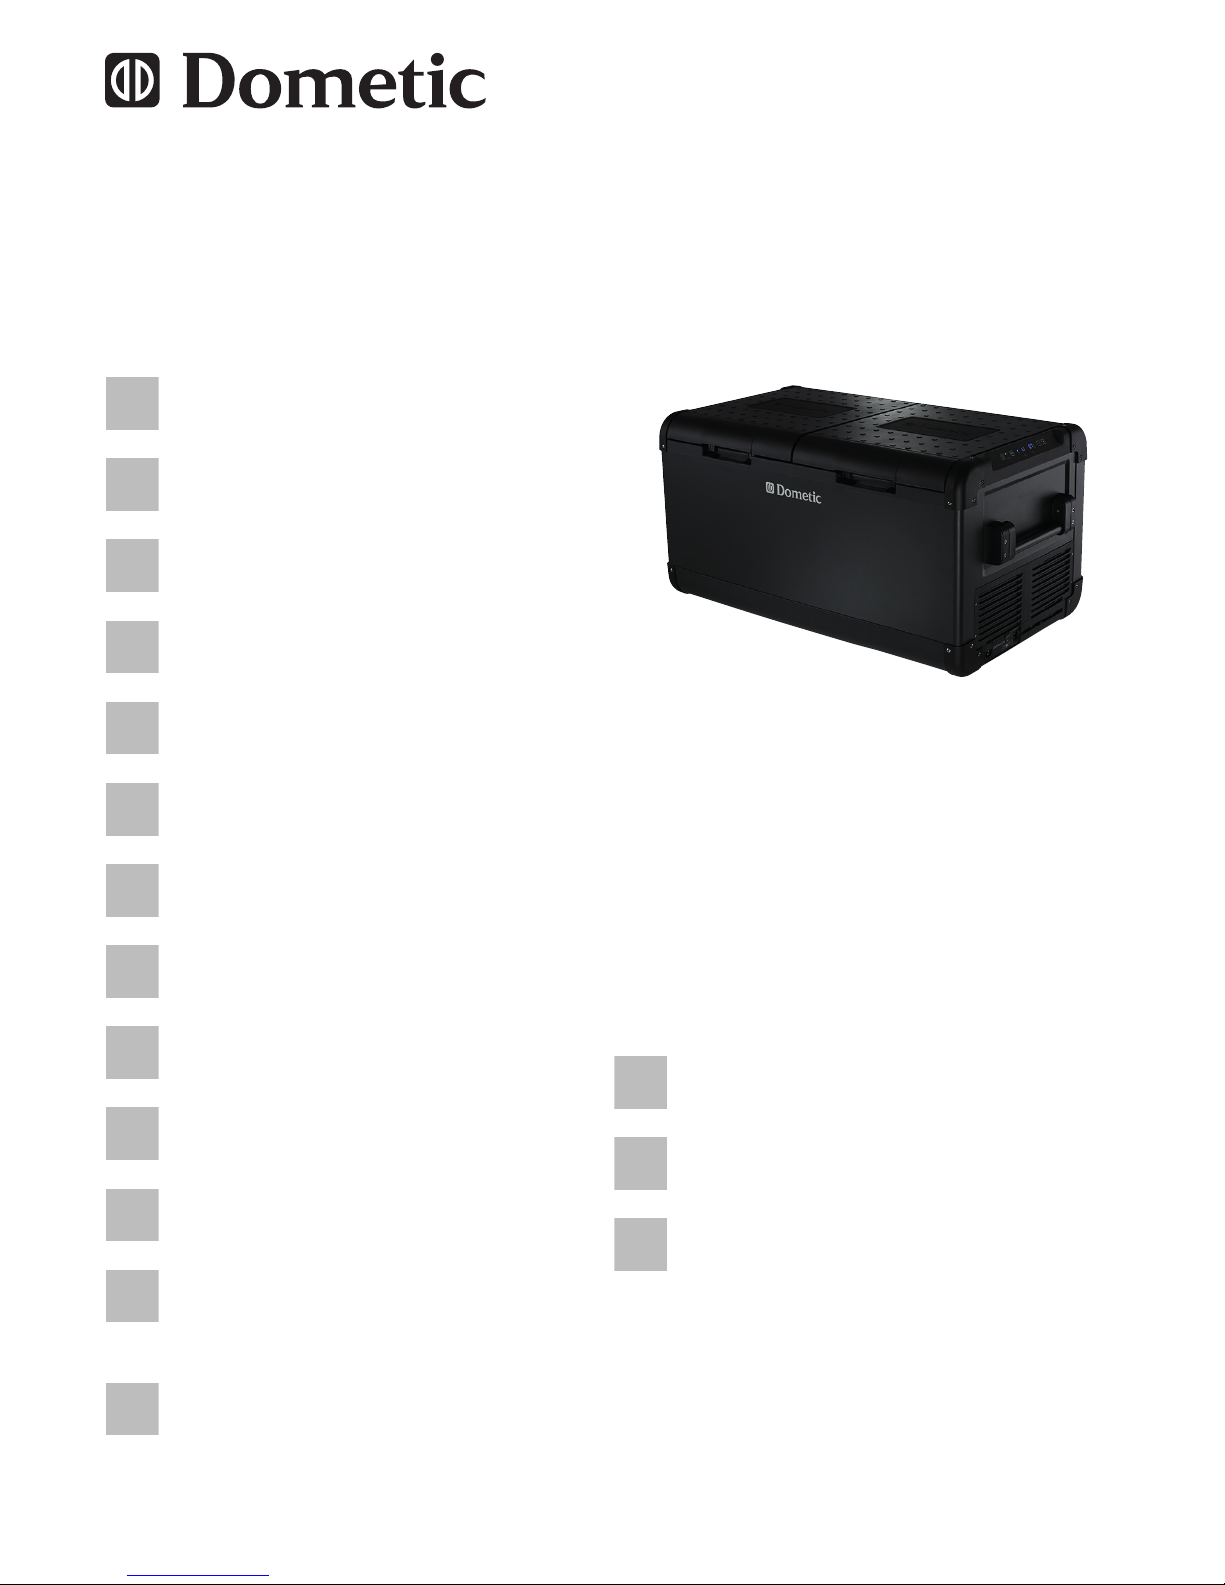
The scope of delivery is shown in fig. 1, page 3.
4 Accessories
Available as accessory (not included in scope of delivery):
Visit the Dometic website (see back page) for information about a WiFi app
with control-, display- and alarm functions. Note that the app may not be
available in your country.
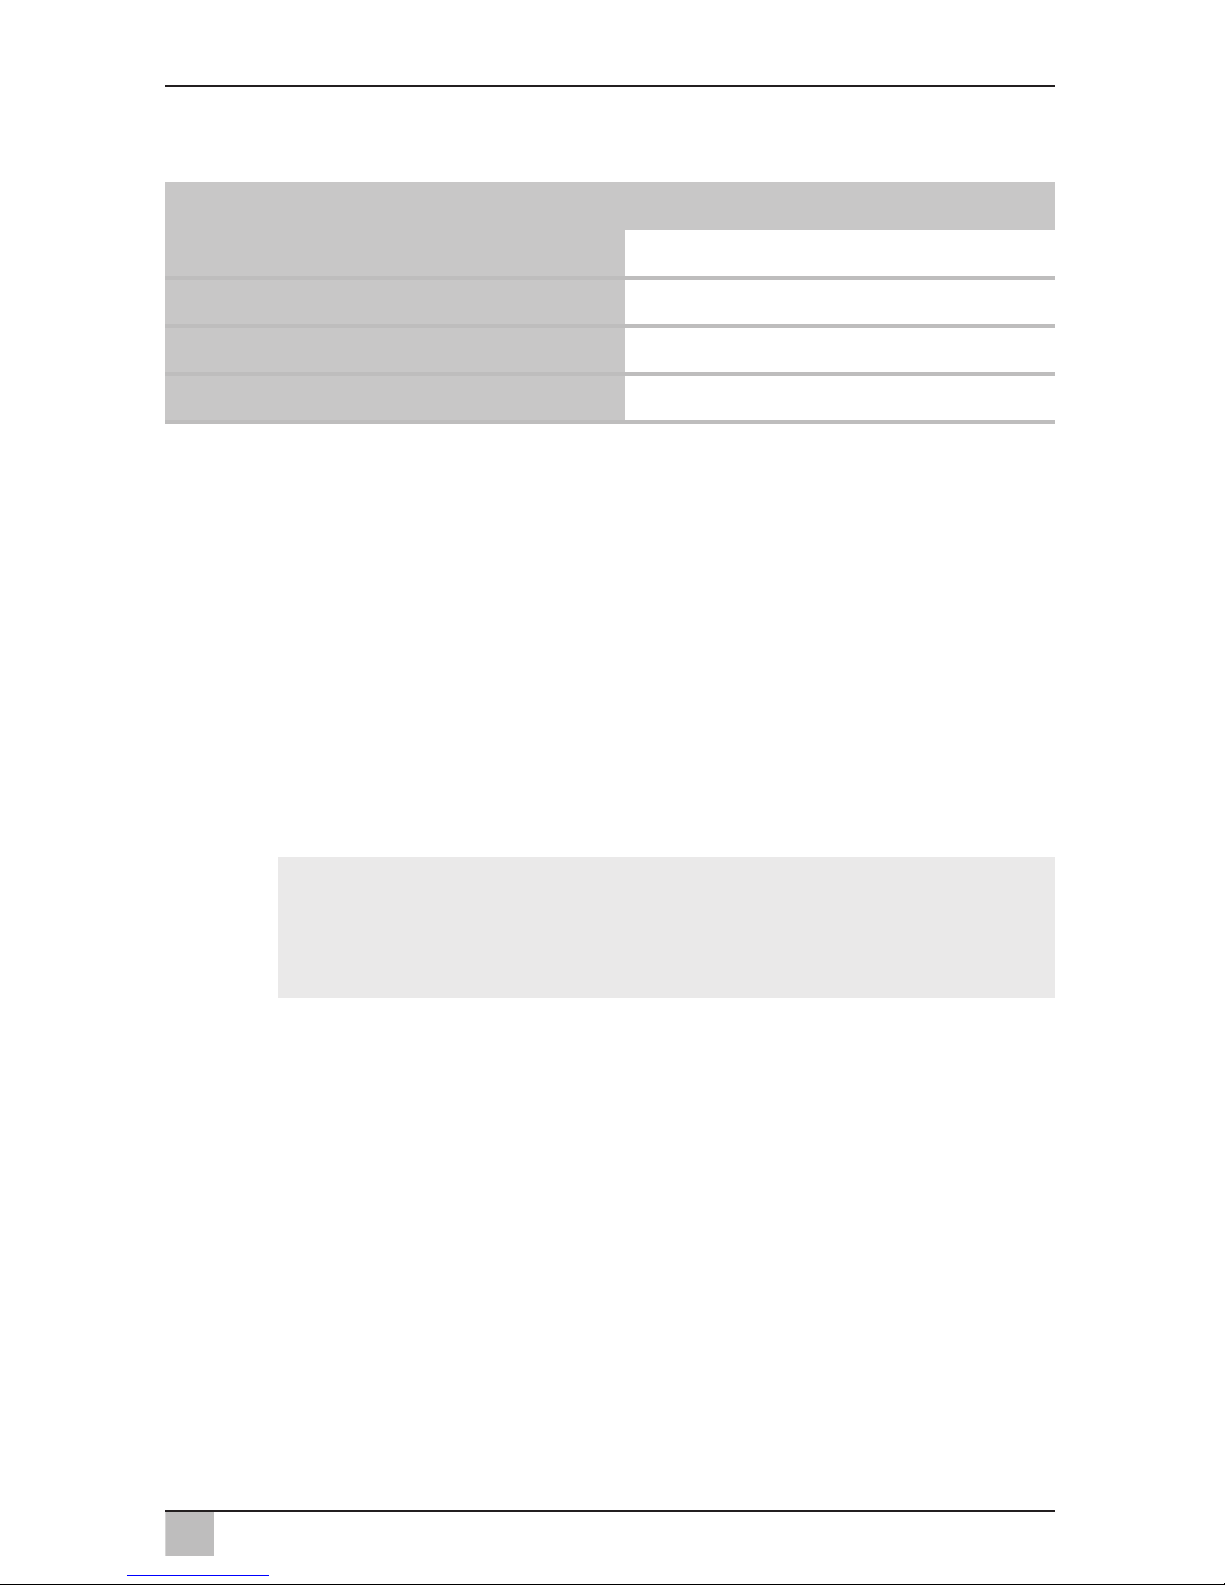
Item Quantity Description
1 1 Cooler
2 1 Connection cable for DC connection
3 1 Connection cable for AC connection
– 1 Operating manual
Designation Item no.
Universal fixing kit (belt system) CFX-UFK 9105304041
Page 11
EN
CFX95DZ2 Intended use
11
5 Intended use
The cooling device is suitable for cooling and freezing foods. The
cooling device is also suitable for use on boats.
The cooling device is designed to be operated from a DC on-board
supply socket of a vehicle (e. g. cigarette lighter), boat or caravan
as well as from an AC mains.
The cooling device is intended to be used in household and similar
applications such as
z staff kitchen areas in shops, offices and other working environments
z farm houses
z clients in hotels, motels and other residential type environments
z bed and breakfast type environments
z catering and similar non-retail applications
!
CAUTION! Health hazard!
Please check if the cooling capacity of the device is suitable for
storing the food or medicine you wish to cool.
Page 12
EN
Function description CFX95DZ2
12
6 Function description
The cooler can chill products, keep them cool as well as freeze them. A low
maintenance refrigerant circuit with compressor provides the cooling. The
generous insulation and powerful compressor ensure efficient and fast cooling.
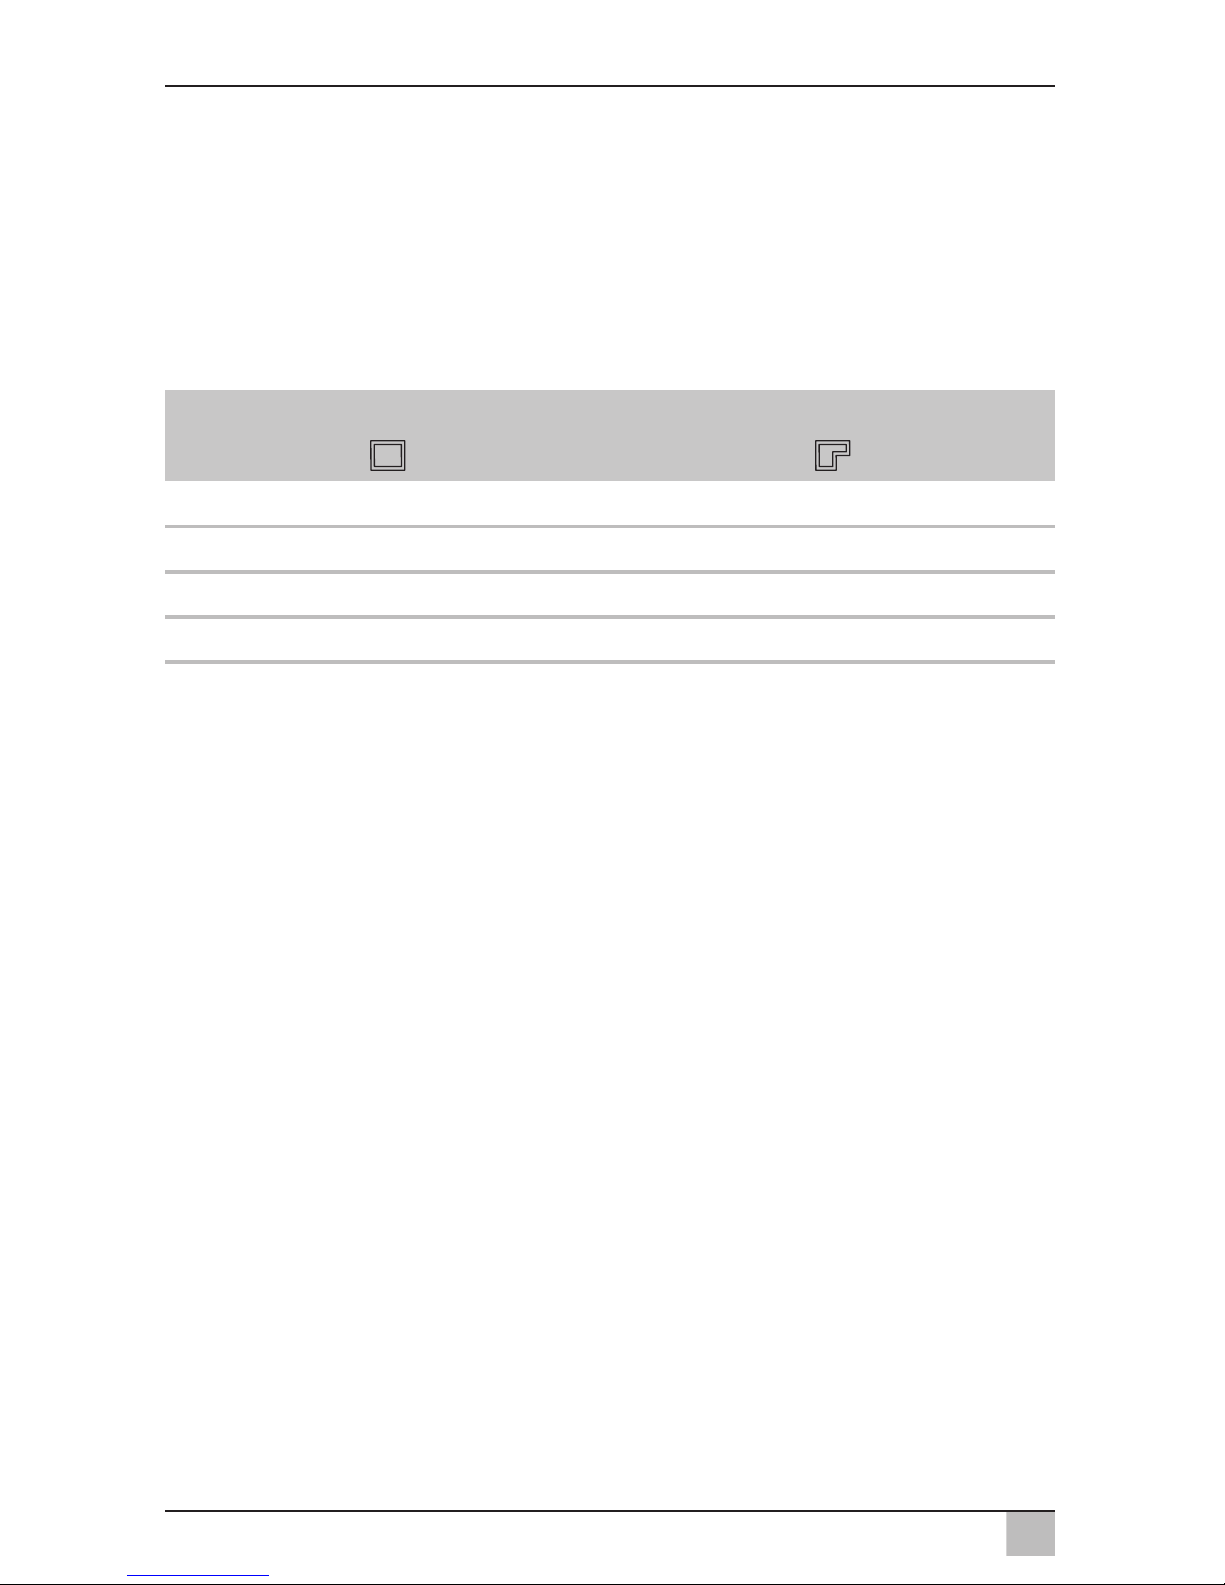
The cooler has two separate compartments which can be adjusted independently. The cooler can be used in all combinations:
(Refer to chapter “Setting the temperature” on page 19 for further details)
The cooler is portable.
The cooler can withstand a constant heel (inclination) of 30°, for example
when used on boats.
6.1 Scope of functions
z Power supply with priority circuit for connecting to the AC mains
z Three-level battery monitor to protect the vehicle battery
z Display with temperature gauge in °C and °F
switches off automatically at low battery voltage
z Independent settings, controls and displays for each compartment
z Temperature setting: With two buttons in steps of 1 °C (2 °F)
z Integrated WiFi transmitter hence controllable using an app
z Lid open alarm
z USB port for power supply
z Emergency switch
z Foldable carrying handles
z Three removable wire baskets
Large compartment Small compartment
Refrigerator Freezer
Freezer Refrigerator
Refrigerator Refrigerator
Freezer Freezer
Page 13

EN
CFX95DZ2 Function description
13
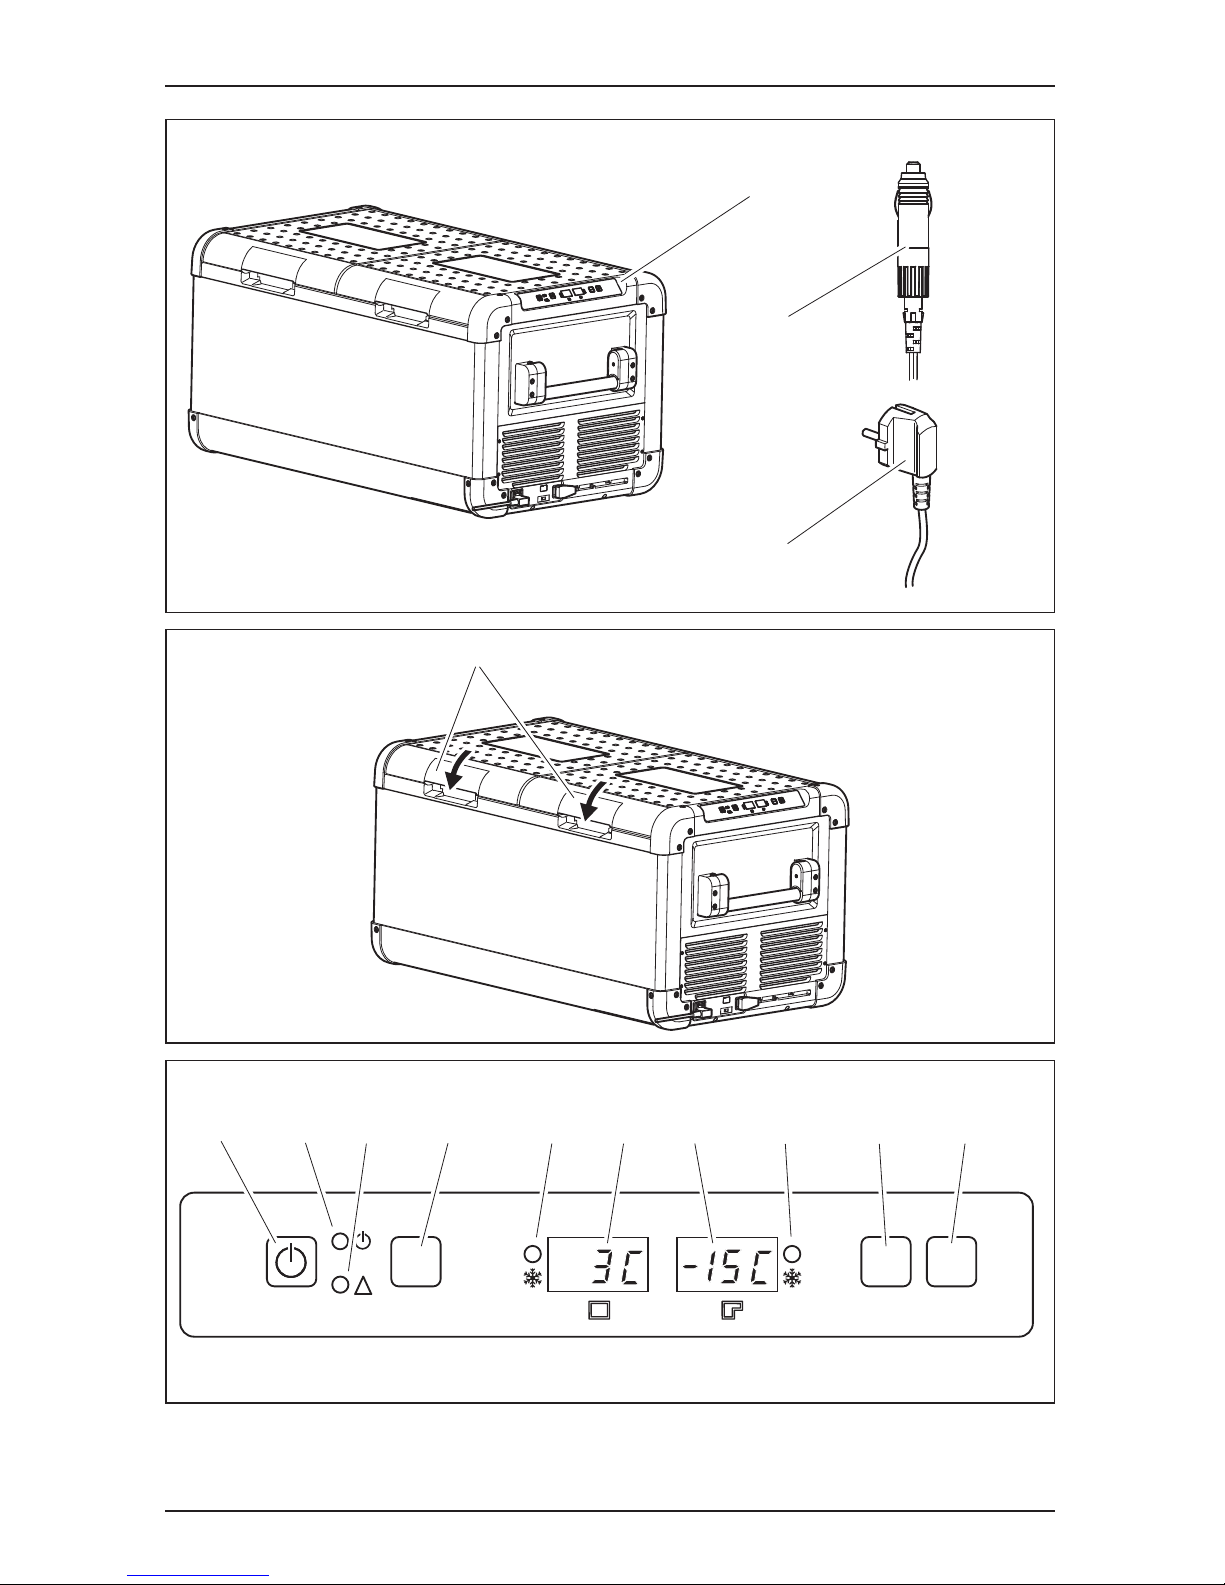
6.2 Operating and display elements
Latch for lid: fig. 2 1, page 3
Operating panel (fig. 3, page 3)
Item Description Explanation
1ON
OFF
Switches the cooler on or off when the button is pressed for
between one and two seconds
2
POWER
“P”
Status indication
LED lights up green: Compressor is on
LED lights up orange: Compressor is off
LED flashes orange: Display switched off automatically
due to low battery voltage
3 ERROR LED flashes red: Device is switched on but not
ready for operation
4 SET Selects the input mode
– Temperature setting (large/small compartment)
– Celsius or Fahrenheit display
– Set battery monitor
– Turn WiFi on or off
5 Cooling large Status indication large compartment
LED lights up blue: compartment is cooling
LED off: compartment is not cooling
6 Display large – Shows information for large compartment
– Shows “OFF”, when the compartment is switched off
7 Display small – Shows information for small compartment
– Shows “OFF”, when the compartment is switched off
8 Cooling small Status indication small compartment
LED lights up blue: compartment is cooling
LED off: compartment is not cooling
9 DOWN – Press once to decrease the value
10 UP + Press once to increase the value
Page 14

EN
Operation CFX95DZ2
14
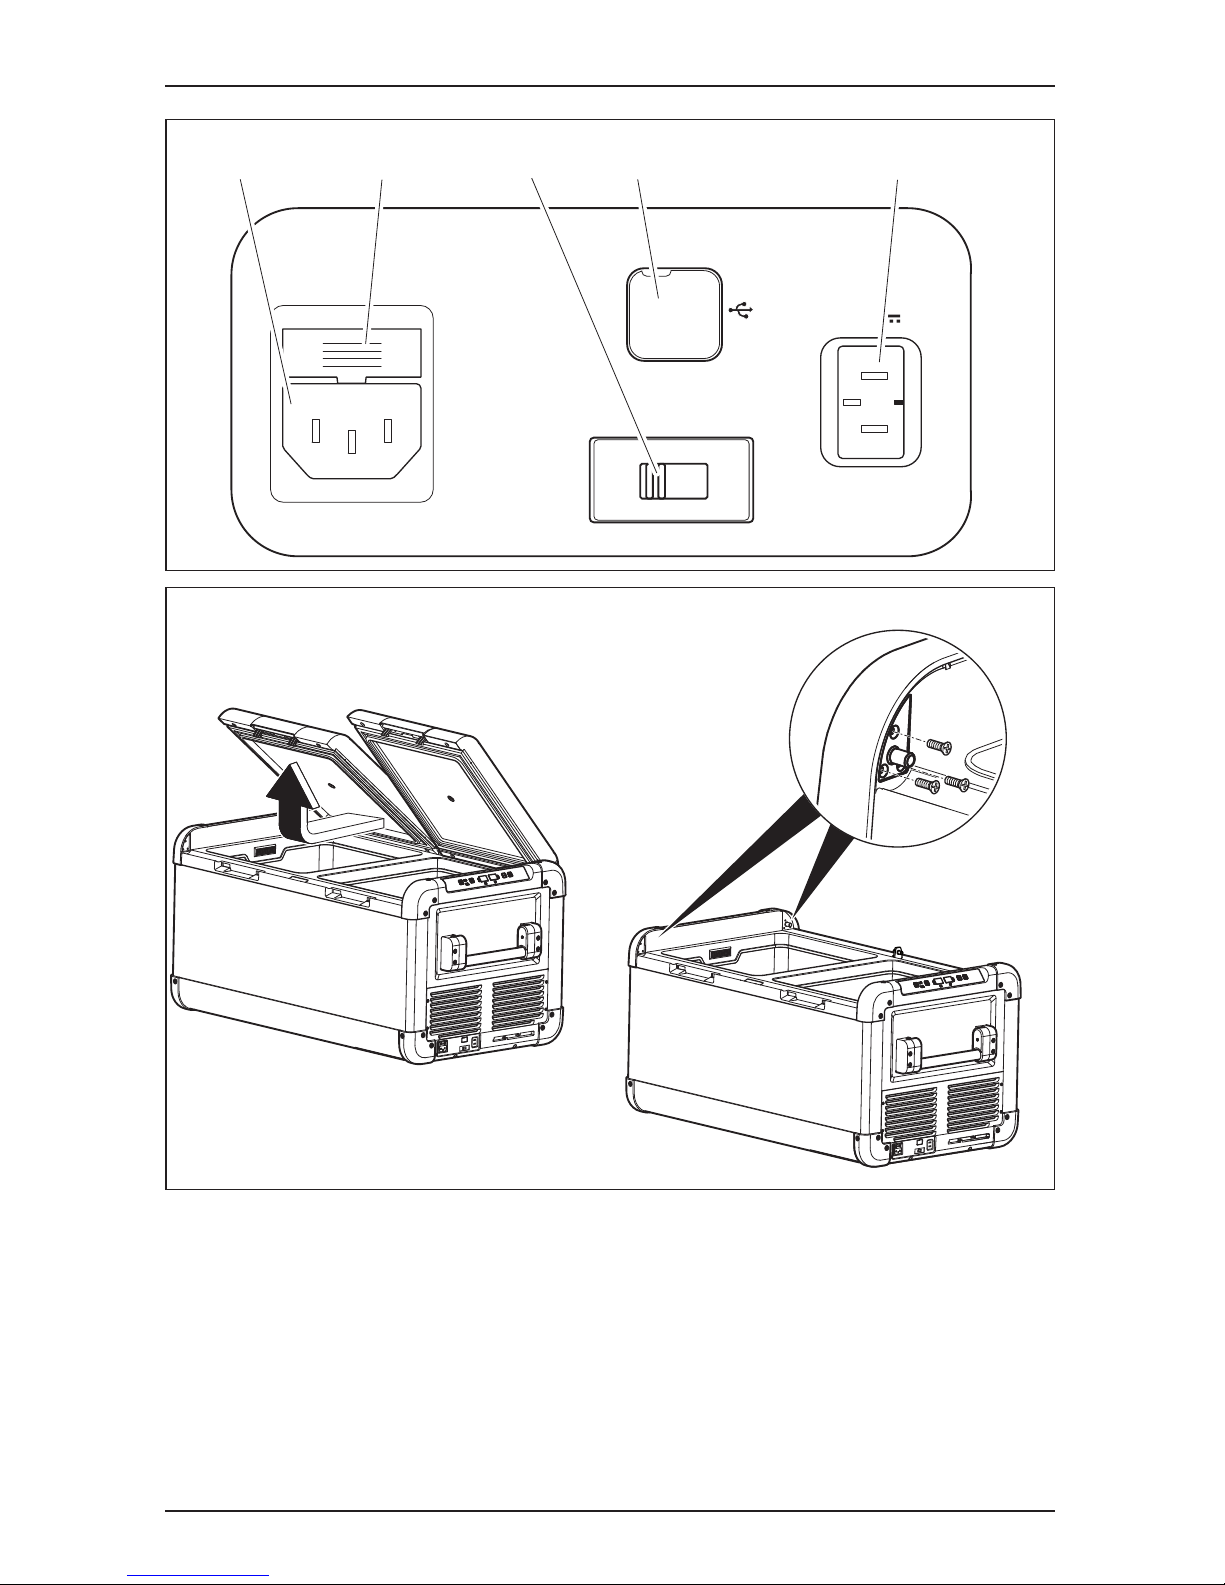
Connection sockets, Emergency switch (when fitted) and USB port
(fig. 4, page 4)
7 Operation
7.1 Before initial use
I
Reversing the lid opening direction
The lid hinges can be moved to the opposite side if you want to open the lids
from the opposite direction. To do this, proceed as follows:
➤ Open the lids and remove them (fig. 5 A, page 4).
➤ Remove three screws per side hinge (fig. 5 B, page 4) and take off
hinges.
➤ Remove plastic covers from new side hinge positions with a small screw-
driver and re-fit to old hinge positions.
➤ Re-fit side hinges in new positions.
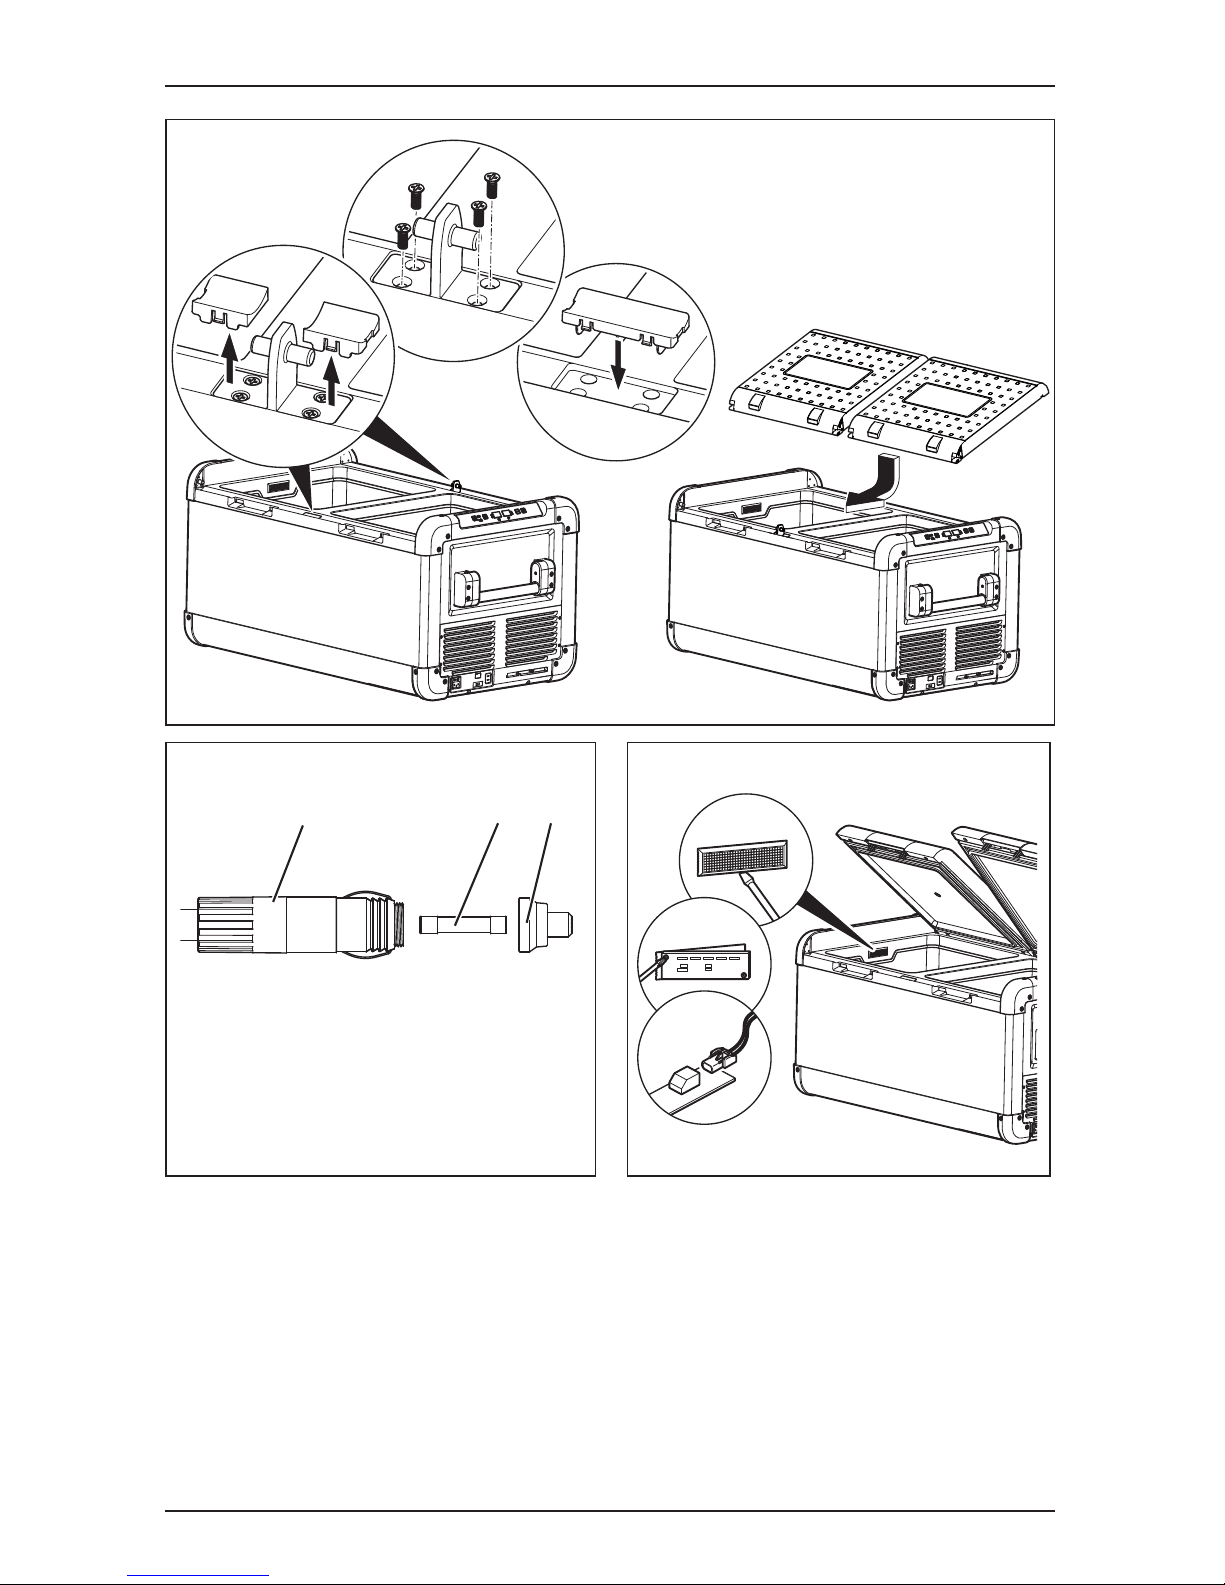
➤ Remove two plastic covers from the centre hinge (fig. 6 A, page 5).
➤ Remove four screws from the centre hinge (fig. 6 B, page 5) and
take off the hinge.
➤ Remove the plastic cover from new centre hinge position with a small
screwdriver and re-fit to old hinge position (fig. 6 C, page 5).
Item Description
1 Connection socket AC voltage supply
2 Fuse holder
3 Emergency switch
4 USB port for power supply
5 Connection socket DC voltage supply
NOTE
Before starting your new cooler for the first time, you should clean
it inside and outside with a damp cloth for hygienic reasons
(please also refer to the chapter “Cleaning and maintenance” on
page 24).
Page 15

EN
CFX95DZ2 Operation
15
➤ Re-fit centre hinge in new position.
➤ Insert the lids in the hinges on the opposite side (fig. 6 D, page 5).
Selecting the temperature units
Temperature display units can be switched between Celsius and Fahrenheit
as follows:
➤ Switch on the cooler.
➤ Press the “SET” button (fig. 3 4, page 3) three times.
➤ Use the “UP +” (fig. 3 10, page 3) or “DOWN –” (fig. 3 9, page 3)
buttons to select Celsius or Fahrenheit.
✓ The selected temperature units then appear in both displays for a few
seconds. The displays flash several times before returning to the current
temperature.
7.2 Energy saving tips
z Choose a well ventilated installation location which is protected against
direct sunlight.
z Allow warm food to cool down first before placing it in the cooling device
to keep cool.
z Do not open the cooling device more often than necessary.
z Do not leave the cooling device open for longer than necessary.
z Defrost the cooler once a layer of ice forms.
z Avoid unnecessarily low temperatures.
7.3 Connecting the cooler
Connecting to a battery (vehicle or boat)
The cooler can be operated with 12 V or 24 V
g.
A
NOTICE! Danger of damage!
Disconnect the cooler and other consumer units from the battery
before you connect the battery to a quick charging device.
Overvoltage can damage the electronics of the device.
Page 16
EN
Operation CFX95DZ2
16
For safety reasons the cooler is equipped with an electronic system to prevent the polarity reversal. This protects the cooler against short-circuiting
when connecting to a battery.
➤ Plug the DC connection cable (fig. 1 2, page 3) into the device
DC voltage socket and also into a DC socket.
Connecting to the AC mains (e.g. in the home or office)
D
The coolers have an integrated multi-voltage power supply with priority circuit
for connecting to an AC voltage source. The priority circuit automatically
switches the cooler to mains operation, if the device is connected to an AC
mains, even if the DC connection cable is still attached.
➤ Plug the AC connection cable (fig. 1 3, page 3) into the device AC
voltage socket and connect it to the AC voltage mains.
7.4 Using the battery monitor
The device is equipped with a multi-level battery monitor that
protects your vehicle battery against excessive discharging when
the device is connected to the on-board DC supply.
If the cooler is operated when the vehicle ignition is switched off, the cooler
switches off automatically as soon as the supply voltage falls below a set
level. The cooler will switch back on once the battery has been recharged to
the restart voltage level.
A
DANGER! Danger of electrocution!
z Never handle plugs and switches with wet hands or if you are
standing on a wet surface.
z If you are operating your cooler on board a boat from an AC
mains connection, you must install a residual current circuit
breaker between the AC mains and the cooler.
Seek advice from a trained technician.
NOTICE! Danger of damage!
When switched off by the battery monitor, the battery will no
longer be fully charged. Avoid starting repeatedly or operating
current consumers without longer charging phases. Ensure that
the battery is recharged.
Page 17
EN
CFX95DZ2 Operation
17
In “HIGH” mode, the battery monitor responds faster than at the levels “LOW”
and “MED” (see the following table).
The battery monitor mode can be selected as follows:
➤ Switch on the cooler.
➤ Press the “SET” button (fig. 3 4, page 3) four times.
➤ Use the “UP +” (fig. 3 10, page 3) or “DOWN –” (fig. 3 9, page 3)
buttons to select the battery monitor mode.
✓ Digital display will be as follows:
Lo (LOW), Ȇd (MED), HI (HIGH)
✓ The selected mode then appears in the display for a few seconds. The
display flashes several times before it returns to the current temperature.
I
Battery monitor mode LOW MED HIGH
Switch-off voltage at 12 V
10.1 V 11.4 V 11.8 V
Restart voltage at 12 V
11.1V 12.2V 12.6V
Switch-off voltage at 24 V
21.5 V 24.1 V 24.6 V
Restart voltage at 24 V
23.0 V 25.3 V 26.2 V
NOTE
When the cooler is supplied by the starter battery, select the
battery monitor mode “HIGH”. If the cooler is connected to a
supply battery, the battery monitor mode “LOW” will suffice.
Page 18

EN
Operation CFX95DZ2
18
7.5 Using the cooler
A
➤ Place the cooler on a firm foundation.
Make sure that the ventilation slots are not covered and that the heated
air can dissipate.
I
➤ Connect the cooler, see chapter “Connecting the cooler” on page 15.
A
➤ Press the “ON/OFF” button (fig. 3 1, page 3) for between one and two
seconds.
✓ The LED “P” lights up (fig. 3 2, page 3).
✓ The displays (fig. 3 6 and 7, page 3) switch on and show the current
temperatures.
✓ Depending on the compartment set temperatures, the cooler starts cool-
ing either one or both compartments.
✓ The LEDs (fig. 3 5 and 8, page 3) light up when the respective compart-
ment is cooling.
I
NOTICE! Danger of overheating!
Ensure at all times that there is sufficient ventilation so that the
heat that generated during operation can dissipate. Ensure that
the ventilation slots are not covered. Make sure that the device
is sufficiently far away from walls and other objects so that the
air can circulate.
NOTE
Place the cooler as shown (fig. 1, page 3). If you operate the box
in a different orientation it can be damaged.
NOTICE! Danger from excessively low temperature!
Ensure that the only those objects are placed in the cooler that are
intended to be cooled at the selected temperature.
NOTE
When operating with the battery, the display switches off automatically if the battery voltage is low. The LED “P” flashes orange.
Page 19

EN
CFX95DZ2 Operation
19
Latching the cooler lid
➤ Close the lids.
➤ Press the latches (fig. 2 1, page 3) down, until they latch in
place audibly.
I
7.6 Setting the temperature
➤ Press the “SET” button (fig. 3 4, page 3):
– once for the large compartment
– twice for the small compartment
✓ The display of the respective compartment blinks.
➤ Use the “UP +” (fig. 3 10, page 3) and “DOWN –” (fig. 3 9, page 3)
buttons to select the cooling temperature.
You can adjust the cooling temperature so that each compartment works
as a refrigerator compartment or as a freezer compartment.
✓ The cooling temperature appears in the display for a few seconds. The
display flashes several times and then the current temperature is displayed again.
I
NOTE – Lid Open Alarm
If a lid is left open for three minutes or more and the device is
switched on, the respective interior light will flash until the lid is
closed.
NOTE
The temperature of each compartment can be set to –22 °C. The
manufacturer however recommends a cooling temperature of
–15 °C to –18 °C for normal usage and optimum energy consumption.
Page 20

EN
Operation CFX95DZ2
20
7.7 Switching a compartment off or on
If only one compartment is required, the other compartment can be switched
off to save energy.
Switching off compartment
If the display of the compartment shows a temperature, you can switch off the
compartment as follows:
➤ Press the “SET” button (fig. 3 4, page 3):
– once for the large compartment
– twice for the small compartment
✓ The display of the respective compartment blinks.
➤ Press the “ON/OFF” button (fig. 3 1, page 3).
✓ “OFF” flashes for five seconds on the display of the respective cooling
compartment, then “OFF” is displayed.
Switching on compartment
If the display of the compartment shows “OFF”, you can switch on the
compartment as follows:
➤ Press the “SET” button (fig. 3 4, page 3):
– once for the large compartment
– twice for the small compartment
✓ The display of the respective compartment blinks.
➤ Press the “ON/OFF” button (fig. 3 1, page 3).
✓ The cooling temperature appears in the display for a few seconds. The
display flashes several times and then the current temperature is displayed.
Page 21

EN
CFX95DZ2 Operation
21
7.8 Enabling WiFi signal for optional app
The cooler can be controlled via WiFi using an app that you can install on a
compatible device. The app has control, display and alarm functions.
You find further information on the Dometic website for your country (see
back page). Note that the app may not be available in your country.
Switching the WiFi signal on or off
➤ Press the “SET” button (fig. 3 4, page 3) five times.
➤ Use the “UP +” (fig. 3 10, page 3) and “DOWN –” (fig. 3 9, page 3)
buttons to switch the WiFi signal on or off.
✓ The desired setting appears in the display for a few seconds. The display
flashes several times and then the current temperature is displayed again.
I
Resetting the WiFi to factory settings
In case you have personalized the WiFi settings of your cooling device using
the WiFi app and forgotten your password, you can reset to the factory
settings as follows:
➤ Press the “SET” button (fig. 3 4, page 3) five times.
➤ Hold the “UP +” (fig. 3 10, page 3) button for at least five seconds.
✓ In both displays “rES” will blink several times before returning to the
previous display.
✓ The WiFi settings have been reset to factory settings.
For additional information visit the Dometic website from which you downloaded the app.
NOTE
The WiFi transmitter uses a small amount of power. For optimal
energy performance switch the WiFi transmitter off if it is not being
used.
Page 22

EN
Operation CFX95DZ2
22
7.9 Using the emergency switch
The emergency switch (fig. 4 3, page 4) is located below the control panel.
For normal operation the switch is in the “NORMAL USE” position.
➤ If an electronic control failure occurs, slide the switch to “EMERGENCY
OVERRIDE” position.
I
7.10 USB port for power supply
The USB port allows you to charge small devices like mobile phones and
mp3-players.
To use your cooling box with any USB devices, simply connect a USB cable
(not included) to your device.
I
7.11 Switching off the cooler
➤ Empty the cooler.
➤ Switch the cooler off.
➤ Pull out the connection cable.
If you do not want to use the cooler for a longer period of time:
➤ Leave the lids slightly open. This prevents odour build-up.
NOTE
If the switch is in the “EMERGENCY OVERRIDE” position, the
cooler circuit runs with full cooling capacity and, depending on the
running conditions of each compartment at the time of switching,
may either freeze one or both compartments, and/or stop cooling
one of the compartments.
NOTE
Ensure that any small device connected to the USB port is
compatible with 5 V/500 mA operation.
Page 23

EN
CFX95DZ2 Operation
23
7.12 Defrosting the cooler
Humidity can form frost in the interior of the cooling device or on the evaporators. This reduces the cooling capacity. Defrost the device in good time to
avoid this.
A
To defrost the cooler, proceed as follows:
➤ Take out the contents of the cooling device.
➤ If necessary, place them in another cooling device to keep them cool.
➤ Switch off the device.
➤ Leave the lids open.
➤ Wipe off the defrosted water.
7.13 Replacing the device fuse
D
➤ Disconnect the power supply to the device.
➤ Pull off the connection cable.
➤ Pry out the fuse insert (fig. 4 2, page 4) with a screwdriver.
➤ Replace the defective glass fuse with a new one that has the same rating
(4A 250V).
➤ Press the fuse insert back into the housing.
➤ Reconnect the power supply to the device.
NOTICE! Danger of damage!
Never use hard or pointed tools to remove ice or to loosen objects
which have frozen in place.
DANGER! Danger of electrocution!
Disconnect the power supply and the connection cable before you
replace the device fuse.
Page 24

EN
Cleaning and maintenance CFX95DZ2
24
7.14 Replacing the plug fuse (DC)
➤ Unscrew the contact pin housing (fig. 7 3, page 5) from the plug
(fig. 7 1, page 5).
➤ Replace the defective fuse (fig. 7 2, page 5) with a new fuse that has the
same rating (3AG, 15 A).
➤ Re-assemble the plug in reverse order.
7.15 Replacing the light PCB
➤ Disconnect the power supply to the device.
➤ Pry out the transparent cover with a screwdriver (fig. 8 A, page 5).
➤ Unscrew the PCB mounting screws (fig. 8 B, page 5).
➤ Pull out the plug from the PCB (fig. 8 C, page 5).
➤ Replace the defective light PCB with a new one.
➤ Fit new PCB using reverse of removal instructions.
➤ Press the transparent cover back into the housing.
➤ Reconnect the power supply to the device.
8 Cleaning and maintenance
!
A
➤ Occasionally clean the device interior and exterior with a damp cloth.
➤ Make sure that the air inlet and outlet vents on the device are free of any
dust and dirt, so that heat can be released and the device is not damaged.
WARNING!
Always disconnect the device from the power supply before you
clean and service it.
NOTICE! Risk of damage
z Never clean the cooler under running water or in dish water.
z Do not use abrasive cleaning agents or hard objects during
cleaning as these can damage the cooler.
Page 25

EN
CFX95DZ2 Troubleshooting
25
9 Troubleshooting
Fault Possible cause Suggested remedy
Device does not function, LED does
not glow.
There is no voltage present in the DC socket in
your vehicle.
The ignition must be switched on in most
vehicles to apply current to the DC socket.
No voltage present in the
AC voltage socket.
Try using another plug socket.
The device fuse is defective.
Replace the device fuse, see chapter
“Replacing the device fuse” on page 23.
The integrated mains
adapter is defective.
This can only be repaired by an
authorised repair centre.
The device does not
cool (plug is inserted,
“POWER” LED is lit).
Defective compressor. This can only be repaired by an
authorised repair centre.
The device does not
cool (plug is inserted,
“POWER” LED flashes
orange, display is
switched off).
Battery voltage is too
low.
Charge the battery as needed.
Battery monitor is set too
high.
Select a lower battery monitor setting.
When operating from
the DC socket:
The ignition is on
and the device is not
working and the LED
is not lit.
Pull the plug out of the
socket and make the
following checks.
The DC socket is dirty.
This results in a poor
electrical contact.
If the plug of your cooler becomes very
warm in the DC socket, either the DC
socket must be cleaned or the plug has
not been assembled correctly.
The fuse of the DC plug
has blown.
Replace the fuse (15 A) in the DC plug,
see chapter “Replacing the plug fuse
(DC)” on page 24.
The vehicle fuse has
blown.
Replace the vehicle’s DC socket fuse
(usually 15 A). Please refer to your vehicle’s operating manual.
The display shows an
error message (e.g.
“Err1”) and the device
does not cool.
The device has switched
off due to an internal
fault.
This can only be repaired by an
authorised repair centre.
The interior light of a
compartment flashes.
The lid of the compartment has been left open
for more than five minutes.
Close the lid of the compartment.
Page 26

EN
Guarantee CFX95DZ2
26
10 Guarantee
The statutory warranty period applies. If the product is defective, please
contact the manufacturer's branch in your country (see the back of the
instruction manual for the addresses) or your retailer.
For repair and guarantee processing, please include the following documents when you send in the device:
z A copy of the receipt with purchasing date
z A reason for the claim or description of the fault
11 Disposal
➤ Place the packaging material in the appropriate recycling waste bins
wherever possible.
M
If you wish to finally dispose of the product, ask your local recycling
centre or specialist dealer for details about how to do this in
accordance with the applicable disposal regulations.
Page 27
EN
CFX95DZ2 Technical data
27
12 Technical data
I
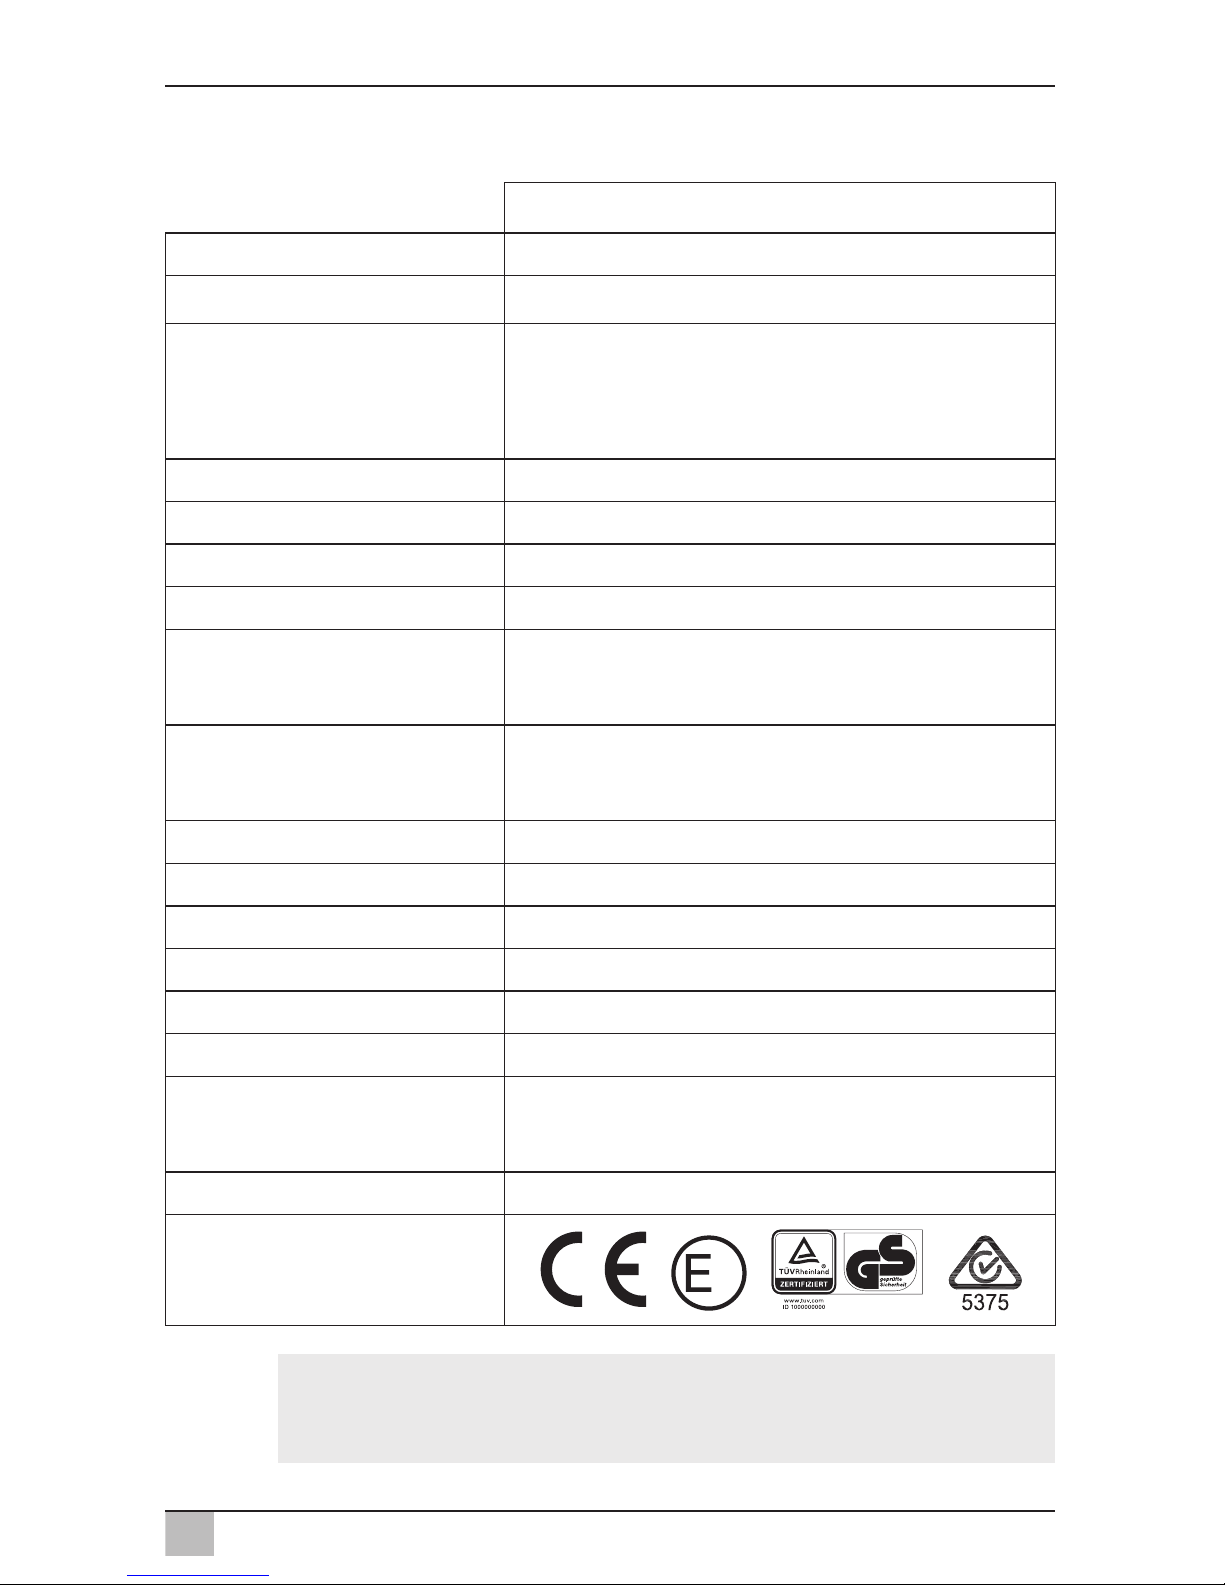
CFX95DZ2
Item no.: 9105306206
Connection voltage:
12/24 V
g and 100 – 240 V
w
Rated current:
12 V
g: 9.2 A
24 Vg: 4.5 A
100 V
w
: 1.10 A
240 V
w
: 0.45 A
Cooling capacity: +10 °C to –22 °C (+50 °F to –8 °F)
Category: 1
Energy efficiency class: A+
Energy consumption: 109 kWh/annum
Gross volume:
Large compartment:
Small compartment:
54 l
40,5 l
Storage volume:
Large compartment:
Small compartment:
50,5 l
34,5 l
Climate class: N, T
Ambient temperature: +16 °C to +43 °C
Noise emission: 37 dB(A)
USB: 5 Vg, 500 mA
Refrigerant: R134a
Refrigerant quantity: 65 g
Dimensions (W x H x D) in mm:
Including handles:
Without handles:
957 x 472 x 530
900 x 472 x 530
Weight: 32 kg
Test/certificates:
NOTE
If the ambient temperature is above +32 °C (+90 °F), the
minimum temperature cannot be attained.
4
Page 28

DE
CFX95DZ2
28
Bitte lesen Sie diese Anleitung vor der Inbetriebnahme sorgfältig durch
und bewahren Sie sie auf. Geben Sie sie im Falle einer Weitergabe des
Kühlgerätes an den Nutzer weiter.
Der Hersteller haftet nicht für Schäden, die durch nicht bestimmungsgemäßen Gebrauch oder falsche Bedienung verursacht werden.
Inhaltsverzeichnis
1 Erklärung der Symbole . . . . . . . . . . . . . . . . . . . . . . . . . . . . . . . . . 29
2 Sicherheitshinweise . . . . . . . . . . . . . . . . . . . . . . . . . . . . . . . . . . . 30
2.1 Allgemeine Sicherheit . . . . . . . . . . . . . . . . . . . . . . . . . . . . . . 30
2.2 Sicherheit beim Betrieb des Kühlgerätes . . . . . . . . . . . . . . . 31
3 Lieferumfang . . . . . . . . . . . . . . . . . . . . . . . . . . . . . . . . . . . . . . . . . 32
4 Zubehör. . . . . . . . . . . . . . . . . . . . . . . . . . . . . . . . . . . . . . . . . . . . . . 32
5 Bestimmungsgemäßer Gebrauch . . . . . . . . . . . . . . . . . . . . . . . . 33
6 Funktionsbeschreibung . . . . . . . . . . . . . . . . . . . . . . . . . . . . . . . . 34
6.1 Funktionsumfang . . . . . . . . . . . . . . . . . . . . . . . . . . . . . . . . . 34
6.2 Bedien- und Anzeigeelemente . . . . . . . . . . . . . . . . . . . . . . . 35
7 Bedienung . . . . . . . . . . . . . . . . . . . . . . . . . . . . . . . . . . . . . . . . . . . 36
7.1 Vor dem ersten Gebrauch . . . . . . . . . . . . . . . . . . . . . . . . . . 36
7.2 Tipps zum Energiesparen . . . . . . . . . . . . . . . . . . . . . . . . . . . 37
7.3 Kühlgerät anschließen . . . . . . . . . . . . . . . . . . . . . . . . . . . . . 38
7.4 Batteriewächter verwenden . . . . . . . . . . . . . . . . . . . . . . . . . 39
7.5 Kühlbox benutzen . . . . . . . . . . . . . . . . . . . . . . . . . . . . . . . . . 40
7.6 Temperatur einstellen . . . . . . . . . . . . . . . . . . . . . . . . . . . . . . 41
7.7 Ein Kühlfach aus- oder einschalten . . . . . . . . . . . . . . . . . . . 42
7.8 WLAN-Signal für optionale App aktivieren . . . . . . . . . . . . . . 43
7.9 Notschalter verwenden . . . . . . . . . . . . . . . . . . . . . . . . . . . . . 44
7.10 USB-Anschluss für Spannungsversorgung . . . . . . . . . . . . . 44
7.11 Kühlbox ausschalten . . . . . . . . . . . . . . . . . . . . . . . . . . . . . . . 44
7.12 Kühlbox abtauen . . . . . . . . . . . . . . . . . . . . . . . . . . . . . . . . . . 45
7.13 Gerätesicherung austauschen . . . . . . . . . . . . . . . . . . . . . . . 45
7.14 Steckersicherung (Gleichstrom) austauschen . . . . . . . . . . . 46
7.15 Lichtleiterplatte wechseln . . . . . . . . . . . . . . . . . . . . . . . . . . . 46
8 Reinigung und Pflege . . . . . . . . . . . . . . . . . . . . . . . . . . . . . . . . . . 47
9 Störungsbeseitigung . . . . . . . . . . . . . . . . . . . . . . . . . . . . . . . . . . . 48
Page 29

DE
CFX95DZ2 Erklärung der Symbole
29
10 Gewährleistung . . . . . . . . . . . . . . . . . . . . . . . . . . . . . . . . . . . . . . . 49
11 Entsorgung. . . . . . . . . . . . . . . . . . . . . . . . . . . . . . . . . . . . . . . . . . . 49
12 Technische Daten . . . . . . . . . . . . . . . . . . . . . . . . . . . . . . . . . . . . . 50
1 Erklärung der Symbole
D
!
!
A
I
➤ Handlung: Dieses Symbol zeigt Ihnen, dass Sie etwas tun müssen. Die
erforderlichen Handlungen werden Schritt für Schritt beschrieben.
✓ Dieses Symbol beschreibt das Ergebnis einer Handlung.
Abb. 1 5, Seite 3: Diese Angabe weist Sie auf ein Element in einer Abbildung hin, in diesem Beispiel auf „Position 5 in Abbildung 1 auf Seite 3“.
GEFAHR!
Sicherheitshinweis: Nichtbeachtung führt zu Tod oder schwerer
Verletzung.
WARNUNG!
Sicherheitshinweis: Nichtbeachtung kann zu Tod oder schwerer
Verletzung führen.
VORSICHT!
Sicherheitshinweis: Nichtbeachtung kann zu Verletzungen
führen.
ACHTUNG!
Nichtbeachtung kann zu Materialschäden führen und die
Funktion des Produktes beeinträchtigen.
HINWEIS
Ergänzende Informationen zur Bedienung des Produktes.
Page 30

DE
Sicherheitshinweise CFX95DZ2
30
2 Sicherheitshinweise
2.1 Allgemeine Sicherheit
!
WARNUNG!
z Wenn das Kühlgerät sichtbare Beschädigungen aufweist,
dürfen Sie es nicht in Betrieb nehmen.
z Wenn das Anschlusskabel dieses Kühlgerätes beschädigt wird,
muss es durch den Hersteller, seinen Kundendienst oder eine
ähnlich qualifizierte Person ersetzt werden, um Gefährdungen
zu vermeiden.
z Reparaturen an diesem Kühlgerät dürfen nur von Fachkräften
durchgeführt werden. Durch unsachgemäße Reparaturen
können erhebliche Gefahren entstehen.
z Dieses Kühlgerät kann von Kindern ab 8 Jahren und darüber
sowie von Personen mit verringerten physischen, sensorischen
oder mentalen Fähigkeiten oder Mangel an Erfahrung und
Wissen benutzt werden, wenn sie beaufsichtigt oder bezüglich
des sicheren Gebrauchs des Kühlgerätes unterwiesen wurden
und die daraus resultierenden Gefahren verstehen.
z Reinigung und Benutzer-Wartung dürfen nicht von Kindern
ohne Beaufsichtigung durchgeführt werden.
z Kinder dürfen nicht mit dem Kühlgerät spielen.
z Kinder sollten beaufsichtigt werden, um sicherzustellen, dass
sie nicht mit dem Kühlgerät spielen.
z Verwahren und benutzen Sie das Kühlgerät außerhalb der
Reichweite von Kindern unter 8 Jahren.
z Lagern Sie keine explosionsfähigen Stoffe wie z. B. Sprüh-
dosen mit brennbarem Treibgas im Kühlgerät.
!
VORSICHT!
z Trennen Sie das Kühlgerät von der Stromversorgung
– vor jeder Reinigung und Pflege
– nach jedem Gebrauch
z Lebensmittel dürfen nur in Originalverpackungen oder
geeigneten Behältern eingelagert werden.
Page 31

DE
CFX95DZ2 Sicherheitshinweise
31
A
ACHTUNG!
z Vergleichen Sie die Spannungsangabe auf dem Typenschild
mit der vorhandenen Energieversorgung.
z Schließen Sie das Kühlgerät nur wie folgt an:
– mit dem Gleichstrom-Anschlusskabel an die Gleichstrom-
Bordsteckdose (z. B. Zigarettenanzünder) im Fahrzeug
– oder mit dem Wechselstrom-Anschlusskabel an das
Wechselstromnetz
z Ziehen Sie den Stecker nie am Anschlusskabel aus der Steck-
dose.
z Wenn das Kühlgerät an der Gleichstrom-Steckdose ange-
schlossen ist: Klemmen Sie Ihr Kühlgerät und andere
Verbraucher von der Fahrzeugbatterie ab, bevor Sie ein
Schnellladegerät anschließen.
z Wenn das Kühlgerät an der Gleichstrom-Steckdose ange-
schlossen ist: Trennen Sie die Verbindung oder schalten Sie
das Kühlgerät aus, wenn Sie den Motor ausschalten. Sonst
kann die Fahrzeugbatterie entladen werden.
z Das Kühlgerät ist nicht geeignet für den Transport ätzender
oder lösungsmittelhaltiger Stoffe.
z Dieses Kühlgerät enthält in der Isolierung brennbares
Zyklopentan. Die Gase im Isolationsmaterial erfordern ein
besonderes Entsorgungsverfahren. Führen Sie das Kühlgerät
am Ende seiner Lebensdauer einer ordnungsgemäßen
Entsorgung zu.
2.2 Sicherheit beim Betrieb des Kühlgerätes
!
VORSICHT!
z Achten Sie vor der Inbetriebnahme darauf, dass Zuleitung und
Stecker trocken sind.
A
ACHTUNG!
z Benutzen Sie keine Elektrogeräte innerhalb des Kühlgerätes,
außer wenn diese Elektrogeräte vom Hersteller dafür
empfohlen werden.
z Stellen Sie das Kühlgerät nicht in der Nähe von offenen
Flammen oder anderen Wärmequellen (Heizung, starke
Sonneneinstrahlung, Gasöfen usw.) ab.
Page 32

DE
Lieferumfang CFX95DZ2
32
z Überhitzungsgefahr!
Achten Sie stets darauf, dass beim Betrieb entstehende Wärme
ausreichend abgeführt werden kann. Sorgen Sie dafür, dass
das Kühlgerät in ausreichendem Abstand zu Wänden oder
Gegenständen steht, sodass die Luft zirkulieren kann.
z Achten Sie darauf, dass die Lüftungsöffnungen nicht abgedeckt
werden.
z Füllen Sie keine Flüssigkeiten oder Eis in den Innenbehälter.
z Tauchen Sie das Kühlgerät nie in Wasser.
z Schützen Sie das Kühlgerät und die Kabel vor Hitze und Nässe.
3 Lieferumfang
Abb. 1, Seite 3 zeigt den Lieferumfang.
4 Zubehör
Als Zubehör erhältlich (nicht im Lieferumfang enthalten):
Auf der Dometic-Webseite (siehe Rückseite) finden Sie Informationen über
eine WLAN-App mit Kontroll-, Anzeige- und Alarmfunktionen. Die App ist
möglicherweise in Ihrem Land nicht verfügbar.
Pos. Menge Bezeichnung
1 1 Kompressor-Kühlbox
2 1 Gleichstrom-Anschlusskabel
3 1 Wechselstrom-Anschlusskabel
– 1 Bedienungsanleitung
Bezeichnung Art.-Nr.
Universales Befestigungs-Kit (Gurtsystem) CFX-UFK 9105304041
Page 33

DE
CFX95DZ2 Bestimmungsgemäßer Gebrauch
33
5 Bestimmungsgemäßer Gebrauch
Das Kühlgerät eignet sich zum Kühlen und Tiefkühlen von
Lebensmitteln. Das Kühlgerät ist auch für den Betrieb auf Booten
geeignet.
Das Kühlgerät ist für den Betrieb an einer Gleichstromsteckdose
eines Fahrzeugs (z. B. Zigarettenanzünder), Boots oder Wohnmobils sowie an einem Wechselstromnetz ausgelegt.
Das Kühlgerät ist für den Hausgebrauch und ähnliche Anwendungsbereiche
vorgesehen wie zum Beispiel
z in Personalküchen von Läden, Büros und anderen Arbeitsbereichen
z in der Landwirtschaft
z von Gästen in Hotels, Motels oder anderen Unterkünften
z in Frühstückspensionen
z im Catering und ähnlichen Großhandelsanwendungen
!
VORSICHT! Gesundheitsgefahr!
Prüfen Sie bitte, ob die Kühlleistung des Kühlgerätes den Anforderungen der Lebensmittel oder Medikamente entspricht, die Sie
kühlen wollen.
Page 34

DE
Funktionsbeschreibung CFX95DZ2
34
6 Funktionsbeschreibung
Das Kühlgerät kann Waren abkühlen und kühl halten sowie tiefkühlen. Die
Kühlung erfolgt durch einen wartungsfreien Kühlkreislauf mit Kompressor.
Die extrastarke Isolierung und der leistungsstarke Kompressor gewährleisten eine besonders schnelle Kühlung.
Das Kühlgerät besitzt zwei separate Fächer, die unabhängig voneinander
eingestellt werden können. Das Kühlgerät kann in allen Kombinationen verwendet werden:
(Für weitere Details siehe Kapitel „Temperatur einstellen“ auf Seite 41)
Das Kühlgerät ist für den mobilen Einsatz geeignet.
Beim Einsatz auf Booten kann das Kühlgerät einer Dauerkrängung von 30°
ausgesetzt werden.
6.1 Funktionsumfang
z Netzteil mit Vorrangschaltung zum Anschluss an Wechselstrom
z Dreistufiger Batteriewächter zum Schutz der Fahrzeugbatterie
z Display mit Temperaturanzeige in °C und °F
schaltet sich bei niedriger Batteriespannung automatisch aus
z Unabhängige Einstellungen, Kontrollen und Anzeigen für jedes Fach
z Temperatureinstellung: Mit zwei Tasten in 1 °C-Schritten (und 2 °F-
Schritten)
z Integrierter WLAN-Sender, dadurch bedienbar per App
z Offener Deckel wird signalisiert
z USB-Anschluss für Stromversorgung
z Notschalter
z Klappbare Tragegriffe
z Drei herausnehmbare Korbeinsätze
Großes Fach Kleines Fach
Kühlfach Gefrierfach
Gefrierfach Kühlfach
Kühlfach Kühlfach
Gefrierfach Gefrierfach
Page 35

DE
CFX95DZ2 Funktionsbeschreibung
35
6.2 Bedien- und Anzeigeelemente
Verriegelungen der Deckel: Abb. 2 1, Seite 3
Bedienfeld (Abb. 3, Seite 3)
Pos. Bezeichnung Erklärung
1ON
OFF
Schaltet das Kühlgerät ein oder aus, wenn die Taste ein bis
zwei Sekunden gedrückt wird
2
POWER
„P“
Betriebsanzeige
LED leuchtet grün: Kompressor ist an
LED leuchtet orange: Kompressor ist aus
LED blinkt orange: Display wurde automatisch
abgeschaltet, weil die Batteriespannung niedrig ist
3 ERROR LED blinkt rot: Eingeschaltetes Kühlgerät ist nicht
betriebsbereit
4 SET Wählt den Eingabemodus
– Temperatureinstellung (großes/kleines Kühlfach)
– Angabe von Grad Celsius oder Grad Fahrenheit
– Batteriewächter einstellen
– Stellt WLAN ein oder aus
5 Kühlung groß Statusanzeige großes Kühlfach
LED leuchtet blau: Das Kühlfach kühlt
LED leuchtet nicht: Das Kühlfach kühlt nicht
6 Anzeige groß – Zeigt Informationen über das große Kühlfach
– Zeigt „OFF“, wenn das Kühlfach ausgeschaltet ist
7 Anzeige klein – Zeigt Informationen über das kleine Kühlfach
– Zeigt „OFF“, wenn das Kühlfach ausgeschaltet ist
8 Kühlung klein Statusanzeige kleines Kühlfach
LED leuchtet blau: Das Kühlfach kühlt
LED leuchtet nicht: Das Kühlfach kühlt nicht
9 DOWN – Einmal antippen verringert den gewählten Eingabewert
10 UP + Einmal antippen erhöht den gewählten Eingabewert
Page 36

DE
Bedienung CFX95DZ2
36
Anschlussbuchsen, Notschalter (falls vorhanden) und USB-Anschluss
(Abb. 4, Seite 4):
7 Bedienung
7.1 Vor dem ersten Gebrauch
I
Deckelanschlag umdrehen
Sie können den Deckelanschlag umdrehen, falls Sie die Deckel zur anderen
Seite öffnen möchten. Gehen Sie hierzu wie folgt vor:
➤ Öffnen Sie die Deckel, und nehmen Sie sie ab (Abb. 5 A, Seite 4).
➤ Entfernen Sie jeweils drei Schrauben der Seitenscharniere (Abb. 5 B,
Seite 4), und nehmen Sie die Scharniere ab.
➤ Entfernen Sie die Plastikabdeckungen von den neuen Seitenscharnier-
positionen mithilfe eines kleinen Schraubendrehers, und bringen Sie sie
wieder an den alten Scharnierpositionen an.
➤ Bringen Sie die Seitenscharniere an den neuen Positionen an.
➤ Entfernen Sie zwei Plastikabdeckungen von der mittleren Scharnier-
position (Abb. 6 A, Seite 5).
➤ Entfernen Sie die vier Schrauben des mittleren Scharniers (Abb. 6 B,
Seite 5), und nehmen Sie das Scharnier ab.
Pos. Bezeichnung
1 Wechselstrombuchse
2 Sicherungshalter
3 Notschalter
4 USB-Anschluss zur Stromversorgung
5 Gleichstrombuchse
HINWEIS
Bevor Sie das neue Kühlgerät in Betrieb nehmen, sollten Sie es
aus hygienischen Gründen innen und außen mit einem feuchten
Tuch reinigen (siehe auch Kapitel „Reinigung und Pflege“ auf
Seite 47).
Page 37

DE
CFX95DZ2 Bedienung
37
➤ Entfernen Sie die Plastikabdeckung von der neuen Scharnierposition mit-
hilfe eines kleinen Schraubendrehers, und bringen Sie sie wieder an der
alten Scharnierposition an (Abb. 6 C, Seite 5).
➤ Bringen Sie das mittlere Scharnier an der neuen Position an.
➤ Setzen Sie die Deckel in die Scharniere auf der gegenüberliegenden
Seite (Abb. 6 D, Seite 5).
Temperatureinheit wählen
Sie können zur Temperaturanzeige zwischen den Werten für °C und °F
wählen. Gehen Sie hierzu wie folgt vor:
➤ Schalten Sie das Kühlgerät ein.
➤ Drücken Sie den Taster „SET“ (Abb. 3 4, Seite 3) dreimal.
➤ Stellen Sie mit den Tastern „UP +“ (Abb. 3 10, Seite 3) bzw. „DOWN
–“
(Abb. 3 9, Seite 3), die Temperatureinheit °C oder °F ein.
✓ Beide Displays zeigen für einige Sekunden die eingestellte Temperatur-
einheit an. Die Displays blinken einige Male, bevor sie zur Darstellung der
aktuellen Temperatur zurückkehren.
7.2 Tipps zum Energiesparen
z Wählen Sie einen gut belüfteten und vor Sonnenstrahlen geschützten
Einsatzort.
z Lassen Sie warme Speisen erst abkühlen, bevor Sie sie im Kühlgerät kühl
halten.
z Öffnen Sie das Kühlgerät nicht häufiger als nötig.
z Lassen Sie das Kühlgerät nicht länger offen als nötig.
z Tauen Sie das Kühlgerät ab, sobald sich eine Eisschicht gebildet hat.
z Vermeiden Sie eine unnötig tiefe Innentemperatur.
Page 38

DE
Bedienung CFX95DZ2
38
7.3 Kühlgerät anschließen
An eine Fahrzeugbatterie anschließen (Fahrzeug oder Boot)
Das Kühlgerät kann mit Gleichstrom betrieben werden.
A
Zur Sicherheit ist das Kühlgerät mit einem elektronischen Verpolungsschutz
ausgestattet, der das Kühlgerät gegen Verpolung bei Gleichstrom und gegen
Kurzschluss schützt.
➤ Stecken Sie das Gleichstrom-Anschlusskabel (Abb. 1 2, Seite 3) in die
Gleichstrombuchse des Kühlgeräts, und schließen Sie es an das Gleichstromnetz an.
An ein Wechselstromnetz anschließen (z. B. zu Hause oder im Büro)
D
Die Kühlgeräte haben ein integriertes Multispannungsnetzteil mit Vorrangschaltung zum Anschluss an eine Wechselstrom. Durch die Vorrangschaltung wird automatisch auf Netzbetrieb umgeschaltet, wenn das
Kühlgerät an ein Wechselstromnetz angeschlossen ist, auch wenn das
Gleichstrom-Anschlusskabel noch angeschlossen ist.
➤ Stecken Sie das Wechselstrom-Anschlusskabel (Abb. 1 3, Seite 3)
in die Wechselstrombuchse des Geräts, und schließen Sie es an das
Wechselstromnetz an.
ACHTUNG! Beschädigungsgefahr!
Klemmen Sie das Kühlgerät und andere Verbraucher von der
Fahrzeugbatterie ab, bevor Sie die Fahrzeugbatterie mit einem
Schnellladegerät aufladen.
Überspannungen können die Elektronik der Geräte beschädigen.
GEFAHR! Lebensgefahr durch Stromschlag!
z Hantieren Sie nie mit Steckern und Schaltern, wenn Sie nasse
Hände haben oder mit den Füßen in der Nässe stehen.
z Wenn Sie Ihr Kühlgerät an Bord eines Bootes per Land-
anschluss am Wechselstromnetz betreiben, müssen Sie auf
jeden Fall einen FI-Schutzschalter zwischen Wechselstromnetz und Kühlgerät schalten.
Lassen Sie sich von einem Fachmann beraten.
Page 39

DE
CFX95DZ2 Bedienung
39
7.4 Batteriewächter verwenden
Das Kühlgerät ist mit einem mehrstufigen Batteriewächter ausgestattet, der Ihre Fahrzeugbatterie beim Anschluss an das Gleichstromnetz vor zu tiefer Entladung schützt.
Wird das Kühlgerät bei ausgeschalteter Zündung im Fahrzeug betrieben,
schaltet sich das Kühlgerät selbstständig ab, sobald die Versorgungsspannung unter einen einstellbaren Wert abfällt. Das Kühlgerät schaltet sich
wieder ein, sobald durch Aufladung der Batterie die Wiedereinschaltspannung erreicht wird.
A
Im Modus „HIGH“ spricht der Batteriewächter schneller an als in den Stufen
„LOW“ und „MED“ (siehe folgende Tabelle).
Um den Modus für den Batteriewächter zu ändern gehen Sie wie folgt vor:
➤ Schalten Sie das Kühlgerät ein.
➤ Drücken Sie den Taster „SET“ (Abb. 3 4, Seite 3) viermal.
➤ Stellen Sie mit den Tastern „UP +“ (Abb. 3 10, Seite 3) oder „DOWN
–“
(Abb. 3 9, Seite 3), den Modus für den Batteriewächter ein.
✓ Auf dem digitalen Display wird Folgendes angezeigt:
Lo (LOW), Ȇd (MED), HI (HIGH)
✓ Das Display zeigt für einige Sekunden den eingestellten Modus an. Das
Display blinkt einige Male, bevor es zur Darstellung der aktuellen Temperatur zurückkehrt.
ACHTUNG! Beschädigungsgefahr!
Die Batterie besitzt beim Abschalten durch den Batteriewächter
nicht mehr ihre volle Ladekapazität. Vermeiden Sie mehrmaliges
Starten oder den Betrieb von Stromverbrauchern ohne längere
Aufladephasen. Sorgen Sie dafür, dass die Batterie wieder aufgeladen wird.
Batteriewächter-Modus LOW MED HIGH
Ausschaltspannung bei 12 V
10,1 V 11,4 V 11,8 V
Wiedereinschaltspannung bei 12 V
11,1V 12,2V 12,6V
Ausschaltspannung bei 24 V
21,5 V 24,1 V 24,6 V
Wiedereinschaltspannung bei 24 V
23,0 V 25,3 V 26,2 V
Page 40

DE
Bedienung CFX95DZ2
40
I
7.5 Kühlbox benutzen
A
➤ Stellen Sie die Kühlgerät auf eine feste Unterlage.
Achten Sie darauf, dass die Lüftungsöffnungen nicht abgedeckt sind und
die erwärmte Luft gut abziehen kann.
I
➤ Schließen Sie das Kühlgerät an, siehe Kapitel „Kühlgerät anschließen“
auf Seite 38.
A
➤ Halten Sie den Taster „ON/OFF“ (Abb. 3 1, Seite 3) ein bis zwei Sekun-
den gedrückt.
✓ Die LED „P“ leuchtet (Abb. 3 2, Seite 3).
✓ Die Displays (Abb. 3 6 und 7, Seite 3) schalten sich ein und zeigen die
aktuelle Kühltemperatur an.
✓ Abhängig von der eingestellten Kühlfach-Temperatur, startet das Kühl-
gerät mit dem Kühlen eines oder beider Kühlfächer.
HINWEIS
Wenn das Kühlgerät von der Starterbatterie versorgt wird, wählen
Sie den Batteriewächter-Modus „HIGH“. Wenn das Kühlgerät an
eine Versorgungsbatterie angeschlossen ist, reicht der Batteriewächter-Modus „LOW“ aus.
ACHTUNG! Überhitzungsgefahr!
Achten Sie stets darauf, dass beim Betrieb entstehende Wärme
ausreichend abgeführt werden kann. Achten Sie darauf, dass die
Lüftungsöffnungen nicht abgedeckt werden. Sorgen Sie dafür,
dass das Kühlgerät in ausreichendem Abstand zu Wänden oder
Gegenständen steht, sodass die Luft zirkulieren kann.
HINWEIS
Stellen Sie das Kühlgerät wie dargestellt auf (Abb. 1, Seite 3).
Wird das Kühlgerät in einer anderen Position betrieben, so kann
das Kühlgerät Schaden nehmen.
ACHTUNG! Gefahr durch zu niedrige Temperatur!
Achten Sie darauf, dass sich nur Gegenstände bzw. Waren in
dem Kühlgerät befinden, die auf die gewählte Temperatur gekühlt
werden dürfen.
Page 41

DE
CFX95DZ2 Bedienung
41
✓ Die LEDs (Abb. 3 5 und 8, Seite 3) leuchten, wenn das jeweilige Kühl-
fach kühlt.
I
Kühlbox verriegeln
➤ Schließen Sie die Deckel.
➤ Drücken Sie die Verriegelungen (Abb. 2 1, Seite 3) nach unten, bis sie
hörbar einrasten.
I
7.6 Temperatur einstellen
➤ Drücken Sie den Taster „SET“ (Abb. 3 4, Seite 3):
– einmal für das große Kühlfach
– zweimal für das kleine Kühlfach
✓ Die Anzeige des jeweiligen Kühlfachs blinkt.
➤ Stellen Sie mit den Tastern „UP +“ (Abb. 3 10, Seite 3) und „DOWN –“
(Abb. 3 9, Seite 3) die Kühltemperatur ein.
Sie können die Temperatur so einstellen, dass jedes Fach als Kühlfach
oder als Gefrierfach arbeitet.
✓ Das Display zeigt für einige Sekunden die eingestellte gewünschte
Kühltemperatur an. Das Display blinkt einige Male, bevor es zur
Darstellung der aktuellen Temperatur zurückkehrt.
I
HINWEIS
Beim Betrieb an einer Fahrzeugbatterie schaltet das Display
automatisch ab, wenn die Batteriespannung niedrig ist. Die
LED „P“ blinkt orange.
HINWEIS – Alarm „Deckel offen“
Wenn ein Deckel länger als drei Minuten offen gelassen wird und
das Gerät eingeschaltet ist, blinkt die zugehörige Innenleuchte,
bis der Deckel geschlossen wird.
HINWEIS
Die Temperatur jedes Kühlfachs lässt sich auf –22 °C einstellen.
Der Hersteller empfiehlt jedoch eine Temperatur von –15 °C bis
–18 °C für den Normalbetrieb und optimalen Energieverbrauch.
Page 42

DE
Bedienung CFX95DZ2
42
7.7 Ein Kühlfach aus- oder einschalten
Falls nur ein Kühlfach benötigt wird, kann das andere Kühlfach ausgeschaltet werden, um Energie zu sparen.
Kühlfach ausschalten
Wenn das Display des Kühlfachs eine Temperatur anzeigt, können Sie das
Kühlfach wie folgt ausschalten:
➤ Drücken Sie den Taster „SET“ (Abb. 3 4, Seite 3):
– einmal für das große Kühlfach
– zweimal für das kleine Kühlfach
✓ Die Anzeige des jeweiligen Kühlfachs blinkt.
➤ Drücken Sie den Taster „ON/OFF“ (Abb. 3 1, Seite 3).
✓ Auf der Anzeige des jeweiligen Kühlfachs blinkt fünf Sekunden lang
„OFF“, dann wird „OFF“ angezeigt.
Kühlfach einschalten
Wenn das Display des Kühlfachs „OFF“ anzeigt, können Sie das Kühlfach
wie folgt einschalten:
➤ Drücken Sie den Taster „SET“ (Abb. 3 4, Seite 3):
– einmal für das große Kühlfach
– zweimal für das kleine Kühlfach
✓ Die Anzeige des jeweiligen Kühlfachs blinkt.
➤ Drücken Sie den Taster „ON/OFF“ (Abb. 3 1, Seite 3).
✓ Das Display zeigt für einige Sekunden die eingestellte gewünschte
Kühltemperatur an. Das Display blinkt einige Male, bevor es zur
Darstellung der aktuellen Temperatur wechselt.
Page 43

DE
CFX95DZ2 Bedienung
43
7.8 WLAN-Signal für optionale App aktivieren
Das Kühlgerät kann über WLAN mit einer App gesteuert werden, die Sie auf
einem kompatiblen Gerät installieren können. Die App ist mit Kontroll-,
Anzeige- und Alarmfunktionen ausgestattet.
Nähere Informationen finden Sie auf der Dometic-Webseite Ihres Landes
(siehe Rückseite). Beachten Sie, dass die App in ihrem Land nicht verfügbar
sein könnte.
WLAN-Signal ein-/ausschalten
➤ Drücken Sie den Taster „SET“ (Abb. 3 4, Seite 3) fünfmal.
➤ Stellen Sie mit den Tastern „UP +“ (Abb. 3 10, Seite 3) bzw. „DOWN –“
(Abb. 3 9, Seite 3) das WLAN-Signal ein oder aus.
✓ Das Display zeigt für einige Sekunden die gewünschte Einstellung an.
Das Display blinkt einige Male, bevor es zur Darstellung der aktuellen
Temperatur zurückkehrt.
I
WLAN auf Werkseinstellung zurücksetzen
Wenn Sie die WLAN-Einstellungen des Kühlgeräts über die WLAN-App
personalisiert haben und Ihr Passwort vergessen haben, können Sie das
Kühlgerät wie folgt auf Werkseinstellungen zurücksetzen:
➤ Drücken Sie den Taster „SET“ (Abb. 3 4, Seite 3) fünfmal.
➤ Halten Sie den Taster „UP +“ (Abb. 3 10, Seite 3) mindestens fünf
Sekunden gedrückt.
✓ Auf den Displays blinkt einige Male „rES“, bevor sie zur vorherigen Dar-
stellung zurückkehren.
✓ Die WLAN-Einstellungen wurden auf Werkseinstellung zurückgesetzt.
Für weitere Informationen besuchen Sie die Dometic-Webseite, von der Sie
die App heruntergeladen haben.
HINWEIS
Der WLAN-Sender nutzt eine geringe Menge Strom. Um eine
optimale Energieleistung zu erreichen, schalten Sie den WLANSender aus, wenn er nicht genutzt wird.
Page 44

DE
Bedienung CFX95DZ2
44
7.9 Notschalter verwenden
Der Notschalter (Abb. 4 3, Seite 4) befindet sich unter dem Bedienfeld. Für
den Normalbetrieb steht der Schalter auf „NORMAL USE“ (normaler
Gebrauch).
➤ Tritt eine Störung der Steuerelektronik auf, schieben Sie den Schalter auf
„EMERGENCY OVERRIDE“ (Notbetätigung).
I
7.10 USB-Anschluss für Spannungsversorgung
Sie können den USB-Anschluss zum Laden von Kleingeräten (z. B. Mobiltelefone und MP3-Player) nutzen.
Wenn Sie Ihr Kühlgerät mit einem USB-Gerät verwenden möchten,
schließen Sie einfach ein USB-Kabel (nicht im Lieferumfang enthalten) an
das Gerät an.
I
7.11 Kühlbox ausschalten
➤ Räumen Sie das Kühlgerät leer.
➤ Schalten Sie das Kühlgerät aus.
➤ Ziehen Sie das Anschlusskabel ab.
Wenn Sie das Kühlgerät für längere Zeit nicht benutzen wollen:
➤ Lassen Sie die Deckel leicht geöffnet. So verhindern Sie, dass sich
Gerüche bilden.
HINWEIS
Wenn der Schalter auf „EMERGENCY OVERRIDE“ steht,
arbeitet das Kühlsystem mit voller Kühlleistung. Abhängig vom
Operationsmodus der einzelnen Fächer zur Zeit des Umschaltens betreibt das System ein oder beide Fächer als Gefrierfach
und/oder schaltet eins der Fächer ab.
HINWEIS
Stellen Sie sicher, dass das an den USB-Anschluss angeschlossene Kleingerät für den Betrieb bei 5 V/500 mA geeignet
ist.
Page 45

DE
CFX95DZ2 Bedienung
45
7.12 Kühlbox abtauen
Luftfeuchtigkeit kann sich an den Verdampfern oder im Innenraum des Kühlgeräts als Reif niederschlagen, der die Kühlleistung verringert. Tauen Sie
das Kühlgerät rechtzeitig ab.
A
Gehen Sie wie folgt vor, um das Kühlgerät abzutauen:
➤ Nehmen Sie das Kühlgut heraus.
➤ Lagern Sie es ggf. in einem anderen Kühlgerät, damit es kalt bleibt.
➤ Schalten Sie das Kühlgerät aus.
➤ Lassen Sie die Deckel offen.
➤ Wischen Sie das Tauwasser auf.
7.13 Gerätesicherung austauschen
D
➤ Trennen Sie die Stromversorgung zum Kühlgerät.
➤ Ziehen Sie die Anschlusskabel ab.
➤ Hebeln Sie den Sicherungseinsatz (Abb. 4 2, Seite 4) z. B. mit einem
Schraubendreher heraus.
➤ Tauschen Sie die defekte Glassicherung gegen eine neue Glassicherung
mit demselben Wert (4A 250V) aus.
➤ Drücken Sie den Sicherungseinsatz wieder in das Gehäuse.
➤ Schließen Sie die Stromversorgung zum Kühlgerät an.
ACHTUNG! Beschädigungsgefahr!
Verwenden Sie nie harte oder spitze Werkzeuge zum Entfernen
von Eisschichten oder zum Lösen festgefrorener Gegenstände.
GEFAHR! Lebensgefahr durch Stromschlag!
Trennen Sie die Stromversorgung und das Anschlusskabel,
bevor Sie die Gerätesicherung austauschen.
Page 46

DE
Bedienung CFX95DZ2
46
7.14 Steckersicherung (Gleichstrom) austauschen
➤ Schrauben Sie das Kontaktstiftgehäuse (Abb. 7 3, Seite 5) vom Stecker
ab (Abb. 7 1, Seite 5) .
➤ Tauschen Sie die defekte Sicherung (Abb. 7 2, Seite 5) gegen eine
neue Sicherung mit demselben Wert (3AG, 15 A) aus.
➤ Setzen Sie den Stecker in umgekehrter Reihenfolge wieder zusammen.
7.15 Lichtleiterplatte wechseln
➤ Trennen Sie die Spannungsversorgung zum Kühlgerät.
➤ Öffnen Sie die transparente Abdeckung mithilfe eines Schraubendrehers
(Abb. 8 A, Seite 5).
➤ Lösen Sie die Montageschrauben der Leiterplatte (Abb. 8 B, Seite 5).
➤ Ziehen Sie den Stecker aus der Leiterplatte (Abb. 8 C, Seite 5).
➤ Tauschen Sie eine fehlerhafte Lichtleiterplatte gegen einen neue aus.
➤ Setzen Sie eine neue Leiterplatte ein, indem Sie die in der Anweisung
zum Entfernen der Leiterplatte beschriebenen Schritte in umgekehrter
Reihenfolge ausführen.
➤ Setzen Sie die transparente Abdeckung wieder in das Gehäuse ein.
➤ Schließen Sie die Stromversorgung zum Kühlgerät an.
Page 47

DE
CFX95DZ2 Reinigung und Pflege
47
8 Reinigung und Pflege
!
A
➤ Reinigen Sie das Kühlgerät innen und außen gelegentlich mit einem
feuchten Tuch.
➤ Stellen Sie sicher, dass die Be- und Entlüftungsöffnungen des Kühl-
gerätes frei von Staub und Verunreinigungen sind, damit die beim Betrieb
entstehende Wärme abgeführt werden kann und das Kühlgerät keinen
Schaden nimmt.
WARNUNG!
Trennen Sie vor jeder Reinigung und Pflege das Kühlgerät von
der Stromversorgung.
ACHTUNG! Beschädigungsgefahr!
z Reinigen Sie das Kühlgerät niemals unter fließendem Wasser
oder gar im Spülwasser.
z Verwenden Sie zur Reinigung keine scharfen Reinigungs-
mittel oder harten Gegenstände, da diese das Kühlgerät
beschädigen können.
Page 48

DE
Störungsbeseitigung CFX95DZ2
48
9 Störungsbeseitigung
Störung Mögliche Ursache Lösungsvorschlag
Das Kühlgerät funktioniert nicht, LED leuchtet
nicht.
An der Gleichstromsteckdose im Fahrzeug liegt
keine Spannung an.
In den meisten Fahrzeugen muss der
Zündschalter eingeschaltet sein, damit die
Gleichstromsteckdose Spannung hat.
Wechselstromsteckdose
führt keine Spannung.
Versuchen Sie es an einer anderen Steckdose.
Gerätesicherung ist
defekt.
Tauschen Sie die Gerätesicherung aus,
siehe Kapitel „Gerätesicherung austauschen“ auf Seite 45.
Das integrierte Netzteil
ist defekt.
Die Reparatur kann nur von einem zugelassenen Kundendienstbetrieb durchgeführt werden.
Das Kühlgerät kühlt
nicht (Stecker ist eingesteckt, LED „POWER“
leuchtet).
Kompressor defekt. Die Reparatur kann nur von einem zuge-
lassenen Kundendienstbetrieb durchgeführt werden.
Das Kühlgerät kühlt
nicht (Stecker ist eingesteckt, LED „POWER“
blinkt orange, Display
ist ausgeschaltet).
Batteriespannung nicht
ausreichend.
Laden Sie die Batterie gegebenenfalls.
Modus des Batteriewächters ist zu hoch
Stellen Sie den Batteriewächter auf einen
niedrigeren Modus.
Beim Betrieb an der
Gleichstromsteckdose:
Die Zündung ist eingeschaltet, das Gerät
funktioniert nicht und
die LED leuchtet nicht.
Ziehen Sie den Stecker
aus der Steckdose und
nehmen Sie folgende
Prüfungen vor.
Die Fassung der Gleichstromsteckdose ist verschmutzt. Das hat einen
schlechten elektrischen
Kontakt zur Folge.
Wenn der Stecker in der Gleichstromsteckdose sehr warm wird, muss entweder die Fassung gereinigt werden, oder
der Stecker ist möglicherweise nicht richtig zusammengebaut.
Die Sicherung des
Gleichstromsteckers ist
durchgebrannt.
Tauschen Sie die Sicherung (15 A) des
Gleichstromsteckers aus, siehe Kapitel
„Steckersicherung (Gleichstrom) austauschen“ auf Seite 46
Die Fahrzeug-Sicherung
ist durchgebrannt.
Tauschen Sie die Fahrzeug-Sicherung der
Gleichstromsteckdose (üblicherweise
15 A) aus (Beachten Sie dazu die Bedienungsanleitung zu Ihrem KFZ).
Das Display zeigt eine
Fehlermeldung (z.B.
„Err1“) an und das
Kühlgerät kühlt nicht.
Eine interne Betriebsstörung hat das Kühlgerät ausgeschaltet.
Die Reparatur kann nur von einem zugelassenen Kundendienstbetrieb durchgeführt werden.
Die Innenbeleuchtung
eines Fachs blinkt.
Der Deckel des Fachs
wurde über fünf Minuten
offen gelassen
Schließen Sie den Deckel des Fachs.
Page 49

DE
CFX95DZ2 Gewährleistung
49
10 Gewährleistung
Es gilt die gesetzliche Gewährleistungsfrist. Sollte das Produkt defekt sein,
wenden Sie sich bitte an die Niederlassung des Herstellers in Ihrem Land
(Adressen siehe Rückseite der Anleitung) oder an Ihren Fachhändler.
Zur Reparatur- bzw. Gewährleistungsbearbeitung müssen Sie folgende
Unterlagen mitschicken:
z eine Kopie der Rechnung mit Kaufdatum,
z einen Reklamationsgrund oder eine Fehlerbeschreibung.
11 Entsorgung
➤ Geben Sie das Verpackungsmaterial möglichst in den entsprechenden
Recycling-Müll.
M
Wenn Sie das Produkt endgültig außer Betrieb nehmen, informieren Sie sich bitte beim nächsten Recyclingcenter oder bei
Ihrem Fachhändler über die zutreffenden Entsorgungsvorschriften.
Page 50

DE
Technische Daten CFX95DZ2
50
12 Technische Daten
I
CFX95DZ2
Art.-Nr.: 9105306206
Anschlussspannung:
12/24 V
g und 100 – 240 V
w
Nennstrom:
12 V
g: 9,2 A
24 Vg: 4,5 A
100 V
w
: 1,10 A
240 V
w
: 0,45 A
Kühlleistung: +10 °C bis –22 °C (+50 °F bis –8 °F)
Kategorie: 1
Energieeffizienzklasse: A+
Energieverbrauch: 109 kWh/annum
Bruttoinhalt:
Großes Kühlfach:
Kleines Kühlfach:
54 l
40,5 l
Nutzinhalt:
Großes Kühlfach:
Kleines Kühlfach:
50,5 l
34,5 l
Klimaklasse: N, T
Umgebungstemperatur: +16 °C bis +43 °C
Schallemissionen: 37 dB(A)
USB-Anschluss: 5 Vg, 500 mA
Kältemittel: R134a
Kältemittelmenge: 65 g
Abmessungen (B x H x T) in mm
Mit Handgriffen:
Ohne Handgriffe:
957 x 472 x 530
900 x 472 x 530
Gewicht: 32 kg
Prüfung/Zertifikate:
HINWEIS
Ab Umgebungstemperaturen von über 32 °C (90 °F) kann die
minimale Temperatur nicht mehr erreicht werden.
4
Page 51

FR
CFX95DZ2
51
Veuillez lire ce manuel avec attention avant de mettre l’appareil en
service. Conservez ensuite ce manuel. En cas de passer de l’appareil,
veuillez le transmettre au nouvel acquéreur.
Le fabricant décline toute responsabilité en cas de dommages provoqués par
une utilisation non-conforme de l'appareil ou par des erreurs de mani-
pulation.
Sommaire
1 Explication des symboles. . . . . . . . . . . . . . . . . . . . . . . . . . . . . . . 52
2 Consignes de sécurité. . . . . . . . . . . . . . . . . . . . . . . . . . . . . . . . . . 53
2.1 Sécurité générale. . . . . . . . . . . . . . . . . . . . . . . . . . . . . . . . . . 53
2.2 Consignes de sécurité concernant le fonctionnement
de l’appareil . . . . . . . . . . . . . . . . . . . . . . . . . . . . . . . . . . . . . . 54
3 Contenu de la livraison . . . . . . . . . . . . . . . . . . . . . . . . . . . . . . . . . 55
4 Accessoires . . . . . . . . . . . . . . . . . . . . . . . . . . . . . . . . . . . . . . . . . . 55
5 Usage conforme. . . . . . . . . . . . . . . . . . . . . . . . . . . . . . . . . . . . . . . 56
6 Description du fonctionnement . . . . . . . . . . . . . . . . . . . . . . . . . . 57
6.1 Fonctions . . . . . . . . . . . . . . . . . . . . . . . . . . . . . . . . . . . . . . . . 57
6.2 Éléments de commande et d'affichage . . . . . . . . . . . . . . . . . 58
7 Utilisation . . . . . . . . . . . . . . . . . . . . . . . . . . . . . . . . . . . . . . . . . . . . 60
7.1 Avant la première utilisation. . . . . . . . . . . . . . . . . . . . . . . . . . 60
7.2 Conseils pour économiser de l'énergie . . . . . . . . . . . . . . . . . 61
7.3 Raccordement de la glacière . . . . . . . . . . . . . . . . . . . . . . . . . 62
7.4 Utilisation du protecteur de batterie . . . . . . . . . . . . . . . . . . . . 63
7.5 Utilisation de la glacière. . . . . . . . . . . . . . . . . . . . . . . . . . . . . 64
7.6 Réglage de la température . . . . . . . . . . . . . . . . . . . . . . . . . . 65
7.7 Marche ou arrêt du compartiment de réfrigération . . . . . . . . 66
7.8 Activation du signal WLAN pour l'application disponible en
option. . . . . . . . . . . . . . . . . . . . . . . . . . . . . . . . . . . . . . . . . . . 67
7.9 Utilisation de l'interrupteur d'urgence. . . . . . . . . . . . . . . . . . . 68
7.10 Port USB pour l'alimentation électrique . . . . . . . . . . . . . . . . . 68
7.11 Arrêt de la glacière. . . . . . . . . . . . . . . . . . . . . . . . . . . . . . . . . 68
7.12 Dégivrage de la glacière . . . . . . . . . . . . . . . . . . . . . . . . . . . . 69
7.13 Remplacement du fusible de l'appareil . . . . . . . . . . . . . . . . . 69
7.14 Remplacement du fusible du connecteur (courant continu) . 70
7.15 Remplacement du platine de commande lumineuse. . . . . . . 70
Page 52

FR
Explication des symboles CFX95DZ2
52
8 Entretien et nettoyage . . . . . . . . . . . . . . . . . . . . . . . . . . . . . . . . . . 71
9 Dépannage . . . . . . . . . . . . . . . . . . . . . . . . . . . . . . . . . . . . . . . . . . . 72
10 Garantie . . . . . . . . . . . . . . . . . . . . . . . . . . . . . . . . . . . . . . . . . . . . . 73
11 Mise au rebut . . . . . . . . . . . . . . . . . . . . . . . . . . . . . . . . . . . . . . . . . 73
12 Caractéristiques techniques. . . . . . . . . . . . . . . . . . . . . . . . . . . . . 74
1 Explication des symboles
D
!
!
A
I
➤ Manipulation : ce symbole vous indique une action à effectuer. Les
manipulations à effectuer sont décrites étape par étape.
✓ Ce symbole décrit le résultat d’une manipulation.
Fig. 1 5, page 3 : cette information renvoie à un élément figurant sur une
illustration, dans cet exemple à la « position 5 de l'illustration 1 à la page 3 ».
DANGER !
Consigne de sécurité : le non-respect de ces consignes
entraîne la mort ou de graves blessures.
AVERTISSEMENT !
Consigne de sécurité : le non-respect de ces consignes peut
entraîner la mort ou de graves blessures.
ATTENTION !
Consigne de sécurité : le non-respect de ces consignes peut
entraîner des blessures.
AVIS !
Le non-respect de ces consignes peut entraîner des dommages
matériels et des dysfonctionnements du produit.
REMARQUE
Informations complémentaires sur l'utilisation du produit.
Page 53

FR
CFX95DZ2 Consignes de sécurité
53
2 Consignes de sécurité
2.1 Sécurité générale
!
AVERTISSEMENT !
z Si l’appareil présente des dégâts visibles, vous ne devez pas le
mettre en service.
z Si le câble de raccordement de l’appareil est endommagé, il doit
être remplacé par le fabricant, son service après-vente ou une
personne de qualification similaire, afin d’éviter tout danger.
z Seul un personnel qualifié est habilité à effectuer des répara-
tions sur l’appareil. Toute réparation mal effectuée risque
d’entraîner de graves dangers.
z Les enfants âgés de 8 ans et plus ainsi que les personnes ayant
des déficiences physiques, sensorielles ou mentales ou un
manque d'expérience ou de connaissances peuvent utiliser ce
produit à condition d'être sous surveillance ou d'avoir reçu des
instructions concernant l'utilisation de l'appareil en toute
sécurité et de comprendre les dangers qui en résultent.
z Le nettoyage et la maintenance ne doivent pas être effectués
par des enfants sans surveillance.
z Les enfants ne doivent pas jouer avec cet appareil.
z Les enfants doivent être surveillés pour s’assurer qu’ils ne
jouent pas avec l’appareil.
z Placez et utilisez l'appareil hors de portée des enfants de moins
de 8 ans.
z Ne stockez aucune substance explosive comme p. ex. des
aérosols contenant des agents propulseurs dans l'appareil.
!
ATTENTION !
z Débranchez l'appareil du secteur
– avant tout nettoyage et entretien
– après chaque utilisation
z Les aliments ne peuvent être conservés que dans leurs
emballages originaux ou dans des récipients appropriés.
A
AVIS !
z Comparez la tension indiquée sur la plaque signalétique avec
l’alimentation électrique dont vous disposez.
Page 54

FR
Consignes de sécurité CFX95DZ2
54
z Branchez l’appareil uniquement comme indiqué ci-dessous :
– avec le câble de raccordement CC sur une prise CC du
véhicule (par ex. un allume-cigare)
– ou avec le câble de raccordement 230 V au secteur à
courant alternatif 230 V
z Ne tirez jamais sur le câble de raccordement pour sortir la fiche
de la prise.
z Si la glacière est raccordée à la prise CC : débranchez de la
batterie la glacière et les autres consommateurs d’énergie
avant de raccorder un chargeur rapide.
z Si la glacière est raccordée à la prise CC : débranchez ou
éteignez la glacière lorsque vous éteignez le moteur. Dans le
cas contraire, il se pourrait que la batterie se décharge.
z N’utilisez pas la glacière pour le transport de produits corrosifs
ou de solvants.
z Cette glacière contient du cyclopentane inflammable dans son
isolation. Les gaz contenus dans le matériau d'isolation exigent
une procédure de retraitement particulière. Une fois que vous
ne l'utilisez plus, recyclez l'appareil de manière conforme.
2.2 Consignes de sécurité concernant
le fonctionnement de l’appareil
!
ATTENTION !
z Avant de mettre l’appareil en service, assurez-vous que la ligne
d’alimentation électrique et la fiche sont sèches.
A
AVIS !
z N'utilisez aucun appareil électrique dans la glacière, sauf si ces
appareils sont recommandés par le fabricant pour cet usage.
z Ne placez pas l’appareil près de flammes ou d’autres sources
de chaleur (chauffage, rayons solaires, réchauds à gaz, etc.).
z Danger de surchauffe !
Veillez toujours à ce que la chaleur produite lors du fonctionnement soit suffisamment dissipée. Veillez à ce que l'appareil se
trouve à une distance suffisante des murs ou des objets, de
sorte que l'air puisse circuler.
z Assurez-vous que les fentes d’aération ne sont pas
recouvertes.
Page 55

FR
CFX95DZ2 Contenu de la livraison
55
z Ne pas remplir le bac intérieur de substances liquides ou de
glace.
z Ne plongez jamais l’appareil dans l’eau.
z Tenez l’appareil et les câbles à l’abri de la chaleur et de
l’humidité.
3 Contenu de la livraison
La fig. 1, page 3 indique les pièces comprises dans la livraison.
4 Accessoires
Disponibles en accessoires (non compris dans la livraison) :
Vous trouverez sur le site Web Dometic (voir au dos) les informations sur une
application WLAN dotée de fonctions de contrôle, d'affichage et d'alarme. Il
se peut que l'application ne soit pas disponible dans votre pays.
Réf. Quantité Désignation
1 1 Glacière à compression
2 1 Câble de raccordement au courant continu
3 1 Câble de raccordement en courant alternatif
– 1 Notice d'utilisation
Désignation N° de produit
Kit de fixation universel (système de sangles) CFX-UFK 9105304041
Page 56

FR
Usage conforme CFX95DZ2
56
5 Usage conforme
La glacière est conçue pour la réfrigération et la congélation d'aliments. La glacière peut également être utilisée sur des bateaux.
La glacière est conçue pour fonctionner sur une prise à courant
continu d'une voiture (allume-cigare), d'un bateau ou d'un camping-car ainsi qu'à un secteur à courant alternatif.
La glacière est conçue pour un usage à domicile et tous les domaines
d'applications semblables, comme par exemple
z dans les cuisines destinées au personnel de boutiques, bureaux et autres
lieux de travail
z dans l'agriculture
z pour les clients d'hôtels, de motels ou autres types d'hébergement
z dans les « bed and breakfast »
z dans le catering et les utilisations semblables du commerce en gros
!
ATTENTION ! Risque pour la santé !
Veuillez vérifier si la puissance frigorifique de la glacière correspond à la température de conservation recommandée pour les aliments ou les médicaments que vous souhaitez conserver au
frais.
Page 57

FR
CFX95DZ2 Description du fonctionnement
57
6 Description du fonctionnement
La glacière permet de réfrigérer, de tenir au frais ou de congeler des produits.
La réfrigération est assurée par un circuit de refroidissement à compresseur
qui ne nécessite aucune maintenance. Sa puissante isolation et son compresseur performant garantissent un refroidissement particulièrement
rapide.
La glacière comporte deux compartiments distincts réglables indépendamment l'un de l'autre. La glacière peut être utilisée dans toutes les
combinaisons :
(pour plus de détails, voir chapitre « Réglage de la température », page 65)
La glacière convient pour une utilisation mobile.
En cas d'utilisation sur bateaux, la glacière peut supporter un angle de gîte
permanent de 30°.
6.1 Fonctions
z Bloc d'alimentation avec circuit prioritaire pour branchement sur une
courant alternatif
z Protecteur de batterie à trois niveaux pour protéger la batterie du véhicule
z Écran avec affichage de la température en °C et °F
S'éteint automatiquement lorsque la tension de la batterie est faible
z Réglages, contrôles et voyants indépendants pour chaque compartiment
z Réglage de la température : Avec deux boutons par pas de 1 °C (et de
2°F)
z Émetteur WLAN intégré, permettant une utilisation depuis une application
z Alarme couvercle ouvert
z Port USB pour l'alimentation électrique
z Interrupteur d'urgence
Grand compartiment Petit compartiment
Compartiment réfrigérateur Compartiment congélateur
Compartiment congélateur Compartiment réfrigérateur
Compartiment réfrigérateur Compartiment réfrigérateur
Compartiment congélateur Compartiment congélateur
Page 58

FR
Description du fonctionnement CFX95DZ2
58
z Poignées de transport rabattables
z Trois paniers extractibles
6.2 Éléments de commande et d'affichage
Verrouillage des couvercles : fig. 2 1, page 3
Panneau de commande (fig. 3, page 3)
Réf. Désignation Explication
1ON
OFF
Permet de mettre en marche ou d'arrêter la glacière en
appuyant une à deux secondes sur la touche
2
POWER
« P »
Témoin lumineux de fonctionnement
La DEL s'allume en
vert :
Le compresseur est en marche
La DEL s'allume en
orange :
Le compresseur est arrêté
La DEL clignote en
orange :
l'écran a été automatiquement
éteint parce que la tension de la
batterie est faible
3 ERROR La DEL clignote en
rouge :
la glacière est allumée mais n'est
pas prête à fonctionner
4 SET Sélection du mode de saisie
– Réglage de la température (grand/petit compartiment
réfrigérateur)
– Indication en degrés Celsius ou Fahrenheit
– Réglage du protecteur de batterie
– Active ou désactive le WLAN
5 Refroidisse-
ment grand
Affichage du statut du grand compartiment de réfrigération
La DEL s'allume en
bleu :
Le compartiment de réfrigération
refroidit
Le voyant DEL n'est
pas éclairé :
Le compartiment de réfrigération
ne refroidit pas
6 Affichage grand – Indique les informations sur le grand compartiment de
réfrigération
– Affiche « OFF » lorsque le compartiment de réfrigération
est désactivé
Page 59

FR
CFX95DZ2 Description du fonctionnement
59
Douille de raccordement, interrupteur d'urgence (le cas échéant) et
port USB (fig. 4, page 4) :
7 Affichage petit – Indique les informations sur le petit compartiment de
réfrigération
– Affiche « OFF » lorsque le compartiment de réfrigération
est désactivé
8 Refroidisse-
ment petit
Affichage du statut du petit compartiment de réfrigération
La DEL s'allume en
bleu :
Le compartiment de réfrigération
refroidit
Le voyant DEL n'est
pas éclairé :
Le compartiment de réfrigération
ne refroidit pas
9 DOWN – Une pression sur cette touche diminue la valeur de saisie
sélectionnée
10 UP + Une pression sur cette touche augmente la valeur de saisie
sélectionnée
Réf. Désignation
1 Douille de courant alternatif
2 Porte-fusible
3 Interrupteur d'urgence
4 Port USB pour l'alimentation électrique
5 Douille de courant continu
Réf. Désignation Explication
Page 60

FR
Utilisation CFX95DZ2
60
7 Utilisation
7.1 Avant la première utilisation
I
Retournement de la butée des couvercles
Vous pouvez retourner la butée des couvercles si vous voulez ouvrir ceux-ci
par l'autre côté. Procédez comme suit :
➤ Ouvrez les couvercles et déposez-les (fig. 5 A, page 4).
➤ Retirez trois vis sur chaque charnière latérale (fig. 5 B, page 4), et
déposez la charnière.
➤ Retirez les caches plastique des nouvelles positions de la charnière
latérale à l'aide d'un petit tournevis et remettez-les aux anciens
emplacements de la charnière.
➤ Mettez en place les charnières latérales sur les nouvelles positions.
➤ Retirez deux caches plastique de la position centrale de la charnière
(fig. 6 A, page 5).
➤ Retirez les quatre vis de la charnière du milieu (fig. 6 B, page 5), et
déposez la charnière.
➤ Retirez le cache plastique de la nouvelle position de la charnière à l'aide
d'un petit tournevis et remettez-la à l'ancien emplacement de la charnière
(fig. 6 C,page 5 ).
➤ Montez la charnière du milieu sur la nouvelle position.
➤ Mettez en place les couvercles dans les charnières sur le côté opposé
(fig. 6 D, page 5).
REMARQUE
Avant la mise en service de l'appareil neuf, nous vous conseillons, pour des raisons d’hygiène, d'en nettoyer l’intérieur et
l’extérieur à l’aide d’un tissu humide (voir aussi chapitre
« Entretien et nettoyage », page 71).
Page 61

FR
CFX95DZ2 Utilisation
61
Sélectionner l'unité de température
Pour l'affichage de la température, vous pouvez choisir entre les valeurs en
°C ou en °F. Procédez comme suit :
➤ Mettez la glacière en marche.
➤ Appuyez trois fois sur la touche « SET » (fig. 3 4, page 3).
➤ Sélectionnez l'unité de température (°C ou °F) à l'aide des touches
«UP+» (fig.3 10, page 3) ou « DOWN
– » (fig. 3 9, page 3).
✓ Les deux écrans affichent l'unité de température sélectionnée pendant
quelques secondes. Les écrans clignotent plusieurs fois avant de revenir
à l'affichage de la température actuelle.
7.2 Conseils pour économiser de l'énergie
z Choisissez un emplacement bien aéré et à l'abri du soleil.
z Laissez refroidir les aliments chauds avant de les déposer dans la
glacière.
z Ne pas ouvrir la glacière plus souvent que nécessaire.
z Ne laissez pas la glacière ouverte plus longtemps que nécessaire.
z Dégivrez la glacière dès qu'une couche de glace s'est formée.
z Évitez une température intérieure inutilement basse.
Page 62

FR
Utilisation CFX95DZ2
62
7.3 Raccordement de la glacière
Raccordement à une batterie de véhicule (véhicule ou bateau)
La glacière peut être alimentée en courant continu.
A
Pour des raisons de sécurité, la glacière est équipée d'une protection
électronique contre les inversions de polarité en courant continu et contre
les court-circuits.
➤ Branchez le câble de raccordement en courant continu (fig. 1 2 page 3)
sur la douille à tension continue de la glacière et raccordez cette dernière
sur le courant continu.
Raccordement sur secteur alternatif (p.ex. à domicile ou au bureau)
D
Les glacières sont dotées d'un bloc d'alimentation multitension avec un circuit prioritaire pour le raccordement en courant alternatif. Le circuit prioritaire
permet de passer directement en fonctionnement sur le secteur quand
l'appareil est raccordé à un réseau de courant alternatif, même si le câble de
raccordement au courant continu est encore branché.
➤ Branchez le câble de raccordement en courant alternatif (fig. 1 3
page 3) sur la douille à tension alternative de l'appareil et raccordez cette
dernière sur le courant continu.
AVIS ! Risque d'endommagement !
Débranchez la glacière et les autres consommateurs d'énergie de
la batterie du véhicule avant de recharger cette dernière avec un
chargeur rapide.
Les surtensions peuvent endommager l'électronique des
appareils.
DANGER ! Danger de mort par électrocution !
z Ne vous approchez pas de prises ou de commutateurs lorsque
vous avez les mains mouillées ou les pieds dans l'eau.
z Si vous raccordez votre glacière à bord d'un bateau à la
tension alternative par l'intermédiaire d'une prise de quai, vous
devez dans tous les cas brancher un disjoncteur différentiel
entre le secteur de tension alternative et la glacière.
Veuillez vous renseigner auprès d'un spécialiste.
Page 63

FR
CFX95DZ2 Utilisation
63
7.4 Utilisation du protecteur de batterie
La glacière est équipée d'un protecteur de batterie multiniveaux
qui protège la batterie de votre véhicule, afin d'éviter une
décharge profonde lorsqu'elle est raccordée au réseau en courant
continu.
Si la glacière est mise en marche alors que l'allumage du véhicule est éteint,
elle s'arrête automatiquement dès que la tension d'alimentation descend en
dessous d'une valeur réglable. La glacière se remet en marche dès que la
batterie est rechargée et que la tension de rallumage est atteinte.
A
En mode « HIGH », le protecteur de batterie se met en marche plus rapidement qu'en mode « LOW » ou « MED » (voir tableau suivant).
Pour modifier le mode du protecteur de batterie, procédez comme suit :
➤ Mettez la glacière en marche.
➤ Appuyez quatre fois sur la touche « SET » (fig. 3 4, page 3).
➤ Réglez le mode du protecteur de batterie à l'aide des touches « UP + »
(fig. 3 10, page 3) ou « DOWN
– » (fig. 3 9, page 3).
✓ L'écran numérique indique :
Lo (LOW), Ȇd (MED), HI (HIGH)
✓ L'écran affiche le mode sélectionné pendant quelques secondes. L'écran
clignote plusieurs fois avant de revenir à l'affichage de la température
actuelle.
AVIS ! Risque d'endommagement !
Lorsque la batterie est éteinte par le contrôleur de batterie, elle n'a
plus sa pleine capacité de charge. Évitez les démarrages répétés
ou d'utiliser des consommateurs de courant sans phases de
recharge prolongées. Veillez à recharger la batterie.
Mode protecteur de batterie LOW MED HIGH
Tension d'arrêt à 12 V
10,1 V 11,4 V 11,8 V
Tension de remise en marche à 12 V
11,1V 12,2V 12,6V
Tension d'arrêt à 24 V
21,5 V 24,1 V 24,6 V
Tension de remise en marche à 24 V
23,0 V 25,3 V 26,2 V
Page 64

FR
Utilisation CFX95DZ2
64
I
7.5 Utilisation de la glacière
A
➤ Placez la glacière sur une surface stable.
Veillez à ce que les fentes d'aération ne soient pas recouvertes, afin que
l'air chaud puisse bien s'évacuer.
I
➤ Nettoyez la glacière (voir chapitre « Raccordement de la glacière »,
page 62).
A
➤ Appuyez pendant une à deux secondes sur la touche « ON/OFF »
(fig. 3 1, page 3).
✓ La LED « P » s'allume (fig. 3 2, page 3).
✓ Les écrans (fig. 3 6 et 7 page 3) s'allument et indiquent la température
de refroidissement actuelle.
✓ La glacière commence à refroidir un ou deux compartiments de
réfrigération en fonction de la température réglée du compartiment
de réfrigération.
REMARQUE
Lorsque la glacière est alimentée par la batterie de démarrage,
réglez le protecteur de batterie sur le mode « HIGH ». Lorsque la
glacière est raccordée à une batterie d'alimentation, le mode
« LOW » suffit.
AVIS ! Risque de surchauffe
Veillez toujours à ce que la chaleur produite lors du fonctionnement puisse se dissiper suffisamment. Assurez-vous que les
ouvertures d'aération ne sont pas recouvertes. Veillez à ce que la
glacière se trouve à distance suffisante des murs ou des objets,
de sorte que l'air puisse circuler.
REMARQUE
Montez la glacière comme indiqué sur l'illustration (fig. 1,
page 3). Si la glacière est utilisée dans une autre position, elle
risque d'être endommagée.
AVIS ! Risque de températures trop basses !
Veillez à ne déposer dans la glacière que des objets ou des aliments qui peuvent être réfrigérés à la température sélectionnée.
Page 65

FR
CFX95DZ2 Utilisation
65
✓ Les LED (fig. 3 5 et 8, page 3) s'allument lorsque le compartiment de
réfrigération refroidit.
I
Verrouillage de la glacière
➤ Fermez les couvercles.
➤ Abaissez les verrouillages (fig. 2 1, page 3) jusqu'à ce qu'ils
s'enclenchent de manière audible.
I
7.6 Réglage de la température
➤ Appuyez sur la touche « SET » (fig. 3 4, page 3) :
– une fois pour le grand compartiment de réfrigération
– deux fois pour le petit compartiment de réfrigération
✓ Le voyant du compartiment de réfrigération correspondant clignote.
➤ Réglez la température de refroidissement à l'aide des touches « UP + »
(fig. 3 10, page 3) et « DOWN – » (fig. 3 9, page 3).
Vous pouvez régler la température de manière à permettre à chaque
compartiment comme un compartiment de réfrigération ou de congélation.
✓ L'écran affiche la température de refroidissement sélectionnée pendant
quelques secondes. L'écran clignote plusieurs fois avant de revenir à
l'affichage de la température actuelle.
I
REMARQUE
En cas de fonctionnement sur batterie, l'écran s'éteint
automatiquement lorsque la tension de la batterie est faible.
La LED « P » clignote en orange.
REMARQUE – Alarme « Couvercle ouvert »
Lorsqu'un couvercle reste ouvert pendant plus de trois minutes et
que l'appareil est en marche, l'ampoule correspondante s'allume
jusqu'à ce que le couvercle soit refermé.
REMARQUE
La température de chaque compartiment de réfrigération peut
être réglée à –22 °C. Le fabricant recommande toutefois une
température de –15 °C à –18 °C pour le mode normal et une
consommation électrique optimale.
Page 66

FR
Utilisation CFX95DZ2
66
7.7 Marche ou arrêt du compartiment de réfrigération
Si vous n'avez besoin que d'un compartiment de réfrigération, l'autre peut
être éteint pour économiser l'électricité.
Arrêt du compartiment de réfrigération
Lorsque l'écran du compartiment de réfrigération indique une température,
vous pouvez éteindre le compartiment de réfrigération comme indiqué ciaprès :
➤ Appuyez sur la touche « SET » (fig. 3 4, page 3) :
– une fois pour le grand compartiment de réfrigération
– deux fois pour le petit compartiment de réfrigération
✓ Le voyant du compartiment de réfrigération correspondant clignote.
➤ Appuyez sur la touche « ON/OFF » (fig. 3 1, page 3).
✓ L'écran du compartiment de réfrigération correspondant fait clignoter
l'indication « OFF » pendant cinq secondes puis indique « OFF ».
Mise en marche du compartiment de réfrigération
Lorsque l'écran du compartiment de réfrigération indique « OFF », vous
pouvez mettre en marche le compartiment de réfrigération comme indiqué ciaprès :
➤ Appuyez sur la touche « SET » (fig. 3 4, page 3) :
– une fois pour le grand compartiment de réfrigération
– deux fois pour le petit compartiment de réfrigération
✓ Le voyant du compartiment de réfrigération correspondant clignote.
➤ Appuyez sur la touche « ON/OFF » (fig. 3 1, page 3).
✓ L'écran affiche la température de refroidissement sélectionnée pendant
quelques secondes. L'écran clignote plusieurs fois avant de passer à
l'affichage de la température actuelle.
Page 67

FR
CFX95DZ2 Utilisation
67
7.8 Activation du signal WLAN pour l'application
disponible en option
La glacière peut être pilotée à l'aide d'une application sur le réseau WLAN.
L'application utilise de fonctions de contrôle, d'affichage et d'alarme.
Vous trouverez de plus amples informations sur le site Web Dometic de votre
pays (voir au dos). Veuillez noter que l'application peut ne pas être disponible
dans votre pays.
Arrêt/marche du signal WLAN
➤ Appuyez cinq fois sur la touche « SET » (fig. 3 4 page 3).
➤ Activez ou désactivez le signal WLAN à l'aide des touches « UP + »
(fig. 3 10, page 3) et « DOWN – » (fig. 3 9, page 3).
✓ L'écran affiche le réglage sélectionné pendant quelques secondes.
L'écran clignote plusieurs fois avant de revenir à l'affichage de la
température actuelle.
I
Réinitialisation du WLAN à la configuration usine
Si vous avez personnalisé les réglages WLAN de la glacière à l'aide de
l'application WLAN et que vous avez oublié votre mot de passe, vous pouvez
réinitialiser la glacière à la configuration usine en suivant la procédure ciaprès :
➤ Appuyez cinq fois sur la touche « SET » (fig. 3 4 page 3).
➤ Appuyez pendant au moins cinq secondes sur la touche « UP + »
(fig. 3 10, page 3).
✓ L'indication « rES » clignote plusieurs fois sur l'écran avant de revenir à
l'affichage précédent.
✓ Les réglages WLAN ont été réinitialisé à la configuration usine.
Pour plus d'informations, rendez-vous sur le site Web Dometic sur lequel
vous avez téléchargé l'application.
REMARQUE
L'émetteur WLAN consomme peu de courant. Pour optimiser les
performances énergétiques, désactivez l'émetteur WLAN lorsqu'il
n'est pas utilisé.
Page 68

FR
Utilisation CFX95DZ2
68
7.9 Utilisation de l'interrupteur d'urgence
L'interrupteur d'urgence (fig. 4 3, page 4) est situé sous le panneau de
commande. Pour le fonctionnement normal, le commutateur est placé sur
« NORMAL USE » (utilisation normale).
➤ En cas de dysfonctionnement de l'électronique de commande, réglez le
commutateur sur « EMERGENCY OVERRIDE » (mode urgence).
I
7.10 Port USB pour l'alimentation électrique
Vous pouvez utiliser le port USB pour le chargement de petits appareils (par
ex. un téléphone mobile ou un lecteur MP3).
Pour utiliser votre glacière avec un appareil USB, branchez simplement un
câble USB (non fourni) sur l'appareil.
I
7.11 Arrêt de la glacière
➤ Videz la glacière.
➤ Éteignez la glacière.
➤ Débranchez le câble de raccordement.
Lorsque vous ne voulez pas utiliser la glacière pendant une période
prolongée :
➤ Laissez la porte légèrement ouverte. Vous évitez ainsi la formation
d'odeurs.
REMARQUE
Lorsque le commutateur est mis sur « EMERGENCY
OVERRIDE », le système de réfrigération fonctionne à pleine
puissance. En fonction du mode des différents compartiments
lors de la commutation, le système utilise un compartiment ou les
deux en guise de compartiment de réfrigération et/ou désactive
l'un des compartiments.
REMARQUE
Assurez-vous que le petit appareil branché sur le port USB soit
utilisable sous 5 V/500 mA.
Page 69

FR
CFX95DZ2 Utilisation
69
7.12 Dégivrage de la glacière
L'humidité de l'air peut se condenser sous forme de givre au niveau de
l'évaporateur ou à l'intérieur de la glacière et diminuer ainsi sa puissance
frigorifique. Veillez donc à dégivrer l'appareil à temps.
A
Procédez de la manière suivante pour dégivrer la glacière :
➤ Retirez les aliments.
➤ Placez-les éventuellement dans un autre réfrigérateur pour qu'ils restent
froids.
➤ Éteignez la glacière.
➤ Laissez le couvercle ouvert.
➤ Essuyez l'eau provenant du dégivrage.
7.13 Remplacement du fusible de l'appareil
D
➤ Débranchez l'alimentation électrique de la glacière.
➤ Débranchez les câbles de raccordement.
➤ Retirez le porte-fusible (fig. 4 2, page 4) en faisant par ex. levier avec un
tournevis.
➤ Remplacez le fusible en verre défectueux par un nouveau fusible de en
verre même valeur (4A 250V).
➤ Replacez le porte-fusible dans le boîtier, en appuyant dessus.
➤ Rebranchez l'alimentation électrique de la glacière.
AVIS ! Risque d'endommagement !
N'utilisez jamais d'outils durs ou pointus pour enlever les couches
de glace ou pour détacher des objets pris dans le givre.
DANGER ! Danger de mort par électrocution !
Débranchez l'alimentation électrique et le câble de raccordement
avant de changer le fusible de l'appareil.
Page 70

FR
Utilisation CFX95DZ2
70
7.14 Remplacement du fusible du connecteur (courant
continu)
➤ Dévissez le boîtier de la tige de contact (fig. 7 3, page 5) du connecteur
(fig. 7 1, page 5) .
➤ Remplacez le fusible défectueux (fig. 7 2, page 5) par un nouveau
fusible de même valeur (3 AG, 15 A).
➤ Remontez le connecteur en effectuant les opérations dans l'ordre inverse.
7.15 Remplacement du platine de commande lumineuse
➤ Débranchez l'alimentation électrique de la glacière.
➤ Ouvrez le cache transparent à l'aide d'un tournevis (fig. 8 A, page 5).
➤ Retirez les vis de montage de la platine de commande (fig. 8 B, page 5).
➤ Retirez la fiche de la platine de commande (fig. 8 C, page 5).
➤ Remplacez la platine de commande défectueuse par une neuve.
➤ Mettez en place une nouvelle platine de commande en exécutant dans
l'ordre inverse des étapes décrites pour la dépose de la platine de
commande.
➤ Replacez le couvercle transparent dans le boîtier.
➤ Rebranchez l'alimentation électrique de la glacière.
Page 71

FR
CFX95DZ2 Entretien et nettoyage
71
8 Entretien et nettoyage
!
A
➤ Nettoyez de temps à autre l’appareil à l’intérieur et à l’extérieur avec un
chiffon humide.
➤ Assurez-vous que les ouvertures d'aération et de ventilation de l'appareil
ne sont pas encombrées de saletés ou de poussières, pour que la chaleur
générée par le fonctionnement soit évacuée et que l'appareil ne soit pas
endommagé.
AVERTISSEMENT !
Avant toute opération de nettoyage ou d'entretien de l'appareil,
veillez à le mettre hors secteur.
AVIS ! Risque d'endommagement !
z Ne nettoyez jamais la glacière à l’eau courante et ne la
plongez pas non plus dans l'eau.
z N'utilisez pour le nettoyage ni produits abrasifs ni objets durs
qui pourraient endommager la glacière.
Page 72

FR
Dépannage CFX95DZ2
72
9 Dépannage
Dysfonctionnement Cause possible Solution proposée
L'appareil ne fonctionne
pas, la LED n'est pas
allumée.
La prise de courant continu
de votre véhicule n'est pas
sous tension.
Dans la plupart des véhicules, le
contact doit être mis pour que la
prise de courant continu soit sous
tension.
La prise de courant alternatif n'est pas sous tension.
Essayez une autre prise.
Le fusible de l'appareil est
défectueux.
Remplacez le fusible de l'appareil
(voir chapitre « Remplacement du
fusible de l'appareil », page 69).
Le bloc d'alimentation intégré est défectueux.
La réparation doit être effectuée uniquement par un service après-vente
agréé.
La glacière ne réfrigère
pas (le connecteur est
branché, la LED
« POWER » est allumée).
Compresseur défectueux. La réparation doit être effectuée uni-
quement par un service après-vente
agréé.
La glacière ne réfrigère
pas (le connecteur est
branché, la LED
« POWER » clignote en
orange, l'écran est
éteint).
La tension de la batterie
est insuffisante.
Chargez la batterie si besoin.
Le protecteur de batterie
est sur « LOW ».
Réglez le protecteur de batterie sur
un mode moins élevé.
En cas d'utilisation sur la
prise de courant continu :
L'allumage est en
marche, l'appareil ne
fonctionne pas et la DEL
n'est pas allumée.
Retirez le connecteur de
la prise, puis procédez
aux contrôles suivants.
La prise de courant est
sale. Ceci entraîne un
mauvais contact électrique.
Si la fiche devient très chaude
lorsqu'elle est branchée dans la
prise de l'allume-cigare, c'est que la
prise de l'allume-cigare doit être nettoyée ou que la fiche n'est pas bien
montée.
Le fusible de sécurité du
câble de raccordement a
grillé.
Remplacez le fusible (15 A) du
connecteur de courant continu (voir
chapitre « Remplacement du fusible
du connecteur (courant continu) »,
page 70)
Le fusible du véhicule est
grillé.
Remplacez le fusible du véhicule de
la prise de courant continu (normalement 15 A) (veuillez respecter les
instructions du manuel d'entretien de
votre véhicule).
Page 73

FR
CFX95DZ2 Garantie
73
10 Garantie
Le délai légal de garantie s'applique. Si le produit s'avérait défectueux,
veuillez vous adresser à la filiale du fabricant située dans votre pays (voir
adresses au verso du présent manuel) ou à votre revendeur spécialisé.
Veuillez y joindre les documents suivants pour la gestion des réparations et
de la garantie :
z une copie de la facture avec la date d'achat,
z le motif de la réclamation ou une description du dysfonctionnement.
11 Mise au rebut
➤ Jetez les emballages dans les conteneurs de déchets recyclables prévus
à cet effet.
M
Lorsque vous mettrez votre produit définitivement hors service,
informez-vous auprès du centre de recyclage le plus proche ou
auprès de votre revendeur spécialisé sur les prescriptions relatives
au retraitement des déchets.
Un message d'erreur
s'affiche (p. ex. « Err1 »)
et l'appareil ne réfrigère
pas.
Un dysfonctionnement
interne a arrêté la glacière.
La réparation doit être effectuée uniquement par un service après-vente
agréé.
L'éclairage intérieur d'un
compartiment clignote.
Le couvercle du compartiment a été laissé ouvert
pendant plus de cinq
minutes.
Refermez le couvercle du compartiment.
Dysfonctionnement Cause possible Solution proposée
Page 74

FR
Caractéristiques techniques CFX95DZ2
74
12 Caractéristiques techniques
I
CFX95DZ2
Nº de produit : 9105306206
Tension de raccordement :
12/24 V
g et 100 – 240 Vw
Courant nominal :
12 V
g : 9,2 A
24 Vg : 4,5 A
100 V
w
: 1,10 A
240 V
w
: 0,45 A
Puissance frigorifique : de +10 °C à –22 °C (de +50 °F à –8 °F)
Catégorie : 1
Classe d'efficacité énergétique : A+
Consommation électrique : 109 kWh/an
Capacité :
Grand compartiment réfrigérant :
Petit compartiment réfrigérant :
54 l
40,5 l
Capacité utile :
Grand compartiment réfrigérant :
Petit compartiment réfrigérant :
50,5 l
34,5 l
Classe climatique : N, T
Température ambiante : De +16 °C à +43 °C
Émissions sonores : 37 dB(A)
Port USB : 5 Vg, 500 mA
Réfrigérant : R134a
Quantité de réfrigérant : 65 g
Dimensions (l x H x p) en mm :
Avec poignées :
Sans poignées :
957 x 472 x 530
900 x 472 x 530
Poids : 32 kg
Contrôle/certificats :
REMARQUE
La température minimale ne peut plus être atteinte à des températures ambiantes supérieures à +32 °C (90 °F).
4
Page 75

ES
CFX95DZ2
75
Lea atentamente este manual antes de la puesta en funcionamiento
del aparato y consérvelo en un lugar seguro para futuras consultas.
En caso de vender o entregar el aparato a otra persona, entregue
también estas instrucciones.
El fabricante declina toda responsabilidad por los daños causados por
el uso inadecuado o por el uso incorrecto del aparato.
Índice
1 Explicación de los símbolos. . . . . . . . . . . . . . . . . . . . . . . . . . . . . 76
2 Indicaciones de seguridad . . . . . . . . . . . . . . . . . . . . . . . . . . . . . . 77
2.1 Seguridad general . . . . . . . . . . . . . . . . . . . . . . . . . . . . . . . . . 77
2.2 Seguridad durante el funcionamiento del aparato . . . . . . . . . 78
3 Volumen de entrega. . . . . . . . . . . . . . . . . . . . . . . . . . . . . . . . . . . . 79
4 Accesorio . . . . . . . . . . . . . . . . . . . . . . . . . . . . . . . . . . . . . . . . . . . . 79
5 Uso adecuado . . . . . . . . . . . . . . . . . . . . . . . . . . . . . . . . . . . . . . . . 80
6 Descripción del funcionamiento . . . . . . . . . . . . . . . . . . . . . . . . . 81
6.1 Características. . . . . . . . . . . . . . . . . . . . . . . . . . . . . . . . . . . . 81
6.2 Elementos de mando y de visualización . . . . . . . . . . . . . . . . 82
7Manejo. . . . . . . . . . . . . . . . . . . . . . . . . . . . . . . . . . . . . . . . . . . . . . . 84
7.1 Antes del primer uso . . . . . . . . . . . . . . . . . . . . . . . . . . . . . . . 84
7.2 Consejos para el ahorro de energía . . . . . . . . . . . . . . . . . . . 85
7.3 Conexión de la nevera. . . . . . . . . . . . . . . . . . . . . . . . . . . . . . 86
7.4 Uso del controlador de batería . . . . . . . . . . . . . . . . . . . . . . . 87
7.5 Uso de la nevera . . . . . . . . . . . . . . . . . . . . . . . . . . . . . . . . . . 88
7.6 Ajuste de temperatura . . . . . . . . . . . . . . . . . . . . . . . . . . . . . . 89
7.7 Encendido o apagado de un
compartimiento de refrigeración . . . . . . . . . . . . . . . . . . . . . . 90
7.8 Activación de señal de WLAN para app opcional . . . . . . . . . 91
7.9 Uso de interruptor de emergencia . . . . . . . . . . . . . . . . . . . . . 92
7.10 Conexión USB para suministro de corriente . . . . . . . . . . . . . 92
7.11 Apagado de la nevera . . . . . . . . . . . . . . . . . . . . . . . . . . . . . . 92
7.12 Descongelamiento de la nevera . . . . . . . . . . . . . . . . . . . . . . 93
7.13 Sustitución del fusible del aparato . . . . . . . . . . . . . . . . . . . . . 93
7.14 Cambio de fusible de clavija (corriente continua) . . . . . . . . . 94
7.15 Cambio de circuito impreso de luces. . . . . . . . . . . . . . . . . . . 94
Page 76

ES
Explicación de los símbolos CFX95DZ2
76
8 Limpieza y mantenimiento . . . . . . . . . . . . . . . . . . . . . . . . . . . . . . 95
9 Solución de averías . . . . . . . . . . . . . . . . . . . . . . . . . . . . . . . . . . . . 96
10 Garantía legal . . . . . . . . . . . . . . . . . . . . . . . . . . . . . . . . . . . . . . . . . 97
11 Gestión de residuos . . . . . . . . . . . . . . . . . . . . . . . . . . . . . . . . . . . 97
12 Datos técnicos . . . . . . . . . . . . . . . . . . . . . . . . . . . . . . . . . . . . . . . . 98
1 Explicación de los símbolos
D
!
!
A
I
➤ Paso a seguir: este símbolo le indica que debe realizar un paso. Todos
los procedimientos necesarios se describen paso a paso.
✓ Este símbolo describe el resultado de un paso realizado.
Fig. 1 5, página 3: esta indicación hace referencia a un elemento de una
figura, en este ejemplo a la “Posición 5 en la figura 1 de la página 3”.
¡PELIGRO!
Indicación de seguridad: su incumplimiento acarrea la muerte o
graves lesiones.
¡ADVERTENCIA!
Indicación de seguridad: su incumplimiento puede acarrear la
muerte o graves lesiones.
¡ATENCIÓN!
Indicación de seguridad: su incumplimiento puede acarrear
lesiones.
¡AVISO!
Su incumplimiento puede acarrear daños materiales y perjudicar
el correcto funcionamiento del producto.
NOTA
Información adicional para el manejo del producto.
Page 77

ES
CFX95DZ2 Indicaciones de seguridad
77
2 Indicaciones de seguridad
2.1 Seguridad general
!
¡ADVERTENCIA!
z No ponga el aparato en funcionamiento si presenta desperfec-
tos visibles.
z Si se daña el cable de conexión del aparato, éste deberá ser
reemplazado por el fabricante, su servicio de atención al cliente
o una persona cualificada para evitar así posibles peligros.
z Sólo personal especializado puede realizar reparaciones en el
aparato. Las reparaciones realizadas indebidamente pueden
dar lugar a situaciones de considerable peligro.
z Los niños mayores de 8 años y las personas de capacidad
física, sensorial o mental disminuida, así como aquellas
personas con falta de experiencia y/o conocimientos suficientes
solo podrán utilizar este aparato si están vigilados o han sido
instruidos respecto al uso seguro del aparato y a los posibles
peligros que pueden emanar de él.
z Los niños solo podrán realizar las tareas de limpieza y manteni-
miento bajo vigilancia.
z Los niños no están autorizados a jugar con el aparato.
z Se ha de vigilar a los niños para garantizar que no usen este
aparato como juguete.
z Mantenga y utilice el aparato fuera del alcance de los niños
menores de 8 años.
z No guarde en el aparato sustancias con peligro de explosión
como, p. ej., atomizadores con gases combustibles.
!
¡ATENCIÓN!
z Desconecte el aparato de la red
– antes de realizar cualquier tarea de limpieza y
mantenimiento;
– después de cada uso.
z Los alimentos sólo se pueden guardar en los envases
originales o en recipientes adecuados.
Page 78

ES
Indicaciones de seguridad CFX95DZ2
78
A
¡AVISO!
z Compare el valor de tensión indicado en la placa de
características con el suministro de energía existente.
z Conecte el aparato únicamente del siguiente modo:
– conecte el cable de alimentación CC a una caja de
enchufe CC en el vehículo (por ejemplo mechero del
vehículo)
– o bien conecte el cable de alimentación de 230 V a la red de
corriente alterna de 230 V
z No extraiga nunca la clavija de la caja de enchufe tirando del
cable de conexión.
z Si la nevera está conectada a la caja de enchufe CC:
Desconecte de la batería el aparato refrigerador u otros
dispositivos consumidores si va a conectar un cargador rápido.
z Si la nevera está conectada a la caja de enchufe CC:
Desconecte la conexión o apague el aparato cuando apague el
motor. De lo contrario podrá descargarse la batería.
z Este aparato refrigerador no es apto para transportar
sustancias corrosivas o disolventes.
z Este aislamiento de este aparato refrigerador contiene
ciclopentanto inflamable. Los gases presentes en el material
aislante requieren un proceso de eliminación especial. Elimine
debidamente el aparato al final de su vida útil.
2.2 Seguridad durante el funcionamiento del aparato
!
¡ATENCIÓN!
z Antes de la puesta en funcionamiento, asegúrese de que el
cable de alimentación y la clavija de enchufe estén secos.
A
¡AVISO!
z No utilice ningún aparato eléctrico dentro de la nevera, a no ser
que el aparato en cuestión haya sido recomendado para ello
por el fabricante.
z No coloque el aparato cerca de llamas vivas ni de otras fuentes
de calor (calefacción, radiación directa del sol, estufas de gas,
etc.).
Page 79

ES
CFX95DZ2 Volumen de entrega
79
z ¡Peligro de sobrecalentamiento!
Asegúrese todo el tiempo de que el calor producido durante el
funcionamiento se puede desalojar adecuadamente. Asegúrese de que el aparato guarda la suficiente distancia con las
paredes u objetos, de forma que el aire pueda circular.
z Procure que no se obstruyan las ranuras de ventilación.
z No introduzca líquidos ni hielo en el contenedor interior.
z No sumerja nunca el aparato en agua.
z Proteja el aparato y los cables del calor y de la humedad.
3 Volumen de entrega
La fig. 1, página 3 muestra el volumen de entrega.
4 Accesorio
Disponible como accesorio (no incluido en el volumen de entrega):
En el sitio web de Dometic (véase al dorso) encontrará información acerca
de una app de WLAN con funciones de control, visualización y alarma.
Puede que la app no esté disponible en su país.
Pos. Cantidad Denominación
1 1 Nevera con compresor
2 1 Cable de conexión de corriente continua
3 1 Cable de conexión de corriente alterna
– 1 Instrucciones de uso
Denominación N.° de art.
Kit de fijación universal (sistema de correas) CFX-UFK 9105304041
Page 80

ES
Uso adecuado CFX95DZ2
80
5 Uso adecuado
Esta nevera es apta para enfriar y congelar alimentos. La nevera
también es apta para su funcionamiento en embarcaciones.
La nevera está diseñada para conectarse a una caja de enchufe
de corriente continua de un automóvil (por ejemplo, el mechero
del vehículo), de una caravana o una embarcación, así como a
una red de corriente alterna.
Esta nevera está concebida para el uso doméstico o usos similares, como
por ejemplo:
z en las cocinas destinadas al personal en establecimientos comerciales,
oficinas u otros recintos de trabajo
z en el trabajo en el campo
z para los huéspedes de hoteles, moteles u otros tipos de alojamiento
z en pensiones con desayuno
z en servicios de catering y otras aplicaciones semejantes
!
¡ATENCIÓN! ¡Riesgo para la salud!
Compruebe si la potencia de refrigeración de la nevera cumple
los requisitos de los alimentos o medicamentos que desea
enfriar.
Page 81

ES
CFX95DZ2 Descripción del funcionamiento
81
6 Descripción del funcionamiento
En la nevera se pueden enfriar, mantener fríos y congelar productos. La refrigeración se realiza a través de un circuito de refrigeración exento de mantenimiento, con compresor. El aislamiento exterior extrafuerte y el compresor
de alto rendimiento garantizan una refrigeración especialmente rápida.
La nevera cuenta con dos compartimientos separados que pueden ajustarse
independientemente el uno del otro. La nevera se puede utilizar en todas las
combinaciones:
(Para obtener más detalles véase capítulo “Ajuste de temperatura” en la
página 89)
La nevera está prevista para un uso portátil.
Para su uso en embarcaciones, la nevera puede funcionar con un ángulo de
escora constante de 30º.
6.1 Características
z Fuente de alimentación con conexión de prioridad para conexión a la
corriente alterna
z Controlador de la batería de tres etapas para proteger la batería del
vehículo
z Pantalla con indicación de temperatura en °C y °F
se apaga automáticamente en caso de tensión baja de la batería
z Ajustes, controles e indicaciones independientes para cada comparti-
miento
z Regulación de temperatura: Con dos teclas a pasos de 1 °C (y a pasos
de 2 °F)
z Emisor WLAN integrado, por lo tanto se puede controlar mediante app
z Señalización en caso de tapa abierta
Compartimiento grande Compartimiento pequeño
Compartimento de refrigeración Congelador
Congelador Compartimento de refrigeración
Compartimento de refrigeración Compartimento de refrigeración
Congelador Congelador
Page 82

ES
Descripción del funcionamiento CFX95DZ2
82
z Conexión USB para suministro de corriente
z Interruptor de emergencia
z Asas de transporte abatibles
z Tres cestas interiores extraíbles
6.2 Elementos de mando y de visualización
Bloqueo de la tapa: fig. 2 1, página 3
Panel de mando (fig. 3, página 3)
Pos. Denominación Explicación
1ON
OFF
Enciende o apaga la nevera cuando se pulsa la tecla
durante uno o dos segundos
2
POWER
“P”
Indicación del modo de funcionamiento
LED iluminado en
verde:
el compresor está en marcha
LED iluminado en
naranja:
el compresor está apagado
LED intermitente en
naranja:
la pantalla se apaga automáticamente porque la tensión de la
batería es baja
3 ERROR LED intermitente en
rojo:
la nevera está encendida pero no
está lista para funcionar
4 SET Selecciona el modo de entrada de datos:
– Ajuste de temperatura (compartimiento de refrigeración
grande/pequeño)
– Indicación de grados centígrados o Fahrenheit
– Ajuste del controlador de la batería
– Activa o desactiva la WLAN
5 Refrigeración
grande
Indicador de estado del compartimiento de refrigeración
grande
LED iluminado en azul: el compartimiento de refrigeración
enfría
LED no iluminado: el compartimiento de refrigeración
no enfría
Page 83

ES
CFX95DZ2 Descripción del funcionamiento
83
Hembrillas de conexión, interruptor de emergencia (si existe) y
conexión USB (fig. 4, página 4):
6 Indicador
grande
– Muestra información acerca del compartimiento de
refrigeración grande
– Muestra “OFF” cuando el compartimiento de
refrigeración está apagado
7 Indicador
pequeño
– Muestra información acerca del compartimiento de
refrigeración pequeño
– Muestra “OFF” cuando el compartimiento de
refrigeración está apagado
8 Refrigeración
pequeño
Indicador de estado del compartimiento de refrigeración
pequeño
LED iluminado en azul: el compartimiento de refrigeración
enfría
LED no iluminado: el compartimiento de refrigeración
no enfría
9 DOWN – Pulsando una vez, disminuye el valor de entrada
10 UP + Pulsando una vez, aumenta el valor de entrada
Pos. Denominación
1 Hembrilla de corriente alterna
2 Portafusibles
3 Interruptor de emergencia
4 Conexión USB para suministro de corriente
5 Hembrilla de corriente continua
Pos. Denominación Explicación
Page 84

ES
Manejo CFX95DZ2
84
7 Manejo
7.1 Antes del primer uso
I
Dar la vuelta al tope de la tapa
Puede dar la vuelta al tope de la tapa, en caso de que desee abrir la tapa
hacia el otro lado. Para ello proceda de la siguiente manera:
➤ Abra la tapa y quítela (fig. 5 A, página 4).
➤ Retire los tres tornillos respectivos de las bisagras laterales (fig. 5 B,
página 4) y quite las bisagras.
➤ Quite las tapas de plástico de las nuevas posiciones de las bisagras
laterales con ayuda de un pequeño destornillador y vuelva a colocarlas
en las posiciones anteriores de las bisagras.
➤ Monte las bisagras laterales en las nuevas posiciones.
➤ Quite las dos tapas de plástico de la posición de la bisagra central
(fig. 6 A, página 5).
➤ Retire los cuatro tornillos de la bisagra central (fig. 6 B, página 5) y quite
la bisagra.
➤ Quite la tapa de plástico de la nueva posición de la bisagra con ayuda de
un pequeño destornillador y vuelva a colocarla en la posición anterior de
la bisagra (fig. 6 C, página 5).
➤ Monte la bisagra central en la nueva posición.
➤ Coloque la tapa en la bisagra del lado opuesto (fig. 6 D, página 5).
NOTA
Por razones de higiene, debería limpiar la nevera por dentro y por
fuera con un paño húmedo antes de ponerla en funcionamiento
(véase también el capítulo “Limpieza y mantenimiento” en la
página 95).
Page 85

ES
CFX95DZ2 Manejo
85
Selección de la unidad de temperatura
Para la indicación de temperatura puede elegir entre grados centígrados o
Fahrenheit. Para ello proceda de la siguiente manera:
➤ Encienda la nevera.
➤ Pulse tres veces la tecla “SET” (fig. 3 4, página 3).
➤ Ajuste con las teclas “UP +” (fig. 3 10, página 3) o “DOWN
–” (fig. 3 9,
página 3), la unidad de temperatura en grados centígrados (Celsius) o
Fahrenheit.
✓ Ambas pantallas muestran durante unos segundos la unidad de tempe-
ratura ajustada. Las pantallas parpadean algunas veces antes de volver
a mostrar la temperatura actual.
7.2 Consejos para el ahorro de energía
z Elija un lugar de montaje correctamente ventilado y protegido de la radia-
ción solar.
z Antes de introducir alimentos calientes, deje que se enfríen.
z Evite abrir la nevera más de lo necesario.
z No deje la nevera abierta más tiempo del que sea necesario.
z Descongele la nevera cuando se forme una capa de escarcha.
z No regule una temperatura innecesariamente baja en el interior.
Page 86

ES
Manejo CFX95DZ2
86
7.3 Conexión de la nevera
Conexión a una batería de vehículo (automóvil o embarcación)
La nevera se puede utilizar con corriente continua.
A
Por motivos de seguridad, la nevera está equipada con una protección
electrónica contra inversión de polaridad que la protege si no se respeta la
polaridad al conectarla a la batería y también si se produce un cortocircuito.
➤ Enchufe el cable de conexión de corriente continua (fig. 1 2, página 3)
a la hembrilla de corriente continua de la nevera y conéctela a la red de
corriente continua.
Conexión a una red de corriente alterna (por ejemplo, en casa o en la
oficina)
D
Las neveras están provistas de una fuente de alimentación integrada de
tensión múltiple con conexión de prioridad para conectar a corriente alterna.
Mediante la conexión de prioridad se cambia automáticamente al funcionamiento por corriente de red cuando la nevera se conecta a una red de
corriente alterna, incluso si el cable de corriente continua aún está
enchufado.
➤ Enchufe el cable de conexión de corriente alterna (fig. 1 3, página 3) a
la hembrilla de corriente alterna de la nevera y conéctela a la red de
corriente alterna.
¡AVISO! Peligro de ocasionar daños materiales
Antes de cargar la batería del vehículo con un cargador rápido,
desconéctela de la nevera y de otros aparatos conectados.
La sobretensión puede dañar el sistema electrónico de los
aparatos.
¡PELIGRO! ¡Peligro de muerte por descarga eléctrica!
z No manipule los enchufes ni interruptores con las manos
mojadas ni con los pies sobre una superficie mojada.
z Si la nevera funciona en una embarcación conectada a una
red de corriente alterna a través de una conexión de tierra, se
deberá conectar un interruptor de protección FI entre la red de
corriente alterna y la nevera.
Consulte con un especialista.
Page 87

ES
CFX95DZ2 Manejo
87
7.4 Uso del controlador de batería
La nevera está equipada con un controlador de batería de varios
niveles que evita que la batería del vehículo se descargue excesivamente cuando se utiliza la red de corriente continua.
En caso de poner la nevera en funcionamiento en el vehículo con el contacto
apagado, ésta se desconectará automáticamente en cuanto la tensión de
alimentación descienda por debajo del valor programable. La nevera vuelve
a conectarse tan pronto como se cargue la batería y se alcance la tensión de
alimentación de reconexión.
A
En el modo “HIGH” el controlador de batería se activa antes que en el nivel
“LOW” y “MED” (véase la siguiente tabla).
Para cambiar el modo del controlador de la batería, proceda como sigue:
➤ Encienda la nevera.
➤ Pulse tres veces la tecla “SET” (fig. 3 4, página 3).
➤ Ajuste con las teclas “UP +” (fig. 3 10, página 3) o “DOWN
–” (fig. 3 9,
página 3), el modo del controlador de la batería.
✓ En la pantalla digital se muestra lo siguiente:
Lo (LOW), Ȇd (MED), HI (HIGH)
✓ La pantalla indica durante unos segundos el modo del controlador de
batería ajustado. La pantalla parpadea algunas veces antes de volver a
mostrar la temperatura actual.
¡AVISO! Peligro de ocasionar daños materiales
Cuando el controlador de la batería la desconecta, ésta ya no dispone de su capacidad de carga plena. Evite arranques reiterados
o poner en funcionamiento otros aparatos conectados a la
corriente sin fases de recarga prolongadas. Asegúrese de recargar la batería.
Modo del controlador de batería LOW MED HIGH
Tensión de desconexión a 12 V
10,1 V 11,4 V 11,8 V
Tensión de reconexión a 12 V
11,1V 12,2V 12,6V
Tensión de desconexión a 24 V
21,5 V 24,1 V 24,6 V
Tensión de reconexión a 24 V
23,0 V 25,3 V 26,2 V
Page 88

ES
Manejo CFX95DZ2
88
I
7.5 Uso de la nevera
A
➤ Coloque la nevera sobre una base firme.
Procure que no se obstruyan las aberturas de ventilación y que el aire
recalentado se evacue correctamente.
I
➤ Conecte la nevera, véase capítulo “Conexión de la nevera” en la
página 86.
A
➤ Mantenga la tecla “ON/OFF” (fig. 3 1, página 3) pulsada durante uno o
dos segundos.
✓ El LED “P” se ilumina (fig. 3 2, página 3).
✓ Las pantallas (fig. 3 6 y 7, página 3) se encienden e indican la tempera-
tura de enfriamiento actual.
✓ Conforme a las temperaturas ajustadas de los compartimientos de
refrigeración, la nevera empieza a enfriar uno o ambos compartimientos
de refrigeración.
NOTA
Cuando la nevera está alimentada por la batería de arranque,
seleccione el modo del controlador de batería “HIGH”. Cuando la
nevera está conectada a una batería de alimentación, es suficiente el modo de controlador de batería “LOW”.
¡AVISO! ¡Peligro de sobrecalentamiento!
Asegúrese de que quede constantemente garantizada una salida
adecuada del calor que se desprende durante el funcionamiento.
Evite que se obstruyan las aberturas de ventilación. Asegúrese
también de que la nevera guarde la suficiente distancia respecto
a paredes u objetos, de forma que el aire pueda circular.
NOTA
Coloque la nevera como se indica en (fig. 1, página 3). Si la
nevera se pone en marcha en otra posición, ésta podría sufrir
daños.
¡AVISO! ¡Peligro debido a una temperatura demasiado baja!
Asegúrese de que en la nevera solo haya objetos o productos
que puedan enfriarse a la temperatura ajustada.
Page 89

ES
CFX95DZ2 Manejo
89
✓ Los LEDs (fig. 3 5 y 8, página 3) se iluminan cuando el compartimiento
de refrigeración correspondiente se enfría.
I
Bloqueo de la nevera
➤ Cierre la tapa.
➤ Presione los bloqueos (fig. 2 1, página 3) hacia abajo hasta que los oiga
encajar.
I
7.6 Ajuste de temperatura
➤ Pulse la tecla “SET” (fig. 3 4, página 3):
– una vez para el compartimiento de refrigeración grande
– dos veces para el compartimiento de refrigeración pequeño
✓ El indicador del compartimiento de refrigeración correspondiente
parpadea.
➤ Ajuste la temperatura de enfriamiento con las teclas “UP +” (fig. 3 10,
página 3) y “DOWN –” (fig. 3 9, página 3).
La temperatura se puede ajustar de modo que cada compartimiento
funcione como compartimiento de refrigeración o como congelador.
✓ La pantalla indica durante unos segundos la temperatura de enfriamiento
ajustada. La pantalla parpadea algunas veces antes de volver a mostrar
la temperatura actual.
I
NOTA
Durante el funcionamiento con una batería de vehículo, la pantalla se apaga automáticamente si la tensión de la batería es baja.
El LED “P” parpadea en naranja.
NOTA – Alarma “Tapa abierta”
Si la tapa se deja abierta durante más de tres minutos y el aparato
está encendido, la correspondiente luz interior parpadea hasta
que se cierra la tapa.
NOTA
La temperatura de cada compartimiento de refrigeración se
puede ajustar hasta –22 °C. Sin embargo, el fabricante recomienda una temperatura de –15 °C hasta –18 °C para el
funcionamiento normal y para un consumo de energía óptimo.
Page 90

ES
Manejo CFX95DZ2
90
7.7 Encendido o apagado de un
compartimiento de refrigeración
En caso de que se requiera un solo compartimiento de refrigeración, el otro
compartimiento se puede apagar para ahorrar energía.
Apagado de un compartimiento de refrigeración
Cuando la pantalla del compartimiento de refrigeración muestra una
temperatura, éste se puede apagar de la siguiente manera:
➤ Pulse la tecla “SET” (fig. 3 4, página 3):
– una vez para el compartimiento de refrigeración grande
– dos veces para el compartimiento de refrigeración pequeño
✓ El indicador del compartimiento de refrigeración correspondiente
parpadea.
➤ Pulse la tecla “ON/OFF” (fig. 3 1, página 3).
✓ En el indicador del compartimiento de refrigeración correspondiente
parpadea durante cinco segundos el mensaje “OFF” y a continuación se
muestra “OFF”.
Encendido del compartimiento de refrigeración
Cuando la pantalla del compartimiento de refrigeración muestra “OFF”, éste
se puede apagar de la siguiente manera:
➤ Pulse la tecla “SET” (fig. 3 4, página 3):
– una vez para el compartimiento de refrigeración grande
– dos veces para el compartimiento de refrigeración pequeño
✓ El indicador del compartimiento de refrigeración correspondiente
parpadea.
➤ Pulse la tecla “ON/OFF” (fig. 3 1, página 3).
✓ La pantalla indica durante unos segundos la temperatura de enfriamiento
ajustada. La pantalla parpadea algunas veces antes de cambiar para
volver a mostrar la temperatura actual.
Page 91

ES
CFX95DZ2 Manejo
91
7.8 Activación de señal de WLAN para app opcional
La nevera se puede controlar a través de WLAN con una app que se puede
instalar en cualquier dispositivo compatible. La app dispone de funciones de
control, visualización y alarma.
Encontrará información más detallada en el sitio web de Dometic de su país
(véase al dorso). Tenga en cuenta que es posible que la app no esté disponible en su país.
Encendido/apagado de la señal de WLAN
➤ Pulse cinco veces la tecla “SET” (fig. 3 4, página 3).
➤ Active o desactive la señal de WLAN con las teclas “UP +” (fig. 3 10,
página 3) o “DOWN –” (fig. 3 9, página 3).
✓ La pantalla indica durante algunos segundos los ajustes deseados. La
pantalla parpadea algunas veces antes de volver a mostrar la temperatura actual.
I
Restablecimiento de ajustes de fábrica de WLAN
Si ha personalizado los ajustes de WLAN de la nevera a través de la app de
WLAN y ha olvidado su contraseña, puede restablecer los ajustes de fábrica
de la nevera de la siguiente manera:
➤ Pulse cinco veces la tecla “SET” (fig. 3 4, página 3).
➤ Mantenga la tecla “UP +” (fig. 3 10, página 3) pulsada durante al menos
cinco segundos.
✓ En las pantallas parpadea varias veces el mensaje “rES” antes de volver
a la visualización anterior.
✓ Los ajustes de WLAN se han restablecido a los ajustes de fábrica.
Para obtener más información visite el sitio web de Dometic desde el que
haya descargado la app.
NOTA
El emisor WLAN consume muy poca corriente. Para alcanzar un
rendimiento energético óptimo, apague el emisor WLAN cuando
no esté en uso.
Page 92

ES
Manejo CFX95DZ2
92
7.9 Uso de interruptor de emergencia
El interruptor de emergencia (fig. 4 3, página 4) se encuentra debajo del
panel de mando. Para el funcionamiento normal el interruptor se coloca en
“NORMAL USE” (uso normal).
➤ Si se produce una avería en la electrónica de control, coloque el interrup-
tor en “EMERGENCY OVERRIDE” (accionamiento de emergencia).
I
7.10 Conexión USB para suministro de corriente
La conexión USB se puede utilizar para cargar dispositivos pequeños (como
por ejemplo teléfonos móviles y reproductores de MP3).
Si desea utilizar su nevera con un dispositivo USB, solo tiene que conectar
un cable USB (no incluido en el volumen de entrega) al aparato.
I
7.11 Apagado de la nevera
➤ Vacíe la nevera.
➤ Apague la nevera.
➤ Desenchufe el cable de conexión.
Si no desea usar la nevera durante un largo período de tiempo:
➤ Deje la tapa ligeramente abierta. De esta forma evitará la formación de
olores.
NOTA
Si el interruptor está en la posición “EMERGENCY OVERRIDE”,
el sistema de enfriamiento funciona con potencia de refrigeración
total. Según el modo de funcionamiento de los compartimientos
individuales al momento del encendido, el sistema funciona con
uno o ambos compartimientos como congelador o apaga uno de
los compartimientos.
NOTA
Asegúrese de que el dispositivo pequeño que enchufe a la conexión USB sea adecuado para el funcionamiento con 5 V/500 mA.
Page 93

ES
CFX95DZ2 Manejo
93
7.12 Descongelamiento de la nevera
Es posible que la humedad del aire se deposite en forma de escarcha en el
evaporador o en el interior de la nevera, disminuyendo de este modo la
potencia de refrigeración. Descongele la nevera a tiempo.
A
Para descongelar la nevera, proceda como se indica a continuación:
➤ Extraiga los productos.
➤ En caso necesario, coloque los productos en otro frigorífico para mante-
nerlos fríos.
➤ Apague la nevera.
➤ Deje la tapa abierta.
➤ Seque con un paño el agua descongelada.
7.13 Sustitución del fusible del aparato
D
➤ Desconecte la alimentación de tensión a la nevera.
➤ Desenchufe el cable de conexión.
➤ Quite el juego de fusibles (fig. 4 2, página 4) con un destornillador.
➤ Cambie el fusible de cristal averiado por otro nuevo del mismo valor
(4A 250V).
➤ Presione el juego de fusibles en la carcasa.
➤ Conecte la alimentación de tensión a la nevera.
¡AVISO! Peligro de ocasionar daños materiales
Nunca utilice herramientas duras ni puntiagudas para retirar
capas de hielo o despegar productos que se hayan adherido al
congelarse.
¡PELIGRO! ¡Peligro de muerte por descarga eléctrica!
Desconecte la alimentación de tensión y el cable de conexión de
tensión antes de sustituir el fusible del aparato.
Page 94

ES
Manejo CFX95DZ2
94
7.14 Cambio de fusible de clavija (corriente continua)
➤ Desatornille la carcasa de clavija de contacto (fig. 7 3, página 5) de la
clavija (fig. 7 1, página 5) .
➤ Cambie el fusible averiado (fig. 7 2, página 5) por otro nuevo con el
mismo valor (3AG, 15 A).
➤ Vuelva a montar la clavija procediendo en el orden inverso.
7.15 Cambio de circuito impreso de luces
➤ Desconecte la alimentación de tensión a la nevera.
➤ Abra la cubierta transparente mediante un destornillador (fig. 8 A,
página 5).
➤ Suelte los tornillos de montaje del circuito impreso (fig. 8 B, página 5).
➤ Quite la clavija del circuito impreso (fig. 8 C, página 5).
➤ Cambie el circuito impreso de luces defectuoso por uno nuevo.
➤ Coloque un nuevo circuito impreso realizando en sentido inverso los
pasos indicados en las instrucciones para quitar el circuito impreso.
➤ Coloque la cubierta transparente nuevamente en la carcasa.
➤ Conecte la alimentación de tensión a la nevera.
Page 95

ES
CFX95DZ2 Limpieza y mantenimiento
95
8 Limpieza y mantenimiento
!
A
➤ Limpie de vez en cuando el interior y el exterior de la nevera con un paño
húmedo.
➤ Asegúrese de que las aberturas de ventilación y desaireación del aparato
están limpias de polvo para que se pueda evacuar el calor generado
durante el funcionamiento y el aparato no resulte perjudicado.
¡ADVERTENCIA!
Desconecte el aparato de la red antes de proceder con la
limpieza o el mantenimiento del mismo.
¡AVISO! ¡Peligro de ocasionar daños materiales!
z Nunca limpie la nevera bajo el chorro de agua corriente ni
inmersa en agua jabonosa.
z No emplee productos de limpieza corrosivos u objetos que
puedan arañar o deteriorar el aparato durante su limpieza.
Page 96

ES
Solución de averías CFX95DZ2
96
9 Solución de averías
Avería Posible causa Propuesta de solución
La nevera no funciona, el
LED no se ilumina.
No hay tensión en el
enchufe de corriente continua del vehículo.
En la mayoría de los vehículos debe
estar conectado el interruptor de
encendido para que el enchufe de
corriente continua reciba tensión.
El enchufe de corriente
alterna no conduce tensión.
Inténtelo en otro enchufe.
El fusible del aparato está
averiado.
Cambie el fusible del aparato, véase
capítulo “Sustitución del fusible del
aparato” en la página 93.
La fuente de alimentación integrada está averiada.
La reparación solo puede ser realizada por un servicio de atención al
cliente autorizado.
La nevera no enfría (la clavija está conectada, el LED
“POWER” se ilumina).
Compresor averiado. La reparación solo puede ser reali-
zada por un servicio de atención al
cliente autorizado.
La nevera no enfría (la clavija está conectada, el LED
“POWER” parpadea en
naranja, la pantalla está
apagada).
La tensión de batería no
es suficiente.
Cargue la batería en caso necesario.
El modo del controlador
de la batería es demasiado alto
Ajuste el controlador de la batería a
un modo más bajo.
Para el funcionamiento en
el enchufe de corriente
continua:
el encendido está conectado, pero el aparato no
funciona y el LED no está
iluminado.
Desenchufe la nevera y
realice las siguientes comprobaciones.
El casquillo del enchufe
de corriente continua está
sucio y, en consecuencia,
el contacto eléctrico es
defectuoso.
Si la clavija se calienta demasiado en
el enchufe de corriente continua,
puede que sea necesario limpiar el
casquillo o que la clavija no se haya
montado correctamente.
El fusible del enchufe de
corriente continua está
fundido.
Cambie el fusible (15 A) del enchufe
de corriente continua, véase capítulo
“Cambio de fusible de clavija
(corriente continua)” en la página 94.
El fusible del vehículo
está fundido.
Cambie el fusible del enchufe de
corriente continua del vehículo (normalmente 15 A) (consulte para ello el
manual de instrucciones de su vehículo).
Page 97

ES
CFX95DZ2 Garantía legal
97
10 Garantía legal
Rige el plazo de garantía legal. Si el producto presenta algún defecto,
diríjase a la sucursal del fabricante de su país (ver direcciones en el dorso
de estas instrucciones) o a su establecimiento especializado.
Para la tramitación de la reparación y de la garantía debe enviar también los
siguientes documentos:
z una copia de la factura con fecha de compra,
z el motivo de la reclamación o una descripción de la avería.
11 Gestión de residuos
➤ Deseche el material de embalaje en el contenedor de reciclaje correspon-
diente.
M
Cuando vaya a desechar definitivamente el producto, infórmese en
el centro de reciclaje más cercano o en un comercio especializado
sobre las normas pertinentes de eliminación de materiales.
La pantalla muestra un
mensaje de error (por
ejemplo, “Err1”) y la nevera
no enfría.
La nevera se ha apagado
por un fallo interno.
La reparación solo puede ser realizada por un servicio de atención al
cliente autorizado.
La iluminación interior de
un compartimiento parpadea.
La tapa del compartimiento se dejó abierta
durante más de cinco
minutos.
Cierre la tapa del compartimiento.
Avería Posible causa Propuesta de solución
Page 98

ES
Datos técnicos CFX95DZ2
98
12 Datos técnicos
CFX95DZ2
N.° de art.: 9105306206
Tensión de conexión:
12/24 V
g y 100 – 240 Vw
Corriente nominal:
12 V
g: 9,2 A
24 Vg: 4,5 A
100 V
w
: 1,10 A
240 V
w
: 0,45 A
Potencia de refrigeración: +10 °C hasta –22 °C (+50 °F hasta –8 °F)
Categoría: 1
Clase de eficiencia energética: A+
Consumo de energía: 109 kWh/año
Capacidad bruta:
Compartimiento de refrigeración
grande:
Compartimiento de refrigeración
pequeño:
54 l
40,5 l
Capacidad útil:
Compartimiento de refrigeración
grande:
Compartimiento de refrigeración
pequeño:
50,5 l
34,5 l
Clase climática: N, T
Temperatura ambiente: de +16 °C a +43 °C
Emisiones de ruido: 37 dB(A)
Conexión USB: 5 Vg, 500 mA
Refrigerante: R134a
Cantidad de refrigerante: 65 g
Dimensiones (An x Al x P) en mm:
Con asas:
Sin asas:
957 x 472 x 530
900 x 472 x 530
Peso: 32 kg
Inspección/certificados:
4
Page 99

ES
CFX95DZ2 Datos técnicos
99
I
NOTA
A partir de temperaturas ambiente superiores a +32 °C (90 °F) no
será posible alcanzar la temperatura mínima.
Page 100

IT
CFX95DZ2
100
Prima di effettuare la messa in funzione leggere accuratamente
questo manuale di istruzioni, conservarlo e, in caso di trasmissione
dell’apparecchio consegnarlo all'utente successivo.
Il produttore declina ogni responsabilità per danni risultanti da un uso non
conforme alla destinazione o da un impiego scorretto.
Indice
1 Spiegazione dei simboli . . . . . . . . . . . . . . . . . . . . . . . . . . . . . . . 101
2 Indicazioni di sicurezza . . . . . . . . . . . . . . . . . . . . . . . . . . . . . . . . 102
2.1 Sicurezza generale . . . . . . . . . . . . . . . . . . . . . . . . . . . . . . . 102
2.2 Sicurezza durante il funzionamento dell’apparecchio . . . . . 103
3 Dotazione . . . . . . . . . . . . . . . . . . . . . . . . . . . . . . . . . . . . . . . . . . . 104
4 Accessori . . . . . . . . . . . . . . . . . . . . . . . . . . . . . . . . . . . . . . . . . . . 104
5 Conformità d'uso . . . . . . . . . . . . . . . . . . . . . . . . . . . . . . . . . . . . . 105
6 Descrizione del funzionamento . . . . . . . . . . . . . . . . . . . . . . . . . 106
6.1 Funzioni . . . . . . . . . . . . . . . . . . . . . . . . . . . . . . . . . . . . . . . 106
6.2 Elementi di comando e indicazione . . . . . . . . . . . . . . . . . . 107
7 Utilizzo . . . . . . . . . . . . . . . . . . . . . . . . . . . . . . . . . . . . . . . . . . . . . 109
7.1 Prima della messa in funzione iniziale . . . . . . . . . . . . . . . . 109
7.2 Suggerimenti per risparmiare energia . . . . . . . . . . . . . . . . 110
7.3 Collegamento del frigorifero . . . . . . . . . . . . . . . . . . . . . . . . 110
7.4 Utilizzo del dispositivo di controllo
automatico della batteria . . . . . . . . . . . . . . . . . . . . . . . . . . . 111
7.5 Utilizzo del frigorifero portatile . . . . . . . . . . . . . . . . . . . . . . 113
7.6 Regolazione della temperatura . . . . . . . . . . . . . . . . . . . . . . 114
7.7 Attivazione o disattivazione di un vano frigorifero . . . . . . . . 115
7.8 Attivazione del segnale WLAN per la app opzionale . . . . . 116
7.9 Utilizzo dell’interruttore di emergenza . . . . . . . . . . . . . . . . . 117
7.10 Porta USB per la tensione di alimentazione . . . . . . . . . . . . 117
7.11 Disattivazione del frigorifero . . . . . . . . . . . . . . . . . . . . . . . . 117
7.12 Sbrinamento del frigorifero . . . . . . . . . . . . . . . . . . . . . . . . . 118
7.13 Sostituzione del fusibile . . . . . . . . . . . . . . . . . . . . . . . . . . . 118
7.14 Sostituzione del fusibile della spina (corrente continua) . . . 119
7.15 Sostituzione del circuito stampato delle luci . . . . . . . . . . . . 119
8 Pulizia e cura . . . . . . . . . . . . . . . . . . . . . . . . . . . . . . . . . . . . . . . . 120
 Loading...