

Page 1
DOEPFER
DOEPFER
pocketC
Page 24
MIDI Controller
pocket Control
Owners Manual
Written by Andy Horrell
(C) 2000
pocketControl Owners ManualpocketControl Owners Manual Page 1
Revision 1.0
Page 2

Doepfer pocket Control
Contents
Contents...............................................................................2
Foreword ..............................................................................3
Connections .........................................................................4
Functions of the LED ...........................................................4
Functions of the Snapshot switch..........................................5
Functions of the DIP switches on the rear panel ...................6
Notes
List of the Presets..................................................................7
Description of the Presets......................................................9
Troubleshooting....................................................................18
Creating your own P resets.....................................................19
System Exclusive Format.......................................................20
All trademarks recognized as belonging to their respective owners.
pocketControl Owners ManualpocketControl Owners ManualPage 2
Page 23
Page 3
56 38 NRPN102 MSB
57 39 NRPN102 LSB
58 3A NRPN120 MSB [EMU ABS]
59 3B NRPN120 LSB [EMU ABS]
60 3C NRPN127 MSB [Soundblaster AWE 32/64]
61 3D NRPN127 LSB [Soundblaster AWE 32/64]
62 3E free
63 3F free
64 40 XG Drum Pitch Coarse
65 41 XG Drum Pitch Fine
66 42 XG Drum Level
67 43 XG Drum Alternate Group
68 44 XG Drum Pan
69 45 XG Drum Reverb Send
70 46 XG Drum Chorus Send
71 47 XG Drum Variation Send
72 48 XG Drum Key Assign
73 49 XG Drum Receive Note Off
74 4A XG Drum Receive Note On
75 4B XG Drum Filter Cutoff Frequency
76 4C XG Drum Filter Resonance
77 4D XG Drum EG Attack Rate
78 4E XG Drum EG Decay 1 Rate
79 4F XG Drum EG Deacy 2 Rate
80 50 XG Multipart
81 51 XG A/D
82 52 XG Effect
83 53 XG Effect 2-byte
84 54 XG Reverb Type
85 55 XG Chorus Type
86 56 XG Variation Type
87 57 XG EQ
88 58 XG Insertion Effect 1
89 59 XG Insertion Effect 2
90 5A XG Insertion Effect 1Type
91 5B XG Insertion Effect 2 Type
92 5 C free
93 5D free
94 5E free
95 5F free
96 60 GS Effect
97 61 MC303 Global
98 62 MC303 Channel
99 63 free
100 64 Strings
101 65 free
. . . Parameter 2 values between 101 and 126 are not defined
. . . (Reserved for future expansion)
126 7E free
127 7F No Event
Parameter 3:
Range 00 ~ 7F The meaning of parameter 3 depends on what parameter 2 is set to.
FORWARD
How long have you wanted to:
Control your (software) synthesizer without having to use virtual faders,
and having to look at a computer screen and use a mouse?
Use the full capability of your computer’s built-in soundcard?
Have realtime control for synths that have limited or no realtime controls
Could the control possibilities of your master keyboard be improved? N ow it’s time to discover
new uses for real time control by using the Doepfer Pocket Control.
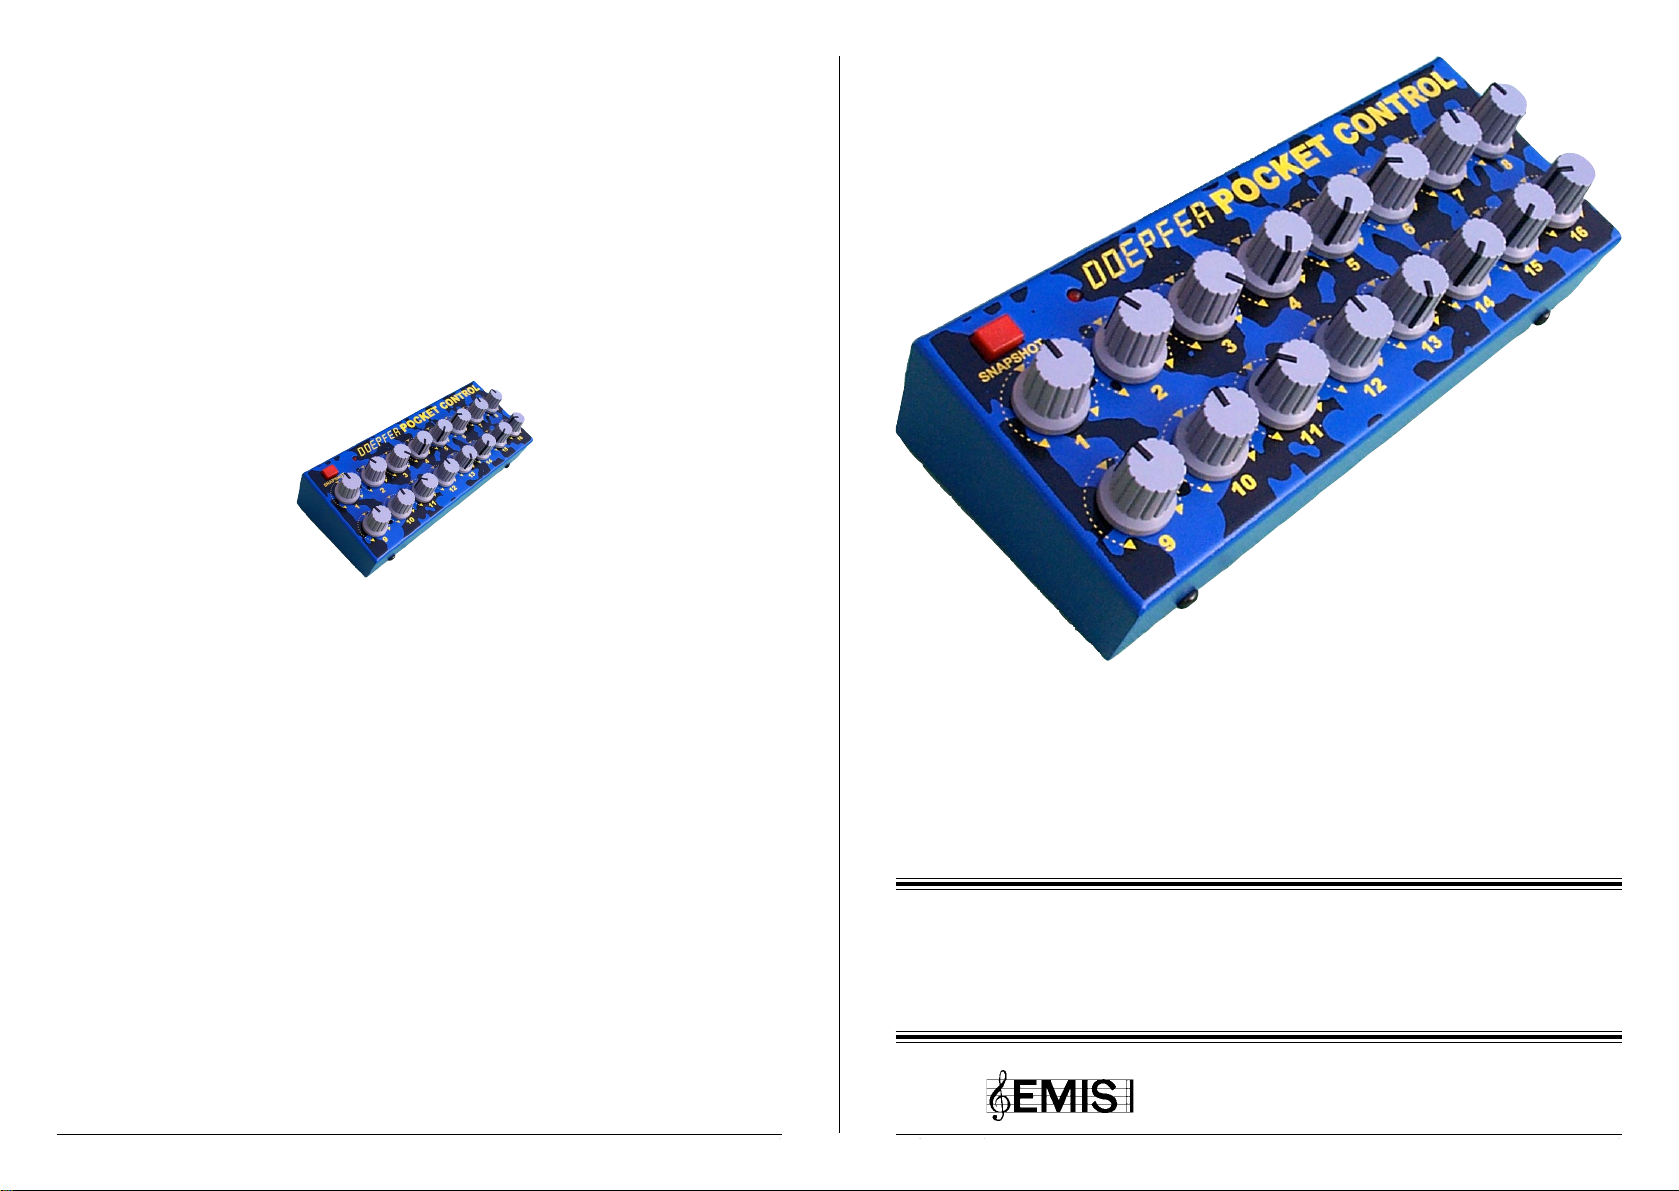
The Pocket Control
The Pocket Control (r eferr ed to as the pocketC) is a device, that everyone could
use, such as for the computer in the studio or for live use in professional and semi-professional
situations.
What can the pocketC do?
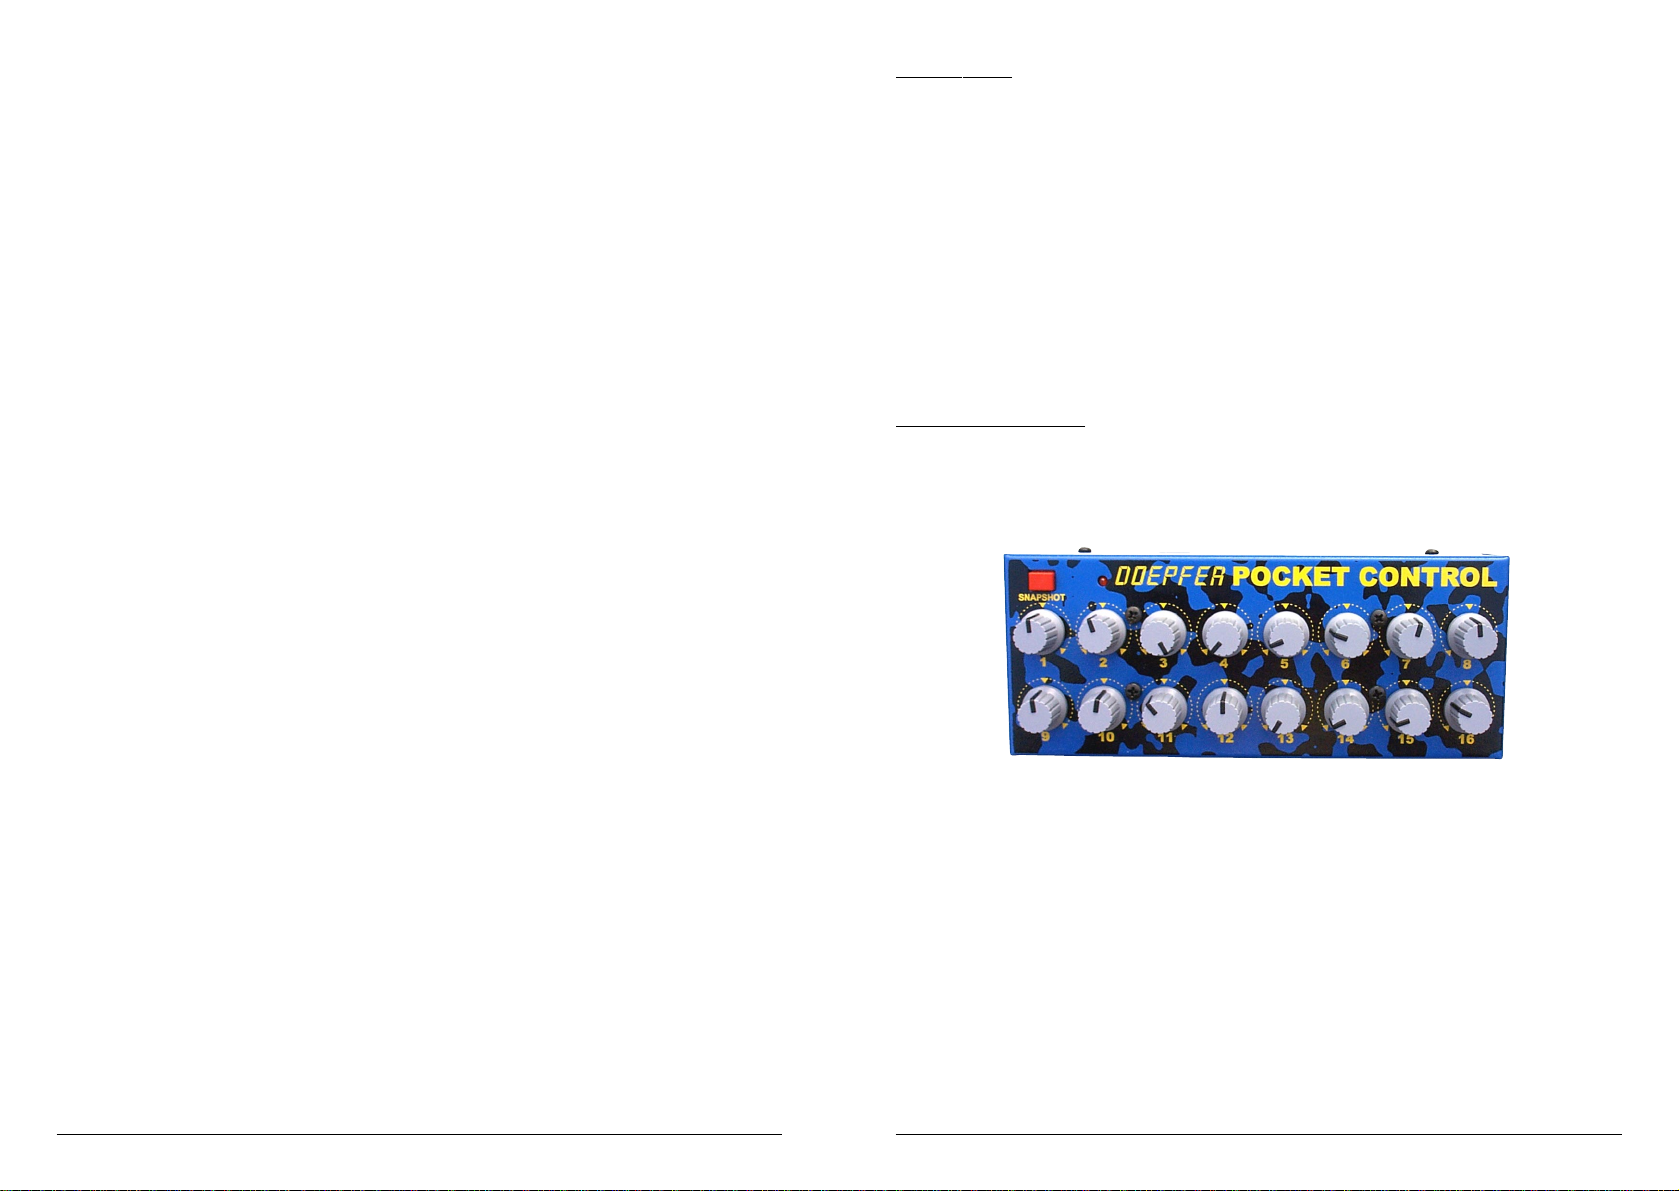
The pocketC can assign each of the 16 control knobs to individual Midi events.
This Midi event controlled can be selected from a list of preset options (giving over 16,000
different event combinations), such as controllers, mono & poly aftertouch, pitch bend, RPN/
NRPN, XG-SysEx, GS/XG controller, program change and even note on/off events. These
events can be from any of the 16 Midi channels, or the master channel (which allows easy
selection of the controlling MIDI channel). The permutation of possibilities is therefore up to
17 (channel options) * 16,000 (event combinations), which is over 250,000 possible
combinations! The system is also ready to take even further SysEx messages and data formats in
future updates.
Page 22
The low cost of the pocketC allows for applications where multiple pocketC’s can be used
chained together.
pocketControl Owners ManualpocketControl Owners Manual Page 3
Page 4
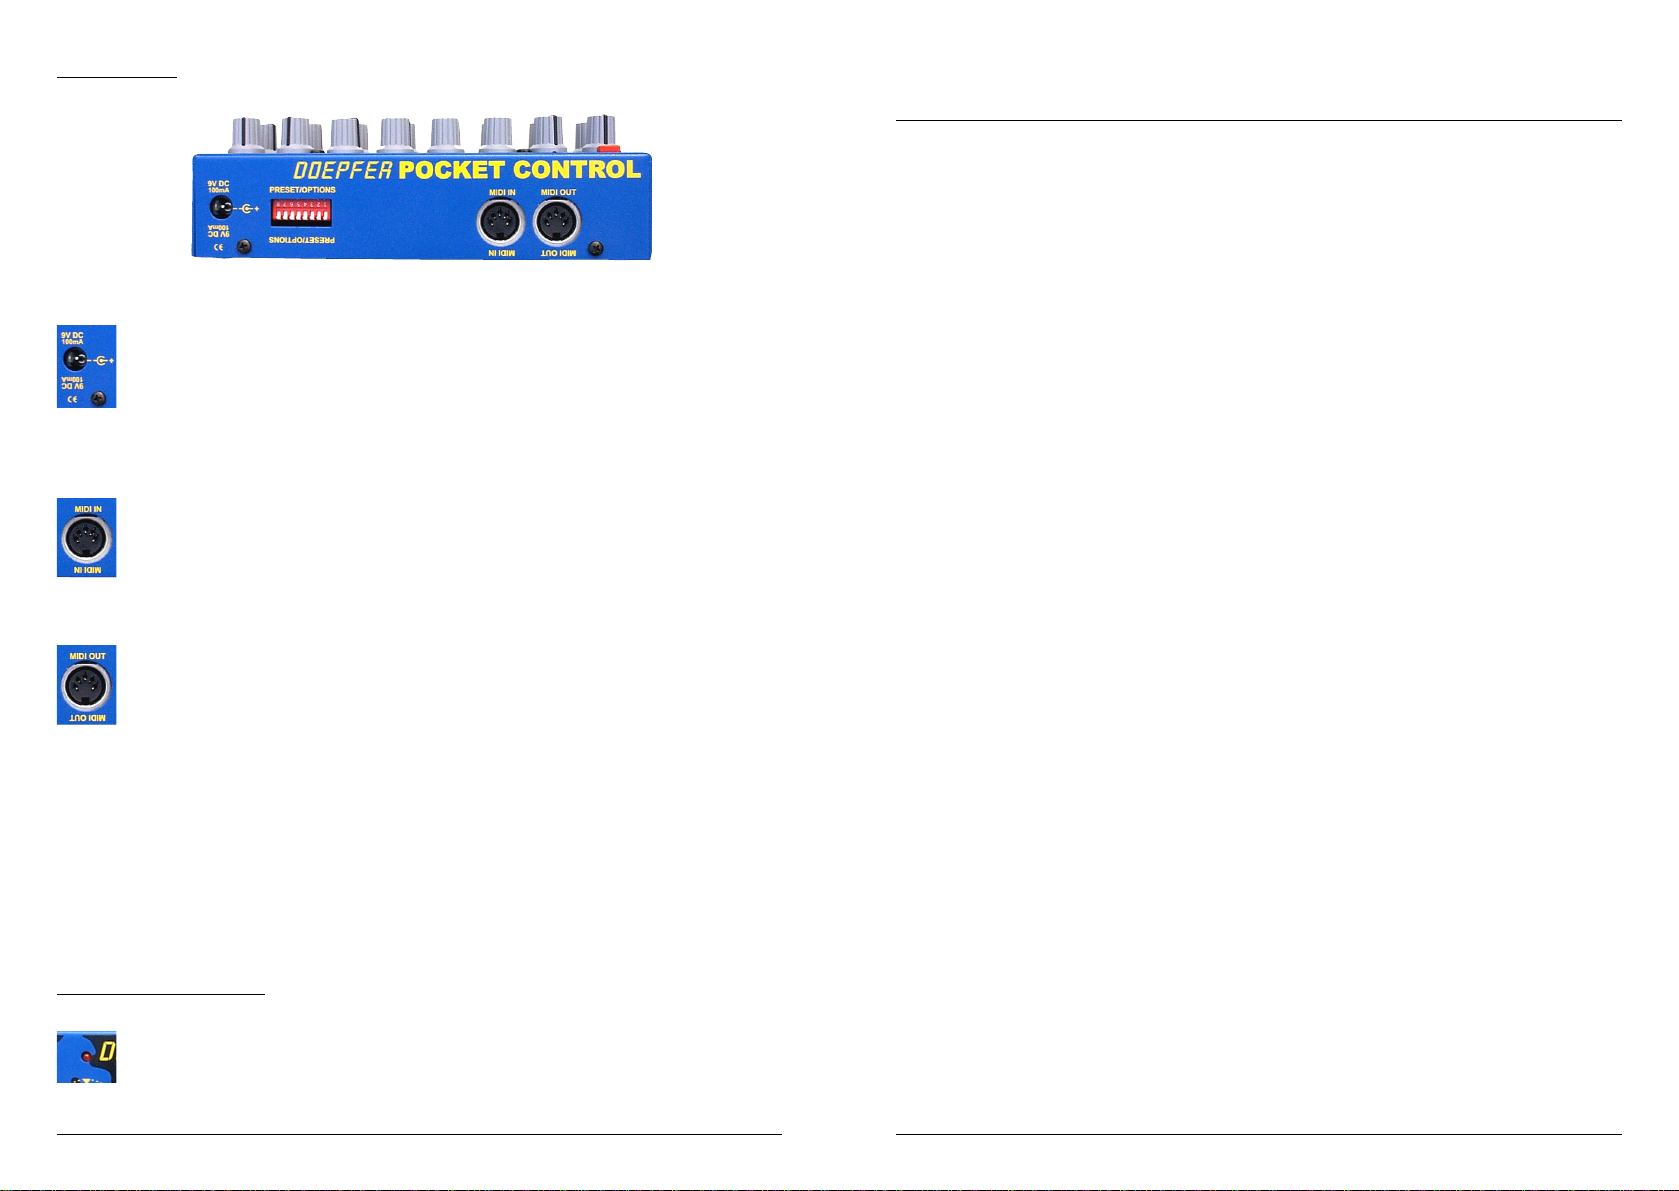
Connections
The pocketC does not have a built in power supply (not enough r oom left inside!),
but uses an external adaptor which can be from 7v to 12v and at least 100mA. The
connection polarity is positive inner. Although the pocketC has a built in protection
diode for protection against incorrect polarity, the pocketC can still be damaged by
using an incorrect adaptor, so only use an approved adaptor and avoid using multipolarity type adaptors with voltage level and polarity switching, as inadvertant settings
can cause problems.
Connect the MIDI out of the controlling keyboard to the MIDI IN of the
pocketC. The MIDI input also allows control of the pocketC, such as with program
changes to select presets, and to receive it’s own Sys-Ex messages for setting up the
128 preset memories (held in non-volatile memory).
Connect the MIDI OUT of the pocketC to the sequencer (computer) or sound
generator MIDI in. The pocketC merges the incoming data with it’s own data, so the
MIDI OUT is a data merge of MIDI in and data generated by the pocketC. There is
no use for a separate MIDI thru with this type of device. Note that if extremely large
Sys-Ex dumps are passed through the pocketC then it is advisable not to move any
pocketC knobs whilst this transmission is taking place, as the merge abilities of the
pocketC were not intended to work whilst this kind of intense transmission is taking
place.
If multiple pocketC’ s ar e being used then the MIDI connections can be chained
together so that all the pocketC’s produce one composite data from the last MIDI out in the
chain.
Functions of the LED
The LED indicates the status of the pocketC in various modes. For example,
under normal operation the LED indicates MIDI input activity, and also MIDI out
activity when moving the control knobs on the pocketC. The LED also indicates:-
Parameter 2: Event Definition
Decimal Hex Definition
0 00 Controller
1 01 Pitch Bend
2 02 Mono Aftertouch
3 03 Program Change
4 04 Poly Aftertouch
5 05 Note On
6 06 Note Off
707 free
8 08 RPN0 MSB
9 09 RPN0 LSB
10 0A RPN1 MSB
11 0B RPN1 MSB
12 0C free
13 0D free
14 0E RPN127 MSB
15 0F RPN127 LSB
16 10 NRPN0 MSB
17 11 NRPN0 LSB
18 12 NRPN1 MSB [XG Multi / GS]
19 13 NRPN1 LSB [XG Multi / GS]
20 14 NRPN8 MSB
21 15 NRPN8 LSB
22 16 NRPN9 MSB
23 17 NRPN9 LSB
24 18 NRPN10 MSB
25 19 NRPN10 LSB
26 1A NRPN20 MSB [XG Drum Instrument Cutoff]
27 1B NRPN20 LSB [X G Drum Instruemnt Cutoff]
28 1C NRPN21 MSB [XG Drum Instrument Resonance]
29 1D NRPN21 LSB [XG Drum Instrument Resonance]
30 1E NRPN22 MSB [XG Drum Instrument EG Attack]
31 1F NRPN22 LSB [XG Drum Instrument EG Attack]
32 20 NRPN23 MSB [XG Drum Instrument EG Decay]
33 21 NRPN23 LSB [XG Drum Instrument EG Decay]
34 22 NRPN24 MSB [XG/GS Drum Instrument Pitch Coarse]
35 23 NRPN24 LSB [XG/GS Drum Instrument Pitch Coarse]
36 24 NRPN25 MSB [XG Drum Instrument Pitch Fine]
37 25 NRPN25 LSB [XG Drum Instrument Pitch Fine]
38 26 NRPN26 MSB [XG/GS Drum Instrument Level]
39 27 NRPN26 LSB [XG/GS Drum Instrument Level]
40 28 NRPN28 MSB [XG/GS Drum Instrument Pan]
41 29 NRPN28 LSB [XG/GS Drum Instrument Pan]
42 2A NRPN29 MSB [XG/GS Drum Instrument Reverb Send]
43 2B NRPN29 LSB [XG/GS Drum Instrument Reverb Send]
44 2C NRPN30 MSB [XG/GS Drum Instrument Chorus Send]
45 2D NRPN30 LSB [XG/GS Drum Instrument Chorus Send]
46 2E NRPN31 MSB [XG/GS Drum Instrument Variation Send]
47 2F NRPN31 LSB [XG/GS Drum Instrument Variation Send]
48 30 NRPN32 MSB
49 31 NRPN32 LSB
50 32 NRPN33 MSB
51 33 NRPN33 LSB
52 34 NRPN99 MSB
53 35 NRPN99 LSB
54 36 NRPN100 MSB
55 37 NRPN100 LSB
pocketControl Owners ManualpocketControl Owners ManualPage 4
Page 21
Page 5

The Sys-Ex data can be broken down into sections, the first part is the Sys-Ex format for the
pocketC Single Dump, which is (numbers in Hex):
Power on reset - the LED will stay lit for around one second when the power is
first applied to the pocketC.
F0 00 20 20 14 00 20 preset channel (16 bytes) data (32 bytes) F7
F0 Sys-Ex byte
00 European Sub ID
20 Doepfer Sub ID 1
20 Doepfer Sub ID 2
14 Device “pocketC”
00 reserved
20 Command Byte “Single Dump”
00 ~ 7F Preset Number
00 reserved
00 ~ 10 Parameter 1. There are 16 data bytes setting the MIDI channel of each
knob, a setting of 0 sets the knob to the Master Channel.
00 ~ 7F Parameter 2. There ar e 16 data bytes setting the event type for each knob,
a setting of 7F defines “No Event” to the knob.
00 ~ 7F Parameter 3. There are 16 data bytes setting the additioanl event data for
each knob. The definition of parameter 3 depends on what parameter 2 is
set to.
F7 EOX (End of System Exclusive)
The data that must follow is the Single Store message which is:
F0 00 20 20 14 00 30 F7
F0 Sys-Ex byte
00 European Sub ID
20 Doepfer Sub ID 1
20 Doepfer Sub ID 2
14 Device “pocketC”
00 reserved
30 Command Byte “Single Store”
00 ~ 7F Preset Number (Must be the same as in the first message above)
00 reserved
F7 EOX (End of System Exclusive)
Parameter Tables
Parameter 1: MIDI Channel
00 Master Channel
01 ~ 10 MIDI Channels 1 ~ 16
11 ~ 7F values undefined (decimal values 17 - 127)
Any error at the MIDI input
Data and status when setting the Master channel
The status of the Snapshot function
Indication that a preset has been changed
Functions of the “Snapshot” front panel switch
The front panel switch labelled “Snapshot” has various functions:
a) to send a Snapshot of all the panel control knob settings
b) for setting the master MIDI channel
c) to reset the pocketC after a MIDI overflow at the MIDI in
To Send a snapshot
The snapshot function is not achieved by just pressing the snapshot switch, as
this could be accidentally pressed too easily. So to activate the Snapshot function, first briefly
press the Snapshot switch once, this causes the LED to flash, the Snapshot switch needs to be
pressed again within at least one second (whilst the LED is still flashing). This then invokes the
snapshot function, and the data from all 16 control knobs is transmitted from the pocketC.
To Set the Master Channel
The Master channel is used to select which channel the pocketC will transmit on
when using relevant presets. Some presets (such as the MIDI volume - preset 0) has each knob
on a different channel, whilst other presets have all knobs on the same channel, it is on these
presets that the Master channel is used. The Master channel is also the channel which the pocketC
will receive program change data on.
To set the Master channel, hold the snapshot switch down for at least one second
and keep it held down, the LED then stays on to indicate Master channel setting mode (do not
let go of the button until the required value has been selected). In this mode the control knobs
become channel selectors, and do not transmit the normal control data. To select a channel,
simply move one of the control knobs that relates to the channel required (to set channel 5,
move control knob 5). If you accidentally move the wrong knob , just mov e the correct one, as it
is the last knob moved that determines the actual Master channel set.
Page 20
pocketControl Owners ManualpocketControl Owners Manual Page 5
Page 6

To clear an error
Creating your own presets
To clear any MIDI input error such as a MIDI overflow (too much data in one
go), press the snapshot switch briefly once (do not press it again until at least one second has
passed, or this would enter the snapshot mode).
Functions of the DIP switches (rear panel)
The eight rear panel DIP switches select settings of the pocketC, the settings can
be looked upon as a binary number where each switch can be either on or off, this
allows up to 256 functions to be selected from the eight DIP switches. The switch
is referred to ON or 1, when set towards the top panel, and referred to OFF or 0
when set towards the bottom panel.
Only seven of the switches are used to select one of the 128 presets. The eighth
switch is not used at present and has no functions, but it is good practice to leave it in the OFF
position, as a future update may make use of this switch position. The switches are numbered
one to eight on the switch block itself, when relating the switch positions to a binary number,
then the least significant bit is towards the middle of the pocketC and numbered 1 on the
switch. It is switch number 8 that is not used.
The factory shipped default setting is Preset number 0, which is all switches off
(towards bottom) which is defined as MIDI Volume across all MIDI channels.
The following listing, lists all the 64 presets that are shipped in the pocketC, note
that the switch settings are shown with the least significant bit to the right (as would normally be
shown with a binary number), so note the switch numbering which is eight to the left and one
to the right, this relates to the switch position when looking at the rear panel of the pocketC. If
holding the pocketC, you tip the unit up at the back to look into the DIP switches that way , you
will be looking at the DIP switches the other way with one to the left and eight to the right,
when doing this remember that the switch order will be the reverse. The following list of presets
shows the switch position split into two groups of four, as this should help reading the switch
code.
New presets can be created or present ones can be altered, though it is recommended to dump
all new presets into locations 65 ~ 127.
Every knob of the pocketC can be assigned with three 7-bit parameters (between 0 and 127),
these parameters define the MIDI event transmitted by the knobs. Each preset can be dumped
into the pocketC by a System Exclusive message. This is a two stage process, first the data is sent
to the pocketC (Single Dump) and then a second message stores the data into non-volatile
memory (Single Store). The data is only stored if the preset number is the same in both the
Single Dump and Single Store messages are the same.
Parameter 1:
This first parameter defines the MIDI channel that the event will be transmitted on (values 1 ~
16), or if the event will use the Master Channel (value set to 0).
Parameter 2:
The second parameter describes the type of event. The pocketC does not allow you to pr ogram
any MIDI string, but uses one of it’ s 128 pr eset events (which is the number set with parameter
2). This list of events include controllers, pitch bend, mono & poly aftertouch, note on, note
off, RPN’s and many NRPN’s along with some more complex Sys-Ex strings for controlling
Roland GS and Yamaha XG instruments.
Parameter 3:
The third parameter is an extension of parameter 2, many events need two values to determine
the event, for example, if a value of 00 is set in parameter 2 (which is controller) then parameter
3 sets the controller number (perhaps a value of 7 to define Volume events).
The Sys-Ex message can be generated within a sequencer program (it is best to use Hex if
possible), or the default file Pc_xxx.mid on the enclosed disk can be used as a basis for editing.
This default file contains the following message (Hex):
F0 00 20 20 14 00 20 00 00 01 02 03 04 05 06 07 08 09 0A 0B 0C 0D 0E 0F
10 00 00 00 00 00 00 00 00 00 00 00 00 00 00 00 00 07 07 07 07 07 07 07 07
07 07 07 07 07 07 07 07 F7
F0 00 20 20 14 00 30 00 00 F7
The first message is the Single Dump and the second message is the Single Store. Please note,
that this default is about to overwrite preset number 00, shown in bold above as the eighth data
byte. It is an idea to experiment with preset 127 (set the data to Hex 7F), but don’t forget to
change the value in both strings. The function of this default dump is to set the knobs to MIDI
volume on their own channels - this is actually the preset data in preset 00 anyway.
pocketControl Owners ManualpocketControl Owners ManualPage 6
Page 19
Page 7

Preset 64 Yamaha 01V [Control] (Master Channel)
Knob 1 Stereo In Level Controller 16
Knob 2 Stereo Out Level Controller 21
Knob 3 Stereo Out Balance Controller 67
Knob 4 Stereo Out 2 Cue Controller 82
Knob 5 Stereo In to Cue Controller 75
Knob 6 Send 4 Level Controller 20
Knob 7 Send 3 Level Controller 19
Knob 8 Internal FX 1 Type Controller 20 (?)
Knob 9 Send 3 to Cue Controller 80
Knob 10 Send 4 to Cue Controller 81
Knob 11 Send 3/4 Balance Controller 66
Knob 12 FX Return 1 Level Controller 17
Knob 13 FX Return 2 Level Controller 18
Knob 14 FX Return 1 to Cue Controller 78
Knob 15 FX Return 2 to Cue Controller 79
Knob 16 Internal FX 2 Type Controller 21 (?)
Presets 65 ~ 128 are undefined, though as new presets are created, they can be loaded into the pocketC by a Sys-Ex
MIDI file. The enclosed disk includes new presets, with details in the README.TXT file .
Troubleshooting
There will be times when the pocketC does not seem to be working as expected, before suspecting
a faulty pocketC, the checklist below should help resolve the problem.
• Is the pocketC powered up corr ectly? There is no actual power indicator on the pocketC,
but the LED is always active. Moving a knob will flash the LED (the LED does not flash if the
knob has not been assigned a function), or briefly pressing the Snapshot switch will cause the
LED to flash for around a second as the pocketC resets.
• Is the pocketC set to the correct preset? Maybe one of the dip switches has moved
accidentally or a MIDI program change has set a new preset up. Check the dip switch settings.
• Is the pocketC set to the correct MIDI channel? Many presets make use of the Master
Channel, there is no way of checking what the Master Channel is set to (other than monitoring
the transmitted data), so the best procedure here is to set the Master Channel again to double
check it is correct. Hold the Snapshot switch down for at least a second, and whilst keeping it
down move the relevant knob that corresponds to the required MIDI channel. Make sure you
do not move another knob after this before releasing the Snapshot switch, as it is the last knob
moved that sets the Master Channel.
• Problems with Sys-Ex transfers? Remember that the pocketC always merges it’ s own data
with MIDI input data, this can cause a MIDI loop when receiving Sys-Ex, therefore you may
find it best to disconnect the MIDI out of the pocketC when sending it Sys-Ex messages, or at
least make sure the transmitting device is not MIDI thru enabled.
• You cannot get the pocketC to make the Coffee. Er ... no, the pocketC actually cannot
do this unless you have a MIDI controlled kettle...
Page 18
List of presets 1 ~ 64
Switch Pos. Preset Description MIDI
8765 4321 Number Channel
0000 0000 Preset 0 Volume (control 7) Channels 1 - 16
0000 0001 Preset 1 Pan (control 10) Channels 1 - 16
0000 0010 Preset 2 Filter Cutoff (control 74) Channels 1 - 16
0000 0011 Preset 3 Resonance (control 71) Channels 1 - 16
0000 0100 Preset 4 Volume (control 7) /Pan (control 10) Channels 1 - 8
0000 0101 Preset 5 Volume (control 7) /Pan (control 10) Channels 9 - 16
0000 0110 Preset 6 Filter Cutoff (control 74) /Resonance (control 71) Channels 1 - 8
0000 0111 Preset 7 Filter Cutoff (control 74) /Resonance (control 71) Channels 9 - 16
0000 1000 Preset 8 Control 0 - 15 Masterchannel
0000 1001 Preset 9 Control 16 - 31 Masterchannel
0000 1010 Preset 10 Control 32 - 47 Masterchannel
0000 1011 Preset 11 Control 48 - 63 Masterchannel
0000 1100 Preset 12 Control 64 - 79 Masterchannel
0000 1101 Preset 13 Control 80 - 95 Masterchannel
0000 1110 Preset 14 Control 96 - 111 Masterchannel
0000 1111 Preset 15 Control 112 - 127 Masterchannel
0001 0000 Preset 16 GS/XG General controls Masterchannel
0001 0001 Preset 17 AWE/SB 1 (Filter, LFO2, ENV1) Masterchannel
0001 0010 Preset 18 AWE/SB 2 (LFO1, ENV 1) Masterchannel
0001 0011 Preset 19 AWE/SB 3 (LFO2, ENV 2) Masterchannel
0001 0100 Preset 20 AWE/SB 4 (Tuning, Modulation) Masterchannel
0001 0101 Preset 21 AWE/SB 5 (Filter, Effects, Portamento, Aftertouch) Masterchannel
0001 0110 Preset 22 GS/XG Drum Pitch Masterchannel
0001 0111 Preset 23 GS/XG Drum Level Masterchannel
0001 1000 Preset 24 GS/XG Drum Pan Masterchannel
0001 1001 Preset 25 GS/XG Drum Reverb Levels Masterchannel
0001 1010 Preset 26 GS/XG Drum Chorus Levels Masterchannel
0001 1011 Preset 27 GS/XG Drum Delay/Variation Levels Masterchannel
0001 1100 Preset 28 XG Drum Filter Cutoff Masterchannel
0001 1101 Preset 29 XG Drum Filter Resonance Masterchannel
0001 1110 Preset 30 XG Drum Envelope Attack Masterchannel
0001 1111 Preset 31 XG Drum Envelope Decay Masterchannel
0010 0000 Preset 32 XG Multi-Part Level Channels 1 - 16
0010 0001 Preset 33 XG Multi-Part Pan Channels 1 - 16
0010 0010 Preset 34 XG Multi-Part Reverb Send Channels 1 - 16
0010 0011 Preset 35 XG Multi-Part Chorus Send Channels 1 - 16
0010 0100 Preset 36 XG Multi-Part Dry Level Channels 1 - 16
0010 0101 Preset 37 XG Multi-Part Variation Level Channels 1 - 16
0010 0110 Preset 38 XG Low EQ Gain Channels 1 - 16
0010 0111 Preset 39 XG Low EQ Frequency Channels 1 - 16
0010 1000 Preset 40 XG High EQ Gain Channels 1 - 16
pocketControl Owners ManualpocketControl Owners Manual Page 7
Page 8

00101001 Preset 41 XG High EQ Frequency Channels 1 - 16
00101010 Preset 42 XG A/D 1&2, W1-12 Level Masterchannel
00101011 Preset 43 XG A/D 1&2, W1-12 P an Masterchannel
00101100 Preset 44 XG A/D 1&2, W1-12 Reverb Send Masterchannel
00101101 Preset 45 XG A/D 1&2, W1-12 Chorus Send Masterchannel
00101110 Preset 46 XG A/D 1&2, W1-12 Variation Send Masterchannel
00101111 Preset 47 XG A/D 1&2, W1-12 Dry Level Masterchannel
00110000 Preset 48 XG EQ Masterchannel
00110001 Preset 49 XG Reverb Parameters Masterchannel
00110010 Preset 50 XG Chorus Parameters Masterchannel
00110011 Preset 51 XG Variation Effect Parameters Masterchannel
00110100 Preset 52 XG Insert Effect 1 Parameters Masterchannel
00110101 Preset 53 XG Insert Effect 2 Parameters Masterchannel
00110110 Preset 54 XG Insertion 2 Masterchannel
00110111 Preset 55 GS Reverb/Chorus Masterchannel
00111000 Preset 56 General Reset Strings Masterchannel
00111001 Preset 57 Rebirth Controls Masterchannel
00111010 Preset 58 Yamaha CS1X Controls Masterchannel
00111011 Preset 59 Waldorf Pulse Controls Masterchannel
00111100 Preset 60 Ensoniq ASR-X controls Masterchannel
00111101 Preset 61 Doepfer MAQ 16/3 Control 1 Masterchannel
00111110 Preset 62 Doepfer MAQ 16/3 Control 2 Masterchannel
00111111 Preset 63 Kawai K5000 Macro Control Box (MCB10) Masterchannel
01000000 Preset 64 Yamaha 01v Control Masterchannel
Presets 00 to 64 are available on the supplied disk for dumping into the pocketC
by system exclusive (in SMF format), this allows the presets to be returned to their factory
shipped state should they get accidentally altered. Presets 65 to 127 are left blank for your own
custom requirements, though the supplied disk may contain additional presets. The
“README.TXT” file gives further information and descriptions of these presets. New presets
will be developed, and these will become available free on the Doepfer web site at:-
www.doepfer.de
Preset 61 Doepfer MAQ16/3 1 [Controller] (Master Channel)
Knob 1 V elocity Ro w 1 [Controller 0]
Knob 2 V elocity Ro w 2 [Controller 1]
Knob 3 V elocity Ro w 3 [Controller 2]
Knob 4 Gate Time Row 1 [Controller 7]
Knob 5 Gate Time Row 2 [Controller 8]
Knob 6 Gate Time Row 3 [Controller 9]
Knob 7 Program Change Row 3 [Controller 30]
Knob 8 Tempo [Controller 3]
Knob 9 Step Position Row 1 [Controller 4]
Knob 10 Step Position Row 2 [Controller 5]
Knob 11 Step Position Row 3 [Controller 6]
Knob 12 Note Time Row 1 [Controller 10]
Knob 13 Note Time Row 2 [Controller 11]
Knob 14 Note Time Row 3 [Controller 12]
Knob 15 Program Change Row 1 [Controller 28]
Knob 16 Program Change Row 2 [Controller 29]
Preset 62 Doepfer MAQ16/3 2 [Controller] (Master Channel)
Knob 1 First Step Row 1 [Controller 13]
Knob 2 First Step Row 2 [Controller 14]
Knob 3 First Step Row 3 [Controller 15]
Knob 4 Run Mode Row 1 [Controller 19]
Knob 5 Run Mode Row 2 [Controller 20]
Knob 6 Run Mode Row 3 [Controller 21]
Knob 7 Program Change Row 3 [Controller 30]
Knob 8 Tempo [Controller 3]
Knob 9 Last Step Row 1 [Controller 16]
Knob 10 Last Step Row 2 [Controller 17]
Knob 11 Last Step Row 3 [Controller 18]
Knob 12 Midi-Channel Row 1 [Controller 22]
Knob 13 Midi-Channel Row 2 [Controller 23]
Knob 14 Midi-Channel Row 3 [Controller 24]
Knob 15 Program Change Row 1 [Controller 28]
Knob 16 Program Change Row 2 [Controller 29]
Presets 62 ~ 63 provide the MAQ16/3 with advanced realtime control with features that may not have been apparent
that the MAQ16/3 could do. Converts an MAQ16/3 into a Super MAQ 16/3 !
Preset 63 Kawai K5000 (MCB10) [Controller] (Master Channel)
Knob 1 Filter Cutoff [Controller 74]
Knob 2 Filter Resonance [Controller 77]
Knob 3 Formant Filter Speed [Controller 19]
Knob 4 Formant Filter Depth [Controller 75]
Knob 5 Formant Filter Bias [Controller 18]
Knob 6 Envelope Attack [Controller 73]
Knob 7 Envelope Decay [Controller 78]
Knob 8 Envelope Release [Controller 72]
Knob 9 Harmonics Low [Controller 16]
Knob 10 Harmonics High [Controller 17]
Knob 11 Even / Odd Harmonics Balance [Controller 71]
Knob 12 Velocity Depth [Controller 76]
Knob 13 User 1 [Controller 80]
Knob 14 User 2 [Controller 81]
Knob 15 User 3 [Controller 82]
Knob 16 User 4 [Controller 83]
Preset 63 emulates every function of the Kawai MCB10 Macro Control Box designed for the K5000 range.
pocketControl Owners ManualpocketControl Owners ManualPage 8
Page 17
Page 9

Preset 58 Yamaha CS1X control [NRPN / Controller] (Master Channel)
Knob 1 Filter Cutoff [Controller 74]
Knob 2 Filter Resonance [Controller 71]
Knob 3 Vibrato Rate [NRPN]
Knob 4 Vibrato Depth [NRPN]
Knob 5 Vibrato Delay [NRPN]
Knob 6 Envelope Attack [Controller 73]
Knob 7 Amplitude Envelope Decay [NRPN]
Knob 8 Envelope Release [Controller 72]
Knob 9 Pitch Bend [Pitch Bend]
Knob 10 Knob 3 Parameter [Controller 17]
Knob 11 Knob 6 Parameter [Controller 18]
Knob 12 Reverb Send [Controller 91]
Knob 13 Chorus Send [Controller 93]
Knob 14 Delay/Variation Send [Controller 94]
Knob 15 Pan [Controller 10]
Knob 16 Volume [Controller 7]
Preset 59 Waldorf Pulse Control [Controller] (Master Channel)
Knob 1 Filter Cutoff [Controller 50]
Knob 2 Filter Resonance [Controller 56]
Knob 3 Filter Cutoff Keytrack [Controller 51]
Knob 4 Envelope 1 Sensitivity [Controller 52]
Knob 5 Envelope 1 Attack [Controller 14]
Knob 6 Envelope 1 Decay [Controller 15]
Knob 7 Envelope 1 Sustain [Controller 16]
Knob 8 Envelope 1 Release [Controller 17]
Knob 9 LFO 1 Speed [Controller 24]
Knob 10 LFO 2 Speed [Controller 26]
Knob 11 VCF Modulation Amount [Controller 25]
Knob 12 Portamento Time [Controller 5]
Knob 13 Envelope 2 Attack [Controller 18]
Knob 14 Envelope 2 Decay [Controller 19]
Knob 15 Envelope 2 Sustain [Controller 20]
Knob 16 Envelope 2 Release [Controller 21]
Preset 60 Ensoniq ASR-X [NRPN / Controller] (Master Channel)
Knob 1 Filter Cutoff [Controller 74]
Knob 2 Filter Resonance [Controller 71]
Knob 3 Vibrato Rate [Controller 75]
Knob 4 Vibrato Depth [NRPN]
Knob 5 Vibrato Delay [NRPN]
Knob 6 Filter Envelope Attack [NRPN]
Knob 7 Filter Envelope Decay [NRPN]
Knob 8 Filter Envelope Release [NRPN]
Knob 9 Pitch Bend [Pitch Bend]
Knob 10 Modulation [Controller 1]
Knob 11 Envelope Attack [Controller 73]
Knob 12 Envelope Decay [Controller 76]
Knob 13 Envelope Release [Controller 72]
Knob 14 Velocity Sensitivity [NRPN]
Knob 15 Portamento Time [Controller 5]
Knob 16 Volume [Controller 7]
Page 16
Description of presets
Preset 0: Volume [controller 7] (Channels 1-16)
Preset 1: Pan [controller 10] (Channels 1-16)
Preset 2: Filter Cutoff [controller 74] (Channels 1-16)
Preset 3: Filter resonance [controller 71] (Channels 1-16)
Presets 0 ~ 3 use a single controller type, with each knob relating to it’s corresponding MIDI channel, this allows full
control of 16 parts within a multitimbral sound generator, or realtime mixing in sequencer automation.
Preset 4: Volume / Pan [controller 7 / 10] (Channels 1-8)
Preset 5: Volume / Pan [controller 7 / 10] (Channels 9-16)
Preset 6: Filter Cutoff / Resonance [controller 74 / 71] (Channels 1-8)
Preset 7: Filter Cutoff / Resonance [controller 74/ / 71] (Channels 9-16)
Presets 4 ~ 7 use two controllers, one across the top row of knobs and the other acr oss the bottom row . With P reset 4, the
top row is MIDI controller 7 (Volume) with the MIDI channel corresponding to the knob number, whilst the lower
row is MIDI controller 10 (Pan) on the same channel as the knob above it, hence knob 9 is channel 1, knob 10 is
channel 2 etc. Preset 5 follows the same idea except the MIDI channel is channels 9 to 16, so the actual MIDI channel
relates to the lower knob numbers. Preset 6, again follows the same idea as Preset 4 except the top row is MIDI
controller 74 (Filter Cut off) and the lower row is controller 71 (Filter Resonance), and finally Preset 7 is the same as
Preset 6 except the channels are 9-16.
Preset 8: general controllers [controllers 0 - 15] (Master channel)
Preset 9: general controllers [controllers 16 - 31] (Master channel)
Preset 10: general controllers [controllers 32 - 47] (Master channel)
Preset 11: general controllers [controllers 48 - 63] (Master channel)
Preset 12: general controllers [controllers 64 - 79] (Master channel)
Preset 13: general controllers [controllers 80 - 95] (Master channel)
Preset 14: general controllers [controllers 96 - 111] (Master channel)
Preset 15: general controllers [controllers 112 - 127] (Master channel)
Presets 8 ~ 15 are general controller sets, which transmit on the Master Channel. Where the r eceiving MIDI device can
be programmed to any controller it can receive, these presets maybe the only presets needed, although preset 8 is
perhaps best avoided for general use as it includes controller 0 (could trigger MIDI program bank changes) and controller
1 which is the mod wheel, although of course there may be instances when MIDI controller 1 is required, such as adding
a modulation wheel function to a keyboard (such as a digital piano). Preset 12 also needs to be used with caution, as
controller 64 is defined as the sustain/damper pedal function, and most devices will always receive this controller as
Damper or Hold.
Preset 16: GS / XG general controls [NRPN / controllers] (Master channel)
Preset 16 has the top row of knobs transmitting relevant NRPN controller data for GS/XG instruments, and the lower
row is general controllers:-
Knob 1 Filter Cutoff [NRPN]
Knob 2 Filter Resonance [NRPN]
Knob 3 Vibrato Rate [NRPN]
Knob 4 Vibrato Depth [NRPN]
Knob 5 Vibrato Delay [NRPN]
Knob 6 EG- Attack [NRPN]
Knob 7 EG Decay [NRPN]
Knob 8 EG Release [NRPN]
Knob 9 Pitch Bend [PitchBend]
Knob 10 Modulation [Controller 1]
Knob 11 Portamento Time [Controller 5]
Knob 12 Reverb Send Level [Controller 91]
Knob 13 Chorus Send Level [Controller 93]
Knob 14 Delay/Var Send Level [Controller 94]
Knob 15 Pan [Controller 10]
Knob 16 Volume [Controller 7]
pocketControl Owners ManualpocketControl Owners Manual Page 9
Page 10

Preset 17: Soundblaster AWE 32/64 1 [NRPN] (Master channel)
Preset 55 GS Reverb / Chorus [NRPN] (Master Channel)
Knob 1 Filter Cutoff Coarse
Knob 2 Filter Resonance Coarse
Knob 3 Vibrato Rate Coarse (LFO 2)
Knob 4 Vibrato Depth Coarse (LFO 2)
Knob 5 Vibrato Delay Coarse (LFO 2)
Knob 6 Envelope 1 Attack Time Coarse
Knob 7 Envelope 1 Decay Time Coarse
Knob 8 Envelope 1 Release Time Coarse
Knob 9 Filter Cutoff Fine
Knob 10 Filter Resonance Fine
Knob 11 Vibrato Rate Fine (LFO 2)
Knob 12 Vibrato Depth Fine (LFO 2)
Knob 13 Vibrato Delay Fine (LFO 2)
Knob 14 Envelope 1 Attack Time Fine
Knob 15 Envelope 1 Decay Time Fine
Knob 16 Envelope 1 Release Time Fine
Preset 18: Soundblaster AWE 32/64 2 [NRPN] (Master channel)
Knob 1 LFO 1 Delay Time Coarse
Knob 2 LFO 1 Frequency Coarse
Knob 3 Envelope 1 Delay Time Coarse
Knob 4 Envelope 1 Attack Time Coarse
Knob 5 Envelope 1 Hold Time Coarse
Knob 6 Envelope 1 Decay Time Coarse
Knob 7 Envelope 1 Sustain Level Coarse
Knob 8 Envelope 1 Release Time Coarse
Knob 9 LFO 1 Delay Time Fine
Knob 10 LFO 1 Frequency Fine
Knob 11 Envelope 1 Delay Time Fine
Knob 12 Envelope 1 Attack Time Fine
Knob 13 Envelope 1 Hold Time Fine
Knob 14 Envelope 1 Decay Time Fine
Knob 15 Envelope 1 Sustain Level Fine
Knob 16 Envelope 1 Release Time Fine
Knob 1 Reverb Preset
Knob 2 Reverb Character
Knob 3 Reverb Low Pass Filter
Knob 4 Reverb Level
Knob 5 Reverb Time
Knob 6 Reverb Delay Feedback
Knob 7 Reverb to Chorus
Knob 8 undefined
Knob 9 Chorus Preset
Knob 10 Chorus Low Pass Filter
Knob 11 Chorus Level
Knob 12 Chorus Feedback
Knob 13 Chorus Delay
Knob 14 Chorus Rate
Knob 15 Chorus Depth
Knob 16 Chorus to Reverb
Preset 56 General Control strings [Sys-Ex / Controller] (M aster Channel)
Knob 1 GM Reset [Sys-Ex]
Knob 2 GS Reset [Sys-Ex Roland]
Knob 3 XG Reset [Sys-Ex Y amaha]
Knob 4 All Sounds Off [Controller]
Knob 5 All Controllers Reset [Controller]
Knob 6 All Notes Off [Controller]
Knob 7 Omni Off [Controller]
Knob 8 Omni On [Controller]
Knob 9 Mono On [Controller]
Knob 10 Poly On [Controller]
Knob 11 undefined
Knob 12 undefined
Knob 13 undefined
Knob 14 undefined
Knob 15 undefined
Knob 16 undefined
Preset 19: Soundblaster AWE 32/64 3 [NRPN] (Master channel)
Knob 1 LFO 2 Delay Coarse
Knob 2 LFO 2 Frequency Coarse
Knob 3 Envelope 2 Delay Time Coarse
Knob 4 Envelope 2 Attack Time Coarse
Knob 5 Envelope 2 Hold Time Coarse
Knob 6 Envelope 2 Decay Time Coarse
Knob 7 Envelope 2 Sustain Level Coarse
Knob 8 Envelope 2 Release Time Coarse
Knob 9 LFO 2 Delay Fine
Knob 10 LFO 2 Frequency Fine
Knob 11 Envelope 2 Delay Time Fine
Knob 12 Envelope 2 Attack Time Fine
Knob 13 Envelope 2 Hold Time Fine
Knob 14 Envelope 2 Decay Time Fine
Knob 15 Envelope 2 Sustain Time Fine
Knob 16 Envelope 2 Release Time Fine
Preset 57 Rebirth Control [Controller] (Master Channel)
Knob 1 Synth 1 Filter Cutoff [Controller 25]
Knob 2 Synth 1 Filter Resonance [Controller 26]
Knob 3 Synth 1 Envelope Mod [Controller 27]
Knob 4 Synth 1 Decay [Controller 28]
Knob 5 Synth 2 Filter Cutoff [Controller 32]
Knob 6 Synth 2 Filter Resonance [Controller 33]
Knob 7 Synth 2 Envelope Mod [Controller 34]
Knob 8 Synth 2 Decay [Controller 35]
Knob 9 Synth 1 Accent [Controller 29]
Knob 10 Synth 2 Accent [Controller 36]
Knob 11 Drum BD Tone [Controller 39]
Knob 12 Drum BD Decay [Controller 40]
Knob 13 Drum SD Snappy [Controller 43]
Knob 14 Synth 1 Mix Level [Controller 11]
Knob 15 Synth 2 Mix Level [Controller 14]
Knob 16 Drum Mix Level [Controller 17]
pocketControl Owners ManualpocketControl Owners ManualPage 10
Page 15
Page 11

Preset 52: XG Effects - Variation [NRPN] (Master Channel)
Preset 20: Soundblaster AWE 32/64 4 [NRPN] (Master channel)
Knob 1 Variation Type
Knob 2 Variation Parameter 1
Knob 3 Variation Parameter 2
Knob 4 Variation Parameter 3
Knob 5 Variation Parameter 4
Knob 6 Variation Parameter 6
Knob 7 Variation Parameter 7
Knob 8 Variation Parameter 11
Knob 9 Variation Parameter 12
Knob 10 Variation P arameter 13
Knob 11 Variation P arameter 14
Knob 12 Variation P arameter 15
Knob 13 Variation Amount to Reverb
Knob 14 Variation Amount to Chorus
Knob 15 Variation Return
Knob 16 Variation P an
Preset 53: XG Effects - Insert effect 1 [NRPN] (Master Channel)
Knob 1 Insert 1 Type
Knob 2 Insert 1 Parameter 1
Knob 3 Insert 1 Parameter 2
Knob 4 Insert 1 Parameter 3
Knob 5 Insert 1 Parameter 4
Knob 6 Insert 1 Parameter 5
Knob 7 Insert 1 Parameter 6
Knob 8 Insert 1 Parameter 7
Knob 9 Insert 1 Parameter 8
Knob 10 Insert 1 Parameter 9
Knob 11 Insert 1 Parameter 10
Knob 12 Insert 1 Parameter 11
Knob 13 Insert 1 Parameter 12
Knob 14 Insert 1 Parameter 13
Knob 15 Insert 1 Parameter 14
Knob 16 Insert 1 Parameter 15
Preset 54 XG Effects - Insert effect 2 [NRPN] (Master Channel)
Knob 1 Insert 2 Type
Knob 2 Insert 2 Parameter 1
Knob 3 Insert 2 Parameter 2
Knob 4 Insert 2 Parameter 3
Knob 5 Insert 2 Parameter 4
Knob 6 Insert 2 Parameter 5
Knob 7 Insert 2 Parameter 6
Knob 8 Insert 2 Parameter 7
Knob 9 Insert 2 Parameter 8
Knob 10 Insert 2 Parameter 9
Knob 11 Insert 2 Parameter 10
Knob 12 Insert 2 Parameter 11
Knob 13 Insert 2 Parameter 12
Knob 14 Insert 2 Parameter 13
Knob 15 Insert 2 Parameter 14
Knob 16 Insert 2 Parameter 15
Page 14
Knob 1 Master Tuning Coarse
Knob 2 LFO 1 to Pitch Coarse
Knob 3 LFO 2 to Pitch Coarse
Knob 4 Envelope 1 to Pitch Coarse
Knob 5 LFO 1 to Volume Coarse
Knob 6 LFO 1 to Filter Cutoff Coarse
Knob 7 Envelope 1 to Filter Cutoff Coarse
Knob 8 undefined
Knob 9 Master Tuning Fine
Knob 10 LFO 1 to Pitch Fine
Knob 11 LFO 2 to Pitch Fine
Knob 12 Envelope 1 to Pitch Fine
Knob 13 LFO 1 to Volume Fine
Knob 14 LFO 1 to Filter Cutoff Fine
Knob 15 Envelope 1 to Filter Cutoff Fine
Knob 16 undefined
Preset 21: Soundblaster AWE 32/64 5 [NRPN / Controller] (Master channel)
Knob 1 Filter Cutoff Coarse [NRPN]
Knob 2 Filter Resonance Coarse [NRPN]
Knob 3 Modulation [Controller 1]
Knob 4 Reverb Send Coarse [NRPN]
Knob 5 Chorus Send Coarse [NRPN]
Knob 6 Portamento [Controller 5]
Knob 7 Balance [Controller 8]
Knob 8 Expression [Controller 11]
Knob 9 Filter Cutoff Coarse [NRPN]
Knob 10 Filter Resonance Coarse [NRPN]
Knob 11 Mono Aftertouch [Mono Aftertouch]
Knob 12 Reverb Send Fine [NRPN]
Knob 13 Chorus Send Fine [NRPN]
Knob 14 Portamento Off/On [Controller 65]
Knob 15 Pan [Controller 10]
Knob 16 Volume [Controller 7]
Presets 17 ~ 21 are specific NRPN controllers that control the specified functions on the Sound Blaster AWE 32/64
soundcards.
Preset 22: GS/XG Drum Pitch [NRPN] (Master channel)
Preset 23: GS/XG Drum Level [NRPN] (Master channel)
Preset 24: GS/XG Drum Pan [NRPN] (Master channel)
Preset 25: GS/XG Drum Reverb Send [NRPN] (Master channel)
Preset 26: GS/XG Drum Chorus Send [NRPN] (Master channel)
Preset 27: GS/XG Drum Delay/Var. Send [NRPN] (Master channel)
Presets 22 ~ 27 control the drum kit, which would normally require the master channel to be set to channel 10. The
knobs all relate to the same drums on these presets as shown below, with each preset controlling Pitch, Level, Pan,
Reverb Send, Chorus Send or Delay/Var. Send depending on the preset selected.
Knob 1 Bass Drum Knob 9 Bongo
Knob 2 Snare Drum Knob 10Conga
Knob 3 Tom Knob 11Timbale
Knob 4 Hi-Hat Knob 12Hi Q
Knob 5 Hand Clap Knob 13Seq Click
Knob 6 Rim Shot Knob 14Finger Snap
Knob 7 Crash Cymbal Knob 15Click Noise
Knob 8 Ride Cymbal Knob 16Tambourine
pocketControl Owners ManualpocketControl Owners Manual Page 11
Page 12

Preset 28: XG Drum Filter Cut Off [NRPN] (Master channel)
Preset 29: XG Drum Filter Resonance [NRPN] (Master channel)
Preset 30: XG Drum Envelope Attack [NRPN] (Master channel)
Preset 31: XG Drum Envelope Decay [NRPN] (Master channel)
Presets 28 ~ 31 control the drum kit, which would normally require the master channel to be set to channel 10. The
knobs all relate to the same drums on these presets as shown above, with each preset controlling Filter Cut Off, Filter
Resonance, Envelope Attack or Envelope Decay depending on the preset selected.
Preset 32: XG Multi-Part Volume Level [NRPN] (Channels 1 -16)
Preset 33: XG Multi-Part Pan [NRPN] (Channels 1 -16)
Preset 34: XG Multi-Part Reverb Send [NRPN] (Channels 1 -16)
Preset 35: XG Multi-Part Chorus Send [NRPN] (Channels 1 -16)
Preset 36: XG Multi-Part Dry Level [NRPN] (Channels 1 -16)
Preset 37: XG Multi-Part Variation Send [NRPN] (Channels 1 -16)
Preset 38: XG Multi-Part Low EQ Gain [NRPN] (Channels 1 -16)
Preset 39: XG Multi-Part Low EQ Frequency [NRPN] (Channels 1 -16)
Preset 40: XG Multi-Part High EQ Gain [NRPN] (Channels 1 -16)
Preset 41: XG Multi-Part High EQ Frequency [NRPN] (Channels 1 -16)
Presets 32 ~ 41 control the XG parts, with each knob controlling the corr esponding MIDI channel. Each preset controls
either Part volume, pan, reverb send, chorus send, dry level, variation effect send, low eq gain, low eq frequency, high eq
gain or high eq frequency.
Preset 42: XG Multi-Part Effects [Sys-Ex] (Master Channel)
Knob 1 High EQ Frequency
Knob 2 Low EQ Frequency
Knob 4 Dry
Knob 5 undefined
Knob 6 undefined
Knob 7 undefined
Knob 8 undefined
Knob 9 Hi Eq Gain
Knob 10 Low Eq Gain
Knob 11 undefined
Knob 12 Reverb
Knob 13 Chorus
Knob 14 Variation
Knob 15 Pan
Knob 16 Level
Preset 42 offers general effects control for an XG instrument.
Preset 43: XG A/D & Wave Level [NRPN] (Master Channel)
Preset 44: XG A/D & Wave Pan [NRPN] (Master Channel)
Preset 45: XG A/D & Wave Reverb Send [NRPN] (Master Channel)
Preset 46: XG A/D & Wave Chorus Send [NRPN] (Master Channel)
Preset 47: XG A/D & Wave Variation Send [NRPN] (Master Channel)
Preset 48: XG A/D & Wave Dry Level [NRPN] (Master Channel)
Presets 43 ~ 48 control the A/D inputs 1 and 2 as well as the 12 wave channels on relevant Yamaha sound cards. These
relevant controls are shown below. Note that knobs 15 and 16 have no defined function for these presets.
Knob 1 A/D Input 1 Knob 8 W6
Knob 2 A/D Input 2 Knob 9 W7
Knob 3 W1 Knob 10W8
Knob 4 W2 Knob 11W9
Knob 5 W3 Knob 12W10
Knob 6 W4 Knob 13W11
Knob 7 W5 Knob 14W12
Preset 49: XG Effects - EQ [NRPN] (Master Channel)
Knob 1 EQ Gain 1
Knob 2 EQ Frequency 1
Knob 3 EQ Q1
Knob 4 EQ Gain 2
Knob 5 EQ Frequency 2
Knob 6 EQ Q2
Knob 7 EQ Gain 5
Knob 8 EQ Frequency 5
Knob 9 EQ Gain 3
Knob 10 EQ Frequency 3
Knob 11 EQ Q3
Knob 12 EQ Gain 4
Knob 13 EQ Frequency 4
Knob 14 EQ Q4
Knob 15 EQ Q5
Knob 16 EQ Type
Preset 50: XG Effects - Reverb [NRPN] (Master Channel)
Knob 1 Reverb Type
Knob 2 Reverb Parameter 1
Knob 3 Reverb Parameter 2
Knob 4 Reverb Parameter 3
Knob 5 Reverb Parameter 4
Knob 6 Reverb Parameter 5
Knob 7 Reverb Parameter 6
Knob 8 Reverb Parameter 7
Knob 9 Reverb Parameter 8
Knob 10 Reverb Parameter 9
Knob 11 Reverb Parameter 10
Knob 12 Reverb Parameter 11
Knob 13 Reverb Parameter 13
Knob 14 Reverb Parameter 15
Knob 15 Reverb Return
Knob 16 Reverb Pan
Preset 51: XG Effects - Chorus [NRPN] (Master Channel)
Knob 1 Chorus Type
Knob 2 Chorus Parameter 1
Knob 3 Chorus Parameter 2
Knob 4 Chorus Parameter 3
Knob 5 Chorus Parameter 4
Knob 6 Chorus Parameter 6
Knob 7 Chorus Parameter 7
Knob 8 Chorus Parameter 8
Knob 9 Chorus Parameter 9
Knob 10 Chorus Parameter 10
Knob 11 Chorus Parameter 11
Knob 12 Chorus Parameter 12
Knob 13 Chorus Parameter 13
Knob 14 Chorus Amount to Reverb
Knob 15 Chorus Return
Knob 16 Chorus Pan
pocketControl Owners ManualpocketControl Owners ManualPage 12
Page 13
 Loading...