

Page 1

P-04C
INSTRUCTION MANUAL
’11.6
Page 2
Thank you for selecting the “docomo STYLE series P-04C”.
Read this manual before use to correctly operate y
About manual of P-04C
The operating procedures for the P-04C are also published as in
“使いかたガイド (Guide)” on-screen manual installed onto your
FOMA terminal, and “Instruction Manual (Detailed Version)” as a
PDF. (In Japanese only)
“Instruction Manual” (this manual)
Description of the displayed content and operating
ocedures for basic functions
pr
“ (Guide)” (installed onto your FOMA terminal)
Description of the outline and operations of frequently used
functions
From the P-04C
※ This function is available in Japanese mode only.
“Instruction Manual (Detailed Version)” (PDF)
From a PC, download detailed information about all the
functions and the operating procedures. (In Japanese only)
http://www.nttdocomo.co.jp/support/tr
download/index.html
※ Note that the URL and published contents may be modified
without notice.
Note that “P-04C” is referred to as “FOMA terminal” in this manual.
Most operating procedures and displays in this manual are shown with the default settings of the “White” handset. Further, displays and
illustrations shown in this manual are for ref
Most operating procedures and displays in this manual are described when the FOMA terminal is in Normal Style. See page 34 for the
operations in Viewer Style (Touch panel).
m▶便利ツール (Tool)▶使いかたガイド (Guide)
ouble/manual/
erence. The actual ones might differ.
our P-04C.
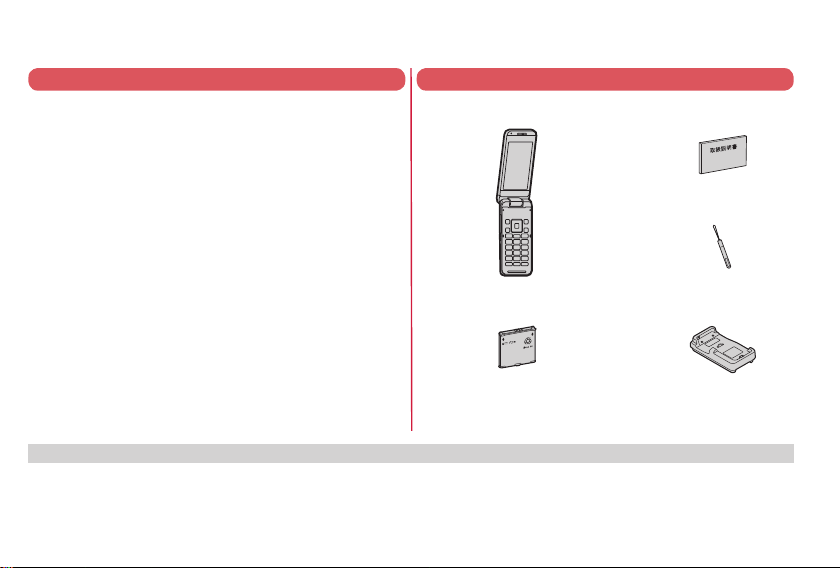
P-04C Handset
(With Warranty and Back Cover P49)
Battery Pack P23
※ A Crystal Touch Pen is provided as a sample to users who purchase a
special model (Pink Gold).
See page 102 for optional items that support this FOMA terminal.
For Using This Manual
Basic Package
Instruction Manual
(Japanese version)
Touch Pen P01
Desktop Holder P45
※
Page 3
FOMA Terminal ································2
Contents
What You can Do with P-04C ···········3
Part Names and Functions ·············· 4
Styles ··············································· 6
Before Using ··················································· 24
Screen Explanation ········································29
Character Entry ··············································39
Precautions
Handling Precautions
Waterproof Performance ···············19
······································7
···················· 16
Sound/Screen Setting ····································41
Lock/Security ··················································46
Introduction
P.1
Basic
Operation
P.24
Call Telephone ················································51
Mail ··································································59
-
mode/Full Browser ·······································66
i
i-Channel
·························································69
Camera ····························································73
1Seg ································································76
Music ·······························································80
-
Keitai ···················································85
Osaifu
i-concier ·························································· 86
Support ···························································95
Appendix ·······················································103
※It is prohibited to copy all or part of this manual without permission. ※The instructions contained in this manual may be changed without notice.
Phonebook ·····················································64
Map/GPS ························································70
i-αppli/i-Widget ···············································82
i-motion/Movie ···············································84
Convenient Tools
············································ 87
Data Management ·········································· 90
Index ·····························································117
Connect
P.51
Search
P.66
Enjoy
P.73
More
Convenient
P.85
Others
P.95
1
Page 4
FOMA Terminal
P-04C supports W-CDMA system.
Because the FOMA terminal uses radio waves, you cannot use it in
places where the radio waves do not reach, where they are weak
even outdoors, such as inside tunnels, basements, or buildings,
or out-of-service area. You might not be able to operate the FOMA
terminal even when you are in a place with a fi ne view such as in
a high-rise building or apartment. Note that you may experience
ruption of calls even if the three antennas respond to a strong
inter
radio wave, and you remain without moving to use the FOMA
terminal.
Introduction
Since the FOMA terminal uses radio waves as the medium of
telecommunication, calls may be tapped by a third party.
However, the W-CDMA system automatically supports tapping
prevention, so your conversation will be incomprehensible to the third
party, because it is recogniz
The FOMA terminals change your voice into digital signals and send
them to the other party. In places where the radio waves are weak,
the digital signals may not be converted correctly, and in such a
case, the voice may sound different from the actual one.
The user hereby agrees that the user shall be solely responsible for
the result of the use of SSL/TLS. Neither DOCOMO nor the certifi ers
as listed herein mak
security in the use of SSL/TLS. In the event that the user shall sustain
damage or loss due to the use of SSL/TLS, neither DOCOMO nor the
certifi ers shall be responsible for any such damage or loss.
Certifi ers: VeriSign Japan K.K., Cybertrust Japan Co., Ltd.,
GlobalSign K.K., RSA Security Japan Ltd.,
SECOM Trust S
Entrust, Inc., and Go Daddy, Inc.
This FOMA terminal supports FOMA Plus-Area and FOMA
High-Speed Area.
2
ed as mere noise.
e any representation and warranty as for the
ystems Co., Ltd., Comodo CA Ltd.,
You are advised that you make separate notes of information (such
as Phonebook entries, schedule events, memos, record messages,
voice memos) stored in the FOMA terminal and keep them in a safe
place. Note that we cannot be held responsible for the unlikely event
of loss of the stored content due to a malfunction, repair, change of
your model, or other mishandling of the FOMA terminal.
You are advised to save your important data on the microSD car
you have a personal computer, you can transfer and save data such
as Phonebook entries, mail messages, schedule events, and others
on the personal computer by using DOCOMO keitai datalink.
The instructions given in this manual are for operating the FOMA
terminal when the DOCOMO’s UIM is used.
d. If
Unlocking SIM
This FOMA terminal supports SIM unlock. When the SIM is unlocked,
other operator company’s SIM cards can be used with your FOMA
terminal.
Contact your nearest docomo Shop for unlocking SIM.
You are charged separately a charge for unlocking SIM.
If other operator company’s SIM is used, restrictions may be applied
to some of the services or the functions. Note that NTT DOCOMO,
INC. cannot provide any guarantees for operating the FOMA terminal
when using other company’s card.
ther details on the SIM unlock, refer to the DOCOMO website.
For fur
Page 5
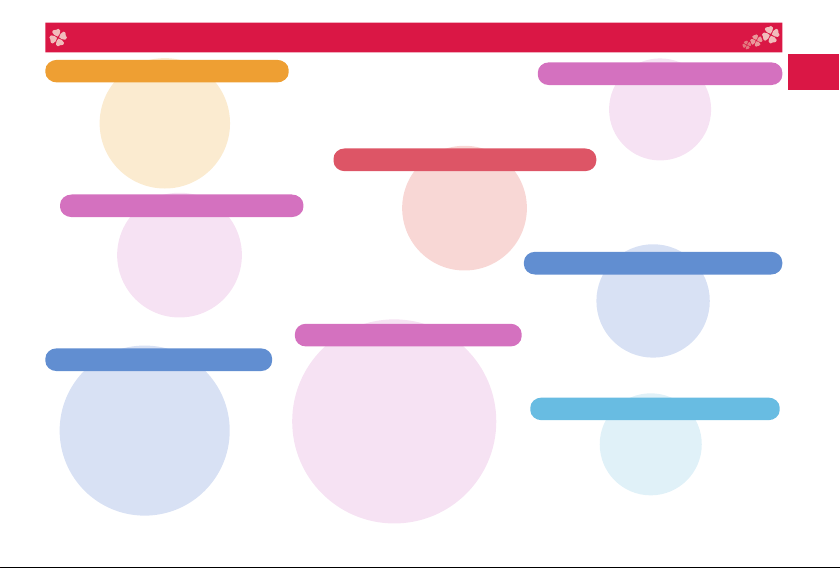
What You can Do with P-04C
Koe-no-Takuhaibin
This service enables to keep voice
messages and notify the recipient by SMS
of a message reception. When the recipient
plays back the message, the sender is also
notifi ed by SMS. You can store and play
messages as easily as making a phone call.
使いかたガイド (Guide) ▶P.38
You can check “使いかたガイド (Guide)”
on screen for how to operate a function
you want. Even when you do not have the
printed “Instruction Manual” at hand, you
can easily operate your FOMA terminal by
referring to it.
※ This function is available in Japanese mode
only.
i-concier
i-concier works to serve you with a
pleasant life just like a clerk or concierge
does. The service holds your data (area
information about your neighborhood,
Memo, Schedule, ToruCa, Phonebook,
etc.) and sends you information, with
good timing, about a variety of things
according to the contents of your memo
and your schedule event, your living
area, your current location, or your
preference or taste.
※ i-concier is available in Japanese only.
▶
P.52
eco Mode
▶
P.86
This function allows you to reduce
battery consumption by adjusting the
brightness of the display. eco Mode
can also be turned on according to the
amount of remaining battery power.
■ ECO NAVI
ECO NAVI is a function that identifi es
waste and conserves energy. A
notifi cation icon will be displayed when
the eco Mode is automatically set, or
when the FOMA terminal has not been
operated for a certain period of time and
1Seg has terminated.
Crystal&Illumination ▶P.45
Four SWAROVSKI ELEMENTS are used for
the Call/Charging indicator, and elegant
gleams notice you of incoming calls.
Waterproof Performance ▶P.19
The FOMA terminal is designed to exhibit a
waterproof performance equivalent to the IPX5
and IPX7 classes once its connector terminal
cover and inner cover have been closed tightly
and the back cover is attached.
Handwriting Photo/Memo ▶P.89
Using glittering or sparkling stamps or neon
pens, you can enjoy adding handwritten
characters or decoration on the images.
▶
P.45
High-image-quality Camera ▶P.73
▶
P.46
Using the high-image-quality camera with
its 13,200,000 pixels, skin is shot beautifully
and scenery is shot vividly.
Introduction
3
Page 6
Introduction
4
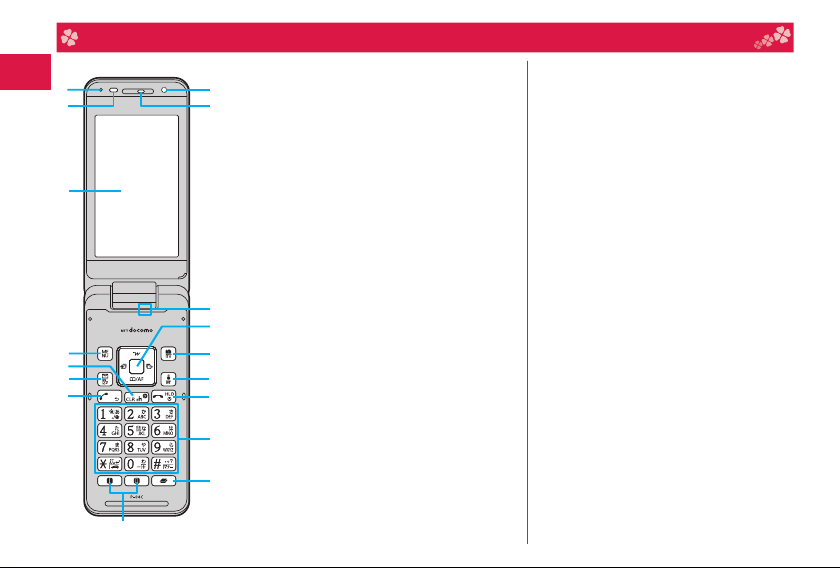
Part Names and Functions
Air vent
❽
For adjusting the pressure inside the FOMA
terminal
Light sensor
For sensing brightness (Do not cover it
with your hands or do not put a sticker on
it. Doing so might disable detecting the
brightness.)
Display/ Touch panel
mMenu key
For showing the Main Menu
rClear key/i-Channel key
lMail key
For showing the Mail Menu
dStart key
For starting to talk
QWMulti one-touch key
Call/Charging indic
Lights while you are receiving a call or
message, talking
Earpiece
For listening to the other party’s voice
Microphone
For speaking to the other party
oCommand navigation key
For operating functions and menus
ator
, or charging.
cCamera key/1Seg key
ii-mode key/i-αppli key
hPower/End key
For turning on/off the power or ending a
call
Numeric keys
For entering phone numbers and text
xMulti key
For showin
GPS antenna
Camera
For shooting portraits and/or landscapes
Flash
Back cover
Remove this when attaching/removing the
battery pack, UIM, and microSD card.
The inner cover is found inside the back
cover. Do not peel off the sticker on the
outside of the inner cover. If you peel it off,
IC card may not be written and read.
fmark
An IC card is installed. Use it for
Osaifu-Keitai or i
g the Task menu
※
C communications.
Page 7
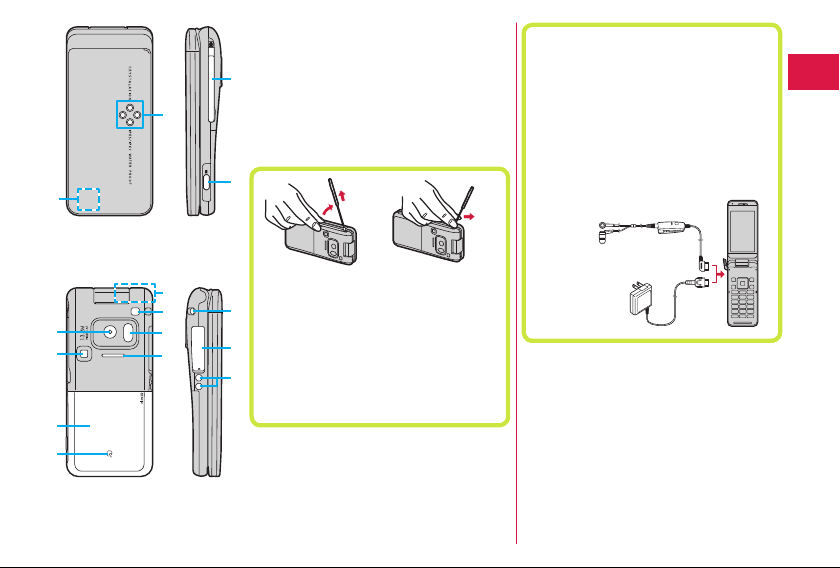
FOMA antenna
Strap hole
Infrared data port
For using infrared communication and the
infrared r
Speaker
1Seg antenna
For receiving 1Seg broadcasting
Engage your
fingertip over the
top of the 1Seg
antenna, and pull it
until it stops.
To house the 1Seg antenna, do not do
it forcibly. Damage to the antenna could
result. Push the antenna until it stops, place
it in correct direction, and then bring it down
for housing.
vSide key
For shooting a subject by the camera
※
emote control
Move it in the direction
of the arrow without
forcible pressure.
For using earphone
Connect an optional connector-terminalcompatible earphone. When using a
connector-terminal-non-compatible earphone,
use an optional plug adapter for connection.
Example for connecting the Stereo Earphone
Set 01 (option) to external connector terminal
This mobile phone serves as the port where
both the AC Adapter (charging) and Stereo
Earphone Set 01 (Earphone/microphone
terminal) are plugged in.
Stereo Earphone Set 01
AC Adapter
Charging terminal
※The antenna is embedded in the handset.
Covering the area near the antenna with
your hand may adversely aff
ect the quality
of the communication.
Introduction
Connector terminal
egrated terminal for connecting earphone
Int
or for charging
, etc.
5
Page 8
Styles
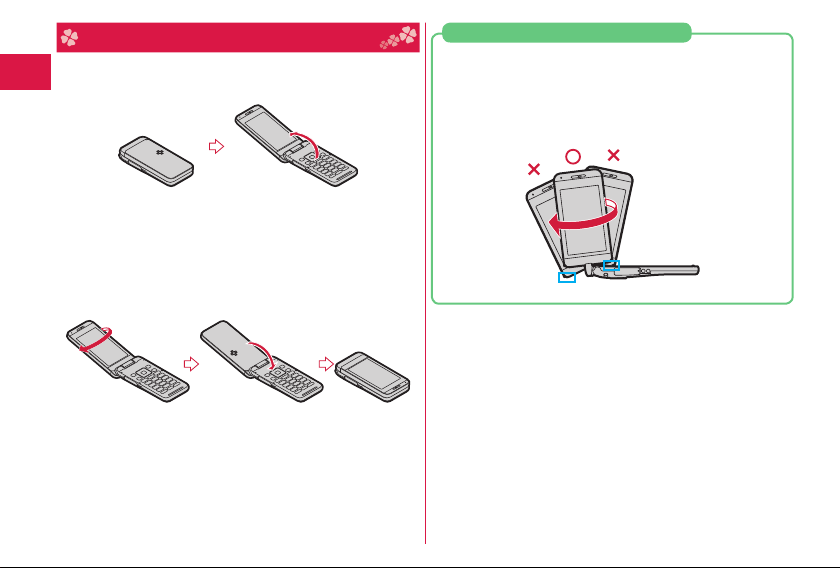
The P-04C comes with two styles.
■ Normal Style
This style supports button operations.
Introduction
■ Viewer Style
This style supports touch operations.
To use the FOMA terminal in this style, rotate the display
panel clockwise by 180 degrees and close it by pulling it
toward you.
To return to the Normal Style, open the display panel, and
then rotate it counterclockwise by 180 degrees.
6
Notes when rotating the display panel
Do not knock the display panel against the button area or
other surface. Doing so may scratch or damage the key
area.
Do not rotate the display panel in the opposite directions
to the ones indicated in the instructions.
Do not rotate the display panel more than 180 degrees.
Page 9
Don’t
Do
Precautions
Before using the FOMA terminal, read these safety precautions
carefully so that you can use it correctly.
After reading the precautions, keep them in a safe place.
Be sure to observe these safety precautions to prevent you or
those around you from infl icting injury and to avoid unnecessary
damage to the property.
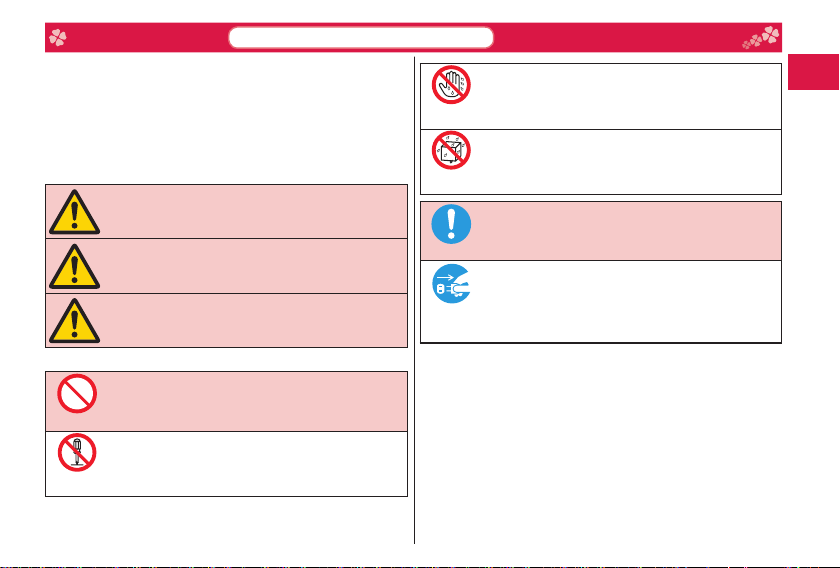
The symbols below indicate the levels of danger or damage that
can be caused if the particular precautions are not observed and
equi
pments are not used properly.
Danger
Warning
Caution
The following symbols show specifi c directions:
Denotes actions prohibited to do.
Denotes not to disassemble the units.
Do not
disassemble
ALWAYS FOLLOW THESE DIRECTIONS
This symbol indicates that incorrect
handling will almost certainly cause
death or serious injury.
This symbol indicates that incorrect
handling poses a risk of causing death
or serious injury.
This symbol indicates that incorrect
handling poses a risk of causing a
slight injury or damage to the product
or property.
Denotes not to touch with wet hands.
Not wet
hands
Denotes not to use where the equipment may get wet,
and avoid get it wet.
Avoid
Water
Denotes mandatory instructions (matters that must be
complied with).
Denotes to pull the power plug out of an outlet.
Pull the
power plug
out
“Precautions” are divided into the following seven sections:
General precautions for FOMA terminal, batteries,
adapters, desktop holder, touch pen, and UIM .................................... P.8
Precautions for FOMA terminal ............................................................ P.9
Precautions for b
Precautions for adapters and desktop holder .................................... P.12
Precautions for touch pen .................................................................. P.13
Precautions for UIM ............................................................................ P.14
Notes on using near electronic medical equipment ........................... P.14
atteries .....................................................................P.11
Introduction
7
Page 10
General precautions for FOMA
terminal, batteries, adapters,
desktop holder, touch pen, and UIM
Danger
Do not use, store, or leave the
mobile phone or its accessories in
places with a high temperature (such
as near fi re, near heating appliances,
Don’t
Introduction
inside a kotatsu or near other
furniture with heating elements, in
places exposed to direct sunlight, or
in cars heated by the sun).
Fire, burns, or injury may result.
Do not place the FOMA terminal
or its accessories inside cooking
appliances such as microwave
ovens or high-pressure containers.
Don’t
Fire, burns, injury or electric shock
may result.
Do not attempt to disassemble or
remodel the FOMA terminal or its
accessories.
Do not
Fire, burns, injury or electric shock
disassemble
may result.
Do not allow the FOMA terminal
or its accessories to get wet either
from water, drinking water or pet
urine, etc.
Avoid
Water
Fire, burns, injury or electric shock
may result.
See “Waterproof Performance” on
page 19 for details on waterproof
performance.
8
With your FOMA terminal, use the
batteries and adapters specifi ed
by NTT DOCOMO, INC.
Fire, burns, injury or electric shock
Do
may result.
Warning
Do not throw the FOMA terminal
or accessories, or subject them to
severe shocks.
Fire, burns, injury or electric shock
Don’t
may result.
Do not allow electrically
conductive foreign objects (such
as metal pieces or pencil leads) to
come into contact with the FOMA
Don’t
terminal’s charging terminal or
connector terminal. Do not allow
such objects to enter into the
FOMA terminal.
Fire, burns, injury or electric shock
may result.
Do not cover or wrap the FOMA
terminal or its accessories with a
cushion, etc. while it is being used
or recharged.
Don’t
Fire or burns may result.
Before entering a gas station or
other places where fl ammable
gases are generated, be absolutely
sure to turn off the FOMA terminal
Do
and stop charging if it is being
charged.
Otherwise, the fl ammable gases
may ignite.
Use the Osaifu-Keitai with the
FOMA terminal turned off when you
are near a gas station. (When IC
Card Lock is set, relea se the lock ,
and then turn off the power.)
If odor, overheat, discoloration,
or deformation is detected during
use, battery charge, or storage,
immediately follow the instructions
Do
below:
• Pull the power plug out of the
outlet or cigarette lighter socket.
• Turn off the power of the FOMA
terminal.
• Remove the battery pack from
the FOMA terminal.
Fire, burns, injury or electric shock
may result.
Page 11
Don’t
Do
Do
Do
Don’t
Don’t
Don’t
Caution
Do not place the FOMA terminal or
accessories on unstable locations
such as wobbly tables or slanted
ions.
locat
Don’t
They may fall off and cause injury.
Do n
ot store in humid or dusty
es, or in high temperature
plac
environments.
Fire, burns or ele
result.
If the FOMA terminal and its
acce
a guardian should explain how to
operate them correctly. During use,
a guardian should also check that
hey are being used as instructed.
t
Otherwise, injury may result.
Keep
and infants.
Accidental swallowing or inj
result.
ctric shock may
ssories are used by a child,
reach of babies
out of the
Take special care when
the FOMA terminal for a long time
the adapter connected.
with
If you
on the videophone, watch 1Seg
rams and so on for a
prog
period of time while charging, the
erature of the F
temp
battery pack or adapter may rise.
If yo
u keep direct contact with
high-t
itching, a rash or low-temp
skin burns may res
the state of your
or constitution.
Precautions for FOMA terminal
Warning
Do not directly point the infrared
data port at someone’s ey
ury may
during transmission.
g so may har
Doin
Don’t
eyes.
While using infrared
communication
FOMA terminal’s in
port at a home electrical appliance
h is equipped with
whic
device.
The infrared device may malfunction,
and possibly cau
you use
use the i-αppli
emperature parts, redness,
programs, talk
prolonged
OMA terminal,
erature
ult depending on
physical condition
es
m the person’s
, do not point the
frared data
an infrared
se an accident.
Do not light the flash close to
eyes. It is particularly important
that you hold the mobile phone at
a distance of at l
away from babies and infants
when shooting them.
Light the flash close to eyes may
dama
ge eyesight. Also, accidents
such as injury mig
someone is startled or dazzled by
the light.
Do not allow liq
or foreign materials such as metal
pieces or flammable materials to
get i
Don’t
slot of the FOMA terminal.
Fire, burns, injury or e
may result.
Do not turn on the flash toward car
driv
ers.
It disturbs driving, and accidents
may result.
uids such as water,
nto the UIM or microSD card
east one meter
Introduction
ht occur if
lectric shock
9
Page 12
Introduction
DoDoDo
Do
Do
Do
10
Turn off the FOMA terminal in
places where use is prohibited
such as in airplanes and hospitals.
Otherwise, the electronic devices
electronic medical equipment
and
in those places may be adversely
affec
ted. If the Auto power ON
function is set, deactivate the
setting, then turn off the power.
For use inside medical facilities,
sure that you comply with
make
their regulations.
Engaging in any prohibited acts
such as using the FOMA terminal in
an airplane is punishable by law.
However, it may be p
a mobile phone in an airplane, such
as by setting radio wave emission
to o
ff. Comply with the instructions
given by the airline company.
When talking in Hands
or when a ring tone is sounding, be
absolutely sure to keep the FOMA
inal away from your ear.
term
Further, when you play games or
play back music with the earphone/
microphone etc. connected, adjust
the sound volume to moderate
volu
me.
The excessive sound volu
impairs your hearing.
Further, accidents may result due
to the hardness of hearing of
ounding sound.
surr
ossible to use
-
free
mode
me
For those with weak heart
conditions, the vibrator and ring
volume must be adjusted carefully.
Otherwise, the functions may
rsely affect your heart.
adve
If you are using an electronic
medi
cal device or other type of
device, check with its manufacturer
or vendor as to whether it will be
ted by the signals from the
affec
FOMA terminal.
The FOMA terminal may adversely
affec
t the device.
Turn off the FOMA terminal when
electronic devices using
near
high-precision control or weak
signals.
The FOMA terminal may cause the
tronic devices to malfunction
elec
and have other adverse effects.
※ Electronic devices that may be
affected:
ing aids, implanted
Hear
cardiac pacemakers, implanted
defibrillators, other ele
medical equipment, fire alarms,
automatic doors and other
automatically controlled devices.
If you use an implanted cardiac
maker, implanted defibrillator
pace
or any other electronic medical
equipment, consult the
manufacturer or retailer of the
device for advice regarding
possible effects from the radio
waves.
ctronic
If the display part or camera lens
is b
roken, be careful about broken
glasses or the exposed interior of
the
FOMA terminal.
A film is coated on the s
the display area and the plastic
panel is used for the surface of
the camera lens, making it hard
for the glass to break into pieces.
However, if you touch the damaged
posed parts by mistake, you
or ex
may injure yourself.
Caution
Do not swing around the FOMA
terminal by its strap, antenna or
other parts.
You may hit yourself or others,
Don’t
Don’t
Don’t
ibly causing injury or other
poss
accidents.
Do not use the F
has been damaged.
Fire, burns, injury or e
may result.
When using the
ensure that you check around you
afety, securely take hold of
for s
your FOMA terminal, and do not
swing more than necessitated.
Otherwise, injury or other accidents
may r
esult.
urface of
OMA terminal if it
lectric shock
motion sensor,
Page 13
Don’t
Do
Do
Do
The surface of the display is
coated by a film that prevents the
surfa
ce from damage to ensure
afety when you accidentally
your s
or give shock to your FOMA
drop
term
inal (for preventing the
forced glass from
rein
Do not forcibly peel off or give
ge to the film.
dama
display is damaged while you
If the
oper
ate the FOMA terminal with the
film peeled off, you might suffer an
injury.
If you accidentally damage the
display part and the substance
de leaks out, keep your f
insi
hands and skin away fro
Don’t
Otherwise, you may impair your
eyesight or damage your skin.
If thi
s substance should get into
eyes or mouth, immediately
your
e them with clean water, and
rins
seek medical attention.
then
t should adhere to your skin or
If i
clot
hing, immediately wipe it off with
alcohol or similar liquid, and then
e the affected area with soap
rins
water.
and
re using the
Befo
inside a car, check with its
manu
facturer or dealer whether the
signals from the FOMA terminal
Do
have any adverse effects.
will
ome vehicle models, the signals
In s
may a
dversely affect the electronic
ces inside the ve
devi
cases are rare. However, if this
happens, stop using the F
terminal immediately.
scattering).
ace,
m it.
FOMA terminal
hicle. Such
OMA
Itching, rash or eczema may be
caused depending on your physical
conditions or pre
abnormality occ
FOMA terminal immediately, and
then
seek medical attention.
See “List of materials used” on
page 15 for material of each part.
Be careful not to get your finger or a
strap caught in the parts when you
e or open the FOMA terminal.
clos
Otherwise, injury or other accidents
may result.
View t
ligh
t place keeping a certain
distance from your eyes.
rwise, your eyesight may
Othe
beco
me impaired.
If the crystal glass has dropped
the handset, do not leave it
from
lying around.
Accidental swallowing or inj
Do
result.
In the event that the crystal glass
been swallowed or that it
has
should get into somebody’s nose,
ear or eye, seek medical attention
imme
diately.
disposition. If an
urs, stop using the
he display in a sufficiently
Precautions for batteries
Check the description on the label of the
battery pack for the type of battery.
Description Type
Li-ion 00 Lithium-ion battery
Don’t
ury may
Don’t
Don’t
Danger
Do not let any metal object such
as a wire come in contact with the
battery terminals. Also do not carry
ore the battery together with
or st
any metal objects like a necklace.
Otherwise, the battery pack may
igni
te, burst or overheat and its
electrolyte may leak.
When installing the b
FOMA terminal, check that it is
facing the right way, and if the
battery cannot be installed easily,
do not force it into place.
rwise, the battery pack may
Othe
igni
te, burst or overheat and its
electrolyte may leak.
Do not throw the battery into fire.
rwise, the battery pack may
Othe
igni
te, burst or overheat and its
electrolyte may leak.
attery in the
Introduction
11
Page 14
Introduction
Don’t
Do
Don’t
Do
Do
Don’t
Don’t
Don’t
12
Do not pierce it with nails, hit it
with a hammer, or step on it.
Otherwise, the battery pack may
te, burst or overheat and its
igni
electrolyte may leak.
If the battery fluid or other material
gets
into your eyes, do not rub
them. Flush your eyes with clean
water and seek medical attention
diately.
imme
Otherwise, the loss of eyesight may
resu
lt.
Warning
Never use the FOMA terminal if it
has damages such as deformities
or scratches as a result of
drop
ping it.
Otherwise, the battery pack may
te, burst or overheat and its
igni
electrolyte may leak.
Immediately stop using the FOMA
inal and keep it away from
term
fire if the battery leaks or emits an
odor.
The leaked battery fluid
causing fire or burst.
Be careful that your pets do not
bite
into the battery pack.
Otherwise, the battery pack may
te, burst or overheat and its
igni
electrolyte may leak.
may ignite,
Caution
Do not dispose of the exhausted
battery with other waste.
The battery may catch fire or
ge the environment. After
dama
Don’t
insulating the battery terminals
with tape, take the unneeded
battery to a handling counter such
as a docomo Shop or dispose of
n accordance with local waste
it i
disposal regulations.
Do not use or attempt to charge a
wet b
attery.
Otherwise, the battery pack may
te, burst or overheat and its
igni
Don’t
electrolyte may leak.
If the electrolyte fluid or other
mater
ial inside the battery has
ed out, do not allow it to come
leak
into contact with the skin on your
Do
face, hands or any other part of
your body.
Contact may res
or skin problems.
If you get the fluid or other material
in your eyes or mouth, or on skin
or clothing, immediately wash the
affected areas with clean water.
If you get it in your eyes or mouth,
diately seek medical attention
imme
after rinsing.
ult in loss of sight
Precautions for adapters and
desktop holder
Warning
Do not use the adapter if its cord
has been damaged.
Fire, burns or ele
result.
Don’t
Do not use the AC
desktop holder in humid places
such as a bathroom.
, burns or ele
Fire
Don’t
result.
The DC adapter is f
negative (-) grounded vehicle. Do
not use it in a positive (+) grounded
vehicle.
Fire, burns or ele
result.
If a thunderstorm is nearby, do not
touc
h the adapter.
Otherwise, you may receive an
tric shock.
elec
Never short-circ
terminal when the adapter is
plugged into the power outlet
or cigarette lighter socket. Also,
never touch the charging terminal
with fingers or other bare skin.
, burns or ele
Fire
result.
ctric shock may
adapter and
ctric shock may
or use only in a
ctric shock may
uit the charging
ctric shock may
Page 15
Do not place heavy objects on the
Don’t
Don’t
Do
Do
Do
Do
Do
power plug
power plug
adapter cord.
Fire, burns or ele
result.
When plugging the AC
into the power outlet, or when
unplugging it from the outlet, do
not allow metal straps or other
metal objects to come in contact
with it.
Fire, burns or ele
result.
Do not touch the adapter cord,
deskt
op holder, or power outlet
wet hands.
with
Fire, burns or ele
Not wet
hands
result.
Use the adapter at the specified V
AC.
en charging the
Wh
overseas, use the AC adapter
available for use overseas to
charge the FOMA terminal.
lying the wrong voltage to
Supp
the A
C adapter may result in a fire,
burns or electric shocks.
AC adapter: 100 V AC
adapter: 12/24 V DC
DC
[For negative (-) grounded vehicles
only]
AC adapter available for use
overseas: 100 V to 240 V AC
[Connect only to household AC
outlet]
ctric shock may
adapter
ctric shock may
ctric shock may
FOMA terminal
If a fuse of the DC adapter has
blown, replace it with a specified
fuse.
Fire, burns or ele
result.
For the specified fuse, refer to each
inst
ruction manual.
Keep the power plugs dust-free
Fire, burns or ele
result.
When plugging the AC adapter
into the power outlet, plug it in
securely.
Fire, burns or ele
result.
When unplugging the
from the power outlet or cigarette
lighter socket, do not yank the
adapter cord, but take hold of the
adapter to unplug it.
Fire, burns or ele
result.
When you do not intend to use the
adap
ter for a long period of time,
disconnect the
the power outlet or cigarette lighter
Pull the
power plug
socket.
out
Fire, burns or ele
result.
ctric shock may
ctric shock may
ctric shock may
power plug
ctric shock may
power plug from
ctric shock may
If liquids such as water get in the
adapter, unplug the power cord
immediately from the outlet or
cigarette lighter socket.
Pull the
Fire, burns or ele
out
result.
Before cleaning, pull the
.
plug out of the outlet or cigarette
lighter socket.
, burns or ele
Fire
Pull the
result.
out
Precautions for touch pen
Caution
Do not point the touch pen toward
other persons.
You may jab yourself or somebody
ith its pointed end, possibly
else w
Don’t
causing injury or even loss of sight.
When the touch pen is attached to
FOMA terminal by the strap, do
the
not take hold of the touch pen and
wave o
Don’t
r swing the terminal about.
Doing so may cau
become detached or the strap to
snap, in turn causing the terminal
to strike you or somebody else and
possibly resulting in an injury, an
accident, malfunctioning and/or
damage.
ctric shock may
power
ctric shock may
se the cap to
Introduction
13
Page 16
Precautions for UIM
Do
Do
Do
Do
Introduction
14
Caution
Be careful not to touch the cut
surface of the UIM when removing
it.
herwise, injury may result.
Ot
Notes on using near electronic
medical equipment
The description below meets “Guidelines
on the Use of Radio-communication
Equipment such as Cellular Telephones
– Safeguards for Electronic Medical
Equipment” by the Electromagnetic
Compatibility Conference Japan.
Warning
Comply with the following in
hospitals or health care facilities:
• Do not carry the F
into operating rooms, intensive
care units (ICU) or cor
units (CCU).
• Turn off the FOMA terminal in
hosp
ital wards.
• If there is any electronic medical
pment near you, turn off the
equi
FOMA terminal even when in a
location such as a lobby.
• Comply with any regulations of
hospital and health care facilities
instructing you not to use or carry
mobile phone.
in a
• If the Auto power ON function is
set, deactivate the setting, then
turn off the power.
OMA terminal
onary care
Turn off the FOMA terminal in
trains during the rush hour or
other crowded areas as there may
be someone near you with an
implanted cardiac pacemaker or
planted defibrillator.
im
The FOMA terminal
adversely affect the operation of
implanted cardiac pacemakers and
implanted defibrillators.
If you use an implanted cardiac
maker or implanted
pace
defibrillator, use the FOMA terminal
22 cm or more away from an
impl
anted cardiac pacemaker or
planted defibrillator.
im
The FOMA terminal
adversely affect the operation of
implanted cardiac pacemakers and
implanted defibrillators.
Patients using electronic medical
pment other than implanted
equi
cardiac pacemakers or implanted
defibrillators (outside medical
Do
establishments for tr
home, etc.) should check the
influence of radio waves upon
the equipment by consulting its
manufacturer.
The FOMA terminal’s si
adversely affect the operation of
electronic medical equipment.
’
s si
gnals may
’
s si
gnals may
eatment at
gnals may
Page 17
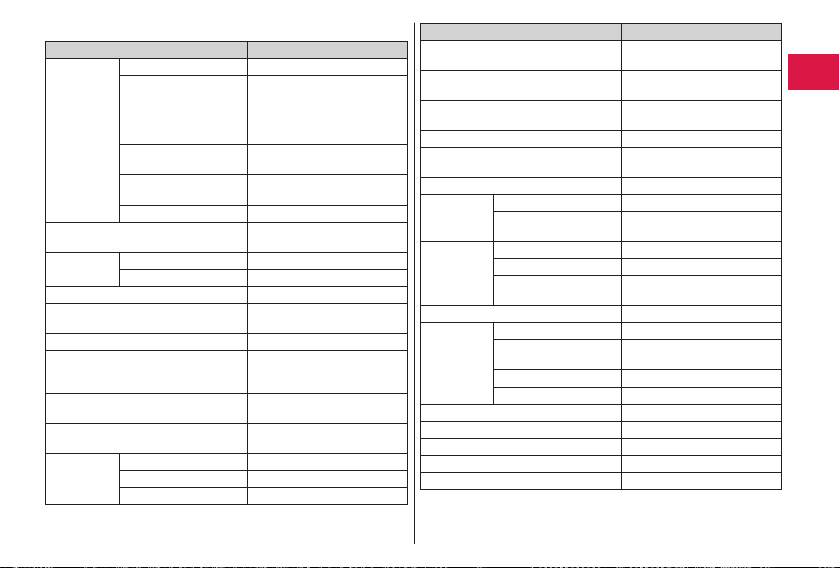
List of materials used
Where it is used Material/Finishing
Outer casing Disp
Connector terminal Stai
Connector
term
inal
Camera lens area PMMA/h
Side key PC/aluminum vapor deposition
Arou
nd the side key ABS/U
Charging terminal Bras
Ornament area
play back surface side)
(Dis
Key area, Sheet area, and Open/close
per of numeric key surface
stop
Touch pen Body, Cap ABS
lay surface PC/hard coating
Numeric key sur
Display side surface,
Bottom part of dis
panel,
Display back surface
Display back surface
ery surface
Batt
(Hin
ge side)
Back cover PC +
Cover PC, elastomer/UV coating
Packing Silicon rubber
Inside of cap, Pen tip POM
Strap band Polyester
face,
PC/UV coating
play
※1
※2
PC/tin vapor deposition +
UV coating
ABS/UV coating
ABS/UV coating
nless steel/
nickel plating + tin plating
ard coating
+ UV coating
V coating
s/nickel plating +
nickel palladium plating +
gold plating
※2
Crystal glass
Acrylic urethane
Where it is used Material/Finishing
Call/Charging indicator
(Dis
play back surface side)
Ring around the C
indicator (Display back surface side)
Corner area at the bottom part of the
lay
disp
Display panel PET/h
Tape (Side surfaces of the b
compartment)
Battery compartment surface Stai
Battery
term
inal
Battery pack Resi
UIM tray POM
nge area Center PA/UV coating
Hi
h part PMMA/hard coating
Flas
Labe
l (Inside of the i
Label (Outside of the
Label (Battery com
Inner cover inside the back cover PC,
all/Charging
Resin part PA
Terminal area Titanium copper/
n area PC
Label PET
Terminal area Glass epoxy substrate/
lay back surface
Disp
side
Hinge support area PC
Cap PET resin
nner cover) PET
inner cover) PEN
partment) Polyester
Crystal glass
PC/tin vapor deposition +
UV coating
Elastomer
attery
PET
nick
nickel plating + gold plating
A
ard coating
nless steel/nickel plating
el plating + gold plating
BS/UV coating
Silicon rubber
Introduction
15
Page 18
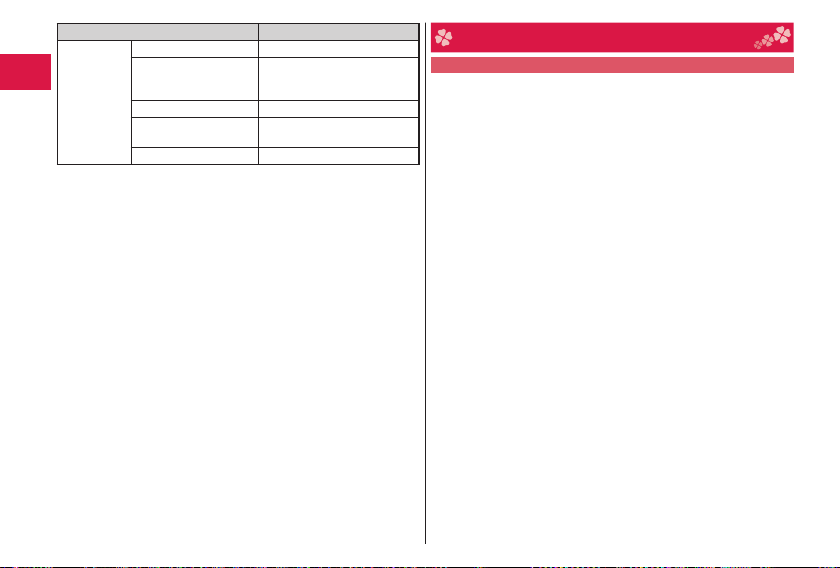
Where it is used Material/Finishing
1Seg
antenna
Materials may vary in some areas depending on the body color.
※1 Body color “White” “Pink”
Introduction
※2 Body color “Pink Gold”
Tip resin part ABS/UV coating
Metal part
(Bottom of the tip resin
part)
Metal part (Wire area)
Hinge area at bottom
part
Holder area Zinc alloy/nickel plating
Stainless steel
Nickel-titanium alloy
Stainless steel
16
Handling Precautions
General notes
The P-04C is provided with the waterproof performance,
however, do not have water entered into the inside of the
FOMA terminal, or do not spray water over accessories and
optional items.
The battery, adapter, desktop holder, and UIM are not
waterproofed. Do not use them in environments, which are high
in humidity such as in bathrooms, and do not allow them to get
wet from rain. Furthermore, if car
they become moist due to perspiration and the internal parts may
become corroded, causing malfunction.
If the parts are found to have been damaged due to exposure to
the liquids, any repairs will not be covered by warranty, or repairs
may not be possible.
This may be repaired at a cost if repairs are possible.
Use a dry soft cloth such as the one for cleaning glasses to
clea
n the equipment.
The display may be scratched if it is rubbed hard with a dry cloth.
Stains may result from droplets of water or dirt if they are left
on the display.
Do not use alcohol, thinner, benzene, detergent or other
solvents for cleaning, otherwise the printing may be removed
or discoloration may result.
Occasionally clean the terminals of the equipment using a dry
co
tton swab, etc.
The soiled terminals deteriorate the connection and might cause
power discontinuity or incomplete charging. Wipe the terminals
with a cotton swab, etc.
Take care not to damage the terminals when cleaning them.
Do not place the FOMA terminal near an air conditioner outlets.
Condensation may form due to rapid changes in temperature,
and this may corrode internal parts and cause malfunction.
rying them against your body,
Page 19
Do not apply excessive force onto the FOMA terminal and
battery pack.
If you
put the FOMA terminal in a bag along with many other
arti
cles or sit with the FOMA terminal in a clothes pocket, the
disp
lay, internal circuitry and
or malfunction. Also, if an external device is left connected to
connector term
the
connector could be damaged, or malfunction.
Do n
ot rub or scr
Doing so might cause damage to th
malfunction.
Carefully read each instruction manual attached to battery
pack
or adapter.
Notes on handling the FOMA terminal
Never forcibly press the surface of the touch panel, or operate
it with something having a sha
pen, or pin.
ge to the touch panel might result.
Dama
Avoi
d using in extremely hig
The FOMA terminal should be used within a temperature range
of 5°C t
limited to temporal use in a bathroom etc.) and a humidity range
of 45
% to 85%.
If the
FOMA terminal is operated near a land-line
television set, radio or oth
affect the devices. Operate the FOMA terminal as far away
from
these devices as possible.
It i
s recommended that
information stored in the
in a safe place.
We ta
Do n
ot drop the
Malfunction or dam
Do not insert an
(earphone/microphone terminal) at a slant when connecting,
and
do not pull it out when it is inserted.
M
alfunction or dam
however, the use at 36°C or higher should be
o 40°C (
ke no responsibility for any loss of the stored data items.
FOMA terminal or subject it to strong impacts.
external device to the connector terminal
the battery pack could be damaged
inal (earphone/microphone terminal), the
atch the display part with metals.
you make separate notes of the
age may result.
age may result.
e part, resulting in trouble or
rp point like a claw, ballpoint
h or low temperatures.
er devices in use, it may adversely
FOMA terminal and keep such notes
phone,
Make sure that nothing, such as the touch pen or strap, gets
caught between the
Otherwise, malfunction or damage may result.
The FOMA terminal becomes warm during use or charging but
this
is not an abnormality. Use the
Do not leave the
Pixels may be discolored or burns may result.
When
using the
for the connector terminal.
Dust or water might enter into the FOMA terminal, causing malfunction.
Do not use the FOMA terminal with the back cover left removed.
The battery pack might come out, or malfunction or damage may
result.
Do not apply an
the display or keys.
Othe
rwise, malfunctioning, damage or pro
may result.
Whil
e you are using the microSD card, never take it off or turn
off th
e power of the FOMA terminal.
may be erased or malfunction may result.
Data
Do n
ot place magnetic cards or sim
terminal or between phone parts.
Magn
etic data on cash cards, credit cards, tele
floppy disks, etc. may be deleted.
Do not bring magnetic substances close to your FOMA terminal.
Problems with operation may result if items with strong magnetic
fields are brought close to th
Notes on handling batteries
Batteries have a limited life.
Though it varies depending on the usage state, you are advised to
replace the battery if its usable time is extremely short even when
you f
ully charge it. Make sure that you buy the specified battery.
Charge the battery in a place with an appropriate ambient
temperature of 5°C to
The usable time
environment or its
Depending on how the
its operating life becomes short, b
parts of the FOMA terminal when you close it.
camera in places exposed to direct sunlight.
FOMA terminal, ensure that you shut the cover
excessively thick sticker onto the surfaces of
35°C.
of the battery differs depending on the usage
remaining life.
battery pack is used, it might swell as
FOMA terminal as it is.
blems with operation
ilar objects near the FOMA
phone cards and
e FOMA terminal.
ut this is not a problem.
Introduction
17
Page 20
Note the following points when you store a battery pack:
Storage in a fully cha
charging is completed)
Storage with no battery pow
on the power of the handset due to battery drain)
Thes
e may lower the battery pack’s pe
operating life.
Before storing a battery, c
recommendable, as a general rule, for the
two bars or for i
Notes on handling adapters and desktop holder
Charge the battery in a place with an appropriate ambient
temperature of 5°C to
Introduction
Charge the battery where:
There is very little humidity, vibration, and dust.
There are no land-line phones, tele
While you are charging, the adapter may become warm. This is
not
a malfunction, so you can keep on using.
Do n
ot use the
car engine is not running.
The
car battery could go flat.
When
using the power outlet having the disengaging prevention
mechanism, observe th
manual.
Do not give a str
terminal.
Malfunction may res
When housing the
your fingers or the adapter cable not to be caught between
them
.
Accidents such as injury or d
Notes on handling touch pen
Use the touch pen only with the FOMA terminal which supports
it: Do not use it with any oth
Malfunction or dam
The touch pen is not waterproofed. Notes that if the touch pen
gets
18
wet, moisture may rem
rged state (the state immediately after
er left (the state you cannot turn
rformance and shorten its
heck its remaining battery level: it is
ts remaining battery level to be about 40%.
35°C.
DC adapter for charging the battery when the
e instructions given in that instruction
ong shock. Also, do not deform the charging
ult.
leg onto the desktop holder, be careful that
amage may result.
er terminals.
age of device may result.
ain inside the cap.
battery icon to show
vision sets or radios nearby.
Notes on handling the UIM
Do not apply more force than is necessary when installing or
removing the UIM.
The
warranty doe
UIM into some other type
Always keep the IC portion clean.
Use
a dry soft cloth such as the one for cleaning glasses to
clea
n the equipment.
It i
s recommended that
information stored on the
place.
We take no responsibility for any loss of the stored data items.
he environmental protection, bring any unneeded UIMs to
For t
a han
dling counter suc
Do not damage, carelessly touc
Data might be lost or mal
Do not drop the
Malfunction may res
Do not bend the
Malfunction may res
Into the FOMA terminal, do not insert the UIM with a label or
stic
ker pasted.
Malf
unction may res
s not cover damage caused by inserting the
s of IC card reader/writer.
you make separate notes of the
UIM and keep such notes in a safe
h as a docomo Shop.
h, or short-circuit the IC.
function may result.
UIM or subject it to strong impacts.
ult.
UIM or place something heavy on it.
ult.
ult.
Page 21
Notes on handling the FeliCa reader/writer
The FeliCa reader/writer function on the FOMA terminal uses
very weak radio waves which do not require to be licensed as
radio stations.
The FeliCa reader/writer is operated on the 13.56 MHz
frequencies. When you use another reader/writer nearby, take
enough distance between your FOMA terminal and the reader/
writer. Further, ensure that there are no radio stations that
the same frequencies.
Caution
Do not use the modifi ed FOMA terminal. Using a modifi ed
FOMA terminal infringes the Radio Law.
The FOMA terminals are granted technical regulations conformity
certifi cation as the specifi ed radio equipment under the Radio
Law and bear a “technical conformity mark
nameplate as evidence of conformity. Unscrewing the FOMA
terminal and modifying internal components void the technical
regulations conformity certifi cation. Do not use the FOMA
terminal in this state, which infringes the Radio Law.
Take special care not to operate the FOMA terminal while
driving.
Holding a mobile phone in your hand while driving is subject to a
fi ne or other penalties.
However, this does not apply in unavoidable circumstances when,
for ins
tance, responding to someone who is sick or injured or
when maintaining public order.
Use the FeliCa reader/writer functions in Japan only.
The FeliCa reader/writer functions on the FOMA terminal have
been authorized in compliance with the radio transmission
standards in Japan.
You might be imposed punishment if you use them overseas.
” on the
use
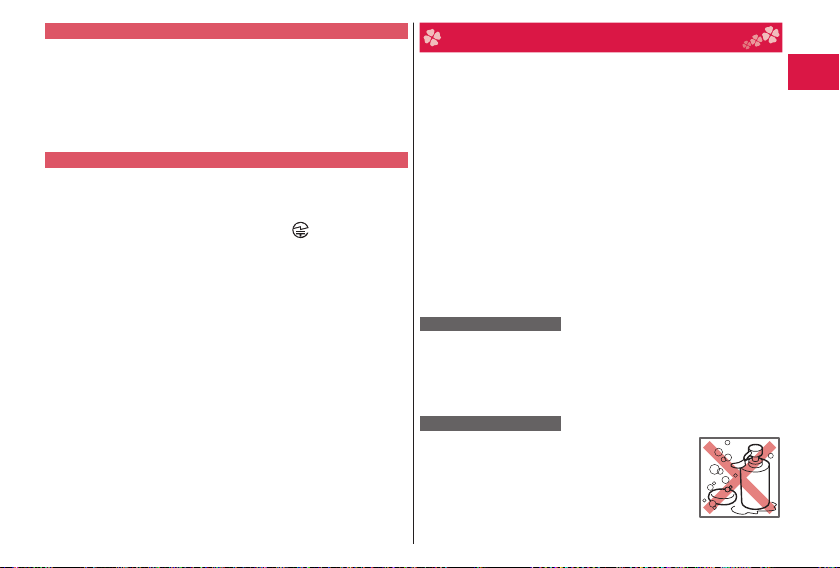
Waterproof Performance
Your P-04C comes with the waterproof performance equivalent to
※1
and IPX7※2 with the connector terminal cover, inner cover and
IPX5
back cover fi rmly closed and no clearance gap and fl oat found in them.
※1 IPX5 means that the P-04C maintains its performance as a phone
even after a water jet fl ow has been sprayed over the FOMA
terminal from all directions under conditions where water in a
volume of 12.5 liters/minute is spray
meters for at least 3 minutes using a water-pouring nozzle with an
inside diameter of 6.3 mm.
※2 IPX7 means that the P-04C maintains its performance as a phone
even after the phone has been gently submerged in a container of
still city water to a depth of 1 meter at room temperature, and left
in place for about 30 minutes, and then removed from the w
This does not mean that the waterproof performance is guaranteed
(Note)
in all given conditions of actual use. Read this manual thoroughly
before use to prevent invasion of water or foreign materials and
then to enable you to safely use your FOMA terminal.
You can operate the FOMA terminal in the rain, in your kitchen, in the
bathroom, and also around poolside.
In the Rain
You can talk on the phone by holding the phone in the rain with your
wet hand without umbrella. (Less than 20 mm/hour of rainfall, and
your feet get wet by drops of rain rebounded off the ground)
※When your hands are wet or water drops remain on the FOMA
terminal, do not attach/remove the back cover, nor open/close the
connector terminal cover.
Wash
When the FOMA terminal gets dirty, you can slowly
swing and wash it in a bowl fi lled with fresh water or
tap water at an ambient temperature, or wash it by
hand while running a slightly-weak water fl ow from
a faucet.
Wash your FOMA terminal with the back cover
fi rmly attached and while you are pushing the cover
of the connector terminal down.
ed from a distance of about 3
ater.
Soap/detergent
Introduction
19
Page 22
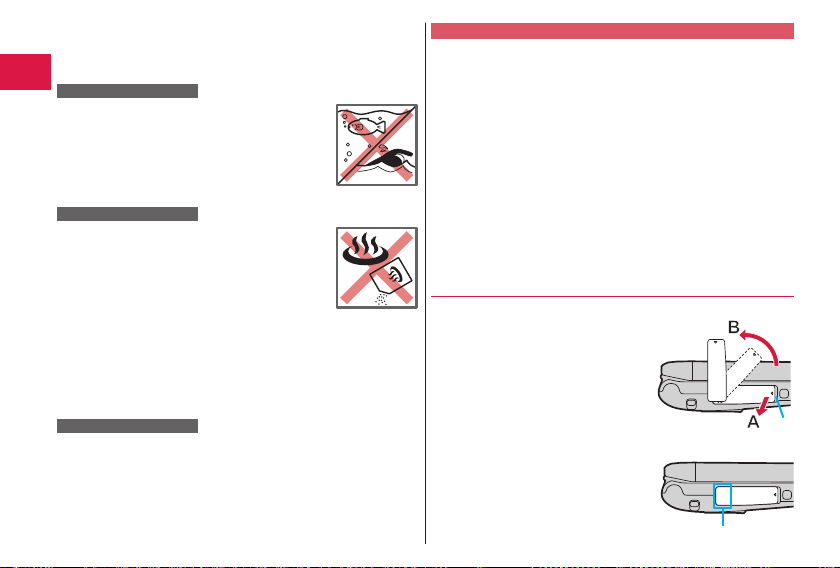
Do not use brushes, sponges, soaps, or detergents for washing.
After rinsing off the FOMA terminal in water, wipe its surfaces
thoroughly using a dry cloth, drain off the water (see page 22), and
allow the FOMA ter
On Leisure
Do not soak or drop your FOMA terminal into a
pool or the sea nor operate it in water
If pool water or seaw
terminal, wash the terminal b
prescribed method (see page 19).
Introduction
In the Bathroom
Do not soak or drop your FOMA terminal into a
bathtub, nor use it in w
Do not soak the FOMA terminal into spa or water
containing soap detergent or bath additive.
Do not dir
(such as water jets from a faucet or sho
strong enough to feel pain on the skin) that ex
the standard (see page 19).
Avoid using the FOMA ter
If you take your FOMA ter
bathroom, condensation might result because of sudden change
in ambient temperatur
restored, and then take it to the bathroom.
In the Kitchen
Do not spray liquids other than fresh water or tap w
temperature onto the FOMA terminal or soak the terminal in them.
Do not spray hot w
it in them.
minal to dry out naturally.
ater splash the FOMA
ater.
ectly expose to the str
e. Warm it up until ambient temperatur
ater or cold water onto the FOMA terminal or soak
.
y following the
ong water flows
wer head
minal for a long time in the bathroom.
minal from a cold place to a warm
20
ceed
Sea/pool
Spa/bath salts
e is
ater at room
Important Information before Use
Before using the FOMA terminal, make sure that you attach the back
cover firmly after tightly closing the connector terminal cover and
inner cover. If ther
of sand) between the covers and the phone, water could find its w
inside the phone. When attaching the back cov
connector terminal cover and inner cov
particles or dirt on or around these parts (especially the packing).
Ensure that the connector terminal cov
cover are closed tightly and that none of these co
the covers are not closed tightly
FOMA terminal.
To keep the waterpr
without fail once two years regardless whether an
the FOMA terminal is found or not. You ar
of parts. Take your FOMA terminal to a repair counter specified by
DOCOMO.
e is any small particles (fine fibers, hair or grains
er after closing the
er, ensure that there is no
er, inner cover and back
, water could find its way inside the
oof performance, you need to replace parts
vers are askew. If
y abnormality with
e charged for replacement
ay
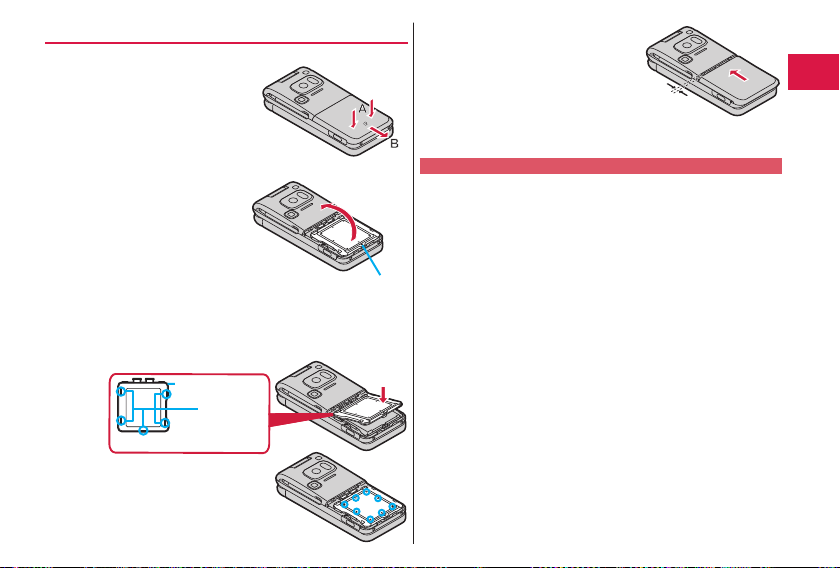
Opening/Closing the Connector Terminal Cover
■Opening the connector terminal cover
① Hook your finger over the groove, pull
out the cover to direction A, and turn it
as direction B.
Hook
■Closing the connector terminal cover
Align the connector terminal cover in
①
parallel with the FOMA terminal, and
while holding its base part firmly, push
it into place.
②
Ensure that no float is found with the
connector terminal cover as a whole.
Base part
Page 23
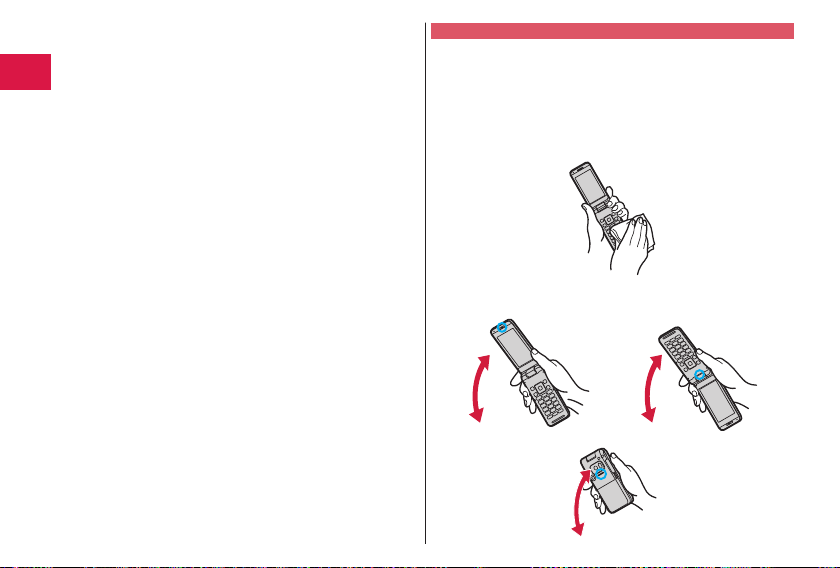
Removing/Attaching the Back Cover
■Removing the back cover
① While pushing the area around the
f mark down in direction A, slide
the back cover (by 2 mm or mor
dire
ction B to disengage and remove
the cover.
② Using the projections on the
cover, pull up the inner cover in the
direction shown by the arr
open it until it will go no further.
The inner co
fir
wa
forcibly may injur
fingers.
■Attaching the back cover
① Fit the claws at the left, right and bottom sides of the inner cover
in
to
② Push the eight ● marks printed on the
sticker of the inner cover, and ensure
that no float is found anywhere on the
cover.
ver should be
mly closed for maintaining
te
rproofness. Opening the cover
the corresponding indentations, and push the cover into place.
e your nails or
Rear surface of inner cover
e) in
inner
ow and
Projection
Packing
Claw
③ With the back cover stayed open
about 2 mm, match it to the groove
on the FOMA terminal. Then while
pushing the back cover as a whole
downward, slide it in the direction of
the arrow
, and then install.
Confirm there is no gap between the back cover and the FOMA
④
terminal.
Approx. 2 mm
Caution
■About FOMA terminal
Do not wash the FOMA terminal with a washing machine or ultrasonic
cleaner.
harge the battery when it gets wet.
Never c
Do not leave the FOMA terminal with dr
・ The connector terminal might be short-circuited.
・ Water might enter into the inside of the FOMA ter
the keys or hinges. In cold districts, drops of w
terminal might freeze, r
If the FOMA terminal gets wet, keep the back co
connector terminal cover closed, drain off the water (see page 22), and
immediately wipe off the moisture remaining on the FOMA terminal
with a clean dry cloth.
Do not drop the FOMA ter
The deterioration of the waterproof per
depending on the damage.
Do not soak the FOMA terminal in hot water, use in a sauna, nor
expose to hot wind cur
The FOMA terminal does not float on water.
Do not directly e
standard (see page 19) or submerge the mobile phone in w
Do not directly place the FOMA terminal on sandy beaches.
Sands enter into the holes on the microphone, earpiece, or
・
ers may reduce the v
speak
・ If you operate the FOMA ter
adhered to, sound might be deteriorated.
Even the slightest sands enter
・
inner cover or back co
the FOMA terminal.
esulting in malfunction.
minal nor give a shock to it.
rents such as those of a dryer.
xpose to the strong water flows that exceed the
ver could cause water to enter the inside of
ops of water r
formance might result
olume.
minal with water drops or sands
ed from the connector terminal cover,
emained on.
minal through
ater on the FOMA
ver attached and the
ater.
Introduction
21
Page 24
■About the connector terminal cover, inner cover and back cover
Do not open or close them with gloves put on hands.
Fine dirt might adhere to the contact sur
Be careful that no fibers adhere to the packing when y
off moisture with a clean dry cloth.
Do not peal the packing off. Also do not insert something pointed at
the head into the clearance of the connector terminal co
er.
cov
The packing is damaged, resulting in water to enter into the FOMA
minal.
ter
If the packing for the connector terminal co
damaged or deformed, replace them at a repair counter specified b
DOCOMO.
Introduction
If the back cover is broken, replace it with new one.
Otherwise liquid such as water enters into the inside of the FOMA
terminal thr
ough broken portions, and an electric shock or corrosion
of the battery pack could result.
When the FOMA terminal gets wet with the connector ter
or back cover left open, water enters inside, and an electric shock
or malfunction could be caused. Do not use it as is, but turn off the
emove the battery pack, and then take it to a repair counter
power, r
specified by DOCOMO.
■About microphone, earpiece, and speakers
Do not thrust something pointed at the head into the holes on
ophone, earpiece, or speakers.
micr
Do not leav
communications ar
■Others
Accessories and optional items are not waterpr
watch 1Seg programs with y
desktop holder provided, do not operate it in a bathroom, sho
oom, kitchen, or lavatory where water is used, even if you do not
r
connect to AC adapter.
It is not that the waterproof per
conditions of actual use. If the damage is found to be caused by your
mishandling of the FOMA terminal as a r
22
guarantee is not supported.
ops adhered to them. It might happen that
e water dr
e disabled.
face of the packing.
ver or inner cover is
our FOMA terminal attached to the
mance is guaranteed in all given
for
esult of our inspection, the
ou try to wipe
ver or inner
minal cov
oofed. When you
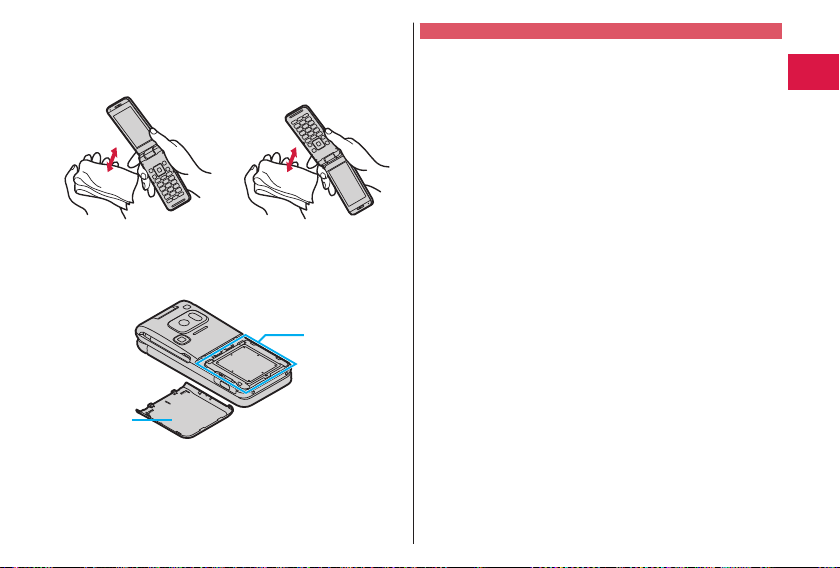
Draining Water
If you operate the FOMA terminal with water drops left adhered to,
the volume level from the speakers might be decreased or sound
quality vary.
e may have entered inside through the clearance gap of the
Moistur
keys or hinges.
Follow the procedur
terminal:
① Wipe completely moisture of
with a clean dry cloth.
y
er
② Securely take hold of the FOMA terminal, and firmly swing each
surface at least 20 times until no moisture sprays off.
<Draining from earpiece> <Draining from microphone>
wer
es described below to wipe moisture off the FOMA
f the surface of the FOMA terminal
<Draining from speaker>
Page 25
③ Lightly push the FOMA terminal against a clean dry cloth, and
wipe moisture off the clearance gap of the microphone, earpiece,
speaker, keys, or hinges.
④ Remove the back cover and wipe off any drops of water around
the inner cover and the rear surface of the back cover, and then
attach the back cover.
Rear surface of
back cover
⑤ Fully drain moisture and then operate the FOMA terminal.
ectly wipe moisture out of joint gap using a cotton swab
Do not dir
etc.
er open the inner cover.
Nev
See page 21 for how to remov
Even when you follow the procedures for draining water as
described above, moistur
Therefore, use the FOMA ter
naturally. Also, take car
get wet awa
from the FOMA terminal.
y from the FOMA terminal since water may leak out
e the back cover.
Around inner cover
e might remain in the FOMA terminal.
minal after allowing it to dry out
e to keep any objects you do not want to
When Charging Battery
Accessories and optional items are not waterproofed. Check the
following before and after charging:
,
Never char
ge the battery with the FOMA terminal left wet. If the
FOMA terminal gets wet, drain and wipe off moisture with a clean dry
cloth and then char
When you char
firmly close it after charging
through the connector terminal, you ar
holder provided for c
Do not touch the AC adapter and desktop holder with your hands
wet.
Do not use the A
shower r
ge.
ge the battery with the connector terminal cover open,
oom, kitchen, and lavatory where water is used.
. To prevent water from entering inside
harging
C adapter and desktop holder in a bathroom,
e advised to use the desktop
.
Introduction
23
Page 26
Before Using
Attaching UIM/ Battery Pack
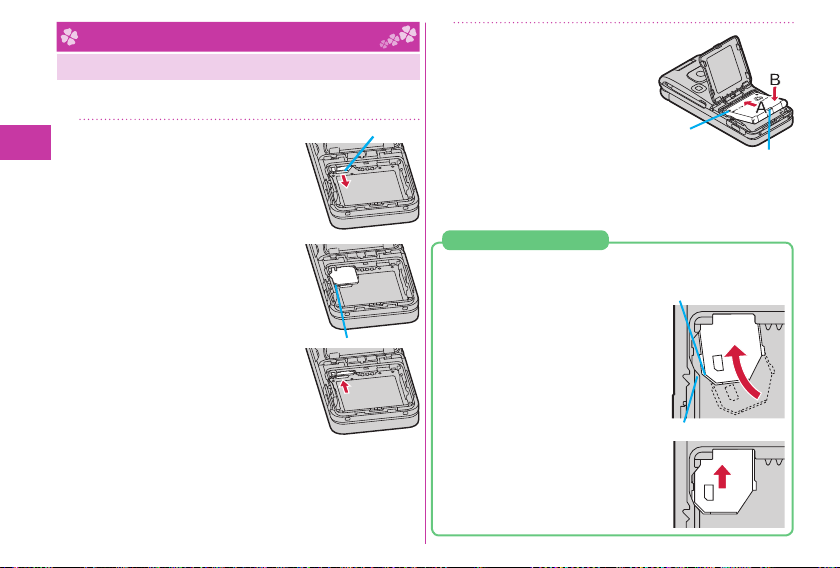
To insert the UIM/battery pack, remove the back cover, then
open the inner cover, and insert. (See page 21)
Insert the UIM.
1
1.
Pull the tab and slowly pull the tray
straight out until it stops.
Do not pull out the tray beyond the
stop position. You may damage the
tab if you do so.
2.
Place the UIM on the tray with the
golden IC surface upward.
Align the cut of the UIM with the
tray.
Basic Operation
3.
Push the tray until it stops.
Push the tray inward fi rmly until it is
in place.
When you remove the UIM
Pull the tray out and remove the UIM.
out the UIM by lifting up slightly
Take
from the tray.
24
Cut
Tab
Attach the battery
2
pack.
With the arrow mark facing up,
fi t the tab side of the battery
pack to the FOMA terminal
securely, and then push the
battery pack in direction B while
pressing it against direction A.
When you remove the battery pack
Lift the battery up using the projection of it.
If the Tray is Disengaged
Place the tray in the FOMA terminal (battery compartment)
before sliding to fi t in.
1.
Slide the tray to bring the cutout
corner towards the projection in the
battery compartment, and place the
tray parallel to the FOMA terminal.
If the tray does not fi t straight in,
do not force it. Move it gently from
side to side or remove to start
fi tting again.
2.
Push the tray straight in.
Note that damage may r
try to force the tray into position
while it is placed at an angle.
Arrow mark
Cutout
Projection
esult if you
Projection
Page 27
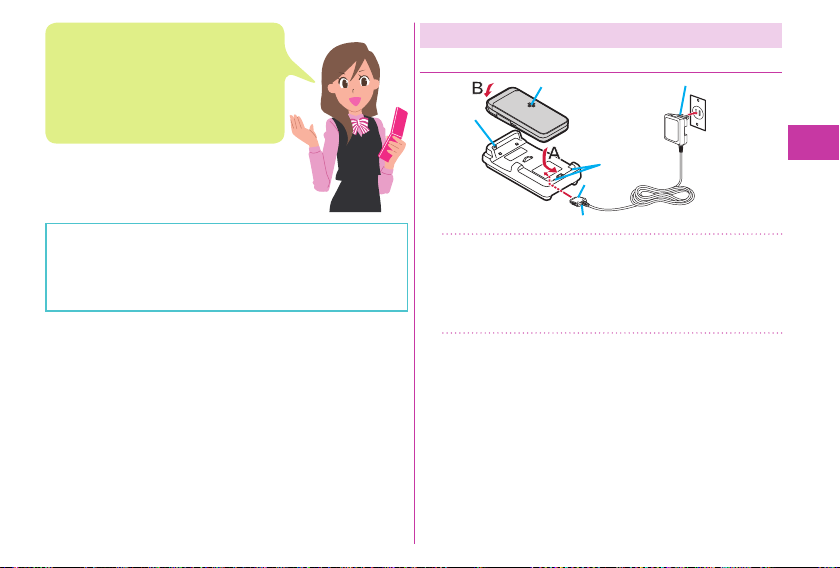
The UIM is an IC card that holds your
information such as phone numbers.
You cannot use the FOMA terminal for
communications such as voice/videophone
calls, i-mode, or sending/receiving mail,
unless the UIM is inserted.
Ensure that you turn off, close, and take hold of the FOMA
terminal when you install or remove the UIM or battery
pack.
You cannot use the UIM (blue) on your FOMA terminal. If
ou have that blue one, ha
y
About UIM
ve it replaced at a docomo Shop.
Charging
Charging Using Desktop Holder
Call/Charging indicator
Lock claw
Stopper
Desktop Holder
With the engraved surface of the connector
1
Connector
Engraved surface (down side)
AC Adapter’s plug
Power socket
AC Adapter
of the AC Adapter (option) face down, plug
the connector straight into the connector
terminal of the desktop holder.
Pull out the AC Adapter’s plug, and plug
2
it into a household power socket of 10
AC.
Basic Operation
0 V
25
Page 28
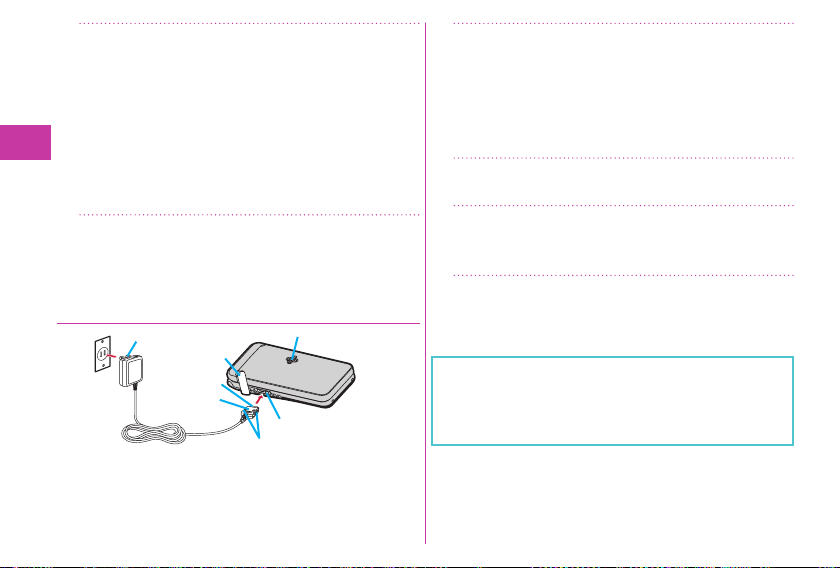
Put the bottom of the FOMA terminal into
3
the stopper of the desktop holder (A) to
fit the head to the lock claw, and then
depress the FOMA terminal until it clic
(B).
Be sure to charge the FOMA terminal with the FOMA
terminal closed.
Be careful that a commercial strap is not caught between
the FOMA terminal and desktop holder.
When charging is completed, hold the
4
desktop holder with fingers and lift up the
head of FOMA terminal to remove.
Basic Operation
Charging Using AC Adapter
AC Adapter’s plug
Power
socket
AC Adapter
Cover
Connector
Engraved
surface
26
Call/Charging indicator
Connector terminal
Release buttons
ks
Open the cover of the connector terminal.
1
(See page 20)
To charge the battery, place the cover of the connector
terminal as illustrated. When you close or open the FOMA
terminal with the cover of the connector terminal opened,
be careful not to catch the cov
terminal between the parts of the FOMA ter
Insert the connector with the engraved
2
er of the connector
minal.
surface facing up until it clicks.
Pull out the AC Adapter’s plug, and plug
3
it into a household power socket of 10
AC.
When charging is completed, pull out the
4
connector from the connector terminal
while pressing the release but
For detaching, pull out the connector horizontally while
pressing the release buttons. Malfunction could result if you
try to pull it forcibly.
ging starts, the Call/Charging indicator lights in
When char
red. When char
ging is completed, it turns off.
tons.
0 V
Page 29
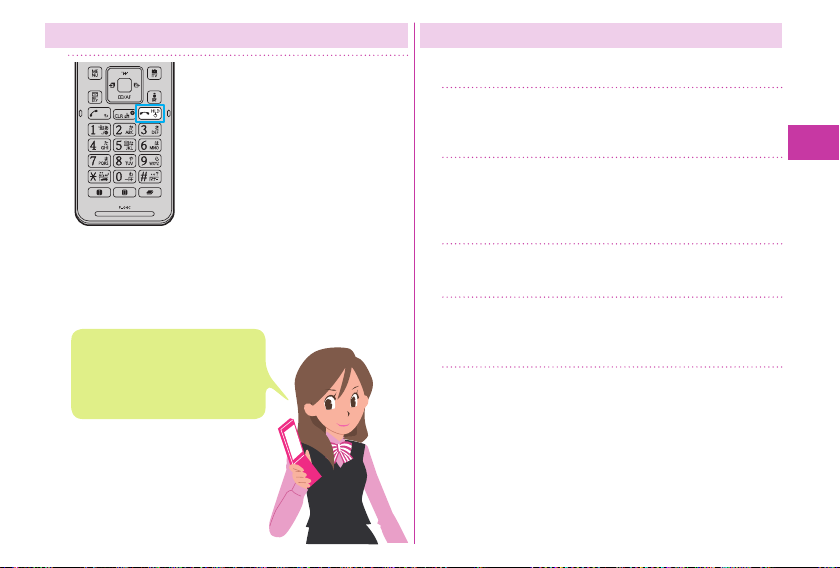
Turning Power ON
1
The Initial Setting display appears
when any of Initial Setting items
have not been set.
In that case, follow on-screen
instructions.
Press and hold h for at
least one second.
After the Wake-up display and notes
of waterproof are displayed, the
Stand-by display appears.
urn off the po
To t
1.
Press and hold h for at least two
seconds
Depending on the display in
operation, the confirmation display
may not appear.
wer
Select “YES”.
▶
Configuring Initial Setting
The Initial Setting display appears when you turn on the
power for the first time.
Set the date and time.
1
You can set the date and time. You can also correct the date
and time automatically.
Set your Terminal Security Code.
2
You can set your Terminal Security Code required for setting
functions.
“000 0” is set at purchase.
Set the size of fonts.
3
You can set the size of fonts on the display.
Set Location Request Set.
4
You can select whether to notify your current location for
when a GPS location provision request arr
Set Keypad Sound.
5
You can select whether to play a keypad sound.
ives.
Basic Operation
27
Page 30
Notifying Your Caller ID on the Other
Party’s Phone
mTEL functionDial/Receive setting
1
Caller ID notifi cation
Select “Activate/Deactivate”.
2
Switching to English Display
m (Setting)
1
(Text display/input)
Select language
Select “English”.
2
Select “ON”.
3
If you hear the guidance requesting your caller ID, either
set the Caller ID notifi cation or add “186” fi rst and then try
calling again.
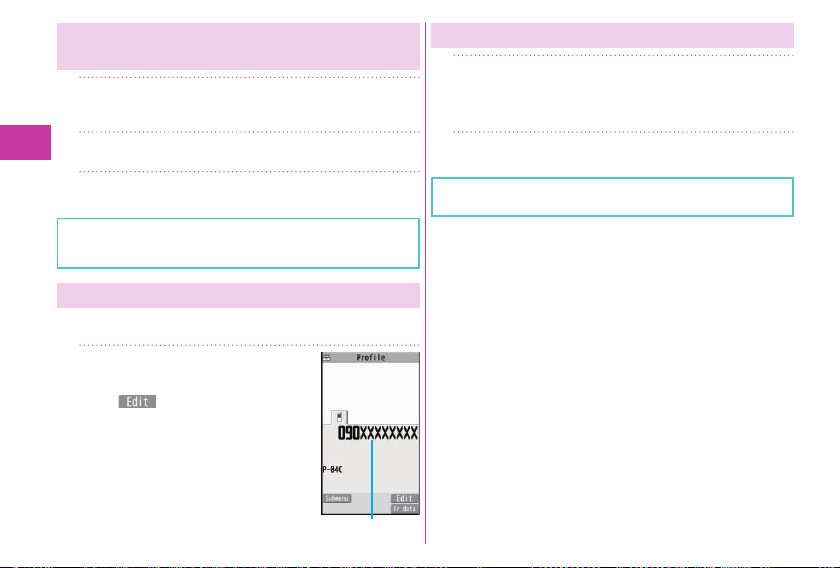
Checking Your Own Phone Number
Basic Operation
You can check your own phone number (Own number), the
model name, etc.
mProfi le
1
From the display on the right, press
c(
address, etc.
Refer to “Mobile Phone User’s Guide
[i-mode] FOMA version” for how to
check or change your mail address.
) to store your name, mail
28
The “バイリンガル (Select language)” setting is saved on
the UIM.
Own number
Page 31
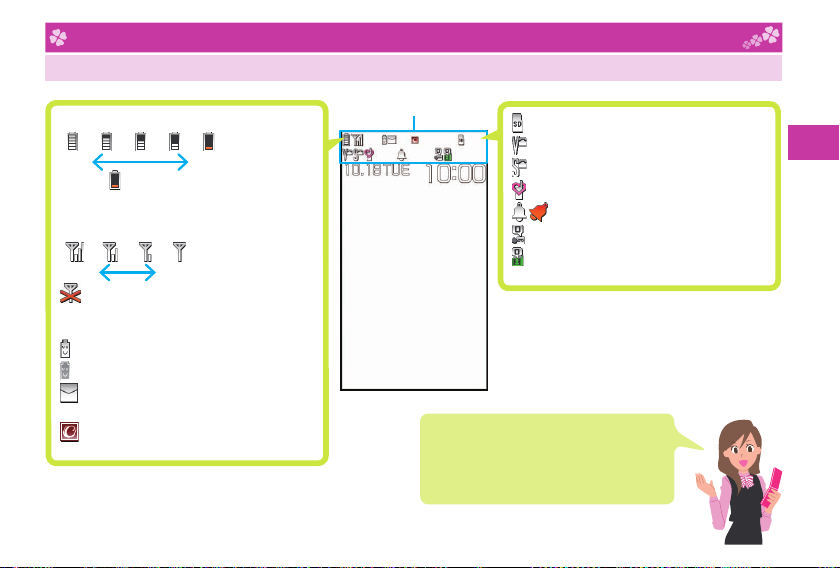
Screen Explanation
Viewing Display/Icon
Battery level (estimate)
Full Low
When is shown, charge the battery.
Depending on the usage state, the battery
level indication might signifi cantly vary.
Radio waves reception level (estimate)
Strong Weak
············ You are out of the FOMA
service area or radio waves do
not reach.
··············· In eco Mode
(gray) ······ eco Mode Autostart is set.
············· Unread i-mode mail or SMS
messages exist.
············· New i-concier information
exists.
Status icon
Here are given descriptions of the main icons.
For descriptions of other icons appearing on
the display, you can get them following the
procedures as shown below:
Setting▶Screen/Display▶Icons
+m
▶
··········· A microSD card is inserted.
·········· Vibrator is set.
·········· Ring Volume is set to “Silent”.
·········· In Manner Mode
···· An alarm is set.
··········· The number of record messages
··········· The number of videophone record
Basic Operation
messages
29
Page 32
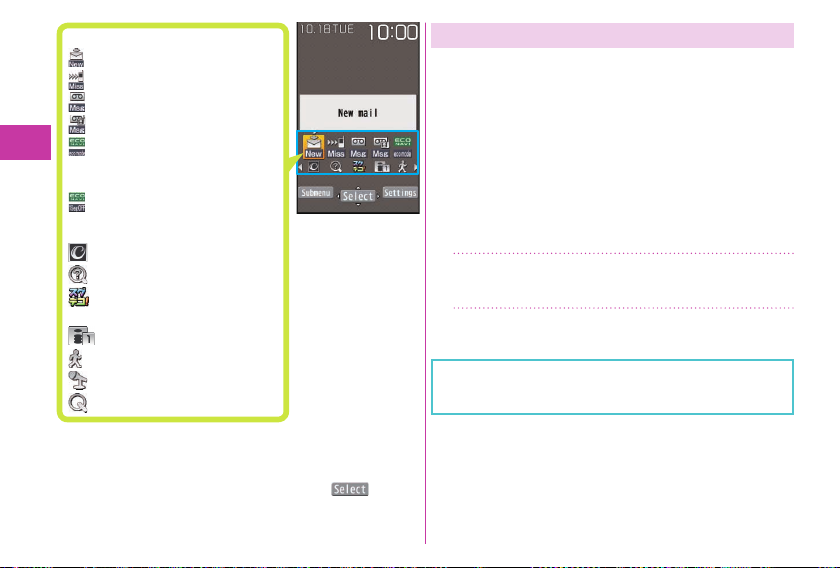
Notifi cation icon
······ New i-mode mail or SMS
······ Missed call
······Record message
······Videophone record message
······The mode has automatically
changed to eco Mode ( ECO
NAVI).
······1Seg has automatically
terminated ( ECO NAVI).
Desktop icon
····· i-concier
····· 使いかたガイド (Guide)
····Send mail message to
Basic Operation
“スグデコ! (Sugu-deco)”
··· Shows the site of the URL
······Pedometer
····· Start by voice
····· Quick search
Proceed to respective functions from icons, etc.
You can proceed to respective functions by selecting “Status
icon”, “Notifi cation icon”, “Desktop icon”, date and time.
1.
Oo
Use Mo to highlight an icon, etc.▶Oo( )
▶
30
Using Motion Control
While the functions are running in Viewer Style, Motion
Control enables to switch the display direction automatically
by tilting the FOMA terminal.
The major functions that support Motion Control are listed
below:
・ Picture Album
※1 When the mobile phone is tilted by 90 degrees to the left
or right or when it is rotated by 180 degrees, the top and
the bottom of the display follow the orientation of the
mobile phone.
2 When the mobile phone is tilted by 90 degrees to the left,
※
the display appears horizontally.
mSettingOther setting
1
Motion control setting
Select “ON” or “OFF”.
2
If you tilt the FOMA terminal while a confi rmation or
submenu pop-up display appears, the pop-up display may
be cleared.
※1
・ Full Browser
※2
Page 33
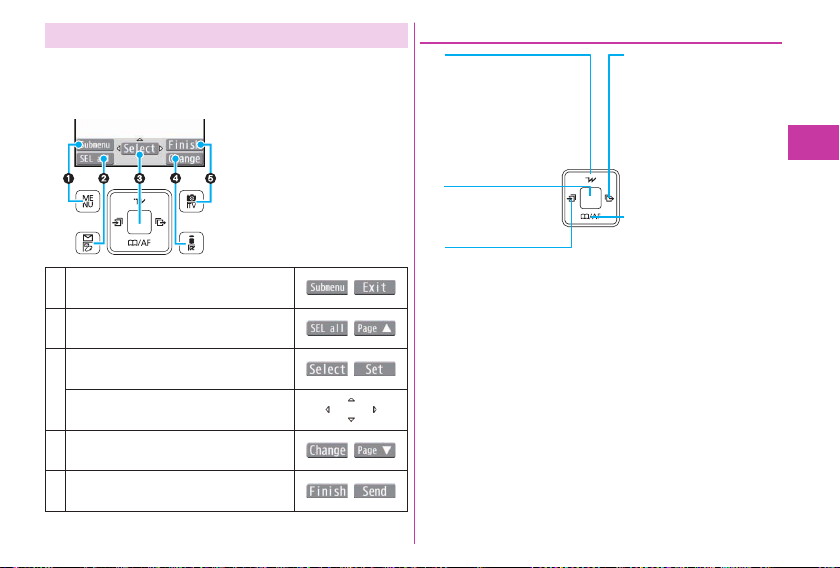
Navigation Displays and Key Operations
Key operations you can perform while you are operating a
function are shown at the bottom of the display. (Navigation
displays)
■Key assignments and basic navigation displays
Operations you can perform with the
m key.
Operations you can perform with the
l key.
Operations you can perform with the
Oo key.
Directions in which you can scroll and
select items with the Mo key.
Operations you can perform with the
i key.
Operations you can perform with the
c key.
Operating Command Navigation Key
Zo
Moves the cursor or
highlighted display up. (Hold
down to scroll continuously.)
Scrolls the page up.
Oo
Fixes the operation.
Co
Moves the cursor to the left.
Scrolls back page by page.
(Hold down to scroll continuously.)
Vo
Moves the cursor to the
right.
Scrolls forward page by
page. (Hold down to scroll
continuously.)
Xo
Moves the cursor or
highlighted display down.
(Hold down to scroll
continuously.)
Scrolls the page down.
Basic Operation
31
Page 34
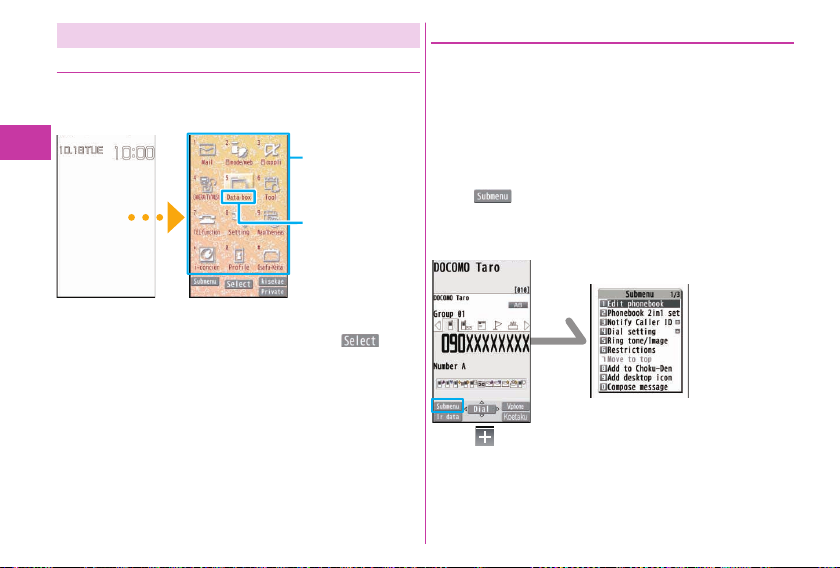
Menu Operation
Main Menu
Press m from the Stand-by display to show Main Menu.
In this manual, the descriptions of operating procedures are
given mainly starting with the Stand-by display.
Basic Operation
Stand-by display Main Menu
Use Mo to highlight a menu icon and press Oo( ).
Functions categorized by the menu items are displayed.
Repeat selecting items to call up the target function.
You can press r to return to the previous display. When you
press h from any display, the Stand-by display returns.
See “Function List” for the menu items of each function. (See
page 103)
32
Menu icons
Menu icon name
In this manual, the item
names shown here are
described in operating
procedures, etc.
Simple Menu
Simple Menu is a menu focusing on only basic functions for
easy operation. By setting “シンプルメニュー (Simple menu)”
using the Kisekae tool, you can show the Simple Menu by
pressing m from the Stand-by display.
Some operating procedures or items which appear on the
display in Simple Menu differ from the ones described in this
manual.
Submenu
When “
can use functions such as Store, Edit, and Delete by pressing
m.
<Example> Display the submenu of a Phonebook entry
” is displayed at the lower left of the display, you
+m
The “ ” is displayed when there are further items under a
particular menu item.
Page 35
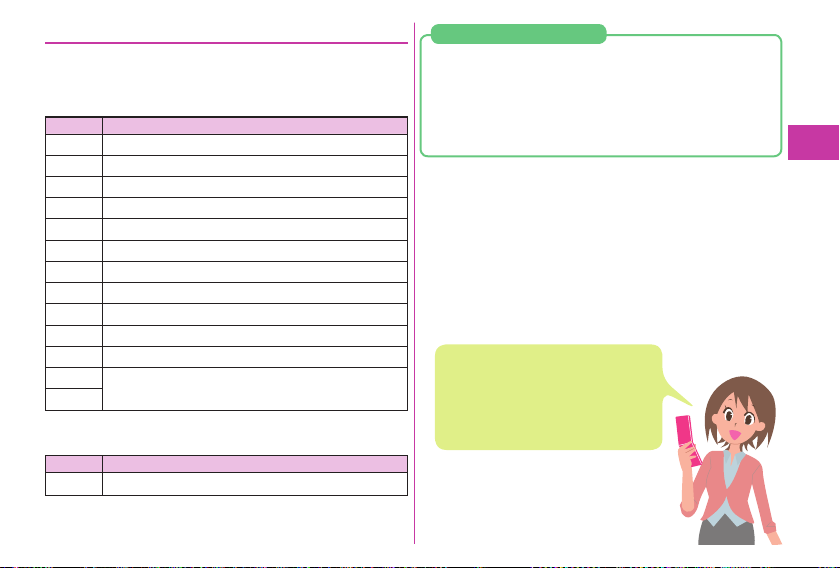
Functions Starting with Simple Operation
Depending on the function, you can start it either by selecting
a menu item or by key operation from the Stand-by display.
The following are the functions you can start by pressing keys
for at least one second.
Key Performance
Oo
Sets/Releases Ke
Xo
Shows the Registration displa
c
Start
s 1Seg.
l
Exe
cutes Chec
i
Shows the Softw
d
e
Ex
cutes Start by v
3
Sets/Releases IC Card Lock.
5
Sets/Releases eco Mode.
7
Show
8
Switches View Blind on/off
a
Activa
s Activa
v
This function is available in J
※
■Operations while the FOMA terminal is closed
Key Performance
v Activates/Deactivates Manner Mode.
ypad Loc
k.
or Phonebook entries.
y f
k mail/message.
are list.
※
oice.
s the F
ont setting display.
.
tes/Deactivates Public mode (Dr
tes/Deactivates Manner Mode.
apanese mode only.
ive mode).
Multi One-touch Function
You can register frequently used functions and telephone
numbers in “Multi One Touch set.”. When Q or W is
pressed while in Stand-by, the functions which have been
registered can easily be called up.
1.
Press and hold Q / W for at least one second.
2.
Select an item
When -Q or -W which has an already
registered Multi one-touch function is
pressed for at least one second on the
Stand-by display, a confirmation display
appears asking whether to change the
setting.
Select “YES”.
▶
Basic Operation
33
Page 36
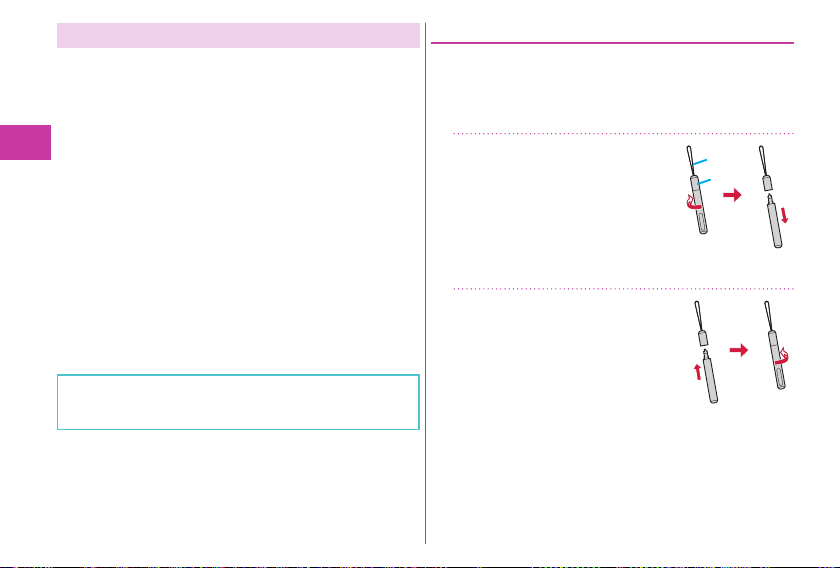
Using Touch Panel
In place of operating the keys in Normal Style, in Viewer
Style, you can perform operations by touching the touch
panel (display) using the touch pen to select items, scroll the
display and perform other operations.
In Normal Style, you cannot perf
touching the touch panel.
e use, peel off the stick
Befor
panel at the time of purchase.
■Notes on using Touch Panel
ollowing cases, the touch panel ma
In the f
if you touch it. Also, f
malfunction.
・ Operation with foreign objects placed on the operation
surface
・ Operation on the touch panel on whic
Basic Operation
ker is put
a stic
Do not press too forcefully down on the touch panel with your
fingers or fingernails or with a ballpoint pen, pins or any other
sharply pointed object.
You might not be able to operate the Touch Panel depending
on the i-αppli program. If this is the case, operate it in the
Normal Style.
ollowing operations may cause a
34
orm any operations by
ers which is stuck on the touch
y not work even
h a protective sheet or
Touch Pen
When using the touch pen, touch the touch panel (display)
lightly with the tip of the pen.
When attaching the touch pen to the FOMA terminal using its
emove the cap first, and then attach it.
strap, r
■Removing the touch pen from the cap
Take hold of the cap, turn
1
the pen counterclockwise,
and remov
■Attaching the touch pen to the cap
Take hold of the cap, turn the
1
e it.
Strap
Cap
pen clockwise, and attach it.
Keep turning the pen until it locks into
place.
Page 37
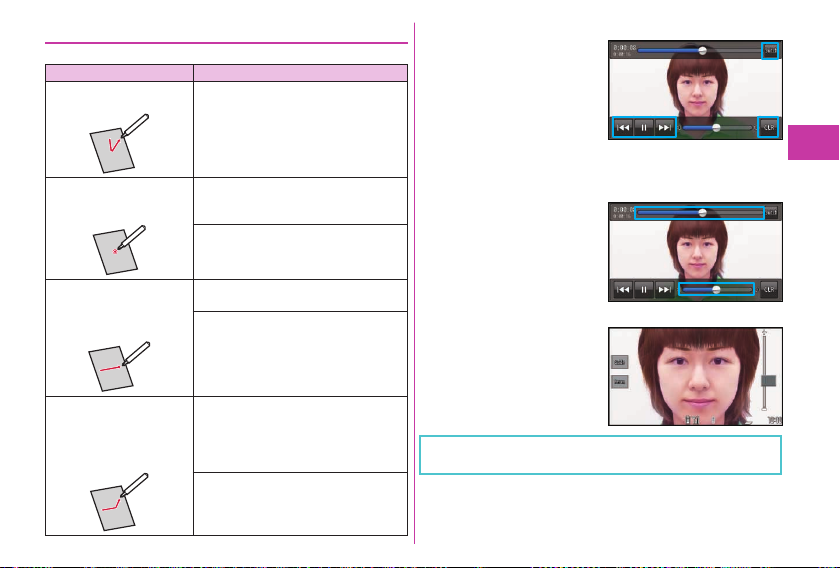
Basic Touch Panel Operations
Use the touch pen to perform the touch panel operations.
Operation Main Operation
Touch
Simply tap the touch panel.
Long touch
Touch and keep the touc
pen on the touch panel.
Slide
Touch and keep the touch
pen on the touch panel and
it up, down, right or left.
move
Quick slide
Quickly slide the touch pen
up, down, right or left and
then lift it off fr
panel.
om the touch
Select/OK
Touch an item or control key on the
touch panel.
Move the cursor or highlighted item on
the touch panel
h
Touch an item long on the list, etc.
Continuous operation
Touch a control k
forward, etc.
Scroll
Slide an item on the list, etc.
Display the previous or next data
You can use the “Slide” operation to
lay the previous or next data/page,
disp
etc.
Scroll
On some displays, scrolling continues
for a while even after you lift the touch
pen up. To stop scr
panel while scrolling.
Display the previous or next data
You can use the “Quic
operation to display the pr
next data/page, etc.
ey long for fast
olling, touch the
k slide”
evious or
■Control key
Whereas in Normal Style
you perfor
m command
navigation key operations, dial
key operations or submenu
operations, in Viewer Style you
form the equivalent
can per
operations by touching (long
touch) the control k
eys.
■Slide lever
By adjusting the position of
the slide lever, you can set the
vel, etc.
volume le
■Magnification/Reduction
Yo
u can zoom in or out the
es displayed in the Pictur
pictur
e
Album and sites displayed in the
owser.
Full Br
Position and type of control keys and slide levers depend
on the functions.
Basic Operation
35
Page 38
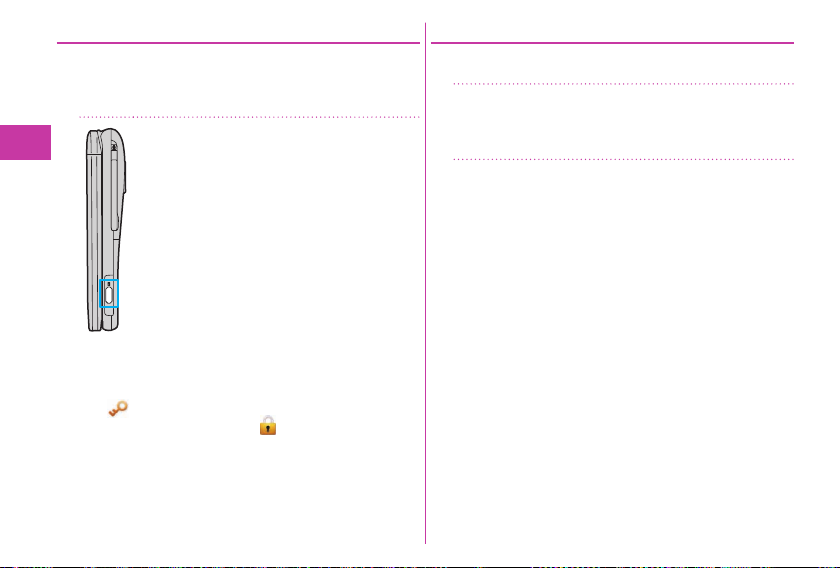
Setting Display Lock
You can set Display Lock to ensure that no further operations
using the touch panel will be performed. In this way, you can
prevent operations from being carried out in error while you
e carrying the FOMA terminal around in a bag.
ar
1
Press v in Viewer Style.
What is shown on the display is cleared, and
Display Lock is set.
When you press v while a function screen
is displayed, the function concerned will be
xited. When you press and hold v for at least
e
one second, Display Lock can be set even while
functions ar
e operating.
Basic Operation
To release
1.
Press v in Viewer Style.
2.
Slide “ ” to the right.
Perform the sliding operation to “
Display Lock is also released when you switch the FOMA
terminal to Normal Style.
36
” within 10 seconds.
Adjusting the Touch Panel
Take the steps below to adjust the Touch Panel operations
(where the touched positions are detected).
mSettingOther setting
1
Touch panel adjustment
Switch to the Viewer Style, and operate as instructed below.
Touch the center of “+”.
2
Following what appears on the display, repeat the operation
in step 2.
When the adjustments are completed, you can check
the post-adjustment operation.
adjustments again b
y touching “Retry”.
You can per form the
Page 39
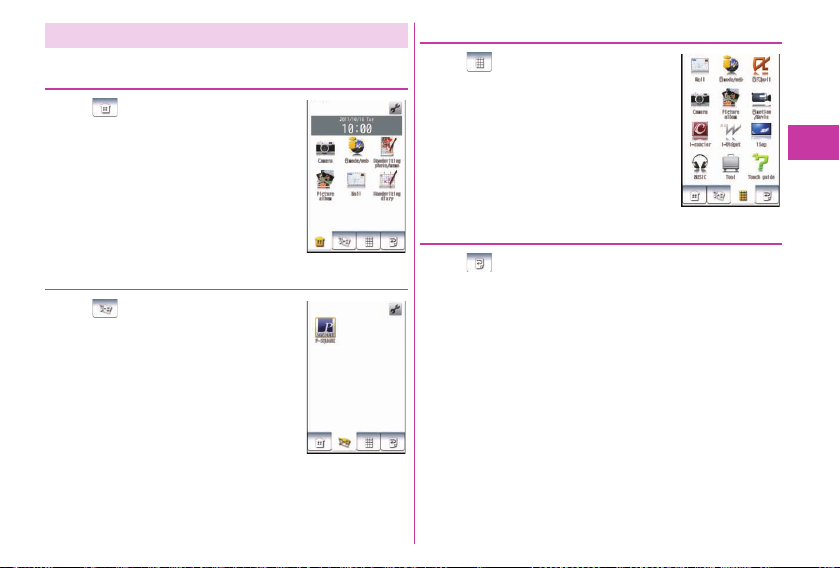
Displaying Touch Menu
In Viewer Style, Touch Menu is displayed.
Home Menu
When “ ” is touched with Viewer Style
selected, the Home Menu is displayed.
On the Home Menu, you can register
short-cut icons up to six and activate
respective functions by touching the
corresponding short-cut icon. Notifi cation
icons and i-Channel tickers are also shown
on this menu.
Customize Menu
When “ ” is touched with Viewer Style
selected, the Customize Menu is displayed.
On the Customize Menu, you can register
short-cut icons up to 27 and activate any
of the functions by touching the
corresponding short-cut icon.
Normal Menu
When “ ” is touched with Viewer Style
selected, the Normal Menu is displayed.
You can operate any of the functions by
touching the corresponding icon on this
menu. The Normal Menu icons cannot be
changed.
Basic Operation
Stand-by Display (Viewer Style)
When “ ” is touched with Viewer Style selected, the
Stand-by display (Viewer Style) appears.
The Home Menu is displayed by touching the screen on the
Stand-by display (Viewer Style).
37
Page 40
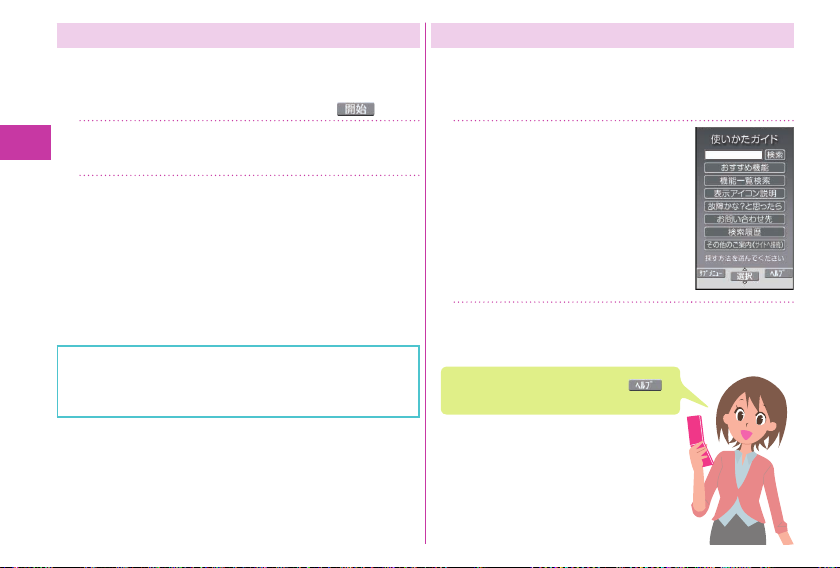
Using Start by Voice
You can call up the function by voice.
This function is available in Japanese mode only.
The fi rst time you use this function, select “利用する (Use)”
on the usage information display, or press c(
Press and hold d for at least one
1
second.
When “
2
(PleaseVoice is being
accepted.)” is displayed, pronounce
the function into the microphone within
10 seconds.
When the function to be called up cannot be specifi ed,
Basic Operation
you can look it up in “使いかたガイド (Guide)”.
Speak as clearly as possible, in natural conversation speed.
Speak in quiet, noise-free locations.
Recognition result may differ depending on pronunciation
and the surrounding environment.
38
Using Guide
You can search and check the operating methods of the
functions you want to know and use. You can execute some
functions from “使いかたガイド (Guide)”.
).
This function is available in Japanese mode only.
m (Tool)
1
(Guide)
Enter a keyword or select a way of
2
searching.
Highlight each item and press +c( ).
The detailed descriptions are displayed.
Page 41
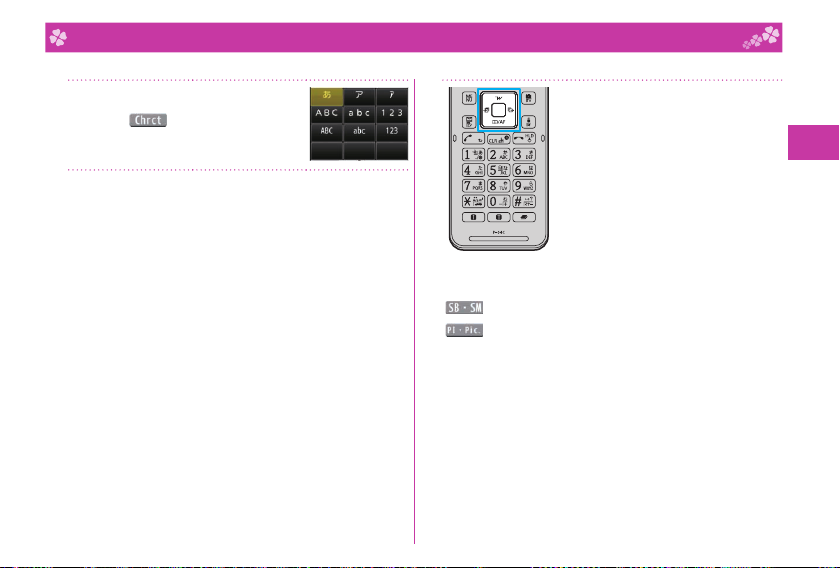
Character Entry
You can enter characters on the Registration display for Phonebook entries or the Composition display for mail messages, etc.
Select a input mode.
1
Press l( ) to select one of the
input modes.
Enter characters.
2
By repeatedly pressing a numeric key, you can enter other
characters assigned to the key.
<Example> When you press 2
Kanji/Hiragana input mode
“か→き→く→け→こ”
Katakana input mode
“カ→キ→ク→ケ→コ→2”
Alphabet input mode (Uppercase)
“A→B→C→a→b→c→2”
Alphabet input mode (Lowercase)
“a→b→c→A→B→C→2”
Numeral input mode
“2”
3
Other key operations
c(
i(
a: Enter a line feed.
d(for at least one second): Undo the fi xed/erased characters.
r: Clear text.
): Enter symbols, smileys, or URLs.
): Enter pictograms, Deco-mail pictograms, or
Deco-mail pictures.
(You can switch between uppercase and lowercase or
enter “゛” and “゜” by pressing this key after you enter a
character.)
Convert/fi x characters.
1.
Press No to specify the area to be
converted.
2.
Press Bo to move the cursor onto
the candidate list.
3.
Press Mo to select a conversion
candidate.
4.
Press Oo to fi x the character.
Basic Operation
39
Page 42
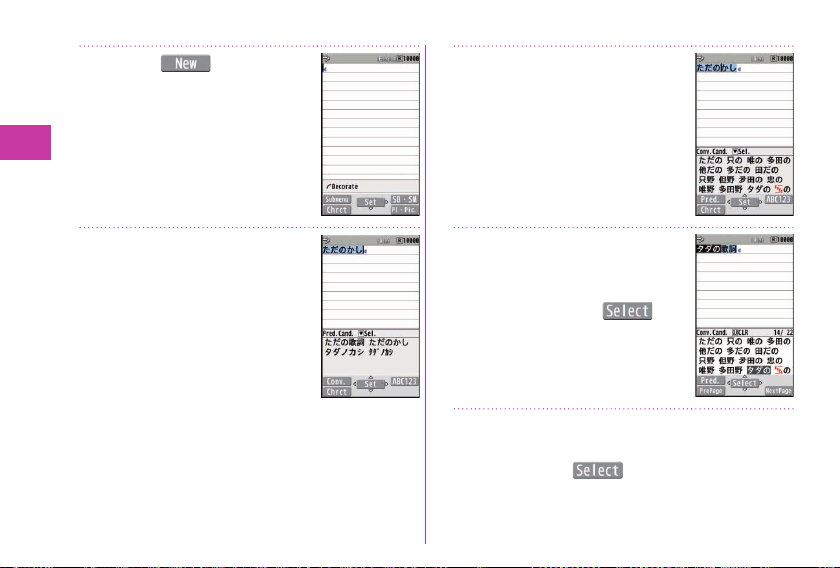
<Example> Entering “タダの菓子” in the text of an i-mode mail message
o
ll( )
1
Enter hiragana characters in
2
Kanji/Hiragana input mode.
た → Press 4 once and Vo once.
Basic Operation
だ → Press 4 once and a once.
の → Press 5 fi ve times.
か → Press 2 once.
し → Press 3 twice.
40
Select the text fi eld.
When a character on the same key
comes after a character such as “あ” and “い”, press Vo
to move the cursor, and enter the next character.
You can press Bo to select one of the prediction
conversion candidates while you are entering the
characters.
Use Co to move the cursor
3
to the right of “”.
Use Bo to move the cursor
4
onto the candidate list
Use Mo to highlight “
” and press Oo(
Use Bo to move the cursor onto the
5
candidate list
Use Mo to highlight “”
and press Oo(
).
).
Page 43
Sound/Screen Setting
Changing Ring Tone
<Example> Changing the ring tone for incoming voice calls
mSettingSound/Vib./Manner
1
Select ring tone
Select “Phone”.
2
Press c( ) to check the content actually played
back or displayed.
To set a ring tone for mail messages, videophone calls,
and so on, select the corresponding item.
Select “Select ring tone”.
3
Select a type of ring tone.
4
Select a folderSelect a ring tone.
5
Adjusting Ring Volume
<Example> Adjusting the ring volume for incoming voice calls
mSettingSound/Vib./Manner
1
Ring volume
Select “Phone”.
2
To adjust ring volume for mail messages, videophone
calls, and so on, select the corresponding item.
Use Bo to adjust the volume.
3
Setting Vibrator
You can set the vibrator to notify you of incoming calls.
<Example> Setting the vibrator for incoming voice calls
mSettingSound/Vib./Manner
1
Vibrator setting
Select “Phone”.
2
To set a vibrator for mail messages, videophone calls,
and so on, select the corresponding item.
Select a pattern.
3
Basic Operation
41
Page 44
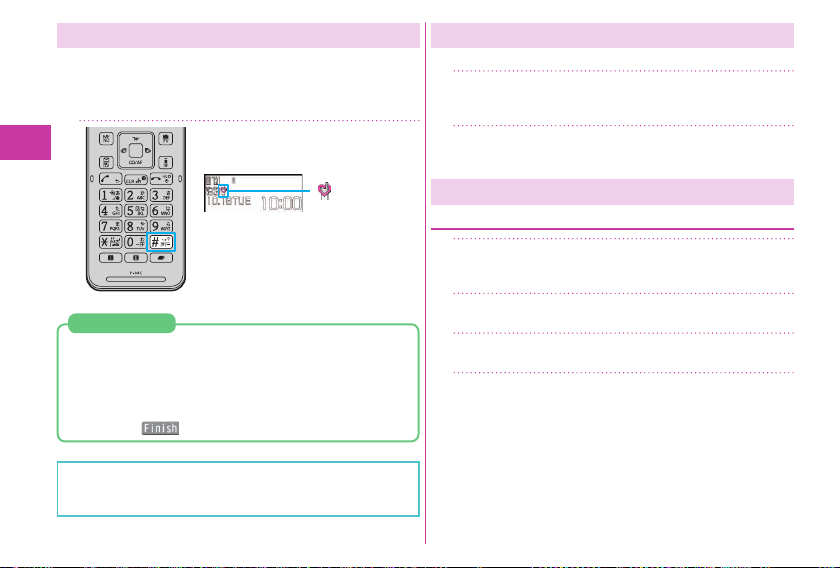
Using Manner Mode
With a single key press, you can set a tone from the FOMA
terminal such as a ring tone, keypad sound, and alarm sound
silent. When you start Manner Mode, not a sound but the
vibration notifi es you of incoming calls or messages.
1
Press and hold s for at
least one second.
“ ” appears on the
Stand-by display.
To release
Perform the same operation.
Basic Operation
Using Original
You can use “Or iginal” to tailor your FOMA terminal to how
it works while Manner Mode is ON.
1.
m
Setting▶Sound/Vib./Manner
▶
Manner mode setting▶Manner mode set▶Original
▶
2.
Set each item.
3.
Press c(
Even in Manner Mode, the shutter tone and focus lock tone
of the camera, and the start/end tones of the voice recorder
sound.
42
).
Setting Keypad Sound OFF
You can silence a Keypad sound for when you press a key.
mSettingSound/Vib./Manner
1
Other sound settingKeypad sound
Select “OFF”.
2
Changing Display Settings
Changing Stand-by display
mSettingScreen/Display
1
Stand-by display
Select “Stand-by display”.
2
Select a type of image.
3
Select a folderSelect an image.
4
You may be able to select a display format depending on
the image.
Page 45
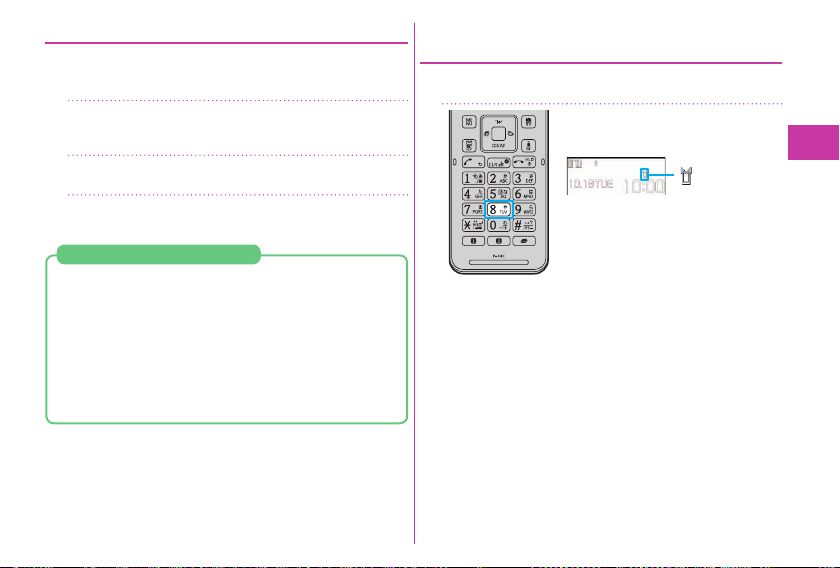
Changing Display Brightness
You can adjust the brightness of the display. You can also set
to automatically adjust the display brightness according to
the ambient light.
mSettingBacklight/Illum.
1
Backlight
Select “Brightness”Select “ON”.
2
Press Bo to adjust the brightness.
3
Lighting off/Power Saver Mode
You can set the display brightness to OFF. You can also set
the time that elapses before Power Saver Mode activates.
Power Saver Mode activates when the time set for “Time
to saver” has elapsed without any operations on the
FOMA terminal. The display turns off to reduce battery
consumption.
1.
m
Setting▶Backlight/Illum.▶Backlight
▶
2.
Select “Lighting”▶Select “OFF”.
3.
Enter the time (seconds) for “Time to saver”.
Making Display Hard to See from People
Around
You can set “View blind” to make it harder for the people
around you to see the display from oblique angles.
1
Press and hold 8 for at
least one second.
“ ” appears on the
Stand-by display.
To release
Perform the same operation.
Basic Operation
43
Page 46
Changing Font Size
<Example> Changing the size of all the characters to “X-large”
Press and hold 7 for at least one
1
second.
Select “Character size”.
2
Select “X-large”.
3
Select “Separate setting” when you want to set the
character size of each function separately.
Changing Machi-chara Setting
You can change the Machi-chara image which appears to
inform you of missed calls, new mail messages, new i-concier
Basic Operation
information and others.
mSettingScreen/Display
1
Machi-chara setting
Select “Display setting”Select “ON”
2
Select a folder.
Highlight a Machi-chara image and press
3
c(
).
44
Using Kisekae Tool
You can set the ring tone, Stand-by display, menu icons and
others at a time.
mSettingScreen/Display
1
Kisekae Tool setting
Select a folder.
2
Highlight a Kisekae Tool fi le and press
3
c(
Select “YES”.
4
Some menu confi gurations change according to the
usage frequency depending on the type of the menu.
Reset Menu Icons to Default
1.
m
▶
2.
Enter your Terminal Secur ity Code
).
m( )▶Reset menu screen
Select “YES”.
▶
Page 47
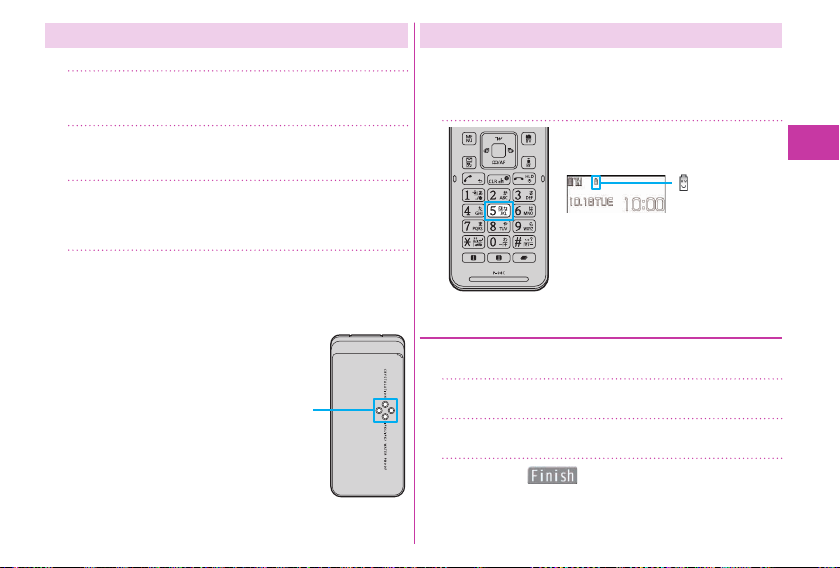
Changing Illumination When Receiving
<Example> Changing call Illumination for voice calls
mSettingBacklight/Illum.
1
Illumination setting
Select “Illumination in call”
2
Select “Illumination”.
Select “Phone”.
3
To set illumination such as for mail messages and
videophone calls, select the corresponding menu.
Select an illumination.
4
If you select “Gradation”, Color 1 to 12 light up in
sequence.
The indicator lights in the set
color when a call comes in.
Switching to the eco Mode
With a single key press, you can set the eco Mode that
reduces battery consumption. Changing to eco Mode affects
items specifi ed in “eco mode setting”, e.g. dimming the
display.
1
Press and hold 5 for at
least one second.
“ ” appears.
To release
Perform the same operation.
eco Mode Setting
You can set the items for reducing battery consumption for
when the eco Mode activates.
mSettingBatteryeco mode setting
1
Put a check mark for items to be set.
2
Press c( ).
3
Basic Operation
45
Page 48
eco Mode Autostart
This setting ensures that the mode will be automatically set to
the eco Mode when the remaining battery level has dropped
to the set level or less.
“Battery level” of “eco mode autostart” is set to “40%” in
default.
mSettingBattery
1
eco mode autostart
Select “ON”.
2
Set each itemc( )
3
Basic Operation
When the “eco mode autostart” is set
46
to “ON”, “
When the mobile phone automatically
switches to eco Mode, “
displayed and “
on the desktop.
(gray)” will be displayed.
” will be
” will be displayed
Lock/Security
Various Security Codes
■Caution on security codes
You should avoid using the numbers for security codes
such as denoting your birth date, part of your phone
number, local address number, room number, “1111” or
“1234” that is easily decoded by a third party. Also make
sure that you take a note of the security codes you have
selected just in case you forget them.
Take care not to let others know your security codes.
Even if your security codes are known and used by a
third party, we at DOCOMO take no responsibility in any
event for the r
If you do not remember your respective security codes,
you need to bring an identifi cation card such as your
driver’s license, the FOMA terminal and UIM to the
handling counter of a docomo Shop.
For details, contact “docomo Information Center” on the
back page of this manual.
The PIN unblocking key (PUK) is described on the
application form (your copy) that is handed over to you at
a docomo Shop at the time of contract. If your contract
has been made at a shop other than a docomo Shop,
you need to bring an identifi cation card such as
your driver’s license, and the UIM to the handling
counter of a docomo Shop, or consult “docomo
Information Center” on the back page of this
manual.
esultant loss.
Page 49
Terminal Security Code
This is a four-to-eight digit number for deleting all fi les or
changing settings. When the display for entering the Terminal
Security Code appears, enter your four-to-eight digit code
and press Oo(
To change
1.
Setting▶Lock/Security▶Change security code
m
▶
Network Security Code
This is a four-digit number required for your identifi cation
when you place an order at a docomo Shop, docomo
Information Center, or “お客様サポート (User support)” site,
or when you use respective network services.
“お客様サポート (User support)” is available in Japanese only.
To change
From i-mode, you can change your Network Security Code by
selecting “iMenu”→“お客様サポート (User support)”→
“各種設定(確認・変更・利用) [Respective settings (Confi rmation/
Change/Use)]”→“ネットワーク暗証番号変更 (Change Network
Security Code)”.
i-mode Password
This is a four-digit number required for registering/deleting
My Menu, applying for/canceling Message Services or i-mode
pay services, etc.
To change
From i-mode, you can change your i-mode password by
selecting “
→“Change i-mode Password”.
iMenu”→“English”→“Options”
).
Determining at the time of contract
“000 0” at the time of your contract
“000 0” at purchase
PIN1 Code/ PIN2 Code
For the UIM, you can set two security codes, namely the PIN1
code and PIN2 code.
The PIN1 code is a four-to-eight digit number for checking
the user each time the UIM is inserted into the FOMA terminal
or each time the FOMA terminal is turned on, to prevent the
unauthorized use by a third party.
The PIN2 code is a four-to-eight digit number for executing
Reset Total Charge, using the user certifi cate or applying for
the issue of it, etc.
When the PIN1 Code/PIN2 Code entry display appears, enter
your four-to-eight digit PIN1 code/PIN2 code and press
Oo
To change
1.
2.
).
(
If you enter a wrong PIN1 code/PIN2 code three times in
succession, the FOMA terminal locks and cannot be used.
Setting▶Lock/Security▶UIM setting
m
▶
Enter your Terminal Secur ity Code
Select “Change PIN1 code” or “Change PIN2 code”.
▶
You need to set “PIN1 code entry set” to “ON” to change the
PIN1 code in advance.
“000 0” at the time of your contract
Basic Operation
47
Page 50
PIN Unblocking Key (PUK)
The PIN unblocking key (PUK) is the eight-digit number for
releasing the blocked PIN1 code and PIN2 code.
You cannot change this code by yourself.
If you enter a wrong PIN unblocking k
succession, the UIM is locked. In that case contact one of
docomo Shops.
ey (PUK) 10 times in
PIN1 Code Entry Set
You can set the FOMA terminal not to work unless you enter
your PIN1 code when turning on the power.
mSettingLock/Security
1
UIM setting
Enter your Terminal Security Code
2
Basic Operation
Select “PIN1 code entry set”.
Select “ON”Enter the PIN1 code.
3
To release
Select “OFF”.
48
Various Lock Functions
A variety of lock functions is installed on your FOMA terminal
such as preventing illegal use of a third party, or protecting
your private information.
Dial Lock You can set your FOMA terminal not to be
IC Car
Lock
used by a third party.
You can do no operations other than
answering calls and turning on/off the power.
1.
m▶Setting▶Lock/Security▶Lock
Enter your Terminal Secur ity Code
▶
Dial lock
▶
To release, enter your Terminal Security Code
from the Stand-by display.
d
You can lock the IC card function.
ou cannot use the Osaifu-Keitai, ToruCa
Y
download, iC Communication, etc.
1.
Press and hold 3 for at least one second.
To release, perform the same operation and
enter your Terminal Secur ity Code.
Page 51
Omakase
Lock
Original
Lock
Keypad
Lock
When you have lost your FOMA terminal or
in other cases, you can lock your personal
data (such as Phonebook entries) and the IC
card function of Osaifu-Keitai by contacting
DOCOMO.
For details on Omakase Lock, ref
Guide [Basic Usage]”.
■Setting/Releasing Omakase Lock
-
524-360 (In Japanese only)
0120
Business hours: 24 hours (open all year round)
※Unavailable fr
You can set/release also from the My docomo site
via y
Japanese only)
You can lock functions which utilize personal
information such as Phonebook entries or
schedule events.
1.
m▶Setting▶Lock/Security▶Lock
▶
▶
To release, select “OFF”.
Keys and the touch panel operations are
disabled.
1.
Press and hold Oo for at least one second.
To release, perform the same operation.
om some IP phones.
our personal computer or other devices. (In
Enter your Terminal Secur ity Code
Select a level for Original Lock.
er to “User’s
-
Setting Auto
Keypad Lock can be activated when you close the FOMA
terminal or the specified time elapses without any operations.
mSettingLock/Security
1
Keypad lock
Enter your Terminal Security Code
2
Auto-key lock
Select “Closed lock set.” or “Unoperated
3
lock set.”
key Lock
Select an item.
Basic Operation
49
Page 52
Setting Incoming Call Restriction
You can set whether to receive (accept) or not to receive
(reject) incoming calls depending on the reason, such as from
the parties which has not been registered in Phonebook or
incoming calls from any parties who do not notify you of their
e numbers. There are three reasons for no caller ID; “User
on
ph
unset”, “Payphone”, and “Unknown”.
mSettingLock/Security
1
Call rejection set.
Enter your Terminal Security Code
2
Select an item to be set.
Select “Accept” or “Reject”.
3
If you select “Accept” for “User unset”, “Payphone” or
Basic Operation
“Unknown”, you can set a ring tone or call receiving
display.
50
Resetting to Default
Resetting the Function Settings to Default
You can reset the items on “Function List”, which are
indicated by . (See page 103)
The items indicated by
which do not return to their default settings or state.
mSettingOther setting
1
Reset settings
Enter your Terminal Security Code
2
Select “YES”.
might include the functions
Deleting Stored Data at Once
You can delete all the stored files together and each function
setting will return to the default.
mSettingOther settingInitialize
1
Enter your Terminal Security Code
2
Select “YES”.
Select “YES”.
3
Page 53
Call Telephone
Making a Call/Videophone Call
Making a Call by Entering the Phone
Number
Enter a phone number starting with a city
1
code.
Press d to make a call.
2
Press c( ) to make a videophone call.
Press h to end the call.
3
This FOMA terminal has no inward-facing camera.
Therefore, the image sent to the other party is a Chara-den
image, still image, or image being shot by the
outward-facing camera.
You can put a call on hold by pressing
-r during a call.
You can release held call by pressing -r.
Making a Call from Phonebook
<Example> Search a Phonebook entry by the name stored in
1
2
3
4
Phonebook
Press Xo.
Select “Search name”.
Enter the reading of the name from the fi rst character.
You can use another search method such as “Search
phone No.”, and “Search e-mail”.
Enter a part of the nameBo
If you enter nothing and press Bo; then you can display
all Phonebook entries.
Select a Phonebook entryd
When an entry contains multiple phone numbers, press No
to select a desired phone number.
Press c(
) to make a videophone call.
Connect
51
Page 54
Making a Call with Redial/Received Calls
Press Vo(Redial) or Co(Received calls).
1
Select a call recordd
2
Press c( ) to make a videophone call.
Using Koe-no-Takuhaibin
This service keeps voice message on behalf of you.
For details, refer to the DOCOMO website.
Enter a phone number.
1
Koe-no-Takuhaibin message can be sent from a
Phonebook entry, Redial, Dialed Calls, or Received Calls
as well.
Connect
l( )
2
Operate following the voice guidance.
Playing Back Messages
When Koe-no-Takuhaibin message has been received, an
SMS message is given as notice of recording. Select “再生
(Play)” on the detailed display of the SMS message to play
back the received message.
You can also play back messages by following the
operation below:
TEL functionKoe-no-Takuhaibin
“m
Play messages”.
52
Making an International Call
You can use WORLD CALL to make an international call from
Japan.
Contact “docomo Information Center” on the back page of
this manual for inquiries about details on WORLD CALL.
When using international carriers other than DOCOMO,
contact them.
0(for at least one second)
1
Enter numbers in order of country code
area code (city code)
destination phone number.
You can enter “+” by pressing and holding 0 for at least
one second.
When the area code (city code) begins with “0”, enter the
area code without “0”. However, include “0” when making
a call to some countries or regions such as Italy.
Press d.
2
Press c( ) to make a videophone call.
Select “Dial”.
3
DOCOMO videophones conform to “3G-324M standardized
by the international standard 3GPP”. You cannot connect to
the videophone using a different format.
Page 55
Receiving a Call/Videophone Call
A call comes in.
1
The ring tone sounds and the Call/Charging indicator lights.
Press d to answer the call.
2
When a videophone call comes in
You can receive the videophone call the same way as with a
voice call.
The substitute image is sent to the other party.
Press h to end the call.
3
Adjusting Earpiece Volume
Press and hold Bo for at least one
1
second during a call.
Press Bo during a videophone call.
Press Bo to adjust the earpiece volume.
2
When You cannot Answer a Call
Activate Record Message
By activating Record Message, you can record a caller’s
voice/video message when you cannot answer the call.
When a call comes in, an answer message is played back
after the ring time elapses. Then, the caller’s voice is recorded
with audio or video.
mTEL function
1
Rec. msg./Voice memo
Record message setting
Select “ON”Select “Phone”.
2
To activate Record Message for videophone calls, select
“Videophone”.
Select an answer message
3
Enter a ring time (seconds).
When a voice or video message is
recorded as Record Message, the
notifi cation icon like “
appears in the Stand-by display.
Select “
” or “ ” icon to play
either the voice or video message.
” or “ ”
Connect
53
Page 56
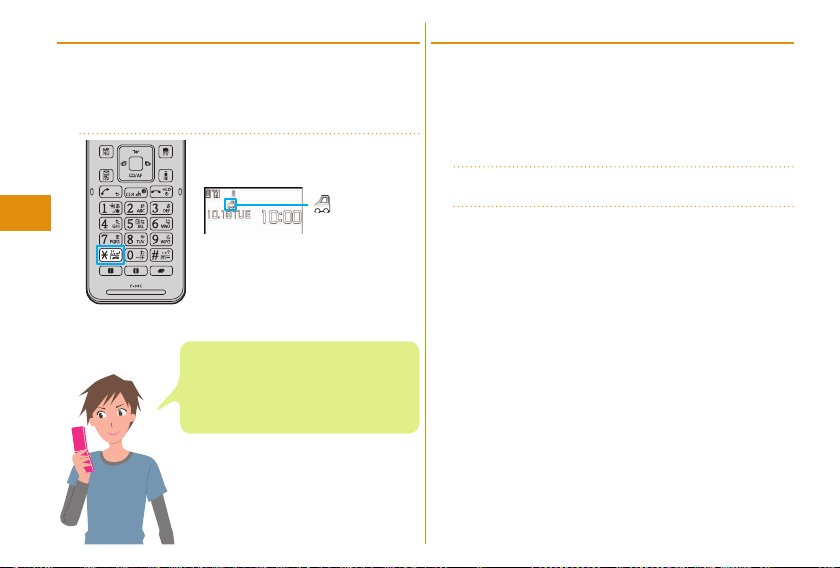
Using Public Mode (Drive Mode)
Once you activate Public mode (Drive mode), the guidance is
played back telling that you cannot answer the call as you are
currently driving or in a public place (such as a train, bus or
movie theater) where you should refrain from speaking on the
phone. Then, the call is disconnected automatically.
1
Press and hold a for at
least one second.
“ ” appears on the
Stand-by display.
To deactivate
Perform the same operation.
Connect
When a call comes in during Public mode
(Drive mode), the ring tone does not sound
and the record is stored in “Received calls”.
The alarm does not sound even when the
specifi ed alarm time comes.
54
Using Public Mode (Power Off)
Once you activate Public mode (Power off), when the FOMA
terminal’s power is OFF, the guidance is played back telling
that you cannot answer the call as you are currently in a
public place (such as a hospital, airplane or near a priority
seat on a train) where you are required to turn off the
power of the FOMA terminal. Then, the call is disconnected
automatically.
Enter a25251.
1
Press d.
2
To deactivate
1.
Enter a25250.
2.
Press d.
Page 57
Using Various Network Services
■Network services available
The following are the DOCOMO network services available for the FOMA terminal.
Voice Mail Service Required Charged
Turned Off or Out of Range
Notification Call Service
Call Waiting Service Required Charged
Call Forwarding Service Required Free
Nuisance Call Blocking Service
Caller ID Notification Service
Caller ID Display Request Service
Dual Network Service Required Charged
The network services are not available when you are out of the service area or out of reach of radio waves.
“Deactivate” does not mean that the contract for Voice Mail Service, Call Forwarding Service or other services is
canceled.
For details on “OFFICEED”, refer to the DOCOMO corporate service website (in Japanese only).
http://www.docomo.biz/html/service/officeed/
T
For details, refer to “Mobile Phone User’s Guide [Network Services]”.
For subscriptions and inquiries, contact “docomo Information Center” on the back page of this manual.
Service Application
Not required
Not required
Not required
Not required
outlines of the each network service in this manual are described along with the menus of the FOMA terminal.
he
Monthly fee
Free
Free
Free
Free
English Guidance
Multi Number Required Charged
2in1 Required Charged
Public mode (Drive mode)
Public mode (Power off)
OFFICEED Required Charged
Melody Call Required Charged
Koe-no-Takuhaibin
Service Application
Not required
Not required
Not required
Not required
Monthly fee
Free
Free
Free
Connect
Free
55
Page 58
Using Voice Mail Service
Using Call Waiting Service
1
Connect
56
mTEL functionVoice mail service
To activate the service
1.
Select “Activate”▶Select “YES”.
You can also specify a ring time.
To play back the message
1.
Select “Play messages”
Select “Play (voice call)” or “Play (videophone)”
▶
Select “YES”.
▶
2.
Operate following the voice guidance.
mTEL functionOther network serv.
1
Call waiting
To activate the service
1.
Select “Activate”▶Select “YES”.
Answer an Incoming Call during a Call
Press d. Each time you press d, you can switch the
parties you can talk with.
Using Call Forwarding Service
mTEL functionOther network serv.
1
Call forwarding
To activate the service
1.
Select “Activate”▶Select “Activate”▶Select “YES”.
You can set the phone number of forwarding destination
or ring time as well.
Page 59
Emergency Call
Calls to police 110
Calls to fir
e station and ambulance 119
Calls f
or accidents at sea 118
This FOMA terminal supports “Emergency Location Report”. When you make an emergency call such as at 110/119/118,
information about the place where you are dialing from (location information) is automatically notified to emergency-response
agencies such as police stations. It might happen that your correct location is not detected b
agencies depending on the location you dial from or radio wav
name of emergency-response agency is displayed on the Stand-by display. When you do not notify your phone number
such as by adding “184” by every call, your location information and phone number are not notified. However, when an
emergency-response agenc
emergency priority such as for protection of human life, it might get location information and phone number regardless of
your setting. Areas and timing “Emergency Location Report” introduced vary depending on the preparation of respective
emergency-response agencies.
ou make a call at 110/119/118 from the FOMA terminal, tell an operator that you are calling from a mobile phone and
When y
let them know your phone number, and then clear ly tell wher
a confirmation call to your mobile phone. In addition, stay at the current location while talking preventing the call from being
disconnected. Do not turn off the power immediately, and mak
the call.
You might not be connected to regional police/fire station depending on the area where you are calling from.
When using the videophone function of the FOMA terminal to place an emergency call to 11
automatically be made as a voice call.
Emergency Calls Phone number
y emergency-response
0, 119 or 118, the call will
y has judged that the location infor
e conditions. When your location information is notified, the
mation and phone number should be detected because of
e you are currently around, so that police/fire station can make
e sure to place your phone standby for at least 10 minutes after
Connect
57
Page 60
Using Overseas
International Roaming (WORLD WING) is a service that
allows you to use the FOMA terminal with the phone
number and mail address you use in Japan, in a service
area of the overseas carrier partnered with DOCOMO. It
enables you to continue using the voice call, SMS and
i-mode mail settings without having to make any changes.
Concerning the ar
This FOMA terminal is available within the service area of
3G network, and in the countries/regions supporting 3G
850MHz. Check the areas where you can use the service.
Refer to the following before you use this FOMA terminal
overseas:
・ “Mobile Phone User’s Guide [International Services]”
・ DOCOMO Inter
・ “海外ご利用ガイド (Overseas use guide)” pre-installed
Connect
in “My document” in Data Box or displayed fr
+m
▶
※“海外ご利用ガイド (Overseas use guide)” is available
in Japanese only.
For the country codes, international call access codes,
rnational prefix numbers for the universal number, and
inte
connectable countries, regions, and overseas carriers,
refer to “Mobile Phone User’s Guide [International
Services]” or the DOCOMO International Services
website.
A fee charged for overseas use (call fee, packet
communication fee) differs from that of in Japan.
58
eas where the service is supported:
national Services website
Map/Overseas▶Overseas use guide
om
Available Service Overseas
Major Communication Service 3G
※1
Voice call
Videophone call
SMS
i-mode
i-mode mail ○
i-Channel
i-concier
i-Widget
Packet communication by connecting with a personal
computer
Position location of GPS
○: Available
※1 When using 2in1, you cannot mak
When using Multi Number, you cannot make calls using an
additional number.
※
2 If the destination is a FOMA terminal, enter the other party’s phone
number as you do in Japan.
※3 Y
※4 You need to establish i-Channel International Settings. You are
charged a packet communication fee for automatically updating
the basic channel information as well (whic
in the i-Channel fee).
You need to establish i-concier International Settings. You are charged
※5
a packet communication fee for each information you receive.
※6 You need to establish i-Widget International Settings. When you
show an i-Widget display, multiple Widget Appli programs might
start communication. In that case, you are charged a packet
communication fee for each communication.
※7
No fee is charged for GPS measuring (checking current location).
Howev
displaying maps from location information.
Some services are not available depending on the ov
network.
※1
※2
※3
※3※4
※5
※6
※7
e calls using your B number.
ou need to establish i-mode International Settings.
h, in Japan, is included
er, you are charged a packet communication fee for
○
○
○
○
○
○
○
○
○
erseas carrier or
Page 61
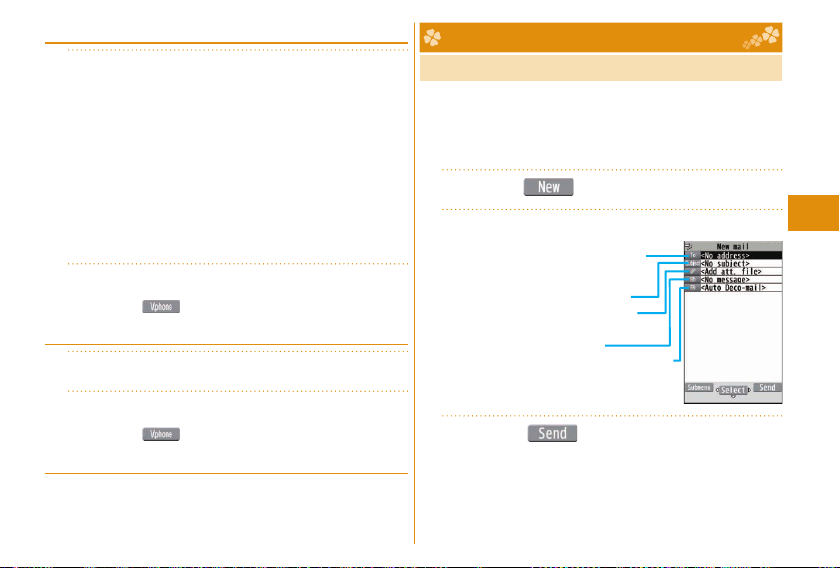
Making a Call to Outside the Country You Stay in
0(for at least one second)
1
Enter numbers in order of country code
area code (city code)
destination phone number.
You can enter “+” by pressing and holding 0 for at least
one second.
Enter “81” as a country code when you make an
international call to Japan.
When the area code (city code) begins with “0”, enter the
area code without “0”. However, include “0” when making
a call to some countries or regions such as Italy.
Press d to make a call.
2
Press c( ) to make a videophone call.
Making a Call in Country You Stay
Enter a phone number.
1
Press d to make a call.
2
Press c( ) to make a videophone call.
Making a Call to WORLD WING User Overseas
When you make a call to a person who is also internationally
roaming, make the call the same way as to make international
calls to Japan even if he/she is in the country you stay at.
Sending i-mode Mail
Once you subscribe to i-mode, you can exchange e-mail
messages over the Internet. You can attach within 2 Mbytes
of up to 10 fi les (photos, moving pictures, etc.) with body text
added. For details on i-mode mail, refer to “Mobile Phone
User’s Guide [i-mode] FOMA version”.
ll( )
1
Enter each item.
2
Enter a destination
(mail address).
Enter a subject.
Select a fi le such
as an image.
Enter text.
Operate Auto Deco-mail.
Press c( ).
3
Connect
59
Page 62
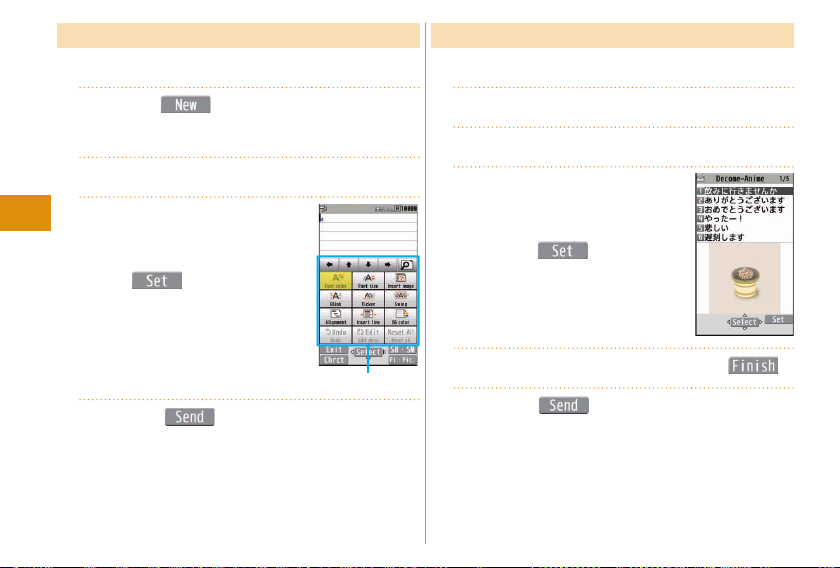
Sending Deco-mail
You can change the color or size of characters or background
color, or insert images or Deco-mail pictograms.
ll( )
1
You can also select “Decome-Template” to create
Deco-mail.
Enter an address and subject.
2
Select the text fi eldd
3
Select one of decorations
Connect
4
60
from the palette
Oo( )
When the text fi eld is selected, the
prediction conversion candidates
appear. Press r to close the
conversion candidate display, and
then press d to display the palette.
(In Japanese mode only)
Press c( ).
Enter text
Palette
Sending Decome-Anime
You can create impressive messages by inserting text or
images into a Flash fi le.
lCreate new Deco-Anime
1
Enter an address and subject.
2
Select the text fi eld
3
Highlight a Decome
Anime template and
press c(
Edit characters and imagesc( )
4
Press c( ).
5
-
).
Page 63
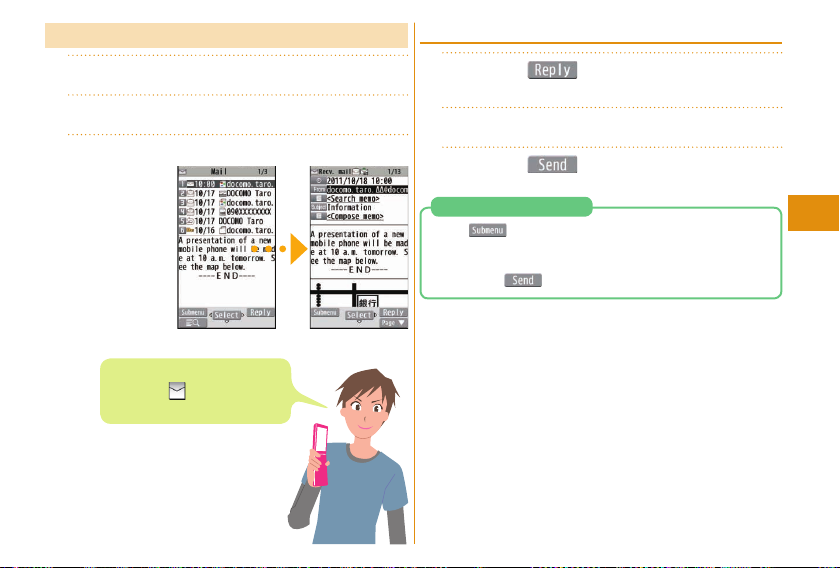
Displaying Received i-mode Mail
lInbox
1
Select a folder.
2
Select an i-mode mail message.
3
Replying to i-mode Mail
Press c( ) while an i-mode mail is
1
displayed.
Enter each item.
2
Press c( ).
3
Forwarding i-mode Mail
1.
m( ) while an i
Reply/Forward▶Forward
▶
2.
Enter each item.
3.
Press c(
-
mode mail is displayed
).
Connect
When you receive an i-mode mail
message, “
upper area of the display.
” appears on the
61
Page 64
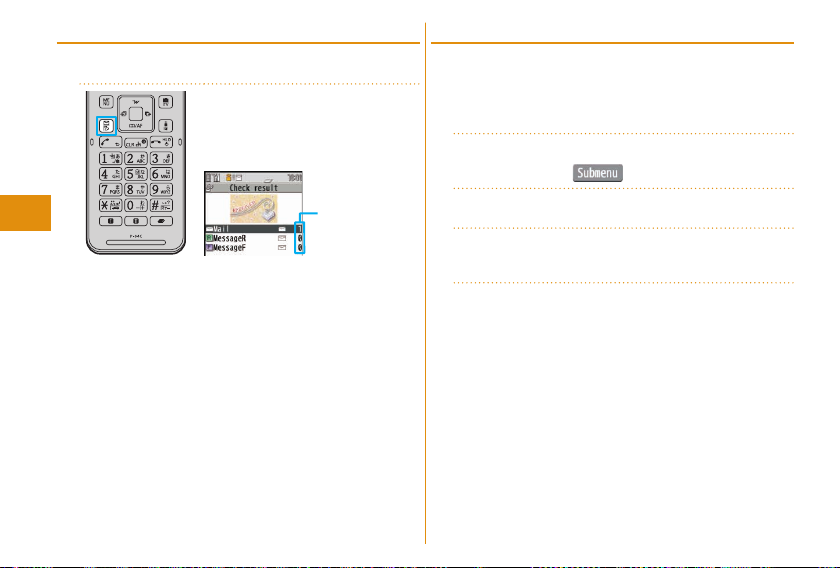
Checking New i-mode Mail
You can check the i-mode Center for a new mail message or
Message R/F.
1
Press and hold l for at
least one second.
When checking is completed, the
following display appears.
Number of
messages
Select an item to
show the display
for selecting a
message.
Connect
62
Sorting i-mode Mail
You can use “Auto-sort” to sort received/sent i-mode mail
messages into a folder such as “Business” or “Friend” which
has been created in advance.
<Example> Sorting mail messages, which come from the
1
2
3
4
address stored in the Phonebook, into a folder
Highlight a folder from Inbox Folder list
and press m(
)Auto-sort
Select “Address sort”.
Select “Look-up address”
Select “Phonebook”.
Look up for Phonebook entries and select
a target i-mode mail address.
Page 65
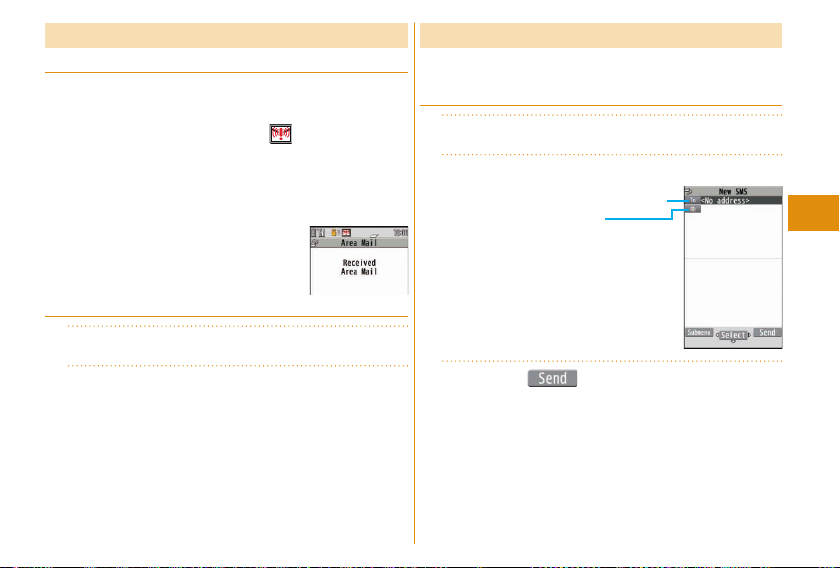
Early Warning “ Area Mail”
Receiving Area Mail
You can receive information such as about earthquake alerts
that are issued from the Japan Meteorological Agency as an
Area Mail message.
When an Area Mail message arrives, “
buzzer for Area Mail sounds.
The received contents of some messages are automatically
displayed. To erase the displayed content, select “OK”.
You can receive Area Mail messages even when you are not
contracted to use i-mode.
” lights and the
Setting Area Mail
lMail settingArea Mail setting
1
Select an item to be set
2
Set each setting.
You can also check “Check ring tone” for how your FOMA
terminal works when you receive an Area Mail message.
Using SMS
You can send text messages to the mobile phone number at
the other party.
Sending SMS
lCompose new SMS
1
Enter each item.
2
Enter a phone number.
Enter text.
Press c( ).
3
Connect
63
Page 66
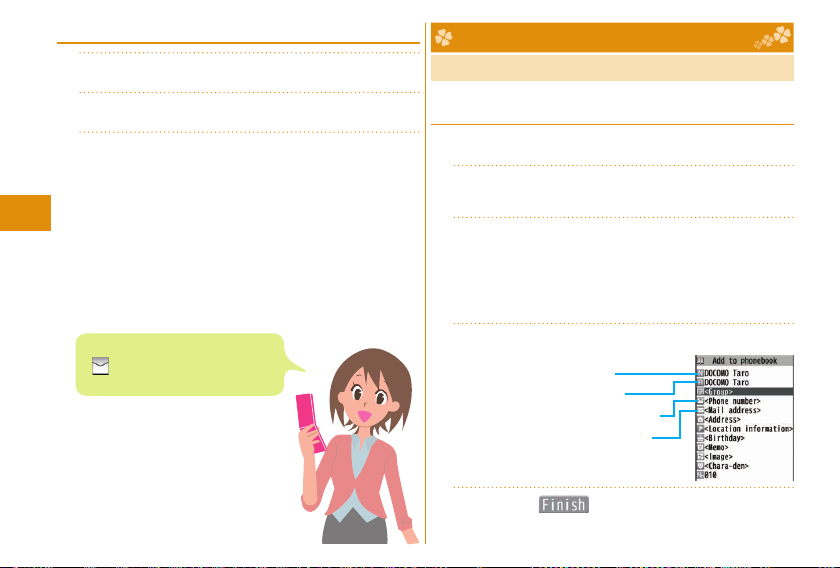
Displaying Received SMS Message
lInbox
1
Select a folder.
2
Select an SMS message.
3
Connect
When you receive an SMS message,
“
” appears on the upper area of
the display.
64
Phonebook
Storing Phonebook Entries
Storing New Phone Numbers/Mail
Addresses, etc.
You can store Phonebook entries in the FOMA terminal
(Phone) or on the UIM.
Press and hold Xo for at least one
1
second.
Select “Phone”.
2
The display for entering a name appears. Enter a name and
proceed.
When storing entries onto the UIM Phonebook
Select “UIM”.
Enter each item.
3
Enter a name.
Enter a reading.
Enter a phone number.
Enter a mail address.
Press c( ).
4
Page 67
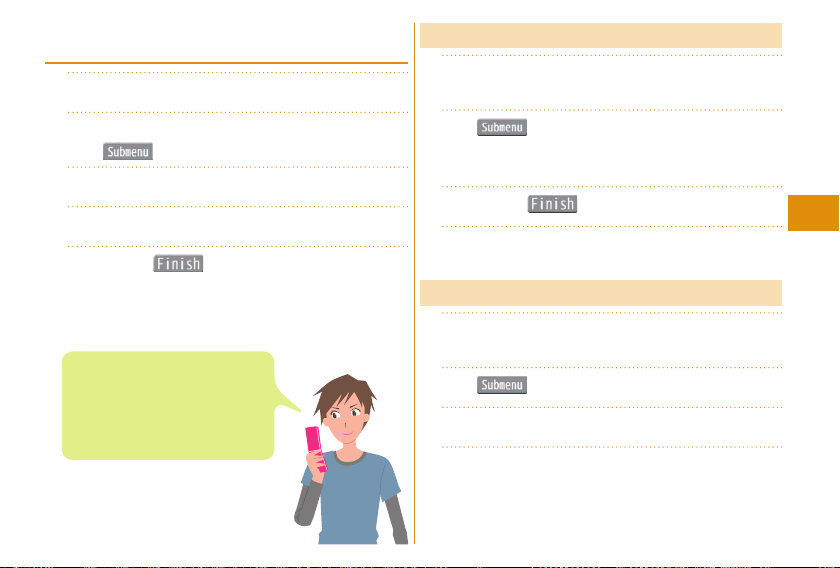
Storing Phonebook Entries from Redial/
Received Call
Press Vo(Redial) or Co(Received calls).
1
Highlight a call record and press
2
m(
Select “Phone”Select “New”.
3
Enter each item.
4
Press c( ).
5
Stored birthdays are displayed also
in your schedule. If you do not wish
them to be displayed, select “Disp. in
schedule” → “Not disp. in schedule”
in the submenu on the birthday input
display.
)Select “Add to phonebook”.
Editing Phonebook Entries
XoSearch and select a Phonebook
1
entry.
m( )Edit phonebook
2
Select an item to be edited
Edit the contents.
Press c( ).
3
Select “YES”.
4
Deleting Phonebook Entries
XoSearch and select a Phonebook
1
entry.
m( )Select “Delete data”.
2
Select “Delete this”.
3
Select “YES”.
4
Connect
65
Page 68
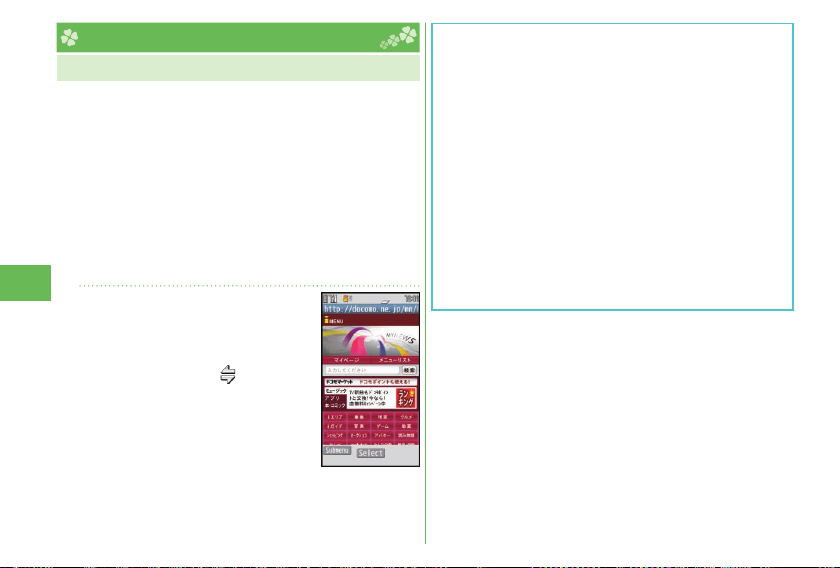
i-mode/Full Browser
Displaying i-mode Sites
i-mode is a service that enables you, by using the display of
the mobile phone supporting i-mode, to use online services
such as site access, Internet access, and i-mode mail.
i-mode is a pay service that is available on a subscription
basis.
For details on i-mode, refer to “Mobile Phone User’s Guide
[i-mode] FOMA version”.
You can display SSL/TLS
terminal.
※SSL/TLS are the safer data communication systems using
authentication/encryption technology to protect your
privacy.
Press i.
1
You can access the iMenu. Repeat
selecting items (links) to display the
desired site.
Search
While you are online, “
iMenu is available in English. Select
“English” from the display on the right.
66
※
-
compatible pages via FOMA
” blinks.
■Before using i-mode
Content of sites or websites is in general protected by
copyrights law. You can use data such as text and images
for your entertainment, which you download to your mobile
phone supporting i-mode, but you cannot use them, part or
whole of it as is, or modify them for the purpose of sale or
redistribution, without approval from copyright holders.
If you replace the UIM with another one or turn on the
r without UIM, you cannot display/play back fi les, such
powe
as still images/moving pictures/melodies you download
from sites, attached fi les (still images/moving pictures/
melodies and other fi les) sent/received by mail, Screen
Memo, and Messages R/F.
When the fi le has been set for the Stand-by display or
for specifi ed ring tone, of which display or playback is
restricted by the UIM, the settings return to default if you
replace it with new one or turn on the po
wer without UIM.
Page 69
Displaying Websites Designed for PC
You can browse Internet websites designed for PCs using the
Full Browser function.
Note that you are charged a high communication fee for
the massive data communication such as browsing Internet
websites having many images or downloading data. For
details on the packet communication fee, refer to “Mobile
Phone User’s Guide [i-mode] FOMA version”.
You can browse Internet websites composed of frames. You
can select a frame to display it as well.
mimode/webFull Browser Home
1
By default, a confi rmation display appears asking
whether you want to use Full Browser.
You might not correctly display some Internet websites.
Switching Browsers
You can switch to Full Browser to show the Internet websites
incorrectly displayed by i-mode.
The billing system differs between i-mode and Full Browser.
With the latter, as packet communications fee will be a large
sum, you are advised to use i-mode packet fl at-rate service.
m( ) while the website is displayed
1
by i-mode
Select “YES”.
2
To switch from Full Browser to i-mode
1.
m(
Full Browser▶imode Browser▶Switch to imode
Full BrowserSwitch to FB.
) while the website is displayed by
Search
67
Page 70
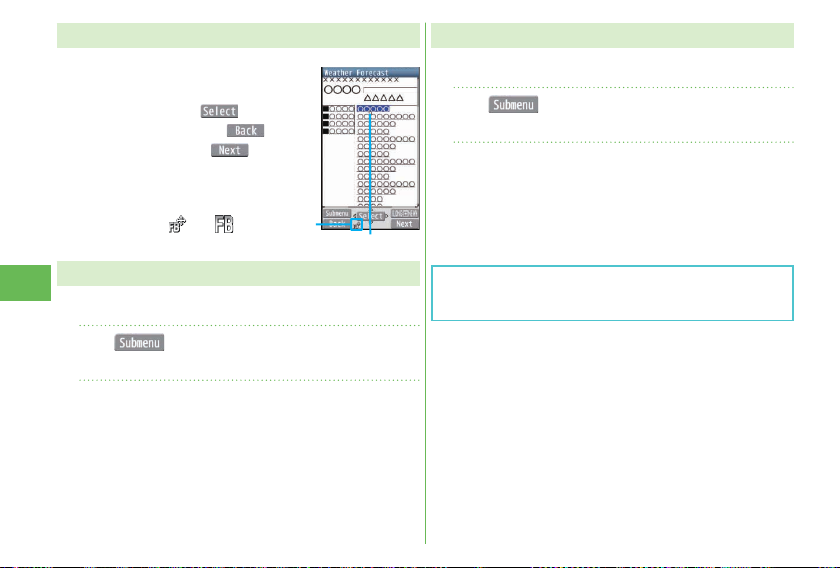
Viewing and Operating Sites
Operations on site viewing display
Scroll display/Move highlighted/
Move the pointer: Mo
Select an item (link): Oo(
Return to previous page: l(
Forward to next page: i(
“ ” or “ ” appears while
accessing by Full Browser.
)
)
)
Pointer
Saving Site Contents
If you save the page once you visited as a screen memo, you
can easily refer to it without connecting to i-mode.
m( ) while the site is displayed
1
Screen MemoSave screen memo
Select “Phone”Select “YES”.
2
To display a saved screen memo
1.
m
imode/web▶Screen Memo
▶
2.
Select “Phone” or “microSD”.
3.
Select a screen memo.
Storing Frequently Accessed Sites
Bookmark websites or i-mode sites you frequently visit to get
them displayed easily.
m( ) while the site is displayed
1
Search
68
BookmarkAdd bookmark
Select “OK”Select a destination folder.
2
To access a site stored in Bookmark
1.
m
imode/web▶Bookmark
▶
2.
Select a folder
Select a bookmark.
▶
Depending on the site, for instance, when saving of screen
memos is disabled at the site, you may not be able to save
screen memos properly.
Page 71
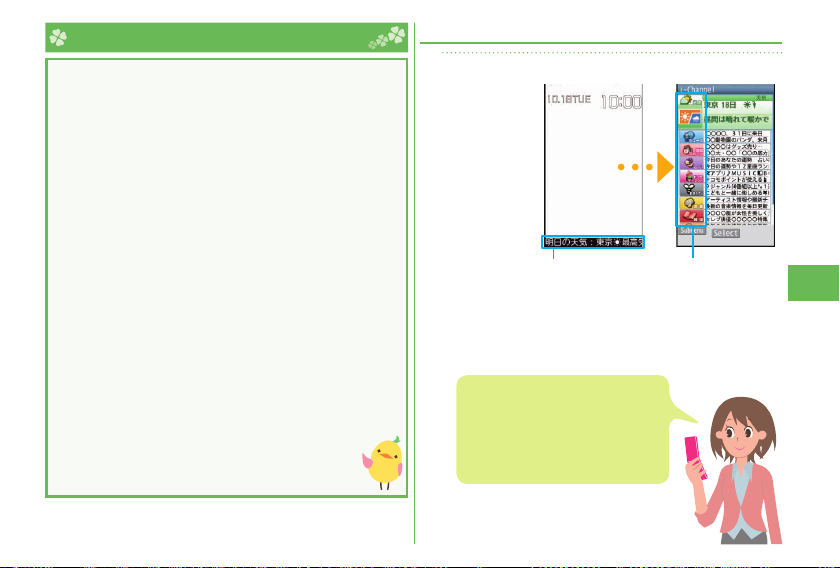
i-Channel
This service distributes information such as news and
weather forecast to i-Channel mobile phones. The
automatically received latest information fl ows on the
Stand-by display by tickers. You can read it on the
i-Channel list by pressing -r.
Further, two types of channels, “Basic channel” provided
by DOCOMO and “Okonomi (Optional) channel” provided
by IPs (Information Providers) are available. You are not
charged a packet communication fee for auto-updates of
“Basic channel” information.
You are charged a packet communication fee for
auto-updates of “Okonomi (Optional) channel” information
that will be available by registering your favorite
channels. Note that you ar
communication fee for browsing detailed information for
both “Basic channel” and “Okonomi (Optional) channel”.
When you use the international roaming service, you are
charged a packet communication fee for both auto-update
owsing detailed information.
and br
i-Channel is a pay service which is available on a
subscription basis (You need to subscribe to i-mode to
apply for i-Channel).
For details on i-Channel, refer to “Mobile Phone
User’s Guide [i-mode] FOMA version”.
The i-Channel service is provided in Japanese
only.
e charged separately a packet
Displaying i-Channel
Press r.
1
Ticker
※The display is for reference. The actual one may differ.
You can change font size for ticker by
following the steps described below;
1.
imode/web▶i-Channel
+m
▶
Ticker display setting
▶
Ticker size setting
▶
2.
Select an item.
Select each channel
to browse its detailed
information.
Search
69
Page 72
Map/ GPS
GPS is a function that receives radio waves from the GPS satellites and acquires location information of the FOMA
terminal.
This GPS function cannot be used as a navigation device for airplanes, vehicles or people or as a device for conducting
high-accuracy survey. If it is used for these purposes or even if used for other purposes, we do not take any responsibility
for a loss, such as pure economic loss resulting from the facts that you have missed the chance to check the positioning
(communication) results, which have been caused by external factors such as malfunctions, err
power failure (including battery shortage) on the FOMA terminal.
GPS is operated by the United States Department of Defense, so the GPS radio wave conditions might be controlled
(accuracy deterioration or radio wave supply suspension, etc.) depending on the defense strategy of the United States
Department of Defense. In addition, even when surveys have been conducted in the same location or environment, the
radio wave status may differ depending on the positions of the satellites so that the same results may not be obtained.
GPS uses the radio waves fr
receive radio waves, and as a result, the error in the position information may be gr
・ In densely wooded areas, downtown high-rise areas, built-up residential areas
・ In a building or right under it ・ In the basement, tunnel, ground, water
・ Close to high-tension wires ・ In a car or train
・ In bad weather such as heavy rain and snow ・ In a bag or case
・ There are obstacles (persons and articles) ar
Search
・ When you cover the displays, keys, microphone, or speakers of the FOMA terminal with your hand.
When providing position information or notify your current location, check the information given from your GPS service
provider or DOCOMO’s website. In some cases, you may be charged for using these functions.
When you are outside the service area, you cannot use the GPS function except to check your current position.
In the following cases, you cannot use the GPS function except to pr
・ During Dial Lock ・ During Keypad Lock ・ During Omakase Lock
om satellites so note that in the environments listed below make impossible or diffi cult to
eater than 300 meters.
ound the FOMA terminal.
ovide your position.
70
oneous operations, or
Page 73
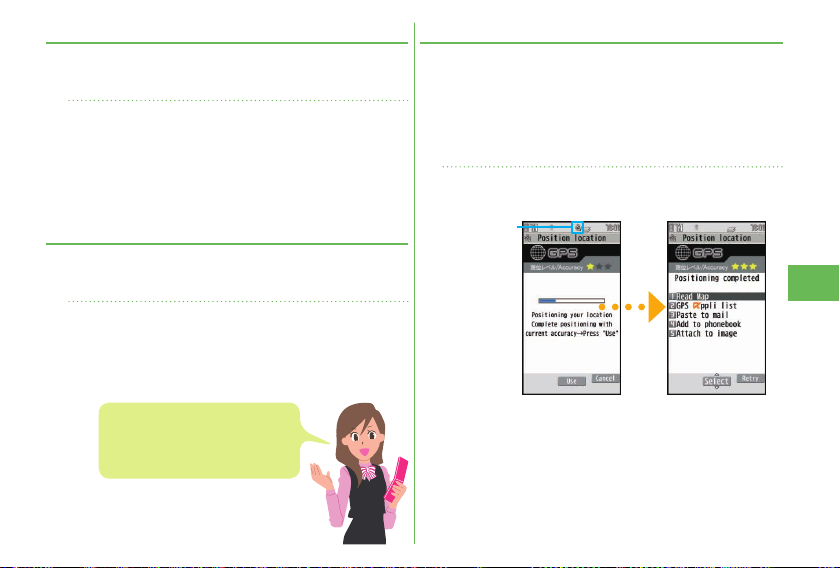
Reading Map
You can start GPS compatible i-αppli, and you can read a
map of current or specified location.
At purchase, “地図アプリ (Map Application)” is set.
mMap/OverseasMap
1
To change GPS compatible i-αppli to be started
1.
m▶Map/Overseas▶Map&GPS set./history
Map setting▶Select Map
▶
2.
Select an i-αppli program▶Select “OK”.
Using Navi
You can activate a GPS compatible i-αppli to use the
navigation functions.
At purchase, “地図アプリ (Map Application)” is set.
mMap/OverseasNavigation
1
Checking Current Location
You can locate your current location by GPS. You can also
display a map using this location information and send this
information as an i-mode mail.
You are not charged a packet communication fee for
checking your cur
communication fee are charged in cases wher
a map has been displayed from the location information.
mMap/OverseasPosition/Notify
1
Position location
rent location. However, a separate packet
e, for instance,
Blinks
Search
When you use a GPS compatible
i-αppli, the location information is
sent to the information provider of
the i-αppli program you use.
Positioning Positioning location result
Your cur rent position is located by GPS, and the positioning
accuracy is displayed.
To display the map of the current location
1.
Select “Read Map” from the Position Location Result
display.
GPS compatible i-αppli starts and shows the map.
71
Page 74

Using AUTO-GPS
Your current location is automatically positioned, and by
sending your location information periodically to your GPS
service provider, you are enabled to receive a variety of
ervices according to your location, such as weather forecast,
s
shopping guide, or sightseeing information around.
To use a service that supports the AU
the AUTO-GPS function compatible i-α
AUTO-GPS service information for respectiv
The AUTO-GPS function enables you to automatically
position your current location accor
and to send your location information and pedometer
mation to your service provider. (Your location is
infor
positioned once every five minutes accor
movements.)
When you start to use the AU
service providers or the DOCOMO w
use services. It might happen that you will be charged a fee
or using them.
f
You might separately be charged a packet communication
Search
fee for sending your location inf
that depending on the way you use your FOMA terminal,
Note
the level of the power consumed by the FOMA terminal may
be increased as a result of periodical communication.
72
TO-GPS function, use
ppli to establish the
ding to your movements,
ding to your
TO-GPS function, check GPS
ebsite for how you can
ormation.
e services.
Setting AUTO-GPS
You can set whether to use AUTO-GPS function. (“ON” is set
at purchase.)
AUTO-GPS function uses your stride when determining your
movements so you can set your stride as well.
mMap/Overseas
1
Map&GPS set./historyAUTO-GPS
AUTO-GPS setting
Select “ON”.
2
Enter a stride (cm).
3
Using Service provided by DOCOMO
Select whether you use the AUTO-GPS service that syncs
with i-concier or respective services provided by DOCOMO.
Set the service to “ON” to automatically and periodically
send your location information fr
DOCOMO.
To use i-concier or respectiv
separately subscribe f
mMap/Overseas
1
Map&GPS set./historyAUTO-GPS
DOCOMO service set.
Select “ON” or “OFF”.
2
om the FOMA terminal to
e services, you need to
or and establish the settings.
Page 75
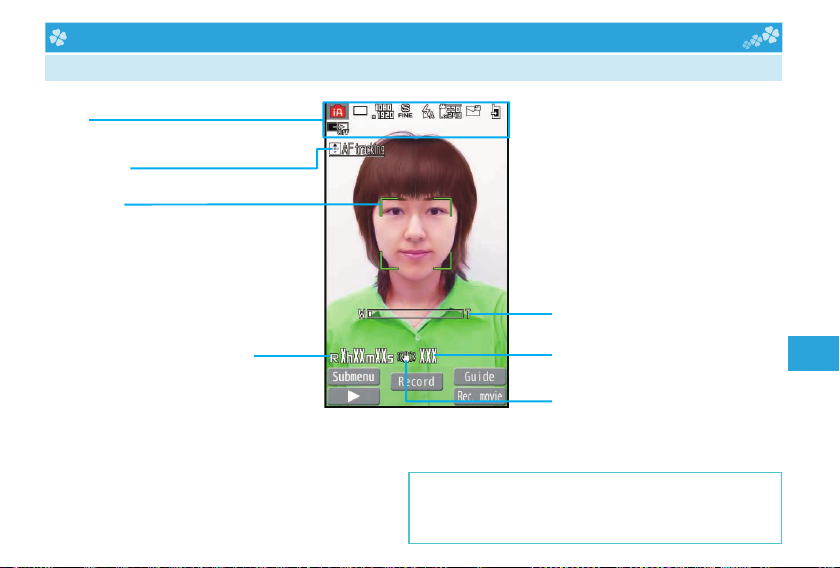
Camera
Viewing and Operation of Finder Display
MENU
You can check the settings.
Key guidance
The key operation guide is displayed.
Focus frame
When a subject is focused on, the frame
becomes green.
Time of recordable moving picture
Shows the remaining time of recordable
moving pictures.
Operations for shooting
Shoot/Save still image: Oo or v
Start/End moving picture shooting: i
Zoom: Vo(TELE)/Co(WIDE)
Focus function: Xo or v(halfway)
Flash: 8
For Digicam mode
Zoom bar
The zooming status is displayed.
Number of recordable image
Shows the number of remaining recordable
still images.
Image stabilizer
You can check the setting of Image stabilizer.
Do not leave the FOMA terminal with the lens pointing to
direct sunlight. Pixels may be discolored or burns may result.
When the battery level is low, you may not be able to save still
images/moving pictures you shoot.
Enjoy
73
Page 76
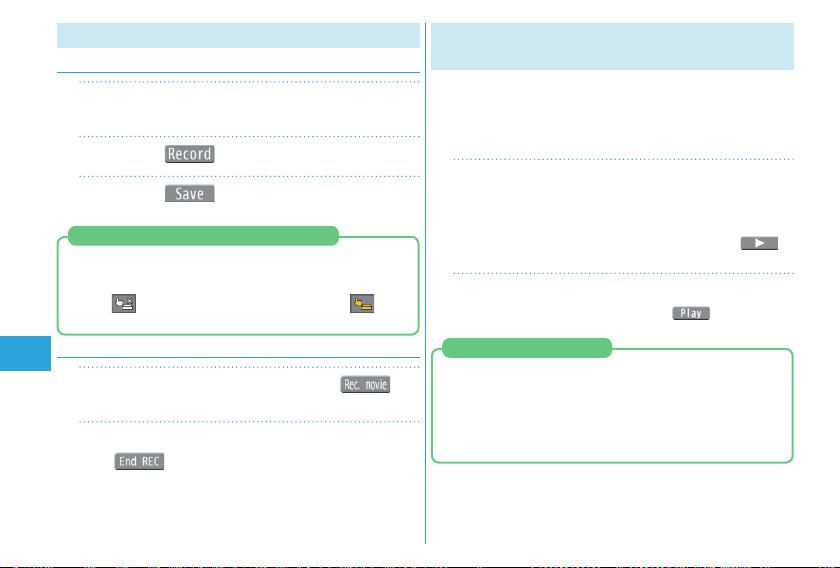
Shooting Still Images/Moving Pictures
Shooting Still Images
mCAMERA/TV/MUSICCamera
1
Digicam mode
Press Oo( ).
2
Press Oo( ).
3
When shooting images by touch operation
When shooting images in Viewer Style, you can touch the
touch panel to shoot the images instead of pressing v.
( Touch Shutter)
Touch “
Then touch the subject to shoot.
” on the shooting display to set it to “ ”.
Shooting Moving Pictures
Start recording by pressing i( )
1
from the Finder display for Digicam Mode.
Enjoy
End the recording by pressing
2
i(
The moving picture is automatically saved.
).
74
Viewing Still Images/Moving Pictures
after Shooting
You can display the still image or the moving picture you have
shot in Picture Album. You can detect a person’s face on the
still image you have shot and expand it, or add corrective
effects to the detected face. You can also play expressive
slide shows with the effect function.
mData box
1
My picture or imotion/Movie
Picture album
Picture Album is also activated by pressing l( )
from the Finder display.
Select a folderSelect a fi le.
2
To play a moving picture, press Oo( ).
To Upload a File Quickly
From the submenu while fi les are displayed, you can upload
the fi les to pre-registered sites or attach them to an i-mode
mail.
In Viewer Style, these operations can be performed by
touching the fi les on the fi le lists for at least one second
and then, slide ( Picture Jump).
Page 77
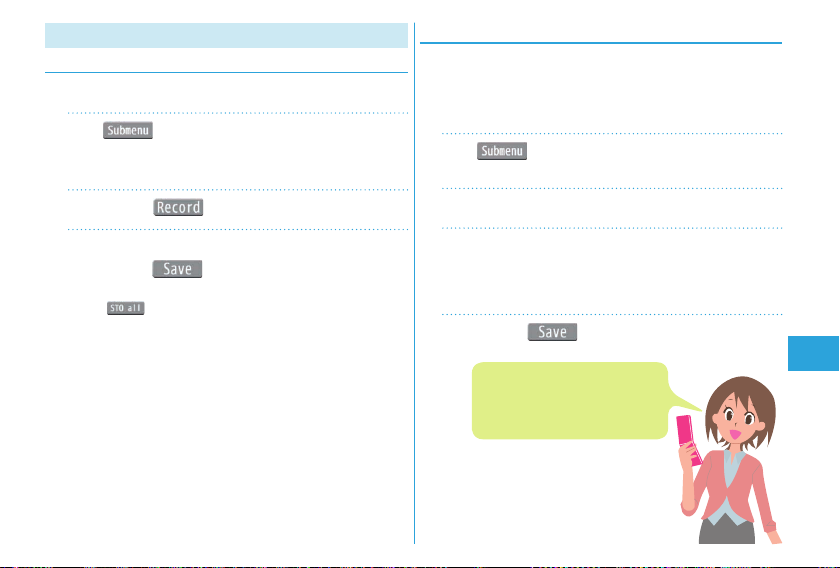
Shooting in Various Ways
Continuous Shooting Still Images
You can continuously shoot still images within the sizes from
Stand-by (480 x 854) to 3M (1536 x 2048).
m( ) from the Finder display for
1
Digicam Mode
Continuous
Press Oo( ).
2
Burst Shoot
Shooting Still Images Using Auto Shutter
The camera automatically shoots identifying the number of
faces and detecting the distance between faces by the face
detection.
<Example> Using “Group shutter” to shoot a group of three
1
2
persons
m( ) from the Finder display for
Digicam Mode
AutoShutter
Select “Group shutter”.
Highlight a still image to be saved and
3
press Oo(
You can save all the shot images by pressing
c(
).
).
Select “Three”.
3
When the faces of three persons are detected, the self timer
works, and about three seconds later an image of the group
is shot.
Press Oo( ).
4
When you select “Love shutter”,
the camera automatically shoots
identifying the distance between
two faces.
Enjoy
75
Page 78
1Seg
Using 1Seg
■Using 1Seg
1Seg is a service provided by television entrepreneurs (broadcasting stations). You are not charged a communication fee
for receiving video and audio. For about fee charged by NHK, contact NHK.
※You are charged a packet communication fee for browsing “Data broadcasting site” and “i-mode site”. You might be
charged an information fee for using some sites (i-mode pay sites).
※For details on the 1Seg service, browse the following websites:
The Association for Promotion of Digital Broadcasting
From personal computer: http://www
■Broadcasting waves
1Seg is one of the broadcasting services receiving radio waves (broadcasting waves) different from that used for the FOMA
services.
Reception condition might be deteriorated or you might not be able to receive 1Seg broadcast in places as follows:
Places far away from radio towers that transmit broadcasting waves
In tunnels, underground, or recesses of buildings
To improve reception conditions, fully extend the 1Seg antenna. Also the reception conditions might be improved by
changing the direction of the antenna, or by moving yourself to another place.
■Battery level
If you try to start 1Seg when the battery is low, the battery alert tone sounds, and a confi rmation display appears asking
whether to start it. When you do nothing on the confi rmation display for about one minute, 1Seg automatically terminates.
■Messages on the display when you use 1Seg for the fi
Enjoy
When you use 1Seg for the fi rst time after purchase, the Exemption Clause Confi rmation display appears.
If you select “NO” on a confi rmation display which appears after pressing *Oo
display does not appear afterward.
76
.dpa.or.jp/english/ From i-mode: http://www.dpa.or.jp/1seg/k/ (In Japanese only)
Mountain-ringed regions or behind buildings
rst time
( ), the same confi rmation
Page 79
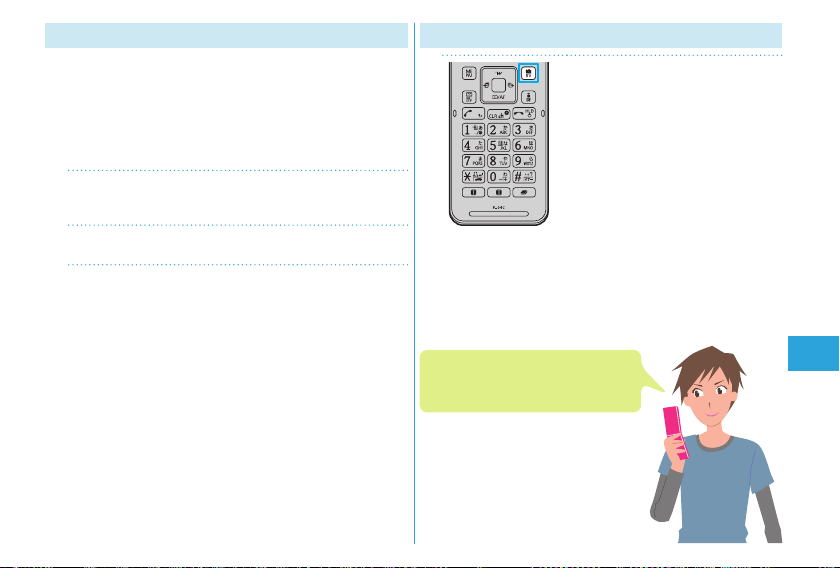
Setting Channels
When you activate 1Seg for the first time or change the area
you are in, you need to operate “Channel setting”. Select
“Auto channel setting” to enable you to search automatically
for broadcast stations you can watch.
You need to set this function with the 1Seg antenna extended
when you ar
area.
mCAMERA/TV/MUSIC1Seg
1
Channel settingAuto channel setting
Select “YES”.
2
Select “YES”Enter a title.
3
To execute Channel Setting by selecting an area
1.
m▶CAMERA/TV/MUSIC▶1Seg▶Channel setting
Select area
▶
2.
Select an area▶Select a prefecture.
3.
Select “YES”.
estrial digital TV broadcasting service
e in a terr
Watching 1Seg
1
Each time -r is pressed while viewing,
the mode is switched between mute
and unmute.
Press and hold c for at
least one second.
1Seg starts and the viewer display
appears.
Enjoy
77
Page 80
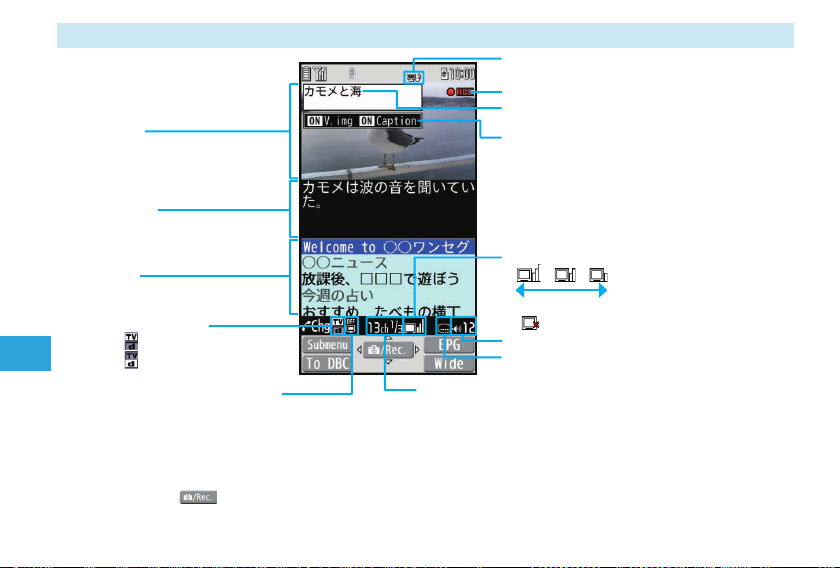
Viewing and Operating Viewer Display
Displayed while you are watching a
1Seg program
Video being recorded
Program’s name
Video
Caption
Data
Broadcasting
Operation Mode
: Video Mode
: Data Broadcasting Mode
Displayed while setting 1Seg
Enjoy
Op-free Auto Off
Starts fl ashing approximately one
minute before automatic termination.
The operation on the viewer display
Channel switch: No Sound volume adjustment: Bo
Video recording: Oo(
The recorded video is saved on the microSD card.
)(for at least one second) or v(for at least one second) Switch TV/data BC: l
Channel (Remote-control number)
When a broadcasting station is broadcasting multiple services
(programs), “Viewing service number/Number of all services” is
also displayed.
78
Switch Visual Image/Caption
Airwave Reception Level (estimate)
Strong Weak
“
” appears out of the broadcasting area.
Sound Volume
Displayed while receiving caption
information
Page 81
Setting Timer Watching or Recording
1Seg
Set the date and time, a channel, and program name, and
enter them to the TV Timer List or Timer Recording List. When
the set time arrives, watching or recording starts.
mCAMERA/TV/MUSIC1Seg
1
Select “TV timer list” or “Timer recording
2
list”.
Press c( ).
3
Enter each item.
4
Press c( ).
5
Playing Recorded Video
mData box1Seg
1
Select “Video”Select a fi le.
2
Each time -c is pressed while playing,
the mode is switched between mute
and unmute.
Enjoy
79
Page 82
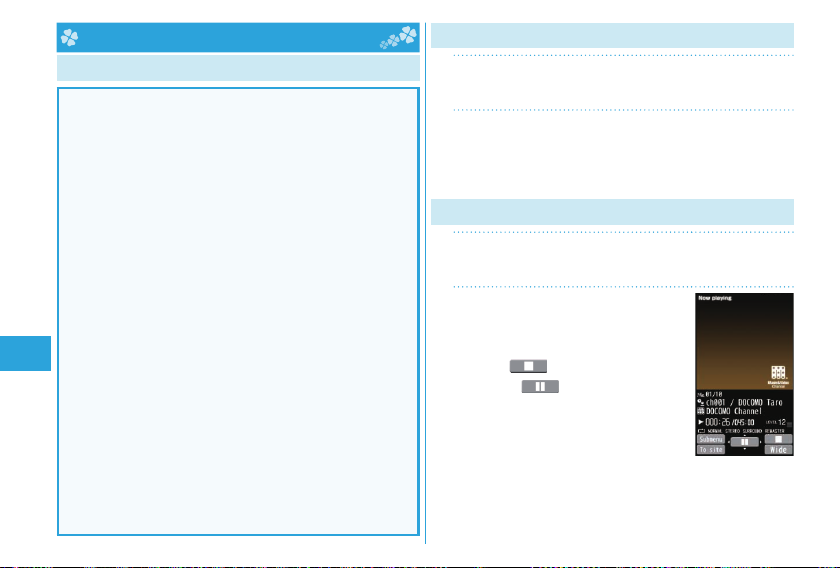
Music
Music&Video Channel
Music&Video Channel is a service which automatically delivers
up to about two-hour sound programs at night just by selecting
your favorite music programs etc. in advance. Further, you
can enjoy high-quality video program of up to about one-hour.
Programs are updated periodically and you can enjoy the
delivered programs at any time such as on commuting.
■Before using Music&Video Channel
Music&Video Channel is a pay service that is available on
a subscription basis. (To apply for Music&Video Channel,
you need to subscribe to i-mode and i-mode packet
fl at-rate service.)
In addition to the service fee for using Music&Video
Channel, you might be charged separately an information
fee depending on the program.
If you insert the UIM to the Music&Video Channel
incompatible FOMA terminal after you subscribe to
Music&Video Channel, you cannot use Music&Video
Channel Service. Note that the service fee applies unless
you cancel the Music&Video Channel subscription.
ou cannot set or download programs during
Y
international roaming
distribution of programs before going abroad. Then, after
homecoming, resume the reception of distribution.
Enjoy
※When you try to set or download programs during
international roaming, note that you are charged a
packet communication fee for i-mode communication.
For details on Music&V
Phone User’s Guide [i-mode] FOMA version”.
The Music&Video Channel service is provided in
Japanese only.
80
※
. Take procedures to halt the
ideo Channel, refer to “Mobile
Setting Programs
mCAMERA/TV/MUSIC
1
Music&Video ChannelProgram set.
Follow the instructions on the display to
2
set a program.
The program automatically downloads at night.
Playing Programs
mCAMERA/TV/MUSIC
1
Music&Video Channel
Select a program.
2
Operation while playing back a
Music&Video Channel program
Halt: c(
Pause: Oo(
Sound volume adjustment: Bo
Search (fast forward): Press and hold Vo
Search (fast rewind): Press and hold Co
)
) or v
Page 83
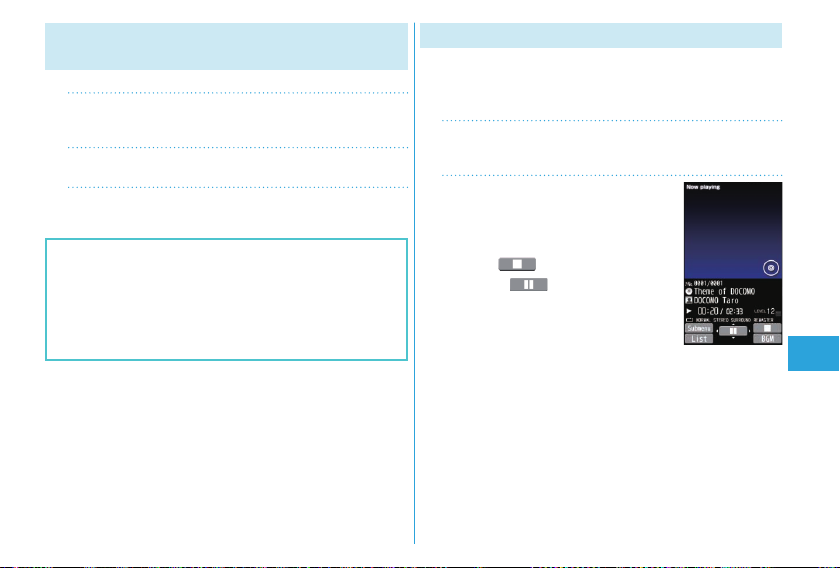
Downloading Chaku-uta Full® Music
Files
You can download Chaku-uta Full® music fi les from sites.
Select a Chaku-uta Full® music fi le from a
1
downloadable site.
Select “Save”Select “YES”.
2
Select a destination folder.
3
“Chaku-uta Full” is a registered trademark of Sony Music
Entertainment Inc.
■Handling music fi les
You can use music fi les saved on the microSD card for
personal use only. Before using, give enough consideration
not to infringe on the third party’s intellectual property rights
or other rights such as copyright.
Playing Music Files
MUSIC Player enables you to play Chaku-uta Full® music fi les
you have downloaded from sites, or to play Windows Media
Audio (WMA) fi les you saved on the microSD card using your
personal computer.
mCAMERA/TV/MUSIC
1
MUSIC Player
Select “All music”
2
Select a music fi le.
Operations of MUSIC Player display
Halt: c(
Pause: Oo( ) or v
Search (fast forward): Press and hold Vo
Search (fast rewind): Press and hold Co
Sound volume adjustment: Bo
Replay next fi le: Vo
Replay previous fi le: Co (When playback time is over three
)
seconds, you go back to the beginning
of the fi le.)
®
Enjoy
81
Page 84
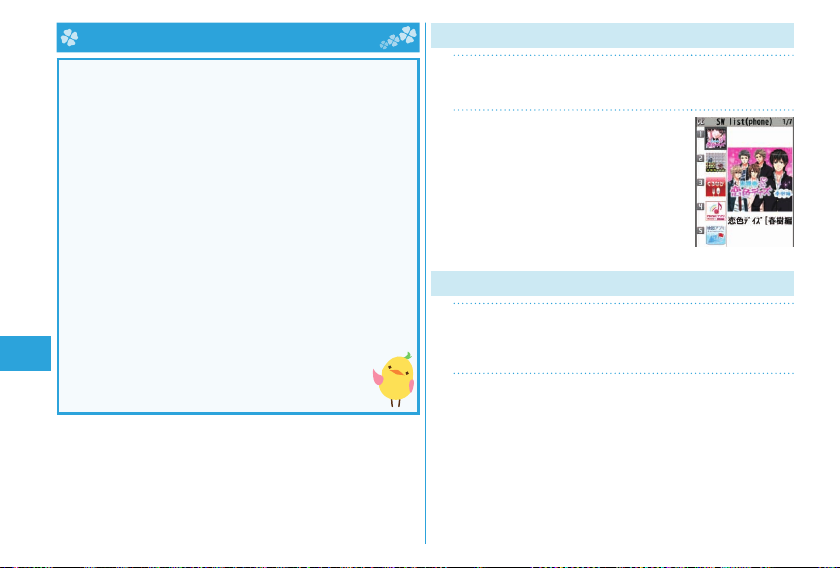
i-αppli/ i-Widget
i-αppli is a software program for mobile phone supporting
i-mode. By downloading various software programs from
the i-mode site, you can use your FOMA terminal more
conveniently. You can automatically update the stock
price information or weather information, and enjoy games
without accessing network.
i-Widget is a useful function for gaining easy access to
frequently used contents and tools (Widget Appli programs)
such as the calculator, clock, memo pad and stock market
information. Widget Appli programs can be added by
downloading them from the web site.
Depending on the i-α
a communication fee for using.
The packet communication fee for overseas use differs
from the one for domestic use.
A multiple number of Widget Appli programs may start
communicating when you open the i-Widget display. If
you browse detailed information, you are charged
separately a packet communication fee.
For details on i-α
Phone User’s Guide [i-mode] FOMA version”.
Enjoy
82
ppli program, you might be charged
ppli/i-Widget, refer to “Mobile
Starting i-αppli
Press and hold i for at least one
1
second.
Select a software program.
2
Starting Widget Appli
Press Zo.
1
The i-Widget display that can simultaneously start multiple
Widget Appli programs appears.
Select a Widget Appli program.
2
You can operate Widget Appli program separately.
Page 85

-
Downloading i
Select a software program from a
1
αppli from Sites
downloadable site.
Select “OK” when downloading ends.
2
When the software program is storable in “Customize
Menu”, the confirmation display appears asking whether
to store it.
Select “YES”.
3
You can delete the pre-installed i-αppli programs. You can
re-download deleted programs from the “P-SQUARE” site.
You can download not only i-αppli programs but also the
pre-installed Deco-mail pictograms, Kisekae
Machi-chara images, Chara-den images, templates,
dictionaries, and Content packages from the “P-SQU
site (in Japanese only).
Menu→メニューリスト (Menu List)
i
カー (Mobile Phone Maker)→P-SQUARE
Deadlines f
・“リバーシ (REVERSI)”: the end of March, 2015
・“ハイパー四川省 (Hyper Sic
・“モバイルGoogleマップ (Google Map for Mobile)”: the end
The re-download services may be halted or closed without
notice e
or re-download services
huan)”: the end of March, 201
of May, 2014
ven in the service period.
Tool files,
ARE”
→ケータイ電話メー
5
Enjoy
83
Page 86
i-motion/ Movie
i-motion is a fi le consisting from video, audio, and music
which you can download to your FOMA terminal from
i-motion sites that support i-motion. You can also set it for a
ring tone.
Also, by using high speed communication, you can play back
smooth and high-quality movie fi les provided by portal sites,
movie specialty sites and other sites on the Internet.
When downloading or streaming an i-motion/movie fi le, y
might receive a bulky fi le. When data size required for sending
or receiving is bulky, packet communications fees will be a
large sum. You are advised to use i-mode packet fl at-rate
service.
Two types of i-motion/movie fi les, streaming type and normal/
download type are available.
Categories Description
Streaming type
(cannot be saved)
Normal/Download type
(can be saved)
Enjoy
84
Plays data while receiving.
When download is completed,
the Download Completion display
appears. You can then play or save
data.
Downloading i-motion/Movie
Select an i-motion/movie fi le from a
1
downloadable site.
Select “Save”Select “YES”.
2
Select a destination folder.
3
ou
Playing i-motion/Movie
mData boximotion/Movie
1
Select a folderSelect a fi le.
2
Page 87
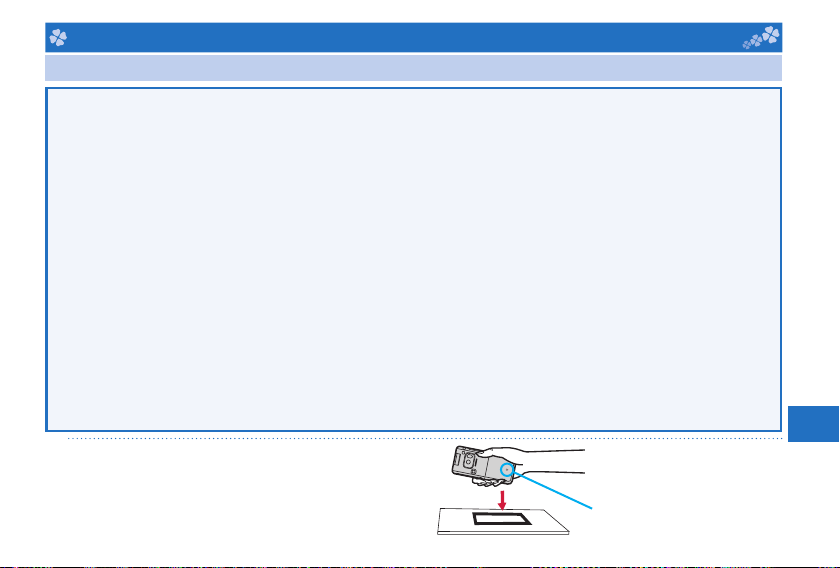
Osaifu-Keitai
Osaifu-Keitai/ ToruCa
Osaifu-Keitai is equipped with the IC card which enables you to make payments, use coupons, enjoy stamp rallies and so
on by placing the FOMA terminal over the scanning device in the stores or other locations. Furthermore, by placing the
FOMA terminal over a scanning device, you can access sites and web pages, obtain the latest coupons by communication,
and check the deposits of electronic money and the status of its use. Security of the card is well established so that you
can use it carefree.
ToruCa is an electr
You can download ToruCa fi les from scanning devices, sites, or data broadcasting, and can easily exchange them using
mail, infrared communication, iC communication, or a microSD card. The downloaded ToruCa fi les are saved to “ToruCa”
on “Osaifu-Keitai”.
For details on Osaifu-Keitai and ToruCa, refer to “Mobile Phone User’s Guide [i-mode] FOMA version”.
Data on the IC card (including electr
of the FOMA terminal. (You cannot deposit your FOMA terminal at our hand for repair, remaining data fi les on it. You
are asked, as a rule, to delete them by yourself.) As to the support such as reissue, restoration, temporal storage, and
transfer of data, consult the pr
service. For your important data, be sure to use Osaifu-Keitai compatible service with backup support.
In any case including malfunction or model change, we cannot be held responsible for the loss or deformation of data on
the IC card or other losses caused regarding Osaifu-Keitai compatible services.
When your FOMA terminal is stolen or lost, immediately inquir
about the countermeasures.
Even when the power is turned off or the battery runs out, the “Osaifu-Keitai” function is available by holding the
f mark over the scanning device. The function may not be available, however, if you do not use the battery pack for a
long time or leave the battery uncharged after the low battery alert activates.
Place the f mark over a scanning
1
device.
The Call/Charging indicator lights when you bring your FOMA
terminal close to the scanning device and communication
becomes ready.
onic card that you can receive with FOMA terminal for use as fl iers, restaurant cards, and coupon tickets.
onic money, reward points, etc.) might be lost or deformed owing to the malfunction
ovider of your Osaifu-Keitai compatible service, except for the transfer by the iC transfer
e of the provider of your Osaifu-Keitai compatible service
Place the f mark over a
scanning device.
More Convenient
85
Page 88
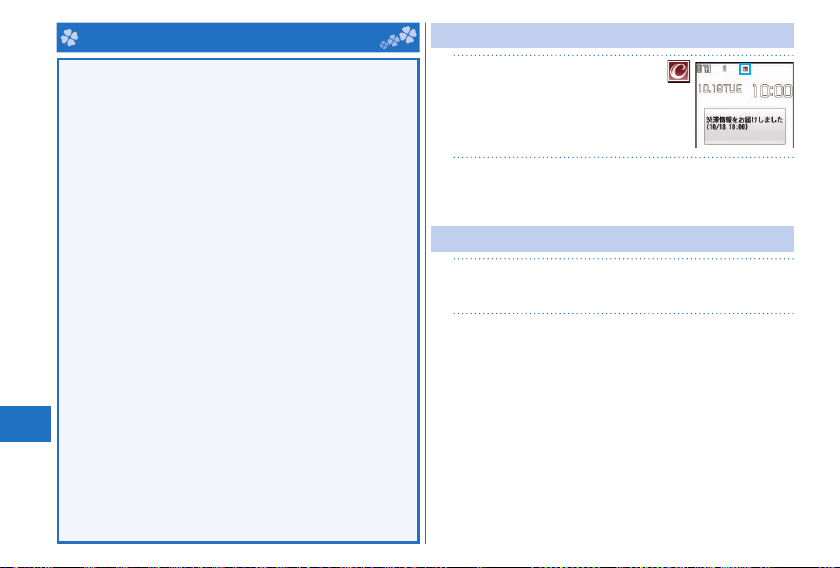
i-concier
i-concier works to serve you with a pleasant life just like a clerk
or concierge does. The service holds your data (area information
about your neighborhood, Memo, Schedule, ToruCa, Phonebook,
etc.) and sends you information, with good timing, about a variety
of things according to the contents of your memo and your
schedule event, your living area, your current location, or your
preference or taste. This service provides related information
ut Memos, schedule events, or ToDo items, and automatically
abo
updates schedule events or ToruCa fi les to the latest, and also
automatically adds useful information such as about the opening
hours of various shops to your Phonebook. It also allows you
to share the schedules or images held by the DOCOMO’s Data
Storage Center with friends, family members or other groups. It
also enables you to easily print out the images held. i-concier
rmation is notifi ed by a Machi-chara image (cartoon character
info
that appears on the Stand-by display).
For details on i-concier, refer to “Mobile Phone User’s Guide
[i-mode] FOMA version”.
i-concier is a pay service which is available on a subscription
basis (You need to subscribe to i-mode to apply for i-concier).
If you have not subscribed to Data Security Service but will
newly subscribe to i-concier, you are to subscribe to Data
Security Service as well as i-concier.
Depending on the content (information, i-schedule, and
More Convenient
others), you might be charged separately an information fee
other than the i-concier monthly fee.
ou are charged a packet communication fee separately for
Y
receiving information except some.
You are charged separately a packet communication fee for
using detailed information.
You are charged separately a packet communication fee for
auto-updates of i-schedule, Memo, T
etc.
i-concier is available in Japanese only.
86
oruCa, and Phonebook,
Receiving Information
When information arrives,
1
blinks and the content is
displayed on the Stand-by
display.
Select a message
2
Select a piece of information.
Displaying i-concier
mi-concier
1
(Information list)
Select a piece of information.
2
Page 89
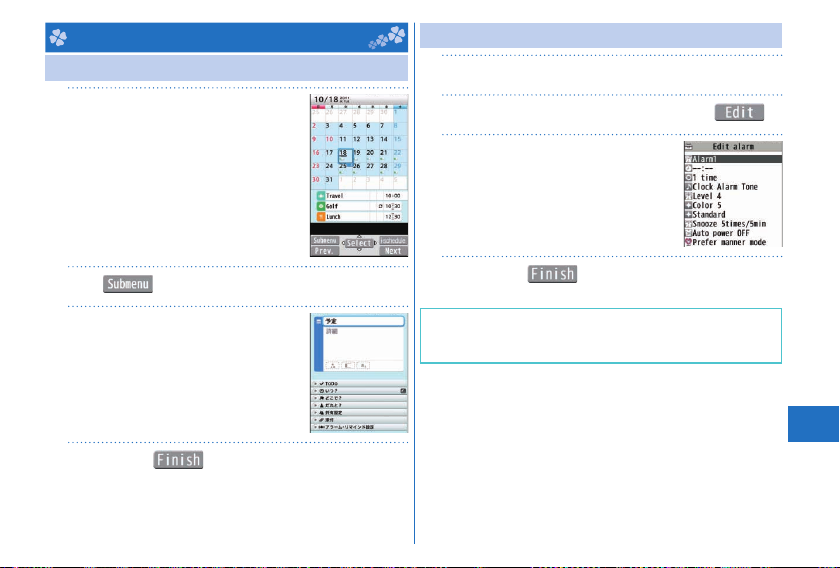
Convenient Tools
Using Schedule
mToolSchedule
1
Select a date to show a schedule event
of the selected date. Select the schedule
event to confi rm its details.
m( )Select “New”.
2
Enter each item.
3
Press c( ).
4
Using Alarm
mToolAlarm
1
Highlight an alarm and press c( ).
2
Enter each item.
3
Press c( ).
4
The alarm does not sound in Public mode (Drive mode),
Dial Lock, “Alarm” locked in Original Lock or Omakase
Lock.
More Convenient
87
Page 90
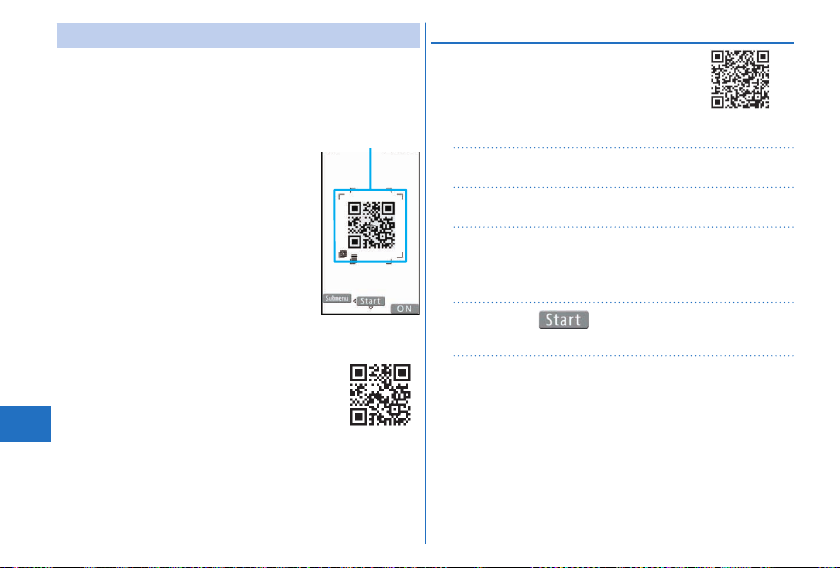
Using Bar Code Reader
You can use the camera to scan QR codes and others, and
store them as fi les.
From the scanned data, you can make calls, compose i-mode
mail messages, access Internet websites, and so on.
■When scanning with Bar Code Reader
Scan the code as large as possible within
the guide frame.
Autofocus works when you scan the code
about 10 cm or more away from it.
When you scan the code in the out-of-focus
state, the recognition rate lowers.
Hold the camera in parallel with the code
when y
ou scan.
■ QR code
QR code is one of the two-dimensional codes
that denotes data in the vertical and horizontal
More Convenient
directions.
“株式会社NTTドコモ (NTT DOCOMO, INC.)”
is displayed when you scan the QR code with
the FOMA terminal.
88
Guide frame
Scan a Code
<Example> Access P-SQUARE by using
1
2
3
QR code on the right
QR code for
accessing the site
mToolBar code reader
Select “Scan code”.
Fit a code to the guide frame and
press Xo.
The subject is focused on by autofocus function.
Press Oo( ) to scan the code.
4
A URL is displayed as a scanned result.
Select the URLSelect “i-mode Browser”.
5
Page 91
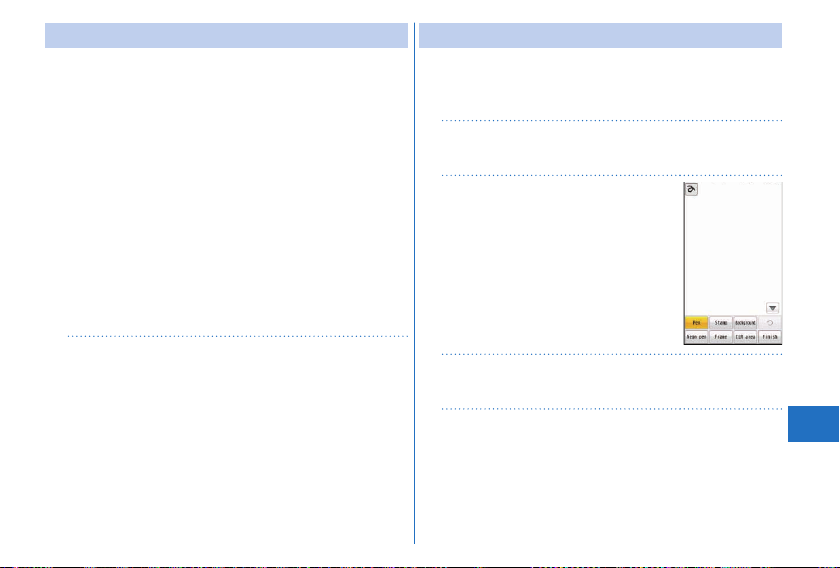
Using Pedometer
As you walk with your FOMA terminal in hand or in your
pocket, your pace is measured, and then depending on the
measured results, your distance, calories consumed, and
body fat burned ar
■Caution when using Pedometer
If you hav
function.
When you use Carry C
house it, fasten it to your waist belt.
When you put Pedometer into y
or partition that holds it securely.
■About measur
Note that measurement results are just for r
When the power is not turned on or while software is being
updated, no measurement is carried out.
Your pace might not be cor
usage conditions.
mToolPedometer
1
The measurement records of your pace are displayed.
From the submenu, you can switch between ON/OFF of
Pedometer, or set user infor
e displayed.
e not yet set Set Main Time, you cannot use this
ase L 01/Carry Case 02 (option) to
our bag, store it in a pocket
ement
eference.
rectly measured depending on the
mation.
Creating Handwriting Photo/Memo
On the touch panel, you can draw pictures or write characters
by hand onto the images or you can add decoration. The
Handwriting photos/memos you have created are saved as
JPEG images.
Normal MenuTool
1
Handwriting photo/memo
Set backgroundEdit
2
Handwriting photo/memo
Touch “Finish”.
You can draw pictures, write characters
and position stamps.
Touch “Save in portrait” or “Save in
3
landscape”.
Touch “Save to pictures”.
4
More Convenient
89
Page 92
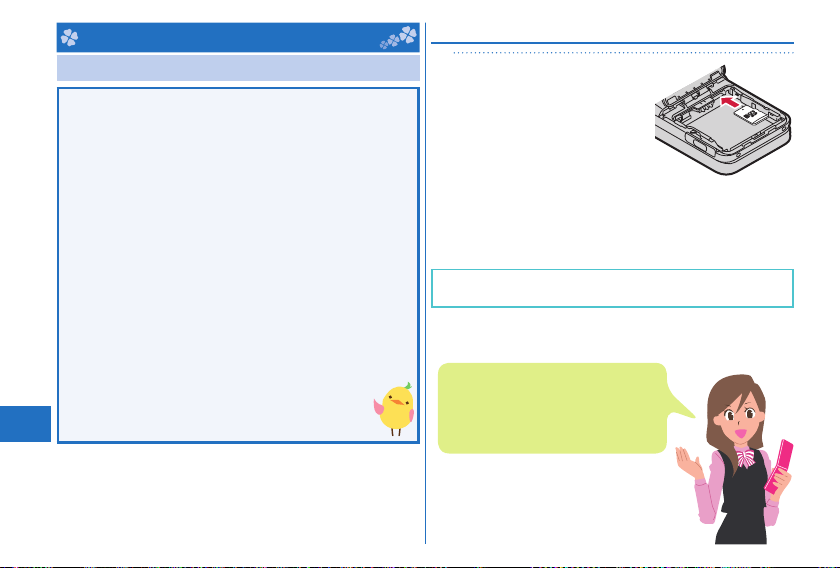
Data Management
Using microSD Card
If you do not have a microSD card, you need to purchase it.
P-04C supports a commercial microSD card of up to 2
Gbytes and microSDHC card of up to 32 Gbytes (As of
May 2011).
For the latest operation, check information such as the
memory capacity and manufacturers of microSD cards,
access the following sites (in Japanese only). Note that
the microSD cards other than published in the sites may
not work correctly.
・From i-mode to P-SQUARE (As of May 2011)
→メニューリスト (Menu List)
iMenu
→ケータイ電話メーカー (Mobile Phone Maker)
→P-SQUARE
・From personal computers
http://panasonic.jp/mobile/
Note that the published information is the result obtained
from the operation check, which does not necessarily
guarantee all performances of those microSD
More Convenient
cards.
Make sure that you turn off the power, and then
insert/remove the microSD card.
90
Inserting/Removing microSD Card
With the metal
1
terminal surface facing
downward, make sure
that the cut edge is
positioned at right and
then insert.
Push it until it clicks.
When you remove the microSD card
Push the microSD card until it stops and remove it.
Note that the microSD card may pop out when you insert or
remove it.
The inserting slot of the microSD card is
in the inside of the back cover.
To insert it, remove the back cover and
open the inner cover, and then remove
the battery pack.
Page 93
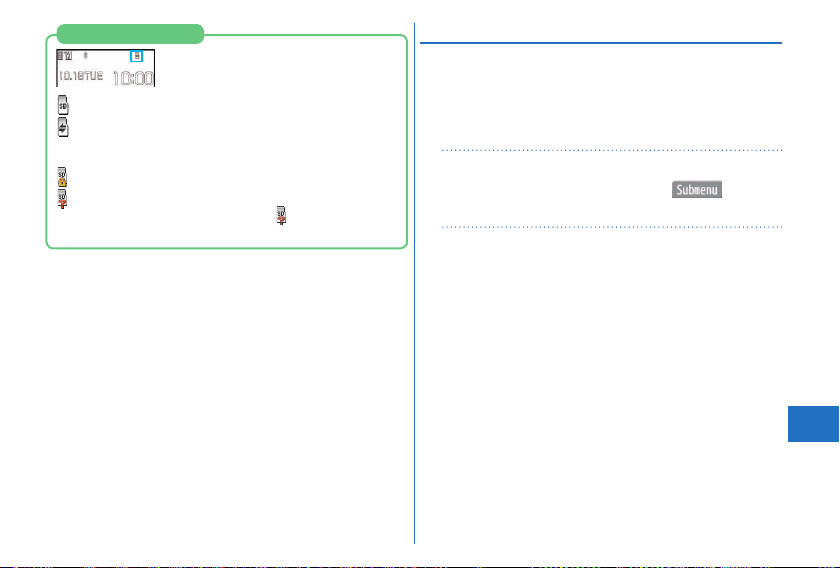
Icons on the Display
: A microSD card is inserted.
: Data is being read/written.
(Do not remove the microSD card nor turn off the FOMA
terminal.)
: The microSD card is write-protected.
: The microSD card cannot be used.
(Insert the microSD card again. If “ ” is still displayed,
execute “Check microSD” or “microSD format”.)
Formatting microSD Card
When you use the microSD card for the fi rst time, you need to
format (initialize) it.
Be sure to use P-04C for formatting. The microSD card
formatted using other devices such as personal computers
may not work properly.
Note that formatting deletes all content on the microSD card.
mToolmicroSD
1
Refer microSD datam( )
microSD format
Enter your Terminal Security Code
2
Select “YES”.
More Convenient
91
Page 94
Copying Data to microSD Card
<Example> Copying a still image
mData boxMy picture
1
Select a folder.
Highlight a still image to be copied and
2
press m(
Select “Copy to microSD”
Select “Copy this”.
)
Copying Data to FOMA Terminal
<Example> Copying a still image
mData boxMy picturel( )
1
Select a folder.
Highlight a still image to be copied and
2
More Convenient
press m(
Select “Copy to phone”
Select “Copy this”.
)
92
Displaying Data Stored on microSD Card
<Example> Displaying a still image
mData boxMy picturel( )
1
Select a folderSelect an image.
2
Check Capacity of microSD Card
The total memory and used memory (estimated) in the
microSD card can be displayed.
1.
m
Tool▶microSD▶Refer microSD data
▶
2.
m(
)▶Select “microSD info”.
Page 95
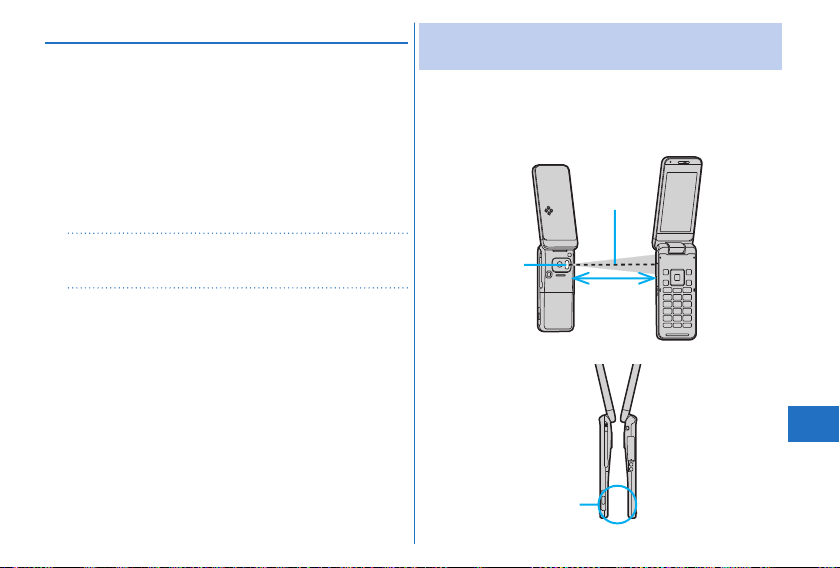
Backing up Data to microSD Card
You can back up Phonebook entries, schedule events, mail
messages, memos, bookmarks, and the settings on and
information about your FOMA terminal collectively onto the
microSD card. When restoring the backup data onto your
FOMA terminal, they are collectively restored.
Backing up data fr
card is collectively applied to all data, so emptied files in the
FOMA terminal ar
When you restore such data onto your FOMA terminal,
emptied files on the microSD card overwr
FOMA terminal created later.
mToolmicroSDBackup/Restore
1
Backup to microSD
Enter your Terminal Security Code
2
Select “YES”.
To restore backup data to FOMA terminal
1.
m▶Tool▶microSD▶Backup/Restore
Restore to phone
▶
2.
Enter your Terminal Secur ity Code▶Select “YES”.
om the FOMA terminal onto the microSD
e also backed up on the micr
oSD card.
ite the data in the
Sending/Receiving Data by Infrared
Communication/iC Communication
You can send or receive data such as Phonebook entries to
or from a device supporting infrared communication function
or iC communication function.
You cannot exc
device or FOMA terminal.
Infrared data port
hange data depending on the other party’s
Within ±15°
from the center
Within about
20 cm
<Infrared communication>
Face one another’s
f marks.
<iC communication>
More Convenient
93
Page 96
Sending Data
For infrared communications, set the receiving end terminal
first, and then start sending data within 30 seconds.
Submenu of the data to be sent
1
Select “Send Ir data” or “iC
transmission”.
Procedure for sending data might differ depending on the
data.
Select “YES”.
2
Receiving Data by Infrared Communication
mToolReceive Ir dataReceive
1
Select “YES”.
2
Receiving Data by iC Communication
More Convenient
Face the f mark of the receiving end
1
terminal which shows the Stand-by
display, to the f mar
k of the sending
end terminal.
Select “YES”.
2
94
Connecting to a PC
You can connect the FOMA terminal to a personal computer
to exchange WMA files, images or other files stored on
microSD card.
You can also access the Internet to perform data
communication.
ou need the FOMA USB Cable with Char
※Y
(option) or FOMA USB Cable (option).
orm data communication, you need to install the
※To per f
“FOMA communication configuration file” (driver).
For details, ref
You can download the “FOMA communication configuration
file” and “Manual for PC Connection” from the DOCOMO
website. (
http://www
er to “Manual for PC Connection”.
.nttdocomo.co.jp/english/support/
ge Function 02
)
DOCOMO Connection Manager
“DOCOMO Connection Manager” is a software which comes
in handy for DOCOMO’s data communication.
It enables easy PC settings according with the terms and
conditions of the user’s agreement.
It also makes it possible to check the amount of the data
communication and provides a rough estimate of the charges
using the charge counter function.
For details, refer to the DOCOMO website.
http://www.nttdocomo.co
service/connection_manager/)(In Japanese only)
.jp/support/utilization/application/
(
Page 97
Support
Troubleshooting
First of all, check to see if you need to update the software
program and then update it if necessary. See page 99 for
how to update software programs.
When symptom persists even after you check the
countermeasures for the problem you suffer, contact the
“Repairs” counter listed on the back page of this manual or
a repair counter specifi ed by DOCOMO.
The “Repairs” counter is available in Japanese only.
Power source
The FOMA terminal does not turn on.
…Make sure the battery pack is attached to the FOMA terminal
correctly. (See page 24)
…Make sure the battery is fully charged. (See page 25)
Charging
Cannot charge.
(The Call/Charging indicator does not light, or it fl ickers.)
…Make sure the battery pack is attached to the FOMA terminal
correctly. (See page 24)
…Make sure the power plug of the adapter is securely inserted into
the outlet or cigarette lighter socket.
…Make sure the adapter and the FOMA terminal are connected
correctly. (See page 26)
…When you use an AC adapter (option), make sure its connector is
fi rmly connected to the FOMA ter
holder. (See page 25, page 26)
…When you use the desktop holder, make sure the connector
terminal of the FOMA terminal is not stained. If it is stained, wipe
the terminal part with a dry cotton swab, etc.
…If you talk on the phone, have communications, or operate other
functions for a long time during battery charge, the temperature of
the FOMA terminal may rise to fl
that case, charge the battery after the FOMA terminal cools down.
(See page 25)
minal or the provided desktop
icker the Call/Charging indicator. In
Operation of terminal
While you operate the FOMA terminal or charge the battery, they
get hot.
…While operating or charging, or when you operate i-αppli programs,
talk on the videophone, or watch 1Seg programs for a long time
during battery charge, the FOMA terminal, battery pack, or adapter
may become warm, but this is not a saf
continue to use them.
ety hazard, so you can
Others
95
Page 98
The usable time of the battery is short.
…Make sure not to leave the FOMA terminal out-of-service-area for
a long time. If your FOMA terminal is left out-of-service area, it
searches for radio waves to establish communications, consuming
more power.
…The usable time of the battery pack varies depending on the usage
environment or its remaining life.
…Battery packs are consumables. The usable time slightly shortens
each time you char
extremely short as compared with the default state even if fully
charged, purchase the specifi ed battery pack.
The power of the FOMA terminal shuts down and restarts.
…If the terminal of the battery pack is stained, the connection might
deteriorate to shut down the power. Wipe the battery terminal with
a dry cotton swab, etc.
Pressing keys is disabled.
…Make sur
…Make sure Keypad Lock is deactivated. (See page 49)
…Make sure Side Key Guard is set to “OFF”.
The UIM is not recognized.
…Make sure you insert the UIM in the correct direction. (See page 24)
The clock does not show the correct time.
The clock may not show the correct time when the power has been
…
kept on for a prolonged period of time. Check whether “Auto time
adjust” and “Auto time difference” of “Set main time” ha
to “Auto” and then, move to a location with good signal reception,
turn off the power of FOMA terminal and then back on.
ge the battery. If the usable time becomes
e Dial Lock is deactivated. (See page 48)
Others
96
ve been set
Call
Cannot make a call by pressing numeric keys.
…Make sure Restrict Dialing is deactivated.
…Make sure the lock for “Keypad dial” in Original Lock is released.
(See page 49)
…Make sure Dial Lock is deactivated. (See page 48)
…Make sure Self Mode is deactivated.
Cannot talk.
” does not disappear even if you move to another place.
(“
You cannot make or receive a call, though the radio wave
conditions are not bad.)
…Turn off and on the FOMA terminal, or remove and attach/insert the
battery pack or UIM. (See page 24, page 27)
…Depending on the characteristics of the radio waves, you may not
be able to make or receive a call even if the FOMA terminal is
“within service area” or “
condition. Move to another place and redial.
…Make sure the call restrictions such as Call Rejection, Call
Acceptation, etc. are deactivated.
…Depending on the radio wave congestion state, calls and mail
messages may be congested and hard to be connected in crowded
places. In that case, the message “Please wait” or “Please wait
for a while” is displayed and a busy tone sounds. Move to another
place or wait for a while, and then redial.
” is displayed for a radio wave
Osaifu-Keitai
Cannot use Osaifu-Keitai function.
…If you remove the battery pack or activate Omakase Lock, the
Osaifu-Keitai function becomes unavailable regardless of the
setting of IC Card Lock. (See page 24, page 49)
…Make sure IC Card Lock is deactivated. (See page 48)
…Make sure you place the f mark on the FOMA terminal over the
scanning device. (See page 85)
Page 99

Warranty and After-sales Service
Warranty
Make sure that you have received a warranty card provided at
purchase. After checking the contents of the warranty card as well as
“Shop name and date of purchase”, keep the w
place. If you notice that necessary items of the warranty card are
not filled in, immediately contact the shop where you purchased the
minal from. The term of the w
FOMA ter
date of purchase.
All or part of this product including the accessories ma
for improv
ement without notice.
arranty car
d in a safe
arranty is one year from the
y be modified
After-sales Services
◎When there is a problem with the FOMA terminal
Before asking repairs, check “Troubleshooting” in this manual or in
“使いかたガイド (Guide)” mounted on the FOMA terminal. (“
たガイド (Guide)” is av
r
emains unsolved, contact the “Repairs” counter listed on the back
page of this manual for malfunction and consult them.
The “Repairs” counter is av
◎When r
epairs are necessitated as a result of consultation
Bring your FOMA terminal to a r
Note that your FOMA terminal is accepted for repair dur
counter’s business hours. Further, note that you ma
fixing depending on the malfunction state.
ailable in Japanese mode only.) If the problem
ailable in Japanese only
epair counter specified by DOCOMO.
使いか
.
ing the repair
y need to wait for
■In warranty period
・ Your FOMA terminal is repaired charge free in accordance with the
terms of warranty
・ Make sure that y
repair. If you do not sho
or malfunctions are regarded to be caused by y
(the damages of liquid crystal, connector, etc.), the repair cost is
char
ged even within the warranty period.
・ The cost for troubles caused b
consumables other than those specified by DOCOMO is charged
en within the warranty period.
ev
■Repairs may not be carried out in the following cases:
・ When exposure to w
When the moisture detection sticker has reacted)
・
When, as a result of inspection at our repair center, corrosion is
found due to exposure to w
when damage or deformation is found in the circuit boar
might not be carried out when damage to the connector terminal
(earphone/microphone terminal) or liq
body ar
※Even
if repair is feasible, the repair cost is charged when the trouble
you suffer matches one of the symptoms listed abo
supported by the war
■After the warranty period
We will repair your FOMA ter
■Spare parts availability period
The minimum storage period of the performance spar
required for maintaining performance) for the FOMA terminal is
basically six years after the closure of its production. Note, how
that your FOMA terminal might not be repaired depending on the
troubled portions because of the shortage of spar
.
ou bring the warranty card to the counter for
w the warranty card, or when troubles
y the use of devices and
ater is found at our repair counter (Example:
ater, dew condensation, or sweat, or
e found.]
ranty.
uid crystal, or cracks in the
minal on request (charges will apply).
our mishandling
d [Repairs
ve, which is not
e parts (parts
ever,
e parts.
Others
97
Page 100
◎Other points to note
Make sure not to modify the FOMA terminal or its accessories.
・ We might reject to r
modification.
The following might be r
・ To put stick
・ To decorate the FOMA terminal using adhesiv
replace the coverings etc. with those of other than DOCOMO
・ To
genuine products
・ Repairs of troubles or malfunctions resulting fr
modifications are charged ev
Do not peel the nameplate off the FOMA terminal.
Note that when we cannot ensure the contents described on the
nameplate and theref
the technical standard, it might happen that we at DOCOMO reject
to repair the malfunction.
The information such as about function settings, etc. might be
eset depending on the troubles or repairs, or the w
r
the FOMA terminal. Set the settings again.
The parts generating magnetism are used in the follo
of the FOMA terminal. Note that if you place a magnetism-sensitive
object such as a cash car
become unusable.
Portions: speaker, earpiece
This FOMA terminal comes with the waterproof perf
however, if the inside of the FOMA terminal gets wet or becomes
moist, imm
then visit a repair counter. The FOMA terminal ma
depending on the condition.
epair depending on the degrees of your
ers, etc. onto the liquid crystal or keys
ore cannot ver
ediately turn off the power and remove the battery pack;
Others
98
egarded as modifications:
es
en within the warranty period.
ify the product conformity to
d near the FOMA terminal, the card might
om the
ay you handle
wing portions
ormance,
y not be repaired
-
mode Fault Diagnosis Site
i
You can check on your FOMA terminal whether sending/
receiving mail messages, downloading images/melodies,
and others are normally working. When you think your FOMA
terminal is in trouble as a result of your check, contact the
“Repairs” counter listed on the back page of this manual.
The “Repairs” counter is available in Japanese only.
To connect to “
iモード故障診断サイト (i-mode Fault
Diagnosis Site)” [in Japanese only]
i-mode site: iMenu→お知らせ
→サポート情報 (Support infor
(News)
mation)
→お問い合わせ (Inquiries)
→故障・電波状況お問い合わせ先 (F
Radio wave condition)
ailures &
→iモード故障診断 (i-mode Fault Diagnosis)
QR code for
accessing the site
When you use overseas, you are charged a fee.
 Loading...