

Page 1
Page 2
System Requirements
• Pentium III 1 GHz processor or equivalent
• Screen resolution of 1024 x 768
• Browser must support 128 bit data encryption
• Internet connection speed of at least 128 kbps
• For the Windows Client, DirectX 7.0 or higher
• For the Java Client, Sun’s Java 2 (1.4 or higher)
• For the Log Server, the Microsoft Jet OLEDB 4.0 driver
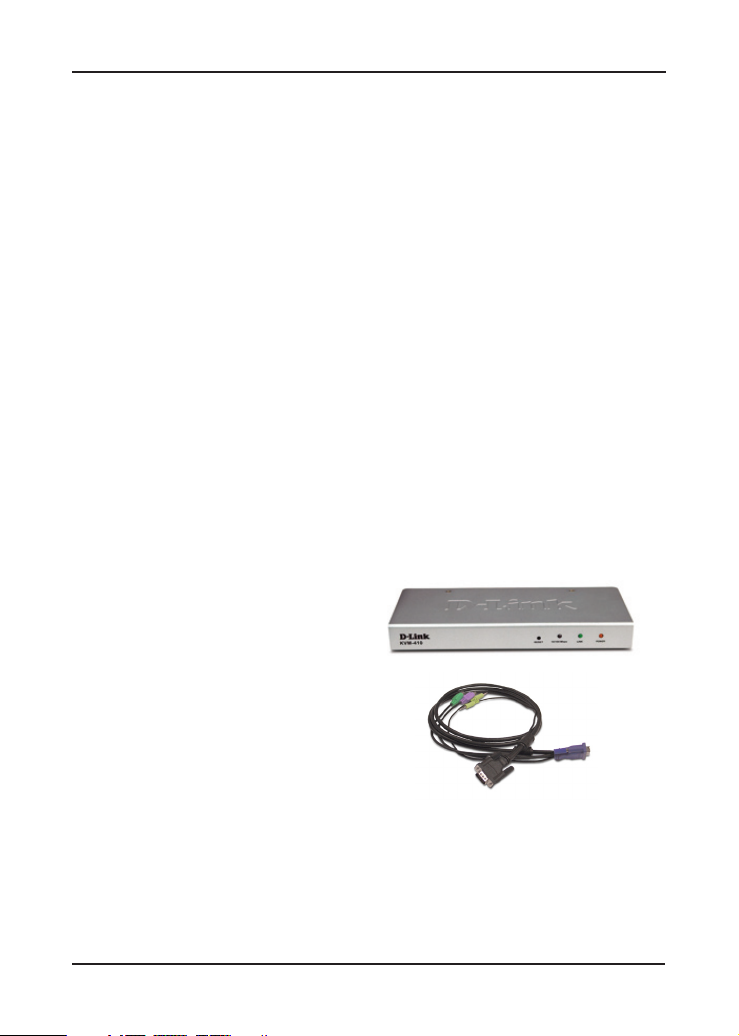
Package Contents
• D-Link KVM-410 IP KVM Switch
• Detachable 6 ft. KVM Cable
• Manual and Warranty on CD
• Quick Installation Guide
• Rack Mount Kit
• Power Adapter
• CAT5 Ethernet cable
If any of the above items are missing, please contact your reseller.
2D-Link KVM-410 Quick Install Guide
Page 3
Hardware Overview
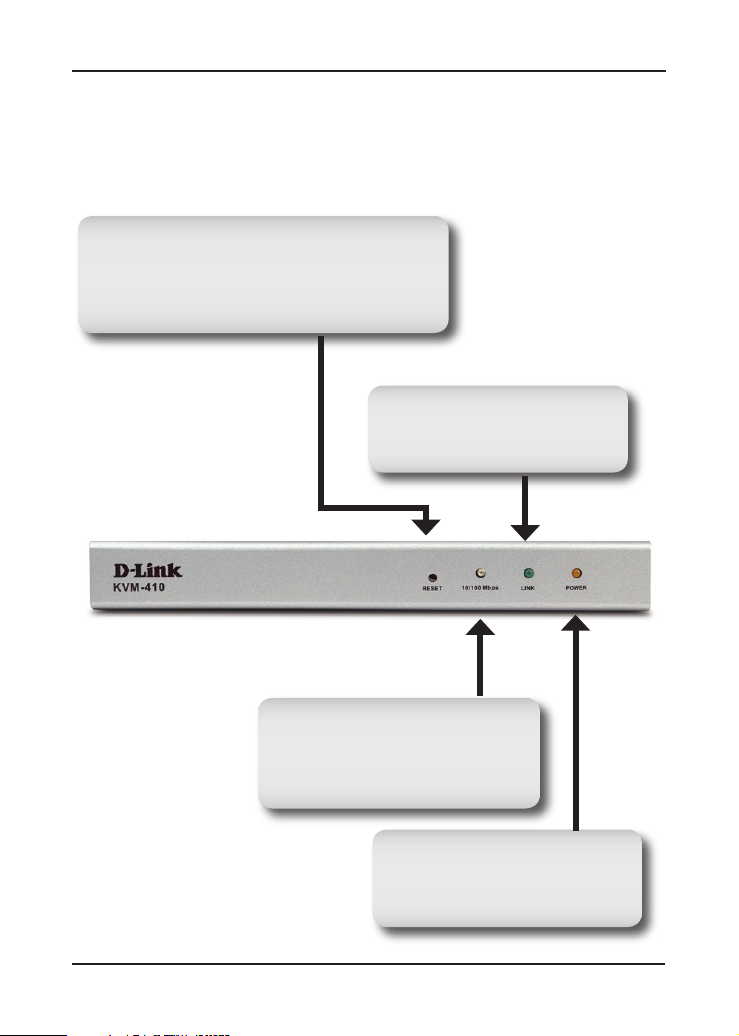
Front Panel
Reset Button
Press and hold this button to restart the KVM-410.
Press and hold this button for 2 or more seconds
while powering the KVM-410 on to perform a
system reset.
Link LED
A GREEN LED indicates a Client
program is accessing the device.
Data Speed LED
A GREEN LED indicates a 10Mbps
connection. An ORANGE LED indicates
a 100Mbps Ethernet connection.
Power LED
An ORANGE LED indicates the
KVM-410 is powered on and ready
for operation.
3 D-Link KVM-410 Quick Install Guide
Page 4
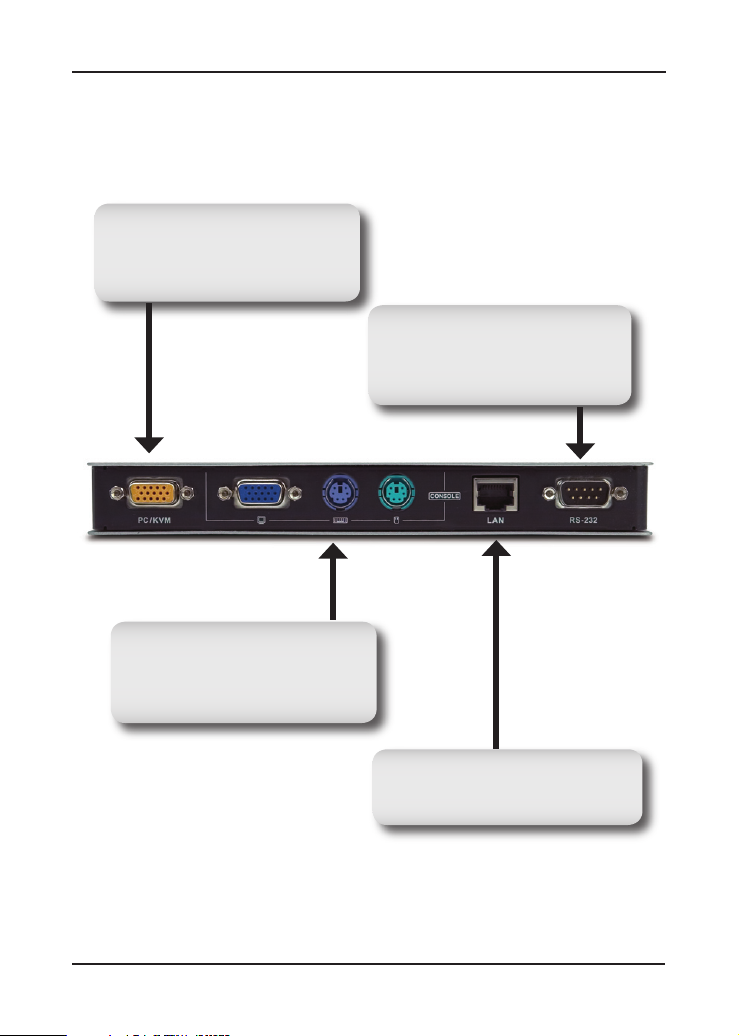
Rear Panel
KVM Port
Connect the included KVM cable
that links to the existing server,
workstation, or KVM switch.
Local Console
Conn ect the keybo ard, mouse,
and monitor cables from the local
console here.
RS-232 Port
This port is used when connecting
a PDU remote power management
module.
RJ-45 Port
Connect the LAN or WAN ethernet
cable here.
4D-Link KVM-410 Quick Install Guide
Page 5

Hardware Installation
Power off the existing KVM switch, server or workstation that will
be connected to the KVM-410.
Plug the local monitor, keyboard
and mouse into the KVM-410
Console Ports.
Connect the provided KVM cable
to the PC/KVM port.
Use the KVM cable provided to connect the KVM-410’s PC/KVM
port to the Keyboard, Video and Mouse ports of the existing KVM
switch, server, or workstation.
OR
5 D-Link KVM-410 Quick Install Guide
Page 6

Plug the LAN or WAN ethernet
cable into the RJ-45 LAN port.
Connect the power adapter to
the KVM-410 and then plug in
the adapter to an AC power
source.
Turn on the server, workstation, or existing KVM switch.
6D-Link KVM-410 Quick Install Guide
Page 7

Logging In
The KVM-410 can be managed and configured with an Internet
browser. To configure the KVM-410 using an Internet browser, you
must first log into the device by browsing to it’s IP Address.
When first powered on, the KVM-410, by default is set to obtain an
IP Address through DHCP. If it does not obtain an IP Address after
30 seconds, the KVM-410 automatically sets a static IP address of
192.168.0.60:
Note: Your IP Address may be different from the example shown
here. See the manual included on the product CD for other methods
of determining the IP Address of the KVM-410.
Open a web
browser and in the
address bar, enter
the IP Address of
the KVM-410.
A Security Alert dialog box will appear. Click Yes
to accept the certificate to be redirected to the login
screen.
7 D-Link KVM-410 Quick Install Guide
Page 8

Provide a user name and password to login
to the device. The default user name is
administrator, and the default password is
password.
After logging in, the KVM-410 Main Page will appears. This page
contains a menu at the top of the page for configuring the
KVM-410 and links to the client software utilities on the left side.
The installation and configuration of the KVM-410 is now complete.
8D-Link KVM-410 Quick Install Guide
Page 9

Windows Client
The Windows Client utility allows users remote access to the KVM-410
and control of any connected servers or workstations.
Note: Requires DirectX 7.0 or higher. To use the Java Client, refer
to the product manual included on the CD.
To run the Windows Client utility, select
Windows Client from the KVM-410 Main
Page.
A File Download prompt appears:
Click Run
9 D-Link KVM-410 Quick Install Guide
Page 10

When the Windows Client utility has loaded the following screen will
display:
Click Switch to take control of the server or
workstation the KVM-410 is connected to.
The remote display will appear on your desktop:
10D-Link KVM-410 Quick Install Guide
Page 11

A small control panel is located in the lower right hand corner of the screen.
This panel contains configuration options for the remote display.
Video
Key Pad Lock Key
Resolution
You can now access the KVM-410 remotely through the Windows
Client utility.
Exit
Indicators
IP Address
11 D-Link KVM-410 Quick Install Guide
Page 12

Technical Support
D-Link’s website contains the latest user documentation and
software updates for D-Link products.
U.S. and Canadian customers can contact D-Link Technical
Support through our website or by phone.
United States
Telephone
(877) 453-5465
Twenty four hours a day, seven days a week.
World Wide Web
http://support.dlink.com
Canada
Telephone
(800) 361-5265
Monday through Friday, 7:30am to 9:00pm EST.
World Wide Web
http://support.dlink.ca
Version 1.0
May 26, 2006
Copyright ©2006 D-Link Corporation/D-Link Systems, Inc. All rights reserved. D-Link and the D-Link logo are registered
trademarks of D-Link Corporation or its subsidiaries in the United States and other countries. Other trademarks are the property
of their respective owners. Product specifications, size and shape are subject to change without notice, and actual product
appearance may differ from that depicted herein.
12D-Link KVM-410 Quick Install Guide
 Loading...