

Page 1
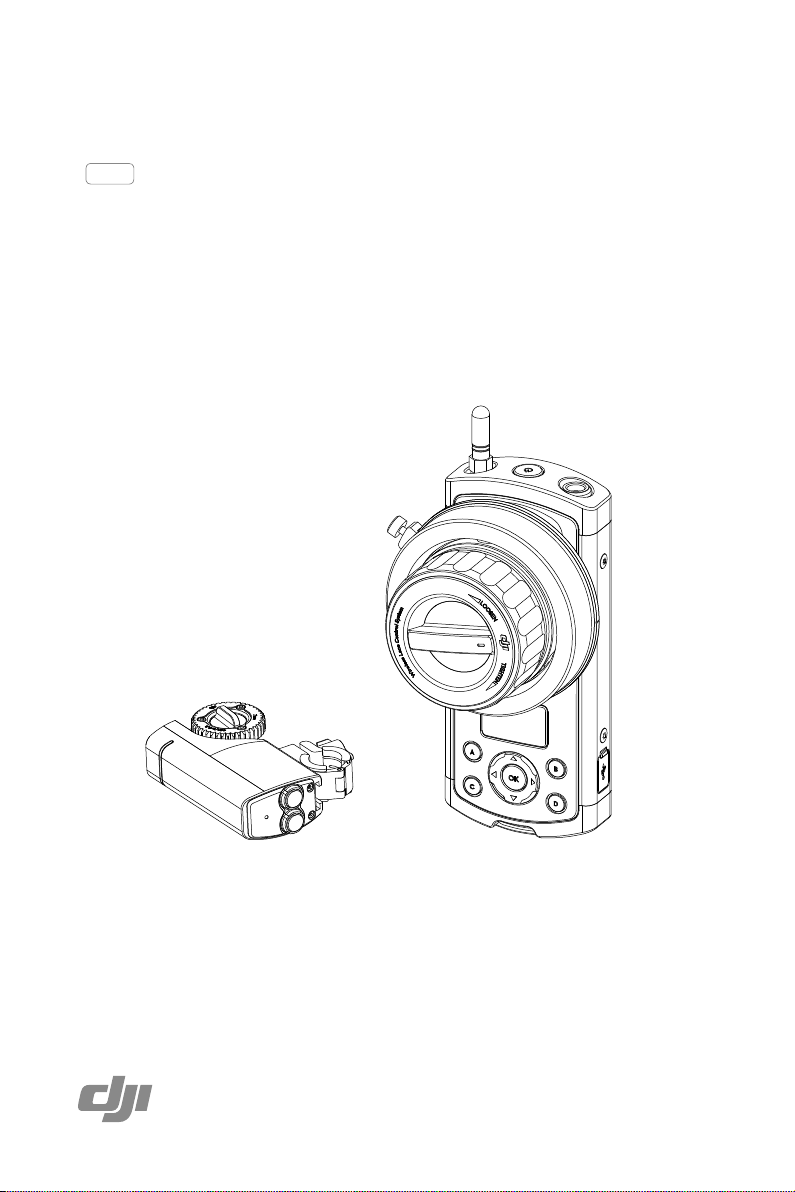
DJI FOCUS
2015.12V1.2
User Manual
Page 2
Searching for Keywords
Search for keywords such as “battery” and “install” to nd a topic. If you are using Adobe
Acrobat Reader to read this document, press Ctrl+F on Windows or Command+F on Mac
to begin a search.
Navigating to a Topic
View a complete list of topics in the table of contents. Click on a topic to navigate to that section.
Page 3

Disclaimer and Warning
WARNING
CAUTION
NOTICE
TIPS
Congratulations on purchasing your new DJI product. The information in this document affects
your safety and your legal rights and responsibilities. Read this entire document carefully to
ensure proper conguration before use. Failure to read and follow instructions and warnings in
this document may result in serious injury to yourself or others, or damage to your DJI product
or damage to other objects in the vicinity. This document and all other collateral documents
are subject to change at the sole discretion of DJI. For up-to-date product information, visit
http://www.dji.com and click on the product page for this product.
By using this product, you hereby signify that you have read this disclaimer and warning
carefully and that you understand and agree to abide by the terms and conditions herein. You
agree that you are solely responsible for your own conduct while using this product, and for
any consequences thereof. You agree to use this product only for purposes that are proper
and in accordance with all applicable laws, rules, and regulations, and all terms, precautions,
practices, policies and guidelines DJI has made and may make available.
DJI accepts no liability for damage, injury or any legal responsibility incurred directly or indirectly
from the use of this product. The user shall observe safe and lawful practices including, but not
limited to, those set forth in this document.
Using this Manual
Legend
Warning: Failure to properly follow procedures may result in property damage, collateral
damage, and serious or supercial injury.
Caution: Failure to properly follow procedures may result in property damage and
serious injury.
Notice: Failure to properly follow procedures may result in property damage, a small
possiblity of injury, or no possibility of injury.
Tips
Before You Begin
The following documents have been produced to help you safely operate and make full use of
your DJI Focus:
DJI Focus Quick Start Guide
DJI Focus User Manual
Check all of the included parts listed in the
Manual and watch the informational on the product page of DJI’s ofcial website (http://www.dji.
com/product/focus). Read the disclaimers and warnings above to understand your legal rights
and responsibilities. If you have any questions or problems during the installation, maintenance
or use of this product, please contact DJI or a DJI authorized dealer.
The content is subject to change.
Download the latest version from
http://www.dji.com/product/focus
In the Box
section below. Read this entire User
2015 DJI. All Rights Reserved.
©
3
Page 4

Contents
Disclaimer and Warning
Using this Manual
Legend
Before You Begin
Introduction
In the Box
Remote Controller
Motor
Getting Started
Prepare the Remote Controller
Mounting the Lens Gear Ring
Prepare the Motor
Mounting the Motor
Linking
System Status Indicator
Settings
Calibration
Menu
Quick Focus
Locking the Remote Controller
Focus Wheel Settings
3
3
3
3
5
5
7
8
9
9
10
11
12
14
14
15
15
16
17
17
18
Used with the Zenmuse X5
Firmware Update
Troubleshooting
Specifications
2015 DJI. All Rights Reserved.
4
©
Connection
Settings
Installing the DJI PC/MAC Assistant
Upgrade
19
19
19
20
20
21
22
22
Page 5
Introduction
DJI Focus is a wireless follow focus system that comprises of a remote controller and motor unit.
The low noise motor produces 25 dB of noise at 96 rpm, and has a maximum speed and torque
of 192 rpm and 0.35 Nm respectively. The system can be operated in wireless mode or cable
mode.
In the Box
Check that all of the following items are included in the package. If any items are missing,
contact DJI Support or your local DJI authorized dealer.
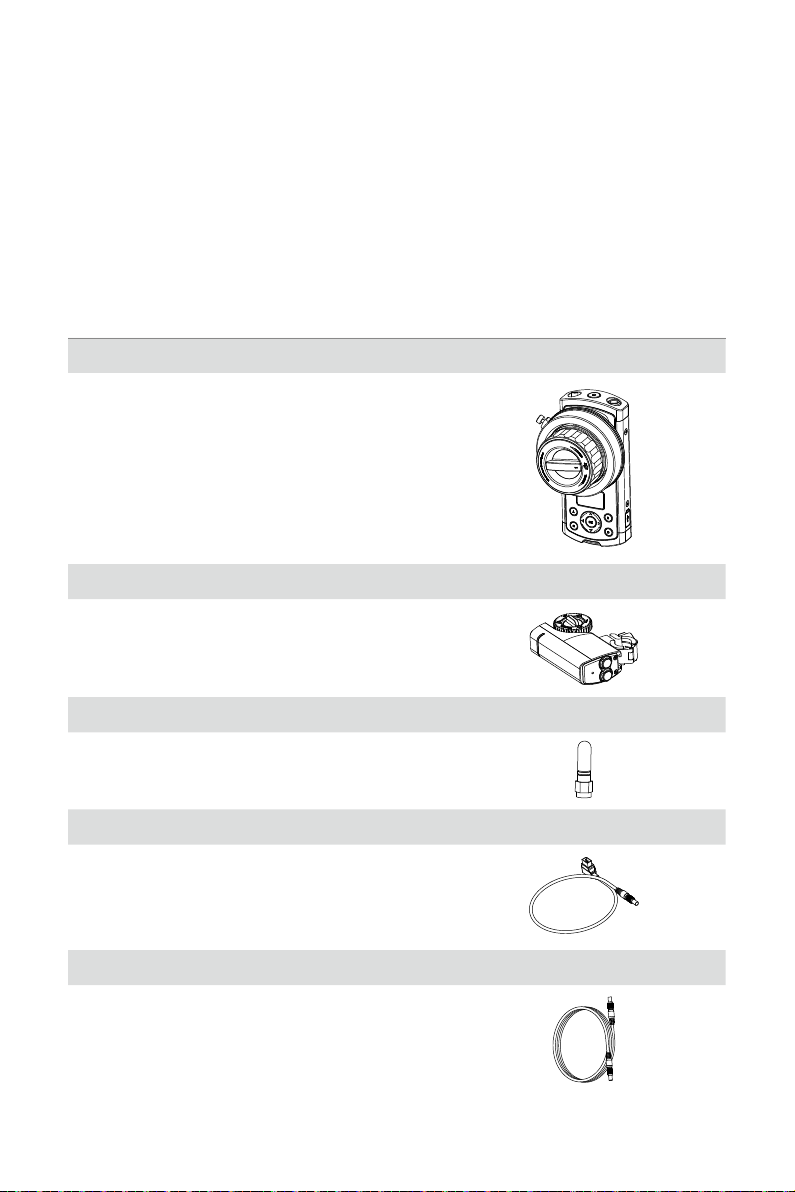
Remote Controller ×1
Handheld unit which controls the motor remotely.
Motor ×1
Mounted on the camera to control the lens.
Antenna ×2
Amplies the remote controller’s signal.
Motor Power Cable ×2
Connects the motor to the power supply.
Lengths: 40 cm and 75 cm.
Data Cable ×1
Used in cable mode and for rmware updates.
2015 DJI. All Rights Reserved.
©
5
Page 6

DJI FOCUS
User Manual
Micro USB Cable ×1
Use to charge or upgrade the remote controller.
Marking Ring ×3
Mark down the focus values for individual lenses on
this ring for reference.
Lens Gear Ring ×4
0.8 Mod, 105 Teeth
Inner Diameter: 60 mm
0.8 Mod, 105 Teeth
Inner Diameter: 70 mm
0.8 Mod, 105 Teeth
Inner Diameter: 80 mm
0.8 Mod, 105 Teeth
Inner Diameter: 90 mm
Neck Strap ×1
For carrying the remote controller around the neck
or over the shoulder between takes.
2015 DJI. All Rights Reserved.
6
©
Page 7
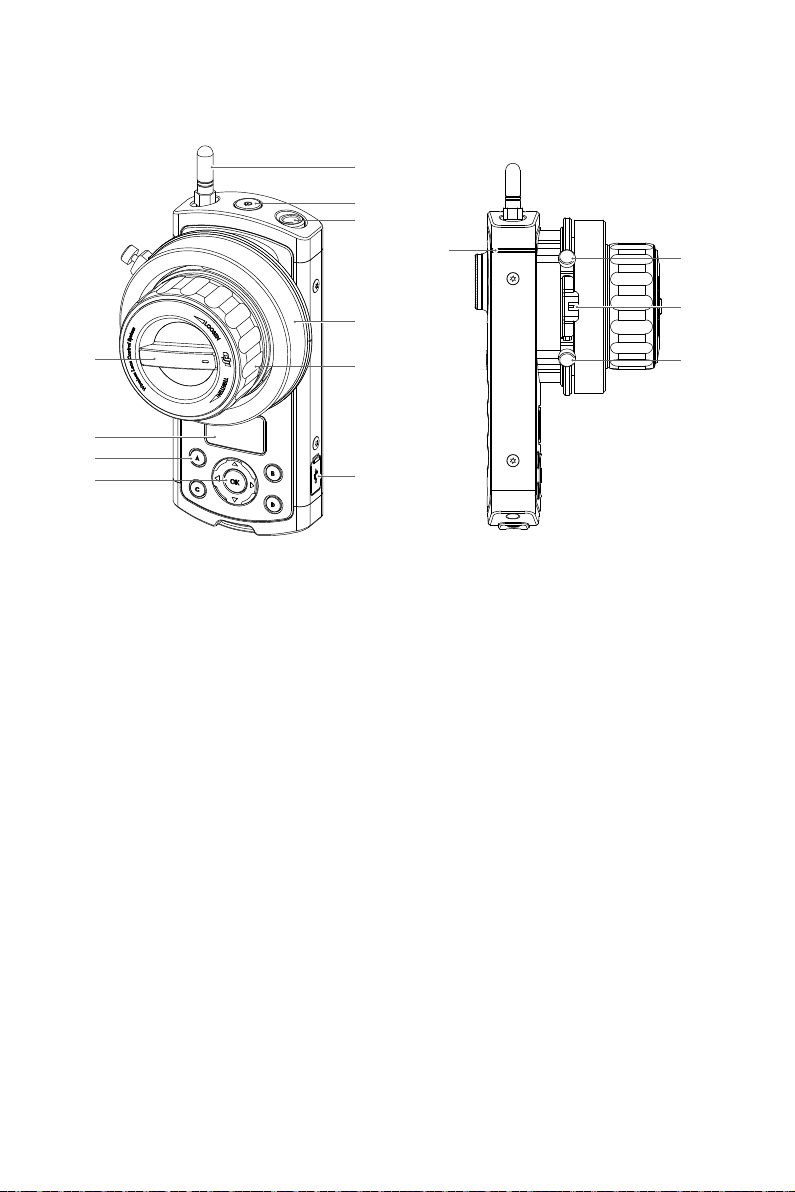
Remote Controller
[1]
[2]
[3]
[11]
[12]
[10]
[9]
[8]
[7]
[1] Antenna
Transmits at 2.4 GHz.
[2] Power Button
Press and hold for 2 seconds to power
on/off the remote controller.
[3] Communication Port
Allows the motor to communicate with the
remote controller.
Allows the motor to be upgraded.
[4] Marking Ring
Used to provide marking scale.
[5] Focus Wheel
Used to adjust the lens of your camera.
[6] Micro USB Port
Used to charge or update the remote
controller.
[7] Navigation Buttons
Allows you to navigate through menu items.
[4]
[5]
[6]
[8] Quick Focus Buttons
Assign focus points to buttons A, B, C
and D for quick access.
[9] OLED Screen
Displays the menu, system status and
battery level.
[10] Stiffness Control
Adjusts the stiffness of the focus wheel.
[11] System Status Indicator
Indicates the system status of the remote
controller.
[12] [13] Hard Stop Screws
Adjustable hard stops to limit the travel
range of the focus wheel.
[14] Backlight
Illuminates the marking ring from behind.
[14]
[13]
2015 DJI. All Rights Reserved.
©
7
Page 8

DJI FOCUS
[15]
User Manual
[18]
[16]
[15] Rosette Mount
For mounting accessories.
[16] Rear Screw
Needs to be removed in order to take off
the battery cover for battery replacement.
Motor
[1]
[2]
[6]
[5]
[1] Gear Knob
Secures the gear to the motor.
2015 DJI. All Rights Reserved.
8
©
[17]
[17] Lanyard Hole
Used to attach the neck strap.
[18] Link Button
Used to link the remote controller to the
motor or enter forced update mode.
[2] Gear
Turns the gear ring on the camera lens.
[3] Quick-Release Mount
For mounting the motor onto the camera.
The position of the mount can be adjusted
by sliding the mount upward or downward.
[4] Communication Ports
The two communication ports are identical.
[3]
Connect one port to an external power
supply, and, if you want to enable cable
mode, connect the other port to the
[4]
controller.
[5] Link Button
Used to link the motor to the remote
controller.
[6] System Status Indicator
Indicates the system status of the motor.
Page 9

Getting Started
WARNING
Prepare the Remote Controller
Charge the Battery
The remote controller contains a 1700 mAh battery that can power the device for up to 14 hours.
Charge the battery through the Micro USB port located on the side and check the battery level
on the OLED screen.
To replace the battery, remove the screw and battery cover on the back of the remote controller.
Micro USB Port
Only use ofcial DJI batteries that can be purchased on www.dji.com. DJI takes no
responsibility for any damage to your devices caused by non-DJI batteries.
Never use swollen, leaky, or damaged batteries. If your batteries show any abnormal
signs in performance, contact DJI or a DJI authorized dealer for assistance.
Never disassemble or pierce the battery in any way, or else the battery may leak,
catch re, or explode.
DO NOT attach the batteries to wall outlets or car charger sockets directly, and
always use a DJI approved adapter. DJI takes no responsibility if the battery is
charged using a third party charger.
Screw
Installing the Antenna
Screw the antenna onto the top of the remote controller. Remove the antenna during transportation
or when placing back into the case.
2015 DJI. All Rights Reserved.
©
9
Page 10

DJI FOCUS
NOTICE
TIPS
CAUTION
User Manual
Attaching the Neck Strap
Pull down and hold the button on the neck strap connector, slide it through the mounting hole on
the bottom of the remote controller, and then release the button.
Ensure the neck strap is attached securely.
Mounting the Lens Gear Ring
DJI Focus comes with four sizes of lens gear rings. Choose the lens gear ring that best ts your
camera lens.
Ensure the screw is tight and that the lens gear ring makes good contact with the lens.
Ensure the lens gear ring screw is installed properly to allow an unobstructed full
range of motion.
You may also use a standard 0.8 Mod lens gear ring of your own.
The lens gear ring is not required if you are using a cinema camera with gear
rings.
2015 DJI. All Rights Reserved.
10
©
Page 11

DJI FOCUS
User Manual
Prepare the Motor
The motor gear can be mounted on either side of the motor. To remove the gear, loosen the
knob at the center the gear. Ensure the gear is mounted securely.
The motor can be clamped to a 15 or 19 mm support rod. To clamp the motor to a 19 mm
support rode, rst remove the two adapters on the clamp:
1. Loosen the knob and remove the quick-release mount.
1
2
2. Push the knob away from the clamp and open up the clamp. Slide and remove the two
adapters on the clamp.
2015 DJI. All Rights Reserved.
©
11
Page 12

DJI FOCUS
User Manual
Mounting the Motor
To mount the motor onto your camera support rod:
1. Loosen the knob on the quick-release mount and slide the motor onto the support rod.
Tighten the knob to secure the motor’s position on the support rod.
2. Tighten the knob to secure its position. Ensure the motor gear and lens gear ring make good
contact. Ensure the lens gears are not too tight to avoid premature wear to the gears or
damage to the lens.
Lens Gear Ring
Motor Gear
3. Connect the power port on the motor to an external power source using the supplied power
cable. If your camera is mounted on the Ronin-M, connect the motor to the P-TAP Accessory
power port on the Ronin-M.
Motor Power Cable
2015 DJI. All Rights Reserved.
12
©
Page 13

DJI FOCUS
TIPS
User Manual
Ensure the motor is mounted rmly.
Keep your ngers, hair and clothing away from the motor when it is in operation.
4. DJI Focus can work in wireless mode or cable mode. To use cable mode, connect the
communication port on the remote controller to the communication port on the motor using
the signal cable.
Cable mode will take precedence over wireless mode.
Ensure the motor is connected to an external power supply.
2015 DJI. All Rights Reserved.
©
13
Page 14

DJI FOCUS
User Manual
Linking
Linking is only required when the remote controller or motor is replaced with a new one.
To link the remote controller to the motor:
1. Turn on both devices.
2. Press the link button on the bottom of the remote controller, or use the navigation buttons to
enter Menu
3. Within the next 5 seconds, press the link button on the motor.
Settings Connect Motor Connect.
Link Button
Settings
Power Off
Connect Motor
Back
Select
Link Button
4. The system status indicators on both the remote controller and motor will blink slowly to indicate
that linking is successful.
System Status Indicator
The system status indicator is a white LED that is located on both the remote controller and
motor.
Remote Controller Description
Solid light
Blinks quickly (4 times per second) RC is disconnected from the motor. / RC is charging.
Motor Description
Solid light
Blinks quickly (4 times per second)
2015 DJI. All Rights Reserved.
14
©
RC is connected to the motor and functioning normally.
/ Forced update.
RC is connected to the motor and functioning normally.
/ Forced update.
RC is disconnected from the motor. / Overcurrent
Protection.
Page 15

Settings
When both the remote controller and motor are turned on. The OLED screen of the remote
controller will display the following information.
[1] Battery Level
[2] Focus Wheel Travel Percentage
[3] Focus Wheel Travel Bar
[4] Main Menu
[5] Calibration Menu
[6]
Calibrate Menu
50.0%
[7]
[1]
[2]
[3]
[4][5]
[6] Wireless Signal Strength
[7] Calibration Status
Calibration
The motor remembers your last calibration and does not need to be re-calibrated every time it
is turned on unless you swap lenses or change the motor position after the motor has been shut
off. It is recommended to perform a calibration in order for the motor to nd the end points on a
lens when installing the motor.
If your camera lens has mechanical limits, use auto calibration. Otherwise, use Manual-Remote
or Manual-Hand calibration.
Auto
On the remote controller, select Calibrate
The motor gear will rotate in each direction in turn to locate the mechanical limits of your camera
lens. When the calibration is complete, select Back to apply the calibration or Stop to cancel.
Manual-Remote
Select Calibrate
Manual-Remote Start to begin. Hold down the up arrow to rotate the lens
in one direction, and select OK when it reaches the desired upper limit. Next, press the down
arrow to rotate the lens in the other direction, and select OK when it reaches the desired lower
limit.
Note: You will be reminded if the motor reaches its mechanical limits.
Auto (Shortcut: Press the 'A' and 'B' buttons together).
Manual-Hand
Select Calibrate
Manual-Hand Start to begin. Rotate the lens manually to the desired upper
and lower limits of your camera lens, and select OK to conrm the limits.
When the calibration is complete, select Back to apply the calibration or Stop to cancel.
2015 DJI. All Rights Reserved.
©
15
Page 16

DJI FOCUS
TIPS
User Manual
The motor will automatically reserve a 1mm margin at both mechanical limits for
protection.
When to Calibrate
1. If there is an ‘OK’ icon on the OLED screen, the motor is working normally and does not need
calibration.
2. If there is an ‘OK’ icon on the OLED screen but it is blinking, the motor was moved to a
different mounting position and needs to be re-calibrated.
3. If no ‘OK’ icon is on the OLED screen, the motor is not responding to the remote controller
accurately and should be calibrated.
Menu
Press the right arrow or OK button to enter the Menu.
Set the motor and system parameters and check the rmware version on this page.
Motor Parameters
Calibration Torque: The motor torque used for calibration-min, normal or max.
Run Torque: The motor torque used for normal operation-min, normal or max.
Speed: The rotational speed of the motor-slow, medium or fast.
Acceleration: The acceleration of the motor-slow, medium or fast.
Rack Speed: The speed at which the motor moves between the preset focus points A, B, C
and D. The rack speed ranges from 1% to 100%, and is proportional to the motor speed and
acceleration.
Direction: The motor’s direction of rotation-normal or reversed.
Default: Restore the default motor parameters.
Settings
Power Off: Idle time before the remote controller auto-powers off-10 min, 30 min, 60 min or
never.
Connect Motor: Select Link and then press the link button on the motor to start linking.
Endpoints: The upper and lower travel limits of the focus wheel. Turn the focus wheel to the
desired upper travel limit and select Set Point 1. Then, turn the focus wheel to the desired lower
travel limit and select Set Point 2. Turning the focus wheel from Point 1 to Point 2 will rotate the
camera focus by a full cycle.
LED Control: Enable or disable the LED and system status indicators on the remote controller
and motor individually.
Default: Restores the default settings for the remote controller.
About
Displays the current rmware version of the remote controller.
2015 DJI. All Rights Reserved.
16
©
Page 17

DJI FOCUS
TIPS
User Manual
Quick Focus
Allows rapid switching between four preset focus points.
Assigning a Focus Point
Adjust the lens focus to the desired focus point by turning the focus wheel. Hold down one of
the letters until it blinks to store the focus point. To reassign a focus point, press and hold the
letter to discard its value, and then redo the rst step.
Switching to a Focus Point
Press one of the letters to apply its assigned focus point. The OLED screen will display the
active Quick Focus letter. The selected letter will light up and the remaining letters will blink
rapidly. Press the active letter again to exit Quick Focus.
After selecting a Quick Focus button, you can ne tune the focus by turning the
focus wheel without changing its assigned value.
There are mechanical limits on both the focus wheel and motor. If the motor does
not respond to the focus wheel, check if the motor has reached its mechanical
limit.
Locking the Remote Controller
The remote controller can be locked to avoid unintentional operations. All controls except the
power button and OK button are disabled in the locked state.
To lock the remote controller, press and hold the OK button until a lock icon appears on the
OLED screen. Repeat this procedure to unlock the remote controller.
50.0%
Calibrate Menu
2015 DJI. All Rights Reserved.
©
17
Page 18

DJI FOCUS
User Manual
Focus Wheel Settings
Setting Mechanical Limits
The two adjustable hard stop screws around the focus wheel can be used to limit the travel
range physically.
1. Loosen the hard stop screws, slide them to the desired positions and tighten.
2. The travel range of the focus wheel is now limited to the distance between the two hard stop
screws.
Adjusting the Stiffness
Turn the control knob at the center while holding the focus wheel to adjust the stiffness of the
wheel. Adjust the focus wheel until it reaches a stiffness or looseness that feels comfortable.
2015 DJI. All Rights Reserved.
18
©
Page 19

Used with the Zenmuse X5
TIPS
DJI Focus is fully compatible with the Zenmuse X5 series gimbal and camera. No calibration is
required when using the Focus with the Zenmuse X5 camera.
Connection
To allow communication between the two devices, connect the communication port on the
Focus remote controller to the CAN Bus port on the Inspire 1 remote controller using the
dedicated CAN Bus cable.
Ensure that the Zenmuse X5 camera is set in AF mode.
The remote controller overrides the in-app controls. You will not be able to adjust
the focus or aperture in the DJI GO app.
You can purchase the dedicated CAN Bus cable on the DJI Store.
Settings
The Focus remote controller will display the following information when it is connected to the
Inspire 1 Pro or Raw system.
50.0%
Menu
Zenmuse X5 Settings
Aperture: Enable or disable aperture control.
Direction: The motor’s direction of rotation – normal or reversed.
Default: Restore the default motor parameters.
Settings
Power Off: Idle time before the remote controller auto-powers off-10 min, 30 min, 60 min or never.
Endpoints: The upper and lower travel limits of the focus wheel. Turn the focus wheel to the
desired upper travel limit and select Set Point 1. Then, turn the focus wheel to the desired lower
2015 DJI. All Rights Reserved.
©
19
Page 20

DJI FOCUS
TIPS
TIPS
travel limit and select Set Point 2. Turning the focus wheel from Point 1 to Point 2 will rotate the
camera focus by a full cycle.
LED Control: Enable or disable the LED and system status indicators on the remote controller
and motor individually.
Default: Restores the default settings for the remote controller.
User Manual
About
Displays the current rmware version of the remote controller.
Aperture Control
Once aperture control is enabled, the 'D' button is used to switch between focus control and
aperture control.
To switch from focus control to aperture control, press the 'D' button and then follow the
instructions in the DJI GO app to operate the focus wheel. Press the 'D' button again to switch
back to focus control.
Firmware Update
The DJI Focus rmware can be updated through the DJI PC/MAC Assistant.
Installing the DJI PC/MAC Assistant
Windows
1. Download the DJI WIN DRIVER INSTALLER and Assistant from the DJI Focus product page
on DJI.com.
2. Double click the Assistant installer and follow the steps to nish the installation. Then, launch
the Assistant.
The Assistant installer can be used on Windows XP (32 or 64 bit) or above.
Mac OS X
1. Download the Assistant installer (.DMG) from DJI.com, and then run the installer and follow
the prompts to nish the installation.
2. When launching for the rst time, if using Launchpad to run the Assistant, Launchpad will
block access because Assistant has not been reviewed by the App Store. Locate the
Gimbal icon using the Finder, press Control, then click the icon (or right-click the icon using
a mouse). Choose Open from the shortcut menu, then click Open in the dialog box to launch
the program.
3. After the first successful launch, double click the Gimbal icon, as usual, to launch the
program using the Finder or Launchpad.
The DMG installer supports Mac OS X 10.9 or above.
2015 DJI. All Rights Reserved.
20
©
Page 21

DJI FOCUS
NOTICE
User Manual
Upgrade
You can view the latest rmware versions of all components on this page.
Upgrading the Remote Controller
Turn ON the controller and connect it to your computer via the Micro-USB cable and wait until
the indicator LED in the Assistant blinks blue. Click Upgrade to upgrade the Follow Focus
Remote, and then upgrade the Follow Focus Remote Radio.
Upgrading the Motor
Turn on the controller, and connect to the motor through data cable, then connect the controller
to your computer. Click “Upgrade” to upgrade the Follow Focus Motor, and then upgrade the
Follow Focus Motor Radio.
Forced Upgrade
Use Forced Upgrade if the remote controller or motor rmware upgrade fails. To initiate Forced
Upgrade, power on the remote controller or motor while holding down the link button.
Ensure your PC is connected to the Internet.
Close any antivirus programs and network rewalls.
Ensure that the controller or the motor is powered on during the upgrade.
Do not disconnect the USB cable during the upgrade.
2015 DJI. All Rights Reserved.
©
21
Page 22

Troubleshooting
The motor does not respond to the remote controller.
1. Make sure you have calibrated the motor at least once. The motor will not respond unless it
has been calibrated for the rst time.
2. Check for any bent or damaged pins on the data cable plugs. Replace the cable if
necessary.
3. Ensure the polarity of the power cable is correct and the P-Tap is rmly connected to the
power supply.
4. Try connecting the motor to the remote controller directly using the data cable.
5. Try re-linking the motor to the remote controller.
Specications
General
Operating Frequency 2.415-2.473 GHz
Max Transmission Distance 100 m (outdoors and unobstructed)
Transmitter Power 14 dBm
Operating Temperature -20° to 55° C
Motor
Weight 170 g
Dimensions 90×50×26 mm
Max. Torque 0.35 Nm
Max. Speed 192 rpm
Operating Current Free current: 80 mA (@12 V)
Stall current: 2 A (@12 V)
Operating Voltage 9-16 V
Noise <25 dB (@96 rpm)
Rob Clamp Inner Diameter 15 or 19 mm
Gear 0.8 Mod, 40 Teeth
Remote Controller
Weight 745 g
Dimensions 153×86×90 mm
Battery Model: FB01-554461
LiPo
3.7 V, 1700 mAh, 6.29 Wh
2015 DJI. All Rights Reserved.
22
©
Page 23

If you have any questions about this document, please contact DJI
by sending a message to DocSupport@dji.com.
2015 DJI. All Rights Reserved.
©
 Loading...