

Disney STAR WARS DARTH VADER Instructions Manual
INSTRUCTIONS
CAUTION:
away from the wheels.
To prevent entanglement, keep all hair
DARTH VADER
CAUTION:
burns if electronics get wet. Do not operate vehicle
through water or snow.
™
RC VEHICLE
Surfaces may become hot and cause
5+
© & ™ Lucasfilm Ltd.
service.mattel.com
DMB45-0970-G1
1100790277-DOM
KEEP THESE INSTRUCTIONS FOR FUTURE REFERENCE AS THEY
CONTAIN IMPORTANT INFORMATION. IMPORTANT: PLEASE READ
ALL “CONSUMER INFORMATION” BEFORE OPERATING YOUR VEHICLE.
165
CONTENTS / FEATURES
OR
OR
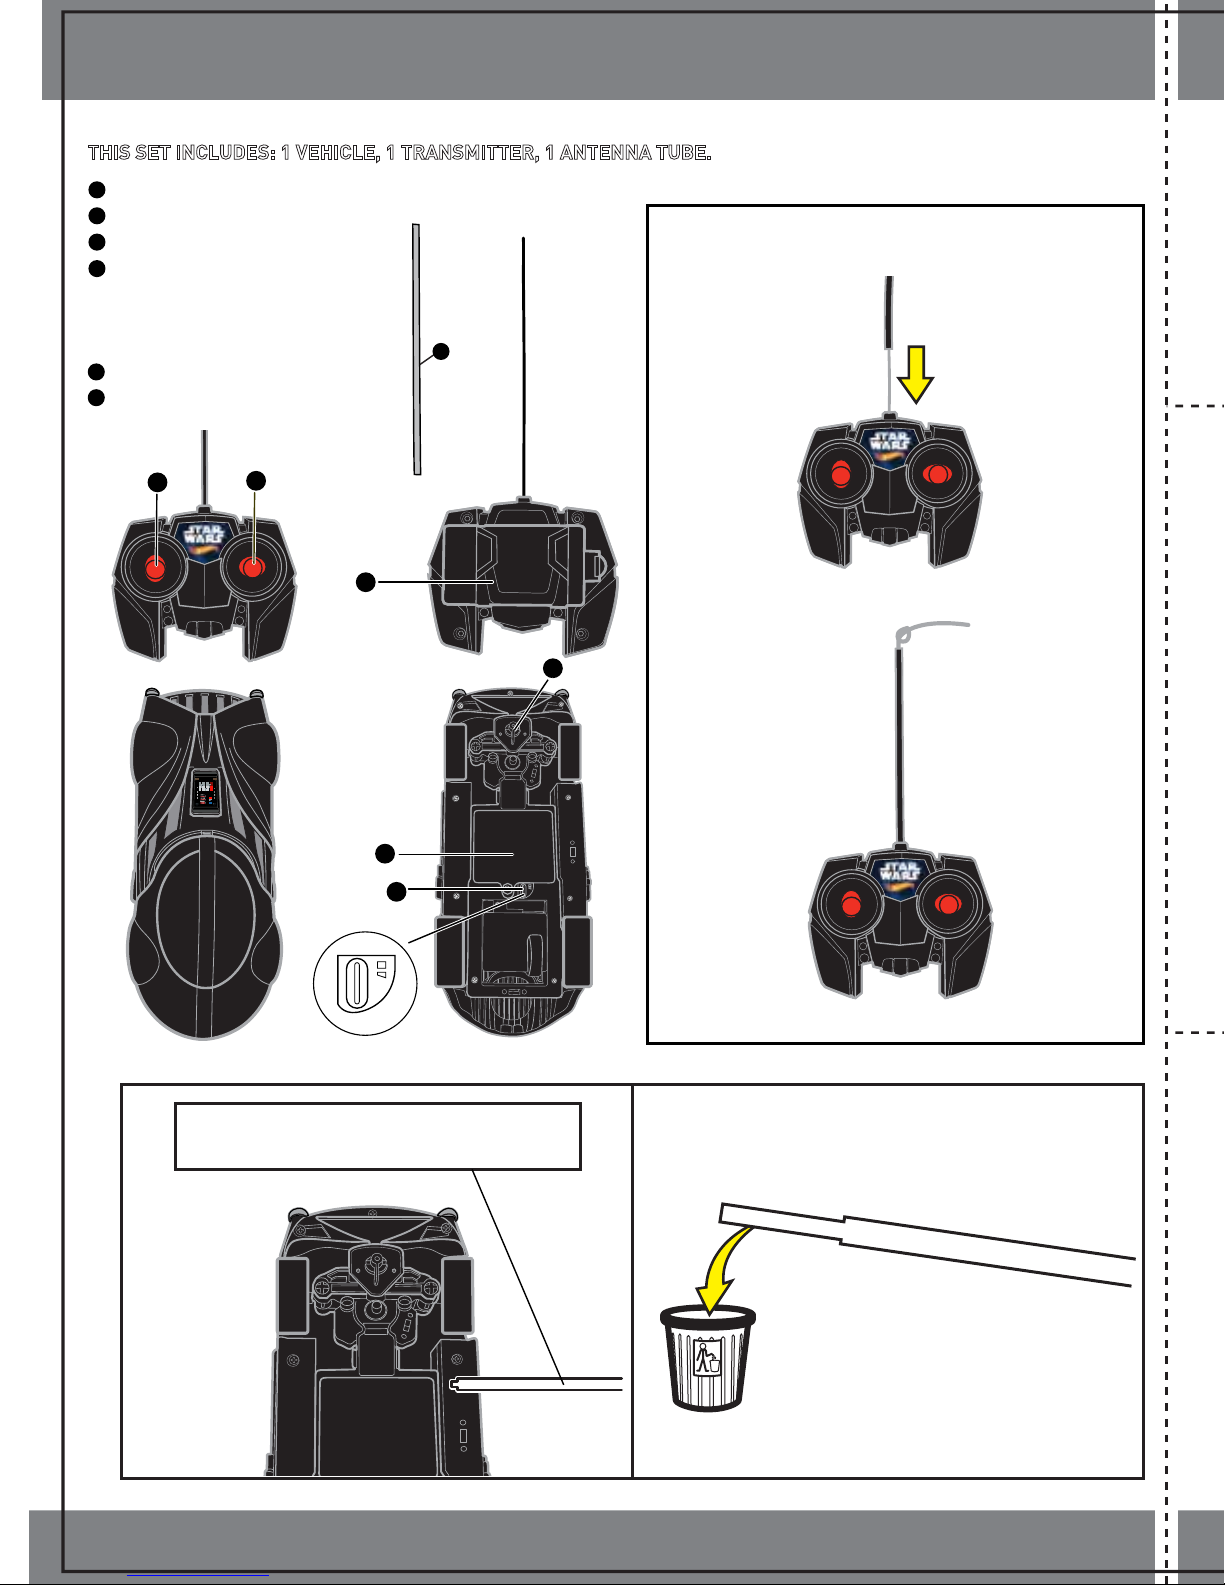
THIS SET INCLUDES: 1 VEHICLE, 1 TRANSMITTER, 1 ANTENNA TUBE.
1
Forward / Reverse
2
Left / Right
3
Battery cover
4
Steering adjuster:
adjust left or right,
if necessary, to keep
vehicle running straight
5
ON(I) / OFF(0)
6
Antenna tube
6
a. Insert flexible antenna wire through antenna tube,
then insert end of tube firmly into transmitter hole.
BATTERY INSTALLATION
Vehicle & Transmitter
Vehicle includes 4 AA (LR6) alkaline batteries.
Transmitter requires 2 AA (LR6) alkaline batteries, not included.
For longer life, use alkaline batteries.
Dispose of batteries safely.
1
2
3
b. Tie a knot at the end of the flexible antenna
wire to keep the tube in place.
Vehicle
4
3
5
I
O
Wires are not to be inserted into socket-outlets.
1. Unscrew the battery cover with a Phillips head
screwdriver (not included).
2. Remove batteries included for demonstration purposes and
dispose of them safely.
3. Your vehicle requires 4 AA (LR6) alkaline batteries.
Install with polarity (+/-) as shown inside the battery compartment.
Replace battery cover and tighten screw.4.
If plastic tab is still attached to vehicle,
pull it out and dispose of it before play.
Transmitter
1. Remove the battery cover.
2. Transmitter requires 2 AA (LR6) alkaline batteries. Install with
polarity (+/-) as shown inside the battery compartment.
Replace battery cover and push shut.3.
NOTE: Once the batteries are installed the transmitter
will always be “ON” and will work automatically the
moment you use it.
 Loading...