

Page 1
Hotpot° & Aquagrad°
X
MA
MIN
Royal Appliance International GmbH
Jagenbergstraße 19
41468 Neuss
Germany
℡ +49 (0) 2131 - 60 90 0
+49 (0) 2131 - 60 90 60 95
info@dirtdevil.de
Roya-10858-3 • A5 • 13.12.2010
www.dirtdevil.de
elektrischer Kochtopf mit Temperaturregler
DE
Bedienungsanleitung
electric cooking-pot with temperature control
GB
Operating Manual
Bouilloire avec régulateur de température
FR
Mode d‘emploi
elektrische kookpan met temperatuurinstelling
NL
Bedieningshandleiding
Olla eléctrica con regulador de temperatura
ES
Manual de instrucciones
Кастрюля с температурным регулятором
RUS
Инструкция по эксплуатации
Sıcaklık regülatörlü elektrikli ısıtma tenceresi
TR
Kullanma Talimatı
elektrický hrnec s regulátorem teploty
CZ
Návod k obsluze
Varný hrniec s regulátorom teploty
SK
Návod na obsluhu
Posoda z regulatorjem temperature
Sl
Navodila za uporabo
lonac za kuhanje s termometrom
HR
Uputa za upotrebu
Főzőedény, hőfokszabályzóval
HU
Kezelési útmutató
Page 2
Bedienungsanleitung ................................................................................ 4 - 13
Operating Manual ....................................................................................... 14 - 23
Mode d‘emploi............................................................................................. 24 - 33
Bedieningshandleiding .............................................................................. 34 - 43
Manual de instrucciones ........................................................................... 44 - 53
Инструкция по эксплуатации ................................................................. 54 - 63
Kullanma Talimatı ....................................................................................... 64 - 73
Návod k obsluze ......................................................................................... 74 - 83
DE
GBFRNLESTRCZSKSIHRHU
RUS
Návod na obsluhu ...................................................................................... 84 - 93
Navodila za uporabo................................................................................... 94 - 103
Uputa za upotrebu ..................................................................................... 104 - 113
Kezelési útmutató ...................................................................................... 114 - 123
2
Page 3
1
D
6
4
11
10
5
9
X
7
MA
5
4
3
8
MIN
2
1.1
1.2
1
1.8
1.7
1.6
3
1.5
1.4
1.3
Page 4
Übersicht über Ihren Hotpot°
Übersicht über Ihren Hotpot°
Vielen Dank!
Es freut uns, dass Sie sich für den Hotpot°
entschieden haben! Mit dem Hotpot° haben
Sie ein Gerät zum wunschtemperaturgenauen Erwärmen von Gerichten, Babynahrung, Konserven und dergleichen erworben.
Wir danken Ihnen für den Kauf und das entgegengebrachte Vertrauen!
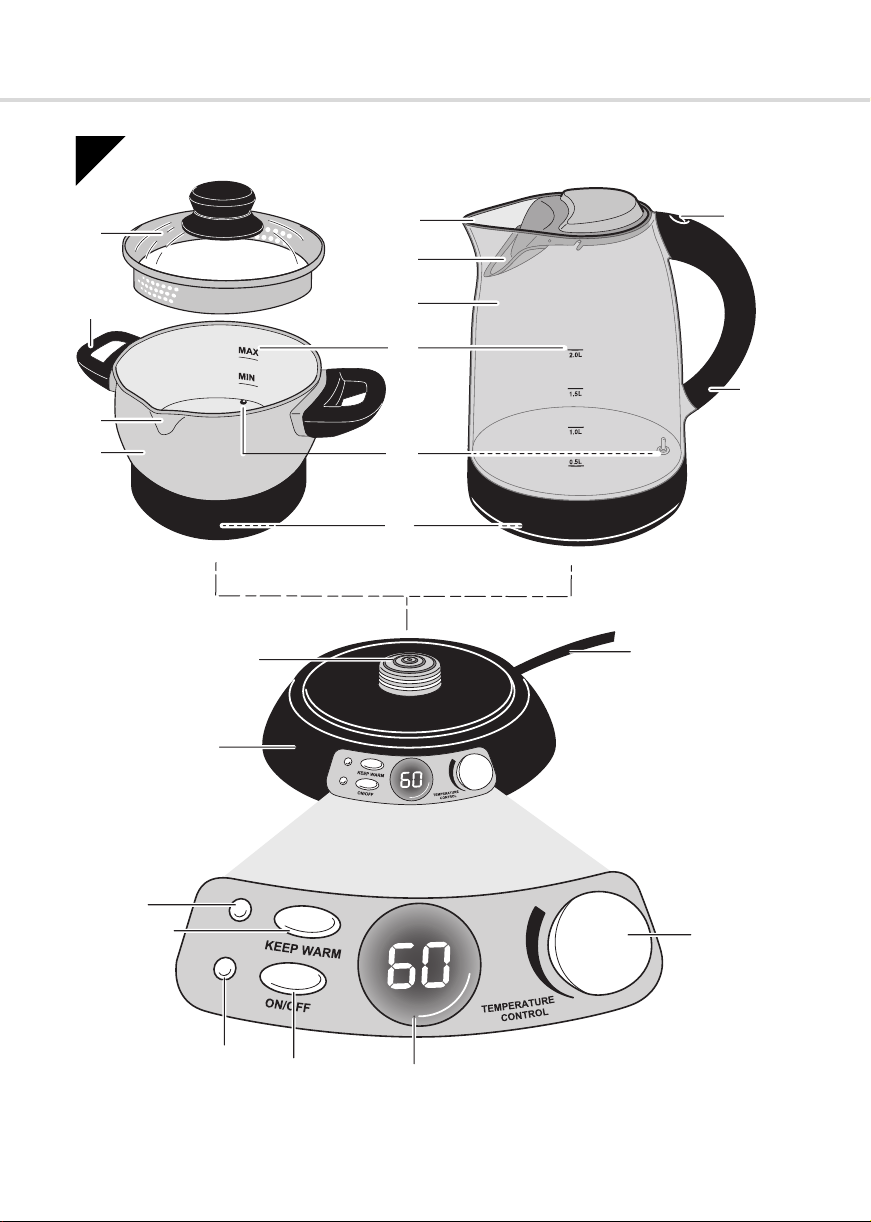
Überblick
(Abb. 1):
1 Sockel
(je nach Ausführung im Lieferumfang)
1.1 Kontaktstecker
1.2 Stromkabel
1.3 Temperatur-Drehregler
1.4 Temperatursollwert-Anzeige
1.5 Ein-/Aus-Schalter „ON/OFF“
1.6 Betriebskontrollleuchte (rot)
1.7 Warmhaltetaste „KEEP WARM“
1.8 Warmhaltekontrollleuchte (grün)
2 Kontaktaufnahme
3 Hotpot°
4 Ausschank
5 Handgriff
6 Glasdeckel mit integriertem Sieb
7 „MIN“-/„MAX“-Markierung
8 Temperaturfühler
9 Wasserkessel Aquagrad°
(je nach Ausführung im Lieferumfang)
10 Deckel mit integriertem Filtersieb
11 Deckelentriegelung („ “)
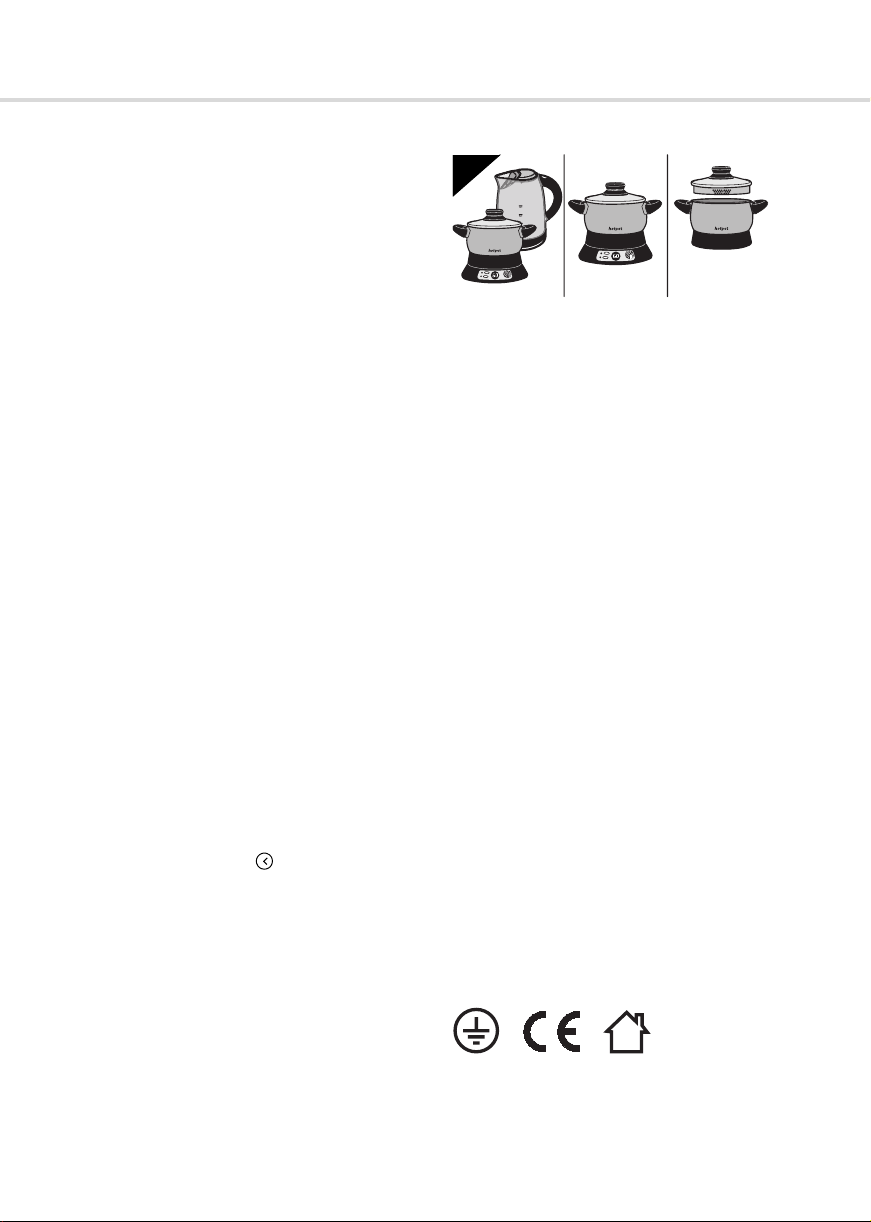
Lieferumfang/Varianten
2
X
MA
MIN
12 3
1 Hotpot° mit Sockel und Aquagrad°
(Standardlieferumfang)
2 Hotpot° mit Sockel
(Special Edition ohne Aquagrad°)
3 Hotpot° solo (Special Edition
ohne Aquagrad° und Sockel)
- Betriebsanleitung (nicht abgebildet)
Technische Daten
Geräteart : elektrischer Kochtopf/
Modell : Hotpot° und Aquagrad°
Spannung : 220–240 V~, 50 Hz,
Leistung
Hotpot°
Leistung
Aquagrad°
Füllmenge
Hotpot°
Füllmenge
Aquagrad°
Temperierbar im
Bereich
Genauigkeit
(bei 1 l Füllmenge)
Gewicht nur Topf/
Kessel
Gewicht Topf/Kessel mit Sockel
Wasserkocher mit
Temperaturregler
M9119 (-0/-1/.../-8/-9)
Class I
: 800 W max.
: 2300 W max.
: 0,25 l min.
1,0 l max.
: 0,5 l min.
2,0 l max.
: 30 °C – 100 °C
:± 4°C
:ca. 1 kg
: ca. 1,6 kg
Technische und gestalterische Änderungen im Zuge
stetiger Produktverbesserungen vorbehalten.
© Royal Appliance International GmbH
4
Page 5
Sicherheitshinweise
1 Sicherheitshinweise
1.1 zur Bedienungsanleitung
Lesen Sie diese Bedienungsanleitung
vollständig durch, bevor Sie mit dem Gerät arbeiten.
Bewahren Sie die Anleitung gut auf.
Falls Sie das Gerät an Dritte weitergeben,
geben Sie auch die Bedienungsanleitung mit.
Die Nichtbeachtung dieser Anleitung kann
zu schweren Verletzungen oder Schäden
am Gerät führen.
Für Schäden, die aufgrund der Nichtbeachtung dieser Bedienungsanleitung entstehen,
übernehmen wir keine Haftung.
Wichtige Hinweise für Ihre Sicherheit sind besonders gekennzeichnet. Beachten Sie diese
Hinweise unbedingt, um Unfälle und Schäden
am Gerät zu vermeiden:
WARNUNG:
Warnt vor Gefahren für Ihre Gesundheit und
zeigt mögliche Verletzungsrisiken auf.
ACHTUNG:
Weist auf mögliche Gefährdungen für das
Gerät oder andere Gegenstände hin.
HINWEIS:
Hebt Tipps und Informationen hervor.
1.2 zu heißem Wasser/Dampf
Verbrühungsgefahr!
Heißes Wasser/Dampf kann zu
schweren Verbrühungen führen. Achten Sie daher besonders auf Folgendes:
Nehmen Sie niemals während des Be-
triebs den Deckel ab.
Betreiben Sie das Gerät nicht ohne Deckel.
Vermeiden Sie den Kontakt mit heißem
Dampf, der beim und nach dem Kochen entweicht.
1.3 zur Stromversorgung
Gefahr eines elektrischen
Schlages!
Das Gerät wird mit elektrischem Strom betrieben, dabei besteht grundsätzlich die
Gefahr eines elektrischen
Schlags. Achten Sie daher besonders auf Folgendes:
Tauchen Sie das Gerät niemals in Wasser
oder andere Flüssigkeiten. Füllen Sie das
Wasser ausschließlich wie beschrieben in
das Gerät ein.
Fassen Sie den Netzstecker oder den So-
ckel niemals mit nassen Händen an.
Wenn Sie den Netzstecker aus der Steck-
dose herausziehen wollen, ziehen Sie immer
direkt am Stecker. Ziehen Sie niemals am
Stromkabel, es könnte reißen.
Achten Sie darauf, dass das Stromkabel
nicht geknickt, eingeklemmt, überfahren wird
oder in der Nähe von Wasser- oder Hitzequellen betrieben wird.
Stellen Sie vor dem Anschließen an die
Stromversorgung sicher, dass die auf dem
Typenschild angegebene Spannung mit der
Spannung Ihrer Steckdose übereinstimmt.
Falsche Spannung kann das Gerät zerstören.
Benutzen Sie nur Steckdosen mit Schutz-
kontakt.
Benutzen Sie keine Mehrfachsteckdosen.
Benutzen Sie allenfalls geprüfte, einfache
Verlängerungskabel, die für die hohe Leistungsaufnahme des Geräts ausgelegt sind.
Stecken Sie den Netzstecker niemals mit
Gewalt in die Steckdose. Modifizieren Sie niemals Netzstecker.
Setzen Sie keine anderen Geräte auf den
Sockel.
Bevor Sie das Gerät reinigen oder warten,
schalten Sie es immer aus und ziehen Sie den
Netzstecker.
DE
5
Page 6

Sicherheitshinweise
1.4 zu heißen Oberflächen
Verbrennungsgefahr!
Das Äußere des Geräts wird
während des Betriebs heiß!
Achten Sie daher besonders
auf Folgendes:
Tragen Sie das volle Gerät mit Vorsicht
und ausschließlich am Handgriff.
Berühren Sie nie die heiße Heizplatte.
Bevor Sie das Gerät reinigen oder warten,
schalten Sie es immer aus, ziehen Sie den
Netzstecker und lassen Sie es auskühlen.
1.5 zu bestimmten Personengruppen
Dieses Gerät ist nicht dafür bestimmt,
durch Personen (einschließlich Kinder) mit
eingeschränkten physischen, sensorischen
oder geistigen Fähigkeiten oder mangels Erfahrung und/oder mangels Wissen benutzt zu
werden, es sei denn, sie werden durch eine
für ihre Sicherheit zuständige Person beaufsichtigt oder erhielten von ihr Anweisungen,
wie das Gerät zu benutzen ist.
Kinder sollten beaufsichtigt werden, um
sicherzustellen, dass sie nicht mit dem Gerät
spielen.
Schalten Sie das Gerät bei Verlassen des
Raumes immer aus und ziehen Sie den Netzstecker aus der Steckdose.
Bewahren Sie es unzugänglich auf.
Halten Sie heiße Gefäße sowie Gefäße
mit heißem Inhalt von Babys und Kleinkindern
fern. Tragen Sie niemals Kleinkinder und heiße Gefäße sowie Gefäße mit heißem Inhalt
gleichzeitig.
Verpackungsmaterialien dürfen nicht zum
Spielen verwendet werden. Es besteht Erstickungsgefahr.
Personen mit Sensibilitätsstörung, insbe-
sondere verminderte Empfindlichkeit für Temperaturunterschiede, müssen beim Einsatz
dieses Gerätes ungleich vorsichtiger sein.
1.6 zum Aufstellort
Achten Sie darauf, dass das Gerät und
alle Zubehörteile nicht mit heißen Oberflächen in Berührung kommen. Stellen Sie es
nicht auf oder in der unmittelbaren Nähe von
Wärmequellen wie z. B. Herdplatten ab.
Stellen Sie das Gerät zum Betrieb auf einen
trockenen, ebenen und stabilen Untergrund.
1.7 zur bestimmungsgemäßen
Verwendung
Das Gerät darf nur im Haushalt eingesetzt
werden. Es ist für eine gewerbliche Nutzung
nicht geeignet.
Der Hotpot° darf ausschließlich für das
Erhitzen von kalten Nahrungsmitteln und Gerichten verwendet werden.
Der Aquagrad° darf ausschließlich für
das Erhitzen von kaltem Trinkwasser verwendet werden.
Darüber hinausgehende Verwendung gilt als
nicht bestimmungsgemäß und ist untersagt.
Untersagt ist für den Aquagrad°:
Das Einfüllen anderer Flüssigkeiten oder
Medien als kaltem Trinkwasser. Insbesondere das Erhitzen von Getränken und Gerichten
ist untersagt.
Untersagt ist für Aquagrad° wie Hotpot°:
Der Betrieb mit Nicht-Lebensmitteln.
Der Betrieb mit Füllmengen unterhalb der
„MIN“- oder oberhalb der „MAX“-Markierung.
Die Verwendung im Freien.
1.8 falls das Gerät defekt ist
Betreiben Sie niemals ein defektes Gerät
oder ein Gerät mit einem defekten Stromkabel. Wenn die Anschlussleitung dieses Geräts
beschädigt wird, muss sie durch den Hersteller oder seinen Kundendienst oder eine ähnlich qualifizierte Person ersetzt werden, um
Gefährdungen zu vermeiden.
Geben Sie ein defektes Gerät zur Repara-
tur an einen Fachhändler oder den Royal Appliance-Kundendienst.
6
Page 7
Gerät vorbereiten
2 Gerät vorbereiten
2.1 Auspacken
1. Packen Sie das Gerät und alle Zubehör-
teile aus.
2. Prüfen Sie den Inhalt auf Vollständigkeit
und Unversehrtheit.
ACHTUNG:
Transportieren/versenden Sie das Gerät
grundsätzlich immer in der Originalverpackung, damit es keinen Schaden nimmt.
Heben Sie dazu die Verpackung auf.
Entsorgen Sie nicht mehr benötigtes Verpackungsmaterial entsprechend den in Ihrem
Land geltenden Vorschriften.
HINWEIS:
Sollten Sie einen Transportschaden bemerken, wenden Sie sich umgehend an Ihren
Händler.
2.2 Aufstellen
1. Stellen Sie den Sockel fern von Wasser-
und Hitzequellen auf einen trockenen,
ebenen und stabilen Untergrund.
2. Setzen Sie den Deckel auf das Gerät.
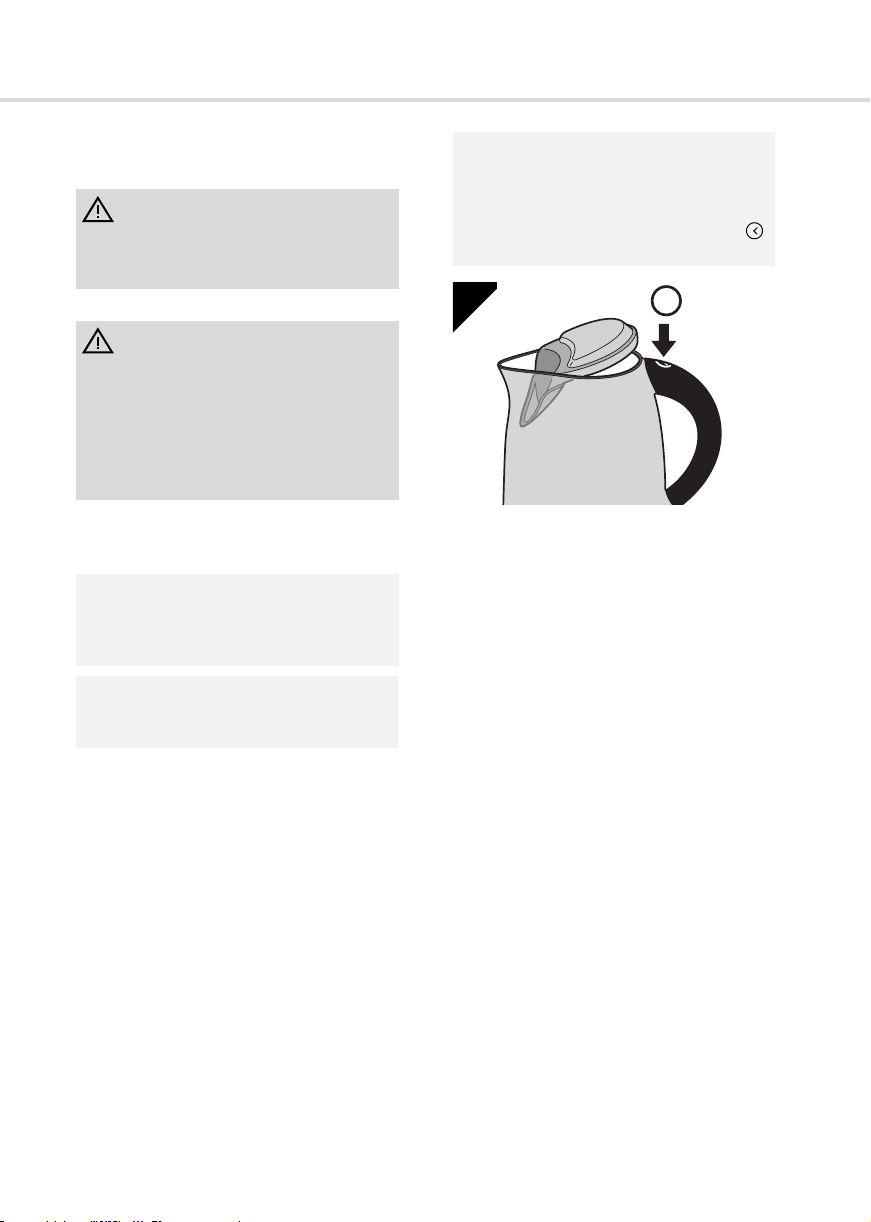
2.3 Deckel des Wasserkessels
montieren
2
2.
2.
1.
1.
2.4 Anschließen
ACHTUNG:
Betreiben Sie das Gerät nur, wenn die auf
dem Typenschild angegebene elektrische
Spannung mit der Spannung Ihrer Steckdose übereinstimmt. Falsche Spannung
kann das Gerät zerstören.
1. Wickeln Sie das Stromkabel von der Un-
terseite des Sockels gerade so weit ab wie
nötig.
WARNUNG:
Verletzungsgefahr!
Achten Sie beim Verlegen des Stromkabels
auf Unfallsicherheit.
2. Fixieren Sie das Stromkabel, indem Sie es
in der Austrittsöffnung des Sockels wieder
festklemmen.
3. Stecken Sie den Netzstecker in eine
Steckdose mit Schutzkontakt.
Im Display der TemperatursollwertAnzeige erscheint nun „EE“.
Dies zeigt an, dass der Sockel bereits mit Strom versorgt wird, aber
das Gerät noch nicht darauf abgestellt ist.
4. Stellen Sie das Gerät auf dem Sockel ab,
so dass der Kontaktstecker einrastet.
In der Temperatursollwert-Anzeige
blinkt jetzt „OF“.
Ihr Gerät ist jetzt einsatzbereit.
ACHTUNG:
Vermeiden Sie ein Trockenlaufen des
Geräts, da es trotz der eingebauten
Abschaltautomatik sonst auf Dauer Schaden nehmen kann.
DE
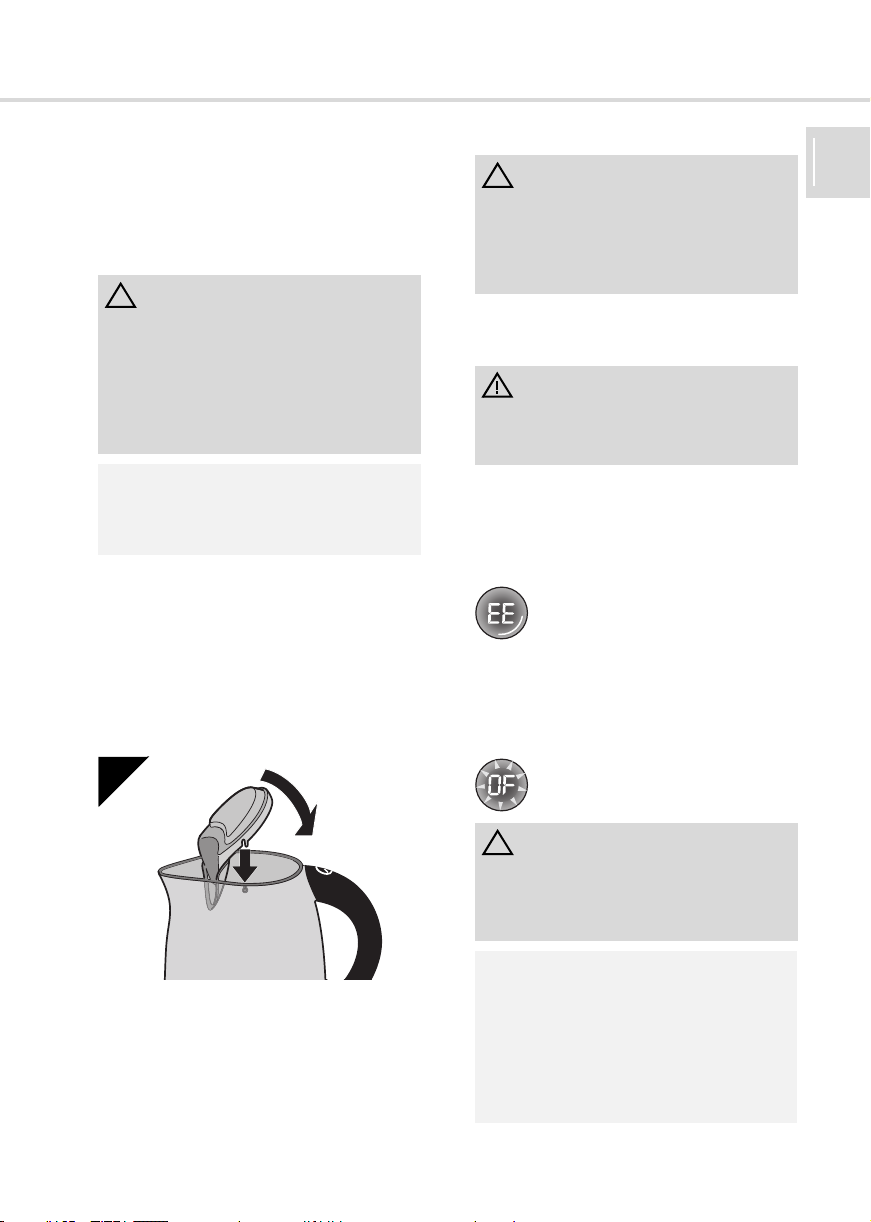
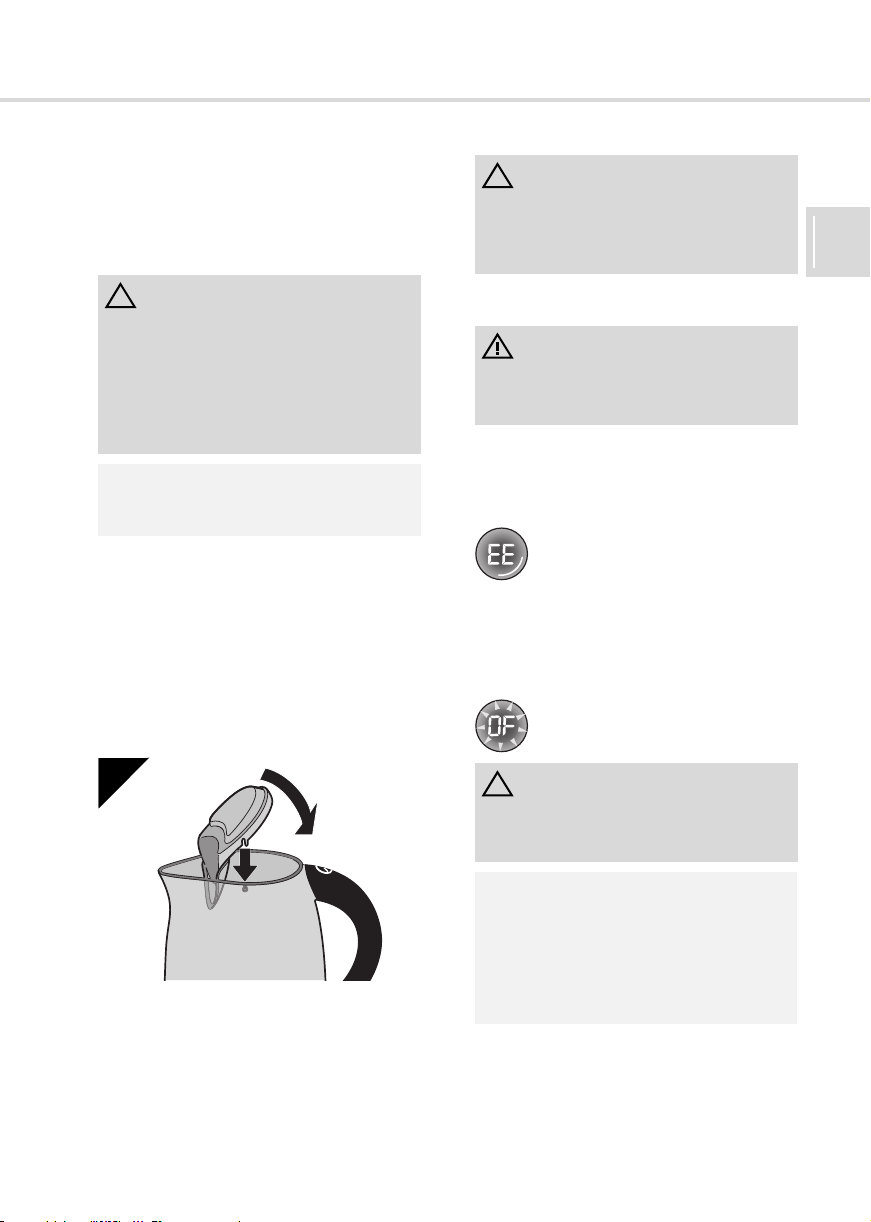
1. Setzen Sie den Deckel wie abgebildet auf
den Wasserkessel auf (Abb. 2/1.).
Schieben Sie den Deckel mit den beiden
Aussparungen auf die zwei Stifte am
Rand des Wasserkessels (Abb. 2/1.).
2. Drücken Sie den Deckel nach hinten fest,
bis er hör- und spürbar einrastet (Abb. 2/2.).
HINWEIS:
Wird das Gerät versehentlich im leeren
Zustand eingeschaltet, schaltet es der
Überhitzungsschutz automatisch ab (sehen
Sie hierzu auch ZKapitel 3.4,
„Abschaltautomatik“). Lassen Sie das Gerät
erst völlig auskühlen, bevor Sie wieder
Wasser/Gargut einfüllen.
7
Page 8
Kochen
3 Kochen
3.1 Befüllen
.
WARNUNG:
Verletzungsgefahr!
Prüfen Sie das Gerät vor jeder Benutzung.
Ein beschädigtes Gerät darf nicht verwendet werden.
1. Nehmen Sie das Gerät vom Sockel.
WARNUNG:
Gefahr eines elektrischen Schlags!
Beim Befüllen dürfen die Unterseite des
Geräts sowie der Sockel keinesfalls nass
werden, da sonst die dort liegenden Kontakte einen Kurzschluss verursachen können. Folglich muss auch das Äußere des
Geräts trocken sein, ehe dieser auf den
Sockel gestellt werden darf.
2. Geben Sie nur so viel Wasser/Gargut in
das Gerät, dass der Füllstand zwischen
der „MIN“-/„MAX“-Markierung liegt.
HINWEIS:
Bedenken Sie dabei, dass die Füllmenge im
Hotpot° weiter zunimmt, falls neben dem
Wasser noch weiteres Gargut in das Gerät
gegeben werden soll.
HINWEIS:
Um Strom zu sparen, füllen Sie nur so viel
Wasser ein, wie Sie gerade benötigen.
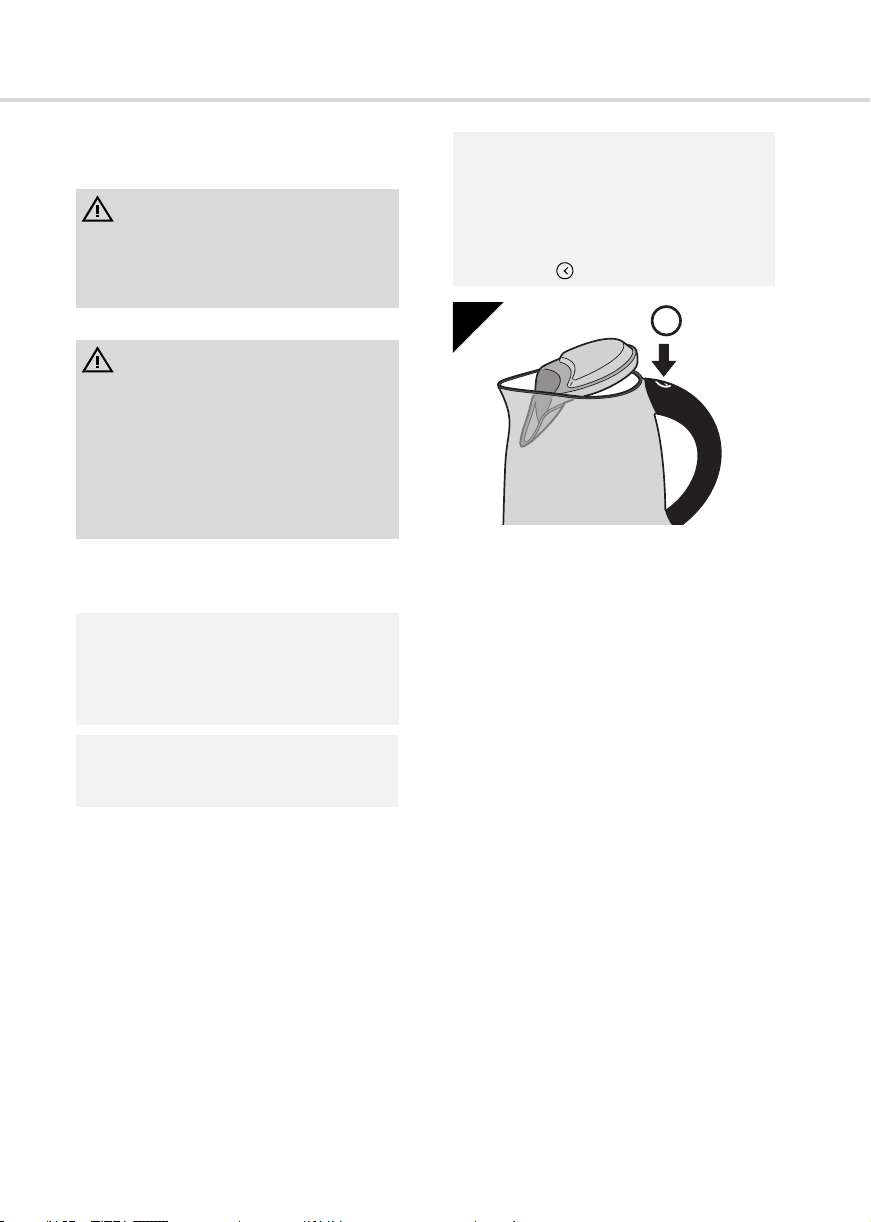
HINWEIS:
Befüllen Sie den Aquagrad° entweder bei
geschlossenem Deckel durch die Einfüllund Ausschanköffnung oder bei geöffnetem
Deckel. Den Deckel können Sie durch Betätigen der im Handgriff integrierten Deckelentriegelung „ “ (Abb. 3) öffnen.
3
3. Schließen Sie den Deckel.
4. Stellen Sie das Gerät zurück auf den So-
ckel.
<
3.2 Erster Gebrauch
1. Geben Sie Wasser bis zur „MAX“-Markie-
rung in das Gerät (ZKapitel 3.1,
„Befüllen“).
2. Bringen Sie das Wasser zwei- bis dreimal
zum Kochen (ZKapitel 3.3, „Täglicher
Gebrauch“) und gießen Sie es nach jeder
Erhitzung vollständig weg.
8
Page 9
Kochen
3.3 Täglicher Gebrauch
WARNUNG:
Verbrühungsgefahr!
Das Gerät darf nicht mit fehlendem oder
geöffnetem Deckel in Betrieb genommen
werden. Anderenfalls besteht Verbrühungsgefahr durch herausspritzende Flüssigkeiten.
4
1. Befüllen Sie das Gerät wie unter ZKapitel
3.1, „Befüllen“ beschrieben.
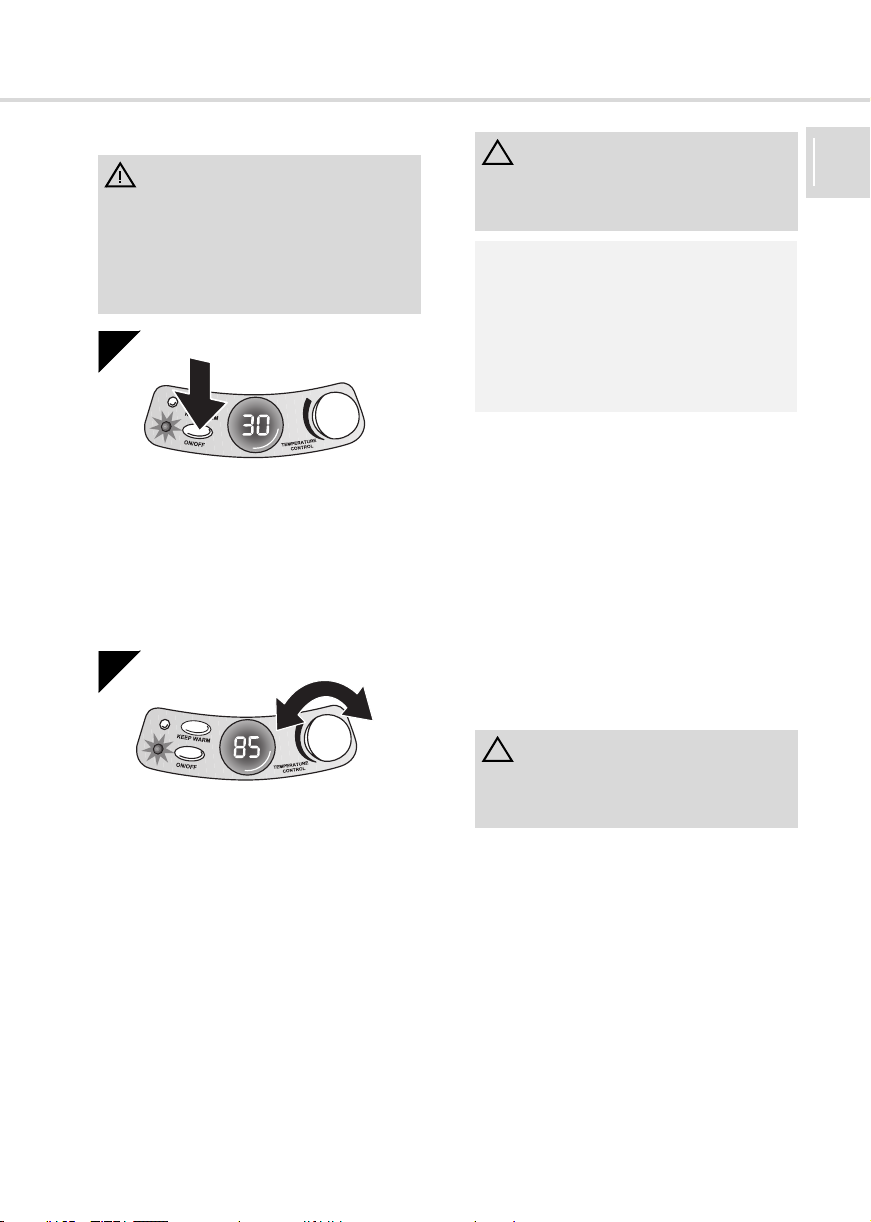
2. Drücken Sie den Ein-/Aus-Schalter „ON/
OFF“ (Abb. 4/1.), um das Gerät einzu-
schalten.
Die rote Betriebskontrollleuchte zeigt an,
dass das Gerät aufheizt. Die Temperatursollwert-Anzeige zeigt „30“.
5
1.
2.
ACHTUNG:
Halten Sie die Bedientasten im Bedienfeld
nicht gedrückt. Die Elektronik könnte
beschädigt werden.
HINWEIS:
Wird das Gerät während des Betriebs vom
Sockel genommen, stoppt der Aufheizvorgang. Die Temperatursollwert-Anzeige zeigt
„EE“. Wenn Sie das Gerät auf den Sockel
zurückstellen, wird wieder die zuvor eingestellte Temperatur angezeigt und weiter
aufgeheizt.
3.4 Abschaltautomatik
Das Gerät verfügt über eine Abschaltautomatik, die (innerhalb von 30 Sekunden) ein Überhitzen und somit eine Beschädigung verhindert.
Eine automatische Abschaltung erfolgt,
sobald:
- die voreingestellte Temperatur erreicht
wurde,
- zu wenig oder kein Wasser/Gargut eingefüllt wurde,
- das Gerät im Betrieb vom Sockel genommen wird.
DE
3. Stellen Sie nun durch Drehen des Tempe-
ratur-Drehreglers (Abb. 5/2.) die gewünschte Temperatur ein.
- Durch Drehen nach rechts erhöhen Sie
die Temperatur in 5-Grad-Schritten.
- Durch Drehen nach links verringern Sie
die Temperatur in 5-Grad-Schritten.
Die kleinste einstellbare Temperatur ist
30 °C.
Das Gerät erhitzt nun das Wasser/Gargut auf
die gewünschte Temperatur und schaltet sich
danach automatisch ab. Die rote Betriebskontrollleuchte erlischt daraufhin.
ACHTUNG:
Warten Sie, bis die Heizplatte völlig abgekühlt ist. Erst dann darf das Gerät erneut mit
Wasser/Gargut befüllt werden.
9
Page 10

Kochen
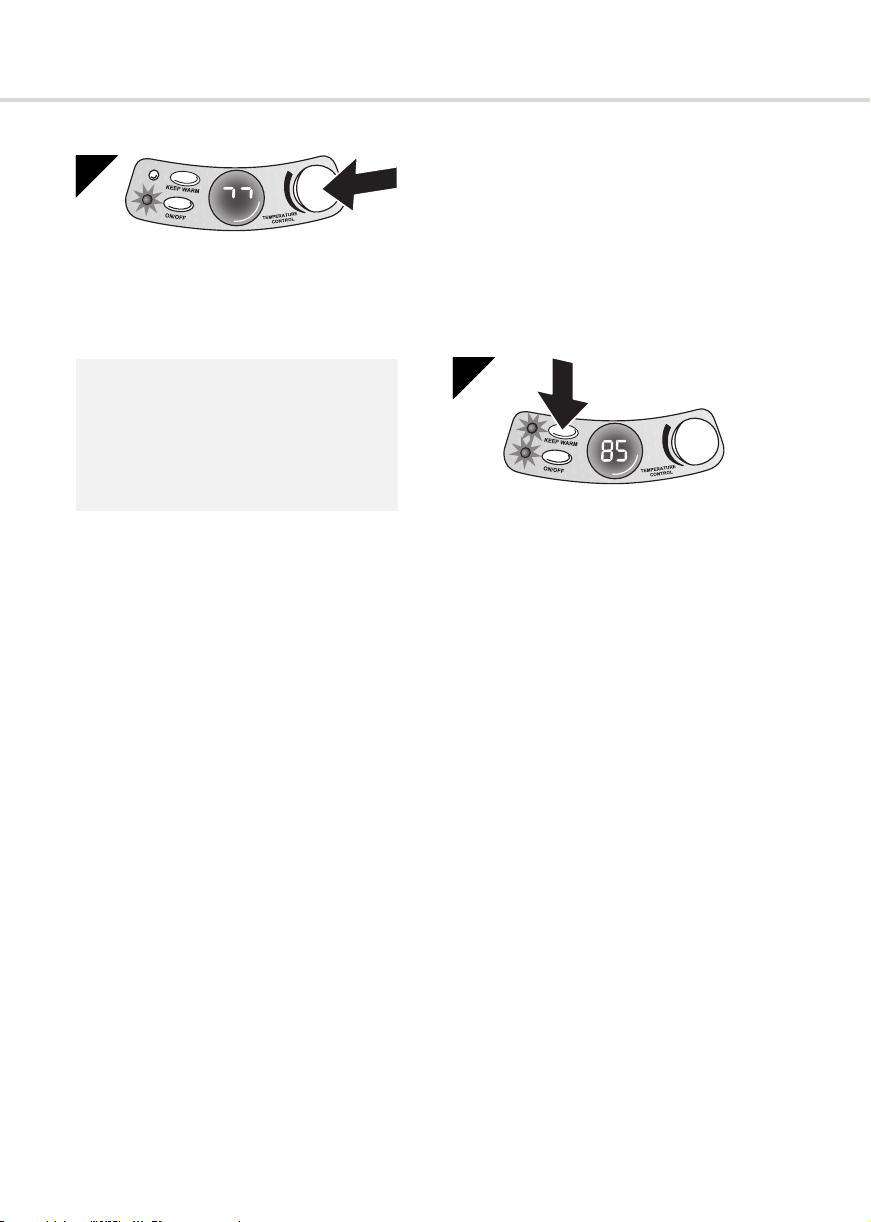
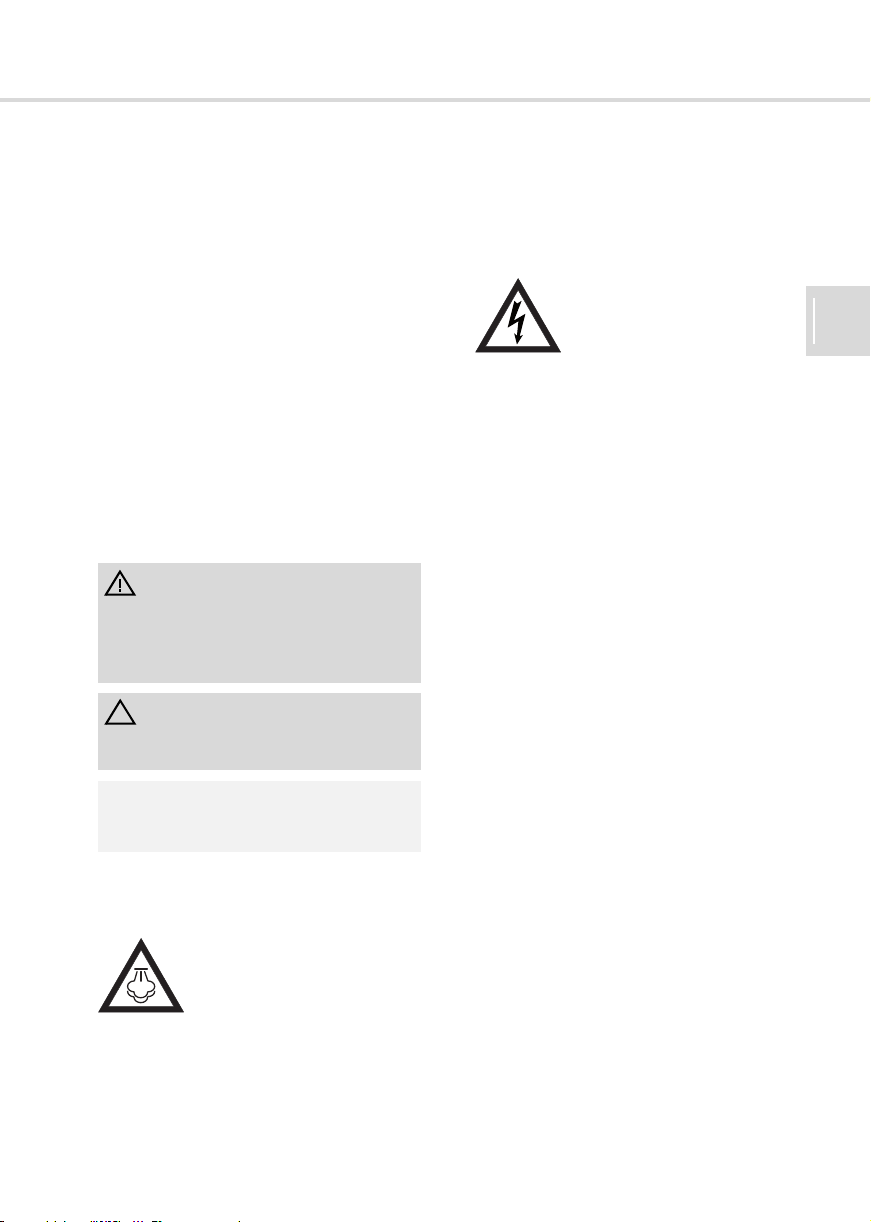
3.5 Schnelleinstellung
6
Durch einmaliges Drücken des Tempera-
tur-Drehreglers (Abb. 6) gelangen Sie direkt
zur höchsten Temperatureinstellung. Das eingefüllte Wasser/Gargut wird nun, unabhängig
von der eingefüllten Menge, zum Kochen gebracht.
HINWEIS:
Drehen Sie den Temperatur-Drehregler bei
angezeigten „95“ Grad ein weiteres Mal
nach rechts, zeigt die TemperatursollwertAnzeige ebenfalls zwei sich bewegende
Striche (Abb. 6) für die höchstmögliche
Temperatureinstellung im Display an.
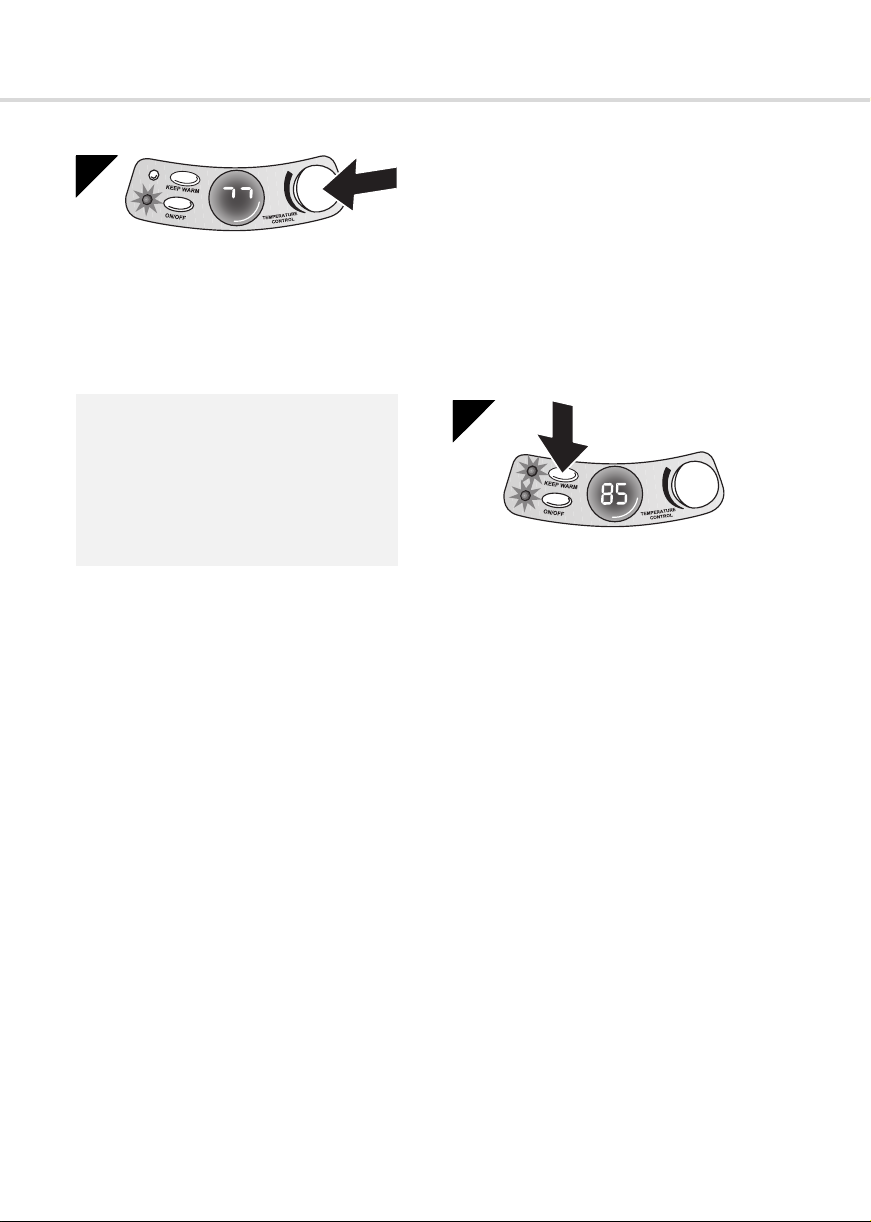
3.6 Warmhaltefunktion
Falls Sie Wasser/Gargut mit einer be-
stimmten Temperatur vorhalten möchten, nutzen Sie die Warmhaltefunktion.
Um die Warmhaltefunktion zu aktivieren,
gehen Sie wie folgt vor:
1. Befüllen Sie das Gerät wie unter ZKapitel
3.1, „Befüllen“ beschrieben.
2. Nehmen Sie das Gerät wie unter ZKapitel
3.3, „Täglicher Gebrauch“ beschrieben in
Betrieb.
7
3. Drücken Sie die Warmhaltetaste „KEEP
WARM“, um die Warmhaltefunktion zu ak-
tivieren (Abb. 7).
- Die grüne Warmhaltekontrollleuchte beginnt zusätzlich zur roten Betriebsleuchte
zu leuchten (Abb. 7).
- Das Gerät heizt nun auf, bis die eingestellte Temperatur erreicht ist.
- Dann schaltet sich das Gerät ab und die
rote Betriebskontrollleuchte erlischt.
- Die Warmhaltefunktion ist weiterhin aktiv.
(Die grüne Warmhaltekontrollleuchte
leuchtet.)
- Sobald die Temperatur sinkt, schaltet sich
das Gerät wieder ein und heizt auf. (Die
rote Betriebskontrollleuchte leuchtet.)
4. Drücken Sie den Ein-/Aus-Schalter „ON/
OFF“, um die Warmhaltefunktion zu deak-
tivieren.
Die grüne Warmhaltekontrollleuchte und
die rote Betriebskontrollleuchte erlöschen.
10
Page 11
Wartung
4 Wartung
4.1 Nach dem Gebrauch
HINWEIS:
Lassen Sie das Gerät generell vor erneutem Aufheizen abkühlen.
WARNUNG:
Gefahr eines elektrischen Schlags!
Verhindern Sie, dass Feuchtigkeit an den
Kontaktstecker gelangt. Setzen Sie das
Gerät nach dem Ausschenken/Entleeren
stets wieder auf seinen Sockel, damit der
Kontaktstecker verdeckt und gegen Berührung, Wasser und Schmutz geschützt ist.
Tauchen Sie das Gerät, den Sockel oder
das Stromkabel niemals in Wasser oder
andere Flüssigkeiten. Setzen Sie beim Reinigen nur sparsam Flüssigkeit ein.
Reinigen Sie das Gerät oder den
Sockel daher niemals mit dem
Geschirrspüler.
WARNUNG:
Verbrennungsgefahr!
Bevor Sie das Gerät reinigen, lassen Sie es
auskühlen.
ACHTUNG:
Verwenden Sie keine Reinigungsmittel,
Scheuermittel oder Alkohol, da diese das
Gerät beschädigen können. Verwenden Sie
bei starker Verschmutzung allenfalls ein
mildes Spülmittel.
1. Ziehen Sie den Netzstecker aus der
Steckdose.
2. Leeren Sie das Gerät vollständig.
3. Reinigen Sie das Innere des Hotpot° un-
ter sparsamen Einsatz von Wasser.
4. Reinigen Sie das Äußere des Geräts aus-
schließlich mit einem leicht angefeuchteten Tuch.
5. Lassen Sie das Gerät trocknen.
6. Setzen Sie das Gerät zurück auf seinen
Sockel.
7. Bewahren Sie das Gerät in einem kühlen,
trockenen Raum auf.
4.2 Entkalken des Aquagrad°
ACHTUNG:
Halten Sie die im Folgenden angegebenen
Intervalle zum Entkalken ein. Anderenfalls
drohen unnötig hoher Stromverbrauch, auf
lange Sicht u. U. sogar Geräteschäden.
Entkalken Sie den Wasserkessel, je nach
Kalkbefall, regelmäßig, jedoch mindestens:
- zweimal jährlich,
- vor jeder längeren Lagerung,
- bei sichtbarem Kalkbelag,
- bei ungewöhnlich langer Erhitzungsdauer.
Gehen Sie zum Entkalken wie folgt vor:
1. Füllen Sie den Wasserkessel bis zur
„Max“-Markierung mit Essig.
2. Schalten Sie das Gerät mit dem Ein-/AusSchalter „ON/OFF“ ein und bringen Sie
den Essig zum Kochen.
3. Lassen Sie den Essig über Nacht einwirken.
4. Legen Sie ebenso den Deckel mit Kalkfilter zum Entkalken über Nacht in ein Essigbad.
5. Gießen Sie den Essig am nächsten Tag
vollständig weg.
6. Kochen Sie den Wasserkessel noch mindestens zweimal mit frischem Wasser aus
und kippen Sie es weg.
7. Spülen Sie den Wasserkessel mit kaltem
Wasser aus, bevor Sie ihn erneut verwenden.
HINWEIS:
Sie können auch im Handel erhältliche Entkalkungsmittel verwenden. Beachten Sie
jedoch deren eventuell abweichende
Gebrauchsanweisung.
11
DE
Page 12
Wartung
0180 501 50 50*
In Deutschland stehen wir Ihnen
für Fragen, Anregungen oder bei
Problemen gerne zur Verfügung.
Mo.-Fr. 8-20 Uhr
*0,14€ /Min. aus dem deutschen Festnetz
(deutscher Mobilfunkhöchstpreis 0,42€ /Min.)
SERVICE- HOTLINE
4.3 Bevor Sie das Gerät einsenden
WARNUNG:
Verletzungsgefahr!
Bevor Sie auf Problemsuche gehen, schalten Sie das Gerät aus. Verwenden Sie niemals ein defektes Gerät. Um Gefährdungen
zu vermeiden, reparieren Sie niemals
selbstständig. Wenden Sie sich hierfür an
den Royal
Bevor Sie Ihren zuständigen Royal-Vertragshändler, Royal-Servicepartner oder Ihren
Fachmarkt kontaktieren, überprüfen Sie anhand der folgenden Tabelle, ob Sie das Problem selbst beseitigen können.
Problem mögliche Ursache
Gerät heizt nicht Netzstecker ist nicht ein-
Gerät schaltet
„zu früh“ ab
Gerät braucht
ungewöhnlich
lang für den Erhitzungsvorgang
Appliance-Kundendienst.
Lösung
gesteckt.
Netzstecker einstecken.
Steckdose führt keinen
Strom.
Testen Sie das Gerät an
einer Steckdose, bei der
Sie sicher sind, dass diese
Strom führt.
Überhitzungsschutz hat
angesprochen. Gerät abkühlen lassen und korrekte
Wassermenge einfüllen.
Gerät ist verkalkt.
Gerät entkalken ZKapitel
4.2, „Entkalken des
Aquagrad°“.
12
4.4 Ersatzteile
Zubehörteile sowie Ersatzteile können nachbestellt werden:
Artikel-Nr. Beschreibung
9119001 Glasdeckel für den Hotpot°
9119002 Bodenplatte / Sockel für
M9119 / M3005 / M9000
Diese erhalten Sie im Dirt Devil
unter www.dirtdevil.de
oder bei den Firmen
Service-Versand Ina Riedmüller
Frankenstraße 34
89233 Neu-Ulm
DEUTSCHLAND
Tel.: +49 - 7307 - 51 75
Fax: +49 - 7307 - 41 56
Riedmueller.service@t-online.de
Service Center Feuerbach KG
Corneliusstr. 75
40215 Düsseldorf
DEUTSCHLAND
Tel.: +49 - 211 - 38 10 07
Fax: +49 - 211 - 37 04 97
dirtdevil-service@t-online.de
www.dirtdevil-service.de
®
Onlineshop
4.5 Entsorgung
Wenn das Gebrauchsende erreicht ist, insbesondere, wenn
Funktionsstörungen auftreten,
machen Sie das ausgediente
Gerät unbrauchbar, indem Sie
den Netzstecker aus der Steckdose ziehen und das Stromkabel durchtrennen.
Entsorgen Sie das Gerät entsprechend den in
Ihrem Land geltenden Umweltvorschriften.
Elektrische Abfälle dürfen nicht zusammen
mit Haushaltsabfällen entsorgt werden. Wenden Sie sich für Ratschläge bezüglich des Recyclings an Ihre Kommunalbehörde oder Ihren Händler.
Page 13

5 Garantie
Wir übernehmen für das von uns vertriebene Gerät eine Garantie von 24 Monaten
ab Kaufdatum.
Innerhalb dieser Garantiezeit beseitigen wir
nach unserer Wahl durch Reparatur oder
Austausch des Gerätes oder des Zubehörs
(Schäden an Zubehörteilen führen nicht automatisch zum Umtausch des kompletten Gerätes) unentgeltlich alle Mängel, die auf Material- oder Herstellungsfehlern beruhen.
Von der Garantie sind Schäden ausgenommen, die auf unsachgemäßen Gebrauch (Betrieb mit falscher Stromart/-spannung, Anschluss an ungeeignete Stromquellen, Bruch
etc.) zurückzuführen sind, normaler Verschleiß und Mängel, die den Wert oder die Gebrauchstauglichkeit des Gerätes nur unerheblich beeinflussen. Bei Eingriffen durch eine
nicht von uns autorisierte Stelle oder bei Verwendung anderer als original Royal Appliance
Ersatzteile erlischt die Garantie. Verschleißteile fallen nicht unter die Garantie und sind
deshalb kostenpflichtig! Die Garantie tritt nur in
Kraft, wenn das Kaufdatum durch Stempel und
Unterschrift des Händlers auf der Garantiekarte bestätigt ist oder eine Rechnungskopie dem
eingeschickten Gerät beiliegt. Garantieleistungen bewirken weder eine Verlängerung der
Garantiezeit, noch beginnt dadurch ein Anspruch auf eine neue Garantie!
Versenden Sie das Gerät vollständig entleert
und trocken sowie mit einer kurzen Fehlerbeschreibung in Blockschrift. Versehen Sie das
Anschreiben mit dem Vermerk „Zur Garantie“.
Senden Sie es zusammen mit der Garantiekarte oder einer Rechnungskopie an nachstehende Adresse:
Garantie
DE
Royal Appliance International GmbH
Abt. Kundenservice
Jagenbergstraße 19
41468 Neuss
Deutschland
Tel.: +49 (0) 21 31 / 60 90 0
Fax: +49 (0) 21 31 / 60 90 60 95
www.dirtdevil.de
info@dirtdevil.de
13
Page 14

An overview of your Hotpot°
An overview of your Hotpot°
Thank you!
We are pleased that you have chosen Hotpot°! With Hotpot°, you have bought an appliance for heating prepared dishes, baby food,
preserves and more exactly to your desired
temperature. Thanks for your purchase and
your confidence in us.
Overview
(Fig. 1):
1 Base
(included in the scope of delivery depending on the model)
1.1 Contact plug
1.2 Power cord
1.3 Temperature selector
1.4 Set temperature display
1.5 On/off switch "ON/OFF"
1.6 "On" indicator light (red)
1.7 "Keep warm" button "KEEP WARM"
1.8 "Keep warm" indicator light (green)
2 Contact socket
3 Hotpot°
4 Spout
5 Handle
6 Glass lid with integrated strainer
7 „MIN"/"MAX" marking
8 Temperature feeler
9 Aquagrad° water kettle
(included in the scope of delivery depending on the model)
10 Lid with integrated strainer
11 Lid release latch (" ")
Scope of delivery / models
2
X
MA
MIN
12 3
1 Hotpot° with base and Aquagrad°
(Standard scope of delivery)
2 Hotpot° with base
(Special edition without Aquagrad°)
3 Hotpot° solo (Special edition without
Aquagrad° and base)
- Instruction manual (not shown)
Technical data
Type of appliance : electric cooking-pot /
Model : Hotpot° & Aquagrad°
Voltage : 220 – 240V~ 50Hz
Power
Hotpot°
Power
Aquagrad°
Capacity
Hotpot°
Capacity
Aquagrad°
Adjustable to temperatures in the
range from
Accuracy
(with 1 l of water)
Weight pot / kettle
only
Weight pot / kettle
with base
water kettle with temperature control
M9119 (-0/-1/.../-8/-9)
Class I
: 800 W max.
: 2300 W max.
: 0.25 l min.
1.0 l max.
: 0.5 l min.
2.0 l max.
: 30 °C - 100 °C
:± 4°C
: approx. 1 kg
: approx. 1.6 kg
14
Technical and design specifications may be changed
in the course of continuous product improvement.
© Royal Appliance International GmbH
Page 15
Safety notices
1 Safety notices
1.1 Re: Operating Manual
Read this operating manual completely
before working with the appliance.
Keep the operating manual for reference.
If you pass the appliance on to someone
else. give them the operating manual as well.
Non-compliance with these instructions
can lead to serious injuries or damage to
the appliance.
We assume no liability for damage that occurs
as a result of non-compliance with this operating manual.
Important notes for your safety are especially
marked. Always observe these notices to
avoid accidents and damage to the appliance.
WARNING:
Warning concerning health hazards describing possible risks of injury.
ATTENTION:
Warning concerning possible dangers to the
appliance or other objects.
NOTE:
Highlights tips and information
1.2 Re: hot water / steam
Danger of burning!
Hot water and steam can cause
severe burns. So please especially observe the following:
Never remove the lid when
the appliance is in use.
Do not operate the appliance without its
lid.
Avoid contact with the hot steam that es-
capes from the pot during and after boiling.
1.3 Re: Power supply
Danger of electric shock!
The appliance runs on electricity - that means there is a general risk of electric shock. So
please especially observe the
following:
Never immerse the appliance in water or
other liquids. Only fill the appliance with water
in the prescribed way.
Never touch the mains plug or the base
with wet hands.
Always pull directly at the plug if you want
to disconnect the appliance from the mains.
Never pull at the power cord, it might break.
Make sure the mains lead is not buckled,
pinched, run over or operated close to sources of water or heat.
Make sure the voltage of your power sup-
ply is the same as the voltage indicated on the
appliance's nameplate before connecting it to
the mains. Wrong voltage can destroy the appliance.
Only use sockets with a ground/safety
contact.
Do not use multiple sockets. If necessary
use only approved single extension cables of
sufficient capacity for the appliance's power
requirements.
Never use force when inserting the plug
into a socket. Never modify mains plugs
Never put other appliances onto the base
unit.
Always switch off the appliance and dis-
connect it from the mains before performing
cleaning or maintenance.
GB
15
Page 16

Safety notices
1.4 Re: Hot Surfaces
Danger of burning!
The outside ot the appliance
gets hot during use! So please
especially observe the following:
Always carry the full appliance with care,
using only the handle.
Never touch the hot heating-plate.
Always switch off the appliance, discon-
nect it from the mains and let it cool off before
performing cleaning or maintenance.
1.5 Re: Certain groups of persons
This appliance is not intended to be used
by persons (including children) with impaired
physical, sensorial or mental abilities and/or
insufficient experience or knowledge, unless
they are supervised by a person responsible
for their safety or have been instructed in the
proper use of the appliance by this person.
Children should be supervised in order to
make sure that they don’t play with the appliance.
Always switch off the appliance when
leaving the room and disconnect it from the
mains.
Store it out of reach..
Keep hot containers and containers with
hot contents away from babies and infants.
Never carry small children and hot containers
or containers with hot contents at the same
time.
Packing materials must not be used to
play with. There is danger of suffocation.
People with sensory problems, especially
with reduced sensitivity for temperature differences, must use great caution when working
with this appliance.
1.6 Re: Place of Use
Make sure that the appliance and all its
accessories do not come in contact with hot
surfaces. Never put the appliance onto or
near heat sources such as stove plates.
Set the appliance onto a dry, level and sol-
id surface when using it.
1.7 Re: Appropriate Use
This appliance may only be used in households. It is not suitable for industrial or commercial use.
The Hotpot° may only be used to heat
cold food and prepared dishes.
The Aquagrad° may only be used for
heating cold drinking-water.
Any use exceeding this is considered inappro-
priate and is prohibited.
For the Aquagrad°, it is forbidden:
to fill the appliance with other liquids or
materials than cold drinking-water. It is especially forbidden to heat beverages and meals.
It is forbidden to use Aquagrad° and Hotpot°:
with non-food substances.
To operate them with content levels below
the "MIN" and above the "MAX" mark.
To use them outdoors.
1.8 If the appliance is defective
Never use a defective appliance or oper-
ate an appliance with a defective power cord.
If the power cord of this appliance is damaged
it must be replaced by the manufacturers,
their authorised service representative or a
similarly qualified person to avoid danger.
Bring or send defective appliances to a
specialist dealer or to Royal Appliance Customer Services for repair.
16
Page 17
Preparing the appliance
2 Preparing the appliance
2.1 Unpacking
1. Unpack the appliance and all its accesso-
ries.
2. Check the contents for completeness and
possible damages.
ATTENTION:
Always transport/send the appliance in its
original packaging to avoid transport damages. Keep the packaging for such an
event.
Dispose of no longer needed packaging
material according to the applicable regulations of your country.
NOTE:
Immediately contact your dealer if you have
found damage resulting from transportation.
2.2 Setting up
1. Place the base on a solid, dry and level
surface away from sources of water and
heat.
2. Put the lid onto the appliance.
2.3 Fitting the lid of the water kettle
2
2.
1.
1. Put the lid onto the water kettle as shown
in fig. (Fig. 2/1.).
Push the lid with its two notches onto the
two studs on the edge of the water kettle
(Fig. 2/1.).
2. Push the lid backwards until your hear and
feel it snap into place. (Fig. 2/2.).
2.4 Connecting
ATTENTION:
Only operate the appliance if your mains
voltage is the same as that indicated on the
appliance's nameplate. Wrong voltage can
destroy the appliance.
1. Unravel the power cord from the base only
as far as necessary.
WARNING:
Danger of injury!
Run the cord in such a way that it does not
constitute a hazard.
2. Fix the power cord by pressing it back into
the exit opening of the base.
3. Insert the mains plug into a socket with
ground/safety contact.
The display of the temperature setting will now show "EE".
This indicates that the base is already connected to the mains, but
the appliance has not yet been put
onto the base.
4. Put the appliance onto the base so that
the plug engages the contacts.
The set temperature indicator will
now show a blinking "OF".
Your appliance is now ready to use.
ATTENTION:
Avoid heating the empty pot, as this might
damage the appliance in spite of its automatic shut-off feature.
NOTE:
If the appliance is accidentally switched on
empty, the overheating-protection will automatically switch it off (for this, also refer to
ZChapter 3.4, "Automatic switch-off"). Let
the appliance cool off completely before filling it with water or food again.
GB
17
Page 18
Cooking
3 Cooking
3.1 Filling
.
WARNING:
Danger of injury!
Check the appliance before each use. A
damaged appliance must never be used.
1. Take the appliance off of its base.
WARNING:
Danger of electric shock!
During filling, the underside of the appliance
and the base must by no means get wet –
this could cause a short-circuit of the contacts in the base. Therefore, the outside of
the appliance must also be dry before setting it onto the base.
2. Only put so much water or food into the
appliance that the content level is between
the "MIN" and "MAX" markings.
NOTE:
Take into account that the content level will
rise when other substances besides water
are put into the Hotpot°.
NOTE:
To save electricity, only heat the amount of
water you actually need at the moment.
NOTE:
You may fill the Aquagrad° either through
the filler and spout with the lid closed or with
the lid open. You can open the lid by pushing the release catch in the handle " "
(Fig. 3).
3
3. Close the lid.
4. Put the appliance back onto its base.
<
3.2 First use
1. Fill the appliance with water up to the
"MAX" marking (ZChapter 3.1, "Filling").
2. Bring the water to a boil (ZChapter 3.3,
"Daily use") and pour it away completely;
repeat this once or twice.
18
Page 19

Cooking
3.3 Daily use
WARNING:
Danger of burning!
The appliance must never be used with the
lid open or missing. Otherwise, there is danger of burning by spattering liquids.
3
1. Fill the appliance as described under
ZChapter 3.1, "Filling"
2. Push the "ON/OFF" (Fig. 3/1.), switch to
switch on the appliance.
The red indicator-light shows that the ap-
pliance is heating. The indicator shows the
set temperature of "30".
4
1.
2.
NOTE:
The heating is cut off if you remove the
appliance from its base. The set-temperature indicator will then show "EE". When
you set the appliance back onto the base,
the set temperature is shown again and
heating resumes.
3.4 Automatic switch-off
The appliance has an automatic switch-off
that prevents overheating (within 30 seconds)
to avoid damage to the appliance.
The heating automatically switches off
- when the set temperature has been
reached.
- the appliance has been filled with too little
or no water or food,
- the appliance is removed from the base
during heating.
ATTENTION:
Wait until the heating-plate has cooled off
completely. Only then may the appliance be
filled with water or food again.
GB
3. Now set the desired temperature by turn-
ing the control knob (Fig. 4/2.)
- By turning clockwise you increase the
temperature in 5°C steps.
- By turning counter-clockwise you decrease the temperature in 5°C steps.
The lowest temperature you can set is
30 °C.
The appliance will now heat the water to the
desired temperature and then switch off automatically. The red indicator-light then goes
off.
ATTENTION:
Do not hold down the buttons of the control
panel. This might damage the electronic
system
19
Page 20
Cooking
3.5 Quick setting
5
By pressing the temperature control knob
once you can directly set the highest possible
temperature (Fig. 5) for boiling water. This
means that the water or food is brought to a
boil, regardless of the amount in the kettle.
NOTE:
If the control knob is turned clockwise a further step when the display shows "95" the
selected temperature indicator will show
two moving bars (Fig. 5) indicating the maximum possible temperature setting on the
display.
3.6 Keeping warm function.
You can use the "keep warm" mode if you
want to keep water or food ready at a given
temperature.
To activate the keep warm mode, proceed
as follows:
1. Fill the appliance as described under
ZChapter 3.1, "Filling".
2. Switch on the Hotpot° as described under
ZChapter 3.3, "Daily use".
6
3. Press the "keep warm" button "KEEP
WARM" to activate the "keep warm" mode
(Fig. 6).
- The green indicator light goes on in addition to the red indicator light (Fig. 6).
- The pot now heats up until the set temperature is reached.
- Then the appliance switches itself off, the
red indicator light goes out.
- The keep warm function is still active. (The
green indicator light is on.)
- When the temperature drops, the appliance switches itself on again, reheating
the contents to the set temperature. (The
red indicator light is on.)
4. Push the On/Off switch "ON/OFF" to deactivate the keep-warm mode.
The green keep-warm indicator light and
the red in-use indicator light go off.
20
Page 21
Maintenance
4 Maintenance
4.1 After use
NOTE:
Always let the appliance cool off before
heating it again.
WARNING:
Danger of electric shock!
Avoid moisture entering the contact socket.
Always put the appliance back onto its base
after pouring out the water; this covers the
contact pins and protects them against
touching, water and dirt. Never immerse the
appliance, the base or the mains cable in
water or other liquids. Use liquids sparingly
in cleaning.
So never attempt to clean the
appliance or the base in the
dishwasher.
WARNING:
Risk of burns!
Let the appliance cool off before cleaning it.
ATTENTION:
Do not use cleaning or scouring agents or
alcohol, as these might damage the appliance. Even it the appliance is very dirty, use
only a mild dishwashing agent.
1. Pull the mains plug from the socket.
2. Empty the appliance completely.
3. Clean the inside of Hotpot° using water
sparingly.
4. Clean the outside of the appliance using a
damp cloth only.
5. Leave the appliance to dry.
6. Put the appliance back onto its base.
7. Store the appliance in a cool, dry place.
4.2 Decalcifying the Aquagrad°
ATTENTION:
Observe the intervals for decalcifying indicated here. A calcified kettle consumes
more energy than necessary and might
even be damaged in the long run.
Decalcify your water kettle regularly depending on the degree of calcification, but at least
- twice a year
- before any prolonged storage
- if calcification is visible,
- if heating water takes unusually long.
Proceed as follows for decalcifying:
1. Fill the kettle with ordinary vinegar up to
the "Max“ Mark.
2. Switch on the appliance using the On/Off
switch "ON/OFF" and bring the vinegar to
a boil.
3. Leave the vinegar in the switched-off kettle over night.
4. Also put the lid with the lime filter into a
vinegar bath over night.
5. Completely discard the vinegar the next
morning.
6. Heat the water kettle to the boiling-point
with fresh water at least twice, pouring
away the water each time.
7. Rinse the water kettle with cold water before using it again.
NOTE:
You may also use commercially available
decalcifying agents. However, please
observe their possibly different instructions
for use.
GB
21
Page 22
Maintenance
4.3 Before you send in the appliance
WARNING:
Danger of injury!
Switch off the appliance before troubleshooting. Never use a defective appliance.
To avoid hazards, never attempt to repair
the appliance on your own. For repairs
always refer to your Royal
tomer service.
Before contacting your authorised Royal dealer, Royal service partner or appliance market,
follow the procedure in the following table to
check if you can solve the problem yourself
Problem Possible cause
Solution
The appliance
does not heat
up
The Hotpot°
switches off
"too early"
The appliance
takes too long
to heat up
The mains plug is not connected.
Connect the mains plug
The socket does not carry
current.
Test the appliance on a
socket you are sure is car-
rying current.
The overheating protection
was activated. Let the appliance cool off and fill it
with a correct amount of
water.
The appliance is calcified.
Decalcify the appliance
ZChapter 4.2, "Decalcifying the Aquagrad°".
Appliance cus-
4.4 Spare parts
You can order accessories and spare parts
from:
Item number Description
9119001 Glass lid for the Hotpot°
9119002 Bottom plate / base for
M9119 / M3005 / M9000
These are available at the Dirt Devil
shop at: www.dirtdevil.de
or Zpage 124, „International Service“
®
online
4.5 Disposal
When the appliance has
reached the end of its usefulness, especially if dysfunctions
recur, disable the appliance by
pulling the mains plug out of the
socket and cutting off the mains
lead.
Dispose of the appliance according to the environmental provisions applicable in your
country.
Electrical waste must not be disposed of together with domestic waste. Consult your local authorities or your dealer for advice on
recycling.
22
Page 23

5Warranty
We grant a warranty of 24 months from the
date of purchase for the distributed appliance.
Within this period we will either repair or replace the appliance or accessory (damages to
accessories do not automatically cause a replacement of the complete appliance) all defects due to manufacturing or materials at no
cost.
Damages due to inappropriate use (operation
on wrong voltage or type of current, connecting to unsuitable power supplies, breakage,
etc.) are exempt from warranty, as are normal
wear and minor defects that only negligibly influence the appliance's serviceability. Interventions by unauthorised parties and the use
of spare parts not supplied by Royal Appliance make the warranty null and void.
Consumable parts are not included in the warranty and must be paid for!
The warranty is only valid if the date of purchase has been acknowledged by the dealer's stamp and signature on the warranty card
or if a copy of the invoice or sales slip is included with the sent-in appliance. Warranty
work does not extend the warranty period nor
does it constitute a claim for a new warranty!
Always ship the appliance completely empty
and dry and include a short description of the
malfunction in printed letters in your package.
Head your letter with the line "warranty claim".
Send it to the following address, including the
warranty card or a copy of the purchase slip:
Warranty
GB
Zpage 124, „International Service“
23
Page 24

Aperçu général de votre Hotspot
Aperçu général de votre Hotspot
Merci beaucoup !
Nous sommes heureux de vous compter parmi les utilisateurs du Hotspot ! Le Hotspot est
un appareil qui vous permet de réchauffer à la
température désirée les plats, la nourriture
pour bébés, les conserves et les produits similaires. Nous vous remercions de cet achat
et de votre confiance !
Aperçu
(ill. 1):
1 Socle
(selon l'exécution compris dans les produits fournis à la livraison)
1.1 Prise de contact
1.2 Cordon d’alimentation
1.3 Bouton rotatif de réglage de température
1.4 Indicateur de température souhaitée
1.5 Interrupteur “ON/OFF“
1.6 Voyant lumineux de contrôle de fonction-
nement (rouge)
1.7 Touche de maintien de chaleur “KEEP
WARM“
1.8 Voyant lumineux de maintien de la cha-
leur (vert)
2 Logement du contact
3 Hotpot°
4 Bec verseur
5 Manche
6 Couvercle en verre avec tamis intégré
7 „Indicateur de remplissage avec marqua-
ge “MIN“/“MAX“
8 Capteur de température
9 Bouilloire Aquagrad°
(selon l'exécution compris dans les produits fournis à la livraison)
10 Couvercle avec tamis de filtre intégré
11 Déverrouillage du couvercle (“ “)
Matériel fourni à la livraison /
variantes
2
1 Hotpot° avec socle et Aquagrad°
(Matériel standard fourni à la livraison)
2 Hotpot° avec socle
(Édition spéciale sans Aquagrad°)
3 Hotpot° solo (Édition spéciale sans Aqua-
grad° et socle)
- Instructions d'utilisation (sans illustration)
Caractéristiques techniques
Type d'appareil : Bouilloire électrique/
Modèle :Hotpot° & Aquagrad°
Tension :220-240V~, 50Hz,
Puissance
Hotpot°
Puissance
Aquagrad°
Quantité de remplissage Hotpot°
Quantité de remplissage Aquagrad°
Peut être chauffé
dans la plage suivante
Précision (pour une
quantité de remplissage de 1 l )
Poids du pot/de la
bouilloire seul(e)
Poids du pot/de la
bouilloire avec socle
X
MA
MIN
12 3
pot-au-feu avec régulateur de température
M9119 (-0/-1/.../-8/-9)
Classe I
: 800 W max.
: 2300 W max.
: 0,25 l min.
1,0 l max.
: 0,5 l min.
2,0 l max.
:30°C - 100°C
:± 4°C
: env. 1 kg
: env. 1,6 kg
24
Toutes modifications d'ordre technique ou conceptuel liées à l'évolution du produit sont réservées.
© Royal Appliance International GmbH
Page 25
Consignes de sécurité
1 Consignes de sécurité
1.1 relatives à ce mode d'emploi
Veuillez lire attentivement et intégrale-
ment ce mode d'emploi avant de vous servir
de l'appareil.
Conservez précieusement ce mode d'em-
ploi.
Donnez toujours le mode d'emploi à toute
personne se servant de l'appareil.
Le non respect de ce mode d'emploi peut
entraîner des blessures graves ou des
dommages irréparables à l'appareil.
Nous déclinons toute responsabilité pour des
dommages résultant du non respect de ce
mode d'emploi.
Les consignes importantes pour votre sécurité sont mises particulièrement en évidence.
Respectez impérativement ces consignes
afin d'éviter tout accident ou dommages à
l'appareil :
AVERTISSEMENT:
Nous attirons votre attention sur les dangers
pouvant mettre en péril votre santé et vous
informons sur les éventuels risques de blessures.
ATTENTION:
Nous vous indiquons les risques éventuels
pour l'appareil ou pour tout autre objet.
REMARQUE:
Met en évidence des astuces et des informations.
1.2 par rapport avec l'eau
chaude / la vapeur
Danger d'échaudures !
L'eau chaude / la vapeur peuvent
provoquer de graves échaudures. Respectez par conséquent
les points ci-dessous :
N'enlevez jamais le couvercle pendant
que l'appareil fonctionne.
Ne vous servez pas de l'appareil sans
couvercle.
Évitez d'entrer en contact avec la vapeur
chaude s'échappant lors de la cuisson et
après la cuisson de l'eau.
1.3 par rapport à l'alimentation
électrique
Risques d'électrocution !
L'appareil est alimenté par du
courant électrique, ce qui entraîne des risques d'électrocution. Respectez par conséquent
les points ci-dessous :
Ne trempez jamais l'appareil
dans l'eau ou dans d'autres liquides. Introduisez l'eau dans l'appareil en respectant le mode d'emploi.
Ne touchez jamais la prise ou le socle
avec des mains mouillées.
Si vous voulez retirer la fiche de la prise,
tirez toujours directement sur la fiche. Ne tirez
jamais sur le cordon d’alimentation car il pourrait se rompre.
Assurez-vous que le cordon d'alimenta-
tion ne soit pas plié, coincé, écrasé ou à proximité d'une source d'humidité ou de chaleur.
Assurez-vous avant le branchement à la
source de courant que la tension électrique indiquée sur la panneau signalétique correspond à celle de la prise. Une tension différente pourrait rendre l'appareil définitivement
inutilisable.
N'utilisez que des prises avec contact de
protection.
N'utilisez pas de prises multiples. Utilisez
seulement des rallonges simples certifiées
GS qui résistent à la haute puissance absorbée de l'appareil.
Ne jamais faire pénétrer de force la fiche
dans la prise de courant. Ne modifiez jamais
la fiche.
Ne posez jamais un autre appareil sur le
socle de la bouilloire.
Avant de nettoyer ou d'entretenir l'appa-
reil, éteignez-le toujours et débranchez-le.
FR
25
Page 26

Consignes de sécurité
1.4 par rapport aux surfaces
chaudes
Danger de brûlure ! L'extérieur
de la bouilloire devient chaud en
cours de fonctionnement ! Respectez par conséquent les
points ci-dessous :
Portez avec prudence la bouilloire lors-
qu'elle est pleine et seulement par la poignée.
Ne touchez jamais la plaque chauffante
lorsqu'elle est chaude.
Avant de nettoyer ou d'entretenir l'appa-
reil, éteignez-le toujours, débranchez la prise
et laissez la bouilloire se refroidir.
1.5 concernant certains groupes
de personnes
Les personnes (y compris les enfants) qui
ne sont pas en mesure de se servir de manière sûre de l'appareil, en raison de leurs capacités physiques ou sensorielles, de leurs capacités mentales, de leur inexpérience ou
d'un manque de connaissances, ne doivent
pas utiliser cet appareil sans surveillance ou
sans bénéficier d'indications de fonctionnement données par une personne responsable.
Les enfants doivent être surveillés afin de
s'assurer qu'ils ne jouent pas avec l'appareil.
Avant de quitter la pièce ou se trouve la
bouilloire, éteignez-la toujours et retirez la fiche de la prise.
Conservez-le hors de leur portée.
Maintenez les récipients avec de l'eau
chaude éloignés des bébés et des petits enfants. Ne portez jamais de petits enfants en
même temps que des récipients chauds ou
contenant de l'eau chaude.
Ne jouez pas avec le matériel d'emballa-
ge, car il existe un risque d'asphyxie.
Les personnes souffrant de troubles du
toucher, en particulier d'une perception réduite des écarts de température, doivent être
particulièrement prudentes lors de l'utilisation
de cet appareil.
1.6 par rapport à l'emplacement
de mise en place
Assurez-vous que l'appareil et tous les ac-
cessoires n'entrent pas en contact avec des
surfaces chaudes. Ne placez jamais la
bouilloire sur ou à proximité immédiate de
sources de chaleur comme par exemple des
plaques électriques.
Posez l'appareil sur une surface plate,
stable et sèche avant de le faire fonctionner.
1.7 Remarques par rapport aux
conditions d'utilisation
Cet appareil convient exclusivement à un
usage domestique. Toute utilisation à titre
professionnel est strictement interdite.
Le Hotpot° doit être exclusivement utilisé
pour réchauffer des aliments et des plats
froids.
L'Aquagrad° doit être exclusivement utili-
sé pour faire bouillir de l'eau potable froide.
Toute autre utilisation est considérée comme
non conforme et n'est pas autorisée.
Avec l'Aquagrad°, il est interdit de :
remplir la bouilloire avec d'autres liquides
ou produits que de l'eau potable. Il est en particulier interdit de réchauffer des boissons et
des plats cuisinés.
Il est interdit d'utiliser l'Aquagrad° comme
le Hotpot° dans les conditions suivantes :
avec des produits non alimentaires.
avec un niveau de remplissage au-des-
sous de la marque "MIN" et au-dessus de la
marque "MAX".
à l'air libre.
1.8 si l'appareil est défectueux
N'utilisez jamais un appareil défectueux
ou ayant un cordon d'alimentation abîmé. Si
le cordon de raccordement au secteur de cet
appareil est endommagé, faites-le remplacer
par le fabricant, son service après-vente ou
toute personne ayant des compétences similaires, ceci afin d'éviter tout danger.
Amenez l'appareil à réparer dans un ma-
gasin spécialisé ou auprès du service aprèsvente Royal Appliance.
26
Page 27

Préparation de l'appareil
2 Préparation de l'appareil
2.1 Déballage
1. Déballez l'appareil et tous les accessoires.
2. Vérifier si le contenu est complet et n'a
pas été endommagé.
ATTENTION:
Transportez et expédiez l'appareil uniquement dans son emballage d'origine afin
d'éviter tout dommage. Conservez à cet
effet soigneusement l'emballage.
Jetez l'emballage dont vous n'avez plus
besoin en tenant compte des réglementations nationales et locales en vigueur.
REMARQUE:
Si vous constatez des défauts ou des dommages dus au transport, contactez immédiatement votre revendeur.
2.2 Montage
1. Posez le socle de la bouilloire sur une sur-
face plate, stable et sèche et à un emplacement éloigné de sources d'humidité et
de chaleur.
2. Posez le couvercle sur l'appareil.
2.3 Monter le couvercle de la
bouilloire
2
2.
1.
2.4 Branchement
ATTENTION:
Utilisez l'appareil que si la tension indiquée
sur la plaque signalétique correspond à
celle celle de la prise. Une tension différente
abîmerait l'appareil.
1. Ne pas dérouler plus que nécessaire le câ-
ble placé sur la partie inférieure du socle.
AVERTISSEMENT:
Risque de blessures !
Prenez garde à prévenir tout accident lors
de la mise en place du câble.
2. Mettez en place le câble en le réinsérant
dans l'orifice de sortie du socle.
3. Branchez la fiche dans une prise de cou-
rant munie d'un contact de protection.
L'indication de température sélectionnée de l'affichage indique maintenant “EE“.
Cela vous informe que le socle est
alimenté en courant mais que la
bouilloire n'est pas encore placée sur
celui-ci.
4. Placez l'appareil sur son socle de telle ma-
nière que le dispositif de contact soit inséré.
L'indication de température sélectionnée de l'affichage clignote maintenant en indiquant “OF“.
Votre appareil est maintenant prêt à l'emploi.
ATTENTION:
Évitez de faire chauffer l'appareil sans eau,
car celui-ci pourrait s'abîmer à long terme
en dépit de son système de déclenchement
automatique intégré.
FR
1. Mettez le couvercle sur la bouilloire com-
me illustré selon (ill. 2/1.).
Insérez le couvercle avec les deux évidements sur les deux chevilles au bord de la
bouilloire (ill. 2/1.).
2. Pressez fermement le couvercle vers l'ar-
rière jusqu'à ce qu'il s'emboîte nettement
et de façon audible (ill. 2/2.).
REMARQUE:
Si l'appareil est enclenché par inadvertance
alors qu'il est vide, le dispositif de protection
contre les surchauffes se déclenche automatiquement l'appareil (se référer à ce égard
aussi à ZChapitre 3.4, „Système automati-
que de déclenchement“). Laissez l'appareil
entièrement se refroidir avant de le remplir à
nouveau avec de l'eau / des produits à cuire.
27
Page 28

Cuisson
3 Cuisson
3.1 Remplissage
.
AVERTISSEMENT:
Risque de blessures !
Avant tout emploi, vérifiez l'appareil. N'utilisez jamais un appareil qui est endommagé.
1. Retirez la bouilloire de son socle.
AVERTISSEMENT:
Risque d'électrocution !
Lors du remplissage de la partie inférieure
de l'appareil, cette dernière comme le socle
ne doivent en aucun cas se mouiller, car les
contacts s'y trouvant pourraient sinon provoquer un court-circuit. Il faut par conséquent que la partie extérieure de l' appareil
soit sèche avant que celle-ci ne soit posée
sur le socle.
2. Versez une quantité d'eau / d'aliments à
cuire dans l'appareil de telle manière que
le niveau se trouve entre les marques
“MIN“/“MAX“.
REMARQUE:
Pensez que le volume de remplissage du
Hotpot° continue à croître si, outre de l'eau,
d'autres aliments devant être cuits sont
ajoutés dans l'appareil.
3
3. Fermez le couvercle.
4. Remettre l'appareil sur son socle.
<
3.2 Première utilisation
1. Remplissez d'eau jusqu'à la marque
„MAX“ de l'appareil (ZChapitre 3.1, „Rem-
plissage“).
2. Faites bouillir deux à trois fois de l'eau
(ZChapitre 3.3, „Usage quotidien“) et jetez complètement l'eau après chaque
ébullition.
REMARQUE:
Ne remplissez pas avec plus d'eau que
nécessaire afin d'économiser du courant
électrique.
REMARQUE:
Remplissez l'Aquagrad° soit avec le couvercle fermé au moyen de l'orifice de remplissage et de service ou par le couvervle
ouvert. Le couvercle peut être actionné par
le déverrouillage du couvercle intégré “ “
(ill. 3) à la poignée.
28
Page 29

Cuisson
3.3 Usage quotidien
AVERTISSEMENT:
Danger d'échaudures !
La bouilloire ne doit pas être utilisée sans
couvercle ou si celui-ci est resté ouvert. Il y
a un risque d'échaudure dû à l'eau pouvant
gicler hors de la bouilloire.
3
1. Remplissez l'appareil comme décrit dans
ZChapitre 3.1, „Remplissage“.
2. Appuyez sur l'interrupteur „ON/OFF“
(ill. 3/1.) pour enclencher l'appareil.
La lampe de contrôle rouge indique que
l'appareil est en train de chauffer. L'indication de température sélectionnée de l'affichage indique „30“.
4
1.
2.
REMARQUE:
Si l'appareil est retiré du socle en cours de
fonctionnement, le processus d'échauffement s'arrête. L'indication de température
sélectionnée de l'affichage indique “EE“. Si
l'appareil est replacé sur son socle, la température réglée précédemment s'affiche et
l'échauffement recommence.
3.4 Système automatique de
déclenchement
L'appareil est équipé d'un système automatique de déclenchement qui, dans un laps de
temps de 30 secondes, prévient une surchauffe de l'appareil et son endommagement.
Un déclenchement automatique se produit
donc lorsque :
- la température pré-réglée a été atteinte
- il n'y pas d'eau / d'aliments à cuire ou trop
peu d'eau / d'aliments à cuire
- l'appareil a été retiré de son socle en
cours de fonctionnement.
ATTENTION:
Attendez jusqu'à ce que la plaque de
chauffe se soit complètement refroidie.
C'est seulement après que l'appareil peut à
nouveau être rempli d'eau/d'aliments
FR
3. Sélectionnez maintenant la température
désirée en tournant le bouton de réglage
de température (ill. 4/2).
- Vous augmentez la température par pas
de 5°C en tournant le bouton vers la droite.
- Vous réduisez la température par pas de
5°C en tournant le bouton vers la gauche.
La température minimale qui peut être réglée est de 30°C.
L'appareil chauffe l'eau à la température désirée et se déclenche ensuite automatiquement. Le voyant rouge de contrôle de fonctionnement s'éteint ensuite.
ATTENTION:
Ne maintenez pas les touches du tableau
de commande enfoncées. Les composants
électroniques pourraient d'abîmer.
29
Page 30
Cuisson
3.5 Réglage rapide
5
Vous sélectionnez directement la tempé-
rature d'échauffement la plus élevée en appuyant une seule fois sur le bouton de réglage
de température d'eau (ill. 5). L'eau / les aliments à cuire sont amenés dans ce cas à
ébullition indépendamment du volume qui
aura été versé dans la bouilloire.
REMARQUE:
Lorsqu'une température de „95“ (degrés)
est indiquée, tournez le bouton encore une
fois vers la droite et l'indication de température souhaitée de l'affichage indique deux
traits en mouvement (ill. 5) correspondant
au réglage de température le plus élevé que
permet l'affichage.
3.6 Fonction de maintien de la
température de l'eau
Si vous souhaitez conserver l'eau / les ali-
ments à cuire à une température donnée, utilisez la fonction de maintien de température
d'eau.
Pour activer la fonction de maintien de
température d'eau, procédez comme suit :
1. Remplissez l'appareil comme décrit dans
ZChapitre 3.1, „Remplissage“.
2. Enclenchez l'appareil comme décrit dans
ZChapitre 3.3, „Usage quotidien“.
6
3. Appuyez sur la touche de maintien de la
chaleur „KEEP WARM“ afin d'activer la
touche de maintien de température d'eau
(ill. 6).
- Le voyant de contrôle vert correspondant
au maintien de la température de l'eau
s'allume en plus du voyant rouge de fonctionnement (ill. 6).
- L'appareil ne chauffe alors que jusqu'à ce
que la température réglée soit atteinte.
- L'appareil se déclenche ensuite et le
voyant de contrôle rouge s'éteint.
- La fonction de maintien de température
reste active. (Le voyant de contrôle vert
correspondant au maintien de la température de l'eau reste allumé).
- Dès que la température diminue, l'appareil
se réenclenche et se remet à chauffer. (Le
voyant rouge de contrôle de fonctionnement est allumé).
4. Appuyez sur l'interrupteur „ON/OFF“ pour
désactiver la fonction de maintien de la
température.
Le voyant de contrôle vert correspondant
au maintien de la température de l'eau et
le voyant rouge de contrôle de fonctionnement s'éteignent.
30
Page 31

Entretien
4Entretien
4.1 Après utilisation
REMARQUE:
De manière générale, laissez l'appareil se
refroidir avant de le chauffer à nouveau.
AVERTISSEMENT:
Risques d'électrocution !
Vous évitez ainsi que de l'eau pénètre dans
les éléments de contact. Après avoir vidé
l'appareil de l'eau qu'il contenait, remettez
toujours celui-ci sur son socle, afin que les
éléments de contact soient recouverts et
ainsi protégés contre tout contact, toute
pénétration d'eau et contre la saleté. Ne
trempez jamais l'appareil, le socle ou le
câble électrique dans de l'eau ou dans
d'autres liquides. N'utilisez que peu de
liquide pour le nettoyer.
Ne nettoyez pour cela jamais
l'appareil ou le socle dans un lave-vaisselle.
AVERTISSEMENT:
Danger de brûlure !
Laissez l'appareil se refroidir avant de le
nettoyer.
ATTENTION:
N'utilisez en aucun cas des produits de nettoyage, des détergents ou de l'alcool, car
cela pourrait endommager l'appareil. Utilisez uniquement un produit de nettoyage
doux en cas de fortes salissures.
1. Retirez la fiche de la prise de courant.
2. Videz l'appareil complètement.
3. Nettoyez l'intérieur du Hotpot° en utilisant
avec parcimonie de l'eau.
4. Nettoyez l'extérieur de l'appareil unique-
ment avec un chiffon légèrement humide.
5. Laissez l'appareil sécher.
6. Remettez à nouveau l'appareil sur son so-
cle.
7. Rangez l'appareil dans un endroit frais et
sec.
4.2 Détartrage de l'Aquagrad°
ATTENTION:
Respectez les intervalles de détartrage indiqués ci-dessous. Vous risquez sinon de
consommer inutilement du courant électrique et entre autres d'endommager l'appareil
à long terme.
Détartrez la bouilloire régulièrement en fonction du dépôt de calcaire, mais pour le moins :
- deux fois par an
- avant chaque longue période d'inutilisation
- en cas de dépôt de calcaire visible
- en cas de durée d'échauffement inhabituellement longue
Pour le détartrage, procédez comme suit :
1. Remplissez la bouilloire jusqu'à la marque
„Max“ avec du vinaigre.
2. Enclenchez l'appareil en appuyant sur l'interrupteur “ON/OFF“ et en amenant le vinaigre à ébullition.
3. Laissez le vinaigre agir une nuit entière.
4. Placez aussi le couvercle et le filtre à cal-
caire dans le bain de vinaigre durant une
nuit pour les détartrer.
5. Retirez complètement le vinaigre le lendemain.
6. Faite encore bouillir au moins deux fois de
l'eau fraîche et la jeter ensuite.
7. Rincez la bouilloire à l'eau froide avant de
l'utiliser à nouveau.
REMARQUE:
Vous pouvez aussi utiliser les produits de
détartrage du commerce. Prenez cependant garde à leurs instructions d'utilisation
dans le cas où ils pourraient endommager
la bouilloire.
FR
31
Page 32

Entretien
4.3 Avant d'envoyer l'appareil
AVERTISSEMENT:
Risque de blessures !
Avant de rechercher la cause de l'anomalie,
éteignez l'appareil. N'utilisez jamais un
appareil défectueux. Pour parer à tout danger, ne procédez jamais vous-même à des
réparations. Adressez-vous plutôt au service après-vente Royal
Avant de prendre contact avec un commerçant agréé Royal‚ le service après-vente
Royal ou un commerce spécialisé, veuillez
vérifier, en vous aidant du tableau ci-dessous,
si vous ne pouvez pas remédier vous-même
à l'anomalie.
Problème Cause possible
L'appareil ne
chauffe pas
L'appareil se
déclenche trop
rapidement.
L'appareil
s'échauffe inhabituellement
lentement
Appliance.
Solutions proposées
La fiche n'est pas branchée dans la prise.
Brancher la prise.
Il n'y pas de courant à la
prise.
Essayez de brancher la fiche à une autre prise
après avoir vérifié que celle-ci est correctement alimentée en courant.
La protection contre les
surchauffes s'est déclenchée. Laisser l'appareil se
refroidir et mettre la quantité correcte d'eau.
L'appareil est entartré.
Détartrer l'appareil
ZChapitre 4.2, „Détartrage de l'Aquagrad°“.
4.4 Pièces de rechange
Vous pouvez commander ultérieurement les
pièces détachées et les accessoires :
No. d'art. Description
9119001 Couvercle en verre pour le
Hotpot°
9119002 Plaque de base / socle pour
Vous trouvez celui-ci dans la boutique en ligne de Dirt Devil
ou ZPage 124, „International Service“
M9119 / M3005 / M9000
®
sous www.dirtdevil.de
4.5 Élimination
À la fin du cycle de vie de votre
produit, en particulier lorsque
des dysfonctionnements apparaissent, rendez l'appareil inutilisable en le débranchant et en
coupant le cordon d'alimentation.
Éliminez l'appareil en tenant compte des réglementations locales et nationales en vigueur en matière de protection de l'environnement.
Les déchets électriques ne doivent pas être
jetés avec les déchets domestiques. Pour
toute question relative au recyclage des déchets, demandez conseil à vos autorités communales ou à votre revendeur.
32
Page 33

5 Garantie
Nous assurons une garantie de 24 mois
sur votre appareil à compter de la date
d'achat.
Pendant la garantie, nous nous réservons le
droit de réparer ou de remplacer l'appareil ou
un accessoire gratuitement (les accessoires
endommagés n'impliquent pas forcément le
remplacement de l'appareil) afin de remédier
à tout défaut lié au matériel ou à la fabrication.
Tout dommage résultant d'une utilisation non
conforme (emploi d'une tension ou d'un courant erroné, branchement à une prise non
adaptée ou lorsque l'appareil est cassé) est
exclu de la garantie, de même que l'usure et
les défauts liés à l'usage normal de l'appareil
n'influençant pas le bon fonctionnement de
l'appareil. En cas d'intervention d'une personne ou d'un service non habilité ou lors de l'utilisation de pièces détachées ne provenant
pas de Royal Appliance, les droits de garantie
deviennent caducs.
Les pièces sujettes à usure sont exclues de la
garantie et leur remplacement est payant !
La garantie s'applique uniquement lorsque la
date d'achat, complétée par le tampon du revendeur et par sa signature, figurent sur le
bon de garantie et que celui-ci ou une copie
de la facture d'achat ont été joints à l'appareil
qui a été envoyé. Les prestations de garantie
n'impliquent en aucune façon le prolongement de la durée de garantie, ni un droit à une
nouvelle garantie !
Expédiez l'appareil en ayant pris soin de le vider complètement et en indiquant brièvement
et en majuscule le caractère de l'anomalie.
Envoyez le tout par courrier recommandé
avec la mention "Zur Garantie" ("Appareil
sous garantie“). N'oubliez pas d'y joindre le
bon de garantie ou une copie de la facture
d'achat et d'envoyer le tout à l'adresse suivante :
Garantie
FR
ZPage 124, „International Service“
33
Page 34

Overzicht van uw Hotpot°
Overzicht van uw Hotpot°
Hartelijk dank!
Het verheugt ons dat u voor de Hotpot° gekozen heeft! De Hotpot° is een apparaat waarmee u gerechten, babyvoeding, conserven en
dergelijke op de gewenste temperatuur kunt
brengen. Wij danken u voor de aankoop en
voor het in ons gestelde vertrouwen!
Overzicht
(afb. 1):
1 Voet
(naargelang de uitvoering bij levering inbegr.)
1.1 Contactstekker
1.2 Stroomkabel
1.3 Draaiknop temperatuur
1.4 Display ingestelde temperatuur
1.5 Aan/Uit-schakelaar „ON/OFF“
1.6 Controlelampje (rood)
1.7 Warmhoudknop „KEEP WARM“
1.8 Controlelamp warmhoudfunctie (groen)
2 Elektrisch contact
3 Hotpot°
4 Schenktuit
5 Handgreep
6 Glazen deksel met geïntegreerd zeef
7 „MIN“/„MAX“-aanduiding
8 Temperatuurvoeler
9 Waterkoker Aquagrad°
(naargelang de uitvoering bij levering inbegr.)
10 Deksel met geïntegreerd filterzeef
11 Dekselontgrendeling („ “)
Leveringsomvang/Varianten
2
X
MA
MIN
12 3
1 Hotpot° met voet en Aquagrad°
(Standaard bij levering inbegrepen)
2 Hotpot° met voet
(Special Edition zonder Aquagrad°)
3 Hotpot° solo (Special Edition zonder
Aquagrad° en voet)
- Bedieningshandleiding (niet afgebeeld)
Technische gegevens
Type apparaat : elektrische kookpan/wa-
Model : Hotpot° & Aquagrad°
Spanning : 220-240V~, 50Hz,
Vermogen
Hotpot°
Vermogen
Aquagrad°
Volume
Hotpot°
Volume
Aquagrad°
Instelbaar van - tot : 30 °C - 100 °C
Nauwkeurigheid
(bij 1 l volume)
Gewicht alleen
pan/koker
Gewicht pan/koker
met voet
terkoker met temperatuurinstelling
M9119 (-0/-1/.../-8/-9)
Class I
: 800 W max.
: 2300 W max.
: min. 0,25 l.
max 1,0 l.
: min. 0,5 l.
max 2,0 l.
:± 4°C
:ca. 1 kg
: ca. 1,6 kg
34
Technische en designwijzigingen in verband met
voortdurende productverbeteringen voorbehouden.
© Royal Appliance International GmbH
Page 35

Veiligheidsinstructies
1 Veiligheidsinstructies
1.1 m.b.t. deze handleiding
Lees deze bedieningshandleiding volledig
door voordat u het apparaat gaat gebruiken.
Berg de handleiding goed op.
Als u dit apparaat aan een ander door-
geeft, voeg er dan ook de bedieningshandleiding bij.
Het niet in acht nemen van deze handleiding kan zwaar letsel of schade aan het apparaat tot gevolg hebben.
Voor schade ontstaan door het niet-inachtnemen van deze bedieningshandleiding aanvaarden wij geen aansprakelijkheid.
Belangrijke instructies voor uw veiligheid zijn
speciaal gekenmerkt. Neem deze instructies
absoluut in acht om ongevallen en schade
aan het apparaat te vermijden:
WAARSCHUWING:
Waarschuwt voor gevaren voor uw gezondheid en wijst op mogelijk verwondingsrisico.
OPGELET:
Wijst op mogelijke gevaren voor het apparaat of andere voorwerpen.
AANWIJZING:
Benadrukt tips en informatie.
1.2 m.b.t. heet water/ hete stoom
Verbrandingsgevaar!
Heet water/hete stoom kan ernstige verbrandingen veroorzaken. Houd daarom speciaal rekening met het volgende:
Maak het deksel niet open tijdens het ge-
bruik.
Gebruik het apparaat nooit zonder deksel.
Vermijd het contact met de hete stoom die
tijdens en na het koken ontsnapt.
1.3 m.b.t. de stroomvoeding
Gevaar voor een elektrische
schok!
Het apparaat werkt op elektrische stroom, waarbij in principe
altijd het gevaar van een elektrische schok bestaat. Houd daarom speciaal rekening met het
volgende:
Dompel het apparaat nooit in water of an-
dere vloeistoffen. Vul het apparaat uitsluitend
zoals beschreven met water.
Raak de netstekker of de voet nooit aan
met natte handen.
Trek altijd direct aan de netstekker als u
hem uit het stopcontact wilt trekken. Trek
nooit aan de stroomkabel, omdat deze dan
kan scheuren.
Zorg ervoor dat de stroomkabel niet knikt,
nergens tussen klem komt te zitten, er niet
overheen wordt gereden en deze niet te dicht
bij hittebronnen komt;
Controleer vóór het aansluiten aan de
stroomvoeding of de op het typeplaatje vermelde spanning overeenkomt met de spanning van uw stopcontact. De verkeerde
spanning kan het apparaat onherstelbaar beschadigen.
Gebruik alleen stopcontacten met rand-
aarde.
Gebruik geen meervoudige contactdozen.
Gebruik alleen goedgekeurde, enkele verlengsnoeren die geschikt zijn voor het hoge
vermogen van het apparaat.
Steek de netstekker nooit met geweld in
het stopcontact. Wijzig niets aan de netstekker.
Zet geen andere apparaten op de voet.
Voordat u het apparaat reinigt, dient u het
uit te schakelen en de netstekker los te trekken.
NL
35
Page 36

Veiligheidsinstructies
1.4 m.b.t. hete oppervlakken
Verbrandingsgevaar!
Het apparaat wordt van buiten
heet tijdens het gebruik! Houd
daarom speciaal rekening met
het volgende:
Draag het gevulde apparaat voorzichtig
en houd het uitsluitend aan de handgreep
vast.
Raak de hete kookplaat nooit aan.
Voordat u het apparaat reinigt, moet u het
altijd uitschakelen, laten afkoelen en moet u
de netstekker uittrekken.
1.5 m.b.t. bepaalde groepen van
personen
Dit apparaat is er niet voor bestemd, om
door personen (ook kinderen) met een beperkt fysiek, sensorisch of mentaal vermogen
of met een gebrek aan ervaring en/of gebrek
aan kennis gebruikt te worden, tenzij ze onder
toezicht staan van een persoon die voor hun
veiligheid verantwoordelijk is of van deze persoon aanwijzingen hebben gekregen, hoe dit
apparaat gebruikt moet worden.
Kinderen moeten onder toezicht staan,
om ervoor te zorgen dat ze niet met het apparaat spelen.
Schakel het apparaat uit als u de ruimte
verlaat en trek de stekker uit het stopcontact.
Berg het ontoegankelijk op.
Houd hete vaten en vaten met een hete in-
houd buiten bereik van baby's en kleine kinderen. Hanteer geen hete vaten of vaten met
een hete inhoud als u kleine kinderen draagt.
Verpakkingsmaterialen mogen niet wor-
den gebruikt om ermee te spelen. Ze kunnen
verstikkingsgevaar opleveren.
Personen met een gevoeligheidsstoring,
met name verminderde gevoeligheid voor
temperatuurverschillen, moeten bij het gebruik
van dit apparaat bijzonder voorzichtig zijn.
1.6 m.b.t. de plaats van opstelling
Zorg ervoor dat het apparaat en al het toe-
behoren niet met hete oppervlakken in aanraking komt; Plaats het apparaat niet op of in de
buurt van hittebronnen, zoals b. v. het fornuis.
Plaats het apparaat op een droge, vlakke
en stabiele ondergrond.
1.7 m.b.t. doelmatig gebruik
Het apparaat is alleen bedoeld voor huishoudelijk gebruik. Het is niet geschikt voor industrieel gebruik.
De Hotpot° mag uitsluitend worden ge-
bruikt voor het verwarmen van koude voedingsmiddelen en gerechten.
De Aquagrad° mag uitsluitend worden
gebruikt voor het verwarmen van koud drinkwater.
Elke andere vorm van gebruik geldt als nietdoelmatig en is niet toegestaan.
Verboden is voor de Aquagrad°:
Het vullen met andere vloeistoffen of stof-
fen dan koud drinkwater. Het is vooral verboden om dranken en gerechten te verwarmen.
Verboden is voor de Aquagrad° en Hotpot°:
Het gebruik met niet-levensmiddelen.
Gebruik met een volume onder de „MIN“-
aanduiding of boven de „MAX“-aanduiding.
Het gebruik in de open lucht.
1.8 indien het apparaat defect is
Gebruik dit apparaat nooit als het defect is
of als de stroomkabel defect is. Als de aansluitkabel van dit apparaat wordt beschadigd,
moet deze, om risico te voorkomen, door de
fabrikant of de klantenservice van de fabrikant
of door iemand met dezelfde competentie
worden vervangen.
Geef een defect apparaat voor reparatie
aan een vakhandelaar of de Royal Appliance
klantendienst.
36
Page 37

Apparaat voorbereiden
2 Apparaat voorbereiden
2.1 Uitpakken
1. Pak het apparaat en al het toebehoren uit.
2. Controleer de inhoud op volledigheid en
intactheid.
OPGELET:
Transporteer/verzend het apparaat in principe altijd in de originele verpakking, zodat
het niet beschadigd raakt. Bewaar daarom
de verpakking.
Verwerk niet langer benodigd verpakkingsmateriaal volgens de in uw land geldende
voorschriften.
AANWIJZING:
Als u transportschade constateert, wend u
dan onmiddellijk tot uw handelaar.
2.2 Neerzetten
1. Plaats de voet van het apparaat op een
droge, vlakke, stabiele ondergrond, ver
van water- en hittebronnen.
2. Plaats het deksel op het apparaat
2.3 Deksel van de waterkoker
monteren
2
2.
1.
2.4 Aansluiten
OPGELET:
Gebruik het apparaat alleen als de op het
typeplaatje vermelde elektrische spanning
overeenkomt met die van uw stopcontact.
Verkeerde spanning kan het apparaat
onherstelbaar beschadigen.
1. Rol de kabel van de onderkant van de
voet niet verder af als nodig.
WAARSCHUWING:
Verwondingsgevaar!
Denk aan de veiligheid bij het aansluiten
van de stroomkabel.
2. Zet de stroomkabel in de opening van de
voet vast.
3. Steek de stekker in een stopcontact met
randaarde.
Op het display van de temperatuurinstelling verschijnt: „EE“.
Dit betekent dat de voet al van
stroom wordt voorzien, maar het apparaat daar nog niet op is ingesteld.
4. Plaats het apparaat dusdanig op de voet
dat het op de contactstekker vastklikt.
Op het display van de temperatuurinstelling knippert nu de melding:
„OF“.
Uw apparaat is nu klaar voor gebruik.
OPGELET:
Voorkom dat het apparaat droogkookt,
omdat het anders, ondanks zijn automatische uitschakeling, op de lange duur toch
hierdoor beschadigd kan raken.
NL
1. Plaats het deksel op de waterkoker, zoals
weergegeven in de afbeelding (afb. 2/1.).
Schuif het deksel met de beide uitsparingen op de twee stiften aan de rand van de
waterkoker (afb. 2/1.).
2. Druk het deksel naar achter vast, tot het
hoor- en voelbaar vastklikt (afb. 2/2).
AANWIJZING:
Als het apparaat per ongeluk wordt aangezet als het leeg is, zal de oververhittingsbeveiliging het apparaat automatisch uitschakelen (zie hiervoor ook Zhoofdstuk 3.4,
„Uitschakelautomaat“). Laat het apparaat
eerst volledig afkoelen voordat u het weer
met water/levensmiddelen vult.
37
Page 38

Koken
3 Koken
3.1 Vullen
.
WAARSCHUWING:
Verwondingsgevaar!
Controleer het apparaat vóór elk gebruik.
Een beschadigd apparaat mag niet worden
gebruikt.
1. Neem het apparaat van de voet.
WAARSCHUWING:
Gevaar voor een elektrische schok!
Bij het vullen mag de onderkant van het
apparaat en evenmin de voet in geen geval
nat worden, omdat anders de contacten
kortsluiting kunnen veroorzaken. Daarom
moet de buitenkant van het apparaat droog
zijn voordat deze op de voet gezet mag worden.
2. Doe slechts zoveel water/levensmiddelen
in het apparaat, dat het vulniveau tussen
de MIN“/„MAX“-aanduiding ligt.
AANWIJZING:
Denk er hierbij aan dat het volume verder
toeneemt, als er behalve het water nog
andere levensmiddelen in het apparaat worden gedaan.
AANWIJZING:
Vul de Aquagrad° via het geopende deksel
oftewel via de vul- en schenkopening als
het deksel dicht is. U kunt het deksel openen met behulp van de ontgrendeling „ “
(afb. 3) die in de handgreep geïntegreerd is.
3
3. Sluit het deksel.
4. Zet het apparaat terug op de voet.
<
3.2 Het eerste gebruik
1. Vul het apparaat tot aan de „MAX“-marke-
ring met water (Zhoofdstuk 3.1, „Vullen“).
2. Laat het water twee of drie keer koken
(Zhoofdstuk 3.3, „Dagelijks gebruik“) en
giet het water telkens volledig weg.
AANWIJZING:
Doe, om stroom te besparen, niet meer
water in de waterkoker als u werkelijk nodig
hebt.
38
Page 39

Koken
3.3 Dagelijks gebruik
WAARSCHUWING:
Verbrandingsgevaar!
Het apparaat mag niet worden gebruikt zonder deksel of met openstaand deksel.
Anders bestaat verbrandingsgevaar door
eruitspattende, hete vloeistoffen.
3
1. Vul het apparaat zoals beschreven in
Zhoofdstuk 3.1, „Vullen“.
2. Druk op de Aan/Uit-schakelaar „ON/OFF“
(afb. 3/1.) om het apparaat aan te zetten.
Aan het rode controlelampje ziet u dat het
apparaat water aan het verwarmen is. Op
het display van de temperatuurinstelling
verschijnt nu: „30“.
4
1.
2.
OPGELET:
Houd de bedieningstoetsen nooit lang ingedrukt. Dit zou de elektronica kunnen
beschadigen.
AANWIJZING:
Als u het apparaat tijdens het gebruik van
de voet tilt, stopt het meteen met verwarmen. Op het display van de temperatuurinstelling verschijnt: „EE“. Als u het apparaat
weer op de voet zet, verschijnt meteen weer
de ingestelde temperatuur en het water
wordt verder verwarmd.
NL
3.4 Uitschakelautomaat
Het apparaat beschikt ook over een uitschakelautomaat die (binnen 30 seconden) oververhitting en dus beschadiging van het apparaat voorkomt.
Het apparaat schakelt automatisch uit, zodra:
- de ingestelde temperatuur is bereikt;
- er te weinig of geen water/levensmiddelen
in zitten,
- het apparaat tijdens het gebruik van de
voet wordt genomen.
3. Door aan de temperatuurdraaiknop
(afb. 4/2.) te draaien, stelt u de gewenste
temperatuur in.
- Door naar rechts te draaien, verhoogt u de
temperatuur in stappen van 5 graden.
- Door naar links te draaien, verlaagt u de
temperatuur in stappen van 5 graden.
De laagste instelbare temperatuur is
30 °C.
Het apparaat zal het water/de levensmiddelen
op de gewenste temperatuur verwarmen en
daarna automatisch uitschakelen. Het rode
controlelampje gaat daarna uit.
OPGELET:
Wacht tot de kookplaat volledig is afgekoeld. Daarna mag u het apparaat pas weer
met water/levensmiddelen vullen.
39
Page 40

Koken
3.5 Snelinstelling
5
Door één keer op de temperatuurdraai-
knop (afb. 5) te drukken, kunt u meteen de
hoogste temperatuur instellen. Hierdoor worden het water/de levensmiddelen verhit tot ze
koken, onafhankelijk van de hoeveelheid die
zich in het apparaat bevindt.
AANWIJZING:
Als u de temperatuurdraaiknop nog een
keer naar rechts draait, als in het display
„95“ graden aangegeven worden, dan verschijnen in het display twee bewegende
streepjes (afb. 5) voor de maximale temperatuurinstelling.
3.6 Warmhoudfunctie
Als u het water/de levensmiddelen op een
bepaalde temperatuur wilt houden, kunt u de
warmhoudfunctie gebruiken.
Om de warmhoudfunctie te activeren gaat
u als volgt te werk:
1. Vul het apparaat zoals beschreven in
Zhoofdstuk 3.1, „Vullen“.
2. Zet het apparaat aan, zoals beschreven in
Zhoofdstuk 3.3, „Dagelijks gebruik“.
6
3. Druk op de warmhoudknop „KEEP
WARM“, om deze functie te activeren
(afb. 6).
- Behalve het rode controlelampje gaat nu
ook het groene warmhoudlampje branden
(afb. 6).
- Het apparaat zal het water/de levensmiddelen verwarmen tot de ingestelde temperatuur is bereikt.
- Dan schakelt het apparaat uit en het rode
controlelampje gaat uit.
- De warmhoudfunctie blijft echter actief.
(Het groene warmhoudlampje brandt.)
- Zodra de temperatuur daalt, begint het apparaat weer te verwarmen. (Het rode controlelampje gaat branden).
4. Druk de AAN/UIT-schakelaar „ON/OFF“
om de warmhoudfunctie uit te zetten.
Het groene warmhoudlampje en het rode
controlelampje gaan uit.
40
Page 41

Onderhoud
4 Onderhoud
4.1 Na het gebruik
AANWIJZING:
Het is beter om het apparaat steeds even te
laten afkoelen voordat u het weer aanzet.
WAARSCHUWING:
Gevaar voor een elektrische schok!
Voorkom vocht aan de contactstekker.
Plaats het apparaat altijd weer op zijn voet
na het leegschenken, zodat de contactstekker altijd beschermd is tegen aanraking,
water en vuil. Dompelhet apparaat, de voet
of de kabel nooit in water of andere vloeistoffen. Gebruik maar weinig vocht bij het
reinigen.
Reinig het apparaat of de voet
dus nooit in de vaatwasser.
WAARSCHUWING:
Verbrandingsgevaar!
Voordat u het apparaat reinigt, laat u het
afkoelen.
OPGELET:
Gebruik geen reinigingsmiddelen, schurende middelen of alcohol, omdat deze het
apparaat kunnen beschadigen. Bij sterke
vervuiling met een mild afwasmiddel reinigen.
1. Trek de stekker uit het stopcontact.
2. Maak het apparaat helemaal leeg
3. Reinig de binnenkant van het apparaat
met weinig water.
4. Reinig de buitenkant van het apparaat uit-
sluitend met een licht vochtige doek.
5. Laat het apparaat drogen.
6. Zet het apparaat terug op de voet.
7. Berg het apparaat op in een koele, droge
ruimte.
4.2 De Aquagrad° ontkalken
OPGELET:
Houdt u aan de genoemde intervallen voor
het ontkalken. Anders kan er verhoogd
stroomverbruik optreden en op de lange
duur ook schade aan het apparaat .
Ontkalk de waterkan regelmatig, afhankelijk
van de hoeveelheid kalk, maar minstens:
- twee keer per jaar;
- als u het apparaat voor langere tijd opbergt;
- als er zichtbaar veel kalk in zit;
- als het apparaat zeer lang verhit is geweest.
Ga als volgt te werk voor het ontkalken:
1. Vul de waterkoker met azijn tot het „Max“-
niveau;
2. Druk op de AAN/UIT-schakelaar „ON/
OFF“ van het apparaat en breng de azijn
aan de kook.
3. Laat de azijn 's nachts inwerken.
4. Leg ook het deksel met het kalkfilter in een
azijnbadje om te ontkalken.
5. Gooi de azijn de volgende dag compleet
weg.
6. Kook de volle waterkoker nog twee keer
met vers water uit en giet het water weg.
7. Spoel de waterkoker nog een keer met
koud water door, alvorens u deze opnieuw
gebruikt.
AANWIJZING:
U kunt ook een in de handel verkrijgbare
ontkalker gebruiken. Let in dat geval op de
specifieke gebruiksaanwijzing van de fabrikant.
NL
41
Page 42

Onderhoud
4.3 Voordat u het apparaat
opstuurt
WAARSCHUWING:
Verwondingsgevaar!
Voordat u storingen gaat opsporen, schakelt
u het apparaat eerst uit. Gebruik nooit een
defect apparaat. Repareer nooit zelf; dit om
risico te voorkomen. Neem hiervoor contact
op met de Royal
Voordat u contact opneemt met de verantwoordelijke Royal-dealer, Royal-servicepartner of de vakhandel, kunt u aan de hand van
de volgende tabel controleren of u het probleem zelf kunt verhelpen.
Probleem Mogelijke oorzaak
Apparaat verwarmt niet
Het apparaat
schakelt „te
vroeg“ uit.
Het apparaat
doet bijzonder
lang over het
verwarmen
Appliance klantenservice.
Oplossing
Netstekker zit niet in het
stopcontact.
Netstekker goed in het
stopcontact steken.
Stopcontact heeft geen
stroom.
Test de stekker aan een
ander stopcontact, waarvan u zeker bent dat er
stroom op staat.
De oververhittingsbeveiliging is geactiveerd. Laat
het apparaat afkoelen en
vul het dan met genoeg
water.
Het apparaat is verkalkt
Apparaat ontkalken
Zhoofdstuk 4.2, „De
Aquagrad° ontkalken“.
4.4 Reserveonderdelen
Toebehoren en reserveonderdelen kunnen
worden bijbesteld:
Artikelnr. Omschrijving
9119001 Glazen deksel voor de Hotpot°
9119002 Bodemplaat / voet voor
M9119 / M3005 / M9000
Deze zijn verkrijgbaar in de Dirt Devil
shop op www.dirtdevil.de
of Zpagina 124, „International Service“
®
online-
4.5 Afvalverwijdering
Als de gebruiksduur is afgelopen, met name als er functiestoringen optreden, maak dan het
afgedankte apparaat onbruikbaar door de netstekker uit het
stopcontact te trekken en de
stroomkabel door te knippen.
Recycle het apparaat volgens
de in uw land geldende milieuvoorschriften.
Elektrisch afval mag niet samen met huishou-
delijk afval worden verwijderd. Wend u voor
advies over recycling tot uw gemeentelijke
overheid of uw handelaar.
42
Page 43

5 Garantie
Wij verlenen voor het door ons verkochte
apparaat een garantie van 24 maanden
vanaf de datum van aankoop.
Binnen deze garantieperiode verhelpen wij
naar eigen keuze door reparatie of door vervanging van het apparaat of het toebehoren
(schade aan toebehoren leidt niet automatisch tot vervanging van het complete apparaat) kosteloos alle gebreken die te herleiden
zijn tot materiaal- of productiefouten.
Van de garantie uitgesloten is schade die valt
te herleiden tot ondeskundig gebruik (bedrijf
met verkeerde stroomsoort/-spanning, aansluiting aan niet-geschikte stroombronnen,
breuk enz.), normale slijtage en gebreken die
de waarde of de deugdelijke bruikbaarheid
van het apparaat maar onbeduidend beïnvloeden. Bij ingrepen door een niet door ons
geautoriseerde firma of bij gebruik van andere
dan door originele Royal Appliance reserveonderdelen vervalt de garantie.
Slijtagedelen vallen niet onder de garantie en
moeten daarom worden betaald!
De garantie wordt alleen van kracht als de datum van aankoop door een stempel en handtekening van de handelaar op de garantiekaart is bevestigd, of als er een kopie van de
rekening van het toegestuurde apparaat is bijgevoegd. Garantievergoedingen houden
geen verlenging van de garantieperiode in,
noch het recht op een nieuwe garantie!
Verstuur het apparaat compleet leeggemaakt
en droog met een korte beschrijving van het
defect in blokletters. Voorzie het begeleidende schrijven van de vermelding „Zur Garantie“. Stuurt u het met de garantiekaart of een
kopie van de rekening aan het volgende
adres:
Garantie
NL
Zpagina 124, „International Service“
43
Page 44

Vista de conjunto de su Hotpot°
Vista de conjunto de su Hotpot°
¡Muchas gracias!
¡Nos alegramos de que se haya decidido por
el Hotpot°! Con el Hotpot° ha adquirido un
aparato para calentar toda clase de comidas,
conservas etc. a la temperatura deseada
exacta. ¡Le agradecemos su compra y la confianza depositada en nosotros!
Alcance del suministro/Variantes
2
X
MA
MIN
Vista general
(Fig. 1):
1 Zócalo
(según la ejecución incluido en el alcance
del suministro)
1.1 Clavija de contacto
1.2 Cable
1.3 Regulador giratorio de temperatura
1.4 Indicación del valor nominal de temperatura
1.5 Interruptor de conex. / desconex. “ON/OFF“
1.6 Luz de control de funcionamiento (roja)
1.7 Tecla para conservación del calor “KEEP
WARM“
1.8 Luz de control de la conservación del ca-
lor (verde)
2 Asiento de contacto
3 Hotpot°
4 Pico vaciador
5 Asidero
6 Tapa de vidrio con criba integrada
7 Marcaciones "MIN"/"MAX"
8 Sensor de temperatura
9 Hervidor Aquagrad°
(según la ejecución incluido en el alcance
del suministro)
10 Tapa con criba de filtro integrada
11 Desbloqueo de la tapa („ “)
12 3
1 Hotpot° con zócalo y Aquagrad°
(Alcance de suministro estándar)
2 Hotpot° con zócalo
(Edición especial sin Aquagrad°)
3 Hotpot° solo (edición especial sin
Aquagrad° ni zócalo)
- Instrucciones de operación (no ilustradas)
Datos técnicos
Tipo de aparato : Olla/hervidor eléctrico
con regulador de temperatura
Modelo : Hotpot° & Aquagrad°
M9119 (-0/-1/.../-8/-9)
Tensión : 220-240V~, 50Hz,
Clase I
Potencia
Hotpot°
Potencia
Aquagrad°
Volumen de llenado Hotpot°
Volumen de llenado Aquagrad°
Regulable entre : 30 °C - 100 °C
Precisión
(con 1 l de llenado)
Peso sólo olla/hervidor
Peso olla/hervidor
con zócalo
: 800 W máx.
: 2300 W máx.
: 0,25 l mín.
1,0 l máx.
: 0,5 l mín.
2,0 l máx.
:± 4°C
: apr. 1 kg
: apr. 1,6 kg
44
Nos reservamos el derecho a realizar cambios técnicos y de diseño en el marco de la mejora permanente de nuestros productos.
© Royal Appliance International GmbH
Page 45

Indicaciones de seguridad
1 Indicaciones de seguridad
1.1 sobre el manual de instrucciones
Lea este manual de instrucciones por
completo antes de utilizar el aparato.
Guarde bien las instrucciones.
En caso de que entregue este aparato a
una tercera persona, entréguele también el
manual de instrucciones.
La inobservancia de este manual puede
ser origen de graves lesiones o de daños
en el aparato.
No asumimos la responsabilidad por daños
causados debido al incumplimiento de este
manual de instrucciones.
Las advertencias importantes para su seguridad están marcadas de forma especial. Es
imprescindible tener en cuenta estas advertencias para evitar accidentes y daños en el
aparato:
AVISO:
Advierte sobre peligros para su salud y
muestra posibles riesgos de lesión.
ATENCIÓN:
Indica la posibilidad de que el aparato u
otros objetos corran peligro.
ADVERTENCIA:
Destaca consejos e informaciones.
1.2 sobre agua/vapor caliente
¡Peligro de escaldadura!
El agua/vapor caliente puede
llevar a graves escaldaduras.
Por esta razón, tenga especialmente en cuenta lo siguiente:
Jamás retire la tapa durante el funciona-
miento.
No opere el aparato sin tapa.
Evite el contacto con vapores calientes
que pueden producirse durante y después de
cocinar.
1.3 sobre la alimentación de
corriente
¡Peligro de una descarga
eléctrica!
El aparato funciona con corriente eléctrica, por tanto existe en general el peligro de una
descarga eléctrica. Por esta razón, tenga especialmente en
cuenta lo siguiente:
Jamás sumerja el aparato en agua u otro
líquido. Complete el agua exclusivamente como se describe en el aparato.
Jamás agarre la clavija de red comercial o
el zócalo con las manos húmedas.
Si quiere sacar la clavija de red comercial
del enchufe hálela siempre directamente de
la clavija. Jamás tire directamente del cable
eléctrico porque podría romperse.
Para esto tenga en cuenta que el cable de
energía no esté doblado, enganchado, que se
pase por encima de él o se opere en la cercanía de fuentes de agua o de calor.
Antes de la conexión a la alimentación de
corriente cerciórese que la tensión indicada
en la placa de características corresponde
con la tensión de su enchufe. Una tensión
equivocada puede destruir el aparato.
Emplee solo cajas de enchufe con toma
de tierra.
No utilice enchufes múltiples. Si es preci-
so utilice cable de extensión comprobado,
normal, que esté previsto para el mayor consumo de energía del aparato.
Jamás inserte con violencia la clavija de
red comercial en el enchufe. Nunca modifique
la clavija de red comercial.
No apile ningún otro aparato sobre el zó-
calo.
Antes de limpiar o dar mantenimiento al
aparato, apáguelo siempre y desenchúfelo.
ES
45
Page 46

Indicaciones de seguridad
1.4 sobre superficies calientes
¡Peligro de escaldadura!
¡La superficie exterior del aparato se calienta durante el funcionamiento! Por esta razón,
tenga especialmente en cuenta
lo siguiente:
Transporte el aparato lleno con cautela y
exclusivamente utilizando el asidero.
Nunca toque la plancha calentadora ca-
liente.
Antes de limpiar o dar mantenimiento al
aparato, apáguelo siempre, extraiga la clavija
de red y deje enfriar el aparato.
1.5 sobre determinados grupos
de personas
Este aparato no está destinado para ser
usado por personas (incluidos niños) con capacidad física, sensorial o mental restringida
o con falta de experiencia y/o de conocimientos, a no ser que sean supervisadas por una
persona responsable de su seguridad o hayan recibido de ella instrucciones de cómo
usar el aparato.
Los niños deben ser supervisados para
asegurarse de que no jueguen con el aparato.
Al abandonar el cuarto siempre apague el
aparato y saque la clavija de red del enchufe.
Guárdelo en un lugar fuera de su alcance.
Mantenga los envases calientes y enva-
ses con contenido caliente alejados de bebés
e infantes. Jamás transporte simultáneamente infantes y el envase caliente o con contenido caliente.
El material de embalaje no debe ser utili-
zado para jugar. Existe peligro de asfixia.
Personas con discapacidad sensorial, es-
pecialmente con sensibilidad reducida a diferencias de temperaturas, deben ser mucho
más cuidadosas al usar este aparato.
46
1.6 sobre el sitio de ubicación
Procure que el aparato y todos los acce-
sorios no entren en contacto con superficies
calientes. No coloque el aparato sobre o en la
cercanía inmediata de fuentes de calor, como
por ejemplo, placas de cocina.
Para el funcionamiento disponga el apa-
rato sobre una superficie seca, lisa y estable.
1.7 sobre el uso conforme
El aparato está destinado sólo al uso doméstico. No es adecuado para un uso comercial.
El Hotpot° está destinado exclusivamen-
te al calentamiento de alimentos y comidas
fríos.
El Aquagrad° debe ser utilizado exclusi-
vamente paar el calentamiento de agua potable fría.
Cualquier otra utilización se considera no
conforme y está prohibida.
Para el uso del Aquagrad° está prohibido:
El llenado con líquidos o medios diferen-
tes al agua potable fría. En particular, está
prohibido el calentamiento de bebidas o comidas.
Tanto para el Aquagrad° como el Hotpot°
queda prohibido:
El funcionamiento con sustancias no ali-
menticias.
El funcionamiento con volúmenes de lle-
nado por debajo de la marca "MIN" o por encima de la marca "MAX".
El empleo al aire libre.
1.8 en caso de que el aparato esté
averiado
Jamás utilice un aparato defectuoso o un
aparato con un cable de corriente averiado.
Para evitar riesgos, si la línea de conexión de
este aparato está dañada, deberá ser reemplazada por el fabricante o por su servicio de
asistencia al cliente o por una persona igualmente calificada.
Entregue un aparato defectuoso para su
reparación a un distribuidor especializado o al
Servicio de atención al cliente de Royal
Appliance.
Page 47

Preparar el aparato
2 Preparar el aparato
2.1 Desembalaje
1. Desembale el aparato y todos los acceso-
rios.
2. Compruebe la totalidad e integridad del
contenido.
ATENCIÓN:
Transporte / envíe el aparato siempre en su
embalaje original para que no resulte dañado. Para ello guarde el embalaje.
Elimine el material de embalaje que ya no le
haga falta según las normas vigentes en su
país.
ADVERTENCIA:
En caso de descubrir algún daño debido al
transporte, diríjase inmediatamente a su
distribuidor.
2.2 Colocación
1. Sitúe el zócalo del aparato lejos de fuen-
tes de agua y de calor sobre una superficie seca, lisa y estable.
2. Coloque la tapa sobre el aparato.
2.3 Montar la tapa del hervidor
2
2.
1.
2.4 Conectar
ATENCIÓN:
Use el aparato únicamente si la tensión
eléctrica indicada en la placa de características se corresponde con la tensión de su
caja de enchufe. Una tensión equivocada
puede destruir el aparato.
1. Desenrolle el cable de la parte inferior del
zócalo tanto como sea necesario.
AVISO:
¡Peligro de lesiones!
Al colocar el cable tenga en cuenta la seguridad contra accidentes.
2. Fije el cable apretándolo nuevamente en
el orificio de salida del zócalo.
3. Enchufe la clavija de red en un enchufe
con contacto de puesta a tierra.
En el display de la indicación del valor nominal de temperatura aparece
"EE".
Esto muestra que el zócalo ya está
siendo alimentado con corriente, pero el aparato aún no está colocado
encima.
4. Coloque el aparato sobre el zócalo de tal
modo que encaje la clavija de contacto.
En la indicación del valor nominal de
temperatura parpadea "OF".
Su aparato está listo para ser utilizado.
ATENCIÓN:
Evite la operación en seco del aparato, porque a largo plazo puede ser dañado a pesar
del dispositivo automático de desconexión
incorporado.
ES
1. Coloque la tapa sobre el hervidor como se
ilustra (Fig. 2/1.).
Deslice la tapa con ambas entalladuras
sobre las dos espigas en el borde del hervidor (Fig. 2/1.).
2. Presione la tapa hacia atrás firmemente,
hasta que encaje audible y perceptiblemente (Fig. 2/2.).
ADVERTENCIA:
Si el aparato es conectado accidentalmente
estando vacío, la protección contra sobrecalentamiento lo desconecta automáticamente (véase también ZCapítulo 3.4, "Dis-
positivo automático de desconexión"). Deje
enfriar completamente el aparato antes de
volverlo a llenar con agua o alimentos a
cocinar.
47
Page 48

Cocinar
3 Cocinar
3.1 Llenar
.
AVISO:
¡Peligro de lesiones!
Compruebe el aparato antes de cada uso.
Un aparato dañado no debe ser utilizado.
1. Retire el aparato del zócalo.
AVISO:
¡Peligro de una descarga eléctrica!
Al llenar, de ninguna manera deben mojarse
ni la cara inferior del aparato ni el zócalo,
porque si no, los contactos allí situados
podrían causar un cortocircuito. Por lo tanto
también debe estar seco el exterior del aparato antes de que pueda ser colocado sobre
el zócalo.
2. Llene el aparato con una cantidad de
agua o alimentos tal que el nivel de llenado quede entre las marcas "MIN"/"MAX".
ADVERTENCIA:
Al mismo tiempo, tenga en cuenta que el
volumen de llenado en el Hotpot° sigue
aumentando, si además del agua se añaden otros alimentos al aparato.
ADVERTENCIA:
Para ahorrar energía, llene sólo tanta agua
como necesite.
ADVERTENCIA:
Llene el Aquagrad° con la tapa cerrada a
través de la abertura de llenado o de
vaciado o con la tapa abierta. Podrá abrir la
tapa activando el desbloqueo de la misma
„ “ (Fig. 3) integrado en el asidero.
3
3. Cierre la tapa.
4. Coloque nuevamente el aparato sobre el
zócalo.
3.2 Primer uso
1. Agregue agua hasta alcanzar la marca
"MAX" del aparato (ZCapítulo 3.1, "Lle-
nar").
2. Haga hervir el agua dos a tres veces
(ZCapítulo 3.3, "Utilización diaria") y deséchela completamente después de cada
calentamiento.
<
48
Page 49

Cocinar
3.3 Utilización diaria
AVISO:
¡Peligro de escaldadura!
El aparato no se debe poner en funcionamiento con la tapa defectuosa o abierta.
Existe peligro de escaldadura por líquido
que salta.
3
1. Llene el aparato como se describe en
ZCapítulo 3.1, "Llenar".
2. Oprima el interruptor de conexión / desconexión "ON/OFF" (Fig. 3/1.) para encender el aparato.
La luz de control de funcionamiento roja
indica que el aparato calienta. La indicación del valor nominal de temperatura
muestra "30".
4
3. Ahora ajuste la temperatura deseada del
agua girando el regulador giratorio de
temperatura (Fig. 4/2.).
- Girando hacia la derecha aumenta la temperatura en pasos de 5°C.
- Girando hacia la izquierda disminuye la
temperatura en pasos de 5°C.
La temperatura más baja configurable es
de 30 °C.
Ahora el aparato calienta el agua/los alimentos a la temperatura deseada y posteriormente se apaga automáticamente. Acto seguido
se ilumina la luz de control de funcionamiento
roja.
1.
2.
ATENCIÓN:
No mantenga oprimidas las teclas para operación en el panel de control. Pudiera resultar dañada la parte electrónica.
ADVERTENCIA:
Si el aparato es retirado del zócalo durante
la operación se detiene el proceso de
calentamiento. La indicación del valor nominal de temperatura muestra "EE". Si usted
vuelve a colocar el aparato sobre el zócalo,
se muestra nuevamente la temperatura
ajustada anteriormente y se sigue calentando.
3.4 Dispositivo automático de
desconexión
El aparato dispone de un dispositivo automático de desconexión, el cual evita un sobrecalentamiento (dentro de 30 segundos) y con
esto un daño al aparato.
Se efectúa la desconexión automática tan
pronto como:
- se llega a la temperatura pre-ajustada,
- no se ha vertido nada o una cantidad demasiado pequeña de agua o alimento,
- el aparato es retirado del zócalo durante
la operación.
ATENCIÓN:
Aguarde hasta que la plancha calentadora
se haya enfriado completamente. Recién
entonces podrá el aparato ser llenado nuevamente con agua/alimentos.
ES
49
Page 50

Cocinar
3.5 Ajuste rápido
5
Oprimiendo una vez el regulador giratorio
de temperatura (Fig. 5) llega directamente al
ajuste de temperatura más alto. En este caso
el agua/alimento se lleva a ebullición independientemente de la cantidad llenada.
ADVERTENCIA:
Si usted da vuelta al regulador giratorio de
temperatura con la indicación de "95" grados una vez más a la derecha, la indicación
del valor nominal de temperatura muestra
dos líneas móviles (Fig. 5) para el ajuste de
la temperatura más alto posible.
3.6 Función de conservación del
calor
En el caso que quisiera mantener el agua/
alimento con una determinada temperatura,
utilice la función de conservación del calor.
Para activar la función de conservación
del calor, proceda como sigue:
1. Llene el aparato como se describe en
ZCapítulo 3.1, "Llenar".
2. Ponga el aparato en funcionamiento co-
mo se describe en ZCapítulo 3.3, "Utiliza-
ción diaria".
6
3. Oprima la tecla para conservación del ca-
lor "KEEP WARM" para activar la función
de conservación del calor (Fig. 6).
- Aparte de la luz de control de funcionamiento roja, la luz verde de control de la
conservación del calor empieza a encenderse (Fig. 6).
- Ahora el aparato se calienta hasta llegar a
la temperatura configurada.
- Entonces el aparato se apaga y se ilumina
la luz de control de funcionamiento roja.
- La función de conservación del calor queda ulteriormente activa. (La luz verde de
control de la conservación del calor se enciende).
- Tan pronto como desciende la temperatura, el aparato se vuelve a encender y se
calienta. (Se ilumina la luz de control de
funcionamiento roja).
4. Oprima el interruptor de conexión / desconexión "ON/OFF" para desactivar la función de conservación del calor.
La luz de control de conservación del calor y la luz de control de funcionamiento se
apagan.
50
Page 51

Mantenimiento
4 Mantenimiento
4.1 Después del uso
ADVERTENCIA:
Como regla general, deje enfriar el aparato
completamente antes de un nuevo calentamiento.
AVISO:
¡Peligro de una descarga eléctrica!
Evite que la humedad alcance la clavija de
contacto. Vuelva a colocar siempre el aparato sobre su zócalo después de verter /
vaciar, para que la clavija de contacto
quede cubierta y protegida contra contacto,
agua y suciedad. Jamás sumerja el aparato,
el zócalo o el cable en agua o en otros líquidos. Para la limpieza utilice solamente cantidades pequeñas de líquido.
Por ello, jamás lave el aparato o
el zócalo en el lavavajillas.
AVISO:
¡Peligro de escaldadura!
Antes de limpiar el aparato, déjelo enfriar.
ATENCIÓN:
No utilice productos de limpieza, abrasivos,
ni alcohol, ya que pueden dañar el aparato.
En caso de suciedad intensa utilice a lo
sumo un agente de lavado suave.
1. Desenchufe la clavija del enchufe.
2. Vacíe el aparato completamente.
3. Limpie el interior del Hotpot° usando can-
tidades pequeñas de agua.
4. Limpie la parte exterior del aparato exclu-
sivamente con un paño ligeramente húmedo.
5. Deje secar el aparato.
6. Coloque nuevamente el aparato sobre su
zócalo.
7. Conserve el aparato en un cuarto frío y
seco.
4.2 Descalcificación del Aquagrad°
ATENCIÓN:
Observe los intervalos de descalcificación
dados a continuación. De lo contrario es
inminente un consumo innecesariamente
elevado de corriente, a largo plazo y bajo
ciertas circunstancias hasta daños al aparato.
Descalcifique el hervidor periódicamente, de
acuerdo al grado de calcificación, sin embargo como mínimo:
- dos veces por año,
- antes de cualquier almacenamiento prolongado,
- en caso de calcificación visible
- en caso de duración de calentamiento extremadamente larga.
Para descalcificar proceda como sigue:
1. Llene el hervidor con vinagre hasta la
marca "Max".
2. Conecte el aparato con el interruptor de
conexión / desconexión "ON/OFF" y haga
hervir el vinagre.
3. Deje actuar el vinagre durante la noche.
4. Asimismo, deje durante la noche la tapa
con filtro de cal en un baño de vinagre para su descalcificación.
5. Al día siguiente deseche completamente
el vinagre.
6. Vuelva a hervir agua en el hervidor al menos dos veces con agua fresca y deséchela.
7. Enjuague el hervidor con agua fría antes
de utilizarlo de nuevo.
ADVERTENCIA:
También puede utilizar descalcificantes disponibles comercialmente. Sin embargo
tenga en cuenta sus instrucciones eventualmente divergentes de uso.
ES
51
Page 52

Mantenimiento
4.3 Antes de remitir el aparato
AVISO:
¡Peligro de lesiones!
Apague el aparato antes de pasar a la búsqueda de averías. Jamás utilice un aparato
defectuoso. Para evitar riesgos nunca lo
repare por su cuenta. Para esto diríjase al
servicio al cliente de Royal
Antes de contactar a su concesionario oficial
Royal, al socio de servicio Royal‚ o a su mercado especializado, verifique con la siguiente
tabla si puede solucionar el problema por sí
mismo.
Problema Posible causa
Solución
El aparato no
calienta
El aparato se
apaga "muy
temprano"
El aparato necesita un tiempo extremadamente largo
para el proceso
de calentamiento
La clavija de red no está
enchufada.
Insertar la clavija de red
comercial.
La caja de enchufe no tiene corriente.
Compruebe el funcionamiento del aparato en una
caja de enchufe de la que
esté seguro de que tiene
corriente.
La protección de sobrecalentamiento ha reaccionado. Dejar enfriar el aparato
y llenar con la cantidad de
agua correcta.
El aparato está calcificado.
Descalcificar el aparato
ZCapítulo 4.2, "Descalcificación del Aquagrad°".
Appliance.
4.4 Piezas de recambio
Los accesorios, así como las piezas de recambio, se pueden adquirir con posterioridad:
Nº de artículo Descripción
9119001 Tapa de vidrio para el Hotpot°
9119002 Placa de fondo / Zócalo para
M9119 / M3005 / M9000
Ud. los obtiene en el Dirt Devil
bajo www.dirtdevil.de
o bien ZPágina 124, „International Service“
®
Onlineshop
4.5 Eliminación
Cuando el aparato haya alcanzado el fin de su vida útil, en especial cuando aparezcan problemas de funcionamiento,
inutilícelo desenchufando el enchufe y cortando el cable eléctrico.
Elimine el aparato de acuerdo con las normas
medioambientales vigentes en su país.
Los residuos eléctricos no deben ser desechados con los residuos domésticos. Diríjase a su ayuntamiento o a su proveedor en caso de dudas sobre el reciclaje.
52
Page 53

5 Garantía
Ofrecemos una garantía de 24 meses a
partir de la fecha de compra para el aparato distribuido por nosotros.
Durante este periodo de garantía eliminaremos gratuitamente todas las fallas que se deban al material o a errores de fabricación. Esta eliminación se efectuará según nuestro
arbitrio, mediante la reparación o cambio del
aparato o del accesorio (los daños de piezas
de accesorios no conllevan un cambio automático de todo el aparato).
Quedan excluidos de la garantía los daños
que sean consecuencia de un uso inadecuado (operación del aparato con un tipo de corriente/tensión equivocados, conexión a fuentes de alimentación inadecuadas, rotura,
etc.), de desgaste y de defectos que no influyan significativamente sobre el valor o la capacidad de uso del aparato. La garantía caduca si interviene un establecimiento no
autorizado por nosotros o si se utilizan piezas
de recambio que no sean las originales de
Royal Appliance.
¡Las piezas de desgaste no están incluidas en
la garantía y por lo tanto no son gratuitas!
La garantía sólo entrará en vigor si la tarjeta
de garantía está provista de la fecha de compra, validada por el sello y la firma del vendedor, o si se adjunta una copia de la factura de
compra del aparato enviado. ¡Los servicios
de garantía no generan una prolongación del
período de garantía, ni comienza por ello el
derecho a una nueva garantía!
Envíe el aparato completamente vacío y seco, así como con una breve descripción del
problema en letra de imprenta. Indique en la
carta de acompañamiento la observación
"Garantía". Envíelo junto con la tarjeta de garantía o una copia de la factura de compra a
la siguiente dirección:
Garantía
ES
ZPágina 124, „International Service“
53
Page 54

Обзорная информация о Вашей электрической кастрюле
Hotpot°
Обзорная информация о Вашей электрической кастрюле Hotpot°
Большое спасибо!
Мы рады, что Вы выбрали электрическую
кастрюлю Hotpot°! Купив Hotpot°, Вы приобрели устройство для разогрева до точной температуры блюд, детского питания,
консервов и тому подобных продуктов.
Благодарим Вас за покупку и за оказанное
доверие!
Обзор
(рис. 1):
1 Цоколь
(в комплекте поставки в зависимости
от исполнения)
1.1 Контактный штекер
1.2 Токопроводящий кабель
1.3 Ручка настройки температуры
1.4 Индикатор заданной величины темпе-
ратуры
1.5 Выключатель “ON/OFF“
1.6 Рабочая контрольная лампа (красная)
1.7 Кнопка поддержания горячего состоя-
ния “KEEP WARM“
1.8 Контрольная лампа поддержания горя-
чего состояния (зелёная)
2 Контактное крепление
3 Hotpot°
4 Носик
5 Ручка
6 Стеклянная
шлагом
7 Маркировка “MIN“/“MAX“
8 Термочувствительный элемент
9 Кипятильник Aquagrad°
(в комплекте поставки в зависимости
от исполнения)
10 Крышка с фильтрующим ситом
11 Кнопка деблокировки крышки („ “)
крышка с встроенным дур-
Комплект поставки/Варианты
2
X
MA
MIN
12 3
1 Электрокастрюля Hotpot° с цоколем и
кипятильником Aquagrad°
(стандартная комплектация)
2 Электрокастрюля Hotpot° с цоколем
(специальная комплектация без
Aquagrad°)
3 Hotpot° solo (специальная комплекта-
ция без Aquagrad° и цоколя)
- Инструкция по эксплуатации (без рисунка)
Технические данные
Тип прибора : электрическая каст-
Модель : Hotpot° & Aquagrad°
Напряжение : 220-240В~, 50Гц,
Мощность
Hotpot°
Мощность
Aquagrad°
Ёмкость
Hotpot°
Ёмкость
Aquagrad°
Термостатированность в диапазоне
Точность (при заполнении 1 л)
Вес только кастрюли/кипятильника
Вес кастрюли/кипятильника с цоколем
рюля / кипятильник с
температурным регулятором
M9119 (-0/-1/.../-8/-9)
Класс I
:800 Вт макс.
: 2300 Вт макс.
: 0,25 л мин.
1,0 л макс.
:0,5 л мин.
2,0 л макс.
: 30 °C - 100 °C
:± 4 °C
: ок
. 1 кг
: ок. 1,6 кг
54
Ввиду постоянного усовершенствования продукции, мы оставляем за собой право на внесение
технических и конструктивных изменений.
© Royal Appliance International GmbH
Page 55

Правила техники безопасности
1 Правила техники безо-
пасности
1.1 Об инструкции по эксплуатации
Прежде чем начать работать с прибо-
ром, полностью прочитайте эту инструкцию по эксплуатации.
Бережно храните инструкцию.
В случае передачи устройства третье-
му лицу, передайте также инструкцию по
эксплуатации.
Несоблюдение данной инструкции может привести к тяжелым травмам или
повреждению прибора.
Мы не несём ответственности за ущерб,
возникший вследствие несоблюдения
инструкции по эксплуатации.
Важные указания для Вашей безопасности
отмечены особым образом. Обязательно
соблюдайте эти указания, чтобы избежать
травм и повреждения прибора:
этой
Предупреждение:
Предупреждает об опасностях для Вашего здоровья и указывает на возможные
опасности получения травм.
Внимание:
Указывает на возможные угрозы для прибора или других предметов.
Указание:
Выделяет рекомендации и информацию.
1.2 Предупреждение о горячей
воде/паре
Опасность обваривания!
Горячая вода/пар может вызвать сильное обваривание.
Поэтому обратите особое
внимание на следующее:
Во время эксплуатации не снимайте
крышку.
Не эксплуатируйте устройство без крышки.
Избегайте контакта с горячим паром,
который выделяется во время кипячения и
после него.
1.3 Об электропитании
Опасность удара
электрическим током!
Прибор работает на электрическом токе; при этом существует опасность получения
удара электрическим током.
Поэтому обратите особое
внимание на следующее:
Никогда не погружайте прибор в воду
или другие жидкости. Заливайте воду в устройство исключительно только описанным способом.
Не прикасайтесь к сетевой вилке или
цоколю мокрыми
Если Вы хотите вынуть сетевую вилку
из штепсельной розетки, то всегда тяните
непосредственно за саму вилку. Не тяните
за кабель, он может оборваться.
Следите за тем, чтобы токопроводя-
щий кабель не был согнут, защемлен, не
подвергался переезду транспортом и не
соприкасался с источниками тепла.
Перед подключением к электропита-
нию убедитесь,
на заводской табличке, соответствует напряжению Вашей штепсельной розетки.
Несоответствующее напряжение может
привести к порче прибора.
Используйте только штепсельные ро-
зетки с защитным контактом.
Не пользуйтесь многоконтактными
штепсельными розетками. В случае необходимости используйте проверенные, одинарные удлинительные кабели, рассчитанные на высокую потребляемую мощность устройства.
Не
вставляйте сетевую вилку в розетку
с усилием. Не модифицируйте сетевую
вилку.
Не ставьте на цоколь электрокастрюли
другие приборы.
Прежде чем выполнять чистку или те-
хобслуживание, отключите устройство и
извлеките сетевую вилку.
руками.
что напряжение, указанное
55
RUS
Page 56

Правила техники безопасности
1.4 Предупреждение о горячих
поверхностях
Опасность ожога!
Наружная поверхность устройства нагревается во время эксплуатации! Поэтому
обратите особое внимание на
следующее:
Переносите заполненное устройство с
осторожностью и исключительно за ручки.
Не прикасайтесь к горячей нагрева-
тельной плите.
Прежде чем выполнять чистку или те-
хобслуживание, отключите устройство, извлеките сетевую вилку и дайте устройству
охладиться.
1.5 Об определенных группах
лиц
Данный прибор не предназначен для
эксплуатации лицами (включая детей) с ограниченными физическими, сенсорными
или душевными способностями, или же с
недостаточным опытом и/или навыками,
за исключением тех случаев, когда их сопровождают лица, ответственные за их безопасность, или же эти лица дают им указания по эксплуатации прибора.
Следите
играть с прибором. Храните устройство в
недоступном месте.
Отключите устройство, если выходите
из помещения, и извлеките сетевую вилку
из розетки.
Держите ёмкости с горячей водой в
месте, недоступном для младенцев и маленьких детей. Не переносите одновременно маленьких детей и ёмкости с горячей водой.
Запрещается использовать упаковоч-
ные материалы для игры. Существует
опасность удушения.
Лица с нарушениями чувствительнос-
ти, особенно с пониженной чувствительностью к разности температур, должны
быть особенно осторожны при применении
данного прибора.
за детьми и не позволяйте им
56
1.6 О месте установки
Следите за тем, чтобы устройство и все
принадлежности не соприкасались с горячими поверхностями. Не ставьте устройство на источники нагрева или в непосредственной близости от них, напр., на кухонные плиты.
Для эксплуатации поместите устройство
на сухую, ровную и прочную основу.
1.7 О применении согласно
назначению
Прибор можно использовать только в домашнем хозяйстве. Оно не предназначено
для промышленного применения.
Hotpot° можно использовать исключи-
тельно для нагрева холодных продуктов
питания и блюд.
Aquagrad° можно использовать исключи-
тельно для нагрева холодной питьевой воды.
Любое другое использование считается
использованием не по назначению и как
таковое запрещено.
В случае с Aquagrad° запрещается
Заливать другие жидкости или среды,
кроме холодной питьевой воды. В особенности запрещается разогревать напитки и
блюда.
В случае и с Aquagrad°, и с Hotpot° запрещается:
Эксплуатация с непищевыми продуктами.
Эксплуатация с уровнем заполнения
ниже маркировки "MIN" или выше "MAX".
Использование на открытом воздухе.
:
1.8 В случае повреждения уст-
ройства
Никогда не эксплуатируйте неисправный
прибор или прибор с повреждённым токопроводящим кабелем. Если питающий провод этого устройства поврежден, то, во избежание опасностей, его замену должен
производить изготовитель или его сервисная служба, либо специалист, имеющий
аналогичную квалификацию.
Отправьте прибор для ремонта местно-
му дилеру или в отдел обслуживания клиентов компании Royal.
Page 57

Подготовка устройства
2 Подготовка устройства
2.1 Распаковка
1. Распакуйте прибор и все принадлеж-
ности.
2. Проверьте комплектность и целост-
ность содержимого.
Внимание:
Транспортируйте / отправляйте прибор
всегда принципиально в оригинальной
упаковке, чтобы не повредить его. Для
этого сохраните упаковку.
Утилизируйте ненужный упаковочный
материал в соответствии с действующими в Вашей стране предписаниями.
Указание:
В случае обнаружения повреждений, возникших при транспортировке, незамедлительно обращайтесь к Вашему продавцу.
2.2 Установка
1. Установите цоколь на удалённом рас-
стоянии от источников воды и нагрева,
на сухой, ровной и прочной основе.
2. Установите на прибор крышку.
2.3 Монтаж крышки кипятильника
2
2.4 Подключение
Внимание:
Эксплуатируйте устройство только в том
случае, если указанное на заводской табличке электрическое напряжение совпадает с напряжением в Вашей штепсельной розетке. Несоответствующее напряжение может привести к порче прибора.
1. Размотайте кабель от нижней стороны
цоколя на необходимую длину.
Предупреждение:
Опасность травматизма!
При размещении кабеля учитывайте
безопасность.
2. Зафиксируйте кабель, закрепив его в
выходном отверстии цоколя.
3. Вставьте сетевую вилку в розетку с за-
щитным контактом.
На дисплее с индикацией заданной величины температуры появляется “EE“.
Это означает, что на цоколь подается ток,
но прибор ещё не установлен на
4. Поставьте прибор на цоколь так, чтобы
он зафиксировался на контактном штекере.
На индикаторе заданной величины температуры мигает “OF“.
Теперь Ваше устройство готово к работе.
него.
RUS
2.
1.
1. Установите крышку на кипятильник, как
показано на рисунке (рис. 2/1.).
Надеть крышку двумя углублениями на
два штифта, находящихся на кромке
кипятильника (рис. 2/1.).
2. С усилием нажать на крышку по на-
правлению назад, чтобы она защёлкнулась (рис. 2/2.).
Внимание:
Избегайте эксплуатации устройства без
воды, поскольку, несмотря на встроенную
автоматику отключения, могут возникнуть
повреждения.
Указание:
Если электрокастрюля случайно включена в пустом состоянии, устройство защиты от перегрева автоматически отключает устройство (см. также Zглава 3.4,
„Автоматика отключения“). Сначала
полностью охладите устройство, прежде
чем снова заполнять его водой/приготовляемым продуктом.
57
Page 58

Приготовление пищи
3 Приготовление пищи
3.1 Заполнение
.
Предупреждение:
Опасность травматизма!
Перед каждым использованием производите проверку устройства. Нельзя пользоваться поврежденным прибором.
1. Снимите прибор с цоколя.
Предупреждение:
Опасность удара электрическим током!
При заполнении прибора° жидкость не
должна попадать на его нижнюю часть и
цоколь, иначе находящиеся там контакты
могут вызвать короткое замыкание. Кроме того, поверхность прибора° также
должна быть сухой, прежде чем она
будет установлена на цоколь.
2. Заполняйте воду/приготовляемый про-
дукт в прибор только до уровня между
маркировкой “MIN“/“MAX“.
Указание:
При этом следует учитывать, что объём в
электрокастрюле Hotpot° увеличится,
если в прибор кроме воды будут добавлены другие продукты.
Указание:
Чтобы сэкономить электроэнергию, заливайте только необходимое количество
воды.
Указание:
Заполняйте Aquagrad° или при закрытой
крышке через отверстие носика или
через открытую крышку. Крышку Вы
можете открыть, задействуя кнопку
деблокировки, установленную в ручку
„“ (рис. 3).
3
3. Закройте крышку.
4. Поставьте прибор обратно на цоколь.
3.2 Первое применение
1. Заполняйте воду только до маркировки
"MAX“ на приборе (Zглава 3.1, „Запол-
нение“).
2. Два - три раза вскипятите воду (Zглава
3.3, „Ежедневное применение“) и после
каждого кипячения полностью сливайте ее.
<
58
Page 59

Приготовление пищи
3.3 Ежедневное применение
Предупреждение:
Опасность обваривания!
Электрокастрюлю нельзя эксплуатировать
при отсутствующей или открытой крышке.
Существует опасность обваривания от
разбрызгивающейся воды.
3
1. Заполните электрокастрюлю, как опи-
сано в Zглава 3.1, „Заполнение“.
2. Нажмите переключатель Вкл/Выкл
„ON/OFF“ (рис. 3/1.), чтобы включить
устройство.
Красная рабочая контрольная лампа
сообщает о том, что устройство нагревается. Индикатор заданной величины
температуры указывает „30“.
4
1.
2.
Внимание:
Не удерживайте кнопки на панели управления в нажатом состоянии. Электроника
может повредиться.
Указание:
Если прибор снимается с цоколя во время эксплуатации, процесс нагрева прекращается. Индикатор заданной величины температуры указывает “EE“. Если
прибор поставить назад на цоколь, на
индикаторе снова появляется предварительно настроенная температура и
нагрев продолжится.
3.4 Автоматика отключения
Электрокастрюля имеет автоматику отключения, которая (в течение 30 секунд)
предотвращает перегрев устройства и, таким образом, его порчу.
Автоматическое отключение происходит, если:
- достигнута предварительно настроенная температура,
- слишком мало воды/приготовляемого
продукта, либо он отсутствует,
- прибор во время работы снимается с
цоколя.
RUS
3. Теперь путём вращения ручки настрой-
ки температуры (рис. 4/2.) установите
нужную температуру.
- При вращении вправо температура
вышается шагами по 5°C.
- При вращении влево температура
уменьшается шагами по 5°C.
Наименьшая температура настройки
составляет 30 °C.
Теперь электрокастрюля нагревает воду/
приготавливаемый продукт до нужной температуры и затем автоматически отключается. Вслед за этим гаснет красная рабочая контрольная лампа.
по-
Внимание:
Подождите, пока нагревательная плита
полностью не охладится. Только после
этого прибор можно снова заполнять
водой/приготовляемым продуктом.
59
Page 60

Приготовление пищи
3.5 Быстрая настройка
5
При однократном нажатии на ручку на-
стройки температуры (рис. 5) Вы можете
сразу перейти к максимальной настройке
температуры. При этом вода/приготовляемый продукт доводится до кипения, независимо от количества.
Указание:
Ручку настройки температуры при индикации „95“ градусов поверните ещё
немного вправо, теперь индикатор
заданной величины температуры показывает на дисплее два движущихся
штриха (рис. 5), обозначающих самую
высокую настройку температуры.
3.6 Функция поддержания горячего состояния
Если Вы хотите сохранять определён-
ную температуру воды/приготовялемого
продукта, воспользуйтесь функций поддержания горячего состояния.
Чтобы включить функцию поддержания горячего состояния, действуйте
следующим образом:
1. Заполните электрокастрюлю, как опи-
сано в Zглава 3.1, „Заполнение“.
2. Включите устройство, как описано в
Zглава 3.3, „Ежедневное применение“.
6
3. Нажмите на кнопку поддержания горя-
чего
состояния „KEEP WARM“, чтобы
активировать функцию (рис. 6).
- Дополнительно к красной лампе рабочего состояния, загорается зелёная контрольная лампа поддержания горячего
состояния (рис. 6).
- Теперь устройство нагревается, пока
не будет достигнута настроенная температура.
- Затем устройство отключается и гаснет
красная рабочая контрольная лампа.
- Но функция поддержания горячего состояния продолжает действовать.
(Зелёная
ния горячего состояния горит.)
- Как только температура опускается,
электрокастрюля снова включается и
нагревается. (Горит красная рабочая
контрольная лампа.)
4. Нажмите переключатель Вкл/Выкл
„ON/OFF“ , чтобы отключить функцию
поддержания горячего состояния.
Зелёная контрольная лампа поддержания горячего состояния и красная рабочая контрольная лампа гаснут.
контрольная лампа поддержа-
60
Page 61

Техобслуживание
4 Техобслуживание
4.1 После применения
Указание:
Возьмите за правило всегда охлаждать
прибор, прежде чем снова нагревать её.
Предупреждение:
Опасность удара электрическим током!
Не допускайте попадания влаги на контактный штекер. После отключения/опорожнения снова поставьте прибор на
цоколь, чтобы контактный штекер был
закрыт и защищён от прикосновения,
попадания воды и грязи. Не погружайте
прибор, цоколь или кабель в воду или
другие жидкости. При чистке используйте
лишь небольшое количество жидкости.
Не
мойте прибор или цоколь в
посудомоечной машине.
Предупреждение:
Опасность ожога!
Сначала полностью охладите прибор,
прежде чем чистить его.
Внимание:
Не применяйте чистящие средства, истирающие материалы или спирт, поскольку
они могут повредить прибор. В случае
необходимости, при сильном загрязнении используйте мягкое моющее средство.
1. Извлеките сетевую вилку из розетки.
2. Опорожняйте прибор полностью.
3. Очищайте внутреннюю часть электро-
кастрюли Hotpot° с небольшим количеством воды.
4. Очищайте корпус исключительно слег-
ка влажной тканью.
5. Дайте прибору высохнуть.
6. Поставьте прибор обратно на его цо-
коль.
7. Храните устройство в прохладном и су-
хом месте.
4.2 Удаление накипи из Aquagrad°
Внимание:
Соблюдайте указанную периодичность
для удаления накипи. В противном случае возникнет излишний расход электроэнергии, а при определённых обстоятельствах, это может повлечь за собой
порчу прибора.
Регулярно удаляйте накипь из кипятильника по мере ее появления, но как минимум:
- дважды в год,
- перед каждым длительным хранением,
- при видимом отложении накипи,
- при необычно длительном времени нагрева.
Для удаления накипи действуйте следующим образом:
1. Заполните кипятильник уксусом до от-
метки "Max".
2. Включите прибор посредством выклю-
чателя
"ON/OFF" и доведите уксус до
кипения.
3. Оставьте уксус на ночь.
4. Для удаления накипи также поместите
на ночь крышку с фильтром против
извести в ванночку с уксусом.
5. На следующий день полностью вылей-
те уксус.
6. Прокипятите кипятильник со свежей во-
дой минимум два раза и вылейте воду.
7. Сполосните кипятильник холодной
дой, прежде чем снова им пользоваться.
во-
Указание:
Вы можете также применять средства
для удаления накипи, имеющиеся в продаже. При этом соблюдайте инструкцию
по применению, вероятно, отличающуюся от настоящей.
RUS
61
Page 62

Техобслуживание
4.3 Прежде, чем отправить устройство на ремонт
Предупреждение:
Опасность травматизма!
Прежде чем приступить к поиску неисправностей, выключите прибор. Никогда
не эксплуатируйте неисправный прибор.
Во избежание опасности, не ремонтируйте устройство самостоятельно. Для этого
обращайтесь в сервисную службу фирмы
Royal.
Прежде чем обратиться к своему дистрибьютору Royal, в сервисный центр Royal
или к поставщику, проверьте с помощью
нижеследующей таблицы, сможете ли Вы
самостоятельно устранить неисправность.
Проблема Возможная причина
Устранение
Устройство
не нагревается
Устройство
отключается „слишком
рано“
Устройство
необычно
долго нагревается
Сетевая вилка не вставлена.
Вставить сетевую вилку.
В розетке нет тока.
Проверьте устройство на
другой розетке, где Вы
уверены, что есть ток.
Сработало устройство защиты от перегрева. Охладить устройство и залить
надлежащее количество
воды.
В устройстве накипь.
Удалить накипь из устройства Zглава 4.2, „Уда-
ление накипи из
Aquagrad°“.
4.4 Запасные части
Принадлежности и запчасти можно заказать дополнительно:
Артикул № Описание
9119001 Стеклянная крышка для
9119002 Донная пластина / цоколь
Вы можете получить эти товары в интернет-магазине Dirt Devil
www.dirtdevil.de
или Zстраница 124, „International Service“
Hotpot°
для M9119 / M3005 / M9000
®
на сайте
4.5 Утилизация
По достижении конца срока
эксплуатации, в особенности,
при появлении неполадок,
приведите отслуживший свой
срок прибор в непригодное
состояние, вынув сетевую
штепсельную вилку из розетки и отделив токопроводящий
кабель.
Утилизируйте прибор согласно действующим в Вашей стране экологическим требованиям.
Отходы электрооборудования нельзя утилизировать вместе с бытовыми отходами.
Воспользуйтесь рекомендациями Вашей
коммунальной службы
ца относительно вторичной переработки.
или Вашего продав-
62
Page 63

Гарантия
5 Гарантия
Мы берем на себя установленные законом гарантийные обязательства на продаваемый нами прибор в течение 24 месяцев со дня продажи.
В течение всего гарантийного срока мы, по
нашему усмотрению, бесплатно ремонтируем или заменяем прибор или принадлежности (повреждения на принадлежностях не приводят автоматически к замене всего прибора),
недостатки, возникшие в результате использования бракованного материала или
производственного брака.
В гарантию не входят повреждения, возникшие в результате неправильного пользования (эксплуатация с неправильным
видом тока / величиной напряжения, подключение к непригодным источникам тока,
обрыв кабеля и прочее) или в результате
обычного износа и наличия недостатков,
лишь незначительно снижающих
и эксплуатационные качества прибора. Гарантия прекращается в случае манипуляций неуполномоченной нами фирмы или в
случае использования других запчастей, а
не оригинальных деталей Royal.
устраняем все
ценность
Изнашивающиеся детали не попадают под
действие гарантии и поэтому являются
платными!
Гарантия вступает в силу только тогда, если дата покупки подтверждена печатью и
подписью продавца на гарантийном
не или, если к отосланному прибору прилагается копия счета. Гарантийный ремонт
не влияет на продление гарантийного срока и не инициирует начало новой гарантии!
Отправьте устройство в полностью опорожнённом и сухом состоянии, с кратким
описанием неисправности, выполненным
чётким шрифтом. Снабдите сопроводительную документацию пометкой "Для гарантии". Пошлите устройство
рантийным талоном или копией счета по
следующему адресу:
ООО РТЦ "Совинсервис",
127081 г. Москва,
Ясный проезд, д. 10
РОССИЙСКАЯ ФЕДЕРАЦИЯ
Тел. +7 - 495 - 47 39 003
тало-
вместе с га-
RUS
63
Page 64

Hotpot°'a Genel Bakış
Hotpot°'a Genel Bakış
Teşekkür ederiz!
Hotpot°'ta karar kılmanız bizi sevindirdi! Hotpot° ile, yemeklerin, bebek mamalarının, konservelerin ve benzerlerinin arzu ettiğiniz sı-
caklığa ısıtılması için doğru cihazı aldınız.
Ürünümüzü satın aldığınız ve bize duyduğu-
nuz güven için teşekkür ederiz!
Genel Bakış
(Res. 1):
1 Kaide
(her defasındaki modele göre teslimat
kapsamında)
1.1 Kontak fişi
1.2 Elektrik kablosu
1.3 Döner sıcaklık regülatörü
1.4 Sıcaklık nominal değer göstergesi
1.5 Açma/Kapama şalteri "ON/OFF"
1.6 İşletme kontrol lambası (kırmızı)
1.7 Sıcak tutma düğmesi "KEEP WARM"
1.8 Sıcak tutma kontrol lambası (yeşil)
2 Kontak girişleri
3 Hotpot°
4 Boşaltma ağzı
5 Sap
6 Entegre elekli cam kapak
7 „MIN“-/„MAX“-işareti
8 Sıcaklık sensörü
9 Aquagrad° su kazanı
(her defası
kapsamında)
10 Entegre filtre elekli kapak
11 Kapak kilidi (" ")
ndaki modele göre teslimat
Teslimat kapsamı/varyasyonlar
2
X
MA
MIN
12 3
1 Hotpot°, kaideli ve Aquagrad°'lı
(Standart teslimat kapsamı)
2 Kaideli Hotpot°
(Aquagrad° olmayan özel seri)
3 Hotpot° solo (Aquagrad° ve kaide olma-
yan özel seri)
- İşletme Talimatı (resimlendirilmemiştir)
Teknik Veriler
Cihaz türü : Sıcaklık regülatörlü
Model : Hotpot° & Aquagrad°
Gerilim : 220-240V~, 50Hz,
Güç
Hotpot°
Güç
Aquagrad°
Dolum miktarı
Hotpot°
Dolum miktarı
Aquagrad°
Sıcaklık aralığı : 30 °C - 100 °C
Hassasiyet (1 l dolum miktarında)
Ağırlık, sadece
tencere/kazan
Ağırlık, kaideli tencere/kazan
elektrikli ısıtma tenceresi/su ısıtıcısı
M9119 (-0/-1/.../-8/-9)
Sınıf I
: 800 W maks.
: 2300 W maks.
: 0,25 l min.
1,0 l maks.
: 0,5 l min.
2,0 l maks.
:± 4°C
:yaklaşık 1 kg
:yaklaşık 1,6 kg
64
Sürekli ürün iyileştirme kapsamında teknik değişiklik
ve şekil değişikliği yapma hakkı saklıdır.
© Royal Appliance International GmbH
Page 65

Güvenlik Açıklamaları
1 Güvenlik Açıklamaları
1.1 Kullanma Talimatına ilişkin
olarak
Cihazla çalışmaya başlamadan önce bu
Kullanma Talimatını tamamen okuyun.
Talimatı her zaman bulabileceğiniz bir
yerde muhafaza edin.
Cihazı üçüncü kişilere verdiğinizde, bu
Kullanma Talimatını da beraberinde verin.
Bu Talimatın dikkate alınmaması, ağır yaralanmalara veya cihazda zararlara sebebiyet verebilir.
Bu Kullanma Talimatının dikkate alınmaması
sebebiyle meydana gelen zararlar için herhangi bir sorumluluk üstlenmeyiz.
Güvenliğiniz açısından önemli açıklamalar,
ayrı şekilde işaretlenmişlerdir. Kazaları ve cihazda meydana gelebilecek zararları önlemek için bu açıklamalara mutlaka uyun:
Uyarı:
Sağlığınız açısından söz konusu tehlikelere
karşı uyarır ve olası yaralanma risklerine
işaret eder.
Dikkat:
Cihaza veya başka nesnelere yönelik olası
tehlikelere dikkat çeker.
Açıklama:
Önerileri ve bilgileri gösterir.
1.2 Sıcak suya/buhara ilişkin olarak
Haşlanma tehlikesi!
Sıcak su/buhar, ağır haşlanmalara sebebiyet verebilir. Bu nedenle özellikle aşağıdaki hususlara dikkat edin:
Asla işletim esnasında kapağı ç ıkarmayın.
Cihazı kapaksız işletmeyin.
Kaynatma esnasında ve sonrasında sızan
sıcak buhar ile teması engelleyin.
1.3 Elektrik beslemesine ilişkin
olarak
Elektrik çarpma tehlikesi!
Cihaz elektrikle işletilmekte
olup, burada prensip olarak
elektrik çarpma tehlikesi söz
konusudur. Bu nedenle özellikle aşağıdaki hususlara dikkat
edin:
Cihazı asla suya veya başka sıvılara dal-
dırmayın. Suyu cihaz içine sadece tarif edildiği gibi doldurun.
Şebeke fişini veya kaideyi asla ıslak ellerle
ellemeyin.
Şebeke fişini prizden çekeceğiniz zaman,
her zaman doğrudan fişten çekin. Asla elektrik kablosundan çekmeyin, bunun kopma
tehlikesi vardır.
Elektrik kablosunun bükülmemesine, sı-
kışmamasına, üzerinden ağır nesnelerin geçmemesine veya su ve ısı kaynaklarının yakı-
nında kullanılmamasına dikkat edin.
Elektrik beslemesine bağlarken, model
etiketi üzerinde belirtilen gerilimin, prizinizin
gerilimi ile uygun olduğundan emin olun. Yanlış gerilim cihazı bozabilir.
Sadece koruma kontağına sahip prizler
kullanın.
Çok gözlü prizler kullanmayın. Her durum-
da, cihazın yüksek güç sarfiyatına uygun tasarlanmış olan, test edilmiş, basit uzatma
kabloları kullanın.
Şebeke fişini asla zorla prize takmayın.
Şebeke fişlerinde asla değişiklik yapmayın.
Kaide üzerine başka cihaz yerleştirmeyin.
Cihazı temizlemeden önce veya cihaza
bakım yapmadan önce her zaman kapatın ve
şebeke fişini çekin.
TR
65
Page 66

Güvenlik Açıklamaları
1.4 Sıcak yüzeylere ilişkin olarak
Yanma tehlikesi!
Cihazın dışı, işletim esnasında
ısınır! Bu nedenle özellikle aşa-
ğıdaki hususlara dikkat edin:
dece sapından taşıyın.
Asla sıcak ısıtma plakasına temas etme-
yin.
Cihazı temizlemeden önce veya cihaza
bakım yapmadan önce her zaman kapatın,
şebeke fişini çekin ve cihazın soğumasını
bekleyin.
Cihazı dikkatli şekilde ve sa-
1.5 Belirli kişi gruplarına ilişkin
olarak
Bu cihaz, eğer güvenliklerinden sorumlu
bir kişi tarafından denetlenmiyorlarsa veya cihazı nasıl kullanacaklarına dair talimat almamışlarsa, sınırlı fiziksel, duyumsal veya zihinsel yetilere veya deneyimsiz ve/veya bilgi
sahibi olmayan kişiler tarafından (çocuklar dahil) kullanılmaya uygun değildir.
Çocuklar veya tehlikeyi tahmin edemeye-
cek kişiler cihazın yakınında olduğu zaman,
cihazı asla başıboş bırakmayın ve büyük bir
özenle kullanın.
Odayı terk ettiğinizde cihazı her zaman
kapatın ve şebeke fişini prizden çekin.
Erişilmeyecek şekilde muhafaza edin.
Sıcak kapları ve ayrıca sıcak muhteviyata
sahip kapları bebeklerden ve küçük çocuklardan uzak tutun. Asla küçük çoccukları
cak kapları ve ayrıca sıcak muhteviyata sahip
kapları aynı zamanda taşımayın.
Ambalaj materyali oyun için kullanılmama-
lıdır. Boğulma tehlikesi vardır.
Duyumsal rahatsızlıkları olan kişiler, özel-
likle sıcaklık farklarına ilişkin azalmış hassasi-
yete sahip kişiler, bu cihazın kullanımında daha dikkatli olmalıdırlar.
ve sı-
1.6 Kurma yerine ilişkin olarak
Cihazın ve tüm donanım parçalarının sı-
cak yüzeyler ile temas etmemesine dikkat
edin. Cihazı, ör n. ocak bekleri gibi ısı kaynaklarının üzerine veya doğrudan yakınına koymayın.
Cihazı işletim için kuru, düz ve sağlam bir
zemin üzerine koyun.
1.7 Amaca uygun kullanıma ilişkin
olarak
Cihaz sadece evde kullanılmalıdır. Sınai bir
kullanım için uygun değildir.
Hotpot° sadece soğuk yiyecek maddeleri-
nin ve yemeklerin ısıtılması için kullanılabilir.
Aquagrad° sadece soğuk suyun ısıtılma-
sı için kullanılabilir.
Bunun dışındaki kullanımlar, amaca uygun ol-
mayan kullanım olarak kabul edilir ve yasaktır.
Aquagrad° için aşağıdakiler yasaktır:
Soğuk içme suyu dışında sıvıların veya
maddelerin doldurulması. Özellikle içeceklerin ve yemeklerin ısıtılması yasaktır.
Aquagrad° ve Hotpot° için aşağıdakiler yasaktır:
Gıda dışı maddelerle işletim.
"MIN"-işaretinin altında veya "MAX"-işare-
tinin üzerinde dolum miktarları ile işletim.
Açık havada kullanım.
1.8 Cihaz arızalıysa
Asla arızalı bir cihazı veya arızalı bir elek-
trik kablosuna sahip bir cihazı çalıştırmayın.
Bu cihazın bağlantı hattı zarar gördüğünde,
tehlikelerin önlenmesi için, bunun üretci tarafından veya müşteri hizmetleri tarafından veya benzer yetkili bir kişi tarafından değiştiril-
mesi gerekir.
Arızalı bir cihazı tamir için yetkili satıcınıza
veya Royal Appliance Müşteri Hizmetlerine
yollayın.
66
Page 67

Cihazı hazırlama
2Cihazı hazırlama
2.1 Ambalajdan çıkarma
1. Cihazı ve tüm donanım parçalarını amba-
lajından çıkarın.
2. Parçaların eksik olup olmadığını ve zarar
görüp görmediğini kontrol edin.
Dikkat:
Cihazı, zarar görmemesi için, prensip olarak
her zaman orijinal ambalajında taşıyın/gön-
derin. Bunun için ambalajı muhafaza edin.
Gereksiz ambalaj materyalini, ülkenizde
geçerli yönetmeliklere uygun olarak atın/
imha edin.
Açıklama:
Eğer taşımadan kaynaklı bir zarar tespit
ederseniz, hemen satıcınıza danışın.
2.2 Kurma
1. Kaideyi, su ve ısı kaynaklarından uzakta,
kuru, düz ve sağlam bir zemine kurun.
2. Kapağı cihaz üzerine yerleştirin.
2.3 Su kazanı kapağını monte etme
2
2.
1.
2.4 Bağlantıyı kurma
Dikkat:
Cihazı sadece, model etiketi üzerinde belirtilen elektrik gerilimi, prizinizin gerilimi ile
özdeş olduğunda çalıştırın. Yanlış gerilim
cihazı bozabilir.
1. Elektrik kablosnu, kaidenin alt tarafından,
gerektiği kadar çıkarın.
Uyarı:
Yaralanma tehlikesi!
Elektrik kablosunu ayarlarken kaza güvenliğine dikkat edin.
2. Elektrik kablosunu, kaidenin çıkış açıklığı-
na tekrar tespit ederek sabitleyin.
3. Şebeke fişini, koruma kontağı olan bir pri-
ze takın.
Sıcaklık nominal değer göstergesinin
ekranında şimdi "EE“ görünür.
Bu, kaidenin elektrikle beslendiğini,
ama cihazın henüz üstüne yerleştiril-
mediğini gösterir.
4. Cihazı, kontak fişi yerine oturacak şekilde
kaide üzerine yerleştirin.
Sıcaklık nominal değer göstergesinde şimdi "OF“ yanıp söner.
Cihazınız artık kullanıma hazır.
Dikkat:
Cihazın kuru olarak işletimini engelleyin,
aksi taktirde, entegre kapatma otomatiğine
rağmen, belli bir süre sonra zarar görebilir.
TR
1. Kapağı, resimdeki gibi su kazanı üzerine
yerleştirin (Res. 2/1.).
Kapağı her iki girinti ile su kazanı kenarındaki iki pim üzerine itin (Res. 2/1.).
2. Kapağı arkaya doğru sıkıca, duyulabilir ve
hissedilebilir şekilde kilitlenene kadar bastırın (Res. 2/2.).
Açıklama:
Cihaz yanlışlıkla boş durumda çalıştırılırsa,
aşırı ısınma koruması cihazı otomatik olarak kapatır (bunun için bakınız ayrıca
ZBölüm 3.4, „Kapatma otomatiği“). Tekrar
su/pişmiş malzeme koymadan, cihazın
tamamen soğumasını bekleyin.
67
Page 68

Kaynatma
3 Kaynatma
3.1 Doldurma
.
Uyarı:
Yaralanma tehlikesi!
Her kullanım öncesinde cihazı kontrol edin.
Hasar görmüş cihaz kullanılmamalıdır.
1. Cihazı kaideden alın.
Uyarı:
Elektrik çarpma tehlikesi!
Doldurma esnasında cihazın alt tarafı ve
ayrıca kaide asla ıslanmamalıdır, aksi taktirde burada bulunan kontaklar bir kısa devreye neden olurlar. Ayrıca cihazın dışının
da, kaide üzerine yerleştirilmeden önce kuru
olması gerekmektedir.
2. Cihaz içine, dolum miktarı "MIN“-/„MAX“-
işareti arasında bulunacak kadar su/pişmiş malzeme doldurun.
Açıklama:
Eğer cihaz içine su yanında ayrıca pişmiş
malzeme konacaksa, Hotpot° içindeki
dolum miktarının ayrıca arttığını unutmayın.
Açıklama:
Elektrik tasarrufu için ihtiyaç duyduğunuz
kadar su doldurun.
Açıklama:
Aquagrad°'ı ya kapak kapalıyken doldurma
ve ikram açıklığı üzerindnen veya kapak
açıkken doldurun. Kapağı, sapa entegre
kapak kilidinin " " (Res. 3) işletimi vasıta-
sıyla açabilirsiniz.
3
3. Kapağı kapatın.
4. Cihazı tekrar kaidesi üzerine koyun.
<
3.2 İlk kullanım
1. "MAX"-işaretine kadar suyu cihaza
(ZBölüm 3.1, „Doldurma“) dökün.
2. İki - üç defa su kaynatın (ZBölüm 3.3,
„Günlük kullanım“) ve her ısınma sonra-
sında tamamen dökün.
68
Page 69

Kaynatma
3.3 Günlük kullanım
Uyarı:
Haşlanma tehlikesi!
Cihaz, kapaksız olarak veya açık kapakla
işletilmemelidir. Aksi taktirde dışarıya sıçrayan sıvılar sebebiyle haşlanma tehlikesi
mevcuttur.
3
1. Cihazı aşağıda ZBölüm 3.1, „Doldurma“
tarif edildiği gibi doldurun.
2. Cihazı çalıştırmak için açma/kapama düğ-
mesine "ON/OFF“ (Res. 3/1.) basın.
Kırmızı işletme kontrol lambası, cihazın
ısıtma işlemi yaptığını gösterir. Sıcaklık
nominal değer göstergesi "30“ gösterir.
4
1.
2.
Açıklama:
Cihazişletim esnasında kaideden alınırsa,
ısıtma işlemi durur. Sıcaklık nominal değer
göstergesi "EE“ gösterir. Cihazıkaide üzerine geri koyduğunuzda, yine önceden ayar-
lanan sıcaklık gösterilir ve ısıtmaya devam
edilir.
3.4 Kapatma otomatiği
Cihaz, (30 saniye içinde) bir aşırı ısınmayı ve
böylece bir zararı engelleyen bir kapatma otomatiğine sahiptir.
Otomatik kapatma:
- önceden ayarlanan sıcaklığa ulaşıldığın-
da,
- az su/pişmiş malzeme doldurulduğunda
veya hiç su/pişmiş malzeme doldurulmadığında,
- Cihaz işletim esnasında kaideden alındı-
ğında gerçekleşir.
Dikkat:
Isıtma plakası tamamen soğuyana kadar
bekleyin. Bundan sonra cihazı yeniden
suyla/pişmiş malzemeyle doldurabilirsiniz.
TR
3. Şimdi, döner sıcaklık regülatörünü
(Res. 4/2.) çevirerek, arzu edilen sıcaklığı
ayarlayın.
-Sağa döndürerek, sıcaklıkları 5 derecelik
adımlarla arttırırsını
- Sola döndürerek, sıcaklıkları 5 derecelik
adımlarla düşürürsünüz.
Ayarlanabilir en düşük sıcaklık 30 °C'dir.
Cihaz şimdi suyu/pişmiş malzemeyi, arzu edi-
len sıcaklığa ısıtır ve sonra otomatik olarak
kapanır. Kırmızı işletme kontrol lambası bu-
nun üzerine söner.
z.
Dikkat:
Kumanda alanındaki kumanda düğmelerini
basılı tutmayın. Elektronik bundan zarar
görebilir.
69
Page 70

Kaynatma
3.5 Hızlı ayarlama
5
Döner sıcaklık regülatörüne (Res. 5) bir
defa basarak, doğrudan en yüksek sıcaklık
ayarına gelirsiniz. Doldurulan su/pişmiş malzeme, doldurulan miktardan bağımsız olarak,
kaynatılır.
Açıklama:
Döner sıcaklık regülatörünü, gösterilen "95"
derecede tekrar sağa döndürürseniz, sıcak-
lık nominal değer göstergesi, mümkün olan
en yüksek sıcaklık ayarı için göstergede
yine hareketli iki çizgi (Res. 5) gösterir.
3.6 Sıcak tutma fonksiyonu
Suyu/pişmiş malzemeyi, belirli bir sıcaklık-
ta tutmak istiyorsanız, sıcak tutma fonksiyo-
nunu kullanın.
Sıcak tutma fonksiyonunu devreye sokmak için, aşağıdaki gibi hareket edin:
1. Cihazı aşağıda ZBölüm 3.1, „Doldurma“
tarif edildiği gibi doldurun.
2. Cihazı aşağıda ZBölüm 3.3, „Günlük kul-
lanım“ tarif edildiği gibi çalıştırın.
6
3. Sıcak tutma fonksiyonunu aktifleştirmek
için sıcak tutma düğmesine "KEEP
WARM" basın (Res. 6).
-Yeşil sıcak tutma kontrol lambası, kırmızı
işletme lambasına ek olarak yanmaya
başlar (Res. 6).
-Artık cihaz, ayarlanan sıcaklığa ulaşılana
kadar ısıtma işlemi yapar.
- Sonra cihaz kapanır ve kırmızı işletme
kontrol lambası söner.
-Sıcak tutma fonksiyonu aktif kalmaya de-
vam eder. (Yeşil sıcak tutma kontrol lambası yanar.)
-Sıcaklık düşer düşmez, cihaz tekrar çalışır
ve ısıtma işlemi yapar. (Kırmızı işletme
kontrol lambası yanar.)
4. Sıcak tutma fonksiyonunu devre dışı bı-
rakmak için açma/kapama düğmesine
"ON/OFF" basın.
Yeşil sıcak tutma kontrol lambası ve k
zı işletme kontrol lambası söner.
ırmı-
70
Page 71

Bakım
4Bakım
4.1 Kullanımdan sonra
Açıklama:
Cihazı, tekrar ısıtma işlemi yapmadan önce
genel olarak soğutun.
Uyarı:
Elektrik çarpma tehlikesi!
Kontak fişine nem ulaşmasını engelleyin.
Cihazı her boşaltma sonrası tekrar kaide
üzerine koyun, böylece kontak fişinin üstü
örtülür ve temasa, suya ve kire karşı korunur. Cihazı, kaideyi veya elektrik kablosunu
asla suya veya başka sıvılara daldırmayın.
Temizlik esnasında sadece tasarruflu olarak
sıvı kullanın.
Cihazı veya kaideyi bu yüzden
asla bulaşık deterjanı ile temizlemeyin.
Uyarı:
Yanma tehlikesi!
Cihazı temizlemeden önce, soğumasını
bekleyin.
Dikkat:
Temizlik için temizleme maddeleri, ovma
maddeleri veya alkol kullanmayın, çünkü
bunlar cihaza zarar verebilir. Yoğun kirlenmede her zaman yumuşak bir temizleyici
kullanın.
1. Şebeke fişini prizden çekin.
2. Cihazı komple boşaltın.
3. Hotpot°un içini, suyu tasarruflu kullanarak
temizleyin.
4. Cihazın dışını sadece hafif nemlendirilmiş
bir bezle temizleyin.
5. Cihazın kurumasını bekleyin..
6. Cihazı tekrar kaidesi üzerine yerleştirin.
7. Cihazı serin, kuru bir yerde muhafaza
edin.
4.2 Aquagrad°'ın kirecinin giderilmesi
Dikkat:
Kireç giderme için burada belirtilen aralıkla-
ra uyun. Aksi taktirde uzun vadeli gereksiz
yükseklikte elektrik türetimi ve özellikle
cihaz zararları söz konusu olur.
Su kazanının kirecini her defasındaki kireç
oluşumuna bağlı olarak giderin; ancak düzenli
olarak asgari:
-yılda iki defa,
- her depolama öncesinde,
- gözle görülür kireç oluşumunda,
-alışılmışın dışında uzun ısıtma süresinde
giderin.
Kireç giderme işlemi için aşağıdaki gibi
hareket edin:
1. Su kazanını, "Max"-işaretine kadar sirkey-
le doldurun.
2. Cihazı açma/kapama-şalteri "ON/OFF"
açın ve sirkeyi kaynatın.
3. Sirkenin gece boyunca kalmasını ve etki
etmesini bekleyin.
4. Aynı şekilde kireç filtreli kapağı da kirecini
gidermek için gece boyunca bir sirke banyosuna yatırın.
5. Ertesi gün sirkeyi dökün.
6. Su kazanını
kaynatın ve bu suyu da dökün.
7. Su kazanını tekrar kullanmadan önce so-
ğuk suyla durulayın.
asgari iki defa temiz suyla
Açıklama:
Piyasada mevcut kireç çözücüleri de kullanabilirsiniz. Ancak bunların olası farklı kullanım talimatını dikkate alın.
TR
71
Page 72

Bakım
4.3 Cihazı geri göndermeden
Uyarı:
Yaralanma tehlikesi!
Hata arayacaksanız, cihazı öncelikle kapatın. Asla arızalı bir cihazı kullanmayın. Tehlikeleri engellemek için asla kendi başınıza
tamir yapmayın. Bu durumda Royal
ance Müşteri Hizmetleri ile irtibata geçin.
Yetkili Royal satıcısını, Royal servis ortağını
veya uzman teknik servisi aramadan önce,
aşağıdaki tablodan, sorunu kendiniz giderip
gideremeyeceğinize bakın.
Sorun Olası sebep
Çözüm
Cihaz ısıtmıyor Şebeke fişi takılı değil.
Şebeke fişini takın.
Prizden elektrik gelmiyor.
Cihazı, elektrik geldiğinden emin olduğunuz bir
prizde deneyin.
Cihaz "fazla erken" kapanıyor
Cihaz, ısıtma iş-
lemi için alışıl-
mışın dışında
uzun süre gerektiriyor.
Aşırı ısınma koruması
devreye girdi. Cihazın soğumasını bekleyin ve
doğru su miktarını doldurun.
Cihaz kireçlenmiş.
Cihazı
n kirecini giderin
ZBölüm 4.2, „Aquagrad°'ın kirecinin giderilmesi“.
Appli-
4.4 Yedek parçalar
Donanım parçaları ve ayrıca yedek parçalar
tekrar sipariş edilebilir:
Ürün no. Tanımlama
9119001 Hotpot° için cam kapak
9119002 M9119 / M3005 / M9000 için
taban plakası / kaide
Bunları Dirt Devil
zamızdan www.dirtdevil.de adresinden
veya aşağıdaki adreslerde alabilirsiniz:
ZSayfa 124, „International Service“
®
çevrimiçi alışveriş mağa-
4.5 Atma/İmha Etme
Kullanım ömrü dolduğunda,
özellikle fonksiyon arızaları ortaya çıktığında, hizmet dışı cihazı, şebeke fişini prizden çekerek ve elektrik kablosunu ikiye
ayırarak kullanılamaz hale getirin.
Cihazı, ülkenizde geçerli çevre yönetmeliklerine uygun olarak atın/imha edin.
Elektriksel atıklar, ev atıkları ile birlikte atıla-
mazlar/imha edilemezler. Geri dönüşümle ilgili tavsiyeler için belediye makamlarıyla veya
yetkili satıcınızla irtibata geçin.
72
Page 73

5 Garanti
Tarafımızdan satılan cihaz için, satış tarihinden itibaren 24 ay garantiyi tanıyoruz.
Bu garanti süresi dahilinde, seçimi bize ait olmak üzere cihazın veya donanımın tamiri veya değiştirilmesi vasıtasıyla (donanım parça-
larındaki hasarlar, otomatik olarak komple
cihazın değiştirilmesini gerektirmez) bedelsiz
olarak, materyal veya üretim hatalarına dayalı
tüm kusurları gideriyoruz.
Amaca uygun olmayan kullanıma (yanlış
elektrik türü/elektrik gerilimi ile işletim, uygunsuz elektrik kaynaklarına bağlantı, kırma vs.)
dayalı zararlar, cihazın değerini veya kullanım
kapasitesini önemsiz şekilde etkileyen normal
aşınma ve kusurlar, garanti kapsamı dışındadır. Tarafımızdan yetkilendirilmeyen yerler tarafından yapılan müdahalelerde veya orijinal
Royal Appliance yedek parçaları dışında parçaların kullanımında garanti iptal olur.
Aşınabilir parçalar garanti kapsamına dahil
değildir ve bu nedenle ücrete tabidir!
Garanti sadece, satış tarihi, satıcının garanti
kartı üzerindeki mührü ve imzası ile onaylandığında veya gönderilen cihaza bir fatura fotokopisi/sureti ekli olduğunda yürürlüğe girer.
Garanti edimleri/hizmetleri, ne garanti süresinin uzamasına etki ederler, ne de bu sebeple
yeni bir garanti hakkı doğar!
Cihazı, tamamen boşaltarak ve kuru şekilde
ve ayrıca düz yazıyla hatayı kısaca tarif ederek gönderin. Yazıya "garanti için" notunu düşün. Garanti kartı ile veya bir fatura fotokopisi/
sureti ile birlikte aşağıdaki adrese yollayın:
Garanti
TR
ZSayfa 124, „International Service“
73
Page 74

Informace o Vašem elektrickém hrnci Hotpot°
Informace o Vašem elektrickém hrnci Hotpot°
Mnohokrát děkujeme!
Těší nás, že jste se rozhodli pro elektrický
hrnec Hotpot°! Přístrojem Hotpot° jste získali
elektrický hrnec k ohřevu pokrmů, dětských
pokrmů, konzerv apod. přesně na požadovanou teplotu. Děkujeme Vám za koupi a projevenou důvěru!
Přehled
(Add. 1):
1 Podstavec
(podle provedení obsažen v objemu
dodávky)
1.1 Kontaktní konektor
1.2 Síťový kabel
1.3 Otočný regulátor teploty
1.4 Ukazatel požadované teploty
1.5 Spínač zap/vyp „ON/OFF“
1.6 Kontrolka provozu (červená)
1.7 Tlačítko pro udržování teploty „KEEP
WARM“
1.8 Kontrolka udržování teploty (zelená)
2 Kontaktní zdířka
3 Hotpot°
4 Hubička
5 Držadlo
6 Skleněná poklice s integrovaným sítem
7 „Značky „MIN“/„MAX“
8 Čidlo teploty
9 Rychlovarná konvice Aquagrad°
(podle provedení obsažena v objemu
dodávky)
10 Víko s integrovaným filtračním sítkem
11 Odblokování víka („ “)
Objem dodávky/varianty
2
X
MA
MIN
12 3
1 Hotpot° s podstavcem a konvicí Aqua-
grad° (standardní objem dodávky)
2 Hotpot° s podstavcem
(speciální verze bez konvice Aquagrad°)
3 Hotpot° solo (speciální verze bez konvice
Aquagrad° a podstavce)
- Návod k provozu (není zobrazen)
Technické údaje
Druh přístroje : elektrický hrnec/rychlo-
Model : Hotpot° & Aquagrad°
Napětí : 220-240V~, 50Hz,
Výkon
Hotpot°
Výkon
Aquagrad°
Množství náplně
Hotpot°
Množství náplně
Aquagrad°
Ohřev v rozsahu : 30 °C - 100 °C
Přesnost
(při náplni 1 l)
Hmotnost pouze
hrnec/konvice
Hmotnost hrnec/
konvice s podstavcem
varná konvice s regulátorem teploty
M9119 (-0/-1/.../-8/-9)
třída I
: 800 W max.
: 2300 W max.
: 0,25 l min.
1,0 l max.
: 0,5 l min.
2,0 l max.
:± 4°C
: cca 1 kg
: cca 1,6 kg
74
V souvislosti s neustálým zdokonalováním našich
výrobků si vyhrazujeme právo na technické a vzhledové změny.
© Royal Appliance International GmbH
Page 75

Bezpečnostní pokyny
1Bezpečnostní pokyny
1.1 k návodu k obsluze
Kompletně si přečtěte tento návod k
obsluze ještě předtím, než začnete s přístro-
jem pracovat.
Tento návod si dobře uložte.
Pokud přístroj poskytujete třetí osobě, při-
ložte k přístroji také tento návod k obsluze.
Nedodržování pokynů uvedených v tomto
návodu k obsluze může způsobit těžká
zranění nebo škody na přístroji.
Za škody, které vznikly nerespektováním
pokynů uvedených v tomto návodu k obsluze,
nepřebíráme žádné ručení.
Důležitá upozornění pro Vaši bezpečnost jsou
zvlášt’ vyznačena. Je nutno bezpodmínečně
se těmito pokyny řídit, abyste předešli nehodám a poškozením přístroje:
VAROVÁNÍ:
Var uj e před možným nebezpečím pro Vaše
zdraví a ukazuje na možná rizika zranění.
POZOR:
Poukazuje na možná nebezpečí poškození
přístroje nebo jiných předmětů.
UPOZORNĚNÍ:
Zdůrazňuje tipy a informace.
1.2 k horké vodě/páře
Nebezpečí opaření!
Horká voda/pára může způsobit vážné opaření. Dbejte proto
zejména následujících pokynů:
Nikdy během provozu nesun-
dávejte poklici.
Nepoužívejte přístroj bez poklice.
Vyvarujte se kontaktu s horkou párou, kte-
rá uniká při vaření a po něm.
1.3 k dodávce elektrického
proudu
Nebezpečí úderu elektrickým
proudem!
Přístroj je napájen elektrickým
proudem, přitom zásadně hrozí
nebezpečí úrazu elektrickým
proudem. Dbejte proto zejména
následujících pokynů:
Nikdy přístroj neponořujte do vody nebo
do jiné kapaliny. Naplňujte vodu do přístroje
výhradně popsaným způsobem.
Nikdy neberte zástrčku nebo podstavec
do mokrých rukou.
Když vytahujete zástrčku ze zásuvky,
tahejte vždy přímo za zástrčku. Nikdy netahejte za kabel, mohl by se roztrhnout.
Dbejte na to, aby sít’ový kabel nebyl nikde
zlomený, zmačknutý, přejetý nebo aby se
nedostal do blízkosti zdrojů vody nebo tepla.
Před připojením k elektrickému proudu se
přesvědčete, zda napětí uvedené na typovém
štítku souhlasí s napětím Vaší zásuvky.
Nesprávné napětí může přístroj zničit.
Používejte jenom zásuvky s ochranným
kontaktem.
Nepoužívejte rozdvojky ani prodlužovací
kabely s řadou zásuvek. Používejte nanejvýš
testované, jednoduché prodlužovací kabely,
které jsou pro velký příkon tohoto přístroje
dostate
čně dimenzované.
Nikdy nedávejte zástrčku do zásuvky
násilím. Nikdy neupravujte sít’ovou zástrčku.
Na podstavec nestavte jiné přístroje.
Před čištěním nebo údržbou přístroje jej
vždy vypněte a vytáhněte ze zásuvky.
CZ
75
Page 76

Bezpečnostní pokyny
1.4 k horkým plochám
Nebezpečí popálení!
Během provozu se povrch přístroje ohřívá! Dbejte proto
zejména následujících pokynů:
Plný přístroj noste opatrně a výhradně za
držadlo.
Nikdy se nedotýkejte horké topné desky.
Před čištěním nebo údržbou přístroj vždy
vypněte, vytáhněte sít’ovou zástrčku a nechte
jej vychladnout.
1.5 k určitým skupinám osob
Tento přístroj není určen k tomu, aby jej
používaly osoby (včetně dětí) s omezenými
psychickými, smyslovými nebo duševními
schopnostmi nebo s nedostatkem zkušeností
a/nebo nedostatkem znalostí, kromě případu,
kdy na ně bude dohlížet osoba odpovědná za
jejich bezpečnost nebo od ní obdrží pokyny,
jak se přístroj musí používat.
Na děti je potřeba dohlížet, aby bylo
zaručeno, že si s přístrojem nehrají.
Při opuštění místnosti přístroj vždy vypně-
te a vytáhněte zástrčku ze zásuvky.
Uložte jej na nepřístupném místě.
Horké nádoby i nádoby s horkým obsa-
hem udržujte mimo dosah dětí. Nikdy nenoste
malé děti současně s horkými nádobami nebo
nádobami s horkým obsahem.
Obalové materiály se nesmí používat na
hraní. Hrozí nebezpečí udušení.
Osoby se smyslovými poruchami, zvláště
se sníženou citlivostí na teplotní rozdíly, musí
být při použití tohoto přístroje mnohem opatrnější.
1.6 k místu postavení
Dbejte na to, aby přístroj a všechny části
příslušenství nepřišly do kontaktu s horkými
povrchy. Nestavte je na zdroje tepla, jako
jsou např. plotny sporáku, ani do jejich bezprostřední blízkosti.
Pro provoz postavte přístroj na suchý, rov-
ný a stabilní podklad.
1.7 ke správnému způsobu používání
Tento přístroj smí být používán pouze v
domácnosti. Není vhodný pro profesionální
využití.
Hotpot° smí být používán výhradně pro
ohřev studených potravin a pokrmů.
Konvice Aquagrad° smí být používána
výhradně pro ohřev studené pitné vody.
Každé jiné použití se považuje za nepřiměře-
né účelu použití a je zakázané.
Pro Aquagrad° je zakázáno:
Plnění jinými tekutinami nebo médii než
studenou pitnou vodou. Zvláště ohřívání
nápojů a pokrmů je zakázáno.
Pro Aquagrad° i Hotpot° je zakázáno:
Provoz s jinou náplní než potravinami.
Provoz s náplní pod značkou „MIN“ nebo
nad značkou „MAX“.
Používání venku.
1.8 pro případ, že je přístroj
poškozen
Nikdy nepoužívejte poškozený přístroj,
nebo přístroj s poškozeným kabelem. Pokud
je poškozené přívodní vedení tohoto přístroje,
musí být vyměněno výrobcem nebo jeho servisem nebo podobně kvalifikovanou osobou,
aby se předešlo ohrožení.
Poškozený přístroj nechte opravit v odbor-
ném servisu nebo se obrat’te na oddělení
služeb zákazníkům společnosti Royal Appliance.
76
Page 77

Příprava přístroje
2Příprava přístroje
2.1 Vybalení
1. Vybalte přístroj a všechny díly příslušen-
ství.
2. Překontrolujte obsah, zda je neporušený a
kompletní.
POZOR:
Přístroj transportujte/zasílejte zásadně vždy
v originálním obalu, aby nedošlo k jeho
poškození. Uschovejte si za tímto účelem
jeho obal.
Již nepotřebný obalový materiál likvidujte
odpovídajícím způsobem v souladu s před-
pisy platnými ve Vaší zemi.
UPOZORNĚNÍ:
V případě, že zjistíte na přístroji transportní
poškození, obrat’te se neprodleně na Vašeho prodejce.
2.2 Postavení
1. Postavte podstavec dále od zdrojů vody a
tepla, na suchý, rovný a stabilní podklad.
2. Nasaďte na přístroj poklici.
2.3 Montáž víka konvice
2
2.
1.
1. Nasaďte víko podle vyobrazení na rychlo-
varnou konvici (Add. 2/1.).
Nasuňte víko oběma vybráními na dva
kolíky na okraji rychlovarné konvice
(Add. 2/1.).
2. Pevně víko přitlačte, až slyšitelně a citelně
zaskočí (Add. 2/2.).
2.4 Připojení
POZOR:
Přístroj používejte pouze v případě, když
údaj o elektrickém napětí uvedený na typo-
vém štítku souhlasí s napětím Vaší zásuvky.
Nesprávné napětí může přístroj poškodit.
1. Odvinujte kabel na spodní straně podstav-
ce pouze tak daleko, jak je potřeba.
VAROVÁNÍ:
Nebezpečí zranění!
Při pokládání kabelu dbejte na to, aby se
nestal zdrojem nehody.
2. Upevněte přívodní kabel opětným zacvak-
nutím ve výstupním otvoru podstavce.
3. Zasuňte zástrčku do zásuvky s ochran-
ným kontaktem.
Na displeji ukazatele požadované
teploty se nyní objeví „EE“.
To ukazuje, že sokl už je pod proudem, ale přístroj na něj ještě nebyl
postaven.
4. Postavte přístroj na sokl tak, aby kontakty
zaskočily.
Na displeji ukazatele požadované
teploty nyní bliká „OF“.
Váš přístroj je nyní připraven k
použití.
POZOR:
Vyvarujte se chodu přístroje na sucho, protože by se časem mohl navzdory zabudované vypínací automatice poškodit.
UPOZORNĚNÍ:
Pokud omylem dojde k zapnutí prázdného
přístroje, automaticky jej vypne ochrana
proti přehřátí (viz také ZKapitola 3.4, “Vypí-
nací automatika”). Před dalším naplněním
vody/pokrmu nechte přístroj zcela vychladnout.
CZ
77
Page 78

Vaření
3Vaření
3.1 Naplnění
.
VAROVÁNÍ:
Nebezpečí zranění!
Před každým použitím přístroj zkontrolujte.
Poškozený přístroj nesmí být používán.
1. Sejměte přístroj ze soklu.
VAROVÁNÍ:
Nebezpečí úderu elektrickým proudem!
Při plnění přístroje se jeho spodní strana a
podstavec v žádném případě nesmí namočit, protože by na zde umístěných kontaktech mohlo dojít ke zkratu. Proto musí být
suchý i vnějšek přístroje, než se smí opět
postavit na podstavec.
2. Naplňte přístroj pouze takovým
množstvím vody/pokrmu, které je mezi
značkami „MIN“/“MAX“.
UPOZORNĚNÍ:
Berte přitom v úvahu, že náplň v přístroji
Hotpot°se dále zvětší, pokud se přístroj
bude kromě vody plnit ještě dalšími potravinami.
UPOZORNĚNÍ:
Pro úsporu proudu dávejte vodu jen v takovém množství, jaké právě potřebujete.
UPOZORNĚNÍ:
Naplňujte Aquagrad° buď při uzavřeném
víku plnicím a nalévacím otvorem, nebo při
otevřeném víku. Víko můžete otevřít stisknutím odblokování integrovaného v držadle
„ “ (Add. 3).
3
3. Uzavřete víko.
4. Postavte přístroj zpátky na podstavec.
<
3.2 První použití
1. Naplňte přístroj vodou až ke značce
„MAX“ (ZKapitola 3.1, “Naplnění”).
2. Uveďte vodu dvakrát až třikrát do varu
(ZKapitola 3.3, “Běžné používání”) a po
každém ohřátí ji kompletně vylijte.
78
Page 79

Vaření
3.3 Běžné používání
VAROVÁNÍ:
Nebezpečí opaření!
Přístroj se nesmí uvádět do provozu s chybějící nebo otevřenou poklicí. Jinak hrozí
nebezpečí opaření vystřikujícími tekutinami.
3
1. Naplňte přístroj tak, jak bylo popsáno v
ZKapitola 3.1, “Naplnění”.
2. Stiskněte spínač zap/vyp „ON/OFF“
(Add. 3/1.) pro zapnutí přístroje.
Červená kontrolka provozu ukazuje, že
přístroj ohřívá. Ukazatel požadované teploty ukazuje „30“.
4
1.
2.
UPOZORNĚNÍ:
Pokud se přístroj během provozu sejme z
podstavce, ohřívání se zastaví. Ukazatel
požadované teploty ukazuje „EE“. Když
přístroj opět postavíte na sokl, znovu se
zobrazí předtím nastavená teplota a
ohřívání bude pokračovat.
3.4 Vypínací automatika
Přístroj disponuje vypínací automatikou, která
(během 30 vteřin) zabrání přehřátí a tím
poškození.
Automatické vypnutí se provede, jakmile:
- byla dosažena nastavená teplota,
- bylo naplněno příliš málo vody/pokrmu
nebo žádný,
-je přístroj sejmut z podstavce.
POZOR:
Počkejte, dokud topná deska zcela nevychladne. Teprve potom smí být přístroj opět
naplněn vodou/pokrmem.
3. Otáčením regulátoru teploty (Add. 4/2.)
nastavte požadovanou teplotu.
-Otáčením doprava zvyšujete teplotu v kro-
cích 5°C.
-Otáčením doleva snižujete teplotu v kro-
cích 5°C.
Nejmenší nastavitelná teplota činí 30 °C.
Přístroj nyní vodu/pokrm ohřeje na požadovanou teplotu a potom se automaticky vypne.
Červená kontrolka provozu pak zhasne.
POZOR:
Nedržte ovládací tlačítka stisknutá. Elektronika by se mohla poškodit.
CZ
79
Page 80

Vaření
3.5 Rychlé nastavení
5
Jedním stisknutím otočného regulátoru
teploty (Add. 5) rovnou získáte nejvyšší
nastavení teploty. Přitom se voda/pokrm,
nezávisle na naplněném množství, uvede do
varu.
UPOZORNĚNÍ:
Pokud při regulátoru teploty nastaveném na
„95“ stupňů otočíte ještě jednou doprava,
ukáže ukazatel požadované teploty rovněž
dvě pohybující se čárky (Add. 5) pro nejvyšší možnou nastavenou teplotu.
3.6 Funkce udržování teploty
Pokud chcete vodu/pokrm udržovat na
určité teplotě, využijte tuto funkci.
Pro aktivaci funkce udržování teploty
postupujte dle následujícího popisu:
1. Naplňte přístroj tak, jak bylo popsáno v
ZKapitola 3.1, “Naplnění”.
2. Uveďte přístroj do provozu tak, jak bylo
popsáno v ZKapitola 3.3, “Běžné použí-
vání”.
6
3. Stiskněte tlačítko pro udržování teploty
„KEEP WARM“ pro aktivaci funkce udržování teploty (Add. 6).
- Zelená kontrolka udržování teploty se rozsvítí dodatečně k červené kontrolce provozu (Add. 6).
-Přístroj nyní ohřívá, dokud není dosažena
nastavená teplota.
-Pak se přístroj vypne a červená kontrolka
provozu zhasne.
- Funkce udržování teploty je nadále aktivní. (Zelená kontrolka udržování teploty
svítí.)
- Jakmile teplota poklesne, přístroj se opět
zapne a ohřívá. (Červená kontrolka provo-
zu svítí.)
4. Stiskněte spínač zap/vyp „ON/OFF“ pro
zrušení funkce udržování teploty.
Zelená kontrolka udržování teploty a čer-
vená kontrolka provozu zhasnou.
80
Page 81

Údržba
4Údržba
4.1 Po použití
UPOZORNĚNÍ:
Zásadně nechte přístroj před novým ohříváním vychladnout.
VAROVÁNÍ:
Nebezpečí úderu elektrickým proudem!
Zabraňte vniknutí vlhkosti do kontaktního
konektoru. Po vylití/vyprázdnění vždy
postavte přístroj zpět na sokl, aby byly kontakty zakryty a chráněny proti doteku, vodě
a nečistotám. Nikdy přístroj, sokl ani přívod-
ní kabel neponořujte do vody nebo do jiné
kapaliny. Při čištění používejte vodu jen v
malém množství.
Proto nikdy přístroj ani podstavec nemyjte v myčce.
VAROVÁNÍ:
Nebezpečí popálení!
Před čištěním přístroje jej nechte vychladnout.
POZOR:
Nepoužívejte žádné čistící prostředky, abra-
zivní prostředky nebo alkohol, protože by
mohly přístroj poškodit. Při silném znečiště-
ní použijte nanejvýš jemný saponát.
1. Vytáhněte zástrčku ze zásuvky.
2. Zcela přístroj vyprázdněte.
3. Hotpot° uvnitř čistěte s malým množstvím
vody.
4. Vnější povrch přístroje čistěte výhradně
mírně navlhčeným hadříkem.
5. Nechte přístroj vyschnout.
6. Postavte přístroj zpátky na jeho podsta-
vec.
7. Přístroj ukládejte do chladného a suchého
prostoru.
4.2 Odvápnění přístroje Aquagrad°
POZOR:
Dodržujte níže uvedené intervaly pro
odvápnění. Jinak by hrozila zvýšená spotřeba proudu, z dlouhodobého pohledu mimo
jiné dokonce poškození přístroje.
Odvápnění nádoby na vodu provádějte pravidelně, podle stupně zanesení vápníkem,
minimálně však:
-dvakrát ročně,
-před každým uložením na delší dobu,
-při viditelném zavápnění,
-při nezvykle dlouhé době ohřevu.
Při odvápnění postupujte dle následujícího popisu:
1. Naplňte rychlovarnou konvici až ke znač-
ce „Max“ octem.
2. Zapněte přístroj stisknutím spínače zap/
vyp „ON/OFF“ a uveďte ocet do varu.
3. Nechte ocet působit přes noc.
4. Víko s filtrem vápníku na noc rovněž vlož-
te pro odvápnění do octové lázně.
5. Další den ocet kompletně vylijte.
6. Minimálně dvakrát uveďte čerstvou vodu v
rychlovarné konvici do varu a potom ji vždy vylijte.
7. Před dalším používáním rychlovarné kon-
vice ji propláchněte studenou vodou.
UPOZORNĚNÍ:
Můžete použít i prodávané prostředky pro
odvápnění. Dbejte však na případně odlišný
návod pro jejich použití.
CZ
81
Page 82

Údržba
4.3 Před zasláním přístroje
VAROVÁNÍ:
Nebezpečí zranění!
Předtím, než budete hledat závadu, přístroj
nejdřív vypněte. Nikdy nepoužívejte poškozený přístroj. Pro předcházení rizik nikdy
přístroj neopravujte sami. Obrat’te se na
oddělení služeb zákazníkům společnosti
Royal
Appliance.
Dříve, než budete kontaktovat smluvního prodejce společnosti Royal, servisní partnery
společnosti Royal‚ nebo odborný obchod,
zkontrolujte pomocí následující tabulky, zda
nemůžete problém odstranit sami.
Problém Možná příčina
Řešení
Přístroj neohřívá
Přístroj se
vypíná "příliš
brzy"
Přístroj potřebuje pro ohřá-
tí nezvykle
dlouhou dobu
Zástrčka není v zásuvce.
Zastrčte zástrčku.
Zásuvka nedodává proud.
Otestujte přístroj v jiné
zásuvce, u které jste si jisti,
že je pod proudem.
Reagovala ochrana proti
přehřátí. Nechte přístroj
vychladnout a naplňte
správné množství vody.
Přístroj je zavápněn.
Odvápnění přístroje
ZKapitola 4.2, “Odvápnění
přístroje Aquagrad°”.
4.4 Náhradní díly
Díly příslušenství i náhradní díly mohou být
objednány dodatečně:
Výrobek č.Popis
9119001 Skleněná poklice na Hotpot°
9119002 Spodní deska / podstavec pro
M9119 / M3005 / M9000
Obdržíte je v Dirt Devil
www.dirtdevil.de
nebo ZStrana 124, “International Service”
®
Onlineshop na
4.5 Likvidace
Jestliže je dosaženo konce
použitelnosti přístroje, zvláště
když se vyskytnou poruchy
funkčnosti, je nutné přístroj
vyřadit z provozu tak, že vytáhnete kabel se zástrčkou ze
zásuvky a přeštípnete jej.
Přístroj likvidujte v souladu s předpisy pro
ochranu životního prostředí platnými ve Vaší
zemi.
Elektrický odpad nesmíte likvidovat společně
s komunálním odpadem. Obrat’te se v přípa-
dě potřeby ohledně recyklování na Vaše místní zastupitelstvo nebo Vašeho prodejce.
82
Page 83

5 Záruka
Na námi dodaný přístroj poskytujeme
záruku 24 měsíců ode dne nákupu.
Během této lhůty odstraníme škody opravou
nebo výměnou přístroje nebo příslušenství
dle našeho uvážení (škody na příslušenství
nevedou automaticky k výměně kompletního
přístroje) a všechny nedostatky, které vzniknou vadným materiálem nebo chybou výrobce.
Záruka se nevztahuje na škody, které byly
způsobeny nepovoleným způsobem používání přístroje (provoz pod nesprávným napětím,
připojení na nesprávné napětí, prasknutí,
atd.) ani na normální opotřebení přístroje a
nedostatky, které ovlivňují hodnotu nebo stupeň opotřebení přístroje pouze nepatrně.
Jestliže do přístroje zasahovala osoba, která
nemá naši autorizaci, nebo při použití jiných
než originálních dílů Royal Appliance, záruka
zaniká.
Díly podléhající opotřebení nespadají pod
záruku a musí se proto zaplatit!
Záruka je platná pouze tehdy, jestliže je
datum koupě potvrzeno razítkem a podpisem
prodejce na záručním listu nebo jestliže je s
přístrojem zaslána také kopie faktury. Plnění
záruky vlastní záruční lhůtu neprodlužuje ani
nevzniká jejím plněním nárok na novou záruku!
Odešlete zcela vyprázdněný a suchý přístroj i
s krátkým popisem závady (hůlkovým písmem). Zásilku odešlete s označením „K záru-
ce”. To všechno odešlete spolu se záručním
listem nebo s kopií faktury na následující
adresu:
Záruka
CZ
ZStrana 124, “International Service”
83
Page 84

Prehľad Vášho prístroja Hotpot°
Prehľad Vášho prístroja Hotpot°
Ďakujeme pekne!
Teší nás, že ste sa rozhodli zakúpit’ prístroj
Hotpot°! S prístrojom Hotpot° ste získali prístroj na ohrievanie jedál, detskej výživy, konzerv a podobných potravín podľa vlastej
potreby. Ďakujeme vám za nákup a prejavenú
dôveru!
Prehľad
(Obr. 1):
1 Podstavec
(podľa verzie v obsahu dodávky)
1.1 Kontaktná zástrčka
1.2 Elektrický kábel
1.3 Otočný regulátor teploty
1.4 Zobrazenie menovitej hodnoty teploty
1.5 Tlačidlo Zap/Vyp „ON/OFF“
1.6 Kontrolná prevádzková signálka
(červená)
1.7 Tlačidlo na udržiavanie teploty
„KEEP WARM“
1.8 Kontrolka udržiavania teploty (zelená)
2 Kontakt
3 Hotpot°
4 Výlevka
5 Rukoväť
6 Sklenený kryt s integrovaným sitkom
7 Značka „MIN“/„MAX“
8 Snímač teploty
9 Vodný kotol Aquagrad°
(podľa verzie v obsahu dodávky)
10 Kryt s integrovaným sitkom filtra
11 Odblokovanie krytu („ “)
Obsah dodávky/Varianty
2
1 Hotpot° s podstavcom Aquagrad°
2 Hotpot° s podstavcom
3 Hotpot° solo (špeciálna séria bez Aqua-
- Návod na obsluhu (nie je zobrazený)
Technické údaje
Typ prístroja : elektrický varný hrniec/
Model : Hotpot° & Aquagrad°
Napätie : 220-240V~, 50Hz,
Výkon
Hotpot°
Výkon
Aquagrad°
Množstvo naplnenia Hotpot°
Množstvo naplnenia Aquagrad°
Dokáže temperovať v rozsahu
Presnosť: (pri naplnení obsahom 1 l)
Hmotnosť iba hrnca/kotla
Hmotnosť hrnca/
kotla s podstavcom
X
MA
MIN
12 3
(štandardný obsah dodávky)
(špeciálna séria bez Aquagrad°)
grad° a podstavca)
vodný varič s regulátorom teploty
M9119 (-0/-1/.../-8/-9)
Class I
: 800 W max.
: 2300 W max.
: 0,25 l min.
1,0 l max.
: 0,5 l min.
2,0 l max.
: 30 °C - 100 °C
:± 4°C
:cca 1 kg
: cca 1,6 kg
84
Technické zmeny a zmeny tvaru sú z dôvodu neustáleho vylepšovania produktu vyhradené.
© Royal Appliance International GmbH
Page 85

Bezpečnostné pokyny
1Bezpečnostné pokyny
1.1 k návodu na obsluhu
Skôr, než začnete s prístrojom pracovat’,
prečítajte si dôkladne návod na obsluhu.
Uchovajte si dobre tento návod.
Ak budete odovzdávat’ prístroj tretím oso-
bám, priložte k nemu tento návod na obsluhu.
Nedodržiavanie tohto návodu môže viest’
k vážnym zraneniam alebo poškodeniu
prístroja.
Neručíme za škody, ktoré vzniknú nedodržiavaním tohto návodu na obsluhu.
Dôležité pokyny pre vašu bezpečnost’ sú
zvlášt’ zvýraznené. Dodržiavajte bezpodmienečne tieto pokyny, aby ste zabránili úrazom
a poškodeniu prístroja:
VÝSTRAHA:
Varuje pred nebezpečenstvom ohrozenia
vášho zdravia a zobrazuje možné zranenia.
POZOR:
Upozorňuje na možné ohrozenie prístroja
alebo iných predmetov.
UPOZORNENIE:
Poskytuje tipy a informácie.
1.2 k horúcej vode/pare
Nebezpečenstvo oparenia!
Horúca voda/para by mohla
spôsobit’ t’ažké obareniny.
Dávajte preto pozor najmä na
nasledujúce pokyny:
Nikdy neodstraňujte počas prevádzky kryt
prístroja.
Neprevádzkujte prístroj nikdy bez krytu.
Zabráňte kontaktu s horúcou parou, ktorá
uniká pri varení a po varení.
1.3 pre napájanie elektrickým
prúdom
Nebezpečenstvo úrazu elek-
trickým prúdom!
Prístroj sa prevádzkuje na elektrický prúd, preto tu vzniká principiálne nebezpečenstvo úderu
elektrickým prúdom. Dávajte
preto pozor najmä na nasledujúce pokyny:
Neponárajte prístroj nikdy do vody alebo
iných kvapalín. Napĺňajte vodu do prístroja
iba tak, ako je to popísané v návode.
Nechytajte nikdy siet’ovú zástrčku alebo
stojan mokrými rukami.
Ak chcete vytiahnut’ zástrčku z elektrickej
siete, t’ahajte vždy iba priamo za zástrčku.
Net’ahajte nikdy za kábel, mohol by sa pretrhnút’.
Dávajte pozor, aby sa siet’ový kábel neza-
lomil, nezasekol, aby sa po ňom nestúpalo,
alebo aby sa neprevádzkoval v blízkosti vodných alebo tepelných zdrojov.
Ubezpečte sa pred pripojením k zdroju
elektrickej energie, že sa zhoduje napätie
uvádzané na výrobnom štítku s napätím vo
Vašej zásuvke. Nesprávne napätie by mohlo
zničit’ prístroj.
Používajte iba zástrčky s ochranným kon-
taktom.
Nepoužívajte žiadne lišty so zásuvkami.
Používajte v každom prípade odskúšané, jednoduché predlžovacie šnúry, ktoré sú dimenzované na príkon prístroja.
Nezasúvajte nikdy násilím zástrčku do
siet’ovej zásuvky. Nikdy neupravujte siet’ovú
zástrčku.
Neukladajte žiadne iné predmety na sto-
jan.
Skôr, než začnete čistit’ alebo udržiavat’
prístroj, vypnite ho a vytiahnite siet’ovú
zástrčku zo zásuvky.
SK
85
Page 86

Bezpečnostné pokyny
1.4 k horúcim povrchom
Nebezpečenstvo popálenia!
Teleso prístroja je počas prevádzky veľmi horúce! Dávajte
preto pozor najmä na nasledujúce pokyny:
Prenášajte naplnený prístroj veľmi opatr-
ne a držte ho výlučne za rukovät’.
Nikdy sa nedotýkajte horúcej platne.
Skôr, než začnete čistit’ alebo udržiavat’
prístroj, vytiahnite vždy siet’ovú zástrčku zo
zásuvky a nechajte prístroj vychladnút’.
1.5 pre určité skupiny osôb
Tento prístroj nie je určený na to, aby ho
používali osoby (vrátane detí) s obmedzenými fyzickými, senzorickými alebo duševnými
schopnost’ami alebo s nedostatkom skúseností a/alebo nedostatočnými znalost’ami
prístroja, môžu ho použit’ iba v tom prípade,
ak sú kvôli vlastnej bezpečnosti pod dozorom
spoľahlivej osoby alebo od nej dostali pokyny,
ako sa má prístroj používat’.
Deti by mali byt’ pod dozorom, aby sa
zaistilo, že sa so zariadením nehrajú.
Vypnite prístroj vždy pri opustení miest-
nosti a vytiahnite zástrčku zo siet’ovej zásuvky.
Odkladajte ho na nedostupné miesto.
Udržiavajte horúce nádoby, ako aj nádoby
s horúcim obsahom v dostatočnej vzdialenosti od dojčiat a malých detí. Neprenášajte nikdy
súčasne malé deti a nádoby s horúcim obsahom.
Obalové materiály sa nesmú používat’
ako hračky. Hrozí nebezpečenstvo udusenia.
Osoby s poruchami senzibility, hlavne so
zníženou citlivosťou na kolísanie teploty, musia byť pri používaní tohto prístroja mimoriadne opatrné.
1.6 k miestu inštalcie
Dávajte pozor, aby sa prístroj a všetky die-
ly príslušenstva nedostali do kontaktu s horúcimi plochami. Neukladajte nikdy prístroj na
alebo do bezprostrednej blízkosti zdrojov tepla, ako sú napr. platne pece.
Postavte prístroj na suché, rovné a stabil-
né miesto.
1.7 k používaniu podľa predpisov
Prístroj sa môže používať iba v domácnosti.
Používanie na podnikateľské účely nie je
povolené.
Prístroj Hotpot°sa smie používať iba na
ohrievanie chladných potravín a jedál.
Prístroj Aquagrad° sa môže používať
výlučne na zohrievanie studenej pitnej vody.
Každé iné používanie je používaním proti
predpisom a je zakázané.
Pre prístroj Aquagrad° je zakázané:
Plnenie inými médiami a kvapalinami ako
studenou pitnou vodou. Zakázané je hlavne
ohrievanie nápojov a jedál.
Pre prístroje Aquagrad° a Hotpot° je zakázané:
Prevádzkovanie s iným materiálom ako
potravinami.
Prevádzka s množstvom náplne pod
značkou „MIN“ alebo nad značkou „MAX“.
Používanie v exteriéri.
1.8 ak je prístroj pokazený
Neprevádzkujte nikdy pokazený prístroj
alebo prístroj s pokazenou siet’ovou šnúrou.
Ak sa poškodí siet’ová šnúra tohto prístroja,
musí ju vymenit’ výrobca alebo jeho zákaznícky servis, prípadne iné kvalifikované osoby,
aby sa predišlo vzniku nebezpečenstva.
Odovzdajte pokazený prístroj na opravu
odbornému predajcovi alebo zákazníckej
službe Royal Appliance.
86
Page 87

Príprava prístroja
2 Príprava prístroja
2.1 Vybaľovanie
1. Vybaľte prístroj a všetky diely príslušen-
stva.
2. Skontrolujte obsah dodávky kvôli komplet-
nosti a neporušenosti.
POZOR:
Prepravujte/zasielajte prístroj zásadne vždy
v originálnom obale, aby sa nemohol poškodit’. Uchovajte preto obal.
Odstráňte viac nepotrebný obalový materiál
podľa predpisov platných vo vašej krajine.
UPOZORNENIE:
Ak zistíte transportné škody, obrát’te sa
ihneď na svojho obchodníka.
2.2 Inštalácia
1. Inštalujte stojan prístroja v dostatočnej
vzdialenosti od zdrojov tepla a vody, na
suchom, rovnom a stabilnom podklade.
2. Nasaďte kryt na prístroj.
2.3 Namontujte kryt kotla na vodu
2
2.
1.
2.4 Zapojenie
POZOR:
Prevádzkujte prístroj iba vtedy, ak súhlasí
elektrické napätie uvedené na výrobnom
štítku s napätím vo vašej sieťovej zásuvke.
Nesprávne napätie by mohlo zničiť prístroj.
1. Odviňte sieťovú šnúru na dolnej strane
stojana na potrebnú dĺžku.
VÝSTRAHA:
Nebezpečenstvo poranenia!
Dávajte pri ukladaní sieťovej šnúry pozor na
bezpečnosť pred úrazom.
2. Zafixujte sieťovú šnúru tak, že ho opäť
pevne pripevníte do výstupného otvoru
stojana.
3. Zasuňte sieťovú zástrčku do zásuvky s
ochranným kontaktom.
Na displeji so zobrazením menovitej
hodnoty sa objaví „EE“.
Ukazuje to, že je stojan už napájaný
prúdom, ale nie je na ňom zatiaľ
uložený prístroj.
4. Vložte prístroj do stojana tak, aby kontakt-
ná zástrčka zaklapla.
Na displeji so zobrazením hodnoty
požadovanej teploty teraz bliká „OF“.
Váš prístroj je teraz pripravený na
prevádzku.
POZOR:
Zabráňte chodu prístroja na sucho, pretože
prístroj by sa mohol napriek zabudovanému
automatickému vypínaniu dlhodobo poškodiť.
SK
1. Nasaďte kryt tak, ako to vidíte na obrázku,
na vodný kotol (Obr. 2/1.).
Nasuňte kryt s obomi drážkami na dva
kolíky na okraji vodného kotla (Obr. 2/1.).
2. Zatlačte pevne kryt smerom dozadu, pokiaľ
počuteľne nezaklapne (Obr. 2/2.).
UPOZORNENIE:
Ak sa prístroj neúmyselne zapne v prázdnom stave, vypne ochrana proti prehrievaniu automaticky prístroj (pozrite k tomu tiež
ZKapitola 3.4, „Automatické vypnutie“).
Nechajte prístroj najskôr úplne vychladnúť,
kým ho opäť naplníte vodou/materiálom na
zohriatie.
87
Page 88

Varenie
3Varenie
3.1 Naplnenie
.
VÝSTRAHA:
Nebezpečenstvo poranenia!
Skontrolujte prístroj pred každým použitím.
Poškodený prístroj sa nesmie používať.
1. Vyberte prístroj zo stojana.
VÝSTRAHA:
Nebezpečenstvo úrazu úderom elektrickým
prúdom!
Pri plnení nesmie spodná strana prístroja a
stojan nikdy zvlhnúť, pretože by sa mohli
kontakty, ktoré sa tu nachádzajú, vyskratovať. Skôr, než sa opäť postaví na stojan,
musí sa vonkajšia strana prístroja vysušiť.
2. Dajte do prístroja iba toľko vody/materiálu
na zohriatie, aby sa stav náplne
nachádzal medzi značkami „MIN“/„MAX“.
UPOZORNENIE:
Myslite pritom na to, že stav náplne v prístroji Hotpot° bude naďalej stúpať, ak sa má
okrem vody pridať do prístroja ešte ďalší
materiál na zohrievanie.
UPOZORNENIE:
Aby ste usporili prúd, naplňte do variča iba
toľko vody, koľko práve potrebujete.
UPOZORNENIE:
Plňte prístroj Aquagrad° buď s uzavretým
krytom cez plniaci a vypúšťací otvor, alebo
ho naplňte s otvoreným krytom. Kryt sa dá
otvoriť stlačením odblokovania krytu „ “
(Obr. 3) namontovaného v rukoväti.
3
3. Zavrite kryt.
4. Položte prístroj späť do stojana.
3.2 Prvé použitie
1. Nalejte vodu až po značku „MAX“ do prís-
troja (ZKapitola 3.1, „Naplnenie“).
2. Nechajte vodu dva až trikrát zovrieť
(ZKapitola 3.3, „Každodenné používa-
nie“) a vylejte ju po každom zovretí kompletne z prístroja.
<
88
Page 89

Varenie
3.3 Každodenné používanie
VÝSTRAHA:
Nebezpečenstvo oparenia!
Prístroj sa nesmie prevádzkovat’ s chýbajúcim alebo otvoreným krytom. Vzniká tu inak
nebezpečenstvo obarenia vystrekujúcimi
kvapalinami.
3
1. Naplňte prístroj tak, ako je to popísané
ZKapitola 3.1, „Naplnenie“ dolu.
2. Stlačte tlačidlo Zap/Vyp „ON/OFF“
(Obr. 3/1.), aby ste zapli prístroj.
Červená prevádzková signálka zobrazuje,
že je prístroj zohriaty. Zobrazenie menovitej teploty ukazuje „30“.
4
1.
2.
UPOZORNENIE:
Ak sa vezme počas prevádzky prístroj zo
stojana, zastaví sa zohrievací proces. Zobrazenie menovitej teploty ukazuje „EE“. Ak
sa prístroj postaví späť na stojan, zobrazí
sa predtým nastavená teplota a proces
zohrievania pokračuje ďalej.
3.4 Automatické vypnutie
Prístroj disponuje automatickým vypínaním,
ktoré (v priebehu 30 sekúnd) zabráni prehrievaniu a tým aj poškodeniu prístroja.
Automatické vypnutie sa vykoná, ak:
- sa dosiahne predvolená teplota,
- sa naplní príliš málo alebo žiadna voda/
omateriiál na ohrievanie,
- Prístroj sa počas prevádzky zdvihne zo
stojana.
POZOR:
Počkajte, kým ohrievacia platňa úplne nevychladne. Až potom sa môže prístroj opäť
naplniť vodou/materiálom na ohrievanie.
3. Nastavte otáčaním otočného regulátora
teploty (Obr. 4/2.) potrebnú teplotu.
-Otáčaním vpravo zvyšujete teplotu v 5°C
krokoch.
-Otáčaním vľavo znižujete teplotu v 5°C
krokoch.
Najnižšia nastaviteľná teplota je 30 °C.
Prístroj teraz ohreje vodu/ohrievaný materiál
na potrebnú teplotu a potom sa automaticky
vypne. Červená prevádzková kontrolka
potom zhasne.
POZOR:
Nedržte stlačené ovládacie tlačidlá na ovládacom paneli. Elektronika by sa mohla
poškodit’.
SK
89
Page 90

Varenie
3.5 Rýchle nastavenie
5
Jedným stlačením otočného regulátora
teploty (Obr. 5) sa dostanete priamo na najvyššie nastavenie teploty. Týmto voda/ohrievaný materiál, nezávisle od množstva náplne,
zovrie.
UPOZORNENIE:
Ak otočíte otočným regulátorom teploty pri
zobrazovaných "95“ stupňoch ešte raz
vpravo, zobrazí indikátor menovitej teploty
na displeji dve pohybujúce sa čiarky
(Obr. 5) pre najvyššie možné nastavenie
teploty.
3.6 Funkcia udržiavania tepla
Ak si chcete zachovat’ určitú teplotu vody/
ohrievaného materiálu, využite funkciu
udržiavania tepla.
Kvôli aktivácii funkcie na udržiavanie tepla
postupujte nasledovne:
1. Naplňte prístroj tak, ako je to popísané
ZKapitola 3.1, „Naplnenie“ dolu.
2. Spustite prístroj do prevádzky podľa popi-
su ZKapitola 3.3, „Každodenné používa-
nie“ dole.
6
3. Stlačte tlačidlo udržiavania tepla „KEEP
WARM“, aby ste aktivovali funkciu na
udržiavanie tepla (Obr. 6).
- Rozsvieti sa zelená kontrolka udržiavania
tepla súčasne s červenou prevádzkovou
kontrolkou (Obr. 6).
- Prístroj sa teraz zohrieva, kým sa nedosiahne potrebná teplota.
- Potom sa prístroj vypne a červená prevádzková kontrolka zhasne.
- Funkcia udržiavania tepla je aj naďalej
aktívna. (zelená kontrolka udržiavania
tepla svieti.)
-Hneď, ako teplota klesne, zapne sa opät’
prístroj a začne ohrievat’. (Červená prevádzková kontrolka svieti.)
4. Stlačte tlačidlo Zap/Vyp „ON/OFF“, aby
ste deaktivovali funkciu udržiavania tepla.
Zelená kontrolka udržiavania tepla a čer-
vená prevádzková kontrolka zhasnú.
90
Page 91

Údržba
4Údržba
4.1 Po použití
UPOZORNENIE:
Nechajte prístroj vždy pred novým ohrievaním riadne vychladnúť.
VÝSTRAHA:
Nebezpečenstvo úrazu úderom elektrickým
prúdom!
Zabráňte tomu, aby sa na kontaktnú zástrč-
ku dostala vlhkosť. Položte prístroj po vyliatí/vyprázdnení vždy späť na stojan tak, aby
sa kontaktná zástrčka zakryla a aby bola
chránená pred dotykom, vodou a nečisto-
tou. Neponárajte prístroj, stojan alebo
sieťovú šnúru nikdy do vody alebo iných
kvapalín. Pri čistení iba úsporne používajte
kvapalinu.
Nečistite preto prístroj alebo
podstavec nikdy v umývačke
riadu.
VÝSTRAHA:
Nebezpečenstvo popálenia!
Skôr, než začnete čistiť prístroj, nechajte ho
vychladnúť.
POZOR:
Nepoužívajte žiadne čistiace prostriedky,
drhnúce prostriedky alebo alkohol, pretože
by mohli poškodiť prístroj. Použite pri silnom
znečistení v každom prípade jemný čistiaci
prostriedok.
1. Vytiahnite sieťovú zástrčku zo zásuvky.
2. Vyprázdnite úplne prístroj.
3. Vyčistite vnútro prístroja Hotpot° s úspor-
ným použitím vody.
4. Vyčistite vonkajšiu stranu prístroja iba
pomocou ľahko navlhčenej handričky.
5. Nechajte prístroj vyschnúť.
6. Vložte prístroj späť do stojana.
7. Uskladnite prístroj na chladnom, suchom
mieste.
4.2 Zbavenie prístroja Aquagrad°
vodného kameňa
POZOR:
Dodržiavajte doleuvedené intervaly na
odstránenie vodného kameňa. V opačnom
prípade hrozí zbytočná nadmerná spotreba
prúdu a z dlhodobého hľadiska aj poškodenie prístroja.
Zbavte nádobu na vodu vodného kameňa, vždy podľa povlaku vodného kameňa, minimálne však:
-dvakrát ročne,
- pred každým dlhším uskladnením,
- pri viditeľnom povlaku vodného kameňa,
- pri nezvyčajne dlhej zohrievacej dobe.
Pri odstránení vodného kameňa postupujte nasledovne:
1. Naplňte vodný kotol až po značku „Max“
octom.
2. Zapnite prístroj vypínačom Zap/Vyp „ON/
OFF“ a nechajte ocot zovrieť.
3. Nechajte pôsobiť ocot celú noc.
4. Vložte tiež kryt s filtrom proti vodnému
kameňu kvôli odstráneniu vodného
kameňa na noc do octového kúpeľa.
5. Na druhý deň ocot vylejte.
6. Nechajte v nádobe na vodu ešte minimál-
ne dvakrát zovrieť vodu a potom ju vylejte.
7. Vypláchnite kotol na vodu studenou
vodou skôr, než ho opäť začnete používať.
UPOZORNENIE:
Môžete použiť aj bežné obchodné prostriedky na odstránenie vodného kameňa.
Dodržiavajte pritom aj ich odlišný návod na
použitie.
SK
91
Page 92

Údržba
4.3 Skôr, než zašlete prístroj
VÝSTRAHA:
Nebezpečenstvo poranenia!
Skôr, než začnete odstraňovat’ problémy,
vypnite prístroj. Nikdy nepoužívajte pokazený prístroj. Aby ste minimalizovali nebezpečenstvo, nikdy neopravujte prístroj sami.
Obrát’te sa kvôli tomu na zákaznícky servis
Royal
Appliance.
Skôr, než budete kontaktovat’ zmluvného predajcu Royal, servisného partnera firmy Royal,
alebo ich odborný trh so servisom, skontrolujte na základe nasledujúcej tabuľky, či nedokážete odstránit’ problém sami.
Problém možná príčina
Riešenie
Zariadenie
neohrieva
Prístroj sa
vypína "príliš
skoro"
Prístroj potrebuje nezvyčaj-
ne dlhú dobu
na zohriatie
Siet’ová zástrčka nie je
zastrčená.
Zastrčte siet’ovú zástrčku.
Zásuvka je bez prúdu.
Vyskúšajte prístroj v zásuvke, pri ktojej ste si istí, že je
pod napätím.
Ochrana proti prehrievaniu
sa aktivovala. Nechajte
prístroj vychladnút’ a
naplňte ho správnym
množstvom vody.
Prístroj je zanesený vodným kameňom.
Odstráňte vodný kameň z
prístroja ZKapitola 4.2,
„Zbavenie prístroja Aquagrad° vodného kameňa“.
4.4 Náhradné diely
Diely príslušenstva alebo náhradné diely si
môžete objednat’ pod:
Č. pro-
duktu
9119001 Sklenený kryt prístroja Hotpot°
9119002 Podlahová doska / Podstavec
pre M9119 / M3005 / M9000
Obdržíte ich v Dirt Devil
www.dirtdevil.de
alebo ZStrana 124, „International Service“
Popis
®
online-obchode na
4.5 Likvidácia
Ak je prístroj už na konci životnosti, najmä ak vznikajú neustále poruchy, spravte vyslúžilý
prístroj neupotrebiteľným tak,
že vytiahnete zástrčku zo
siet’ovej zásuvky a prestrihnete
siet’ovú šnúru.
sov o životnom prostredí platných vo Vašej
krajine.
Elektrický odpad sa nemôže likvidovat’ spolu
s domovým odpadom. Kvôli poradenstvu o
recyklácii sa obrát’te na obecný úrad alebo na
svojho predajcu.
Zlikvidujte prístroj podľa predpi-
92
Page 93

5 Záruka
Na nami predaný produkt poskytujeme
záruku 24 mesiacov odo dňa jeho zakúpenia.
V rámci tejto záručnej doby odstránime podľa
našej voľby buď opravou alebo výmenou prís-
troja alebo príslušenstva (poškodenie príslušenstva nevedie automaticky k výmene kompletného prístroja) bezplatne všetky
nedostatky, ktoré boli spôsobené výrobnými
chybami alebo chybami materiálu.
Záruka sa nevzt’ahuje na škody, ktoré vzniknú neodborným používaním (prevádzka s
nesprávnym typom prúdu/napätím, pripojenie
k nevhodným zdrojom napätia, zlomenie
atď.), na bežné opotrebenie a nedostatky,
ktoré iba nepodstatne ovplyvňujú hodnotu
alebo upotrebiteľnost’ prístroja. Pri zásahoch
do prístroja nami neautorizovaným servisom
alebo pri použití iných ako náhradných dielov
Royal Appliance zaniká akýkoľvek nárok na
záruku.
Na opotrebované diely sa nevzt’ahuje záruka
a ich výmena alebo oprava je spoplatnená!
Záruka vstupuje do platnosti iba vtedy, ak je
záručný list potvrdený pečiatkou a podpisom
obchodníka, alebo ak je priložená kópia faktúry k zaslanému prístroju. Záručné výkony
neovplyvňujú ani predĺženie záručnej doby,
ani týmto nevzniká nárok na novú záruku!
Zasielajte prístroj úplne prázdny a suchý, priložte takisto krátky popis chyby napísaný tlačeným písmom. Obálku označte poznámkou
"Kvôli záruke". Zašlite nám ho spolu so záruč-
ným listom alebo kópiou pokladničného
dokladu na nasledujúcu adresu:
Záruka
SK
ZStrana 124, „International Service“
93
Page 94

Pregled naprave Hotpot°
Pregled naprave Hotpot°
Hvala lepa!
Veseli nas, da ste se odločili za Hotpot°! Hotpot° omogoča segrevanje vode, hrane za dojenčke, konzerv in podobnega pri natančno
nastavljeni temperaturi. Zahvaljujemo se vam
za nakup in vaše zaupanje.
Obseg dobave / različice
2
X
MA
MIN
Pregled
(slika 1):
1 podstavek
(odvisno od izvedbe v obsegu dobave)
1.1 kontaktni vtič
1.2 električni kabel
1.3 vrtilno stikalo za temperaturo
1.4 prikaz nastavljene temperature
1.5 stikalo za vklop in izklop »ON/OFF«
1.6 kontrolna lučka za obratovanje (rdeče)
1.7 Tipka za ohranjanje toplote
»KEEP WARM«
1.8 kontrolna lučka za ohranjanje toplote
(zeleno)
2 vzpostavitev stika
3 Hotpot°
4 priprava za izlivanje
5 ročaj
6 stekleni pokrov z vgrajenim cedilom
7 Oznaka »MIN«/»MAX«
8 tipalo za temperaturo
9 posoda za vodo Aquagrad°
(odvisno od izvedbe v obsegu dobave)
10 pokrov z vgrajenim rešetom filtra
11 sprostitev pokrova (» «)
12 3
1 Hotpot°s podstavkom in Aquagradom°
(standardni obseg dobave)
2 Hotpot°s podstavkom
(posebna različica brez Aquagrada°)
3 Hotpot° solo (posebna različica brez
Aquagrada° in podstavka)
- Navodilo za uporabo (ni na sliki)
Tehnični podatki
Vrsta naprave : električna posoda/grel-
Model : Hotpot° & Aquagrad°
Napetost : 220-240V~, 50Hz,
Moč
Hotpot°
Moč
Aquagrad°
Prostornina
Hotpot°
Prostornina
Aquagrad°
Temperaturno območje
Natančnost
(pri količini 1 l)
Teža samo lonca/
posode
Teža lonca/posode s podstavkom
nik vode z regulatorjem
temperature
M9119 (-0/-1/.../-8/-9)
Razred I
: 800 W maksimalna moč
: 2300 W maksimalna
moč
: najmanj 0,25 l
največ 1,0 l
: najmanj 0,5 l
največ 2,0 l
:30°C–100°C
:± 4°C
: okoli 1 kg
: okoli 1,6 kg
94
Ker si stalno prizadevamo za izboljšanje izdelka, si
pridržujemo pravico do tehničnih in oblikovnih sprememb. © Royal Appliance International GmbH
Page 95

Varnostna opozorila
1 Varnostna opozorila
1.1 Glede navodil za uporabo
Pred uporabo naprave dobro preberite na-
vodila za uporabo.
Navodila dobro spravite.
Če napravo predate tretji osebi, ji dajte tu-
di navodila za uporabo.
Neupoštevanje teh navodil lahko povzroči
hude poškodbe ali okvare naprave.
Za škodo, ki je nastala zaradi neupoštevanja
teh navodil za uporabo, ne prevzemamo odgovornosti.
Napotki, ki so pomembni za vašo varnost, so
posebej označeni. Da bi preprečili nesreče in
okvare na napravi, obvezno upoštevajte te
napotke:
OPOZORILO:
Opozarja pred zdravstvenimi nevarnostmi in
nakazuje morebitna tveganja poškodbe.
POZOR:
Opozarja na morebitne nevarnosti za
napravo ali druge predmete.
NAPOTEK:
Vsebuje napotke in informacije.
1.2 Glede vroče vode in pare
Nevarnost oparin!
Vroča voda in para lahko povzročita težje oparine. Zato bodite še posebej previdni na naslednje:
Med obratovanjem nikoli ne snemite po-
krova.
Naprave ne uporabljajte brez pokrova.
Preprečite stik z vročo paro, ki uhaja pri
segrevanju ali po njem.
1.3 Glede električne oskrbe
Nevarnost električnega udara!
Naprava obratuje na električni
tok, pri čemer načeloma obstaja nevarnost električnega udara. Zato bodite še posebej previdni na naslednje:
Naprave nikoli ne pomočite v vodo ali dru-
ge tekočine. Vodo napolnite v napravo izključ-
no tako, kot je opisano.
Omrežnega vtiča ali podstavka se nikoli
ne dotikajte z mokrimi rokami.
Ko želite vtič povleči iz vtičnice, zmeraj po-
vlecite neposredno za vtič. Nikoli ne povlecite
za kabel, ker ga lahko poškodujete.
Pazite, da električnega kabla ne upogiba-
te, stiskate, preko njega peljete, prav tako pa
morate preprečiti, da ne pride v stik z vodnimi
in toplotnimi viri.
Pred priklopom napajalnika na elektriko
preverite, da se napetost na napisni tablici
ujema z navedeno napetostjo vaše vtičnice.
Napačna napetost lahko uniči napravo.
Uporabljajte samo vtičnice z varovalnim
kontaktom.
Ne uporabljajte podaljškov z več vtičnica-
mi. Uporabljajte samo odobrene, preproste
podaljške, ki so primerni za visoko električno
napetost naprave.
Vtiča nikoli ne vstavljajte v vtičnico s silo.
Vtiča nikoli ne spreminjajte.
Drugih naprav ne postavite na podstavek.
Preden napravo čistite ali opravljate vzdr-
ževalna dela, jo vedno izključite in izvlecite
omrežni vtič.
SI
95
Page 96

Varnostna opozorila
1.4 Glede vročih površin
Nevarnost opeklin!
Zunanjost naprave se med
obratovanjem segreje! Zato bodite še posebej previdni na naslednje:
Celotno napravo nosite previdno in iz-
ključno za ročaj.
Ne dotikajte se vroče grelne plošče.
Preden napravo čistite ali opravljate vzdr-
ževalna dela, jo vedno izključite, izvlecite
omrežni vtič in pustite, da se ohladi.
1.5 Glede nekaterih skupin oseb
Te naprave ne smejo uporabljati osebe
(vključno z otroki), ki imajo omejene fizične,
senzorične ali psihične sposobnosti ali nimajo
dovolj izkušenj in/ali znanja za uporabo.
Izjemoma jo lahko uporabljajo, če jih
nadzoruje oseba, ki je zadolžena za njihovo
varnost, ali pa jih natančno pouči, kako se
napravo uporablja.
Otroke je treba nadzorovati, da se ne
bodo igrali z napravo.
Ko zapustite prostor, napravo vedno izklo-
pite in izvlecite vtič iz vtičnice.
Spravite jo tako, da ne bo dostopna.
Vročo posodo ter posodo z vročo vsebino
držite stran od dojenčkov in majhnih otrok. Nikoli hkrati ne nosite majhnih otrok in vroče posode ali posode z vročo vsebino.
Ovojnina ni primerna za igranje. Obstaja
nevarnost zadušitve.
Osebe z motnjami senzibilnosti, pred-
vsem z zmanjšano občutljivostjo za temperaturne razlike, morajo biti zelo previdne pri uporabi naprave.
1.6 Glede kraja postavitve
Pazite, da naprava in vsi dodatni deli ne
pridejo v stik z vročimi površinami. Ne posta-
vite je na toplotni vir ali neposredno v njegovo
bližino, kot je npr. plošča štedilnika.
Za obratovanje napravo postavite na su-
ho, ravno in stabilno podlago.
1.7 Glede pravilne uporabe
Napravo lahko uporabljate samo v gospodinjstvu. Naprava ni primerna za komercialno
uporabo.
Hotpot° lahko uporabljate izključno za se-
grevanje hladnih živil in jedi.
Aquagrad° lahko uporabljate izključno za
segrevanje hladne pitne vode.
Ostala uporaba ni primerna in je prepoveda-
na.
Za Aquagrad° je prepovedano:
Polnjenje drugih tekočin ali medijev razen
hladne pitne vode. Prepovedano je predvsem
segrevanje pijač in jedi.
Za Aquagrad° in Hotpot° je prepovedano:
Uporaba neživil.
Obratovanje s količino polnjenja pod
oznako »MIN« ali nad oznako »MAX«.
Uporaba na prostem.
1.8 Če je naprava pokvarjena
Nikoli ne uporabljajte pokvarjene naprave
ali naprave, ki ima pokvarjen električni kabel.
Če se priključni vodi naprave poškodujejo, jih
– da se izognete nevarnostim – lahko zamenja le proizvajalec, njegova servisna služba
ali ustrezno kvalificirano osebje.
Pokvarjeno napravo nesite na popravilo
strokovnjaku ali servisni službi podjetja Royal
Appliance.
96
Page 97

Priprava naprave
2 Priprava naprave
2.1 Razpakiranje
1. Razpakirajte napravo in vse sestavne dele.
2. Preverite, če je vsebina dostave popolna
in nepoškodovana.
POZOR:
Napravo transportirajte oziroma odpošiljajte
zmeraj v originalni ovojnini, da se ne poškoduje. V ta namen ovojnino spravite.
Ovojnino, ki je več ne boste potrebovali,
odstranite skladno s predpisi, ki veljajo v
vaši državi.
NAPOTEK:
Če opazite, da je med transportom prišlo do
poškodbe naprave, o tem takoj obvestite
svojega prodajalca.
2.2 Postavitev
1. Podstavek postavite stran od vodnih in to-
plotnih virov na suha, ravna in stabilna tla.
2. Nato na napravo postavite pokrov.
2.3 Montaža pokrova posode za
vodo
2
2.4 Priklop
POZOR:
Napravo uporabljajte samo, če je električna
napetost, ki je navedena na napisni tablici,
enaka napetosti vaše vtičnice. Napačna
napetost lahko napravo uniči.
1. Električni kabel odvijte s spodnje strani
podstavka naravnost toliko, kot je potrebno.
OPOZORILO:
Nevarnost poškodbe!
Pri polaganju električnega kabla pazite na
nezgodno varnost.
2. Električni kabel fiksirajte tako, da ga znova
zagozdite v izstopni odprtini podstavka.
3. Vtič vstavite v vtičnico z varovalnim kon-
taktom.
Na zaslonu prikaza nastavljene temperature se sedaj prikaže »EE«.
Ta prikazuje, da se podstavek oskrbuje z električnim tokom, vendar naprava nanj še ni položena.
4. Napravo vode postavite na podstavek, da
se zaskoči v kontaktni vtič.
Na zaslonu prikaza nastavljene temperature sedaj utripa »OF«.
Vaša naprava je sedaj pripravljena
za uporabo.
2.
1.
1. Pokrov namestite na posodo za vodo ta-
ko, kot kaže slika (slika 2/1).
Pokrov potisnite z obema odprtinama na
dva zatiča na robu posode za vodo
(slika 2/1).
2. Pokrov potisnite nazaj, dokler se slišno in
občutno ne zaskoči (slika 2/2).
POZOR:
Preprečite suho obratovanje naprave, saj se
lahko kljub vgrajeni avtomatiki za izklop dolgoročno poškoduje.
SI
NAPOTEK:
Če se naprava pomotoma vklopi v praznem
stanju, jo zaščita pred pregretjem samodejno izklopi (poglejte si tudi ZPoglavje 3.4,
„Avtomatika za izklop“). Naprava naj se najprej popolnoma ohladi, preden jo znova
napolnite z vodo ali živili.
97
Page 98

Segrevanje
3 Segrevanje
3.1 Polnjenje
.
OPOZORILO:
Nevarnost poškodbe!
Napravo preglejte pred vsako uporabo.
Poškodovane naprave ne smete uporabljati.
1. Napravo vzemite s podstavka.
OPOZORILO:
Nevarnost električnega udara!
Pri polnjenju se spodnja stran naprave in
podstavek ne smeta zmočiti, saj lahko kontakti povzročijo kratek stik. Zato mora biti
tudi zunanjost naprave suha, preden jo
postavite na podstavek.
2. V napravo nalijte le toliko vode ali živil, da
bo količina med oznakama »MIN«/
»MAX«.
NAPOTEK:
Upoštevajte, da se bo količina v Hotpot° še
povečala, če boste vodi dodali še drugo živilo.
NAPOTEK:
Da bi prihranili električni tok, dolijte toliko
vode, kot jo potrebujete.
NAPOTEK:
Aquagrad° napolnite pri zaprtem pokrovu
skozi odprtino za dolivanje in izlivanje ali pa
pri odprtem pokrovu. Pokrov lahko odprete
s pritiskom na sprostitev pokrova, ki je vgrajena v ročaju » « (slika 3).
3
3. Pokrov zaprite.
4. Napravo ponovno postavite na podstavek.
<
3.2 Prva uporaba
1. Napravo napolnite z vodo do oznake
»MAX« (ZPoglavje 3.1, „Polnjenje“).
2. Pustite, da voda dva- do trikrat zavre
(ZPoglavje 3.3, „Dnevna uporaba“) in vodo po vsakem vretju v celoti odlijte.
98
Page 99

Segrevanje
3.3 Dnevna uporaba
OPOZORILO:
Nevarnost oparin!
Naprave ni dovoljeno uporabljati brez
pokrova ali z odprtim pokrovom. Sicer
zaradi tekočine, ki škropi, obstaja nevarnost
oparin.
3
1. Napravo napolnite, kot je opisano v
ZPoglavje 3.1, „Polnjenje“.
2. Da bi napravo vklopili, pritisnite stikalo za
vklop in izklop "ON/OFF" (slika 3/1.).
Prikaže se rdeča kontrolna lučka za obratovanje, ki prikaže segrevanje naprave.
Prikaz nastavljene temperature kaže "30".
4
1.
2.
NAPOTEK:
Če med obratovanjem napravo snamete s
podstavka, se proces segrevanja ustavi.
Prikaz nastavljene temperature kaže »EE«.
Če napravo postavite nazaj na podstavek,
se prikaže predhodno nastavljena temperatura in segrevanje se nadaljuje.
3.4 Avtomatika za izklop
Naprava ima avtomatiko za izklop, ki (v 30 sekundah) prepreči pregretje in okvare.
Nato sledi samodejni izklop, ko:
- je dosežena nastavljena temperatura,
- je napolnjeno premalo vode/živil ali vode/
živil v napravi ni,
- napravo vzamete s podstavka.
POZOR:
Počakajte, da se grelna plošča popolnoma
ohladi. Napravo šele takrat napolnite z vodo
ali živili.
3. Želeno temperaturo nastavite z obrača-
njem vrtilnega stikala za temperaturo
(slika 4/2.).
- Z obračanjem v desno povečate temperaturo v korakih po 5°C.
- Z obračanjem v levo zmanjšate temperaturo v korakih po 5°C. Najmanjša nastavljiva temperatura je 30 °C.
Naprava sedaj segreva vodo ali živila do želene temperature in se nato samodejno izklopi.
Rdeča kontrolna lučka za obratovanje sedaj
ugasne.
POZOR:
Upravljalnih tipk ne držite pritisnjenih na
polju upravljanja. Elektronika bi se lahko
poškodovala.
SI
99
Page 100

Segrevanje
3.5 Hitra nastavitev
5
Z enkratnim pritiskom na vrtilno stikalo za
temperaturo (slika 5) pridete neposredno do
najvišje nastavitve temperature. Napolnjena
voda ali živilo zavre neodvisno od dolite količine.
NAPOTEK:
Če vrtilno stikalo za temperaturo pri prikazanih "95" stopinjah še enkrat obrnete v
desno, prikaz nastavljene temperature prikaže na zaslonu dve premikajoči črti
(slika 5) za najvišjo možno nastavitev temperature.
3.6 Funkcija ohranjanja toplote
Če želite ohraniti vodo ali živilo pri določe-
ni temperaturi, uporabite funkcijo ohranjanja
toplote.
Da bi aktivirali funkcijo ohranjanja toplote,
ravnajte kot sledi:
1. Napravo napolnite, kot je opisano v
ZPoglavje 3.1, „Polnjenje“.
2. Napravo vklopite, kot je opisano v
ZPoglavje 3.3, „Dnevna uporaba“.
6
3. Da bi aktivirali funkcijo ohranjanja toplote
(slika 6), pritisnite tipko za ohranjanje toplote "KEEP WARM".
- Kontrolna lučka za ohranjanje toplote zač-
ne svetiti skupaj z rdečo obratovalno lučko
(slika 6).
- Naprava se segreva, dokler ne doseže nastavljene temperature.
- Nato se naprava izklopi in rdeča kontrolna
lučka za obratovanje ugasne.
- Funkcija ohranjanja toplote je še naprej
aktivna. (Zelena kontrolna lučka za ohranjanje toplote sveti.)
- Ko temperatura pade, se naprava znova
vklopi in segreva. (Rdeča kontrolna lučka
za obratovanje sveti.)
4. Da bi deaktivirali funkcijo ohranjanja toplote, pritisnite stikalo za vklop in izklop "ON/
OFF".
Zelena kontrolna lučka za ohranjanje toplote in rdeča kontrolna lučka za obratovanje ugasneta.
100
 Loading...