

Dinex DuraTherm 2011208 Operating & Maintenance Manual
DuraTherm
™
Operating & Maintenance Manual
Model: 2011208 (208V, 3-Phase)
Table of Contents
Introduction ....................................................... 2
Freight Damage Claims ..................................... 2
Applications and Use ........................................ 2
Safety ................................................................. 2
Installation ......................................................... 3
Operation Instructions ...................................... 4
User Interface .................................................... 4
For Service Information, call 1-888-673-4639
Please provide the following information:
• Model number
• Serial number (from bottom of unit)
Manager Options ............................................... 5
Informational Warning ....................................... 6
Troubleshooting ................................................. 6
Error Conditions ................................................ 7
Maintenance ...................................................... 8
Dinex Warranty ..................................................9

DuraTherm
™
INTRODUCTION
Congratulations! You have purchased the new
Dinex® DuraTherm™ Induction Charger. Your
Dinex® DuraTherm induction heated base
system, when used within a controlled hot
food trayline process and covered with Dinex®
insulated domes, will keep hot plated food
satisfying for one hour or more from plating.
! CAUTION: If the product is used without
observing the information given under this
symbol, minor personal injury, or damage to
equipment may result.
! ATTENTION: Installation of this equipment
should be performed only by persons
qualified or licensed to install electrical
equipment.
Please read this manual for helpful guidelines
on how to use your new equipment. Should you
have any questions concerning the equipment,
please call Dinex® Service at 1-888-673-4639.
! Important: For your safety, read and follow
all cautions, information, and warnings.
FREIGHT DAMAGE
CLAIMS
Your DuraTherm™ Induction Charger was
carefully inspected and packed before leaving
our factory. The transportation company assumes
full responsibility for the safe delivery of this
equipment. Dinex® cannot assume responsibility
for damage or loss incurred in transit. Visible
damage or loss should be noted on the freight bill
and signed by the person making the delivery.
A freight claim should be filed immediately with the
transportation company. If damage is unnoticed or
concealed until the equipment is unpacked, notify
the transportation company immediately and tell
them you want to file a concealed damage claim.
This must be done within fifteen (15) days after
delivery was made. Be sure to retain all packing
materials and cartons.
! ATTENTION: Use of this symbol identifies
a potentially hazardous situation which, if
not avoided, may result in damage to the
machine or injury to the operator.
2
• Adjustments and service work should
be performed only by qualified service
technicians.
• This equipment is intended for commercial
use only. Not for household use.
• Use of other than genuine Dinex®
replacement parts or service work
performed by other than authorized Dinex
service agents will void the warranty.
• Do not use corrosive cleaners on the
equipment. Use only mild detergents.
APPLICATION & USE
The equipment is for commercial use in the
foodservice industry. It provides maximum
induction heating compatible with Dinex®
bases. Use with Dinex® DuraTherm and
SmartTherm bases only.
SAFETY
The instructions contained in this manual
provide important guidelines for the
equipment user regarding correct and safe
installation. Particular attention should be
paid to the precautions given in various parts
of this manual. Do not attempt to repair this
equipment. Repairs must be performed by
authorized personnel only.

DuraTherm
™
• Never use the equipment as a work surface
or cutting board.
• Do not attempt to heat anything other than
a Dinex base.
! IMPORTANT: Never place a DuraTherm base
or a SmartTherm base in a microwave oven!
! INFORMATION: This appliance is for
commercial use only and must be used
exclusively for the purposes prescribed.
! IMPORTANT: The following instructions
reduce the risk of fire, electrical shock, or
injury.
INSTALLATION
SET UP
1. Carefully remove any packing material
from the induction charger and check
loose packing material for small parts
or accessories. Inspect the charger for
concealed damage before placing packing
material aside. Keep the packaging until
you are confident with the equipment
performance.
2. The DuraTherm™ induction charger is
equipped with a locking plug. This plug
is part of a system that will protect you
from injury in the event of an electrical
malfunction inside the unit. Be sure the plug
is fully plugged into a matching socket that
is properly grounded.
REQUIREMENTS. A product identification
label on the bottom of the unit specifies
the operating voltage, current, frequency,
phase, and maximum wattage of the
charger. Plugging or wiring the charger into
less voltage than the charger is rated may
significantly decrease the performance
of the unit or damage internal electrical
components.
4. Do not place foreign objects on the charger,
or between the Dinex base and the charger
surface. Foreign objects may heat within
the induction field and cause damage to the
charger surface and/or base.
5. Do not use any DuraTherm™ charger that has
a damaged cord or plug. Consult the warranty
and follow the instructions for service.
6. Do not let the power cord touch hot surfaces.
7. The center of the charger may get hot to the
touch after hours of continuous use. Use
caution when loading and unloading bases.
8. The charger requires ample air flow to cool
the internal electronic components. Air is
pulled in from the bottom of the unit from
the front and sides, and exhausted towards
the rear of the unit. Assure that nothing
obstructs the airflow about all four sides of
the unit. Allow at least two inches from a
wall or partition.
9. A dedicated electrical outlet is recommended
for EACH DuraTherm™ charger.
! ATTENTION: DO NOT cut or break off the
larger angled prong on this plug, or change the
plug or power in any way. Doing so will create
a safety hazard and also void the warranty.
3. MAKE SURE THAT INCOMING
VOLTAGES MATCHES THE CHARGER
! IMPORTANT: Every installation site has
different electrical wiring requirement. Because
many different local codes exist, it is the owner
and installer’s responsibility to comply with all
federal, state, and local codes. Dinex® is not
responsible for any consequential damages,
either expressed or implied, as a result of
3

DuraTherm
failure to comply with installation requirements.
! CAUTION: Please do not attempt to open
the charger or perform service of any
kind. This product can only be serviced
by a Dinex® Authorized Service Agent or
designated Dinex® personnel. Contact
Dinex® at 1-888-673-4639 for service
information.
! CAUTION: Any installation not matching the
requirements discussed in this manual will
automatically void the product’s warranty.
INSTALLATION
™
OPERATION
INSTRUCTIONS
DuraTherm Induction System
1. Make sure that your DuraTherm™ Charger
is plugged into an energized circuit
as described in the previous section.
This should be a dedicated circuit, not
shared with any devices utilizing motors,
compressors, or components requiring a
heavy current draw.
1. The DuraTherm™ Charger can be installed
on top of a flat, level countertop or shelving,
being careful to maintain at least two
inches of clearance on all sides of the
charger for cooling. Do not place over
paper or loose material that may inhibit air
flow into the bottom air intakes. Consider
the Dinex® Induction Stand (Accessory
product) DXICTABLEM (Mobile with casters)
DXICTABLE (Not mobile).
2. The charger must be plugged into a
grounded 208V 3-phase, 20A receptacle.
Check rating plate on the charger to verify
correct voltage.
! IMPORTANT: Each charger should be
connected to its own dedicated circuit.
They should not be connected to circuits
sharing compressors or other heavy current
draw devices (i.e. plate heaters, steam
tables, etc.)
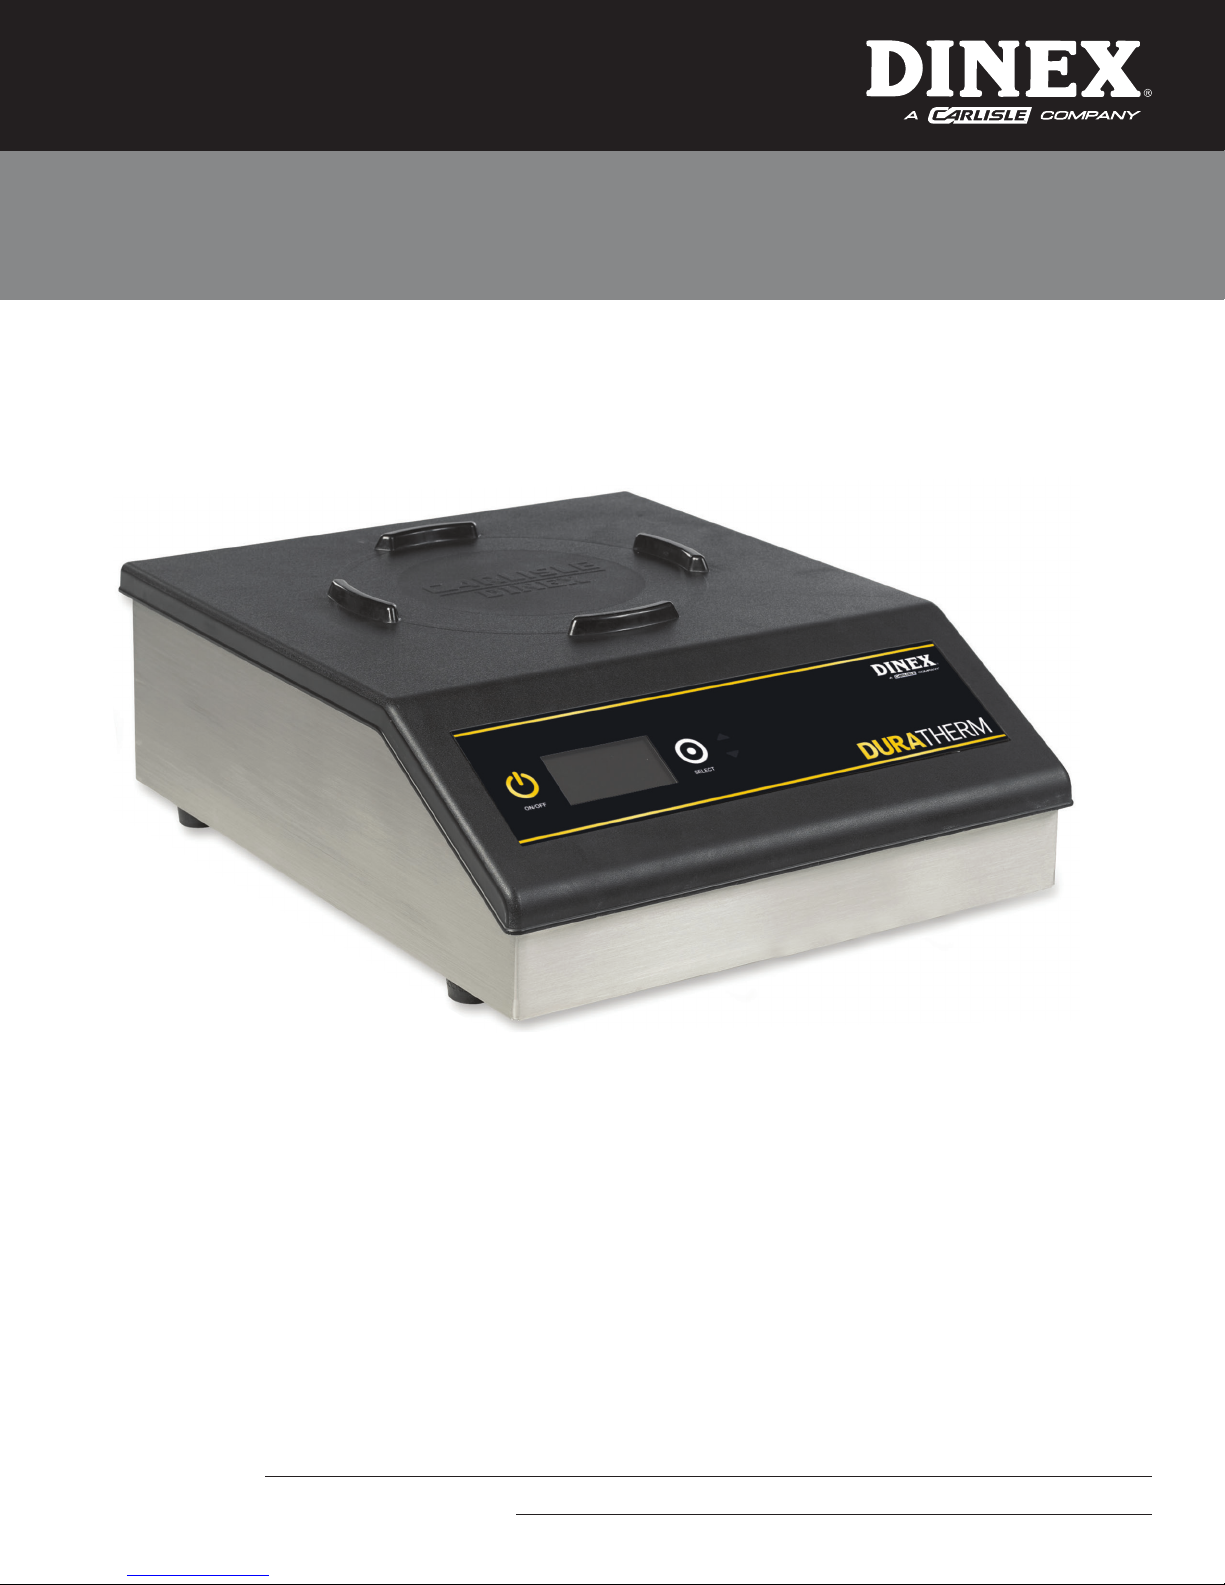
USER INTERFACE:
LCD
Info Center
POWER key will turn the unit on and off.
SELECT key will be used to reset error
conditions, clear informational messages, and
select or set options.
UP/DOWN arrow keys (these are not
embossed – just right of the SELECT key) are
used to move among Manager Options in the
OPTIONS menu.
LCD Info Center provides feedback on the
status of bases charging and equipment
operation.
3. Do not move the DuraTherm™ Charger when
it is electrically connected.
4. Two grease filters are mounted to the
bottom of the unit. Assure each is seated
and free of excessive debris or grease.
4
2. The DuraTherm™ Charger is turned on by
pressing the POWER button on the left front
of the switch panel. The LCD Info Center
will display “Waiting for base…” indicating
the DuraTherm™ Charger is turned on and
ready for use.
 Loading...