

Page 1
Installation and Operating Instructions
•
•
•
•
Fuel Effect Fire
Harcombe Model: HAR20
Basket Fire
Issue 1 21/09/01
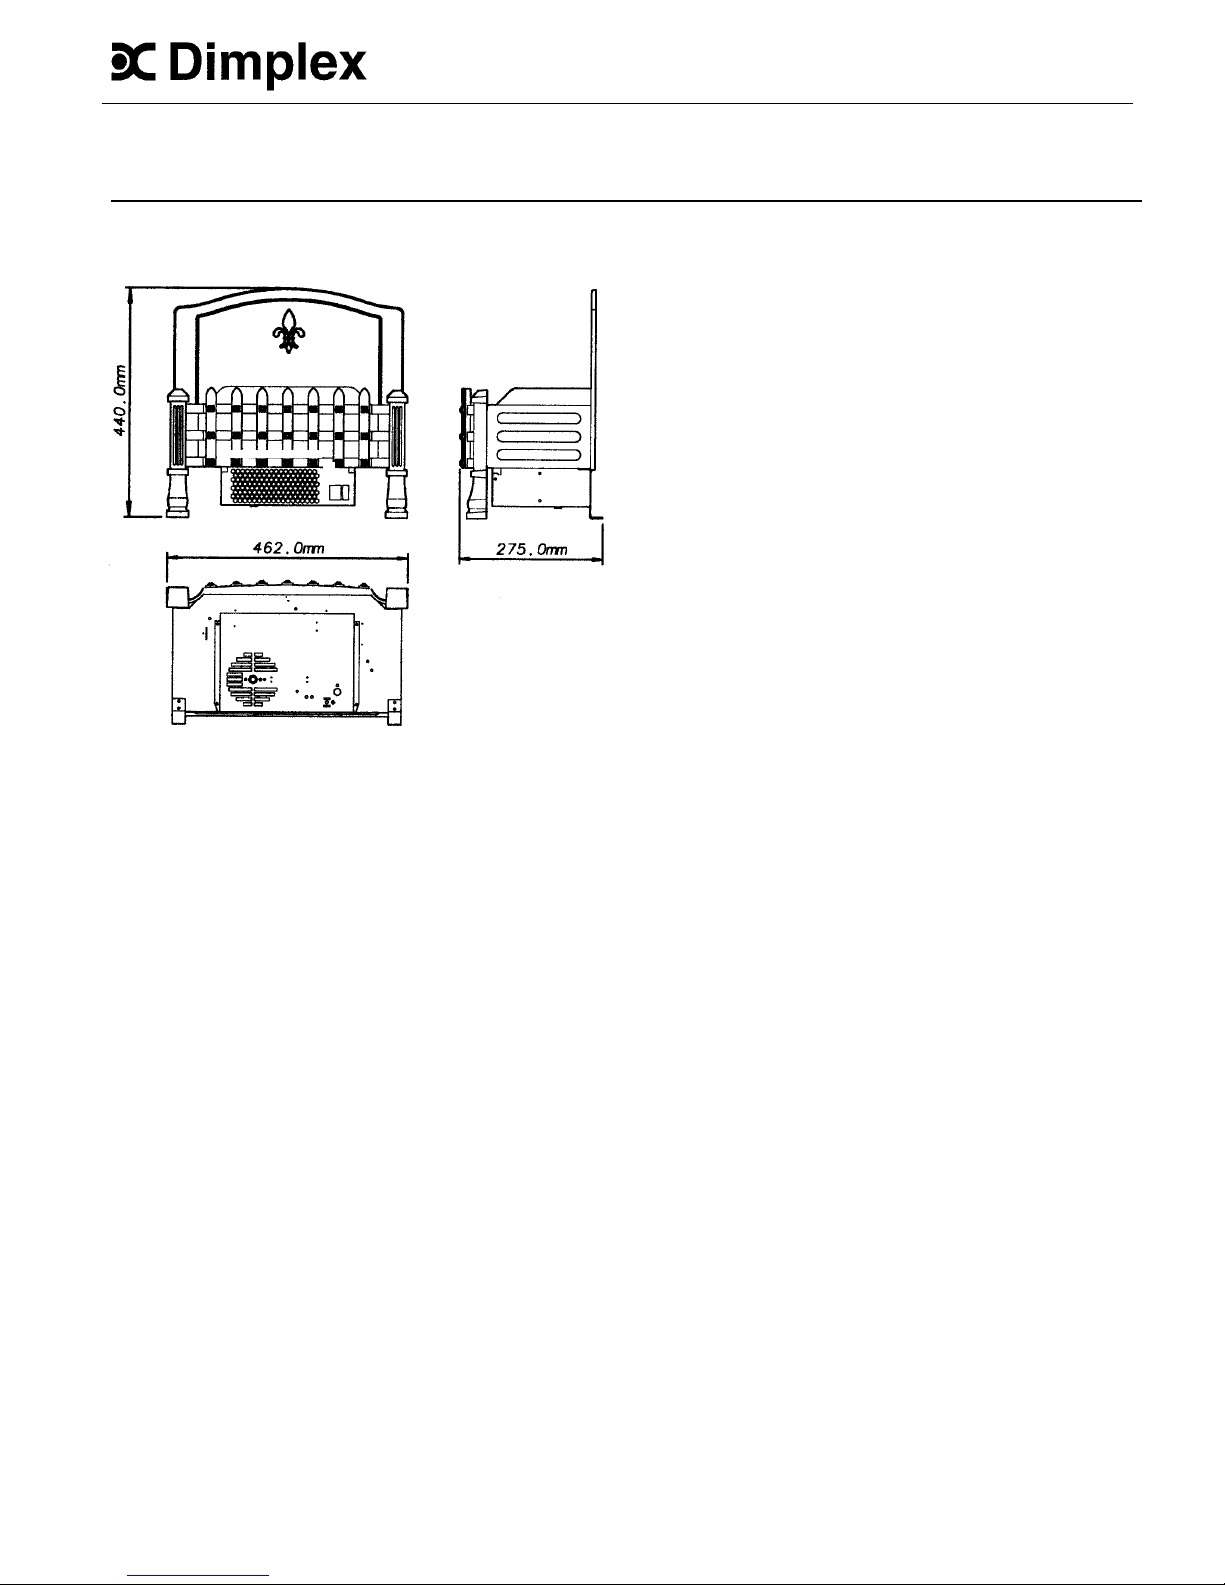
Dimensions (millimeters)
Electrical
WARNING: THIS APPLIANCE MUST BE EARTHED.
This fire is suitable for operation on an AC electrical supply
having the same voltage as that shown on the rating label.
The fire is fitted with a rewireable plug incorporating a 13
amp fuse. In the event of replacing the fuse in the plug
supplied, a 13 amp fuse approved by ASTA to BS1362 must
be used.
IMPORTANT
If the plug is not suitable for your socket, the 13 amp plug
should be removed. Before wiring the appropriate plug
please note the following code
GREEN AND YELLOW - EARTH
BLUE - NEUTRAL
BROWN - LIVE
As the colours of the wires in the mains lead may not
correspond with the coloured markings identifying the
terminals in your plug , proceed as follows:
Connect the GREEN AND YELLOW wire to the terminal
marked E or by the earth symbol ┴
Or coloured GREEN or GREEN AND YELLOW.
Connect the BLUE wire to the terminal marked N or coloured
BLACK.
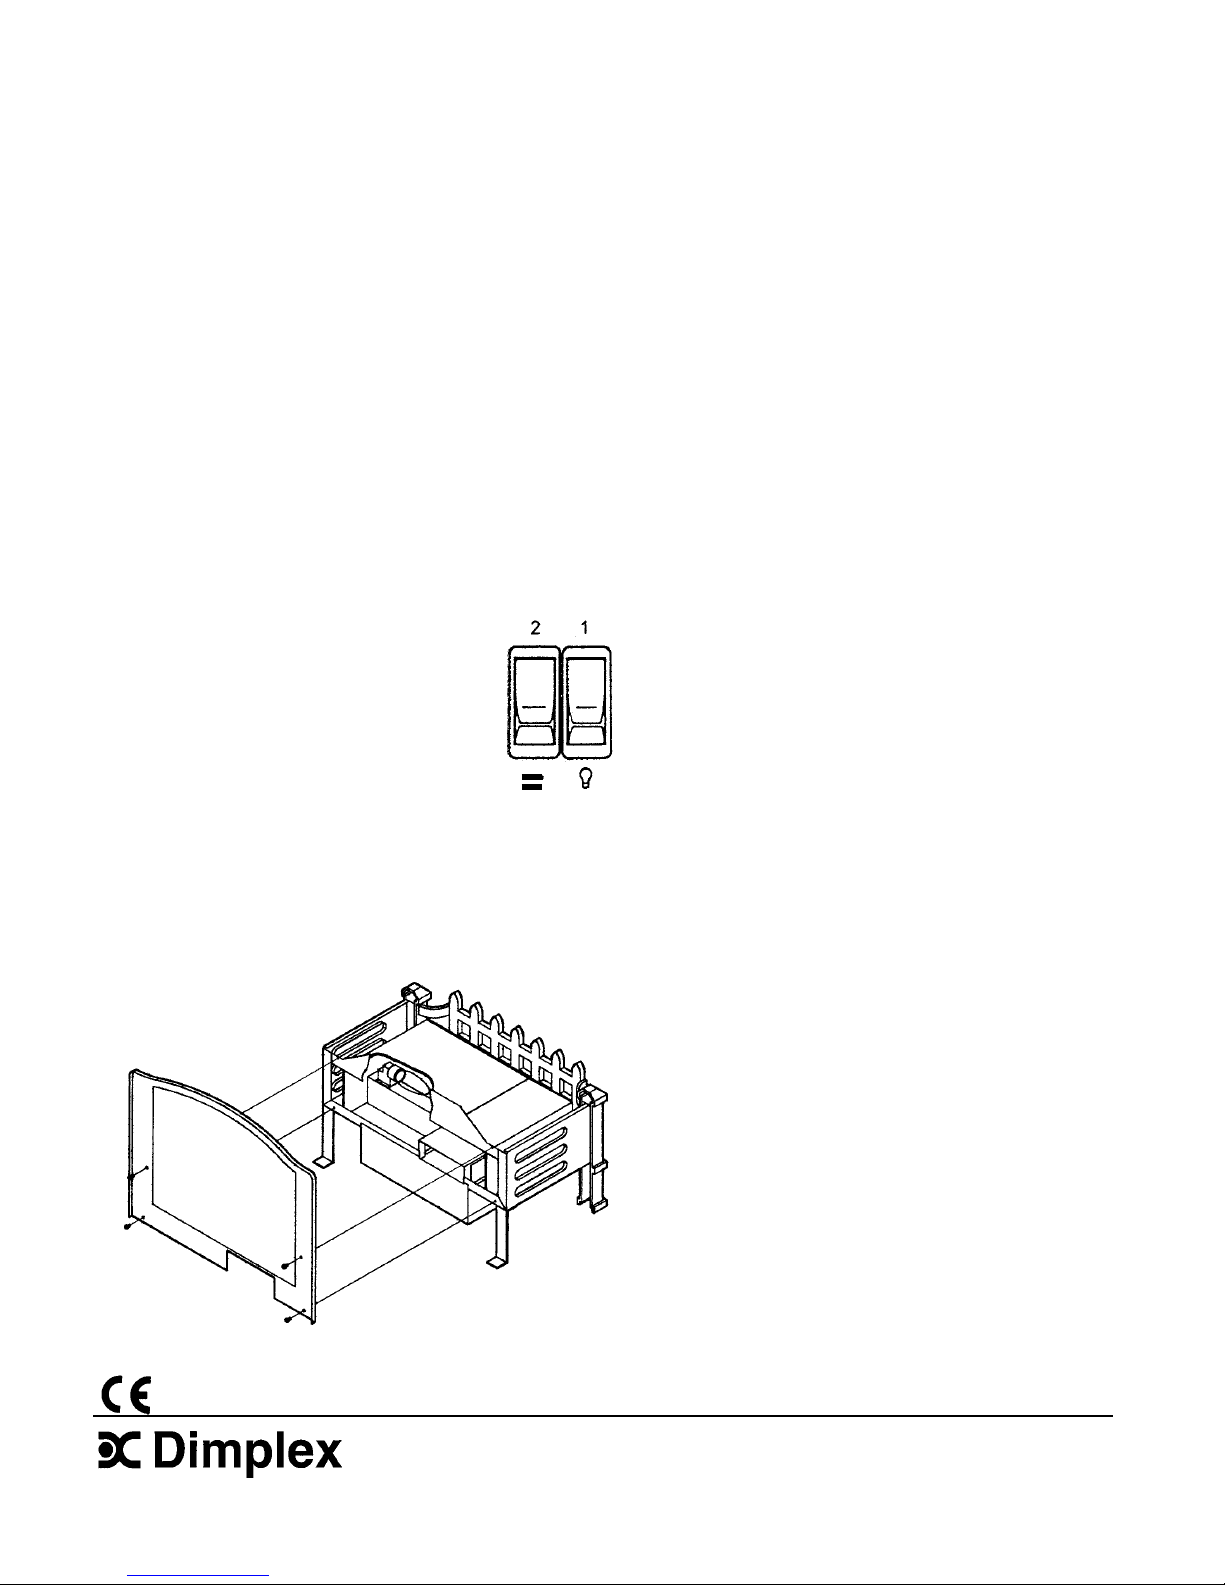
Fig.1
IMPORTANT
Connect the BROWN wire to the terminal marked L or
coloured RED.
THESE INSTRUCTIONS SHOULD BE READ CAREFULLY
AND RETAINED FOR FUTURE REFERENCE
If a 3-pin 15 amp plug is used this should be protected by a
15 amp fuse either in the plug or adapter, or the distribution
board. If in doubt consult your electricity company or a
competent electrician.
General
Unpack the heater carefully and retain the packing for
possible future use, in the event of moving or returning the
fire to your supplier. Three packs contain loose coals.
Important Safety Advice
The appliance must stand on a level, hard, non-combustible
surface. The appliance must not stand on a carpet.
When using electrical appliances, basic precautions should
always be followed to reduce the risk of fire, electric shock,
and injury to persons, including the following:
If the fire is being fitted into an open fireplace, the chimney
should be blocked. This is to ensure that the air supply to the
fire is not interrupted by the draw up the chimney. The
easiest (and cheapest) way to do this is to cut a piece of
cardboard to shape, then tape it in the throat of the chimney.
• If the appliance is damaged, check immediately with the
supplier before installation and operation.
• DO NOT use outdoors.
• DO NOT use in the immediate surroundings of a bath
shower or swimming pool.
• DO NOT locate the heater immediately below a fixed
socket outlet or connection box.
A minimum distance of 1 metre (39”) must be maintained
between the front of the heater and any surrounding
furniture, overhanging curtains or other obstructions.
• DO NOT COVER THE HEATER. Do not place material
or garments on the heater, or obstruct the air circulation
around the heater, for instance by curtains or furniture,
as this could cause overheating and a fire risk.
Before connecting the heater check that the supply voltage is
the same as that stated on the heater.
DO NOT leave young children, the elderly, or the infirm
unsupervised in the vicinity of the heater.
This fire incorporates a flame effect which can be used
without heating, so that the comforting effect can be enjoyed
at any time of year. The flame effect is provided by a low
wattage motor and 2x40W lamps. Using the flame effect on
its own, therefore, requires little electricity.
DO NOT use this heater in series with thermal control, a
programmable controller, a timer or any other device
that switches the heater automatically, since a fire risk
exists when the heater is accidentally covered or
displaced. Ensure that furniture, curtains or other
combustible material are positioned NO closer than
1meter from the heater.
A choice of 1kW or 2kW of heat output is provided by the
heater which is concealed beneath the unit. The model is
designed to be free standing.
In the event of a fault unplug the heater.
Unplug the heater when not required for long periods.
• Keep supply cord away from the front of the heater.
Page 2
• Although this heater complies with safety standards, we
do not recommend its use on deep pile carpets or on
long hair type of rugs.
Lamp Replacement
There are two lamps located beneath the fuel bed. Access to
the lamps is gained by removing back panel, see Fig.3.
• The appliance must be positioned so that the plug is
accessible.
Unscrew defective lamp and replace with a 240V / 40W E14
SES clear candle lamp.
Replace back panel with the four screws provided, tighten
fully.
• If the supply cord is damaged it must be replaced by the
manufacturer or service agent or a similarly qualified
person in order to avoid a hazard.
Safety cut-out
Installation
A thermal safety cut-out is incorporated in the heater to
prevent damage due to overheating. This can happen if the
heat outlet were restricted in anyway. If the cut-out operates,
unplug the heater from the socket outlet and allow
approximately 10 minutes before reconnecting.
Remove the coal pieces from the plastic bags using the
gloves provided . Protect the floor from possible dust and
coal particles when handling the coals. Arrange the coals by
first placing pieces down between front, sides and fuel bed,
then build up to cover the fuel bed. For best effect the larger
piece’s should be placed on top. Slots are cut in bed to cast
a flicker light on back. Experiment by positioning the coals so
as to allow light through some of the slots.
Before switching the heater back on, remove any
obstructions that may be restricting the heat outlet, then
continue normal operation.
Should the cut-out continue to operate repeatedly, switch the
appliance off and see service advice.
Operation
The Fuel Effect may be enjoyed whether or not the heating
elements are in operation. The fire has a grate flap fitted
which conceals the heating unit when not required. When
heat is required lift and secure on clip.
Cleaning
Before commencing cleaning, unplug the heater and allow it
to cool.
The surfaces of the heater should be given an occasional
wipe over with a soft damp cloth. Do not use detergents,
abrasive cleaning powder or polish on the metal body of the
heater.
Controls
Two switches provide the Fuel Effect and a choice of heat
settings. A switch is in the “ON” position when the red
indicator mark on the switch is visible.
Switch 1 -Controls the electricity supply
To remove any accumulation of dust or fluff the soft brush
attachment of a vacuum cleaner should occasionally be used
to clean the outlet grille of the fan heater.
to the heater and the Fuel
Effect.
Note
: This switch must be ON
To clean the fuel effect, remove the coal pieces and wash in
warm water. Clean with a damp cloth. Replace when dry and
arrange as previously described for best effect.
for the heater to operate.
Switch 2 -Provides heat selection.
1kW heat is provided when
grate flap is raised. (Low Speed)
After Sales Service
2kW is provided when switch is ‘ON’. (High Speed)
Your product is guaranteed for one year from the date of
purchase. We undertake to exchange or repair free of charge
within this period, any part (excluding lamps) found to be
defective due to manufacturing fault.
Maintenance
WARNING –
BEFORE UNDERTAKING ANY
MAINTENANCE OR CLEANING REMOVE PLUG OR
DISCONNECT FROM ELECTRICITY SUPPLY.
Should you require after sales service, please get in touch
with the supplier through whom you purchased the appliance
or your nearest Dimplex Service Agent.
Fig.3
Please do not initially return a faulty appliance or part of an
appliance to us as this may result in transit damage and/or
delay in providing service. Let us know your difficulty quoting
the model number and series letter of the appliance. We will
then take the appropriate action.
This appliance complies with European Safety Standard EN 60335-2-30, and European Standards EN 55014, EN 60555-2 and EN
60555-3 for Electromagnetic Compatibility. These standards cover the requirements of EEC Directives 73/23 and 89/336.
Dimplex (UK) Limited Millbrook 8/18465/0
Southampton Tel. (01703) 777117
SO15 OAW Fax
(
01703) 771096
 Loading...