

Page 1
Thermostat Kits
DTK & DTKT Series (Tamper proof)
General Instructions
For use with Dimplex baseboard heaters series BN, DBH
and LC.
DTK-SP and DTKT-SP thermostat kit is design to work as
freeze guard. It does not have a true “off” setting. When
set to its lowest position, by counter clockwise rotation of
the shaft to last stop, the thermostat cycles the heater on at
approximately 4.4° C (40° F).
DTK-DP and DTKT-DP thermostat kits are design to have
a positive “off”. The thermostat is in “off” position when
the shaft is turned counter clockwise to last stop usually
after a slight “click”. At this setting the heater will not cycle
regardless of room temperature.
IMPORTANT INSTRUCTIONS
When using electrical appliances, basic precautions should
always be followed to reduce the risk of re, electric shock
and injury to person, including the following:
1. Read all instructions before using this heater.
Figure 1
Figure 2
WARNING: To prevent electrical shock, disconnect from
power sources before installing or servicing. Install in
suitable enclosure. Keep free from contaminants.
SAVE THESE INSTRUCTIONS
Installation Instructions
WARNING: Wiring procedures and connections should be
in accordance with the National Electric code (NEC) and
local codes.
CAUTION: Disconnect electric power supply before
working on circuit wiring to prevent electric shock.
The built-in thermostat may be installed either on the left or
right hand end cap of the baseboard heater, through the rear
or front entry of the baseboard terminal boxes.
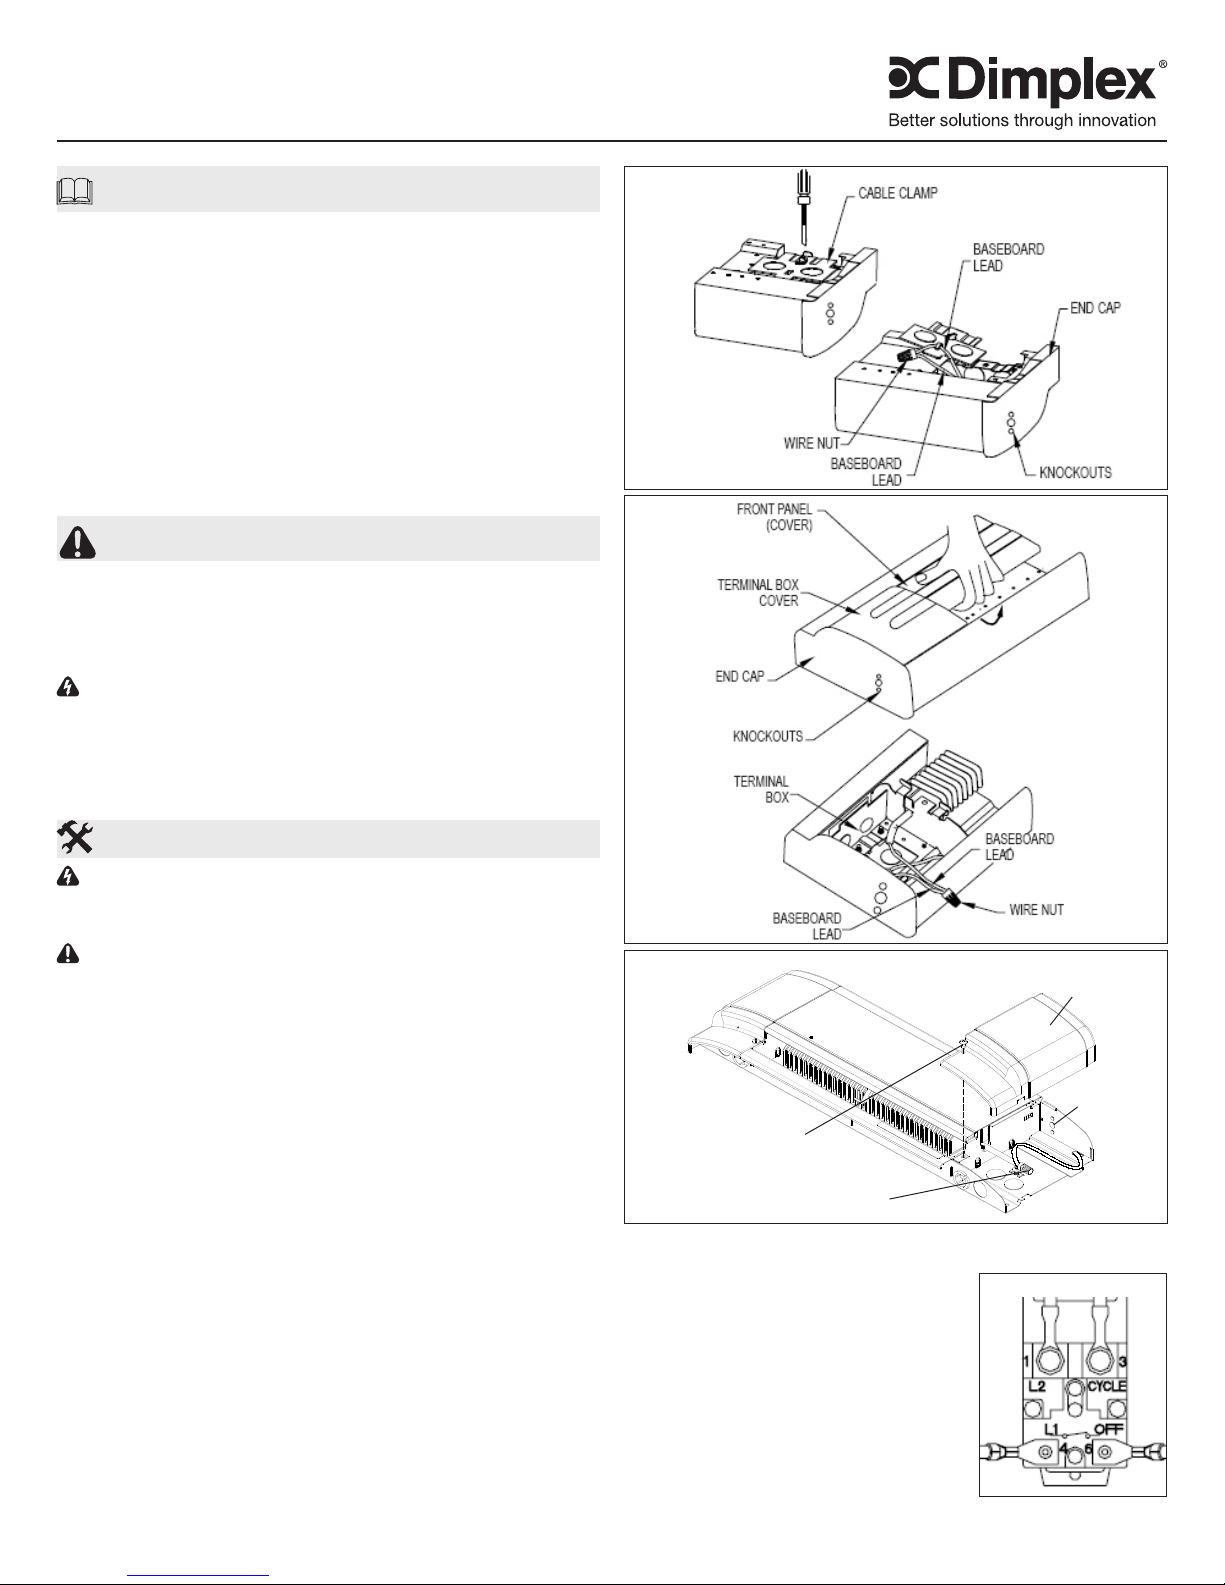
1. BN/DBH: For installation through the rear entry
(Figure 1) remove the cable clamp on the back
of the baseboard. The baseboard lead wires
are hooked to the back of the cable clamp for
easy access.
For installation through the front entry (Figure
2) remove the front panel by pulling the top
edge forward using hand protection and then
lift off the terminal box cover after removing
the retaining screw.
LC: For installation (Figure 3) remove the end panel
(either end) by removing the securing screw.
2. Remove the three small knockouts from end cap using
small punch or screwdriver. (Figure 1/2/3).
3. Remove wire nut and separate the two baseboard leads
(Figure 1/2/3).
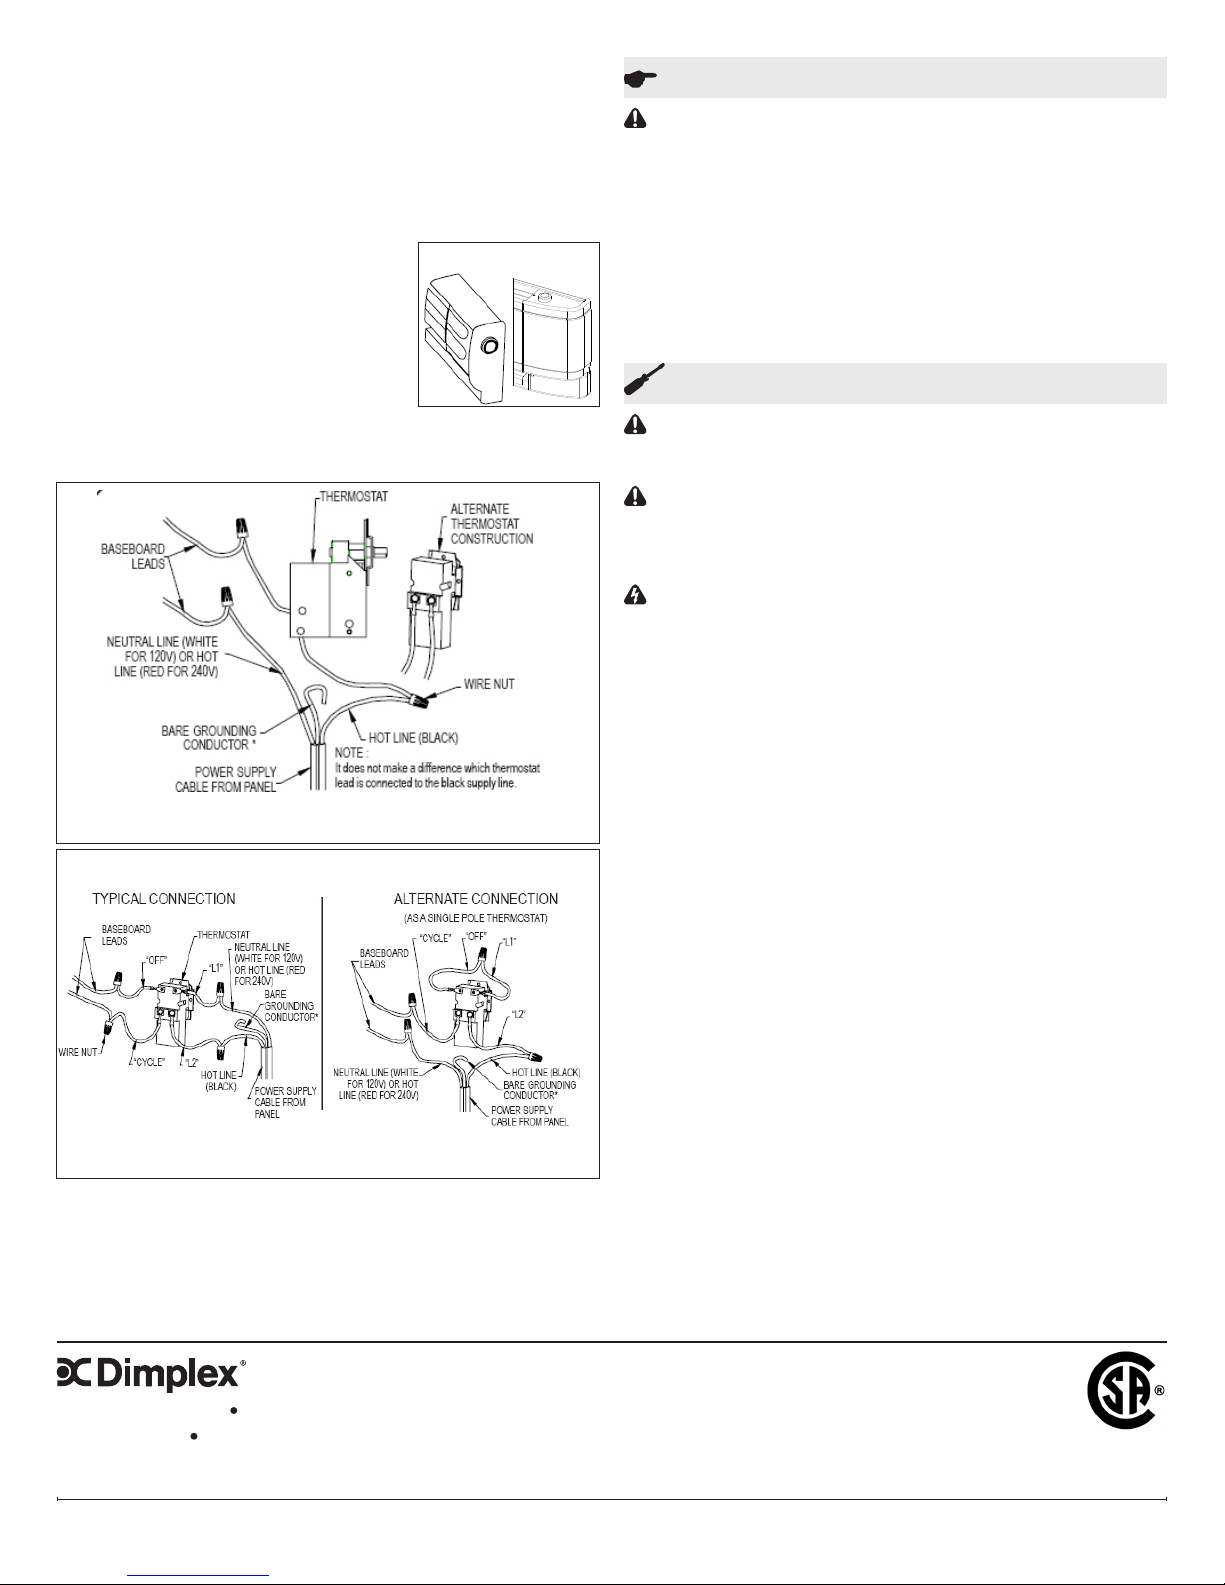
4. Connect thermostat and baseboard leads to power
supply wires as shown in Figure 4 for single pole or
Figure 3
Screw
Wire Nut
Figure 5 for double pole thermostat. Additional wire nuts
are required.
!
NOTE: For double pole thermostat
installation read the marking on
the back of the thermostat casing
(Figure 4). Thermostat terminals
are marked with ‘L1’, ‘OFF’, ‘L2’ and
CYCLE’. These same markings are
referred to in the wiring diagrams on
Figure 6.
5. Attach thermostat assembly to the
end cap and fasten with the screws
Figure 4
Terminal Box
Cover
Knockouts
7202080003R06
Page 2
provided.
6. Remove all residual materials (knockouts or any other
construction material).
7. Check that all electrical connections are tight and place
all wiring inside the terminal box.
8. Replace the terminal box cover and front panel or the
rear cable clamp. Care must be taken that no wires are
pinched during installation.
Figure 7
9. Install knob (Figure 7) or plug
button (Tamper proof version).
10. Follow the baseboard installation
instructions to nish heater
installation.
!
IMPORTANT: DO NOT BYPASS OR
ELIMINATE THERMAL CUTOUT FROM CIRCUIT.
HANDLE THERMOSTAT WITH CARE.
Figure 5 - Single Pole
Operation
CAUTION:This thermostat must be properly installed
before it is used.
The built-in thermostat senses the temperature of the air at
the baseboard and must be set by trial to provide optimum
room comfort. When rst operating baseboard heater, turn
thermostat knob clockwise to last stop. Within a short period
of time the room will be at desired temperature. Turn the
thermostat knob counter clockwise until baseboard goes off
(you will hear a slight “click” ). Keep thermostat knob at that
setting and temperature will be automatically maintained.
Maintenance
CAUTION: Before removing the front cover for cleaning,
make certain the power has been turned off at the circuit
breaker panel.
CAUTION: Allow adequate time for the element and body
casing to cool before attempting to work on the heater.
!
NOTE:See Heater Manual for Cleaning Instructions.
WARNING: The user can perform cleaning ONLY, all
other servicing should be performed by qualied service
personnel.
Grounding conductor must be connected to the green
ground screw or wire on the baseboard
Figure 6 - Double Pole
Grounding conductor must be connected to the green
ground screw or wire on the baseboard
1367 Industrial Road Cambridge ON Canada N1R 7G8
1-888-346-7539 www.dimplex.com
In keeping with our policy of continuous product improvement, we reserve the right to make changes without notice.
© 2013 Dimplex North America Limited
2
 Loading...