

Dimplex BOF4056, BOF4068, BOF6056 Owner's Manual
Owner’s Manual
Model
BOF4056
BOF4068
BOF6056
7213470100R01
IMPORTANT SAFETY INFORMATION: Always read this manual
rst before attempting to install or use the wall mount engine. For
your safety, always comply with all warnings and safety instructions
contained in this manual to prevent personal injury or property
damage.
To view the full line of Dimplex products, please visit
www.dimplex.com

2 www.dimplex.com
Table of Contents
Always use a qualied technician
or service agency to repair
this engine.
!
NOTE: Procedures and
techniques that are considered
important enough to
emphasize.
CAUTION: Procedures and
techniques which, if not
carefully followed, will result in
damage to the equipment.
WARNING: Procedures
and techniques which, if not
carefully followed, will expose
the user to the risk of re,
serious injury, or death.
Welcome & Congratulations ....................3
IMPORTANT INSTRUCTIONS ..................4
Installation ..................................6
Assembly ..................................10
Operation ..................................12
Maintenance ...............................15
Warranty .................................17
Replacement Parts ..........................19
3
Welcome & Congratulations
Thank you and congratulations for choosing to purchase an Optimyst®
Pro engine from Dimplex, the world leader in electric replaces.
Please carefully read and save these instructions.
CAUTION: Read all instructions and warnings carefully before
starting installation. Failure to follow these instructions may result in a
possible electric shock, re hazard and will void the warranty.
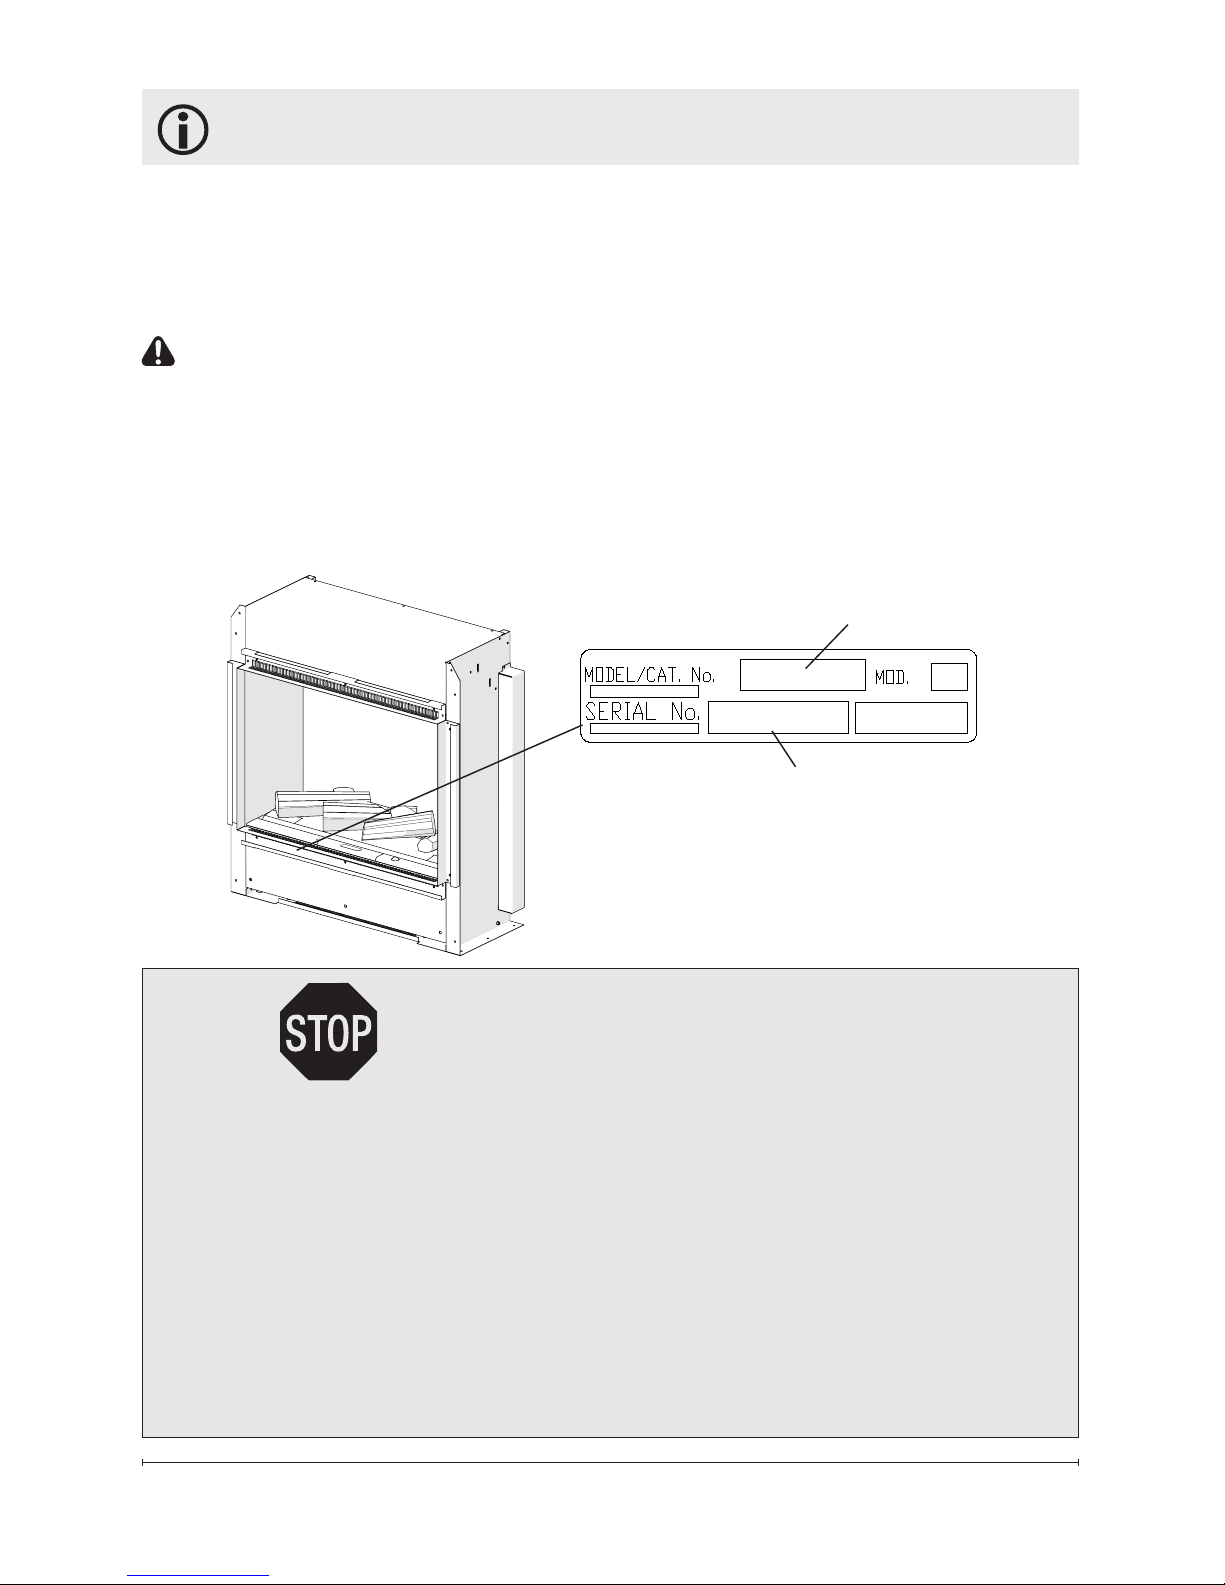
Please record your model and serial numbers below for future
reference: model and serial numbers can be found on the Model and
Serial Number Label of your wall mount engine.
NO NEED TO RETURN TO THE STORE
Questions with operation or assembly? Require Parts Information?
Product Under Manufacturer’s Warranty?
Contact us at: www.dimplex.com/customer_support
For Troubleshooting and Technical Support
OR Toll-Free 1-888-DIMPLEX (1-888-346-7539)
Monday to Friday 8:00 a.m. to 4:30 p.m. EST
Please have your model number and product serial
number ready. (See above)
Model Number
Serial Number

4 www.dimplex.com
When using electrical appliances,
basic precautions should always
be followed to reduce the risk of
fire, electric shock, and injury to
persons, including the following:
① Read all instructions before
using the engine.
②
The heater is hot when in use.
To avoid burns, do not let bare skin
touch hot surfaces. The trim around
the heater outlet becomes hot during heater operation.
DANGER:
High temperatures
may be generated under certain abnormal conditions. Do not partially
of fully cover the front of this heater.
③
Extreme caution is necessary
when any heater is used by or near
children or invalids and whenever
the unit is left operating and unattended.
④ Always unplug the engine
when not in use.
⑤ Do not operate any unit with
a damaged cord or plug, or if
the engine has been dropped or
damaged in any manner. Contact
Dimplex Technical Service at
1-888-346-7539.
⑥ Do not use outdoors.
IMPORTANT INSTRUCTIONS
⑦ Never locate unit where it may
fall into a bathtub or other water
container.
⑧ To disconnect the unit, turn
the controls off, then remove the
plug from the outlet or disconnect
power at the service panel.
⑨ Always use properly grounded,
fused and polarized outlets.
⑩
Do not insert or allow foreign
objects to enter any ventilation or
exhaust opening as this may cause
an electric shock or re, or damage
to the heater.
⑪
To prevent a possible re, do not
block air intake or exhaust in any
manner. Do not use on soft surfaces, like a bed, where openings may
become blocked.
⑫
All electrical heaters have hot
and arching or sparking parts inside.
Do not use in areas where gasoline,
paint, or ammable liquids are used
or stored or where the unit will be
exposed to ammable vapors.
⑬ Do not modify the engine.
Use it only as described in this
manual. Any other use not recommended by the manufacturer may
cause re, electric shock or injury
to persons.
5
SAVE THESE INSTRUCTIONS
⑭
To reduce the risk of electric
shock, this appliance must be
grounded. Avoid the use of an extension cord. Extension cords may
overheat and cause a risk of re.
Always plug heaters directly into a
wall outlet/receptacle. Never use
with an extension cord or relocatable power tap (outlet/power strip).
⑮ Do not burn wood or other
materials in the engine.
⑯ Always use a certied electrician should new circuits or outlets
be required.
⑰ Disconnect the power supply
before performing any cleaning,
maintenance or relocation of the
unit.
⑱ When transporting or storing the unit and cord, keep in a
dry place, free from excessive
vibration and store so as to avoid
damage.
⑲
The wall mount engine must
not be located directly below a
socket outlet.
⑳ The wall mount engine must
be positioned so that the plug is
accessible.
WARNING: Remote control
contains small batteries. Keep
away from children. If swallowed,
seek medical attention immediately.
WARNING: Do not install battery backwards, charge, put in re
or mix with used or other battery
types - may explode or leak causing injury.
!
NOTE: Changes or modica-
tions not expressly approved by
the party responsible for compliance could void user's authority to
operate the equipment.
IMPORTANT INSTRUCTIONS
CAUTION
RISK OF ELECTRIC SHOCK
DO NOT OPEN
NO USER-SERVICEABLE PARTS INSIDE
6 www.dimplex.com
Installation
The Optimyst Pro is supplied
in an assembled state and is
designed to be permanently installed. The unit comes ready for
hardwire installation.
WARNING: Construction and
electrical outlet wiring must
comply with local building
codes and other applicable
regulations to reduce the risk
of re, electric shock and injury
to persons.
WARNING: To reduce the
risk of re, do not store or use
gasoline or other ammable
vapors or liquids in the vicinity
of the heater.
!
NOTE: A 15 Amp, 120 Volt cir-
cuit is required. A dedicated circuit
is preferred but not essential in all
cases. A dedicated circuit will be
required if, after installation, the
circuit breaker trips or the fuse
blows on a regular basis when the
heater is operating. Additional appliances on the same circuit may
exceed the current rating of the
circuit breaker.
WARNING: Failure to install
the replace as instructed
below may result in damage
to the equipment and or may
expose the user to the risk of
re, serious injury, illness or
death.
WARNING: Do not attempt to
wire your own new outlets or
circuits. To reduce the risk of
re, electric shock or injury to
persons, always use a licensed electrician.
WARNING: Ensure that the
On/Off switch is set to the Off
position (refer to Operation
section) and that the circuit
on which the replace is to be
installed has the power cut off
at the service panel until installation is complete.
!
NOTE: Please read all instruc-
tions before installing.
1. For rough in framing, the
opening should follow the
recommended dimensions
located in Figure 1.
!
NOTE: Dimensions provided
are minimum clearances and will
vary depending on type of support
framing and nishing options.
!
NOTE: It is recommended
that the bottom of the unit not be
mounted higher than 40 in. (1020
mm) from the ground to maintain
an optimized viewing angle of the
ame (Figure 2).
 Loading...