

Page 1
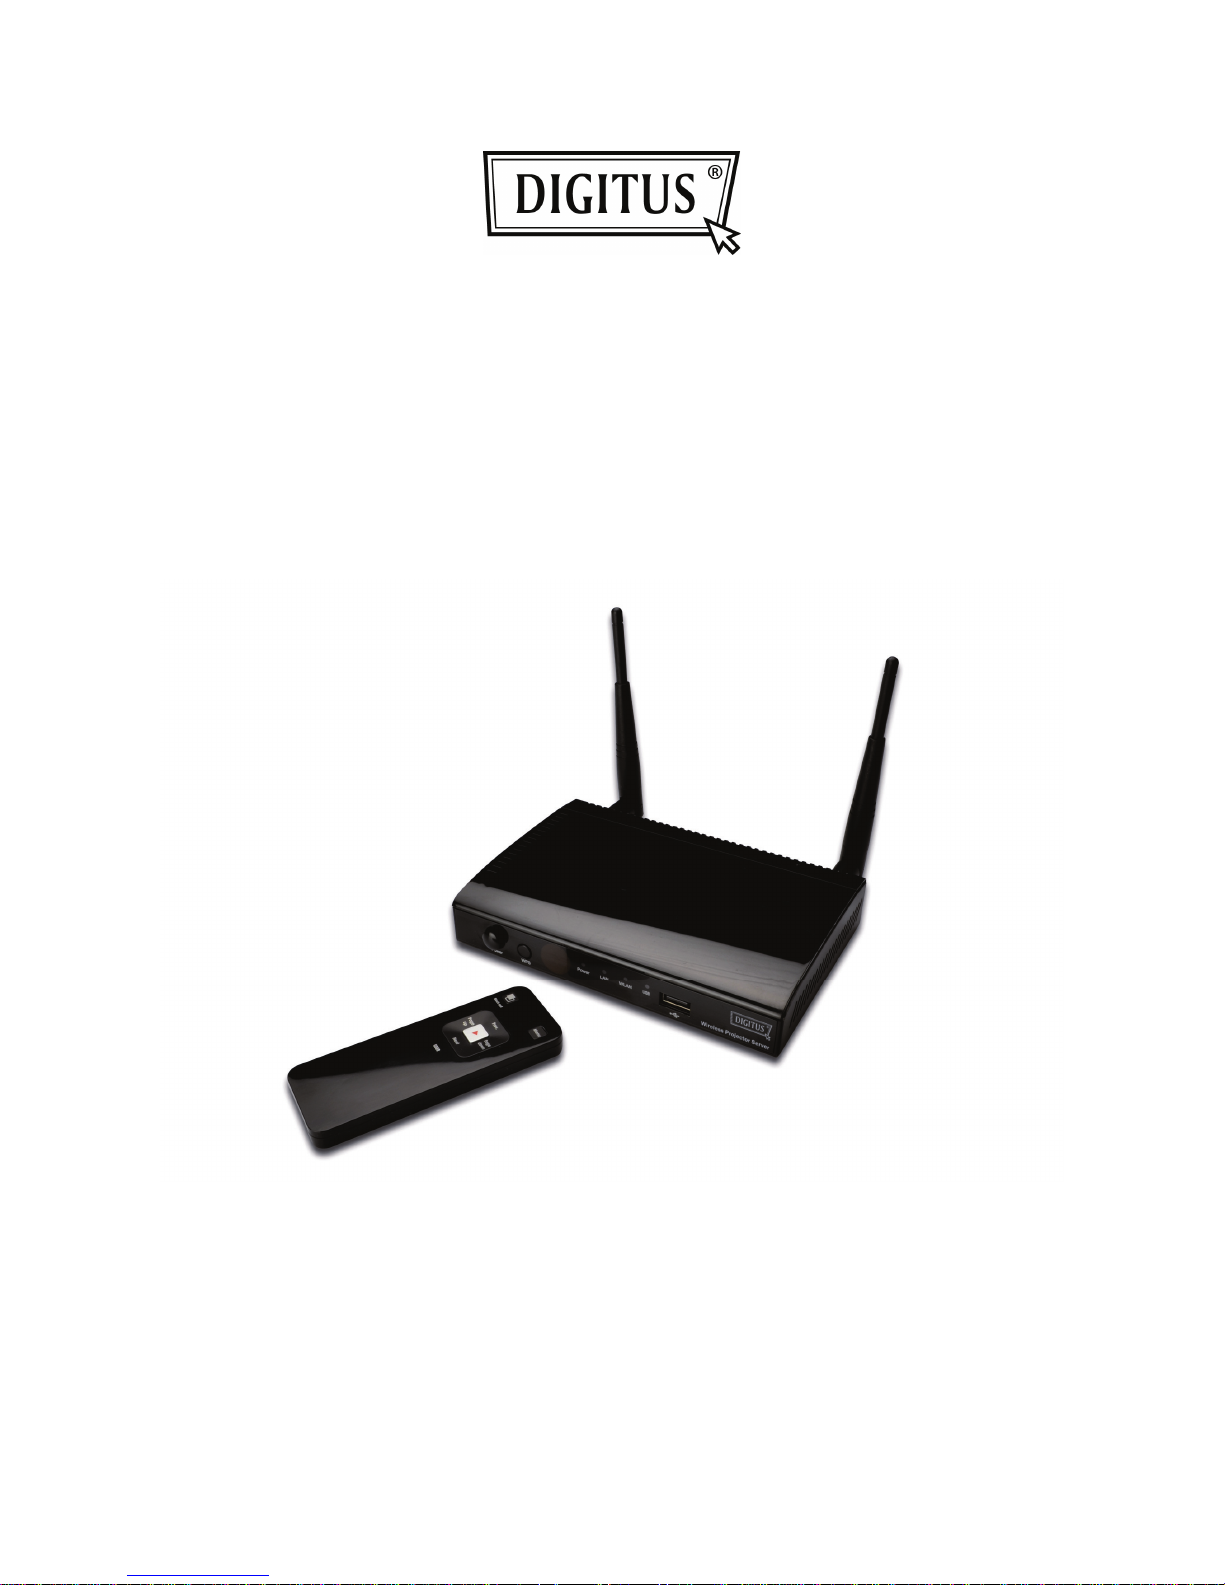
WIRELESS 11N
PROJECTOR SERVER
Quick Installation Guide
DN-70300
Page 2

Thank you for purchasing this wireless projector server!
Before you start to use this projector server, please check if any
item in the packing is missing.
Packaging List
Item Name Qty.
Wireless Projector Server 1
A/C Adapter 1
Network Cable 1
Remote Controller 1
Rubber Foot Pad 4
Wireless Antenna 2
CR-2302 Lithium Battery
(Installed in Remote Controller)
1
CD(Manual) 1
Page 3
Setup Wireless Projector Server
Please follow following steps to setup projector server
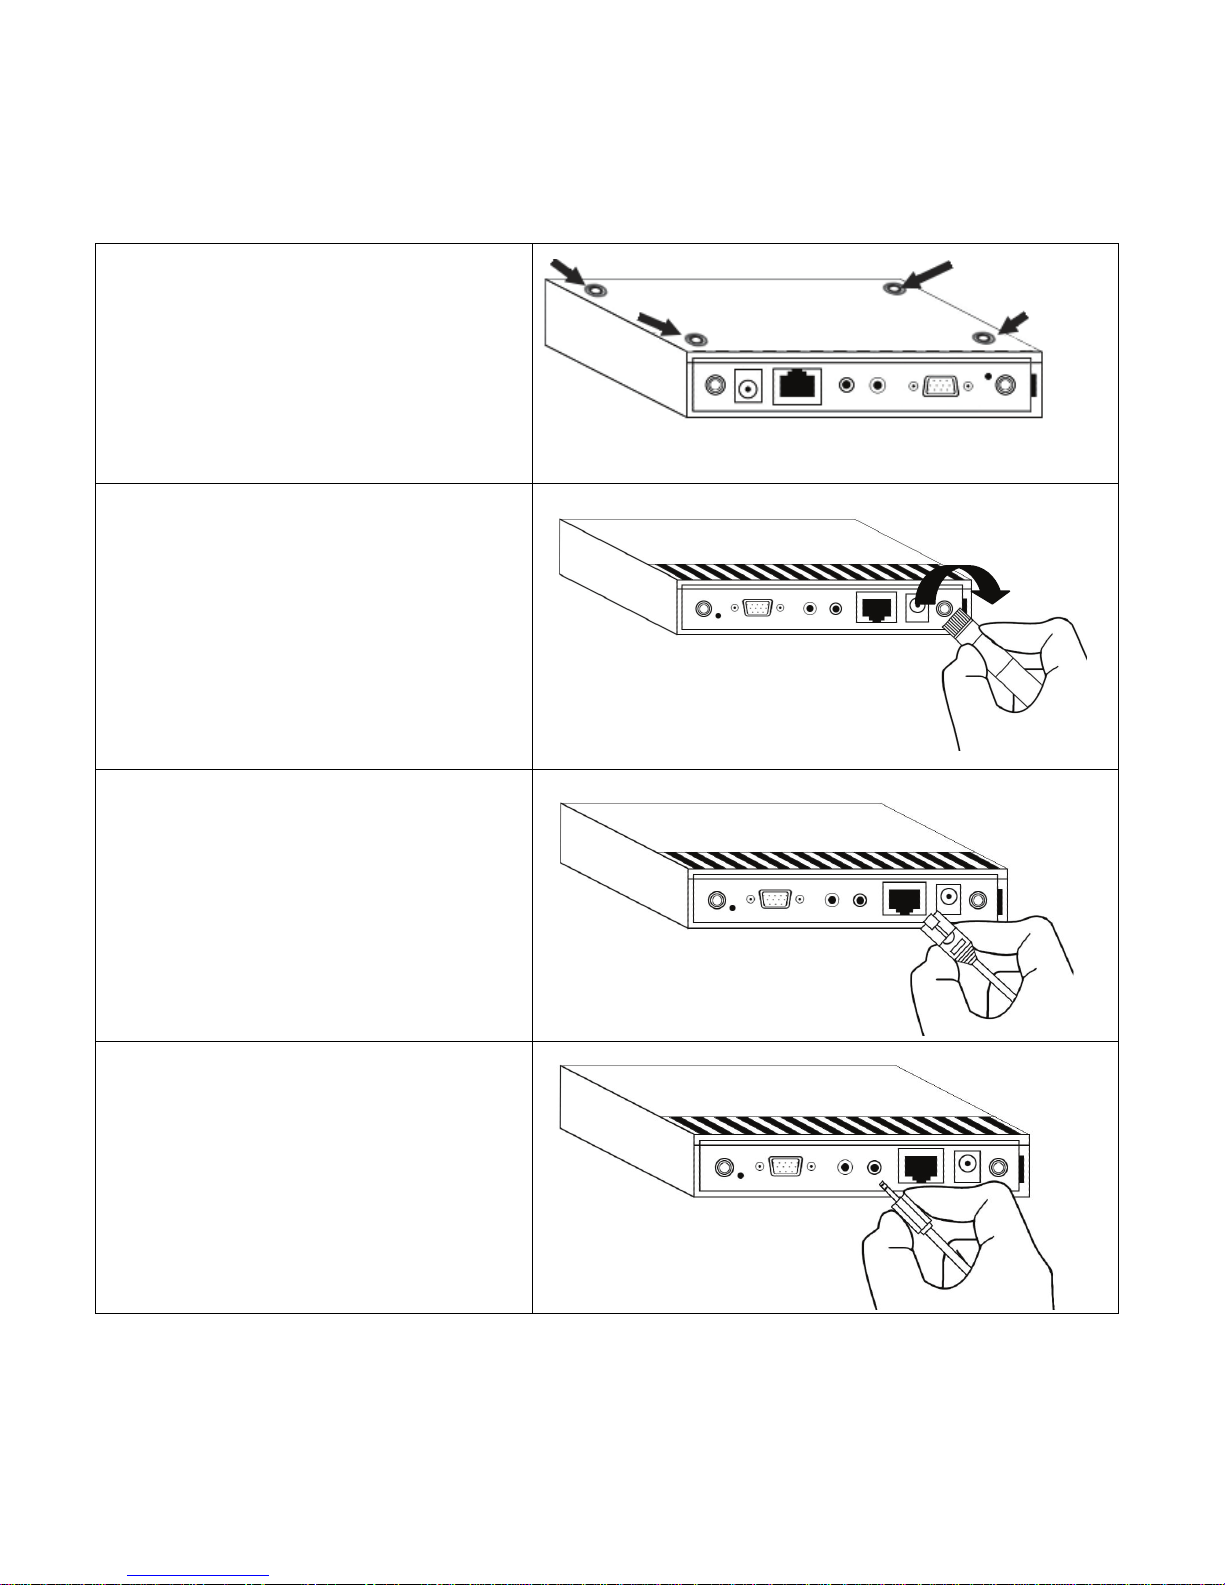
Stick the foot pads on the 4 locations
indicated on the picture shown below if
you plan to put the projector server on the
desk or other horizontal places.
You can skip this step if you plan to hang
the projector server on the wall.
Insert supplied antenna to both
antenna base and fasten antenna
with your finger (hold antenna base
and turn it by clockwise direction to
fasten it to projector server).
You have to fasten all 2 antennas to
projector server.
Insert network cable to network
connector located at the back of
projector server. You can skip this
step if you plan to use wireless
network only.
Insert IR extender into IR extender
connector.
Page 4
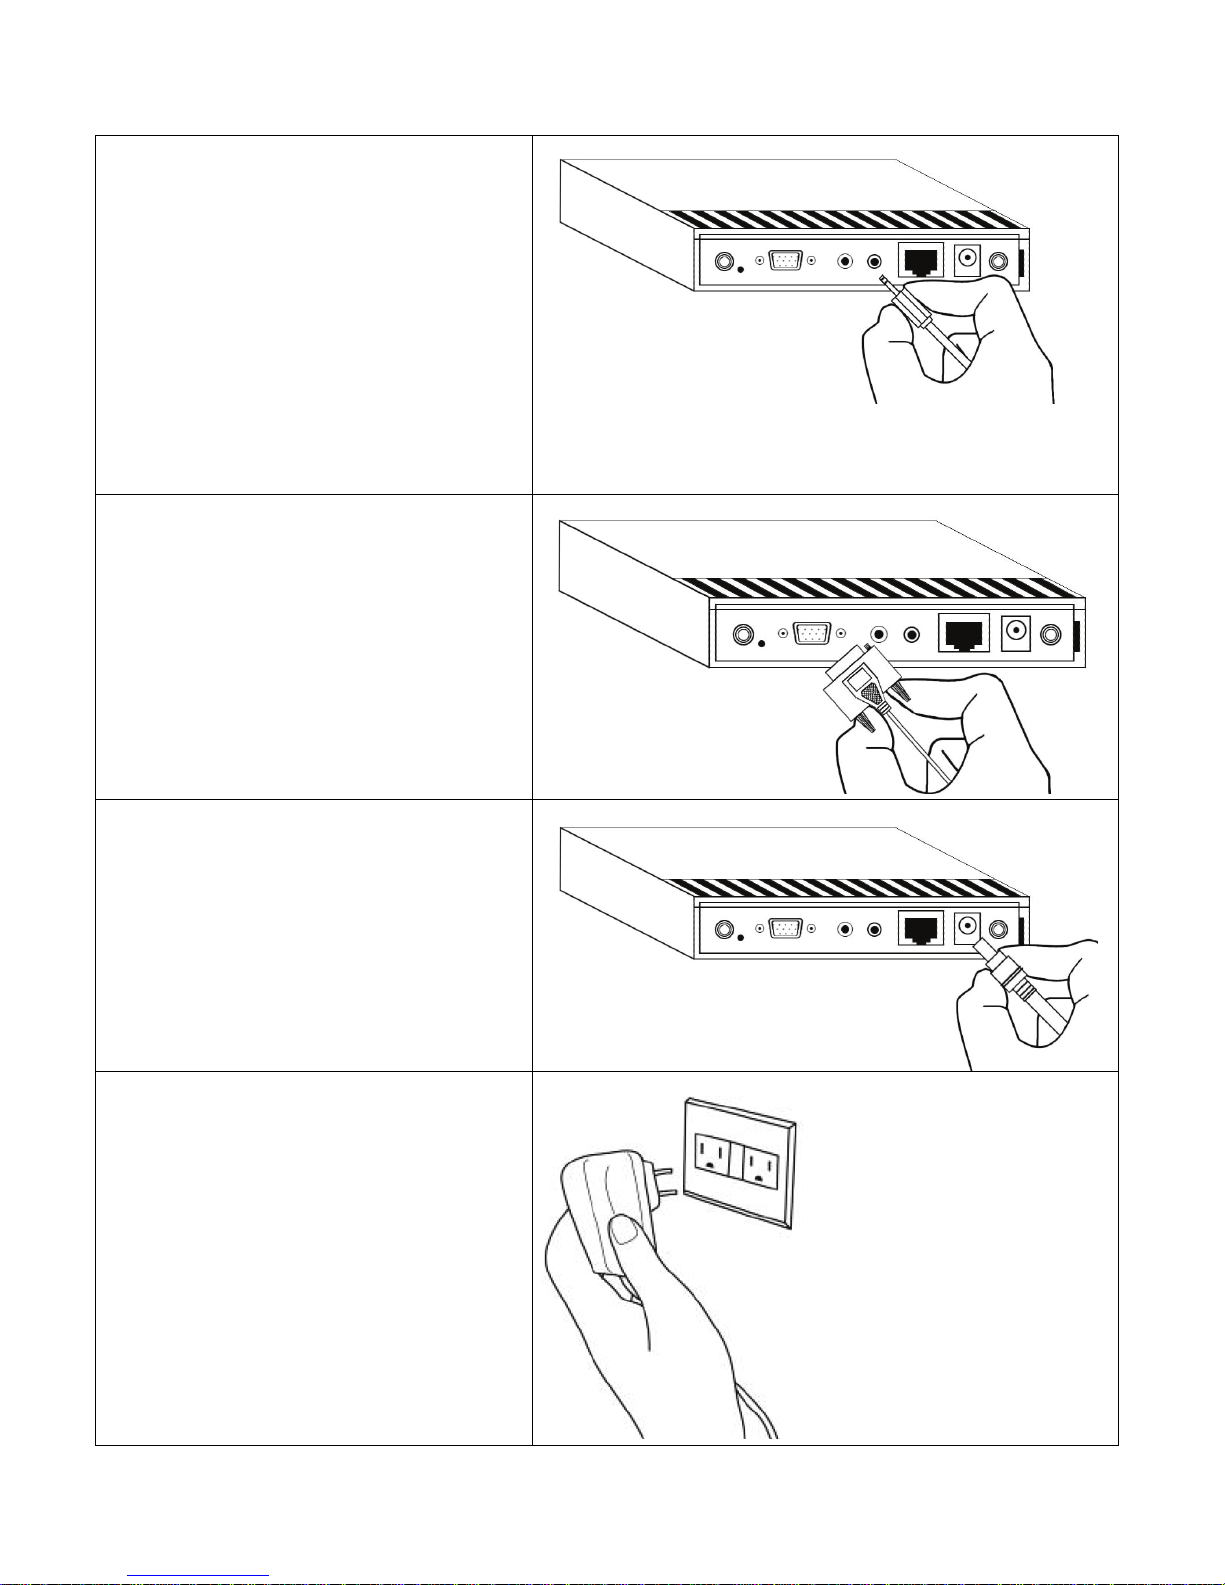
Insert audio cable into audio-out
connector, and connect another
end of cable to your projector’s
audio-in connector or audio
amplifier.
You can skip this step if your
projector doesn’t have audio-in
connector, or you don’t plan to use
audio.
Insert video cable into video-out
connector, and connect another
end of cable to your projector or
monitor’s VGA-in connector.
Insert A/C adapter into wall outlet,
and insert the cable into DC-in
connector of projector server.
Connect the A/C power adapter to
the electrical outlet on the wall.
Page 5
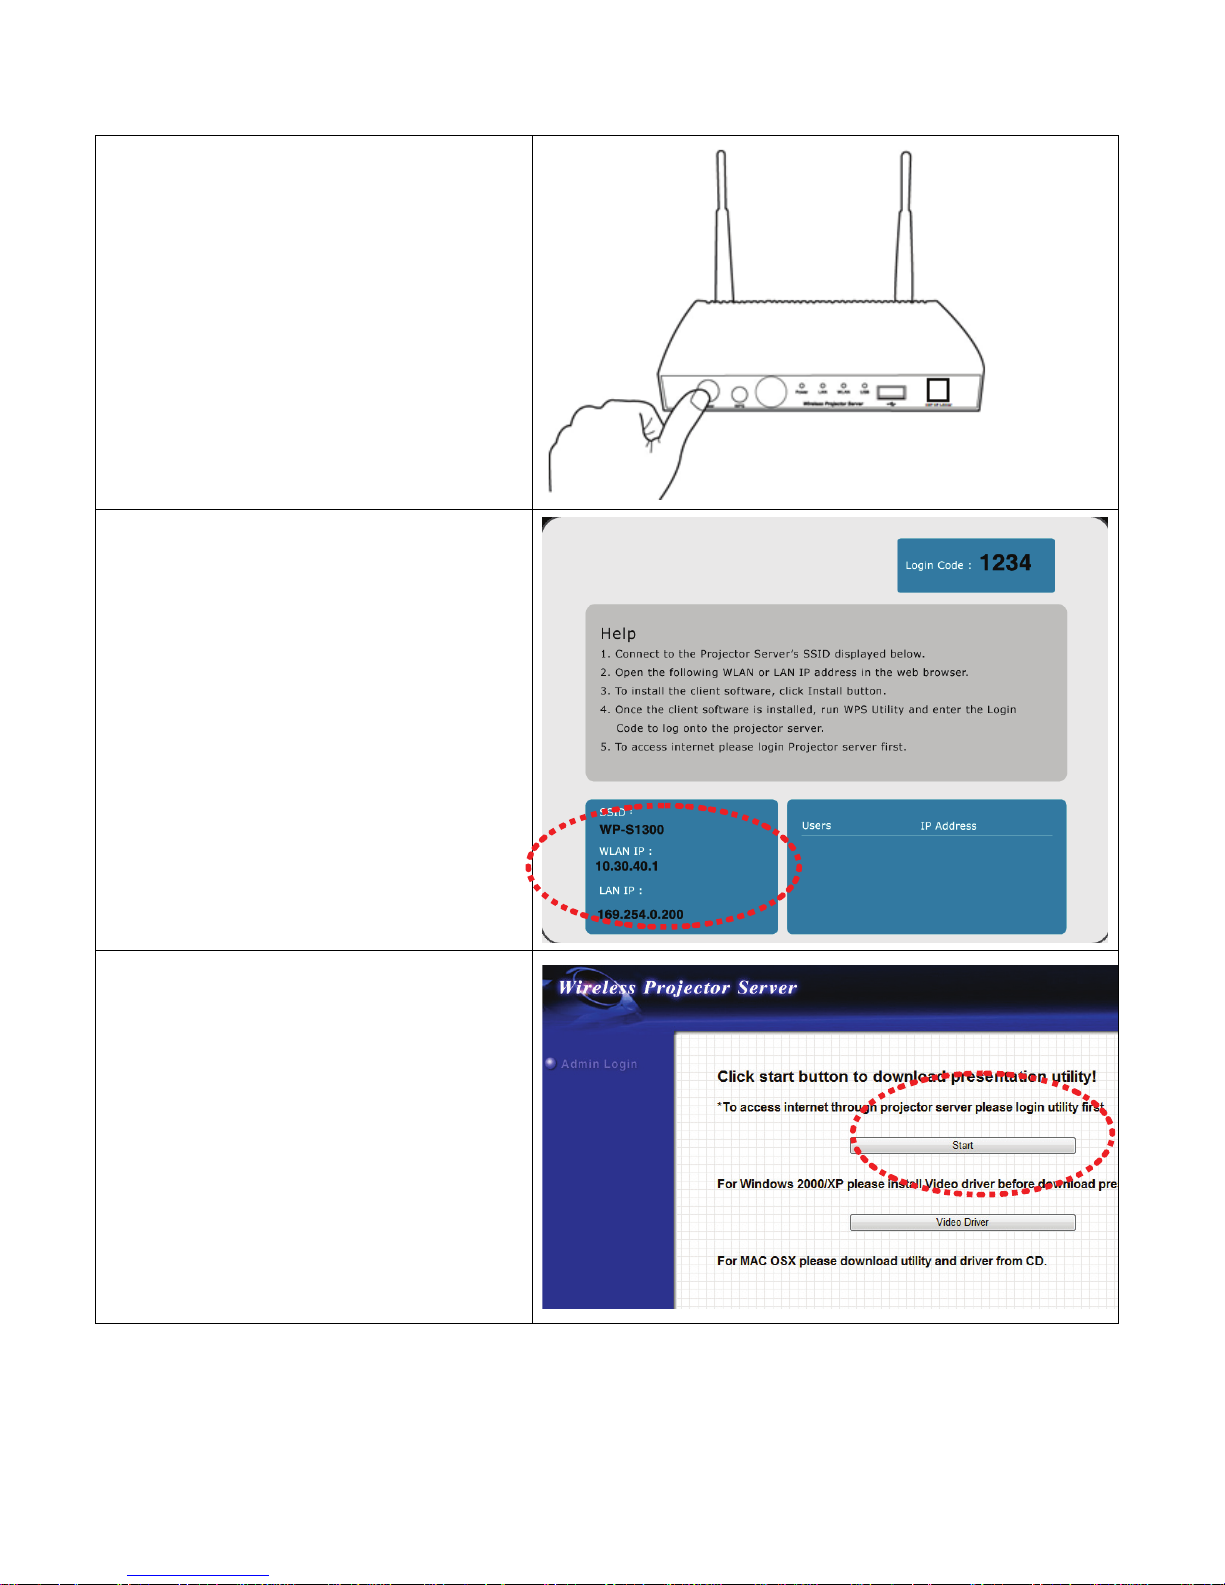
Press ‘POWER’ button, and
‘POWER’ LED on projector server
will light after few seconds, which
indicates projector server is
switched on.
Projector server will acquire an IP
address from the DHCP server on
your LAN automatically, and the IP
address will be displayed at the
bottom-left corner of the display of
attached projector or monitor.
If there’s no DHCP server on your
LAN, projector server will use
‘169.254.0.200’ as default IP
address.
Launch Internet Explorer, Firefox,
or any web browser and input the IP
address of projector server in
address bar.
Click ‘Start’ button to download
presentation utility.
Page 6
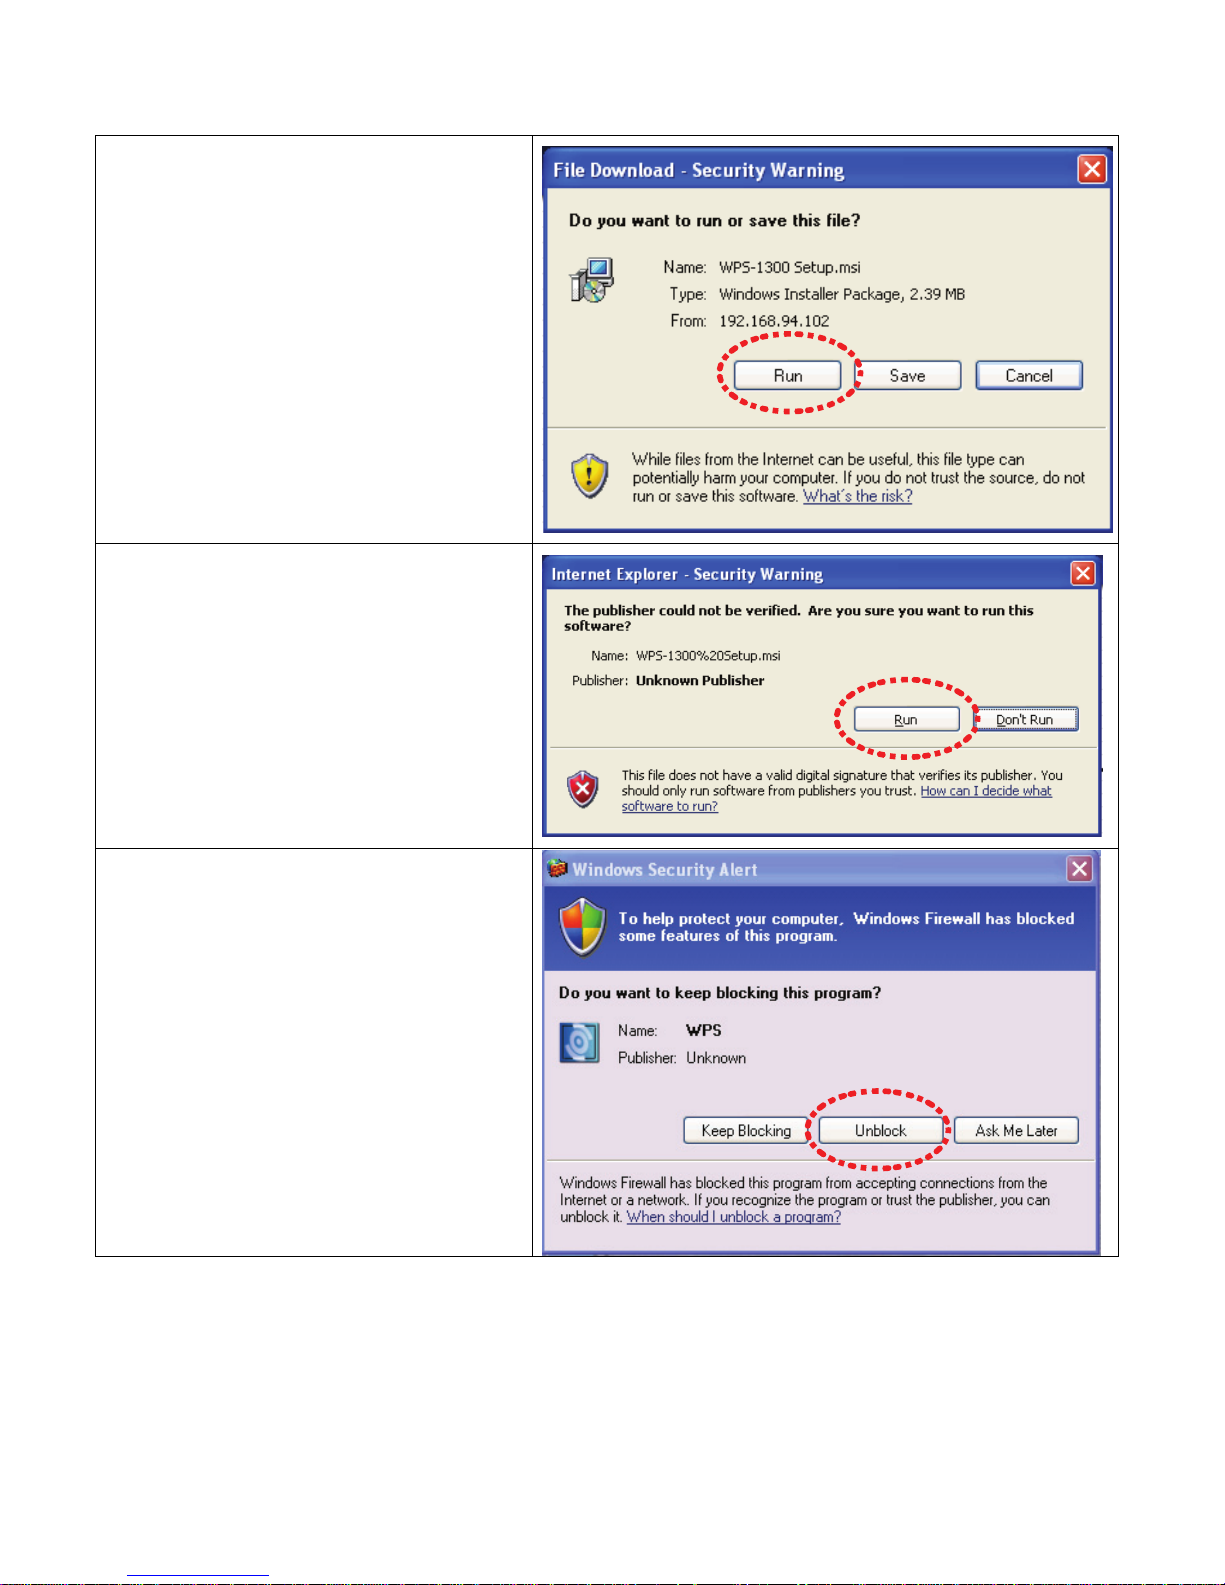
Click ‘Run’ when you see this
message.
Click ‘Run’ to start utility installation
procedure.
If you see this message, click
‘Unblock’.
(You must click ‘Unblock’ or client
utility will become unusable).
Page 7
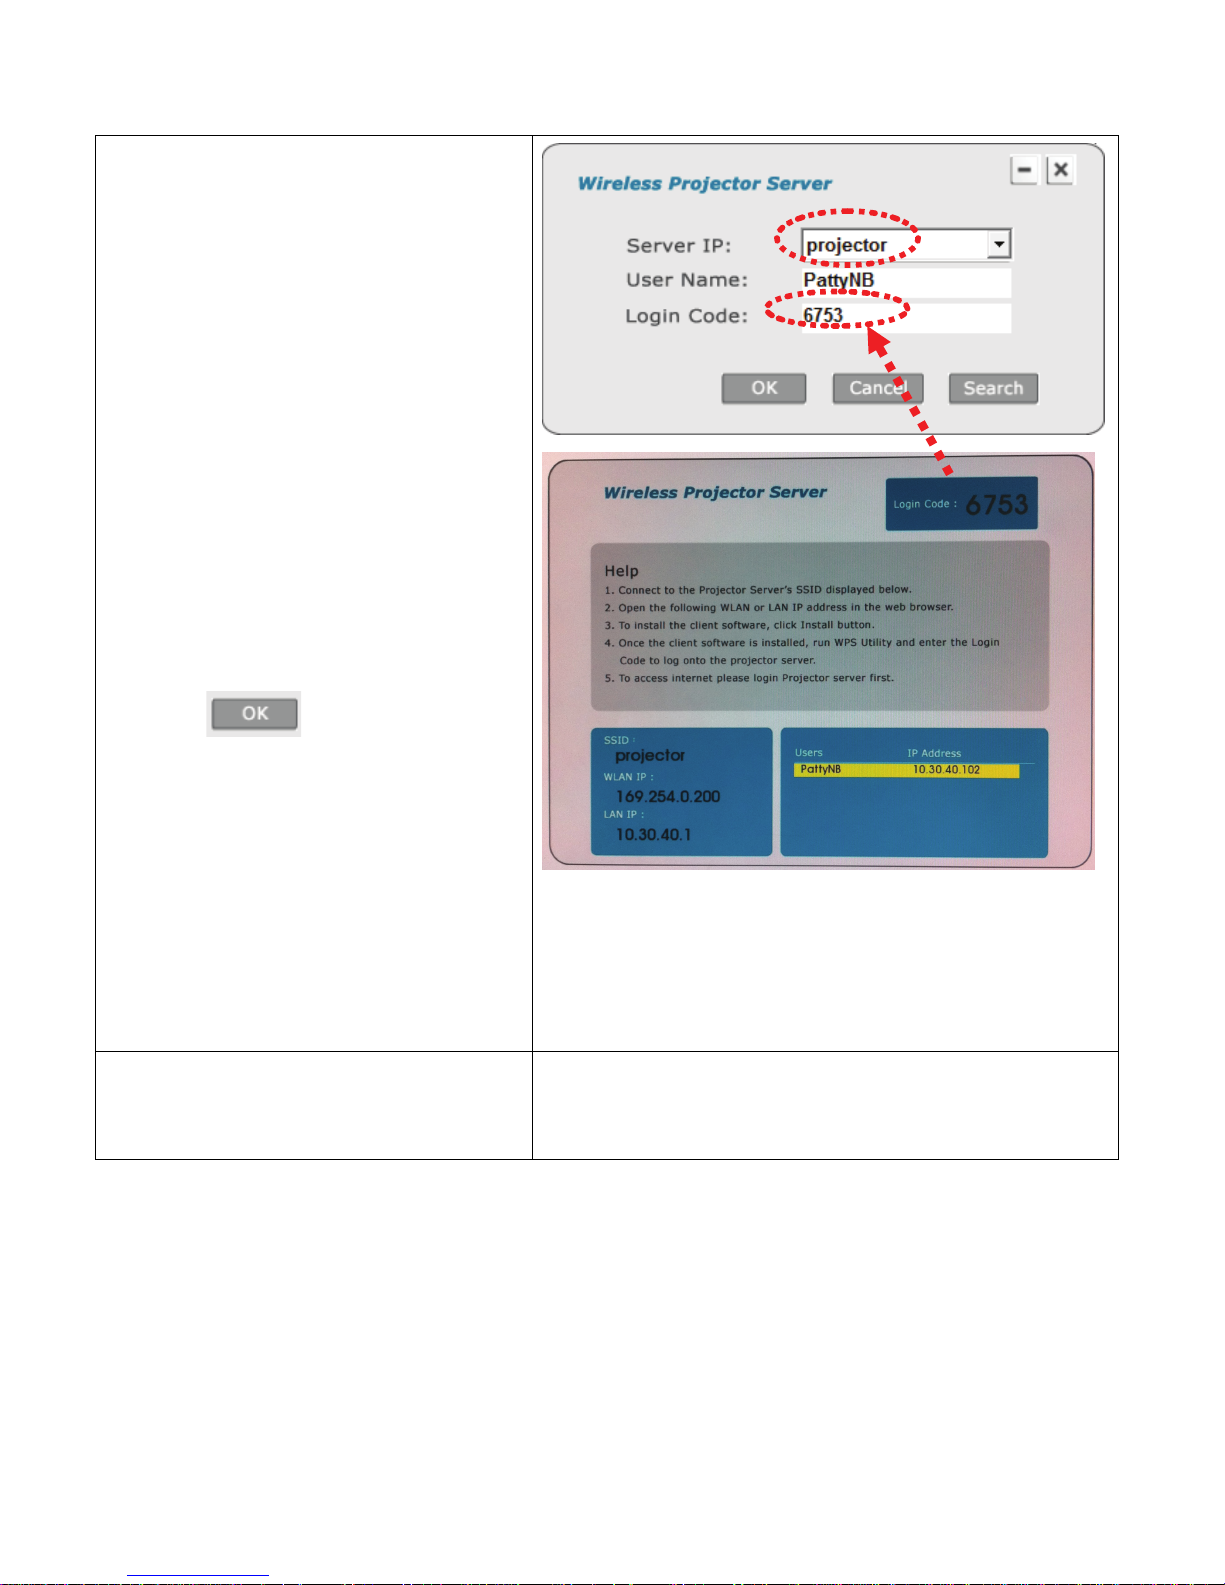
Client utility will look for any
available projector servers on your
network. If you have more than one
projector server, select one from
‘Server IP’ dropdown menu, then:
1) Input a user name in ‘Login
Name’ field, so you can identify
yourself among others. It will use
your computer’s name by default.
2) Input the 4-digit login code in
‘Login Code’ field, which is
displayed on the lower-right corner
of projector or monitor’s display.
3) Click
button to login
projector server.
If the display resolution of your
computer is not 1024 x 768, your
PC resolution will be changed.
Page 8
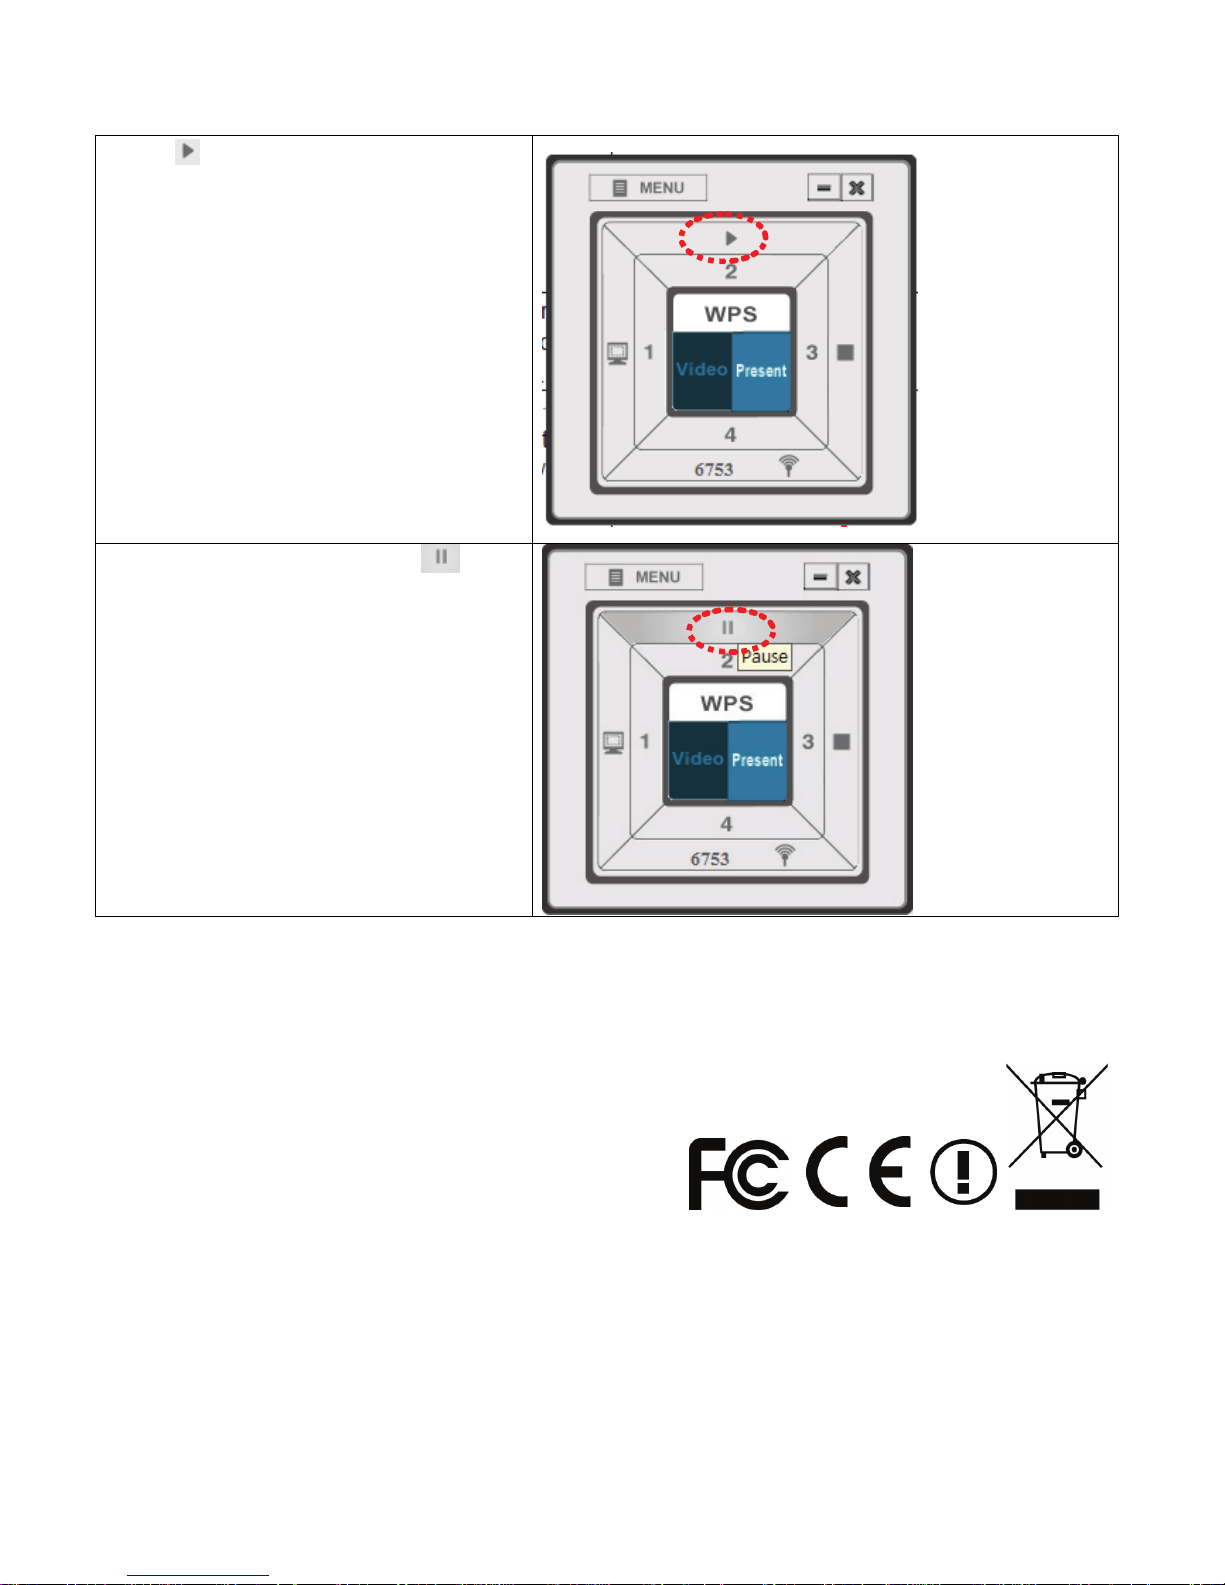
Click to start presentation. The
display content of your computer
will be displayed on projector /
monitor.
Click ‘1’, ‘2’, ‘3’, or ‘4’ to display at a
specific display area (see user
manual for detailed instruction).
To stop presentation, click ‘ ’
button.
 Loading...