

Page 1

Multifunction USB Network
Server Series
Quick Installation Guide
DN-13023
Introduction
This document describes the steps for installing and configuring the
Multifunction USB Network Server as a USB device server in the
Windows environment.
Package Contents
If any item is missing, please contact the shop where you bought this
product.
- One Multifunction USB Network Server (x1)
- One Quick Installation Guide (x1)
- One Control Center Software CD (x1)
- Power Adaptor (x1) DC IN 12V/2A
-
OS Supported
Windows XP, Windows Vista, Windows 7, Windows 8, Windows 10
Mac OS X 10.6 Snow Leopard, Mac OS X 10.7 Lion, Mac OS X 10.8
Mountain Lion, Mac OS X 10.9 Mavericks, Mac OS X 10.10 Yosemite,
OS X 10.11 El Capitan
Physical Description
1. Power Adaptor Connector: for DC IN 12V/2A power adaptor
2. Init Button: for restoring the configurable parameters to the default
values
3. Wireless Station: IEEE 802.11 b/g/n wireless station with antenna
4. Ethernet Connector: connected to a twisted pair category 5 cable
5. USB Host Ports: USB 1.1/2.0 low, full, and Hi-Speed compliant
Page 2

6. Indicators
Power Indicator is lit while power is applied. If it is not lit, or if it
blinks, there is a problem with the USB device server or Power
Adapter.
LAN Indicator blinks to indicate wired network activity. If it is lit, it
indicates the wired network is applied. If it is not lit, it indicates that
the server does not connect to the wired network.
WLAN Indicator blinks to indicate wireless network activity. If it is lit,
it indicates the wireless network is applied. If it is not lit, it indicates
that the server does not connect to the wireless network.
USB Indicator(s) is lit while a USB device connects to a USB Port of
the USB device server. If it is not lit, or if it blinks, there is a problem
with the USB device or the USB device server.
Connect Multifunction USB Network Server to Your Wired
Network
I. Connect Server to the wired network, such as a LAN switch or a LAN
hub, using a LAN cable.
II. Connect USB printers, hard drives or flash ROM disks, or all-in-one
series printers (AIO/MFP), or USB speaker, or USB 1.1 camera to the
server using USB cables.
III. Plug in the power adaptor (included in this package) to power on the
device.
Connect Multifunction USB Network Server to Your
Wireless Network
I. Follow Step 5.
II. Properly set up wireless configuration as Step 8.
III. Plug-off the LAN (Ethernet) cable.
IV. Plug-off the power adapter and then plug-in the power adapter to
restart server. The server will connect to your wireless network.
Page 3
Install Utility
I. Insert the included CD-ROM into the personal computer.
The Autorun screen should appear.
II. Click Install Product button.
III. Click Next, if you see any Next button in installation windows.
IV. Click Finish.
Configure Server with Utility
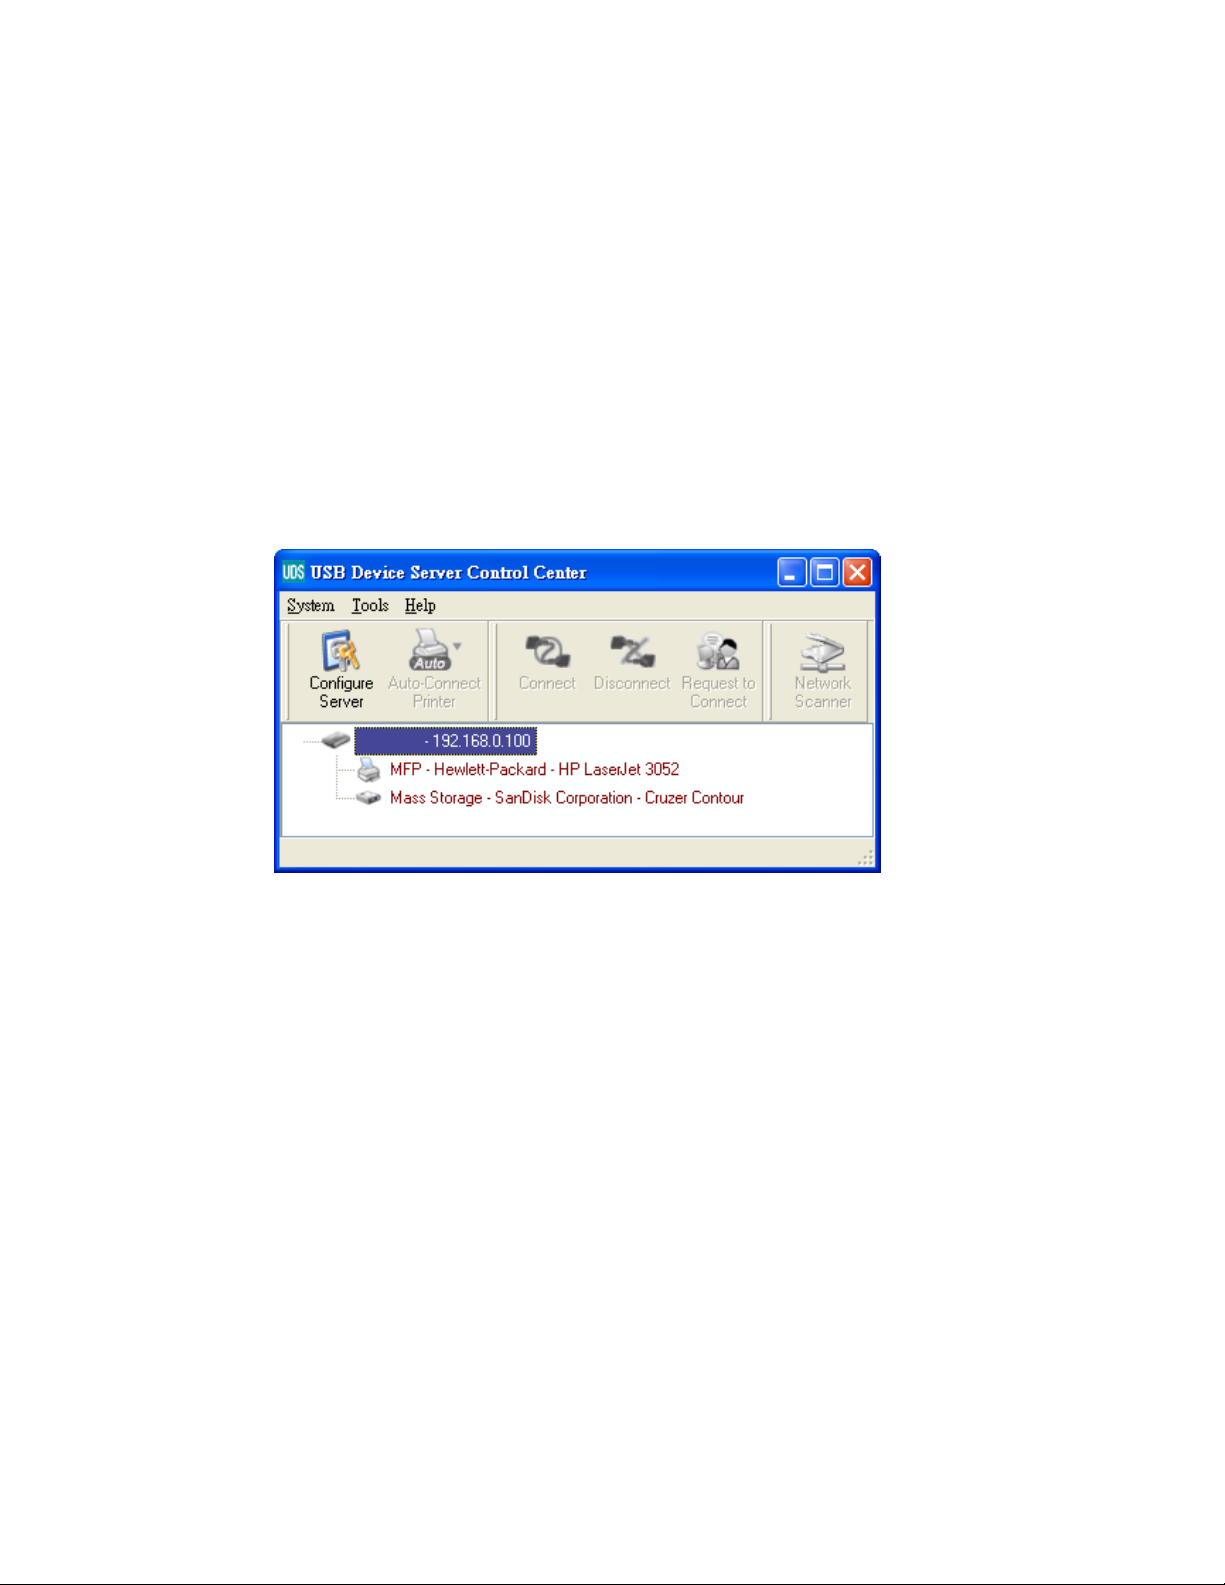
Using the Control Center Software (Fig1):
1. Run the Control Center. It will automatically search the existing servers
and display their status.
Figure 1 Control Center
2. Select the server that you want to configure. Double click the selected
server and you will get the web pages of the server.
Web Page
3. Click “CONFIG” icon and then enter Administrator (default: admin) and
Password (default: admin) to login.
4. Assign IP address to server as. Please choose one method to set the
IP address of the server. You can automatically get IP address by
using DHCP or manually assign an IP address to the server.
Page 4

TCP/IP Setting
5. Set up wireless configuration (only for wireless model):
- Set SSID, Channel, and Security according to the table below
Infrastructure Mode
SSID
Channel
Security Settings
Must match the Access Point.
Access Point sets the Channel used.
Wireless stations automatically locate
the correct channel.
Must match the Access Point.
Install the Driver of the USB Device
Some USB devices, like printers or MFPs (multifunction printers), require
to install vendor-supplied driver (usually on CDROM). For those USB
devices that do not need to install driver, please skip to next step.
A. Insert the CDROM into the CD drive and run the “autorun” program.
B. Follow the instructions of the installation program to install driver.
C. When the installation program asks you to plug-in the USB device, run
the “Control Center”.
D. In the Control Center, click the USB device server that has the desired
USB device attached.
E. Click the desired USB device as Fig4.
Figure 4 Click the Desired USB Device
Page 5

F. Click the “Connect” button. Then the message “Manually Connect by
your_computer_name” will be shown, as Fig5.
Figure 5 Device Connected
G. Now, the installation program will detect the USB device and continue
to install driver.
H. After the installation is completed, click the USB device in the Control
Center and then click the “Disconnect” button to disconnect the USB
device.
Use the USB Device
A. In the Control Center, click the USB device server that has the desired
USB device attached.
B. Click the desired USB device as Fig 4.
C. Click the “Connect” button. Then the message “Manually Connect by
your_computer_name” will be shown, as Fig 5.
D. Now, PC will detect the plug-in of the USB device. The “connect”
operation is a software operation that simulates an actual USB device
plug-in. That is to say, when you do a “connect” operation in the
Control Center, PC can then detect a USB device’s plug-in, although
actually you do not plug in any USB device.
E. Then, just use the USB device as if it is connected directly to your PC’s
USB port.
F. After you finish using the USB device, click the USB device in the
Control Center and then click the “Disconnect” button to disconnect
the USB device, as Fig 6. Other PCs can not “Connect” the USB
device until you “Disconnect” that USB device. That is to say, only one
PC is allowed to connect the USB device at the same time.
Page 6

Figure 6 The Disconnect Button
An Example of USB Storage
If you connect a USB storage, like Fig 7, your PC will have a new disk. If
the USB storage is a flash drive, the new disk is a “removable disk”.
Figure 7 The USB Storage
You can see the storage icon in the system tray, as Fig8.
Figure 8 The System Tray
Page 7

Then just use the new disk as a general disk. After you finish the disk
operations, click the storage icon in the system tray and choose “Safely
remove USB Mass Storage Device” to remove the USB storage, as
Fig9.
Figure 9 Removing the USB Storage
Then, in the Control Center, click the USB storage device and click the
“Disconnect” button to disconnect the USB storage device.
Default Parameters
Some of the important default parameters are shown below.
- Administrator: admin
- Password: admin
- Server Name: DIGITUS
- Workgroup: WORKGROUP
- Static IP: 192.168.1.100
- DHCP: enabled
Hereby ASSMANN Electronic GmbH, declares that this device is in compliance with the
requirements of Directive 2014/53/EU and the Directive 2011/65/EU for RoHS compliance.
The complete declaration of conformity can be requested by post under the below mentioned
manufacturer address.
Warning:
This device is a class B product. This equipment may cause some radio interference in living
environment. In this case, the user can be requested to undertake appropriate measures to
prevent interference.
www.assmann.com
Assmann Electronic GmbH
Auf dem Schüffel 3
58513 Lüdenscheid
Germany
 Loading...