

Page 1
10/100 Mbps Ethernet Network Interface Card
Manual
DN-1001J
Product Introduction
The Realtek Network Interface Card is a cost-effective10/100Mbps Fast Ethernet Card.
With Auto-Negotiation capability, the NIC automatically supports data transmission
bandwidth from 10Mbps to 100Mbps. This function smoothly and automatically switches
drivers between 10Mbps and 100Mbps. The Network Interface Card is your best choice
to improve network performance with the highest performance.
Page 2
Features
Chipset: Realtek/RTL8139D
Bus: PCI V2.2, 32-bit, 33MHz
IEEE802.3, IEEE802.3u, and IEEE802.3ab compliant.
Support for IEEE802.3x Full-Duplex flow control.
Complaint to PC99 and PC2001 standards
Auto-Negotiation support for Auto-Detect 10/100Mbps data rate and Full/Half-Duplex
operation mode
Support ACPI and PCI power management
Supports PCI VPD (Vital Product Data)
Automatic crossover support for crossover or regular cable
Support Wake on LAN function and remote wake-up (Optional)
One RJ-45 Port
System Requirements
Windows® 98se/me/2000/XP/2003/Vista/Win7/2008/Win8/Win8.1/
Win10 (32/64 bit)/Linux
PCI system with an available PCI slot
Package Contents
1 x PCI RTL8139D Ethernet Card
1 x User Manual
1 x Driver CD
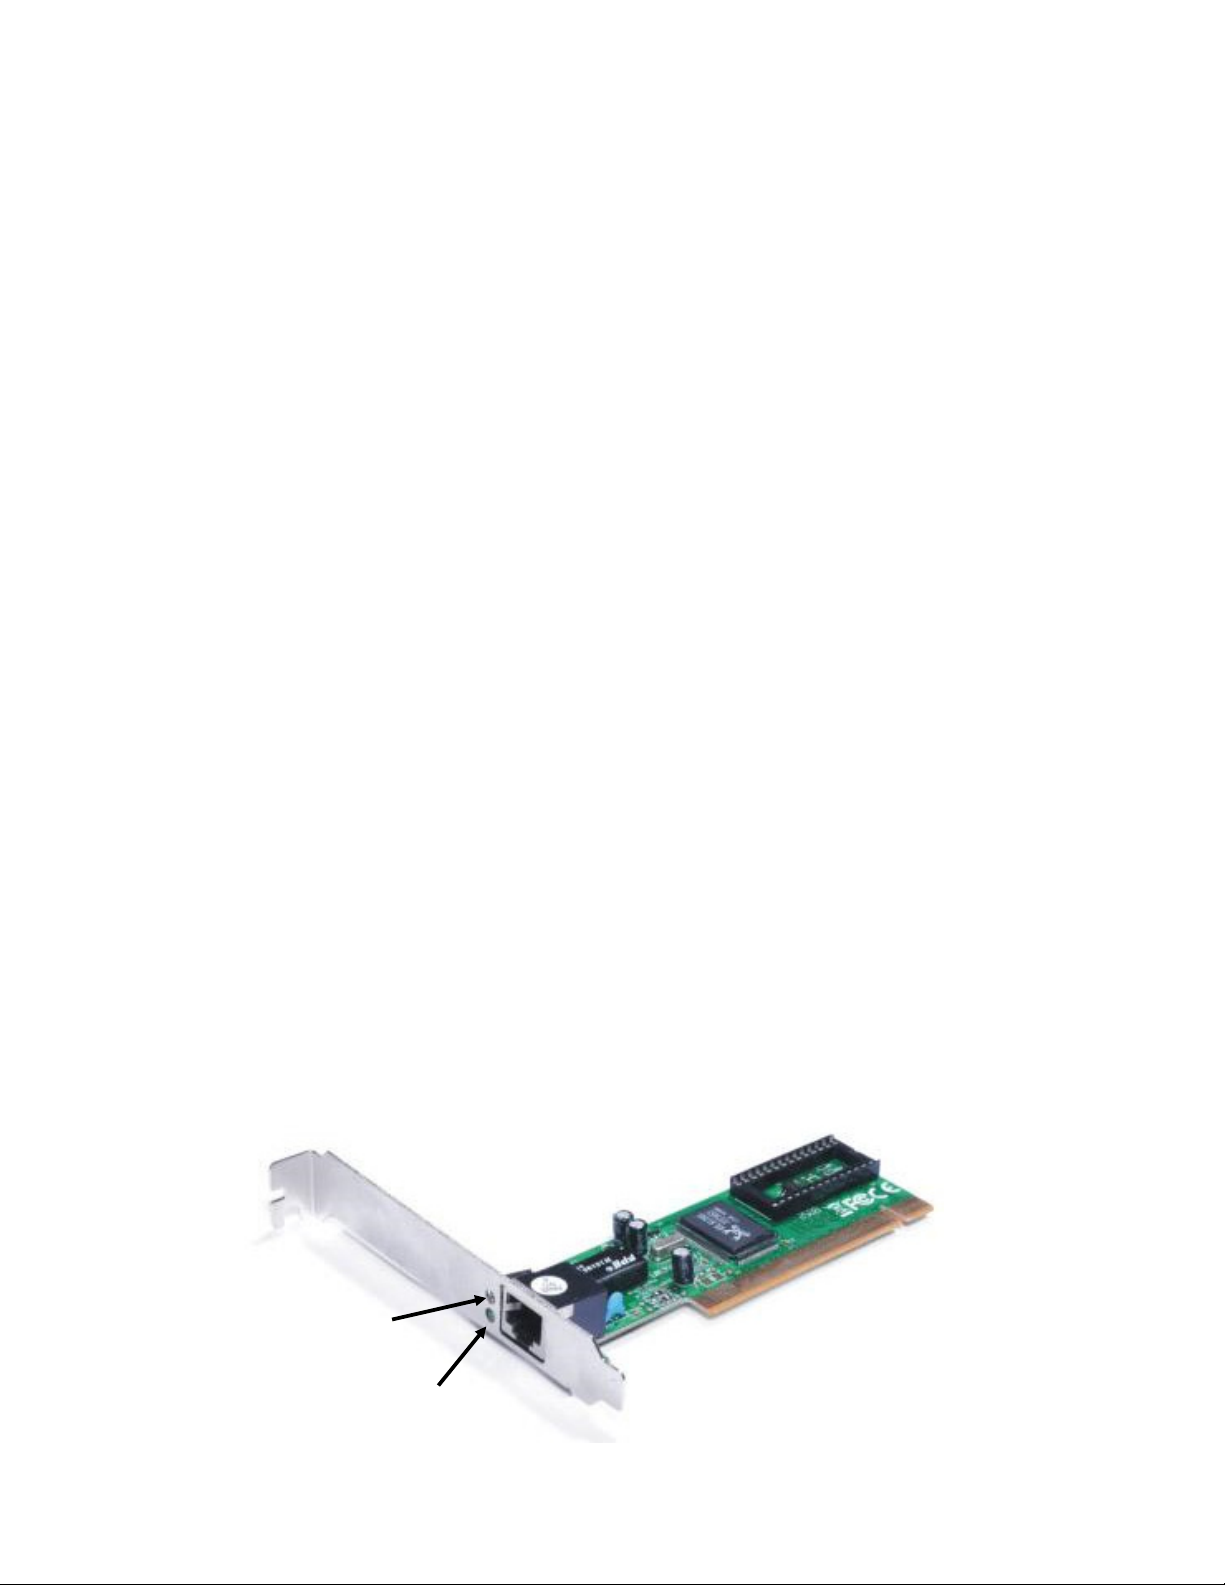
Hardware Description
② Active LED
① 10/100M
②
①
Page 3

LED Indicators
The following table provides descriptions of the LED status and their meaning.
LED Color Status Description
10/100 Link Green ON The port is connecting with 100 Mbps
Active LED Green BLINK Sending/Receiving Packets
Hardware Installation
1. Turn off your computer and devices connected to it.
2. Remove the computer’s cover, Refer to your computer user’s manual for more details
3. Find an unused PCI slot and remove the metal bracket. Save the bracket screw for later
use
4. Align the card horizontally with respect to the PCI slot and insert it into the slot firmly
and evenly, take care not to force it into the slot, once you have properly positioned
the PCI lan card into the slot, then replace the computer cover and reconnect the
power cord.
Driver Installation
Installing Driver for Windows 98, 2000, XP, server2003, Vista, Win7, Win8 and Win10
1. Start Windows and insert the driver CD into the CD-ROM drive, assume drive D.
2. Windows will automatically detect the card. Ignore the driver installation wizard.
3. Browse to the following folder on the driver CD in your operation system:
3.1 For Windows® WIN98SE, Win ME
Type “RTL8139, RTL8100 (ABCD)\Windows Auto installation Program\PCI_Install_98ME_
5707_1119\setup. exe”
Double click it.
3.2 For Windows® WIN2K, XP, Server 2003
Type “RTL8139, RTL8100 (ABCD)\Windows Auto installation Program\PCI_Install_XP_2K_
5719_10202010\setup.exe”
Double click it.
Page 4

3.3 For Windows® Vista (32/64 bit)
Type “RTL8139, RTL8100 (ABCD)\Windows Auto installation Program\Install_Vista_6110_
10202010\setup.exe”
Double click it.
3.4 For Windows® Win7, WIN2008 (32/64 bit)
Type “RTL8139, RTL8100 (ABCD)\Windows Auto installation Program\Install_Win7_6111_
10202010\setup.exe”
Double click it.
3.5 For Windows® Win8, Win8.1 (32/64 bit)
Type “RTL8139, RTL8100 (ABCD)\Windows Auto installation Program\Install_Win8_8.1_
Win7_Vista_6112_03122014\setup.exe”
Double click it.
3.6 For Windows® Win10 (32/64 bit)
In this system, it will be used system box driver.
4. Follow the on-screen instructions to complete the installation.
Support:
If you have further questions, please contact our customer support and you can find more information
on our homepage: www.assmann.com
Hereby ASSMANN Electronic GmbH, declares that this device is in compliance with the requirements of Directive 2014/30/EU
and the Directive 2011/65/EU for RoHS compliance. The complete declaration of conformity can be requested by post under
the below mentioned manufacturer address.
Warning:
This device is a class B product. This equipment may cause some radio interference in living environment. In this case, the
user can be requested to undertake appropriate measures to prevent interference.
www.assmann.com
Assmann Electronic GmbH
Auf dem Schüffel 3
58513 Lüdenscheid
Germany
 Loading...