

Page 1
User’s Guide
Manual de
instrucciones
G
ENETX™
G
UITAR
P
ROCESSOR
PROCESADOR
DE
GUITARRA
GENETX™
Page 2
Instrucciones de seguridad
Aviso para los usuarios si su unidad esta equipada con un cable de alimentación.
Precaucion: Esta unidad debe ser conectada a tierra.
Los filamentos del cable de alimentaci
ón están coloreados de acuerdo al
sigiente código:
Verde y Amarillo - Tierra Azul - Neutral Marron - Activo
Dado que los colores del cable de alimentaci
ón de esta unidad puede que
no se correspondan con las marcas de color identificativas de su enchufe, haga
lo siguiente :
•El filamento que tiene color amarillo y verde debe ser conectado a la
terminal del conector marcada con la letra E, o con el simbolo de tierra o
de color verde o de color amarillo y verde.
•El filamento con color azul debe ser conectado a la terminal marcada con
una N o de color negro.
•El filamento de color marr
ón debe ser conectado a la terminal marcada
con una L o de color rojo.
Advertencia
Compatibilidad electromagnetica
Esta unidad cumple con las Especificaciones de producto indicada en la
Declaración de Conformidad. Este hace que la unidad etsé sujeta a las
dos condiciones siguientes:
•
etsa unidad no puede producir interferencias molestas ni da
ñinas, y
•
esta unidad debe recibir cualquier interferencia recibida, incluyendo
las que puedan causar errores no deseado. Debe tratar de evitar el
uso de esta unidad dentro decampos electromagnéticos significativos
•
utilice solo cables de interconexión con blindaje.
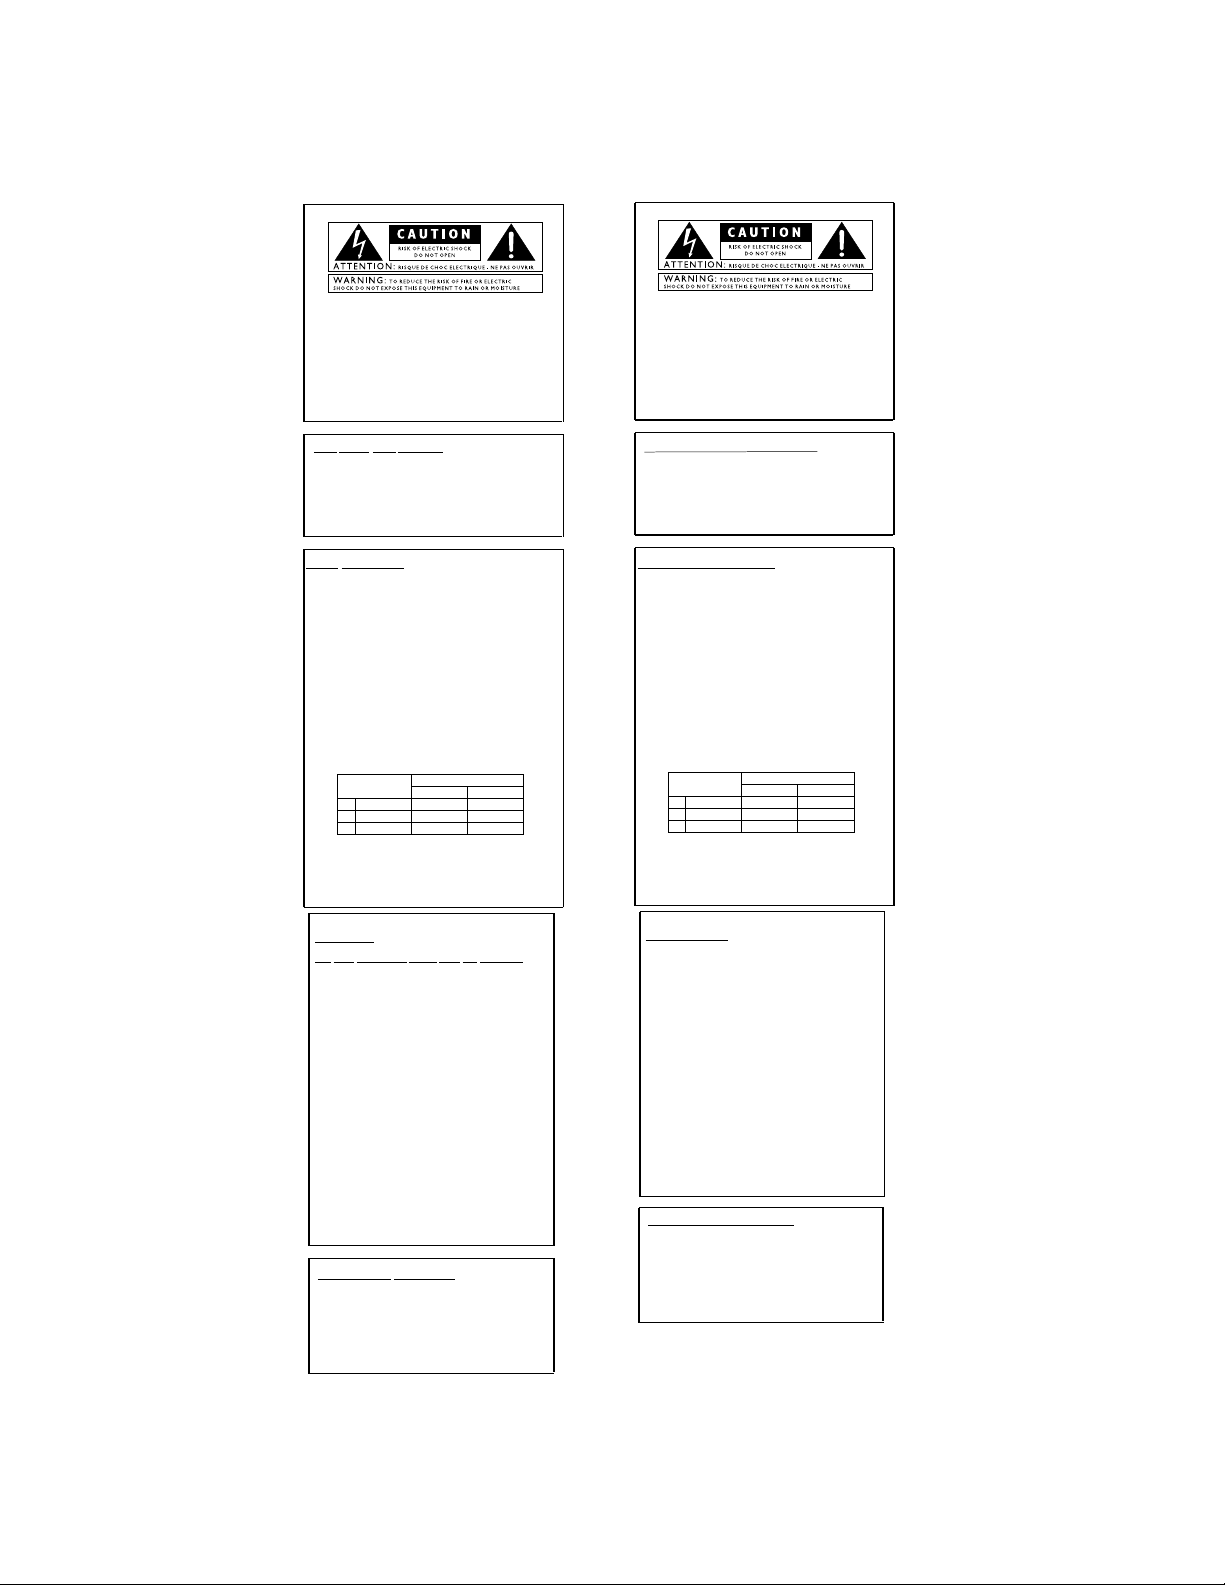
These symbols are internationally accepted symbols that warn of potential
hazards with electrical products.The lightning flash means that there are
dangerous voltages present within the unit.The exclamation point indicates
that it is necessary for the user to refer to the owners manual.
These symbols warn that there are no user serviceable parts inside the unit.
Do not open the unit. Do not attempt to service the unit yourself.Refer all
servicing to qualified personnel. Opening the chassis for any reason will void
the manufacturer’s warranty. Do not get the unit wet.If liquid is spilled on
the unit, shut it off immediately and take it to a dealer for service.
Disconnect the unit during storms to prevent damage
.
U.K. Mains PlugWarning
A molded mains plug that has been cut off from the cord is unsafe.
Discard the mains plug at a suitable facility.Never under any circum-
stances should you insert a damaged or cut mains plug into a 13
amp power socket.Do not use the mains plug without the fuse cover
in place. Replacement fuse covers can be obtained from your local retailer.Replacement fuses are 13 amps and MUST be ASTA approved to
BS1362.
Safety Instructions
Notice for customers if your unit is equipped with a power cord.
Warning:This appliance must be earthed.
The cores in the mains lead are colored in accordance with the following
code:
Green and Yellow - Earth Blue - Neutral Brown - Live
As colors of the cores in the mains lead of this appliance may not correspond with the colored markings identifying the terminals in your plug,proceed as follows:
•The core which is colored green and y
ellow must be connected to the
terminal in the plug marked with the letter E,or with the ear th symbol, or colored green,or gr
een and yellow.
•The core which is colored blue must be connected to the terminal
marked N,or colored black.
•The core which is colored bro
wn must be connected to the terminal
marked L,or colored red.
This equipment may require the use of a different line cord,attachment
plug, or both,depending on the available power source at installation. If the
attachment plug needs to be changed, refer servicing to qualified service
personnel who should refer to the table below.The green/yellow wire shall
be connected directly to the unit’s chassis.
Warning: If the ground plug is defeated,cer
tain fault conditions in the unit
or in the system to which it is connected can result in full line voltage
between chassis and earth ground.Severe injury or death can then result if
the chassis and earth ground are touched simultaneously.
Warning
For your protection, please read the following:
Water and Moisture:Appliances should not be used near water
(e.g. near a bathtub,washbowl, kitchen sink, laundry tub,in a wet
basement, or near a swimming pool,etc.) Care should be taken so
that objects do not fall and liquids are not spilled into the enclosure
through openings.
Power Sources:The appliance should be connected to a power
supply only of the type described in the operating instructions or as
marked on the appliance.
Grounding or Polarization: Precautions should be taken so that
the grounding or polarization means of an appliance is not defeated.
Power Cord Protection:Power supply cords should be routed so
that they are not likely to be walked on or pinched by items placed
upon or against them, paying particular attention to cords at plugs,
convenience receptacles,and the point where they exit from the
appliance.
Servicing: To reduce the risk of fire or electrical shock, the user
should not attempt to service the appliance beyond that described in
the operating instructions.All other servicing should be referred to
qualified service personnel.
For units equipped with externally accessible fuse receptacle: Replace fuse with same type and rating only.
Electromagnetic Compatibility
Operation is subject to the following conditions:
•This device may not cause harmful interference.
•This device must accept any interference received,including
interference that may cause undesired operation.
•Use only shielded interconnecting cables.
•Operation of this unit within significant electromagnetic fields
should be av
CONDUCTOR
LIVE
L
NEUTRAL
N
E
EARTH GND
WIRE COLOR
Normal Alt
BROWN
BLUE
GREEN/YEL
BLACK
WHITE
GREEN
Los simbolos de aqui arriba están reconocidos internacionalmente como de
advertencia de los riesgos potenciales con aparatos eléctricos. El rayo dentro
de un triángulo equilátero implica que dentro de la unidad existen voltajes
peligrosos. El simbolo de exclamación dentro del triángulo equilátero indica
que es necesario que lel usuario lea el manual de instrucciones de la unidad.
Estos simbolos también le adviertenque dentro de la unidad no hay ninguna
pieza que pueda ser reparada por el propio usuario. No abrael aparato. Nunca
intente hacer ningún tipo de reparación por sus propios medios. Consulte
cualquier posible reparación únicamente a un Servico Técnico cualificado. La
apertura del chasis por cualquier razón anulará la garantia del fabricante.
No permita que la unidad se humedezca. Si cae algún liquido en el aparato,
apáguelo immediatemente y llévelo al distribuidor o servicio técnico.
Desconecte la unidad durante las tormentas para evitar daños.
Aviso Sobre El Enchufe Para U.K.
El uso de un conector de otro cable no es seguro. Descarte este tipo de
conexiones. BAJO NINGUNA CIRCUNSTANCIA DEBE INSERTAR
UN CABLE CORTADO O DAÑADO EN UN ENCHUFE DE
CORRIENTE DE 13 AMP. No utilice un enchufe de corriente sin que
etsé colocado la tapa del fusible. Puede conseguir recambios de estas tapas
de fusible en su tienda local. Los fusibles de recambio son de 13 amps y
DEBEN estar aprobados por la ASTA con el standard BS1362.
Puede que para este aparato necesite usar un cable de alimentación o un
conector distintos, dependiendo de la fuente de alimentación disponible en
su instalación. Si debe cambiar el enchufe, contacte con un técnico cualificado
y que este haga referencia a la tabla siguiente.
El filamento verde/amarillo debería ser conectado directamente a la carcasa
de la unidad.
CONDUCTOR
L
Neutral
N
E
Tierra
Precaución : Si se elimina la toma de tierra, determinadas condiciones
de avería de la unidad o del sistema al que esté conectada pueden hacer que
haya cargas de voltaje de linea entre el chasis y la toma de tierra. Esto podriá
producir daños graves o induso la muerte si tocase simultáneamente la
carcasa y la toma de tierra.
AGUA Y HUMEDAD: No utilice este aparato demasiado cerca del
agua (p.e. cerca de una piscina, fregadero, lavadora o en un sótano
húmedo). Evite que pueda caer ningún objeto o líquidos dentro de la
carcasa a tracés de las aberturas.
FUENTE DE ALIMENTACION: Este aparato debe ser conectado a
una toma de alimentación solo del tipo descrito en este manual o
marcado en la propria unidad.
TOMA DE TIERRA O POLARIZACION: Tome las precauciones
necesarias para que la toma de tierra o polarización del aparato no
queden anuladas.
PROTECCION DEL CABLE DE ALIMENTACION: Coloque los
cables de alimentación de tal forma que no puedan ser pisados y que
queden enganchados o aplastados por cosas colocadas sobre o contra
ellos, con un cuidado especial en los receptáculos de entrada y
conectores, y en el punto en el que los cables salen de las unidades.
REPARACIONES : Para reducir el riesgo de incendios o des cargas
eléctricas, el usuario nunca debe tratar de hacer reparaciones en la
unidad fuera de lo descrito en las instrucciones. Debe dirigir cualquier
otra reparación al servicio técnico cualificado.
PARA LAS UNIDADES EQUIPADAS CON RECEPTACULO
DE FUSIBLE ACCESIBLE DESDE EL EXTERIOR: Sustituya el
fusible soo por otro del mismo tipo y características eléctricas.
Línea
COLOR CABLE
Normal Alt
ón
Marr
Azul
Verde/Amarillo
Negro
Blanco
Ver de
Page 3

Table of Contents:
Overview 1
Front Panel 1
Rear Panel 2
Setup Connections 2
Powering Up 2
Footswitch Operation 3
Models and Effects Functions 3
Amplifier 4
Cabinet 4
Compressor 4
Modulation 5
Delay/Reverb 5
Gate 6
Specifications: 7
Declaration of Conformity 7
Indice:
Visión general 1
Panel frontal 1
Panel trasero 2
Conexiones 2
Encendido 2
Funcionamiento del pedal de disparo 3
Funciones de modelos y efectos 3
Amplificador 4
Recinto acústico 4
Compresor 4
Modulación5
Retardo/reverb 5
Puerta de ruido 6
Especificaciones técnicas 7
Declaración de conformidad 7
Warranty
We at DigiTech are very proud of our products and back-up
each one we sell with the following warranty:
1.The warranty registration card must be mailed within ten
days after purchase date to validate this warranty.
2. DigiTech warrants this product, when used solely within
the U.S., to be free from defects in materials and workmanship under normal use and service.
3. DigiTech liability under this warranty is limited to repairing or replacing defective materials that show evidence of
defect, provided the product is returned to DigiTech
WITH RETURN AUTHORIZATION, where all parts and
labor will be covered up to a period of one year.A Return
Authorization number may be obtained from DigiTech by
telephone.The company shall not be liable for any consequential damage as a result of the product's use in any circuit or assembly.
4. Proof-of-purchase is considered to be the burden of the
consumer.
5. DigiTech reserves the right to make changes in design, or
make additions to, or improvements upon this product
without incurring any obligation to install the same on
products previously manufactured.
6.The consumer forfeits the benefits of this warranty if the
product's main assembly is opened and tampered with by
anyone other than a certified DigiTech technician or, if the
product is used with AC voltages outside of the range suggested by the manufacturer.
7.The foregoing is in lieu of all other warranties, expressed
or implied, and DigiTech neither assumes nor authorizes
any person to assume any obligation or liability in connection with the sale of this product. In no event shall
DigiTech or its dealers be liable for special or consequential damages or from any delay in the performance of this
warranty due to causes beyond their control.
NOTE:The information contained in this manual is subject to
change at any time without notification. Some information contained in this manual may also be inaccurate due to undocumented changes in the product or operating system since this
version of the manual was completed. The information contained in this version of the owner's manual supersedes all previous versions.
Garantía
Todos los aparatos DigiTech son fabricados con el máximo
cuidado. Las condiciones de la garantía varían desde el momento en que los distribuidores son distintos en cada país.
Si necesita cualquier información relacionada con las condiciones de la garantía en su país, le rogamos que se ponga en contacto con su distribuidor o comercio local
DigiTech es una marca registrada.
NOTA: La información contenida en este manual está sujeta a
cambios en cualquier momento sin previo aviso.Algunas de las
informaciones contenidas en este manual pueden incluso ser
inexactadas debido a modificaciones no documentadas en el
aparato o en el sistema operativo desde el momento de finalizar
esta versión del manual. La información contenida en este manual de instrucciones sustituye a la de versiones anteriores.
Page 4

Page 5

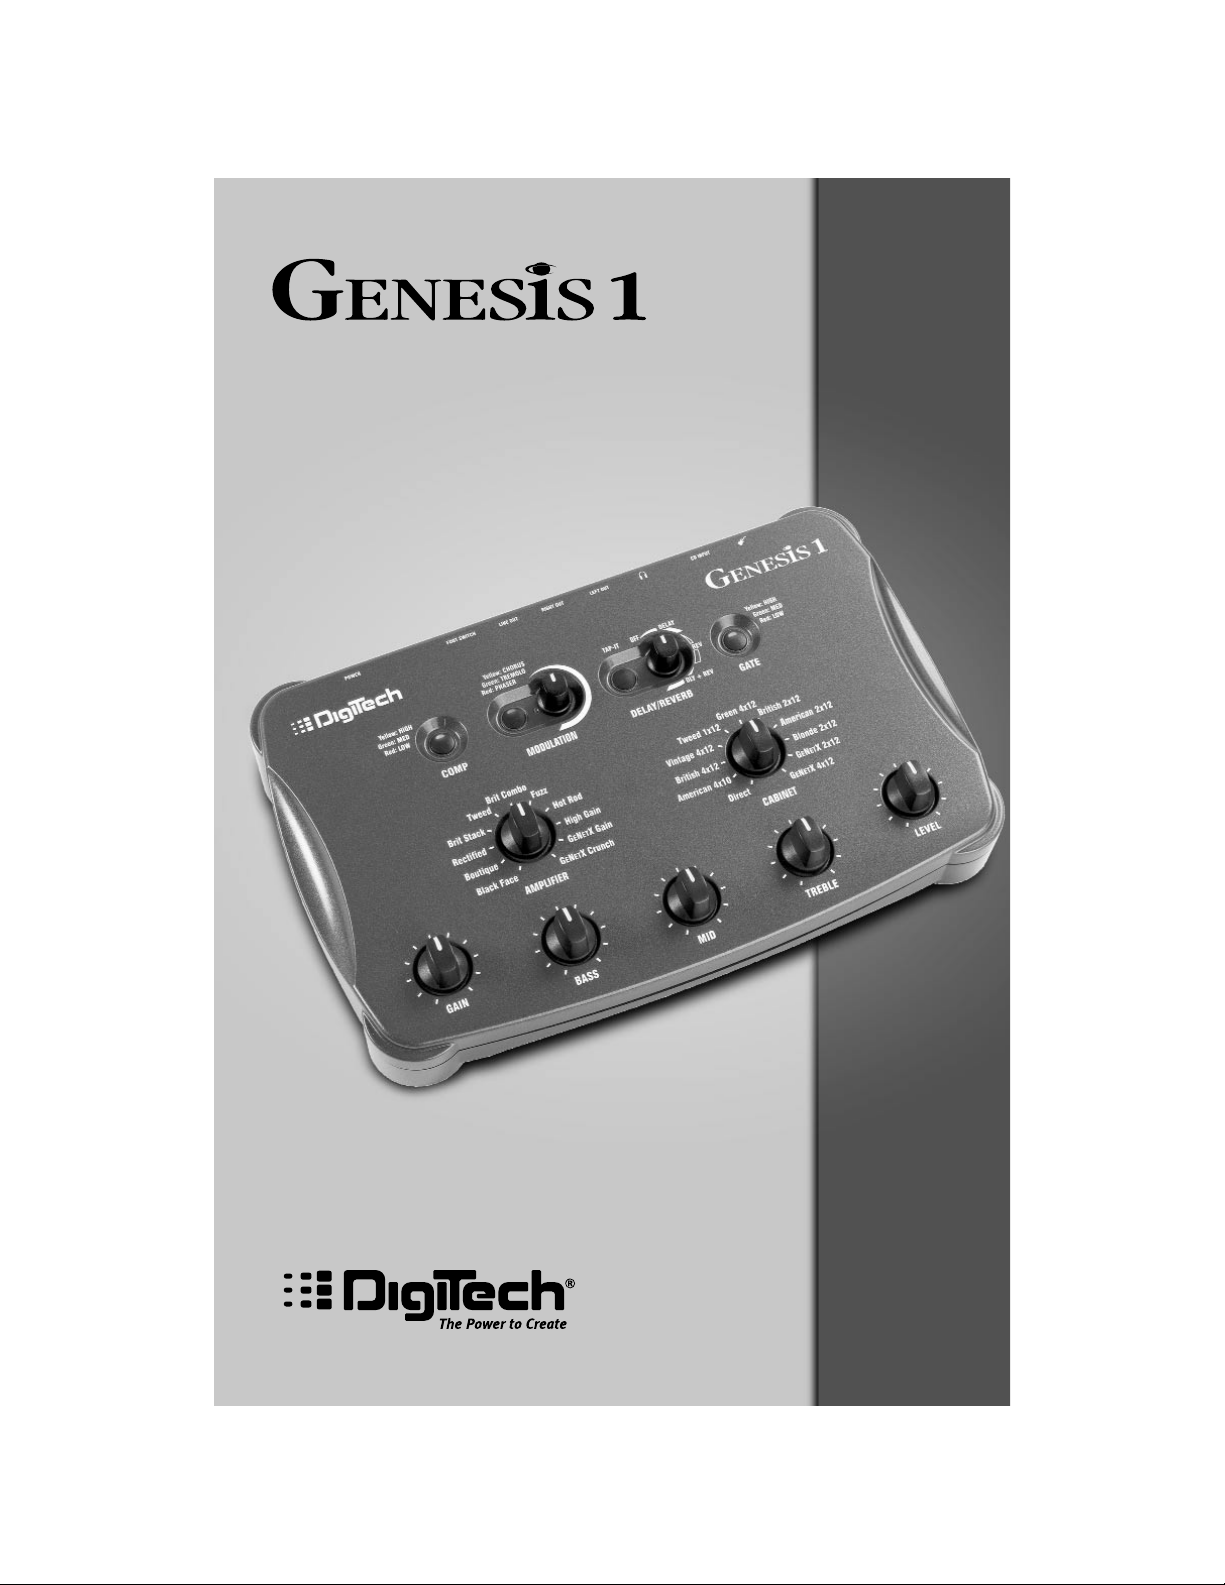
Overview
The Genesis1 is a desktop amp modeling device featuring
GENETX™ amp models, cabinets, and effects processing. Its
simple user interface requires no programming. There are
eleven amp and cabinet types to select from, and the amp models can be modified using the five gain and tone controls. There
are also five effects (Compressor, Modulation,Delay,Reverb, and
Gate) that can be used to enhance the sound.
Front Panel
The Genesis1’s front panel consists of the following:
1. GAIN knob - Adjusts the amp model’s gain.
2. BASS knob - Adjusts the amp model’s bass.
3. MID knob - Adjusts the amp model’s mid.
4. TREBLE knob - Adjusts the amp model’s treble.
5. LEVEL knob - Adjusts the amp model’s level.
6. COMP button - Selects the amount of compression.
7. AMPLIFIER knob - Selects the amp model.
8. MODULATION button with knob - Selects the modulation effect type and adjusts the amount of effect.
9. DELAY/REVERB TAP-IT button w/knob - TAP-IT sets
the delay repeats and the knob selects the Delay and
Reverb effects and level.
10.CABINET knob - Selects the cabinet type.
11.GATE button - Selects the noise gate threshold.
Visión general
El Genesis1 es una unidad de modelado de amplificación de
sobremesa que dispone de modelos de amplificadores, recintos
acústicos y procesado de efectos GENETX™. Su sencillo interface de usuario no hace necesaria ninguna programación. Hay
once tipos de amplificadores y recintos acústicos entre los que
puede elegir,y estos modelos de amplificador pueden ser modificados usando los cinco controles de ganancia y de tono.
También dispone de cinco efectos (compresor, modulación,
retardo, reverb y puerta de ruidos) que puede usar para intensificar el sonido.
Panel frontal
El panel frontal del Genesis1 está formado por lo siguiente:
1. Mando GAIN -Ajusta la ganancia del modelo de
amplificador.
2. Mando BASS - Ajusta los graves del modelo de amplificador.
3. Mando MID -Ajusta los tonos medios del modelo de
amplificador.
4. Mando TREBLE - Ajusta los agudos del modelo de
amplificador.
5. Mando LEVEL - Ajusta el nivel del modelo de amplificador.
6. Botón COMP - Elige la cantidad de compresión.
7. Mando AMPLIFIER -Elige el modelo de amplificador.
8. Botón con mando MODULATION - Elige el tipo de
efecto de modulación y ajusta la cantidad del efecto.
9. Botón c/mando DELAY/REVERB TAP-IT - TAP-IT
ajusta las repeticiones del retardo y el mando elige los
efectos de retardo y reverb y el nivel.
10.Mando CABINET - Elige el tipo de recinto acústico.
11.Botón GATE - Elige el umbral de la puerta de ruidos.
1
Page 6

Rear Panel
The Genesis1’s rear panel has the following connections:
1. Input - Plug your instrument into this jack.
2. CD INPUT(1/8” Stereo TRS) - Connect a CD headphone output to this jack.
3. Headphone Output - Plug stereo headphones to this
jack.
4. LEFT OUTput - Connect an amplifier input, a power
amp input, or line input of a mixing console to this
jack.
5. RIGHT OUTput - Use this jack in conjunction with
the left output for stereo applications. Connect a second amplifier input, or the right input of a stereo
power amp.
6. LINE OUTPUT - (1/8” Stereo TRS) - Connect to a
computer sound card input, or line level input with this
jack.
7. FOOTSWITCH Jack - Connect the FS300 footswitch
to remotely control effects to this jack.
8. POWER Jack - Connect only the Digitech PS913B
power supply to this jack.
Setup Connections
The Genesis 1 has several different connection options.
You can run mono into an amp or power amp, stereo
into two amps, stereo direct into a mixing console, direct
into a computer sound card, or any combination of
these. Before connecting the Genesis 1 to your system,
make sure the Genesis 1 is OFF and your system is ON.
Powering Up
1.Turn the volume completely down on your system.
2. Connect the Genesis 1’s outputs to the inputs
of your system.
3.Turn the
LEVEL knob down to the mini-
mum position on the Genesis 1.
4. Connect the power to the Genesis 1.
5. Bring up the volume on your system.
6.While playing, slowly turn up the
LEVEL
knob to the desired listening level on the
Genesis 1.
Panel trasero
El panel trasero del Genesis1 tiene las siguientes conexiones:
1. Entrada - Conecte su instrumento en esta entrada.
2. CD INPUT(TRS stereo de 3.5 mm) - Conecte la salida de auriculares de un CD en esta entrada.
3. Salida de auriculares - Conecte en esta salida unos
auriculares stereo.
4. LEFT OUTput - Conecte esta salida a la entrada de un
amplificador, de una etapa de potencia o una entrada
de línea de una mesa de mezclas.
5. RIGHT OUTput - Use esta salida junto con la anterior para aplicaciones stereo. Conéctela a la entrada de
un segundo amplificador, la entrada derecha de una
etapa de potencia o similares.
6. LINE OUTPUT - (TRS stereo de 3.5 mm) - Conecte
esta salida a la entrada de una tarjeta de sonido de su
ordenador o a una entrada de nivel de línea.
7. Conector FOOTSWITCH - Conecte a esta entrada el
pedal de disparo FS300 para el control remoto de los
efectos.
8. Entrada POWER - Conecte en esta toma solo la
fuente de alimentación Digitech PS913B.
Conexiones
El Genesis 1 tiene varias posibilidades de conexión.
Puede manejarlo en mono conectándolo a un
amplificador o etapa de potencia, en stereo con dos
amplificadores, en stereo directo conectado a una mesa
de mezclas, directo a una tarjeta de sonido de
ordenador o puede hacer cualquier combinación entre
estos modos.Antes de conectar el Genesis 1 a su
sistema, asegúrese de que el Genesis 1 esté apagado
(OFF) y su sistema encendido (ON).
Encendido
1.Disminuya al mínimo el volumen de su sistema.
2.Conecte las salidas del Genesis 1 a las entradas
de su sistema.
3 Gire el mando
LEVEL del Genesis 1 hasta su
posición mínima.
4 Encienda el Genesis 1.
5.Aumente poco a poco el volumen de su sis-
tema.
6. Mientras toca, gire lentamente hacia arriba el
mando
LEVEL hasta conseguir el nivel de
escucha deseado en el Genesis 1.
2
Page 7

Below are some examples for connecting the
Genesis 1 to different types of systems. When
running stereo into 2 channels of a mixer, be sure
to set the channel pans to hard left and hard right:
Footswitch Operation
If you have chosen to purchase the Digitech
FS300 footswitch, you can remotely control the
Genesis 1. Each button of the FS300 functions
with the Genesis 1 as follows:
Footswitch A - Bypasses modulation effects
Footswitch B - Bypasses delay and reverb effects.
Footswitch C - Bypasses all modeling and effects,
Models and Effects Functions
The Genesis 1’s user interface doesn’t complicate things with
programming functions. Its basic approach provides individual
settings that the user can change, without the complexity of programming. The following explains how each control functions:
A continuación le mostramos algunos ejemplos
de conexión del Genesis 1 a distintos tipos de
sistemas. Cuando esté manejando la unidad en
stereo en dos canales de una mesa de mezclas,
asegúrese de ajustar el panorama de estos canales
completamente a la izquierda y la derecha:
Funcionamiento del pedal de
disparo
Si ha decidido comprar el pedal de disparo
Digitech FS300, podrá controlar el Genesis 1 a
distancia. Cada uno de los botones del FS300 funciona en el Genesis 1 de la siguiente forma:
Interruptor A – Anula los efectos de modulación
Interruptor B - Anula los efectos de retardo y reverb.
Interruptor C - Anula todo el modelado y los efectos,
Funciones de los modelos y efectos
El interface de usuario del Genesis 1 no le complica la vida con
funciones de programación. Su simplicidad y carácter intuitivo
ofrece una serie de configuraciones individuales que el usuario
puede cambiar sin tener que recurrir a una compleja programación. En los párrafos siguientes le explicamos cómo funciona
cada cosa:
3
Guitar Input/Effect Return
Entrada de guitarra / retorno de efectos
Left Output/Salida izquierda
Right Output/Salida derecha
Sound Card Input
Entrada de tarjeta de sonido
Input
Entrada
Page 8

Amplifier
The Genesis1 has eleven amp models to select from
including 2 models created using GENETX™ technology. Rotate the
AMPLIFIER knob to select the amp
model you want to use. Each amp model is labeled on
the front panel. The Amplifier knob has a pointer that
identifies the selected model. The amp models are:
Black Face:‘65 Fender Twin Reverb
Boutique: Matchless DC30
Rectified: Mesa Dual Rectifier
Brit Stack:‘78 Marshall Master Volume
Tweed:‘57 Fender Tweed Deluxe
Brit Combo:Vox AC30
Fuzz:A vintage fuzz distor tion
Hot Rod: Mesa Boogie Mark II C
High Gain:A high gain tube amp
GENETX™ Gain: Rectifier and High Gain
Hypermodel™
GENETX™ Crunch: Hot Rod and Brit Stack
Hypermodel™
Marshall® is a registered trademark of Marshall Amplification Plc.
Vox ® is a registered trademark of Korg UK. Fender, Matchless,and
Mesa Boogie, are trademarks of their respective companies and are
in no way associated with DigiTech.
Cabinet
The Genesis1 has ten cabinet types and one direct setting to select from. Rotate the
CABINET knob to
select the cabinet you want to use. Each cabinet type is
labeled on the front panel. The Cabinet knob has a
pointer that identifies the selected cabinet type. The
cabinet types are:
Direct British 2x12
American 4x10 American 2x12
British 4x12 Blonde 2x12
Vintage 4x12
GENETX™ 2x12
Tweed 1x12
GENETX™ 4x12
Green 4x12
Compressor
The Genesis1 compressor is used to limit peak signals
(LOW/MED) or to increase sustain (HIGH). The
Compressor button has a 3-color LED (Red, Green,
Yellow) that indicates the 3 different compressor settings. Press the
COMP button until the LED color
lights with the setting you want to use. The compressor
threshold is fixed, and the ratio and output gain are
simultaneously controlled. As the compressor ratio
increases, the output gain increases giving no apparent
change in output volume, but compressing the signal to
limit peaks and increase sustain. The compressor settings are: LOW (Red),MED (Green), and HIGH (Yellow).
When the LED is off, the Compressor is bypassed.
Amplificador
El Genesis1 dispone de once modelos de amplificador
entre los que elegir, incluyendo 2 modelos creados usando la tecnología GENETX™. Gire el mando
AMPLIFIER para elegir el modelo de amplificador
que quiera usar. Cada uno de estos modelos viene indicado en el panel frontal.El mando Amplifier tiene un puntero que identifica el modelo elegido en cada momento.
Los modelos de amplificador disponibles son:
Black Face: Fender Twin Reverb del 65
Boutique: Matchless DC30
Rectified: Mesa Dual Rectifier
Brit Stack: Marshall Master Volume del 78
Tweed: Fender Tweed Deluxe del 57
Brit Combo:Vox AC30
Fuzz: Una distorsión fuzz tradicional
Hot Rod: Mesa Boogie Mark II C
High Gain: Un amplificador de válvulas con alta ganancia
GENETX™ Gain: Hypermodelo™ Rectifier y High
Gain
GENETX™ Crunch: Hypermodelo™ Hot Rod y
Brit Stack
Marshall® es una marca registrada de Marshall Amplification Plc.
Vox ® es una marca registrada de Korg UK. Fender, Matchless, y
Mesa Boogie, son marcas registradas de sus respectivas empresas y
no están asociadas en forma alguna con DigiTech.
Recinto acústico
El Genesis1 tiene diez tipos de recintos acústicos y una
opción de ajuste directo entre los que elegir. Gire el
mando
CABINET para escoger el tipo de recinto
acústico que quiera usar.En el panel frontal viene marcado cada uno de estos tipos de recintos. El mando
Cabinet tiene un puntero que marca el tipo de recinto
elegido. Las opciones posibles son:
Directo British 2x12
American 4x10 American 2x12
British 4x12 Blonde 2x12
Vintage 4x12
GENETX™ 2x12
Tweed 1x12
GENETX™ 4x12
Green 4x12
Compresor
El compresor del Genesis1 se usa para limitar los picos
de señales (GRAVES/MEDIOS) o para aumentar el sustain (AGUDOS). El botón Compressor tiene un piloto
de 3 colores (rojo,amarillo y verde) que indica los 3 distintos valores del compresor. Pulse el botón
COMP
hasta que el piloto se ilumine con el color del ajuste que
quiera usar. El umbral del compresor es fijo, y el ratio y
la ganancia de salida se controlan de forma simultánea.
Conforme aumenta el ratio del compresor, aumenta
también la ganancia de salida haciendo que no se produzca ningún cambio aparente en el volumen de salida,
pero comprimiendo la señal para limitar los picos y
aumentar el sustain. Los posibles ajustes del compresor
son: LOW (graves – rojo), MED (medios – verde) y
HIGH (agudos – amarillo). Cuando el piloto esté apagado, el compresor estará anulado o en bypass.
4
Page 9

Modulation
The Genesis1 has 3 modulation effects to choose from:
Chorus, Tremolo, and Phaser. Only one modulation
effect can be selected at a time. The Modulation button
has a 3-color LED (Red, Green,Yellow) that indicates the
3 different effects. Press the
MODULATION but-
ton until the LED color lights with the effect you want to
use. Turn the knob clockwise to increase the speed and
intensity of each effect. For example:
CHORUS - A Chorus adds a short delay to your sig-
nal. The delayed signal is modulated in and out of tune
and then mixed back with the original signal to create a
thicker sound. Turn the knob to increase the speed and
decrease the depth.
TREMOLO - A Tremolo modulates the volume of
the signal at an even rate. Turn the knob to increase both
speed and depth.
PHASER - A Phaser splits the incoming signal, takes it
in and out of phase, and then mixes it back in with the
original signal. Turn the knob to increase the speed and
decrease the regeneration (depth remains fixed).
To bypass the modulation, press the button until the LED
goes off.
Delay/Reverb
The Genesis1 is equipped with both delay and reverb.
Delay records a portion of the incoming signal, and plays
it back at a set time. Reverb gives the listener a sense
that the music is being performed in various acoustical
environments. Both delay and reverb can be used independently or they can be used together. The delay time
is set with the TAP-IT button. Press the button at the
rate you want the delay to repeat.The delay has a range
of 100ms – 2.0 seconds. There are also 2 reverb types,
Spring and Hall. The reverb type is dependent on which
amp model is selected. Below is a list of reverb types
associated with each model:
Black Face - Spring Fuzz - Hall
Boutique - Hall Hot Rod - Hall
Rectified - Hall High Gain - Hall
Brit Stack - Hall
GENETX™ Gain - Hall
Tweed - Spring
GENETX™Crunch - Hall
Brit Combo - Spring
The Delay/Reverb has a TAP-IT button, with a flashing
LED (Delay Time), and a knob that adjusts Delay Level,
Reverb Level, or Delay+Reverb Level. The Delay/Reverb
knob has 3 ranges. The first range selects only the delay
and controls the Delay Level. The second range selects
only the reverb and controls the Reverb Level. The third
range selects both the delay and reverb and controls
both of their levels. To bypass the delay and reverb,turn
the knob fully counter-clockwise to the “OFF” position.
Modulación
El Genesis1 le ofrece 3 efectos de modulación entre los
que elegir: Chorus,Tremolo y Modulación de fase. Sólo
puede elegir simultáneamente un efecto de modulación.
El botón Modulation tiene un piloto de tres colores
(rojo,amarillo y verde) que indica el efecto elegido. Pulse
el botón
MODULATION hasta que su piloto se ilu-
mine con el color correspondiente al efecto que quiera
usar. Gire el mando hacia la derecha para aumentar la
velocidad y la intensidad de cada efecto. Por ejemplo:
CHORUS - Un Chorus añade a su señal un corto
retardo. La señal retardada es modulada con respecto a
su afinación y remezclada con la señal original para crear
un sonido más potente. Gire el mando para aumentar la
velocidad y disminuir la profundidad.
TREMOLO - El Tremolo modula el volumen de la
señal a una velocidad constante. Gire el mando para
aumentar tanto la velocidad como la profundidad.
PHASER - Este efecto de modulación de fase divide
la señal entrante, la desfasa y la remezcla de nuevo con
la señal original. Gire el mando para aumentar la velocidad y disminuir la regeneración (la profundidad permanece fija).
Para anular el efecto de modulación, pulse el botón hasta
que se apague el piloto.
Retardo/Reverb
El Genesis1 está equipado con efectos tanto de retardo
como de reverb. El retardo graba una parte de la señal
entrante y la reproduce un lapso de tiempo después. La
reverb produce sobre el oyente la sensación de que la
música está siendo reproducida en distintos entornos
acústicos. Puede usar el retardo y la reverb tanto de
forma independiente como juntos. El tiempo de retardo
es ajustado con el botón TAP-IT. Pulse este botón al
ritmo con el que quiera que se produzcan las repeticiones del retardo. El retardo tiene un rango de 100 ms
– 2.0 segundos.También dispone de dos tipos de reverb.
Spring (muelles) y Hall (salón). El tipo de reverb depende
del modelo de amplificador que haya elegido.Aquí abajo
tiene una lista de los tipos de reverb asociados con cada
modelo:
Black Face - Spring Fuzz - Hall
Boutique - Hall Hot Rod - Hall
Rectified - Hall High Gain - Hall
Brit Stack - Hall
GENETX™ Gain - Hall
Tweed - Spring GENETX™Crunch - Hall
Brit Combo - Spring
El retardo/reverb tiene un botón TAP-IT, con un piloto
parpadeante (tiempo de retardo) y un mando que ajusta
el nivel de retardo, nivel de reverb o el nivel de retardo+reverb. El mando retardo/reverb tiene 3 rangos. El
primer rango solo elige el retardo y controla el nivel de
dicho retardo. El segundo rango elige solo la reverb y
controla solo su nivel. El tercer rango elige ambos efectos y controla tanto el nivel del retardo como el de la
reverb. Para anular el efecto de reverb y de retardo, gire
el mando completamente a la izquierda hasta la posición
“OFF”.
5
Page 10

Gate
The Genesis1 has an adjustable noise gate with three
threshold settings. The noise gate is designed to eliminate hiss and ambient noise while you are not playing.
The noise gate has a single button with a 3-color LED
(red, green, yellow). Each color represents a different
noise gate threshold: HIGH (Yellow, MED (Green), and
LOW (Red). The lower the threshold, the easier it is to
open the noise gate. Press the Gate button until the
LED color lights with the setting you want to use. To
bypass the noise gate, press the button until its LED goes
off.
Puerta de ruidos
El Genesis1 tiene una puerta de ruidos ajustable con tres
valores de umbral. La puerta de ruidos ha sido diseñada
para eliminar los siseos y el ruido de ambiente mientras
no toca. La puerta de ruidos tiene un único botón con
un piloto de tres colores (rojo, amarillo y verde). Cada
color representa un umbral de puerta de ruidos distinto:
HIGH (alto – amarillo), MED (medio – verde) y LOW
(bajo – rojo). Cuanto menor sea el umbral, más fácilmente se abrirá la puerta de ruidos. Pulse el botón Gate
hasta que el piloto se ilumine con el color del ajuste que
quiera usar.Para anular este efecto de puerta de ruidos,
pulse el botón hasta que el piloto esté apagado.
6
Page 11

7
DECLARATION OF CONFORMITY
Manufacturer’s Name: DigiTech
Manufacturer’s Address: 8760 S. Sandy Parkway
Sandy,Utah 84070, USA
declares that the product:
Product name: Genesis1
Note: Product name may be suffixed by the letters EU, JA,UK and NP.
Product option: all (requires Class II power adapter that conforms
to the requirements of EN60065, EN60742, or equiva
lent.)
conforms to the following Product Specifications:
Safety: IEC60065 (1998)
EN 60065 (1993)
EMC EN 55013 (1990)
EN 55020 (1991)
Supplementary Information:
The product herewith complies with the requirements of
the Low Voltage Directive 72/23/EEC and the EMC
Directive 89/336/EEC as amended by Directive
93/68/EEC.
DigiTech / Johnson
8760 S. Sandy Parkway
Sandy,Utah 84070, USA
Date:August 31, 2001
European Contact: Your local DigiTech / Johnson Sales and
Service Office or
Harman Music Group
8760 South Sandy Parkway
Sandy,Utah
84070 USA
Ph: (801) 566-8800
Fax: (801) 568-7573
DECLARACION DE CONFORMIDAD
Nombre del fabricante: DigiTech
Dirección del fabricante: : 8760 S. Sandy Parkway
Sandy,Utah 84070, USA
declara que el producto:
Nombre del producto: Genesis1
Nota: El nombre de este producto puede llevar los sufijos EX, EU,JA y UK..
Opciones del producto: todas (requiere un adaptador de corri
ente de clase II que cumpla con los req
uisitos de EN60065, EN60742 o equiva
lente).
cumple con las siguientes especificaciones de producto :
Seguridad: IEC60065 (1998)
EN 60065 (1993)
EMC EN 55013 (1990)
EN 55020 (1991)
Información complementaria :
El producto citado anteriormente cumple con los requisitos de la Directiva de bajo voltaje 72/23/EEC y con la
Directiva EMC 89/336/EEC tal como quedó enmendada
por la Directiva 93/68/EEC.
DigiTech / Johnson
8760 S. Sandy Parkway
Sandy,Utah 84070, USA
Fecha: 31 de agosto de 2001
Contacto en Europa: Su distribuidor y servicio técnico oficial
DigiTech/ Johnson o
Harman Music Group
8760 South Sandy Parkway
Sandy,Utah
84070 USA
Ph: (801) 566-8800
Fax: (801) 568-7573
Specifications:
A/D D/A Converter: 24 bit
Sampling Frequency: 44.1kHz
DSP Section:
Dual DSP architecture with true 24-Bit stereo processing @
128 Million Instructions Per Second (MIPS)
Connections:
Guitar Input and Outputs: 1/4" TS
Headphone: 1/8" Stereo TRS
CD Input: 1/8" Stereo TRS
Line Output: 1/8" Stereo TRS
General (all modeling and effects disabled):
S/N ratio: Greater than 96.5dB (A
weighted); ref = max signal,
22kHz measurement band
width.
Total Harmonic Distortion: Less than 0.009% (1kHz).
Power Requirements:
US and Canada: 120 VAC, 60Hz
Japan: 100 VAC, 50/60Hz
Europe: 230 VAC, 50Hz
UK: 240 VAC, 50Hz
Power Consumption: 10 watts
Dimensions: Width 10.5" x Depth 6.6"
x Height 2.25"
Unit Weight: 1.1lbs.
Especificaciones técnicas:
Convertidor A/D D/A: 24 bit
Frecuencia de muestreo: 44.1kHz
Sección DSP:
Arquitectura de DSP dual con procesado stereo real de 24 bits
@ 128 millones de instrucciones por segundo (MIPS)
Conexiones:
Entrada de guitarra y salidas: TS de 6.3mm
Auriculares: TRS stereo de 3.5mm
Entrada CD: TRS stereo de 3.5mm
Salida de línea: TRS stereo de 3.5mm
General (modelado y efectos desactivados):
Relación S/R: Mayor que 96.5dB
(medición A);ref = señal
máxima,
22kHz ancho de banda
medido.
Distorsión armónica total: Inferior a 0.009% (1kHz).
Alimentación:
EE.UU. y Canadá: 120 VAC, 60Hz
Japón: 100 VAC, 50/60Hz
Europa: 230 VAC, 50Hz
UK: 240 VAC, 50Hz
Consumo: 10 watios
Dimensiones: Longitud 267mm x
Profundidad 168mm x
Altura 57mm.
Peso: 0,6kgs.
Page 12

8
8760 South Sandy Parkway
Sandy, Utah 84070
Telephone 801-566-8800
FAX 801-566-7005
International Distribution:
8760 South Sandy Parkway
Sandy, Utah 84070
Telephone 801-566-8800
FAX 801-566-7005
DigiTech, G
ENETX™, and Genesis1
are trademarks
of the Harman Music Group Incorporated
Copyright 2001
the Harman Music Group
Printed in the U.S.A. 8/2001
Manufactured in the U.S.A.
Genesis1 Manual 18-0423-A
Please visit DigiTech on the World Wide Web at:
http://www.digitech.com
8760 South Sandy Parkway
Sandy, Utah 84070
Telefonó 801-566-8800
FAX 801-566-7005
Distribución Internacional :
8760 South Sandy Parkway
Sandy, Utah 84070
Telefonó 801-566-8800
FAX 801-566-7005
DigiTech, G
ENETX™, y Genesis1
son marcas
registradas de Harman Music Group
Copyright 2001
the Harman Music Group
Impreso en U.S.A. 8/2001
Fabricado en the U.S.A.
Manual de instrucciones del Genesis1 18-0423-A
Visite la página Web de DigiTech en:
http://www.digitech.com
 Loading...