

Digital View VF-075-OF, Video Flyer 7” User Manual

- 1 -
Video Flyer 7” User Guide V1.1
(Model: VF-075-OF)
1
Introduction
VF-075-OF is a digital media player for non-network digital signage applications. It is ideal for
shelf edge, counter top and gondola type retail displays being both easy to integrate and ideally
suited to product promotions and marketing campaigns.
The player supports a number of media standards such as MPEG video and JPEG still image as
well as WMA and MP3 for audio. Video is stored on removable media such as SD card, CF card
and USB drives.
IMPORTANT USAGE NOTE
This equipment is for use by developers and integrators, the manufacturer accepts no
liability for damage or injury caused by the use of this product. It is the responsibility of
the developer, integrators or other user of this product to:
• Ensure that all necessary and appropriate safety measures are taken.
•
Obtain suitable regulatory approvals as may be required.
• Check power settings to all component parts before connection.
DISCLAIMER
There is no implied or expressed warranty regarding this material.
- 2 -
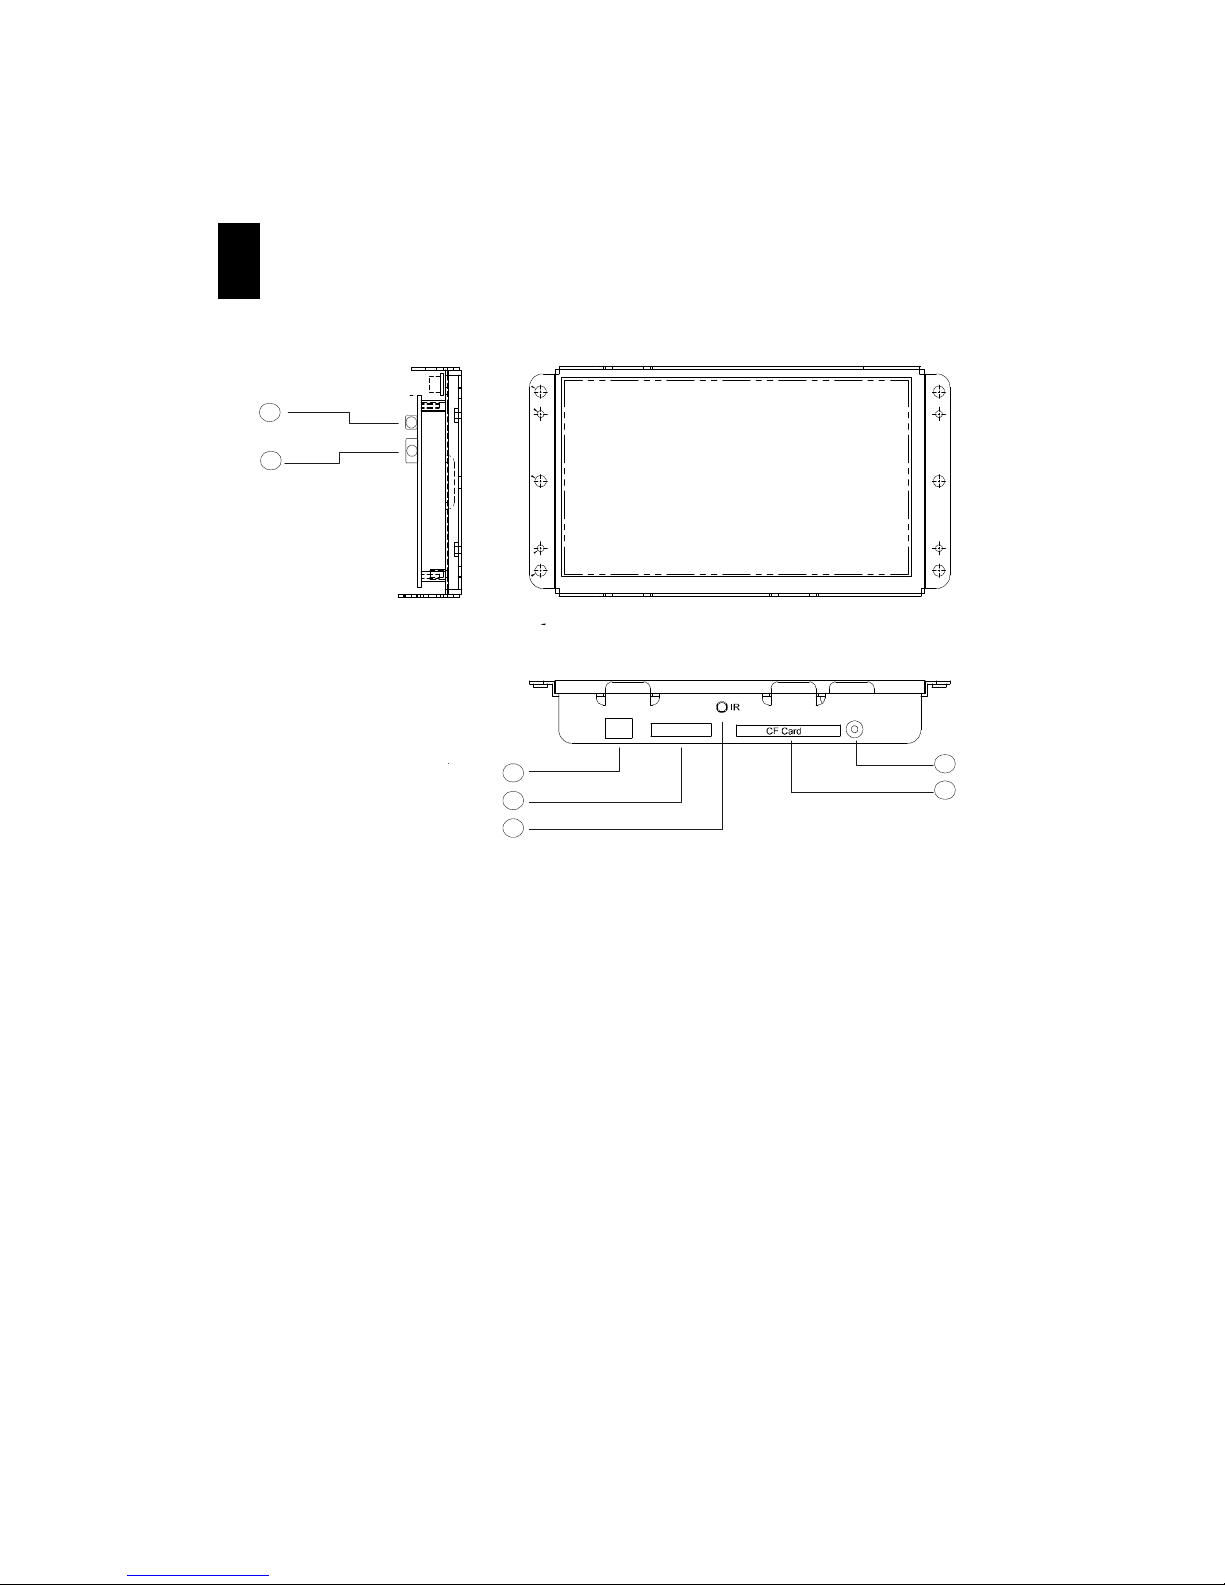
2 System Designs
Summary :
1. YPbPr video out
2. Audio out (Stereo Phone jack)
3. USB (for USB flash drive)
4. SD card slot
5. IR
6. DC in (DC 9V)
7. CF card slot
2
1
3
4
5
6
7
- 3 -
3 Instruction
CAUTION: Never connect or disconnect parts of the system when the system is powered up
as this may cause serious damage.
1) Setting Up
•
Remove the protective cover sheet on the LCD display.
• If you have purchased our remote control unit (RCU) , please pull out the battery
isolation sheet in the battery compartment of the remote control unit in the first use.
•
Plug your memory card with JPEG, MPEG-1 and MPEG-4 video into the corresponding
slot in the unit.
• Connect the mini plug of the AC-DC adaptor into the DC in (DC 9V) socket at the bottom
of the unit. Then the LCD display should come on after a few seconds after
2) Adjusting image quality
•
During playback of picture or video, click the TFT OSD button on RCU to select one of
the brightness, contrast, color and tint adjustments.
• Then use or button to adjust.
50 BRIGHT
50 CONTRAST
50 COLOR
50 TINT

- 4 -
3) Adjusting for 16:9 or 4:3 screen format
• This allows the frame to display the picture or video in the correct aspect ratio. The
aspect ratio will vary depending on the way the picture or video is captured. Most digital
cameras will provide picture in 4:3 format.
• Press the SCALE button on the RCU to toggle between the two formats. The screen size
and aspect ratio will be adjusted accordingly.
4) Using the setup menu
You have to press STOP () button to stop any picture and video playback before entering
the following setup menu.
• Press the SETUP button on your RCU to access the main page of setup menu.
• Use the or buttons to select the menu option that you need.
• Use the or to go back to previous level menu or to enter the next level menu.
• Press ENTER button to confirm selection.
• Press SETUP button to exit setup.
• Press ENTER button again or reboot the unit to resume playback.
16:9 Scaling
4:3 Scaling
GENERAL SETUP
VIDEO SETUP
PREFERENCES
EXIT SETUP
 Loading...