

DIGITAL MONITORING V-4061DB Installation Guide

V-4061DB VIDEO DOORBELL
Lens
Microphone
PIR Motion Detector
Ring Button
Installation Guide
PREPARING VIDEO DOORBELL FOR
INSTALLATION
1
1. The V-4061DB can be installed in place of a functional,
wired, 16-24VAC mechanical doorbell system, or with a 1624V wired transformer.
2. Once you have confirmed that the existing doorbell works,
shut o doorbell’s power at the breaker.
Figure 1: V-4061DB
DESCRIPTION
The V-4061DB is a Wi-Fi enabled
video doorbell capable of of
recording and storing video clips
that are viewable on the Virtual
The V-4061DB provides 16 GB of
storage on a pre-installed SD card
KeypadTM App.
for local recording.
Compatibility
• Virtual Keypad™ App Version
6.36 for iOS and Android
devices
What is Included?
• V-4061DB Video Doorbell
• Pre-installed 16 GB SD card
• 4 dierent color faceplate
options
• Power Kit
• Fuse and Screw Pack
• Vertical, Horizontal, and Flat
Wedges
• Weather Gasket
• Reversible Screwdriver
• Phillips Head
• Security Screw Bit
2
Figure 2: Video Doorbell
Layout
INSTALLING THE VIDEO DOORBELL
Replacing Existing Doorbell
1. Remove the existing doorbell from the wall, leaving the
existing wiring exposed.
2. Remove the security screws securing the faceplate to the
doorbell, then carefully remove the faceplate.
Note: The included screwdriver has a reversible head. The
star bit is used to remove the security screws from the
doorbell faceplate, and the Phillips-head bit is used for
installing the screws on the back of the doorbell.
3. Hold the doorbell flat against the wall where the old
doorbell was and mark the screw hole locations.
4. Drill the holes using the marks you made as a guide.
5. In the screw hardware pack, locate the screw used to
tighten down the wires and loosely attach these screws to
the back of the doorbell. It does not matter which wire is
connected to which screw.
Note: If you are using a 16-24V plug-in transformer to power
the doorbell, be sure to attach the included fuse to either
wire during installation. The fuse is not needed if the
doorbell is being connected to a standard 16-24V
mechanical doorbell chime.
6. Use the included screws to secure the doorbell to the wall.
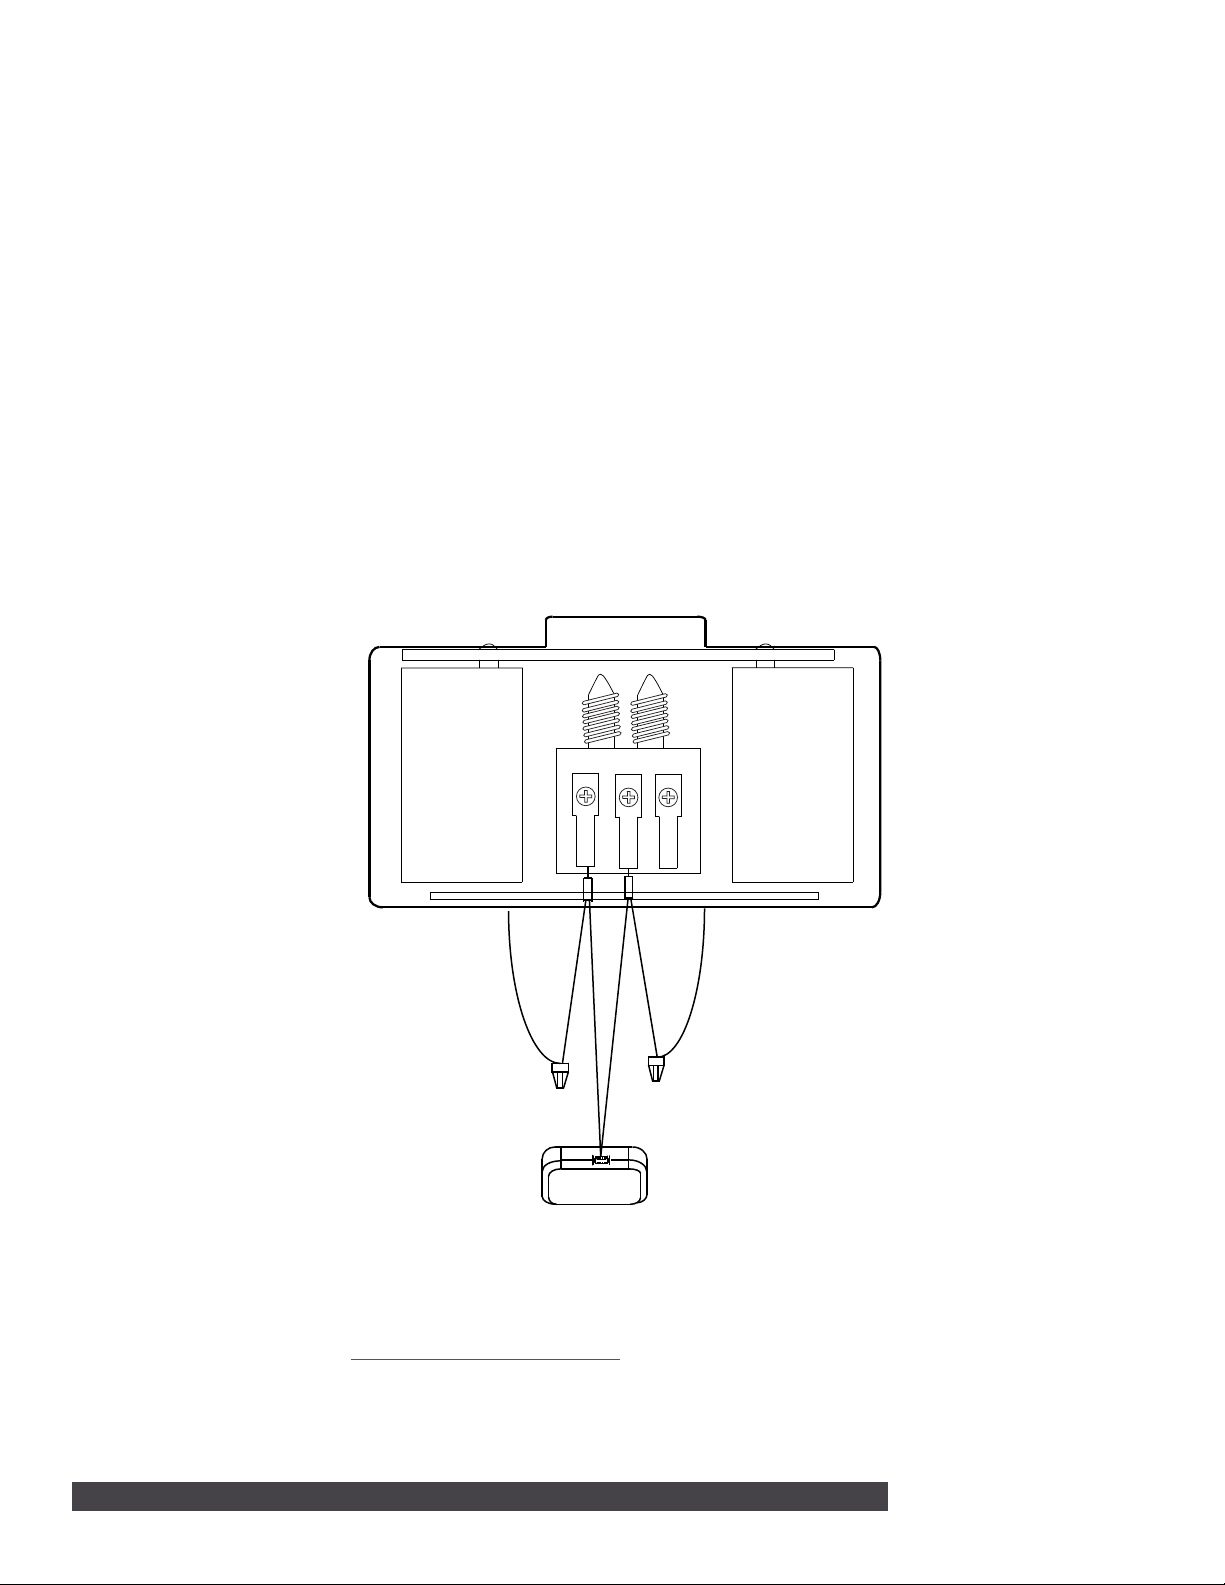
Existing Chime
3
INSTALLING THE POWER KIT
If you are not installing the doorbell with an existing mechanical chime, skip to section 4.
1. With the breaker supplying power to the mechanical chime still o, remove the cover from the
mechanical chime.
2. Loosen the TRANS terminal and connect the existing chime wire to the power kit wire using the
included wire nut.
3. Loosen the FRONT terminal and connect the existing chime wire to the power kit wire using the
included wire nut.
4. Connect the wire harness to the TRANS terminal and tighten it down.
5. Connect the other wire harness to the FRONT terminal and tighten it down.
6. Insert the white wire connector into the power kit.
7. Mount the power kit within the mechanical chime housing using the adhesive backing and replace the
cover.
8. Turn on the breaker to the part of the home where the video doorbell and mechanical chime are
installed.
4
Rear
Trans
Front
ENABLE THE VIDEO DOORBELL IN DEALER ADMIN
1. Log in to dealer.securecomwireless.com.
2. Select the appropriate system for the V-4061DB Video Doorbell.
3. On the System Information screen under Add-On Features, check the Video Doorbell box. This will
allow the doorbell to sync with the Virtual Keypad App.
Chime Wire
Power Kit
Figure 3: Installing the Power
Kit
Chime Wire
2 V-4061DB VIDEO DOORBELL | DIGITAL MONITORING PRODUCTS
 Loading...