

Digital Juice STAND3 User manual
The Aura 3-Point Lighting Kit offers a total of 1500W of hotlight equivalent
lighting power in an energy efficient, low-cost cool-running and compact
kit perfect for shooting both on location and in the studio. Each of the three
Aura light fixtures in the kit produces powerful, soft, flicker-free illumination,
useful for a variety of video and photographic applications. The lightweight
construction of the lights, stands and deluxe compact carry case make this
the ideal on-the-go kit, containing everything you need to get up and running
with a complete lighting setup in minutes.
• Kit includes a stylish deluxe compact carry case containing three DJ-
110HM 500W hotlight equivalent fluorescent light fixtures, three attached
gooseneck mounting arms, three 6’ light stands (each in its own soft
cloth bag) and 6 installed 55W biax fluorescent bulbs (2 per light).
• Aura lights are ideal when high output, energy efficiency, low cost and
minimal heat are priorities such as when shooting in tight spaces or when
power and cooling options are unknown or less than perfect.
• The attached two-way barndoors on each light allow you to alter the
shape and intensity of the light
• Gooseneck mounting arm attaches to any 5/8” (16mm) stud.
Getting Started Guide
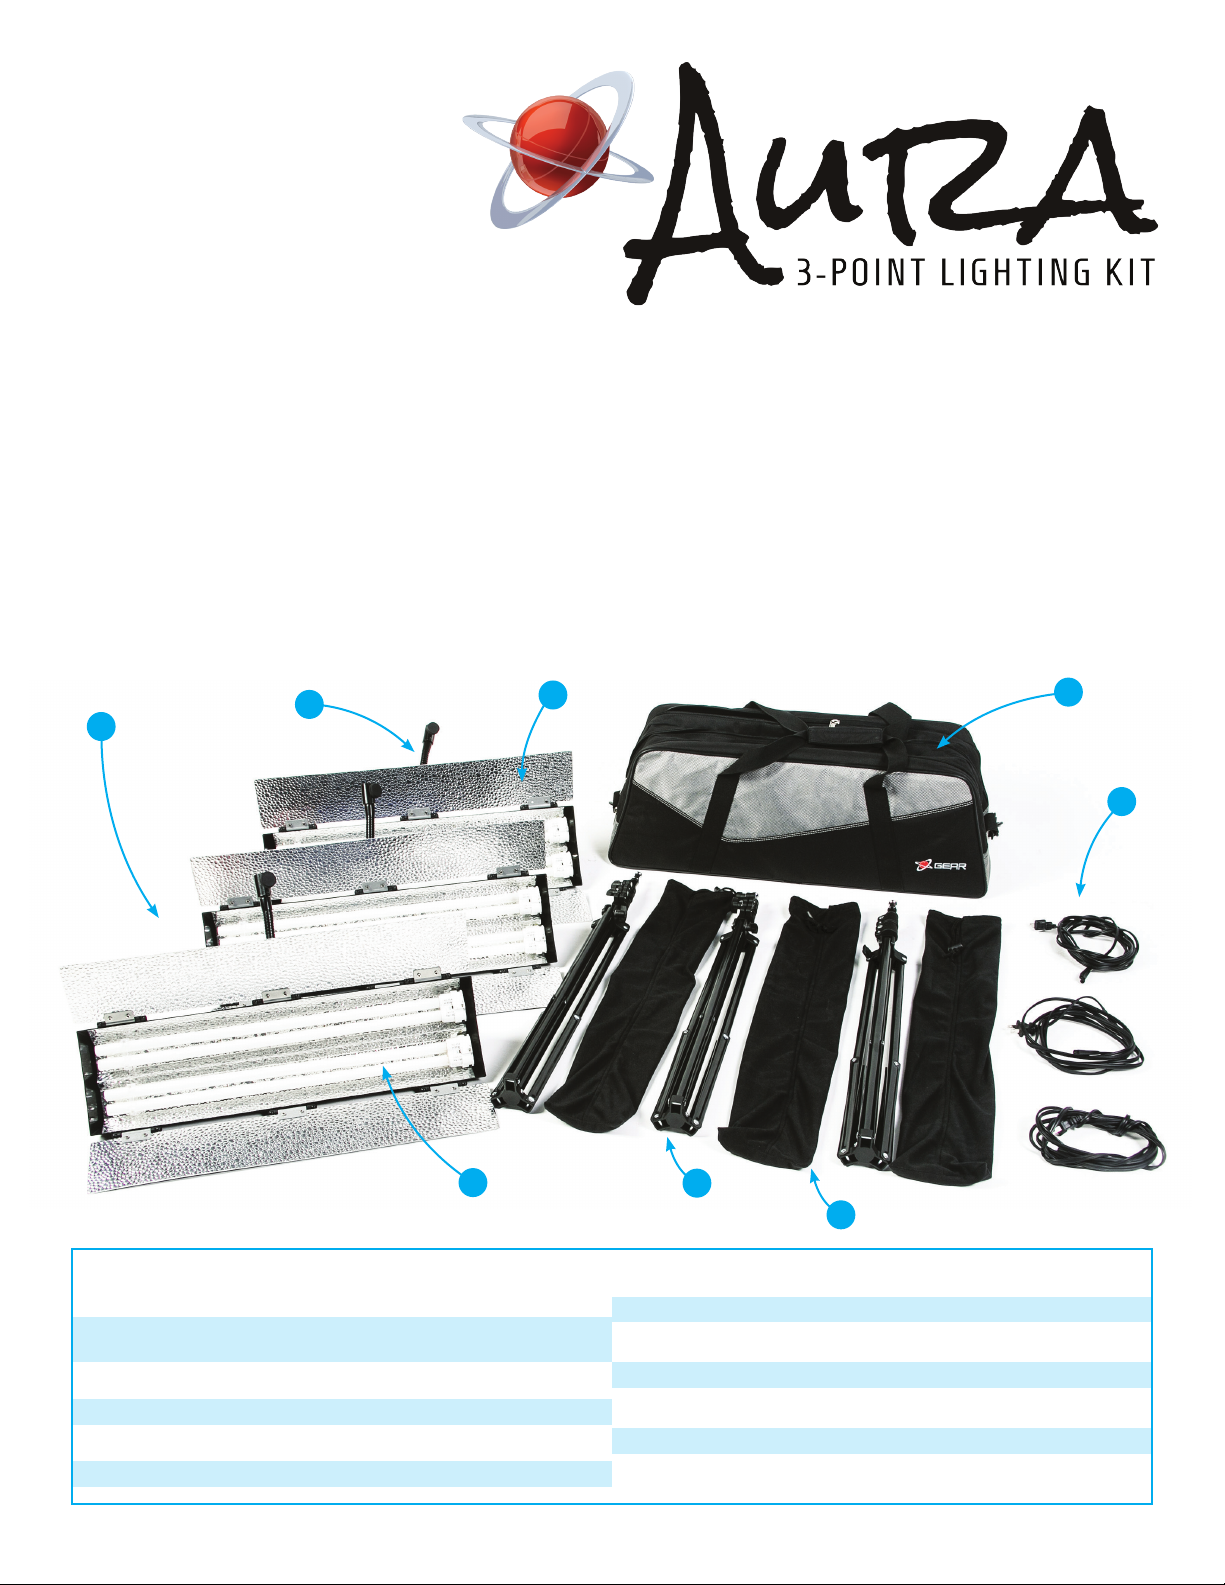
What’s Included:
1 Deluxe Carry Case with padded shoulder strap (1)
3 500W hotlight equivalent DJ-110HM Aura Fluorescent Light Fixtures
(2) with attached two-way barn doors (3) and flexible gooseneck
mounting arm (4)
3 6’ Light Stands (5), each with its own soft cloth carry bag (6)
3 Installed 55W Biax Fluorescent Bulbs (2 per light) (7)
3 Power Cords, one for each Aura fixture (8)
6 Replacement lamp fuses
2
TECHNICAL SPECIFICATIONS
4
7
3
5
6
1
8
Dimensions: 22.3” x 6.6” x 2.9”/56.6cm x 16.8cm x 7.4cm (per light
head); 27” x 10” x 9”/68.6cm x 25.4cm x 22.9cm (complete kit in bag)
Weight: 4 lbs/1.8 kg (per fixture with bulbs & gooseneck mount attached);
2.6 lbs/1.2kg (per light stand); 27 lbs/12.2kg (complete kit in deluxe carry bag)
Bulb Type: 2 x 55W Biax Fluorescent Lamps per fixture
Hot Light Equivalent: 500W
CRI: >90
Brightness: 3ft/2250 lux
Color Temperature: 5400K Daylight
Voltage: 100-130VAC
Lamp Life: Approx. 6,000 hrs
Mounting Assembly: Gooseneck arm with 5/8” attachment end
Frequency Range: 25kHz - 50kHz
Dimming: No
Power Draw: 100.6W @116VAC
(continued on reverse >)
Getting Started Guide (continued)
Setting Up the
Aura 3-Point Lighting Kit
9
10
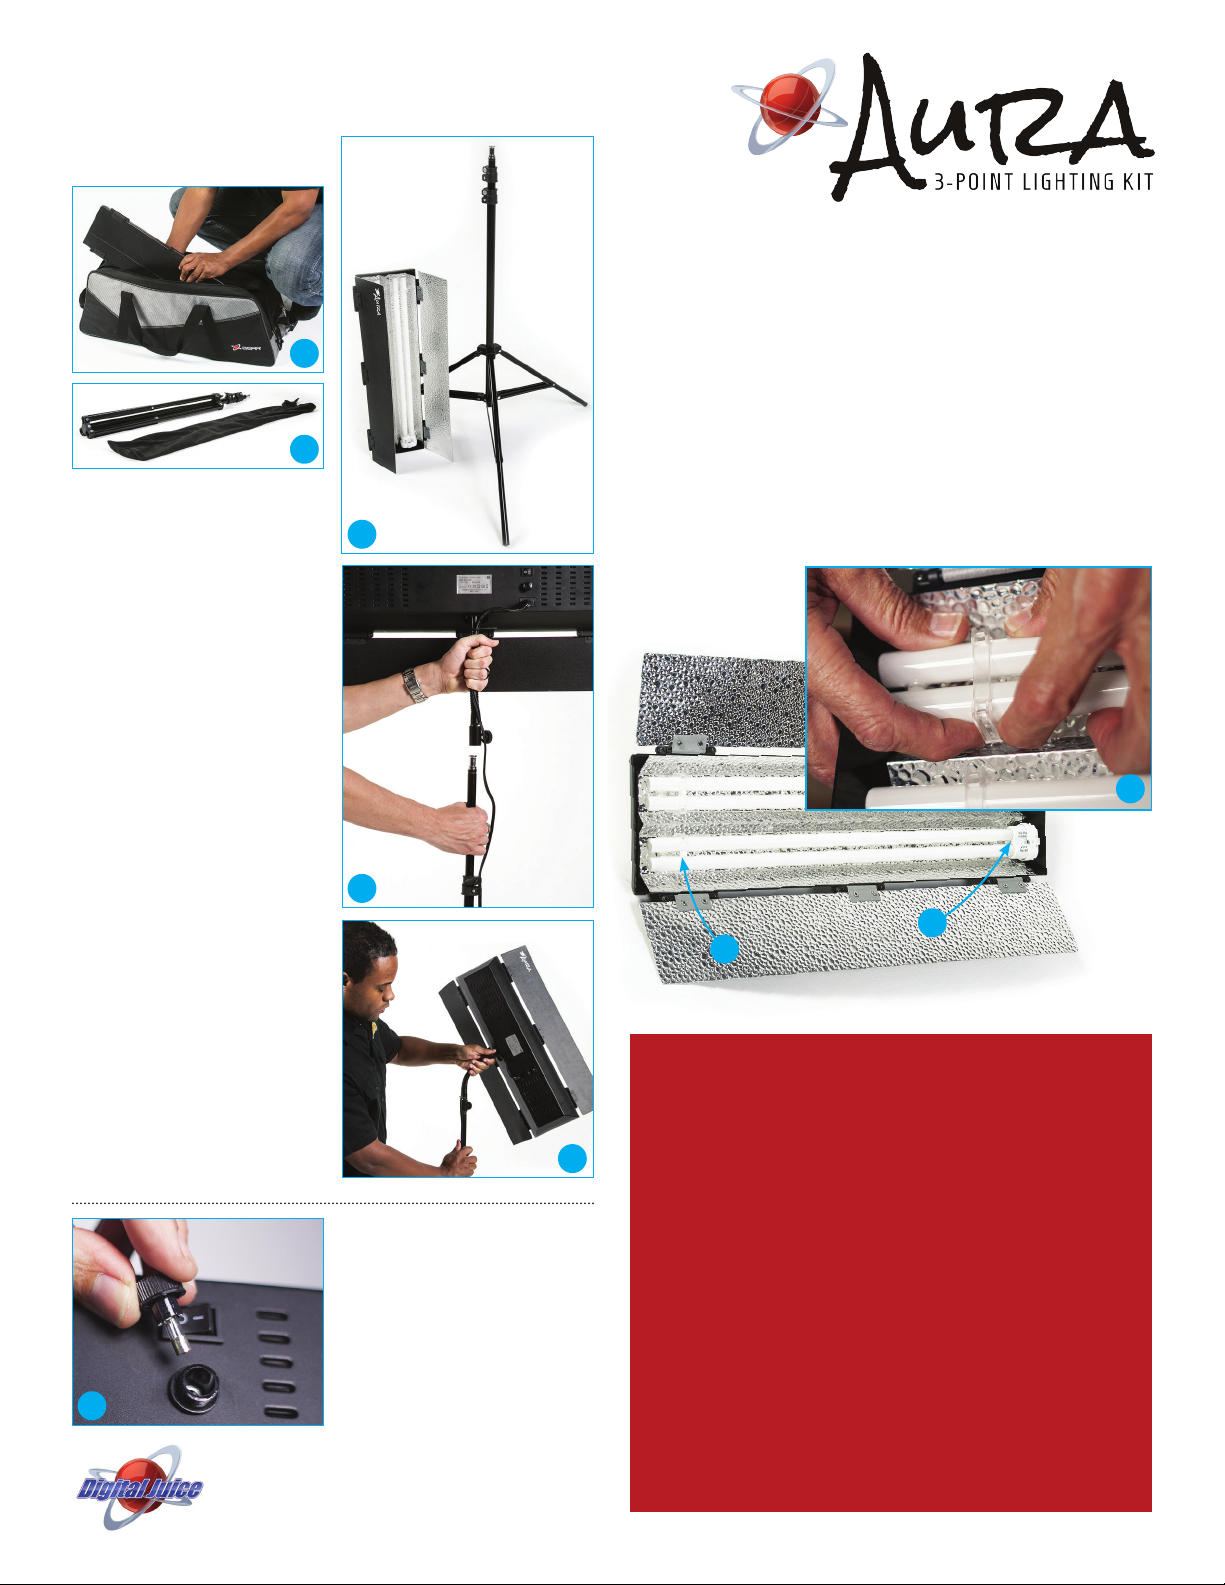
1) Unpack the three light fixtures,
power cords and light stands from
the deluxe carry bag (9).
2) Remove the light stands from their
cloth carry bags (10) and unfold
the tripod legs, setting the height
of the light stand as desired using
the screw knobs to adjust and lock
down the length of each spring
loaded section (11).
3) Attach the power cord to each
Aura fixture and then mount each
light to the top of a light stand by
sliding the end of the gooseneck
arm over the top mounting stud
and tightening the knob (12).
4) Adjust the position of each Aura
light by bending the gooseneck
arm as required (13). Plug in the
lights and you are ready to shoot.
Note: The Aura light fixtures are also
lightweight and compact enough to
use in a variety of other mounting
situations when there is not enough
room to use a light stand. They can be
attached to an available shelf or wall,
for example, using an articulating arm/
mini clamp combination or a suction
cup mount. Because they run very
cool, they can also be handheld by an
assistant when needed.
14
www.digitaljuice.com
11
12
13
Replacing Lamp Fuses
1) Disconnect the light fixture’s power
cord from power source.
2) Unscrew the FUSE twist knob on
the back of the unit (14) and pull
out the existing worn out fuse.
Install one of the replacement fuses
provided in the light kit by sliding it
into the fuse socket. Rescrew the
FUSE knob tightly. Reconnect the
power and continue use.
Replacing Bulbs in Your Aura Light Fixtures
1) Wait for the bulbs to cool if they have been in use and disconnect the power
cord from power source.
2) Remove the plastic buckle clip (15) holding the far end of the bulbs in
place. To do this, using two hands, carefully lift both sides of the buckle
clip at the same time, up and outwards, away from the bulb and the lower
half of the buckle fixture (16).
3) Remove the bulb from the lamp socket at the other end of the fixture (17)
and discard safely. Fit the new bulb into the lamp socket, applying a light
pressure to make sure it is seated properly in the socket and fitting the bulb
into the buckle at the other end.
4) Slide the buckle clip back on top of the bulb, snapping it to the bottom half
of the buckle fixture. Start using your Aura light once again.
16
17
15
Safe Handling & Efficient Use Of Aura Lights
• Avoid turning lights off and on more than necessary during use as
this will reduce lamp life.
• Turn off other lights indoors when shooting in order to avoid
effects on overall color temperature in your shots.
• Use fixtures only with specified voltage and frequency ratings.
• Avoid pulling the power cord to unplug or move the light fixture.
• Do not insert metal objects into the cooling grill holes on back of
fixture.
• Make sure power is disconnected when changing light fuses and
replacing bulbs.
• Discontinue use of the light fixtures if they become damaged. If
only the bulb is damaged it can be replaced. Otherwise, the lights
should be professionally repaired or discarded.
• Do not expose lights to dripping or splashing water and do not use
in wet environments.
 Loading...