

Page 1
I N S T R U C T I O N M A N U A L
HOSE END
WATERING
TIMER
CO72A
TAblE Of CONTENTS INTRODuCTION
Introduction .......................................1
Glossary .............................................2
Battery installation ............................3
Timer installation ...............................4
Technical data ....................................5
Programming
Set automatic watering .....................6
Changing start time ...........................7
Manual start .......................................8
Stop or NO watering ..........................9
Red LED - operating states .............10
Extra watering cycles ......................11
Troubleshooting ...............................12
Warranty...........................................14
Notes ................................................13
CO72A - Hose End Watering Timer
Thank you for purchasing this timer, please read
the operating instructions carefully to familarize
yourself with the features and modes of operation
before using the Hose End Watering Timer.
1 2
3
GlOSSARy
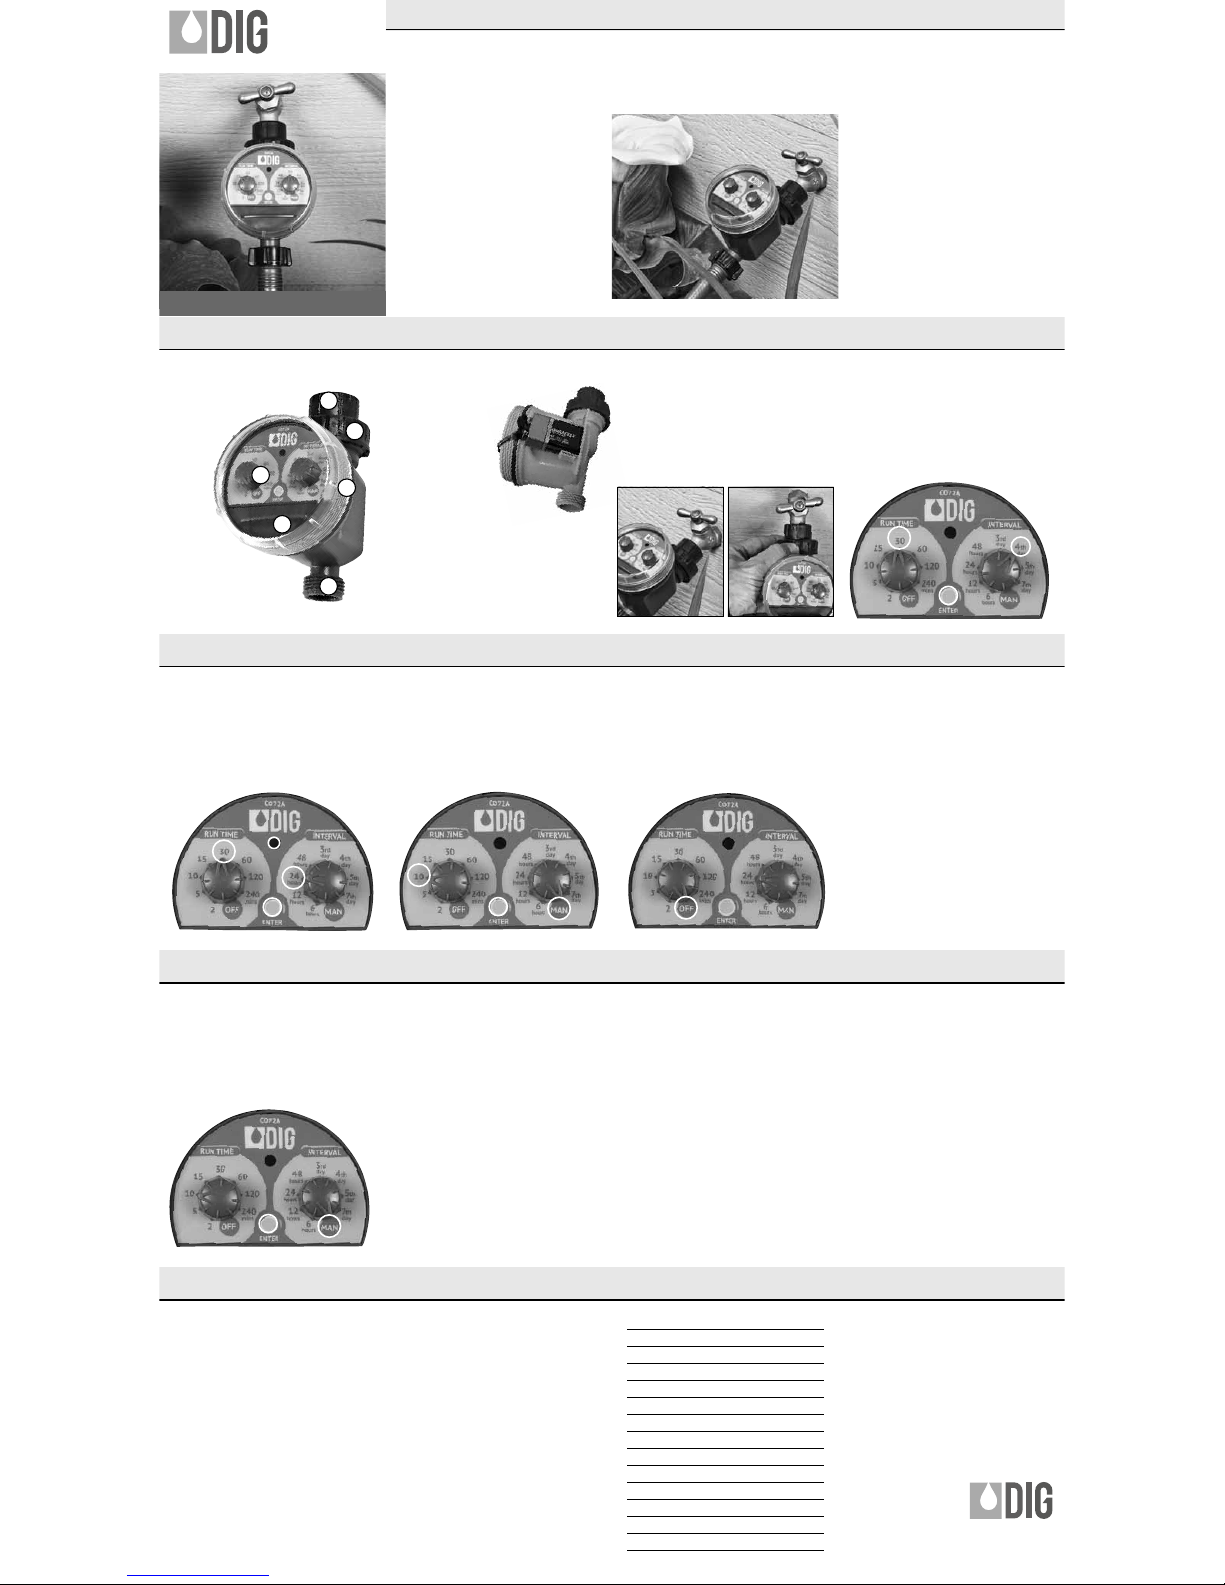
1. Inlet: 3/4 in. female hose
end connection
2. Union nut
3. Control dials
4. Battery compartment
5. Clear screw-on cover
6. Outlet: 3/4 in. male
hose end
1
2
3
4
5
6
bATTERy INSTAllATION TIMER INSTAllATION
TECHNICAl DATA
SET AuTOMATIC WATERING
456
Make sure the filter is in place and screw the
timer to the outdoor faucet by attaching the side
with the female hose thread connection to the
faucet or hose end, then turn it clockwise (A) hand tighten only. Loosen the union nut to allow
the hose end connection to swivel (B). Be sure
to re-tighten the union nut after the hose end
connection is tightened. Connect the timer male
hose thread side to your system or garden hose.
DIG - 2 Dial Hose End Watering Timer
Model Number: CO72A
Operating Pressure: 10-90 PSI
Battery: Use a standard 9 Volt ALKALINE battery.
Fluid: Only use cold water with NO
added chemicals.
Frequency Options:
Every 6 hrs, 12 hrs, 24 hrs, 48 hrs, Every 3rd Day,
Every 4th Day, Every 5th Day, Every 7th Day.
Run Time Options:
2, 5, 10, 15, 30, 60, 120 or 240 Minutes.
SET RUN TIME & WATERING INTERVAL
1. Turn “LEFT” dial to select RUN TIME.
2. Turn “RIGHT” dial to select INTERVAL.
3. Push “ENTER” - The Red LED will appear solid
for 10 seconds to confirm your selections, and
then it will initially water for the duration of the
selected RUN TIME.
In 24 hrs the timer will begin operating at the
selected INTERVAL.
CHANGING START TIME MANuAl START STOp OR NO WATERING RED lED – OpERATING STATES
7
8910
TO CHANGE THE START TIME
(Minimum 6 Hours)
1. While the Red LED is solid ON (see pg 6, step 3),
turn the “RIGHT” dial to select the DELAY time
& press “ENTER” again. This moves the START
time forward by the hours selected.
RUN TIME will begin at that time & thereafter at
the selected
INTERVAL.
HOW TO STOP THE TIMER WATERING
1. Turn “LEFT” dial to the OFF position.
While the RUN TIME (left) dial is in the “OFF”
position NO watering will happen.
Note:
To re-commence automatic operation,
move the
“RUN TIME”
dial to any other position.
SETTING THE TIMER TO START MANUALLY
1. Turn
“LEFT”
dial to select RUN TIME.
2. Turn
“RIGHT”
dial to MAN and press “ENTER”.
Note:
Running a manual run time will not change
any program previously entered.
Watering will begin and end at selected
RUN TIME.
Red LED - OPERATING STATES
as follows:
1. SOLID:
Confirms program & allows
“START TIME” change
2. FLASHING - 30 Seconds:
“ALL IS RUNNING CORRECTLY”
3. FLASHING - 1 Second:
“BATTERIES NEED CHANGING”
11
141213
ExTRA WATERING CyClES TROublESHOOTING
WARRANTy
WARRANTy
The manual operation mentioned previously
(pg. 8), can be used for running an extra cycle
while the timer is programmed.
The “MANUAL” cycle will run immediately after
the enter button is pressed.
The timer will resume the automatic program
once the manual time has elapsed.
1. Ensure your faucet is turned on.
2. Ensure your battery is in good condition.
USE ONLY ALKALINE BATTERIES.
Note: When the timer is not using an automatic
program, it must be in the “OFF” position.
Turn the faucet “OFF” when the timer is not in use.
MAINTENANCE
Turn the faucet off when the timer is not in use.
Check and clean screen washer periodically
as needed.
Remove the battery if the timer will not be used for
a prolonged time.
Shut off faucet and bring timer indoors when
temperatures drop below freezing.
DIG CORPORATION warrants these products to be free
from defects in material and workmanship for a period
of one (1) year from date of purchase. DIG will repair or
replace, at its option, free of charge, this product if it has
proven to be defective within the one year period when
said product is returned at customer expense to DIG
within the warranty period. THIS WARRANTY DOES NOT
COVER ANY EXPENSES INCURRED IN THE REMOVAL AND
REINSTALLATION OF THIS PRODUCT. This warranty does
not cover damage resulting from accident, misuse, abuse,
neglect, modification or improper installation, use for other
than its intended purpose or use with water with subjection
to line pressure in excess of 80 lbs. per square inch. This
warranty shall extend only to the original purchaser of the
product for use by the purchaser. This warranty shall not
cover batteries or any malfunction of the product due to
battery failure. The obligation of DIG CORPORATION under
this warranty is limited to repairing or replacing at its
factory this product which shall be returned to the factory
within one year after the original purchase and which on
examination is found to contain defects in material and
workmanship. DIG CORPORATION SHALL IN NO EVENT
BE LIABLE FOR ANY INCIDENTAL OR CONSEQUENTIAL
DAMAGES OF ANY KIND; THE SOLE OBLIGATION OF
DIG BEING LIMITED TO REPAIR OR REPLACEMENT OF
DEFECTIVE PRODUCTS. SOME STATES DO NOT ALLOW
THE EXCLUSION OR LIMITATION OF INCIDENTAL OR
CONSEQUENTIAL DAMAGES, SO THE ABOVE LIMITATION
OR EXCLUSION MAY NOT APPLY TO YOU. Unattended use
for prolonged periods without inspection to verify proper
operation is beyond the intended use of this product,
and any damage resulting from such use shall not be
the responsibility of DIG CORPORATION. There are no
warranties which extend beyond the description on the face
hereof. In the case of purchase of the product for use other
than for irrigation purposes, DIG CORPORATION hereby
disclaims any implied warranties including any warranties of
merchantability and fitness for a particular purpose.
WARRANTy
TECHNICAl ASSISTANCE NOTES
1210 Activity Drive
Vista, CA 92081-8510, USA
www.digcorp.com
e-mail: [email protected]
Should you encounter any problem(s) with this
product or if you do not understand its many
features, please refer to this instruction first.
If further assistance is required, DIG offers the
following customer support:
Technical Service USA
DIG’s Technical Service Team is available to
answer questions in English and Spanish from
8:00 AM to 5:00 PM (PST) Monday-Friday (except
holidays) at 800-344-2281. Questions in English
and Spanish can be e-mailed to questions@
digcorp.com or faxed to 760-727-0282.
In the case of the purchase of the product for personal,
family or household purposes, DIG CORPORATION disclaims
any such warranties to the extent permitted by law. In order
to obtain performance under this warranty, the unit must
be returned to the factory, along with proof of purchase
indicating original date of purchase, shipping prepaid,
addressed as follows:
DIG CORPORATION, 1210 Activity Drive, Vista,
CA 92081-8510. Repaired or replaced units will be shipped
prepaid to the name and address supplied with the unit
returned under warranty.
Allow four weeks for repairs and shipping time. Repair
of damaged units not otherwise within warranty may be
refused or done at a reasonable cost or charge at the option
of DIG CORPORATION. This warranty gives you specific legal
rights, and you may also have other rights, which vary from
state to state.
15
16
17
26-231 REVA
A B
• Unscrew and remove clear cover.
• Hold the timer with the battery
compartment facing you.
• Remove the battery
compartment cover
towards you
• Connect a
9V battery to the
battery connector.
• Insert the connected
battery and press on the
battery cover.
NOTE: When battery is first fitted, it takes up to
1 minute for the battery indicator to assess the
battery strength.
NOTE: When changing the battery, make sure
the battery compartment stays dry.
USE ONLY ALKALINE BATTERIES.
Page 2
M AN U A L d e I N S TR U C CI O N eS
TEMpORIZADOR
DE CIERRE DE
MANGuERA 2-DIAl
C072A
ÍNDICE INTRODuCCIóN
GlOSARIO
1 2
3
INSTAlACIóN DE lA bATERÍA INSTAlACIóN
DATOS TÉCNICOS
AJuSTE DE RIEGO AuTOMÁTICO
456
CAMbIAR El TIEMpO DE INICIO ENCENDIDO MANuAl DETENER RIEGO O NO REGAR lED ROJO – OpERACIóN
7
8910
11
141213
DE RIEGO ADICIONAlES
SOluCIóN DE pROblEMAS
GARANTÍA
GARANTÍA
GARANTÍA
ASISTENCIA TÉCNICA NOTAS
1210 Activity Drive
Vista, CA 92081-8510, USA
www.digcorp.com
e-mail: [email protected]
15
16
17
Introducción ........................................1
Glosario ................................................ 2
Instalación de las baterías ....................3
Instalación del temporizador ................4
Datos técnicos ...................................... 5
Programación
Ajuste de riego automático ................... 6
Cambio de hora de inicio ......................7
Inicio manual ........................................ 8
Detener riego o no regar ......................9
LED rojo – Estados de operación ........ 10
Ciclos de riego adicionales .................11
Solución de problemas ....................... 12
Observaciones .................................... 13
Asistencia técnica .............................. 16
Gracias por adquirir este temporizador, por
favor, antes de utilizar el temporizador para cierre
de manguera 2-Dial, lea cuidadosamente las
instrucciones de operación para familiarizarse con
las características y modos de Funcionamiento.
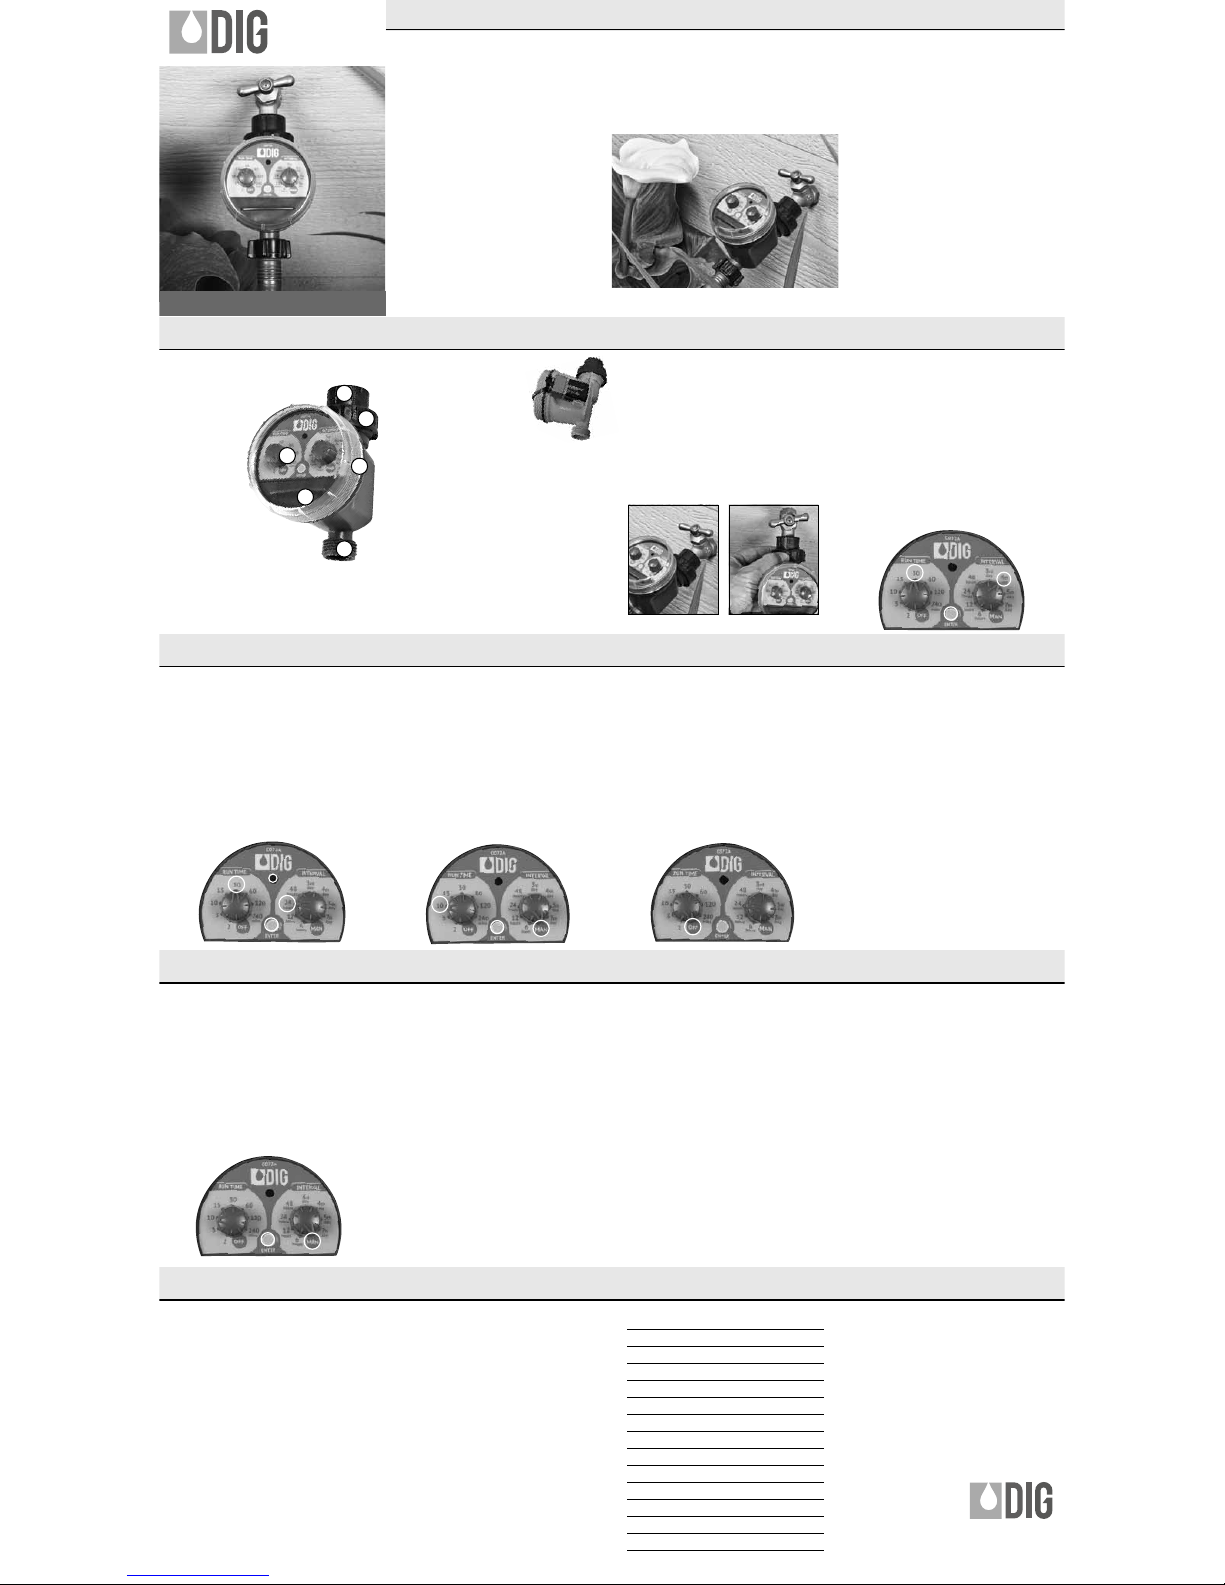
1. Entrada: Rosca hembra para
manguera de 3/4 de pulg.
con filtro
2. Tuerca de unión
3. Selector giratorio
de control
4. Compartimiento de la batería
5. Cubierta atornillable
transparente
6.Salida: Rosca macho
para manguera de
3/4 de pulg.
• Destornille y retire la
cubierta transparente.
• Sostenga el temporizador
orientando el compartimiento
para baterías hacia usted.
• Retire la cubierta del compartimiento
de baterías, levantando de un lado.
• Conecte una batería de 9V al conector de batería.
• Inserte la batería conectada y coloque
la cubierta de la batería presionando.
NOTA: Cuando primero se conectan las baterias,
puede tomar hasta un minuto para que el controlador
indique la carga de las baterias.
NOTA: Al cambiar la batería, asegúrese que
el compartimiento de la batería se mantenga seco.
UTILICE ÚNICAMENTE BATERIAS DE
9V ALCALINAS.
Asegúrese de que el filtro (arandela) esté colocado,
después atornille el temporizador a la llave/grifo de
agua, uniendo el extremo con el conector giratorio
de rosca hembra a la manguera, y gire hacia la
derecha (sólo apriete a mano). Suelte la tuerca de
unión para permitir que la conexión del extremo de
la manguera gire (B). Asegúrese de volver a apretar
la tuerca de unión después de apretar la conexión
del extremo de la manguera. Conecte la rosca
macho de la manguera a su sistema.
Temporizador de cierre de manguera 2-Dial –
Grado profesional DIG
Modelo: CO72A
Presión máxima del agua: 10-90 PSI
Batería: Utilice una batería estándar de
9V ALCALINA.
Líquido: Utilice únicamente agua fría SIN
productos químicos añadidos.
Opciones de frecuencia:
Cada 6 hrs, 12 hrs, 24 hrs, 48 hrs, cada 3 días,
cada 4 días, cada 5 días, cada 7 días.
Opciones de tiempos de funcionamiento:
2, 5, 10, 15, 30, 60, 120 o 240 minutos.
AJUSTE DE TIEMPO DE FUNCIONAMIENTO E
INTERVALO DE RIEGO
1. Gire el selector “IZQUIERDO” para seleccionar
el TIEMPO DE FUNCIONAMIENTO.
2. Gire el selector giratorio “DERECHO” para
seleccionar el INTERVALO.
3. Presione “ENTER” – El LED rojo se encenderá
durante 10 segundos para confirmar su
elección, para después empezar a funcionar.
El riego se in iciará en 24 horas en el
INTERVALO sele ccionado.
PARA CAMBIAR EL TIEMPO DE INICIO (Mínimo
6 horas)
1. Mientras esté ENCENDIDO el LED rojo de
manera fija (consulte la pág. 6, paso 3), gire el
selector giratorio DERECHO para seleccionar
el tiempo de RETARDO y vuelva a presionar
nuevamente “ENTER”.
Esto adelantará del tiempo de INICIO según
las horas seleccionadas.
El TIEMPO DE FUNCIONAMIENTO se iniciará
en ese momento y después, en el INTERVALO
seleccionado.
AJUSTE DEL TEMPORIZADOR PARA
ENCENDER MANUALMENTE
1. Gire el selector giratorio “IZQUIERDO” para
seleccionar el TIEMPO DE FUNCIONAMIENTO.
2. Gire el selector “DERECHO” hasta MAN y
presione “ENTER”.
Aviso: Ejecut ar un ti empo de funciona miento
manual no cambiar á ningun a
programac ión ante rior.
El riego iniciará y finalizará según el TIEMPO
DE FUNCIONAMIENTO seleccionado.
CÓMO DETENER EL RIEGO CON EL
TEMPORIZADOR
1. Gire el selector giratorio “IZQUIERDO” a la
posición de APAGADO.
Mientras el selector giratorio (Izquierdo) se
encuentre en la posición de “OFF” NO se
realizará ningún riego.
Aviso: Para reiniciar el funcionamiento
automático, gire el selector giratorio de
“RUN TIME” a cualquier otra posición.
LED Rojo - ESTADOS DE OPERACIÓN
como siguen:
1. FIJO: Confirma el programa y permite cambiar
la “START TIME”.
2. PARPADEANDO - 20 segundos:
“TODO FUNCIONA CORRECTAMENTE”.
3. PARPADEANDO - 1 segundo:
“SE REQUIERE CAMBIO DE BATERÍA”
La operación manual previamente mencionada
se puede usar para realizar un ciclo adicional
mientras el temporizador se encuentre
programado.
El ciclo “MANUAL” funcionará inmediatamente
después de que se presione el botón introducir.
El temporizador se revertirá al programa
automático, una vez que el tiempo de
funcionamiento manual haya transcurrido.
1. Asegúrese que la llave o grifo estén abiertos
2. Asegúrese que la batería esté en buenas
condiciones.
ÚNICAMENTE UTILICE BATERÍAS ALCALINAS.
3. Su programa iniciará inmediatamente
y después conforme a la frecuencia
seleccionada.
Aviso:
Si el temporizador no está utilizando un programa
automático, deberá estar en la posición
de “OFF”.
CIERRE la llave/grifo de agua si el temporizador
no está en uso. Retire la batería si no se utilizará
el temporizador por un tiempo prolongado. Cierre
la llave/grifo de agua y coloque el temporizador
bajo techo si las temperaturas disminuyen por
debajo del punto de congelación.
DIG CORPORATION garantiza que estos productos estarán
libres de defectos de materiales y mano de obra durante un
período de uno (1) años a partir de la fecha de compra. Esta
garantía no cubre los daños ocasionados por accidentes,
uso indebido, negligencia, modificaciones o instalación
incorrecta. Esta garantía se otorga únicamente al
comprador original que adquiera el producto para su propio
uso. Esta garantía no cubre las pilas, ni el funcionamiento
defectuoso del producto que se deba a una falla de las
pilas. El grado de responsabilidad de DIG CORPORATION
bajo esta garantía se limita a la reparación o sustitución de
este producto en su fábrica; el producto se deberá devolver
a la fábrica dentro de tres años a partir de la fecha de
compra original, y la inspección del mismo debe revelar
algún defecto de materiales o mano de obra.
DIG CORPORATION NO SERÁ RESPONSABLE BAJO
NINGUNA CIRCUNSTANCIA DE DAÑOS CONSECUENTES
O INCIDENTALES DE TIPO ALGUNO; LA OBLIGACIÓN DE
DIG SE LIMITARÁ EXCLUSIVAMENTE A LA REPARACIÓN
O SUSTITUCIÓN DE LOS PRODUCTOS DEFECTUOSOS.
ALGUNAS JURISDICCIONES NO PERMITEN LA EXCLUSIÓN
O LIMITACIÓN DE LOS DAÑOS INCIDENTALES O
CONSECUENTES Y, POR LO TANTO, ES POSIBLE QUE LA
EXCLUSIÓN O LIMITACIÓN ANTERIOR NO CORRESPONDA EN SU CASO. El producto no fue diseñado para
el uso por períodos prolongados sin que se averigüe su
funcionamiento adecuado, y los daños que resulten bajo
dichas condiciones de uso no serán responsabilidad de
DIG CORPORATION. La duración de ninguna garantía se
extenderá más allá del plazo de vigencia que se describe
en el presente documento. En el caso de los productos
adquiridos para usos que no sean la irrigación, por la
presente DIG CORPORATION rechaza toda garantía
implícita, incluidas las garantías de comerciabilidad y
adecuación a un fin determinado. En el caso de los
productos adquiridos para uso personal, de familia o en el
hogar, DIG CORPORATION rechaza todas dichas garantías
en la medida en que lo permita la ley. En la medida en que
la ley no permita tales rechazos de las garantías implícitas,
la duración de cualquier garantía implícita se limitará a un
período de tres años a partir de la fecha original en que el
comprador adquirió el producto para su propio uso. Algunas
jurisdicciones no permiten limitar la duración de una
garantía implícita, de modo que es posible que la exclusión
o limitación anterior no corresponda en su caso.
Para ejecutar esta garantía debe devolver la unidad a la
fábrica junto con el comprobante de compra que indique la
fecha de venta original, con flete prepagado, a la siguiente
dirección: DIG CORPORATION, 1210 Activity Drive, Vista, CA
92081-8510, EE.UU. Las unidades reparadas o sustituidas
se enviarán con flete prepagado al remitente y a la
dirección que se hayan proporcionado con la unidad
devuelta bajo la garantía. Las reparaciones y la devolución
del producto se realizarán dentro de un plazo de cuatro
semanas. Si una unidad dañada no está cubierta por la
presente garantía, es posible que nos neguemos a hacer las
reparaciones, o bien que se las hagamos a un costo o por
un cargo razonable, a opción de DIG CORPORATION.
Esta garantía le otorga derechos legales específicos, y es
posible que usted tenga otros derechos que varían de una
jurisdicción a otra.
Si encuentra cualquier problema o problemas con
este producto o si no entiende sus varias funciones,
por favor remítase primero a este manual. Si quiere
más asistencia, DIG ofrece el siguiente servicio al
cliente: DIGPRO
™
Technical Service USA El equipo
de servicio técnico de DIG’s Technical Service está
disponible para responder cualquier pregunta en
Inglés o Español de 8:00 AM a 5:00 PM (Tiempo
del Pacífico) de lunes a viernes (salvo en días
festivos) al 800-344-2281. Las preguntas pueden
ser enviadas por correo electrónico a questions@
digcorp.com o enviadas por fax al 760-727-0282.
26-231 REVA
1
2
3
4
5
6
A B
 Loading...