


I N S T R U C T I O N M A N U A L
Hose Thread Battery Operated Timer
Model 9001D, 9001DB, and 9001DC
The 3/4" hose end timers have a wide range of features offering a reliable cost effective solution for residential uses.
Features
•Ideal for drip irrigation
•4 start times per day with durations from 1 minute to 12 hours
•Maximum flow rate 5.2 GPM
•Simple 4-button programming
•Powered by 1, 9-volt alkaline battery
•Weekly programming
•Manual operation (via the time)
1. INTRODUCTION
Thank you for purchasing DIG's 3/4" Hose End Timer. This manual is designed to help set up the 3/4" Hose End Timer. After reading the manual and getting familiarized with the basic functionality of the device, use the manual as a reference for less common tasks in the future.
Please take the time to read through the enclosed instructions and follow them step-by-step. If you have any questions, please call our customer service line 1-800-322-9146.
2.HOSE END TIMER PARTS IDENTIFICATION
1.3/4” female swivel hose thread faucet/tap adapter
2.Screen washer
3.Top cover
4.Timer display
5.Programming buttons
6.3/4” male hose thread connection
7.Battery compartment
3.BATTERY INSTALLATION
•Hold the timer with the battery compartment facing up
•Remove the battery compartment cover
•Connect the 9-volt battery to the battery connector (see male/female connectors)
•Insert the battery and press the cover to lock
When changing the battery make sure the battery compartment stays dry.
Use 9-volt alkaline batteries only (not included).
4. TIMER INSTALLATION
The 9001 timer can be attached to a hose end such as a faucet/spigot or garden hose. Make sure the screen washer is in place inside the swivel. Then screw the timer to the male hose end by attaching the side with the 3/4” swivel hose thread to the faucet/spigot or garden hose. Turn it clockwise (hand tighten only). Connect any other components with female hose thread to the outlet side.
5. ABOUT THE PROGRAM
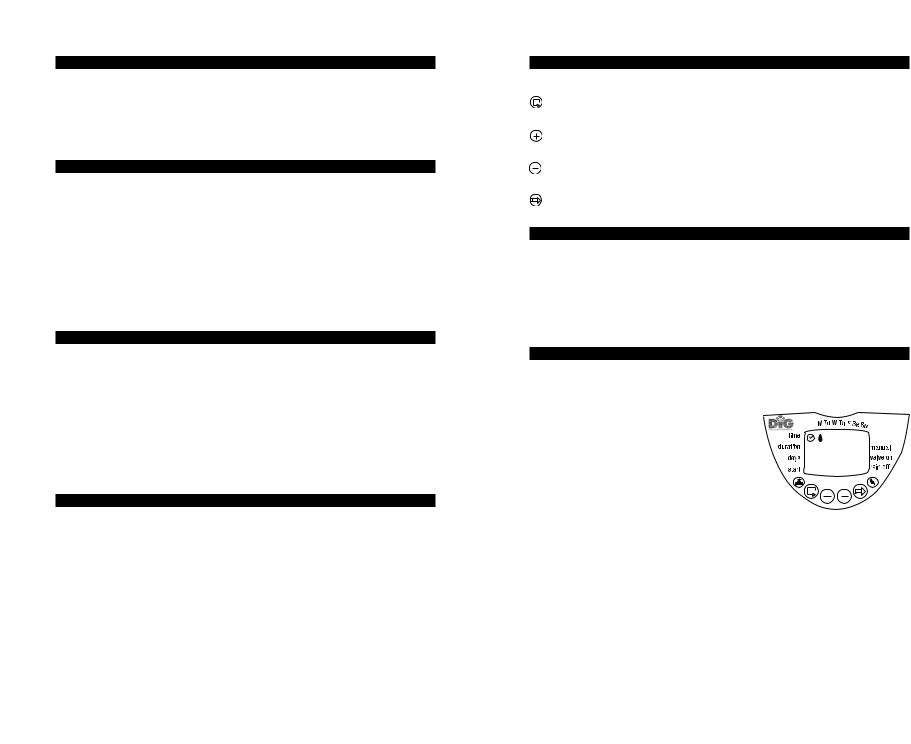
The digital timer is programmed with the aid of 4 buttons.
Programming Mode: Use to accept and/or select the desired programming mode.
Data Increment (increase): Use to raise the value of the selected program feature (e.g. increase the minute and hour).
Data Decrement (decrease): Use to lower the value of the selected program feature (e.g. decrease the minute and hour).
Parameter Selection: Use to select a value that can be changed.
6.NOTES
•If no changes are implemented, the timer display will always revert to the main screen (clock).
•Display digits will stop blinking after 40 seconds. If the last digit (programmed feature) stops blinking before programming is complete, press to restart and continue the process.
•Emergency Irrigation: After inserting the battery, if no buttons are pressed the clock will blink continuously. After 10 minutes the timer will implement 5-minute irrigation every 24-hours (default mode).
7.PROGRAMMING
To enable the irrigation timer to operate the irrigation system at the desired intervals or times, the current time and day of the week must be set as shown:
7.1 SETTING THE CURRENT TIME & DAY OF THE WEEK
To enable the timer to operate the irrigation system |
|
at the required time, the current time and day of the |
|
week must be entered using the 4 programming |
AM 12:06 |
buttons. |
1. Press  until
until  appears.
2. Press  and the hour digits will start blinking. Set the current hour with the aid of
  or
or  (note: AM and PM designation).
3.Press  and the minute digits will start blinking. Set the current minute with the aid of
  or
or  .
.
* For 24-hour clock display (military time): Once the hour/minute digits are not blinking or stop blinking, press concurrently the  and
and  and the time will switch from AM/PM to military time. Pressing these buttons simultaneously again will revert the display back to AM/PM hour display.
7.2 SETTING THE DAY OF THE WEEK
After the current time has been entered set the days of the week to irrigate.
1.Press  until a blinking
  appears at the top of the display.
2.Set the water droplet on the current day of the week by pressing  or
or  . Press
  to review.
3 |
4 |
|
|
|
|
 Loading...