

Page 1

User Guide
Walkabout™ Ultra Digital Recorder
Page 2

Trademarks
Dictaphone and Walkabout are trademarks or registered trademarks of
Dictaphone Corporation.
Other names and trademarks referenced herein are trademarks or registered
trademarks of their respective owners.
Copyright Notices
This manual is copyrighted and all rights are reserved by Dictaphone
Corporation. No part of this publication may be reproduced, transmitted,
transcribed, stored in a retrieval system, or translated into any language or
computer language, in any form or by any means, electronic, mechanical,
magnetic, optical, chemical, manual, or otherwise, without the prior written
permission of Dictaphone Corporation, 3191 Broadbridge Avenue, Stratford, CT
06614-2559.
Copyright © 2002 Dictaphone Corporation. All rights reserved.
Disclaimer
Dictaphone Corporation makes a sincere effort to ensure the accuracy of
the material described herein. However, except as set forth in any license
documentation applicable to each product of Dictaphone, referred to
herein, Dictaphone makes no warrant, express or implied, with respect to
the quality, correctness, reliability, currentness, accuracy, or freedom
from error of this document or the product or products referred to herein
and specifically disclaims any implied warranties of merchantability and
fitness for any particular purpose. Dictaphone disclaims all liability for
any direct, indirect, incidental, consequential, special, or exemplary
damages resulting from the use of the information in this document.
Mention of any product not manufactured by Dictaphone does not
constitute an endorsement by Dictaphone of that product.
Visit Dictaphone on the Web at: www.dictaphone.com
L-2703-001 05/2002
Page 3

Notice
Dictaphone is strongly committed to creating high quality voice and data
management products that, when used in conjunction with your own company’s
security policies and practices, deliver an efficient and secure means of managing
confidential information.
Dictaphone believes that data security is best maintained by limiting access to
various types of information to authorized users only. Although no software
product can completely guarantee against security failure, certain Dictaphone
systems contain configurable password features that, when used properly,
provide a high degree of protection.
Please follow the guidelines for products used in conjunction with the Walkabout
Ultra recorder to ensure that the security features associated with these products
are fully utilized.
We strongly urge current owners of Dictaphone products that include optional
system password features to verify that these features are enabled! You can call
our support line, if you need assistance in setting up passwords correctly or in
verifying your existing security settings.
Electromagnetic Compatibility
This device complies with the requirements of Part 15 of the FCC Rules.
Operation is subject to the following two conditions: (1) this device may not
cause harmful interference, and (2) this device must accept any interference
received, including interference that may cause undesired operation.
This class B digital apparatus meets all requirements of the Canadian
Interference-Causing Equipment Regulations, ICES-003.
Cet appareil numerique de la classe B respecte toutes les exigences du Reglement
sur le materiel brouilleur du Canada.
Page 4

Revision History
DOCUMENT
NUMBER
L-2703-001 Initial release of the
SOFTWARE
VERSION
DESCRIPTION DATE
Walkabout Ultra User Guide
Published by Dictaphone Corporation
Stratford, Connecticut, USA
05/2002
The Customer Documentation Team strives to provide our customers with high
quality printed and on-line documentation for all Dictaphone products. If you
have comments or suggestions as to how we can improve our documentation for
your use, please e-mail us at:
[email protected]
Page 5

Contents
Overview ......................................................................1
Walkabout Ultra Digital Recorder .......................... 2
Features and Functions ......................................... 3
Display Screen ....................................................... 4
About Walkabout Ultra ...............................................5
Turning the Recorder On and Off .......................... 5
Uses of the Menu Button....................................... 5
Working with Folders ............................................. 6
Creating New Folders ............................................. 6
Moving Files from Folder to Folder ......................... 6
Turning Beeps On and Off ..................................... 7
Connecting Your Recorder to a PC ....................... 8
Transferring Files to Your PC ................................ 8
Using Your Ultra Recorder.......................................10
Turning the Recorder On and Off ........................ 10
Making a Recording............................................. 10
Setting the Microphone Sensitivity ....................... 10
Setting the Recording Speed ................................ 10
Using the Microphone ........................................... 11
Starting a Recording ............................................. 11
Pausing During a Recording ................................. 12
Inserting a New Recording .................................... 13
Using a Remote Microphone ................................ 13
Reviewing Statistical Information about
Recordings ..................................................... 13
Playing a Recording............................................. 14
Pausing During Playback ...................................... 14
Stopping a Recording that is Playing ................... 14
Speeding Up a Recording ..................................... 14
Slowing Down a Recording ................................... 14
Scrolling Through a Recording ............................. 15
Playing Recordings Continuously ......................... 15
Inserting and Deleting Text .................................. 15
Inserting New Text ................................................ 15
Adding New Text to the End of a Recording ......... 16
Deleting Existing Text ............................................ 16
Deleting Text from the End of a Recording ........... 17
Deleting Files and Folders ................................... 17
Deleting Entire Recordings ................................... 17
Deleting All the Files in a Folder ............................ 18
Deleting a Folder ................................................... 18
Deleting All the Files in a Memory ......................... 19
Bookmarking Text in Your Dictations .................. 20
Contents
i
Page 6

Contents
Creating Bookmarks ............................................. 20
Finding Bookmarks ............................................... 20
Working with Memory Cards ...................................21
Working with Memory Cards ............................... 21
Installing a Memory Card..................................... 21
Formatting a Memory Card ................................. 22
Removing Write-protection.................................. 23
Maintenance..............................................................24
General Care........................................................ 24
Installing/Replacing the Batteries ........................ 24
Monitoring Battery Level ....................................... 24
Setting the Time and Date ................................... 25
Memory Cards ..................................................... 26
Monitoring Memory Level ..................................... 26
Checking the Amount of Memory Remaining ....... 26
Troubleshooting........................................................27
Problems and Solutions....................................... 27
The Unit Will Not Operate ..................................... 27
The Unit Will Not Record ...................................... 27
The Unit Locks Up ................................................ 27
The Display Reads “Card Read Only” .................. 27
The Display Reads “Wrong Type of Card” ............ 28
The Display Reads “Int Memory Error F” .............. 28
Can’t Find a Folder ............................................... 28
Can’t Find a Recording ......................................... 28
Card Doesn’t Fit in the Recorder Correctly ........... 29
Warranty ....................................................................30
Limited Hardware Warranty................................. 30
Index ..........................................................................31
ii
Page 7
Overview
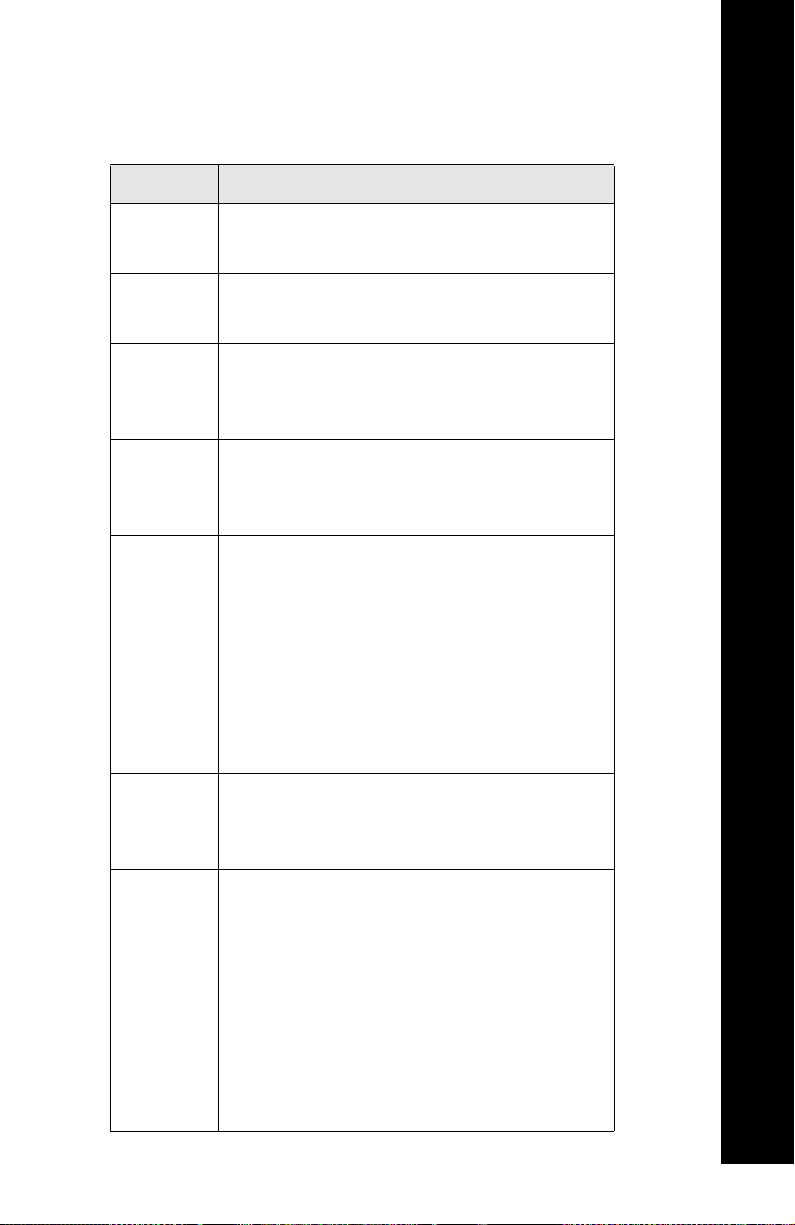
The following table identifies the primary functions of the
buttons on your Walkabout Ultra digital recorder.
Press: To:
Play
• Listen to a recording
• Stop playing
Overview
Record
Pause
Folder
Rewind/
Fast
Forward
Insert
• Create a recording
• Stop recording
• Momentarily stop during recording or
playback
• Resume play
• Move from folder to folder
• Move from the internal memory (I) to a
memory card (C)
• Move from recording to recording
within a folder
• Speed up or slow down a recording
during playback
• Fast forward or rewind a recording
during playback
• Adjust settings within the menu (for
example, clock time)
• Insert new text in a recording
• Insert a recording between two existing
recordings
Menu
• Adjust recording speed
• Set microphone mode
• Change the number of folders
• Turn beeps on or off
• Set the time and date
• View information on recordings
• Move files
• Access or set index marks
1
Page 8
Overview
Walkabout Ultra Digital Recorder
2
Page 9

Features and Functions
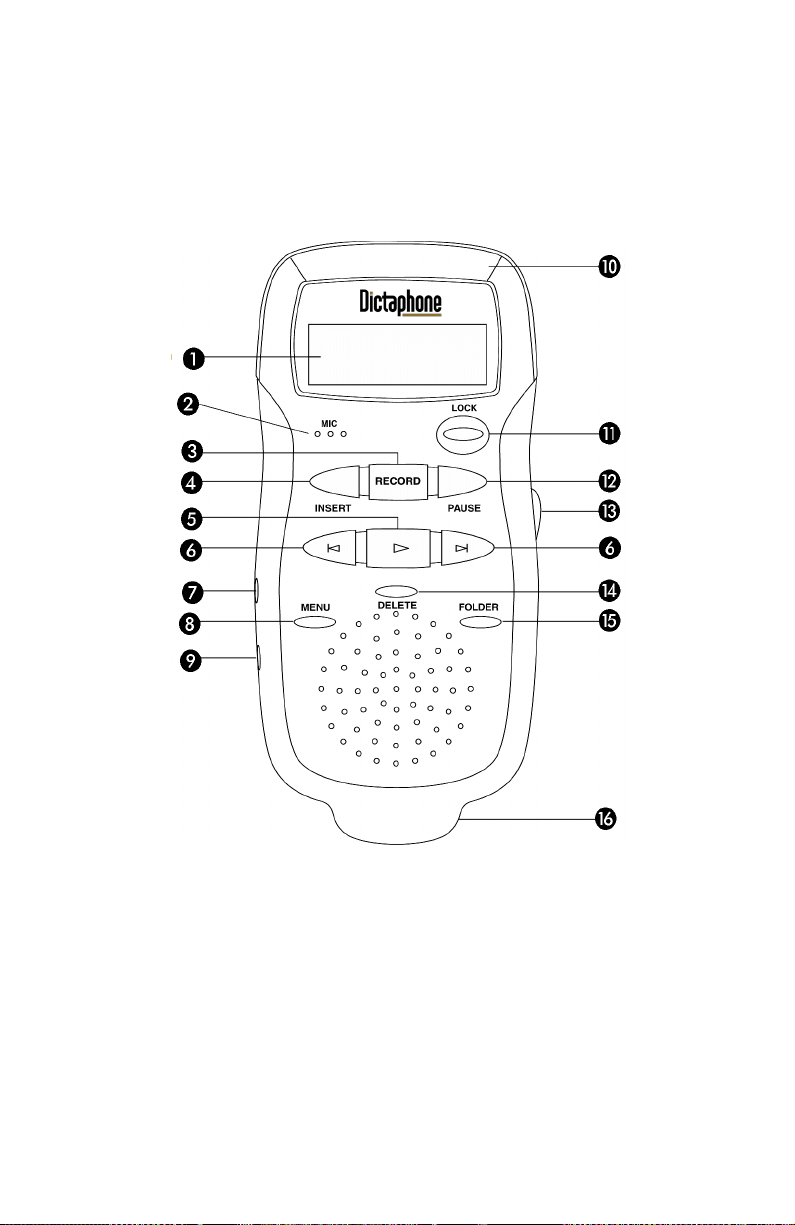
The image on the opposite page identifies each of the buttons and
features of the Walkabout Ultra digital recorder.
Backlit Display – Shows folders, functions, speed, memory
level, battery level, and memory card indicator.
Microphone – For voice-to-text recording, hold the
microphone about 2 inches away from your mouth.
Record – Starts and stops recording.
Insert – Inserts text within recordings and inserts new
recordings between other recordings.
Play – Starts and stops playback, used to set the time and date.
Rewind/Fast Forward – Moves you from recording to
recording, speeds up and slows down playback within a
recording, rewinds and fast forwards within a recording,
sets the clock.
Microphone Jack – Connects unit to an external microphone.
Menu – Accesses adjustments for the clock, recording speed,
beeps, microphone mode, and number of folders. Also
used to view information on files, move files, and set or
find index marks in recordings.
Earphone Jack – Connects unit to earphone or headsets.
Overview
Memory Card Door and Connector – Receives cards that
expand recording and storage capacity.
Power – Turns the Ultra
and date when pressed briefly, exits clock-setting mode.
Pause – Pauses during recording or playback; also used to
jump quickly to the end of a recording.
Vo l u m e C o n tr o l – Turns playback volume up or down.
Delete – Deletes recordings and sections of recordings marked
for deletion, exits clock-setting mode.
Folder – Moves you from folder to folder and from the
internal memory to a memory card.
Serial PC Link Connector – Connects the unit to a PC
through a serial port.
recorder on and off, displays the time
3
Page 10
Overview
Display Screen
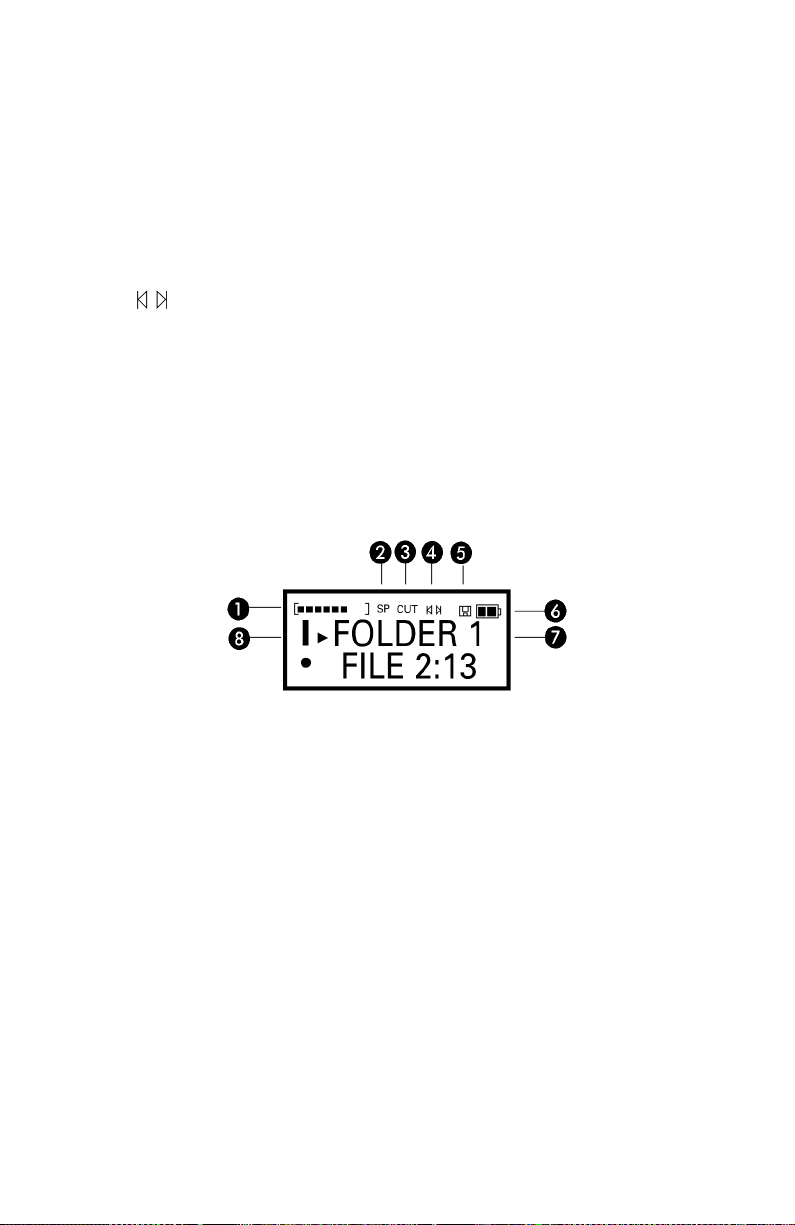
A typical screen display is shown below.
Memory Bar – Indicates how full the memory is.
Speeds – Shows whether
in use. If neither appear,
SP
(standard play) or LP (long play) is
VT
(Voice-to-Text) is the current
speed.
Cut Icon – Indicates that a deletion process is under way.
– Indicates recording move in progress.
Memory Card Icon – Appears if a memory card is inserted.
Battery Level – Shows the life remaining on the batteries.
Text Are a – Shows information on the current use of the
recorder, identifies recordings, gives information about
recordings.
Message Indicator – Shows the beginning or end of a
message.
4
Page 11
About Walkabout Ultra
Turning the Recorder On and Off
• To turn your recorder on, press the Power button and hold it
for about a second. The user name that was set during setup
will show briefly.
• To turn your recorder off, press the Power button and hold it
for about a second.
Uses of the Menu Button
Pressing and releasing the Menu button allows you to:
• access information on your recording files
• move files from one folder to another
• use setup controls for speeds, microphone sensitivity, beeps,
number of folders, and date and time.
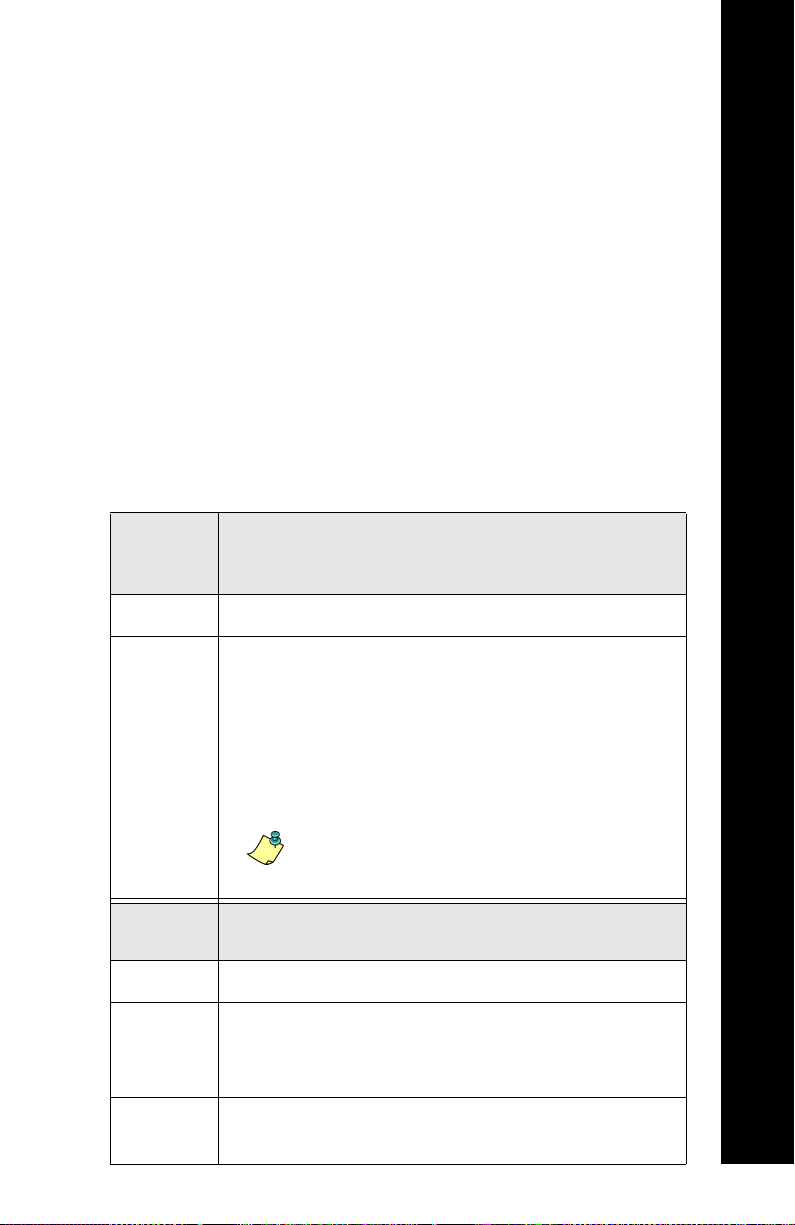
Press
and
release:
Menu enter the Menu function.
To:
About Walkabout Ultra
Menu cycle through the four menu sections:
• FILE INFO
• MOVE FILE
• SETUP
• CLOCK SET
Note: If the current folder is empty, you
will not see FILE INFO or MOVE
FILE.
Then
press:
To:
Play enter a section.
Rewind
or Fast
change settings or to scroll through notes attached
to recordings.
Forward
Delete or
Power
exit the Menu function and save any changes you
have made.
5
Page 12
About Walkabout Ultra
Working with Folders
Creating New Folders
Folders are used to organize and store your recordings. Different
types of recordings can be placed in different folders. Your Ultra
recorder can accommodate up to four folders on its internal
memory and up to four additional folders on the optional external
memory card. (See Working with Memory Cards on page 21.)
Folder names are configured by the system administrator during
system setup.
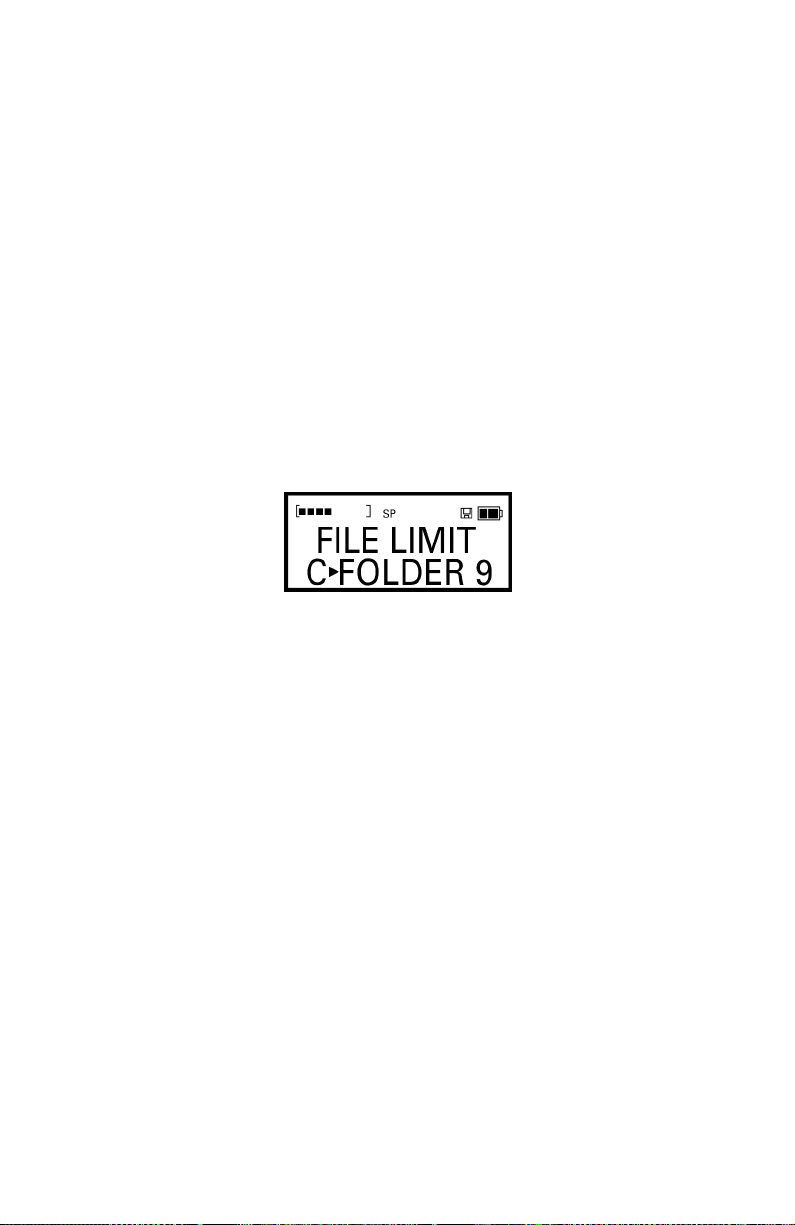
Each folder can hold up to 99 recordings. If you have many brief
recordings, you could encounter a full folder. When a folder is
full, the display will give you a FOLDER FULL message. This
doesn’t mean that you are out of memory. It means only that the
particular folder you are using cannot hold any more recordings.
To continue recording, simply move to another folder.
To move through your folders:
• Press and release Folder to move from folder to folder
and to move back and forth between internal memory and
a memory card.
• Press and hold Folder to move to the first folder of the
next memory.
Moving Files from Folder to Folder
You can easily move files within a folder or from one folder to
another. If you are working within a single memory (internal or
card), the file simply moves from one position to another. If you
move a file from one memory to another, the Ultra recorder
makes a copy of the file.
To move files from one folder to another:
1. When the file you want to move is displayed, press and
release Menu until you see MOVE FILE.
2. Press Play to select the current file as the one to be
moved. The icon at the top of the display will start
6
Page 13
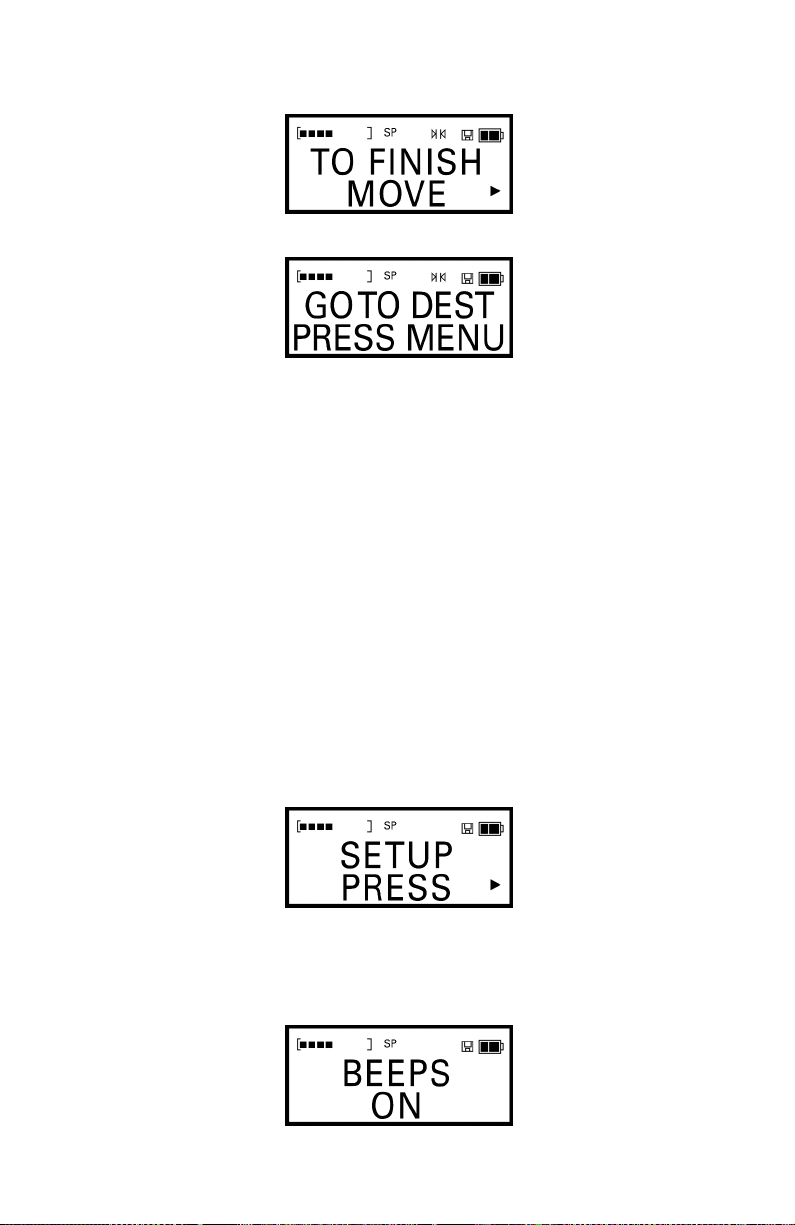
blinking to show a move is in progress. The following
instructions will appear on the display.
3. Locate the destination folder and the position within a
folder. The file will be inserted before or after the current
recording as indicated by the dot ( • ) next to the name.
4. Press Menu to place the file in the new location.
5. If you change your mind about moving the file, press and
quickly release Delete; the move will be canceled.
Turning Beeps On and Off
Yo ur Ultra recorder is programmed to beep in conjunction with
certain functions. Generally, low beeps indicate functions that
cannot be attempted. Higher beeps confirm actions. These beeps
can be turned on or off.
About Walkabout Ultra
To turn beeps on or off:
1. Press and release Menu until you see SETUP.
2. Press Play until you see the beeps option.
3. Press Rewind and Fast Forward to turn the beeps on
and off.
4. Press Delete or Power to exit the menu function.
7
Page 14
About Walkabout Ultra
Connecting Your Recorder to a PC
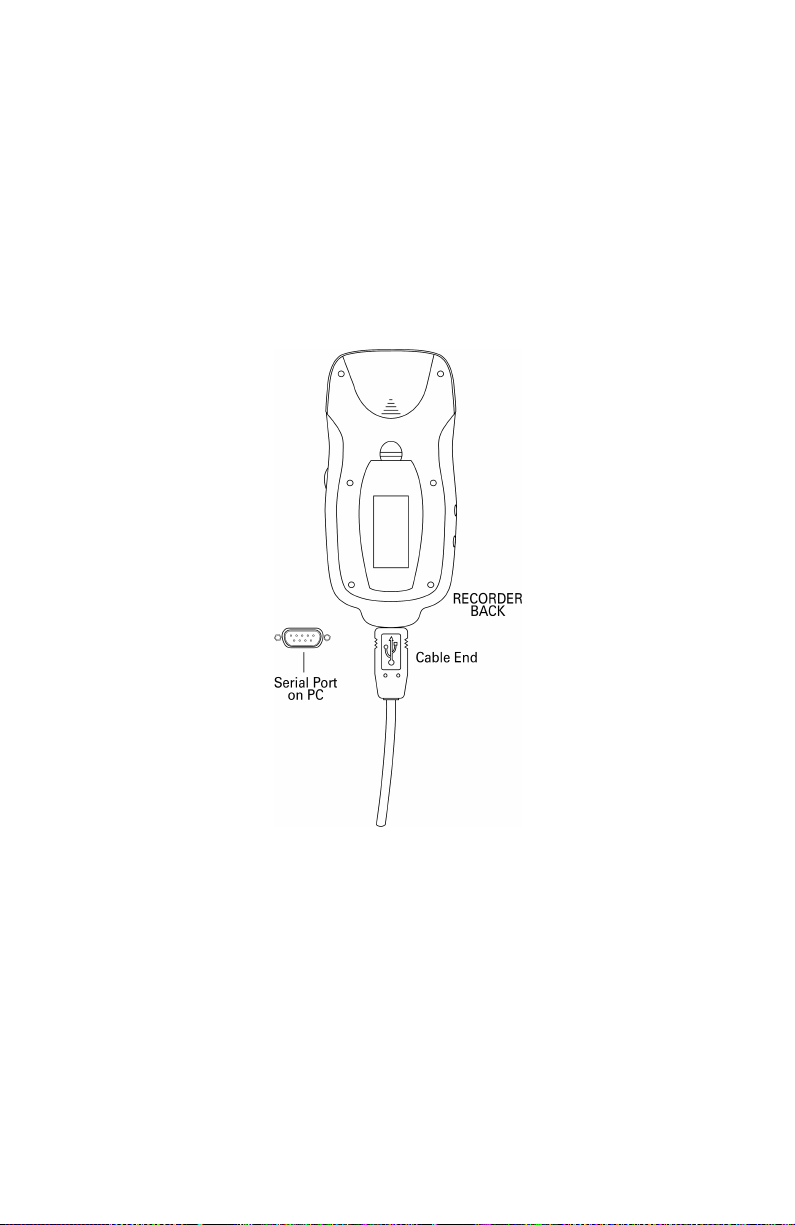
To connect your Ultra recorder to a PC:
1. Press the Power button to turn off the Ultra recorder.
2. Plug the end of the supplied cable into your Ultra
recorder.
3. Plug the other end of the cable into a free serial port on
your PC. You may have to disconnect another peripheral,
such as an external modem, to free up an appropriate port.
Transferring Files to Your PC
When your Ultra recorder is connected to the PC and the Lucid
Client application is running, it polls your recorder every 30
seconds and uploads the completed voice files.
To transfer voice files to your PC:
1. Connect your recorder to your PC as described in
Connecting Your Recorder to a PC.
2. Be sure the Lucid Client application is running on your
PC.
8
Page 15
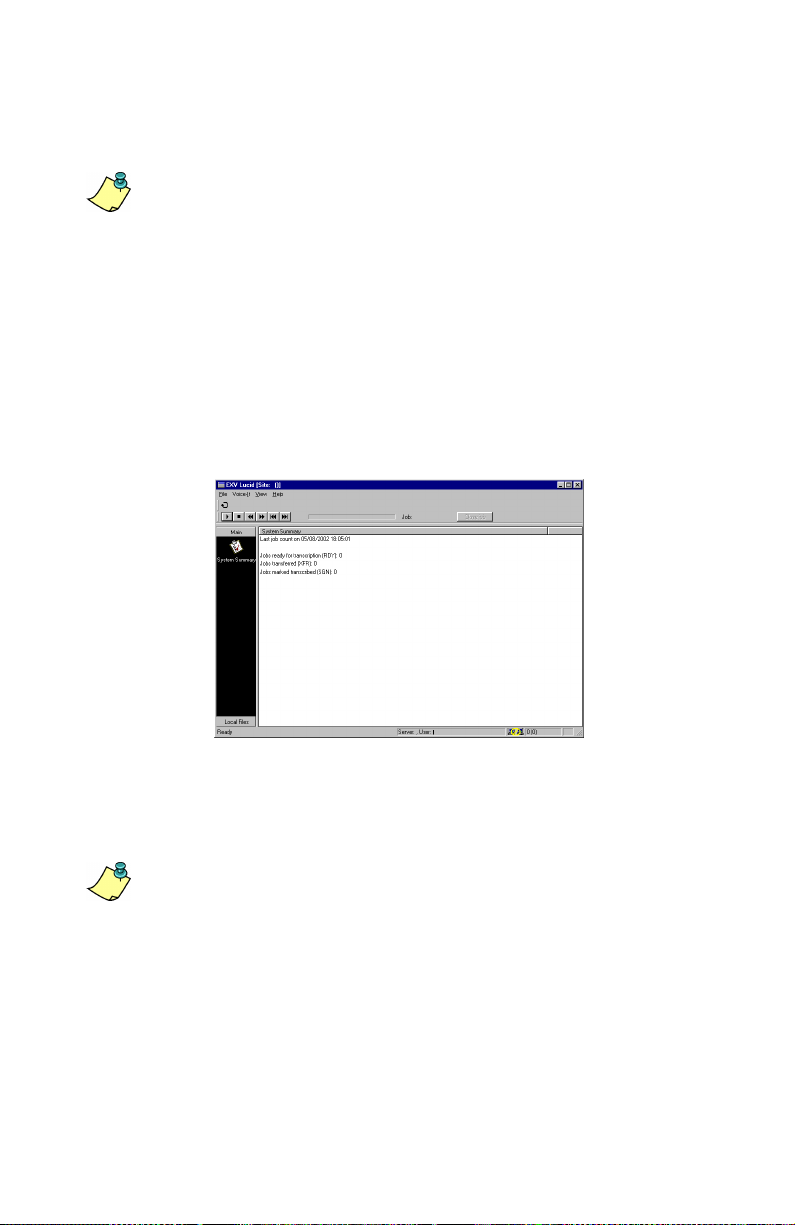
To launch the Lucid Client application:
1. Click Start > Programs > Dictaphone EXV Clients >
Lucid.
Note: When you launch the Lucid Client software, if a newer
version of the software is available, an information dialog
box is displayed. To begin the upgrade, click the Ye s button.
When the upgrade is complete, a message box is displayed
indicating that the upgrade has been completed. Click the OK
button to complete the upgrade process and restart the Lucid
Client application.
2. When the Enterprise Express Voice login screen is
displayed, enter your Straight Talk NE Login and
Password and click OK. The Lucid Client application
opens on your PC.
About Walkabout Ultra
3. When you are ready to exit the Lucid Client application,
click the Close button in the upper right corner, or you
can select File > Exit from the menu bar.
Note: If this is the first time you are launching the Lucid
Client application, an EXV Commander Selection dialog
box is displayed from which you can select a Straight Talk NE
system server.
If you see your Straight Talk NE server listed in the list box,
select the item and then click OK to connect to that server.
If you do not see your Straight Talk NE server listed, you can
add a server by clicking the New button and entering the
network address information. The Lucid Client connects to
the Straight Talk NE server and verifies that your version of
the Lucid Client matches the current version of the software
on the Straight Talk NE system.
9
Page 16
Using Your Ultra Recorder
Using Your Ultra Recorder
Turning the Recorder On and Off
• To turn your recorder on, press the Power button and hold it
for about a second. The user name that was set during setup
will show briefly.
• To turn your recorder off, press the Power button and hold it
for about a second.
Making a Recording
Setting the Microphone Sensitivity
You r Ultra recorder gives you a choice of two microphone
sensitivity settings – Dictation and Conference. For voice-to-text
recording, you must set the microphone to Dictation mode. For
recording at greater distances, use the Conference mode.
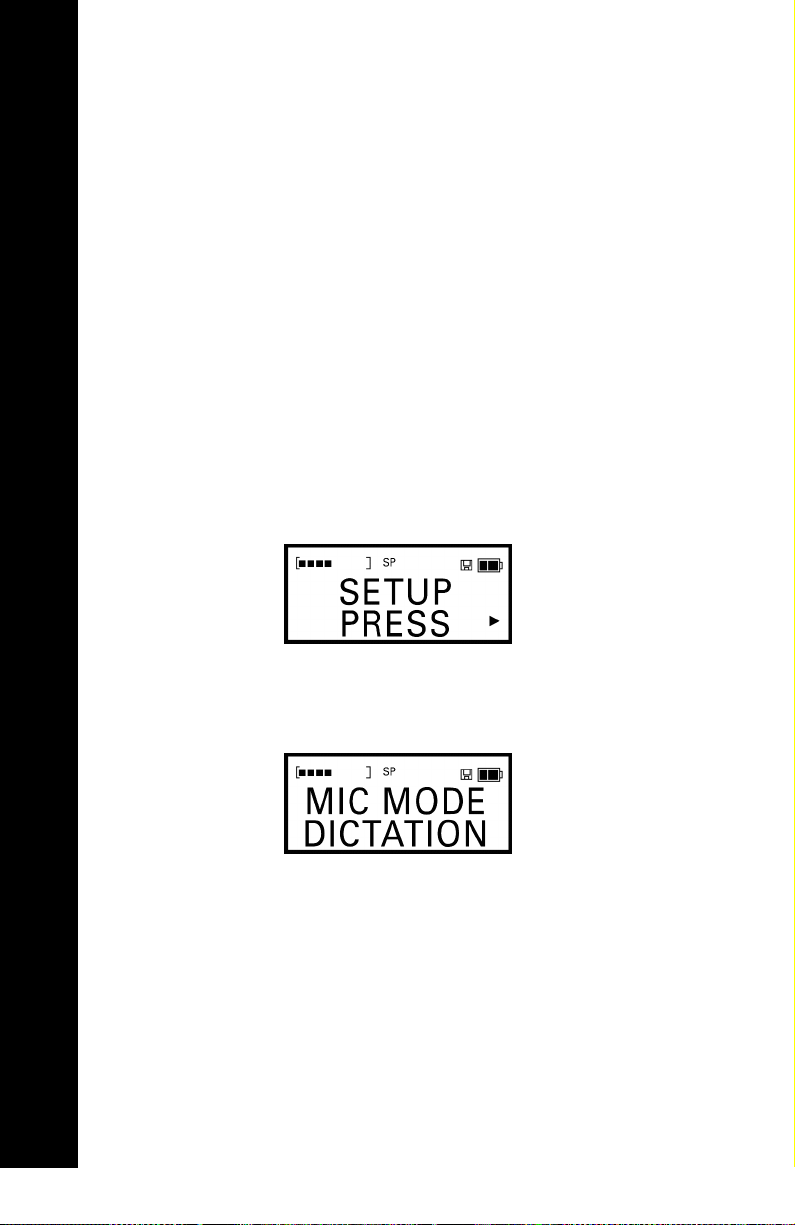
1. Press and release Menu until you see SETUP.
10
2. Press and release Play until you see the microphone
function. The display will show the current microphone
mode, either Dictation or Conference.
3. Press Rewind or Fast Forward to switch from one
microphone mode to another.
4. Press Delete or Power to exit and save changes.
Setting the Recording Speed
You r Walkabout Ultra Recorder gives you three speeds for
recording. When using the 4
are approximately 40 minutes at voice-to-text speed (
minutes at standard play (
MB
internal memory, recording times
VT
), 55
SP
) and 74 minutes at long play (LP).
For voice-to-text recording and for the best sound quality, always
Page 17

select the VT speed. To stretch out your recording time, select SP
LP. SP
or
provides better sound quality than LP.
To set the recording speed:
1. Press and release Menu and continue to press and release
it until you see SETUP.
2. Press and release Play until you see the speed function.
The display will show the selected speed, the memory
you are using (I for internal, C for a card) and the
remaining recording time for the selected speed.
3. Press Rewind or Fast Forward to change the speed. You
VT
should set the speed at
for the best sound quality.
4. Press Delete or Power to exit and save changes, or press
Play to continue to the next setup item.
Using the Microphone
The built-in microphone is located at the top, left on the front side
of the recorder.
To use the microphone properly:
• Hold the microphone about 2 inches away from and
slightly off to the side of your mouth while you are
dictating.
Using Your Ultra Recorder
Starting a Recording
This section tells you how to start a new recording, pause during
a recording, insert a new recording between two existing
recordings, and how to use a remote microphone.
To start a recording:
1. Press the Folder button to select a folder to hold your
recording. Press Folder multiple times to scroll through
the folders on the internal memory (I) and the folders on a
memory card (C), if one is in use.
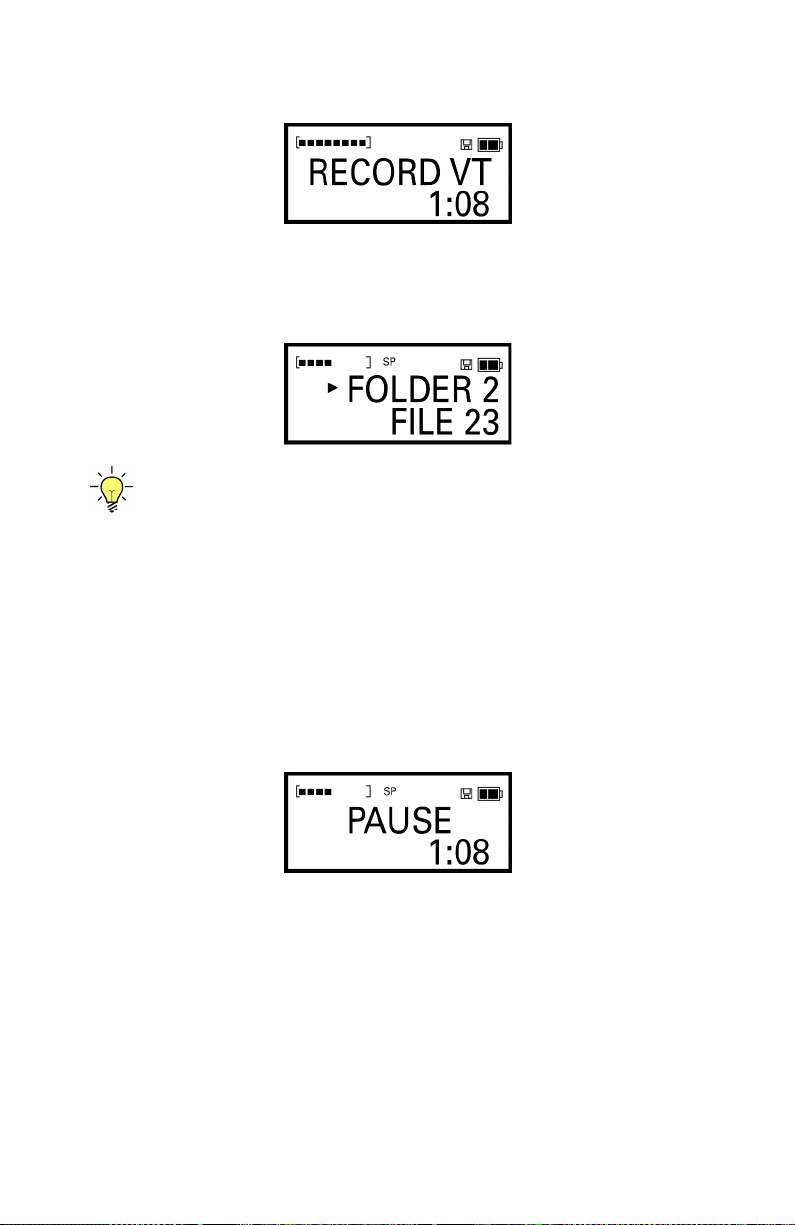
2. Press and release the Record button to begin recording.
The elapsed time of your recording appears on the display
while you are recording. CONFERENCE flashes if you are
11
Page 18
Using Your Ultra Recorder
in conference mode. Recording does not stop until you
press and release the Record button again.
3. Press and release Record to stop recording. The display
will show the folder that holds your recording and the
number of the recording.
Tip: When recording has stopped, if you want to listen to
what you have recorded, simply press Play. Your recording
will immediately begin playing back from the beginning. See
Playing a Recording on page 14 for more information on
playing back your recordings.
Pausing During a Recording
12
To pause while you are recording:
1. Press Pause. The display will blink while you are paused.
After about five minutes, the unit exits pause mode and
goes into standby to save battery power.
2. To review the recording up to the point where you
paused, press and hold Rewind briefly. As you hold
Rewind, the recording will rewind.
3. Press Play to hear what you just recorded.
4. Press Record to resume recording.
Page 19

Inserting a New Recording
To insert a new recording between two existing
recordings:
1. Use the Rewind or Fast Forward buttons to locate the
insertion point where you want to start the new recording.
2. Press the Insert button and you will create a new
recording before or after the current file as indicated by
the dot (•) next to the file name.
Using a Remote Microphone
An external microphone can be used with your Ultra recorder for
settings where an extendible microphone is needed. The
microphone should be an Electret type with an impedance of
about 2.2K ohm.
• Plug the external microphone into the jack on the side of the
recorder.
The internal microphone automatically disconnects when an
external microphone is plugged in.
Reviewing Statistical Information about Recordings
Using Your Ultra Recorder
Yo ur Ultra recorder keeps track of basic information on each of
your recording files, including its length, the date and time it was
created, and the date and time it was last modified.
To review the basic information on each recording:
1. Press Folder until the folder containing the desired file is
displayed, then press Fast Forward until the desired file
is reached.
2. Press and release Menu until you see FILE INFO.
3. Press Play to see the note for the current recording (if a
note exists).
4. Press Rewind and Fast Forward to scroll through the
note.
5. Press Play to advance to the next piece of information.
13
Page 20

Using Your Ultra Recorder
6. Press Delete or Power to exit the menu and save any
changes you have made.
Playing a Recording
This section tells you how to play, pause, stop, speed up, and slow
down a recording in playback mode.
To play a recording:
1. Press Folder to find the folder that holds the recording.
2. Press Rewind or Fast Forward to find the recording you
want to play.
3. Press and release Play.
Pausing During Playback
To pause a recording:
1. Press Pause. After five minutes, the unit exits pause
mode and goes into standby to save battery power.
2. To resume playback, press either Pause or Play.
Stopping a Recording that is Playing
14
To stop playing a recording:
• Press and release Play. The playback is stopped at the
end of the recording.
Speeding Up a Recording
To increase the speed of a recording:
1. While playing a recording, briefly tap Fast Forward.
This will cause the recording to play twice as fast.
2. To return to the normal speed, briefly tap Fast Forward
again.
Slowing Down a Recording
To decrease the speed of a recording:
1. While playing a recording, briefly tap Rewind. This will
cause the recording to play at slower speed.
2. To return to the normal speed, briefly tap Rewind again.
Tip: Earphones or headphones can be used with your
recorder for listening privacy. The speaker on the recorder
Page 21

automatically disconnects when a compatible set of
earphones or headphones are plugged into the unit. If stereo
headphones are used, the sound will emanate from just one
speaker unless a special adapter jack is used.
Scrolling Through a Recording
To scroll through a recording:
• While playing a recording, press and hold Fast Forward
to scroll forward or Rewind to scroll backward.
If you hear a low beep while scrolling forward or backward,
you have reached the end or the beginning of the recording.
At this point, the recorder enters in pause mode.
Playing Recordings Continuously
To play all recordings:
• Press and hold the Play button for about two seconds.
This causes all the recordings in the current folder to play
continuously from your current position.
Inserting and Deleting Text
This section tells you how to insert new text into a recording and
delete existing text from a recording.
Using Your Ultra Recorder
Inserting New Text
To insert new text anywhere in the recording:
1. Locate the point at which you want to begin inserting the
new text.
2. Press Pause.
3. Press Insert to begin.
4. To stop the insertion process, press either Record or
Insert. The recorder will be in pause mode.
Tip: To jump quickly to the end of a recording you are in the
midst of playing, press Play. To jump quickly to the start of a
recording, press Play and then Rewind.
15
Page 22
Using Your Ultra Recorder
Adding New Text to the End of a Recording
To add text to the end of a recording:
1. Press Play to begin playback, then press Pause.
2. Take one of the following actions:
Press and release Record. You will jump to the end of the
recording where your new text can be added.
OR
Press and hold Fast Forward while playing a message
until the end of the message is reached, then press Pause
and release Record.
Tip: Slowing down playback can make it easier to find the
exact spot where you want to insert or delete text. See
Slowing Down a Recording on page 14.
Deleting Existing Text
To protect your recordings, your Ultra recorder won’t let you
write over recordings. Instead, you simply delete unwanted text
and insert new text.
To delete existing text from a recording:
16
1. While playing a recording, locate the point at which you
want to begin the cut, that is, begin deleting text.
2. Press Pause. You can also begin your cut by simply
pressing Delete.
3. Press and release Delete.
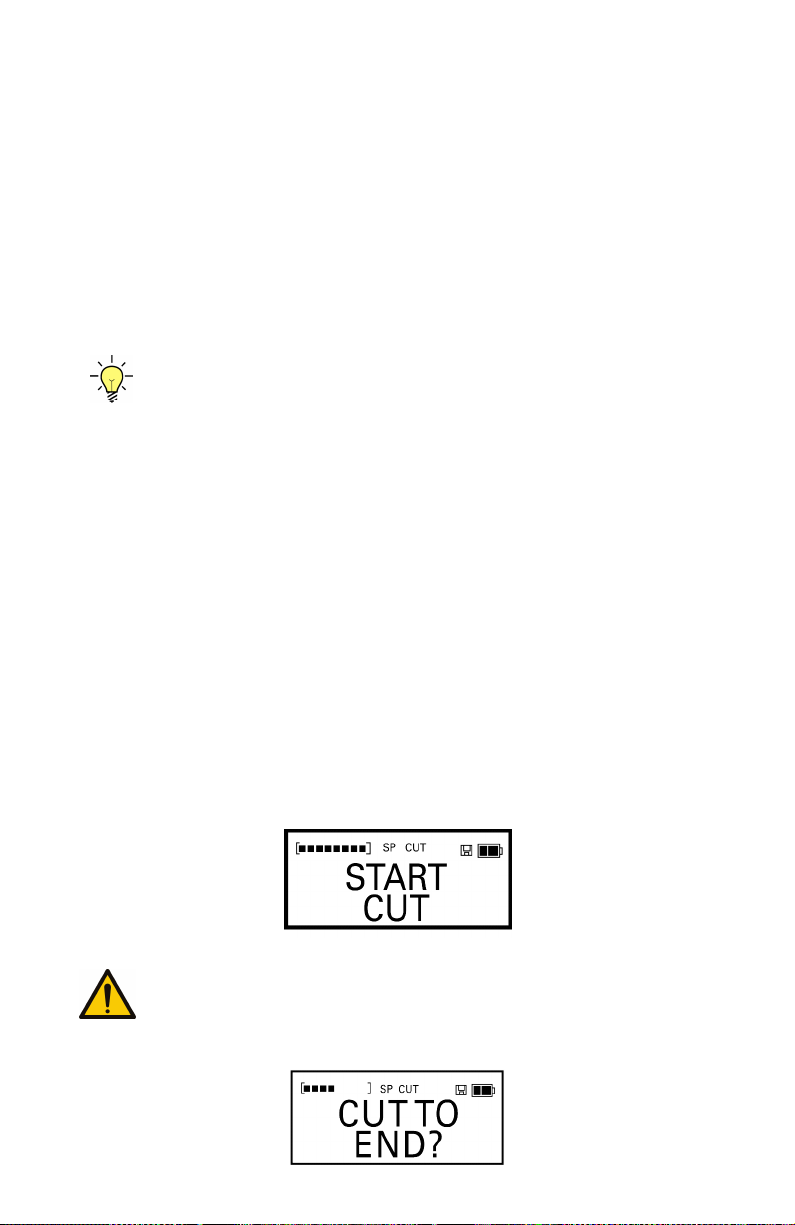
The display will show START CUT briefly, then the
word CUT will blink on the top of the display.
Caution: Be careful here: If you press and hold Delete you
will see CUT TO END? If you continue to hold Delete after
you see that message you will cut from the current location to
the end of the recording.
Page 23
4. Listen to the recording until you reach the end of the text
that you want to cut.
5. Press Pause.
6. If you change your mind and want to cancel a deletion
that is in progress, press and quickly release the Delete
button. No change will be made in the recording.
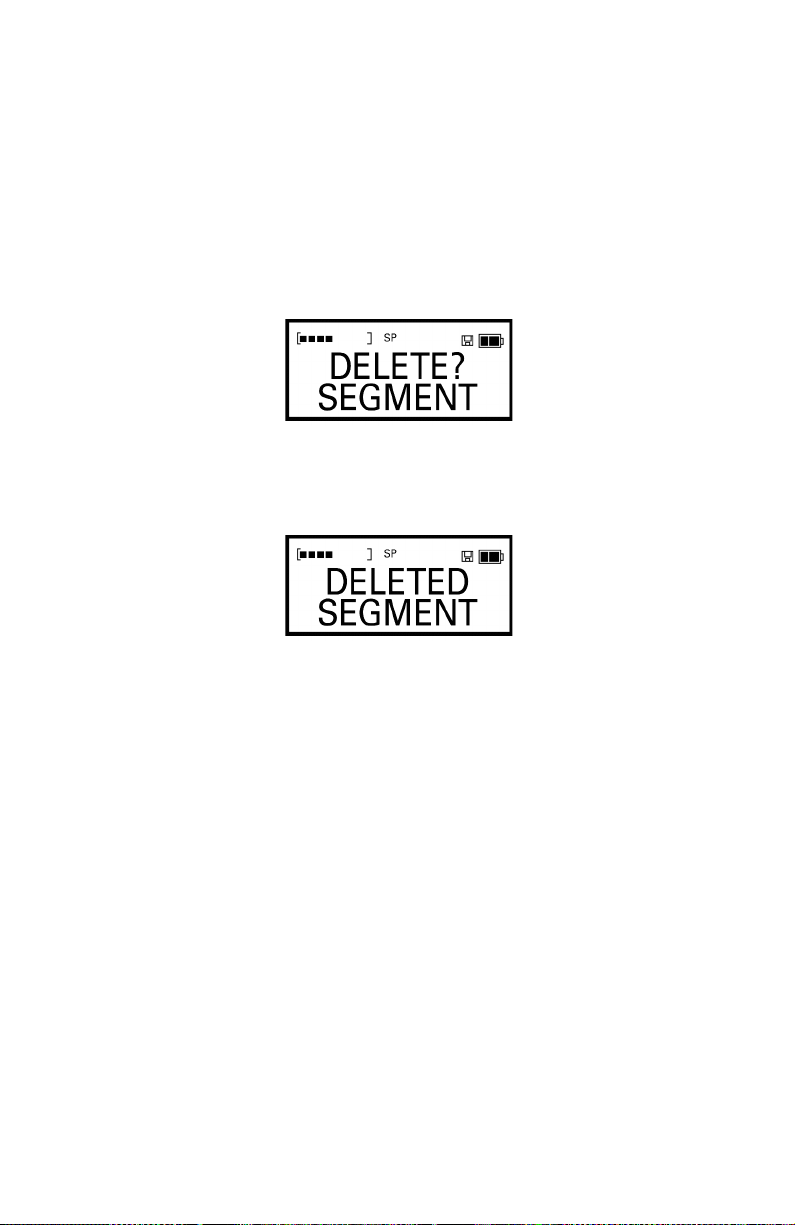
7. To complete the cut, press and hold Delete.
The words DELETE? SEGMENT will blink on the
screen.
8. Continue holding down Delete for about a second until
you hear a double beep and the display reads DELETED
SEGMENT. The cut is then final.
Using Your Ultra Recorder
Deleting Text from the End of a Recording
To delete text from the end of a recording:
1. At the end of a recording, press Pause. This places the
recorder in playback mode.
2. Press and release Delete.
3. Press the Rewind button to scroll backward.
4. Press and hold Delete to complete the cut.
Deleting Files and Folders
This section tells you how to delete a recording, delete all the
files in a folder, remove a folder, and delete all the files in a
memory.
Deleting Entire Recordings
To delete an entire recording:
1. Locate the recording to be deleted.
17
Page 24
Using Your Ultra Recorder
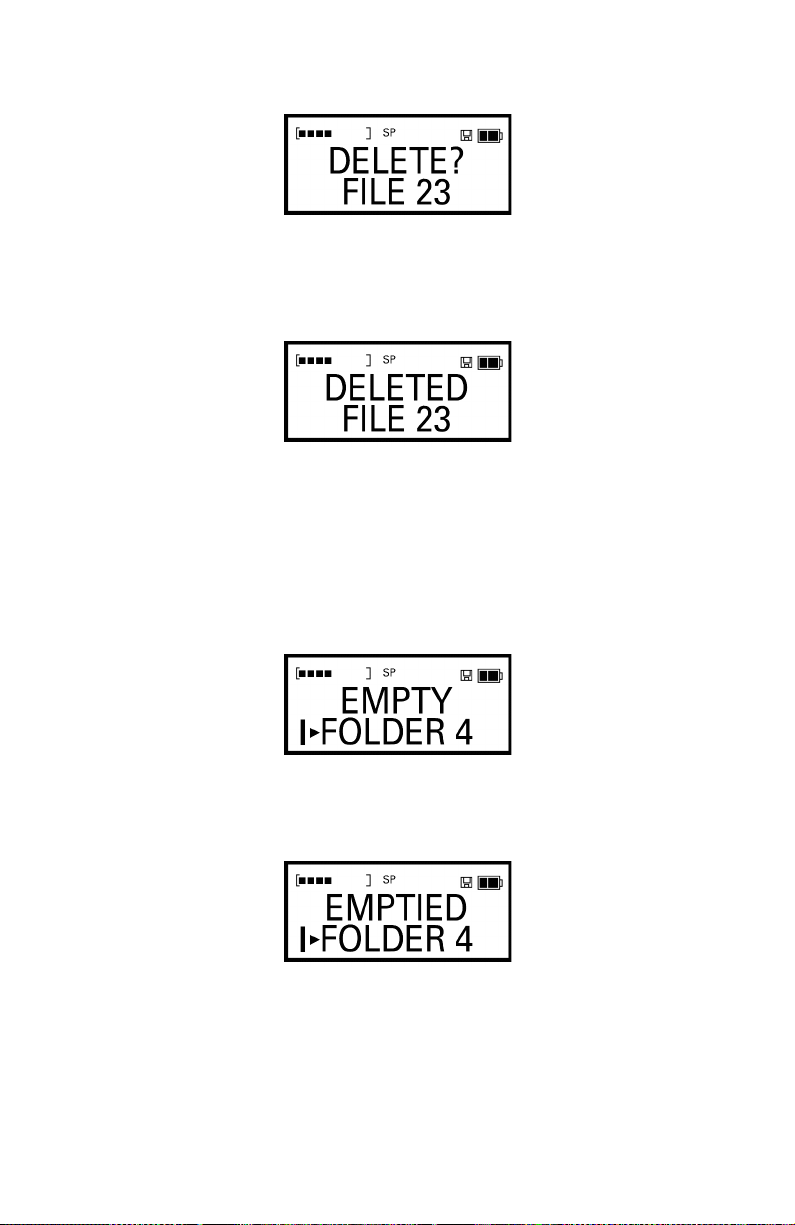
2. Press and hold Delete for about 1 second – no longer.
You will first see DELETE? and then the file name.
When the deletion is final, the display will momentarily
flash the word DELETED and the name of the deleted
recording.
Deleting All the Files in a Folder
To delete all the files in a folder:
1. Press Folder until the desired folder is located.
2. Press and hold Delete for about 4 seconds – no longer.
You will first see EMPTY and the folder name.
18
When the deletion is final, the display will momentarily
flash the word EMPTIED and the name of the folder that
was cleaned out.
Deleting a Folder
To remove a folder:
1. Press Folder until the desired folder is located.
Page 25
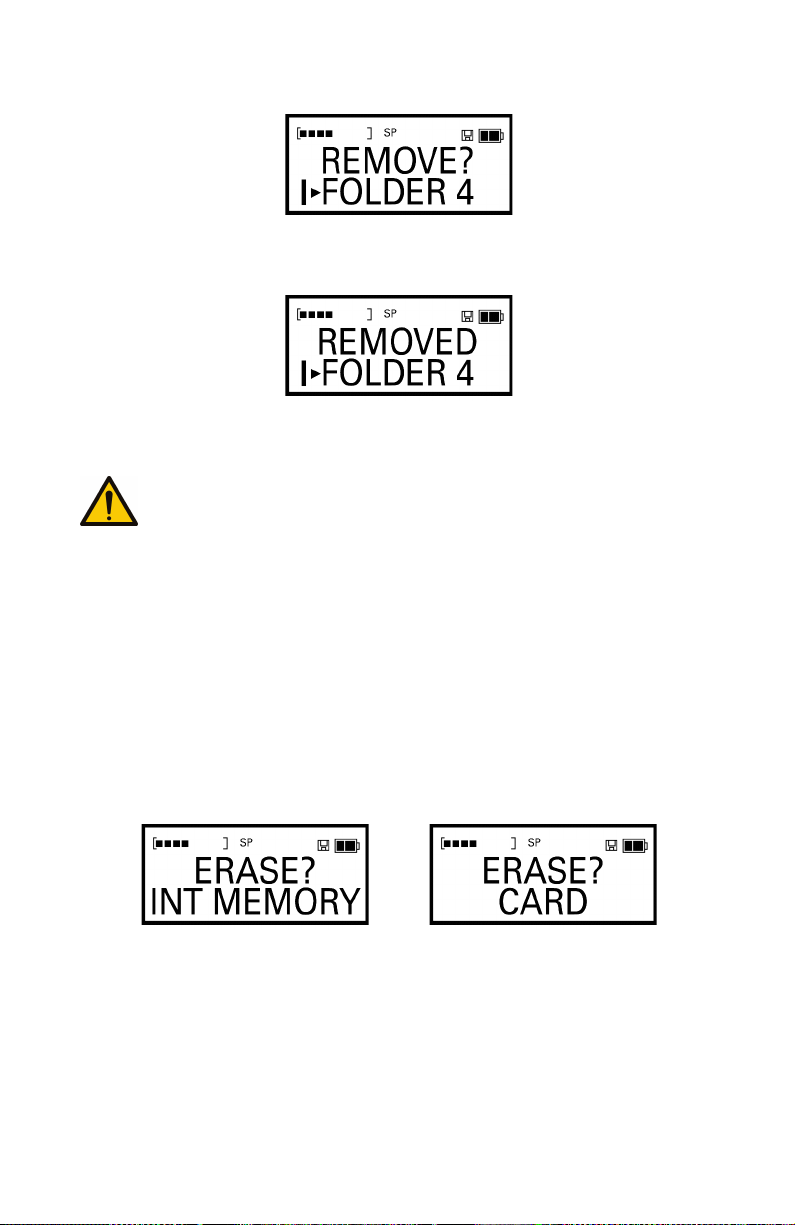
2. Press and hold Delete until you see REMOVE? and the
folder name.
When remove is completed you will see the word
REMOVED and the name of the folder.
Deleting All the Files in a Memory
Caution: This procedure cleans out an entire memory,
including all files in all folders and the names of all folders.
To delete all the files and folders in a memory:
1. Press Folder until the desired memory is located, either
internal (I) or external (C).
Using Your Ultra Recorder
2. Press and hold Delete for about 10 seconds.
This will take you through the process of deleting a
recording, a folder, and then an entire memory. You will
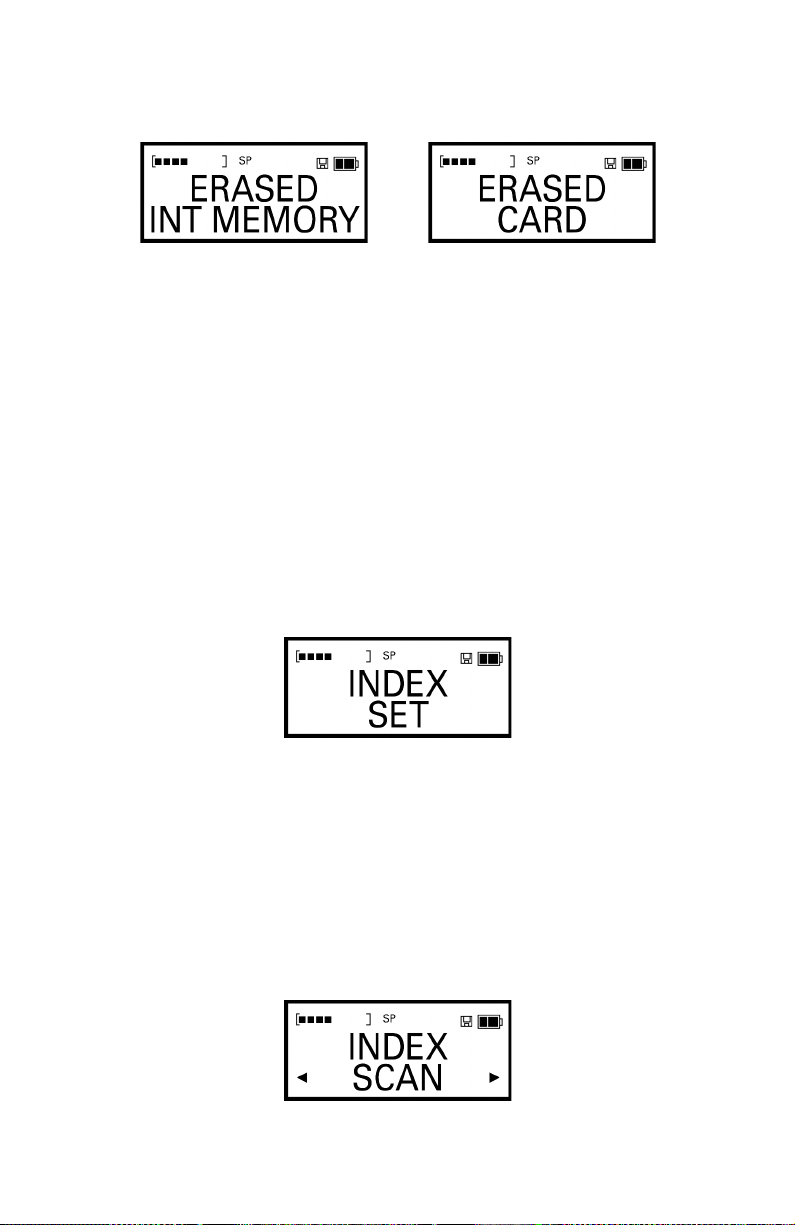
hear a series of beeps and see DELETE and EMPTY, and
then you will see ERASE? INT MEMORY or ERASE?
CARD, depending on the memory you are using.
When this is complete you will have four unnamed,
empty folders. The display will momentarily flash the
19
Page 26
Using Your Ultra Recorder
words ERASED INT MEMORY or ERASED CARD,
depending on the memory you are using.
Bookmarking Text in Your Dictations
You r Walkabout Ultra Recorder has an index function that allows
you to put bookmarks in recordings to make parts of your
dictation easier to find later on. You can drop in an index mark
while you are recording or while you are listening to a recording
by using the following procedures.
Creating Bookmarks
To bookmark your dictation:
• During playback, press and hold Menu until the display
shows INDEX SET, then release.
20
• While recording, press and release the Menu button
quickly, then continue recording.
Finding Bookmarks
To locate bookmarks in a recording:
1. While listening to a recording or while paused in a
recording, press and release Menu. The display will show
INDEX SCAN and arrows will appear.
2. Press either Rewind or Fast Forward to move
immediately to the next index mark.
Page 27
Working with Memory Cards
Working with Memory Cards
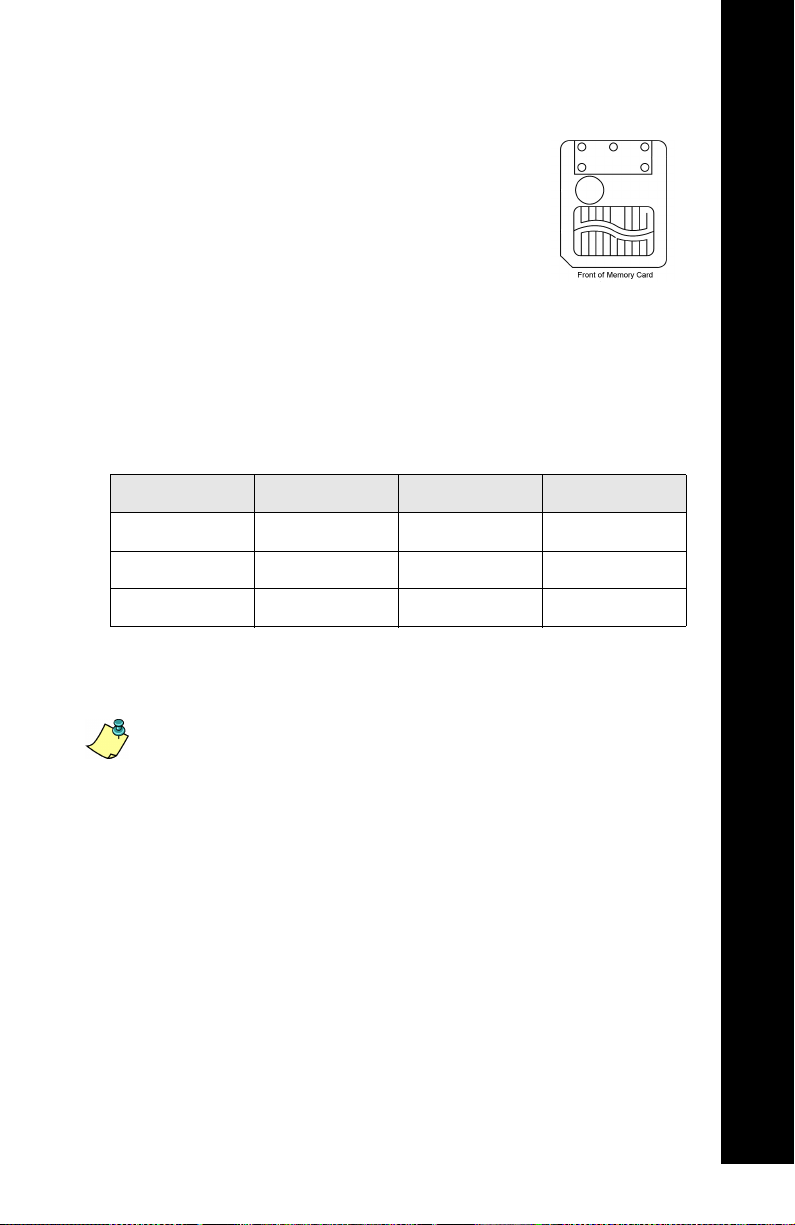
Memory cards expand the capacity of your
Walkabout Ultra Recorder. Your Ultra recorder
uses industry-standard 2
SmartMedia 3.3V cards (
card is inserted, it works just like the recorder’s
internal memory. As with the internal memory,
the cards provide multiple folders to hold
recordings.
The recording time for a memory card will depend on its size and
the speed at which you are recording: voice-to-text (
SP
play (
), or long play (LP). (See Setting the Recording Speed on
page 10 for information on setting recording speeds).
Speed 2 MB Card 4 MB Card 8 MB Card
VT 20 minutes 40 minutes 81 minutes
SP 27 minutes 55 minutes 112 minutes
LP 37 minutes 74 minutes 149 minutes
MB
, 4 MB, and 8 MB
SSFDC
type). When a
VT
), standard
Working with Memory Cards
To protect your recordings, make sure the unit is turned off before
inserting or removing a card.
Note: Treat memory cards as you would treat a computer
floppy disk. Avoid bending or subjecting cards to sudden
impact. Keep them dry and away from dust, dirt, and liquids.
For your protection, we suggests that you back up important
data.
Installing a Memory Card
Recordings stored on cards are accessed in the same manner as
recordings stored on the Ultra recorder’s internal memory. The
display will indicate a C when you are using a memory card.
Because the cards use non-volatile, flash memory technology,
they will continue to store recordings after they are removed from
the recorder – as long as they are handled with care.
21
Page 28
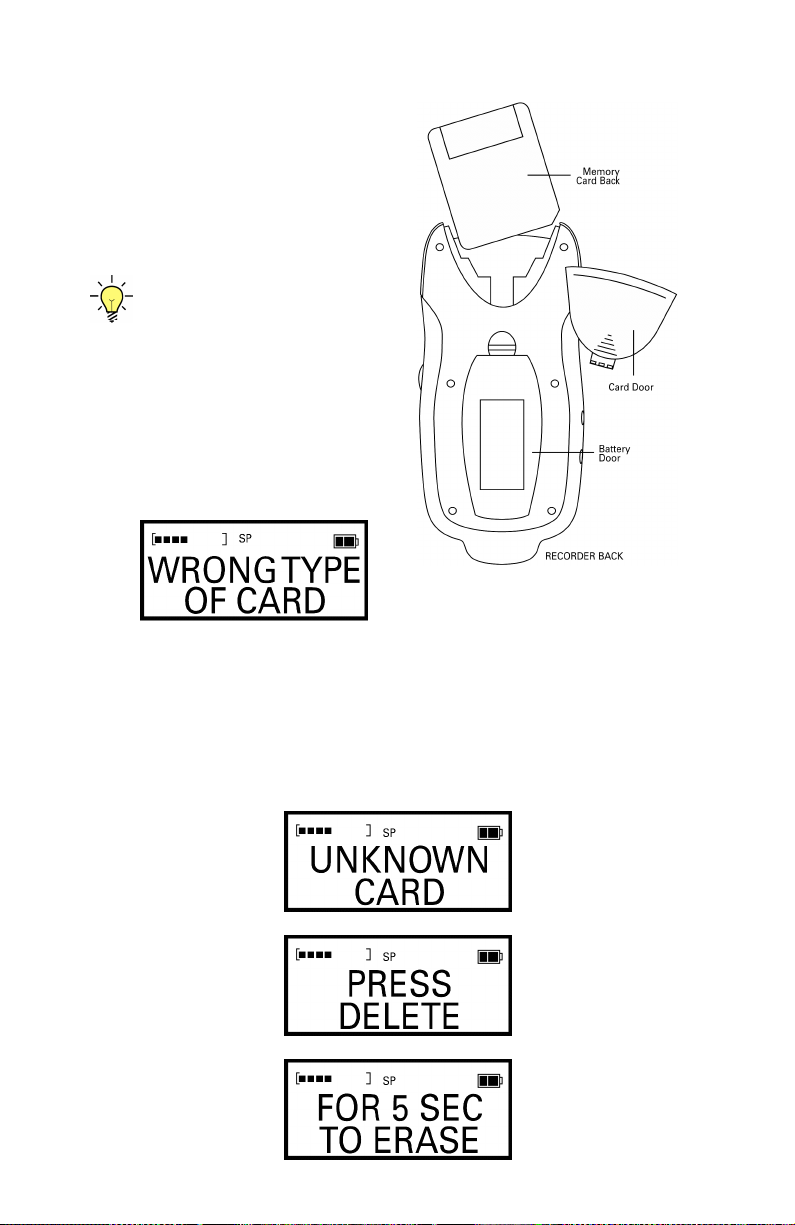
Working with Memory Cards
To install a memory card:
1. Press Power to turn off
the recorder.
2. Carefully slide the card
door open.
3. Insert the card and
replace the door.
Tip: If the display on your
recorder shows the message
WRONG TYPE OF CARD,
the memory card cannot be
used by your recorder. Try
another type of card. If you
have trouble locating cards,
call Dictaphone Customer
Service at 1-800-677-7928.
22
Formatting a Memory Card
When you put a memory card into your recorder, if the words
UNKNOWN CARD, PRESS DELETE, and FOR 5 SEC TO
ERASE appear, the card needs to be formatted for use in the Ultra
recorder.
Page 29
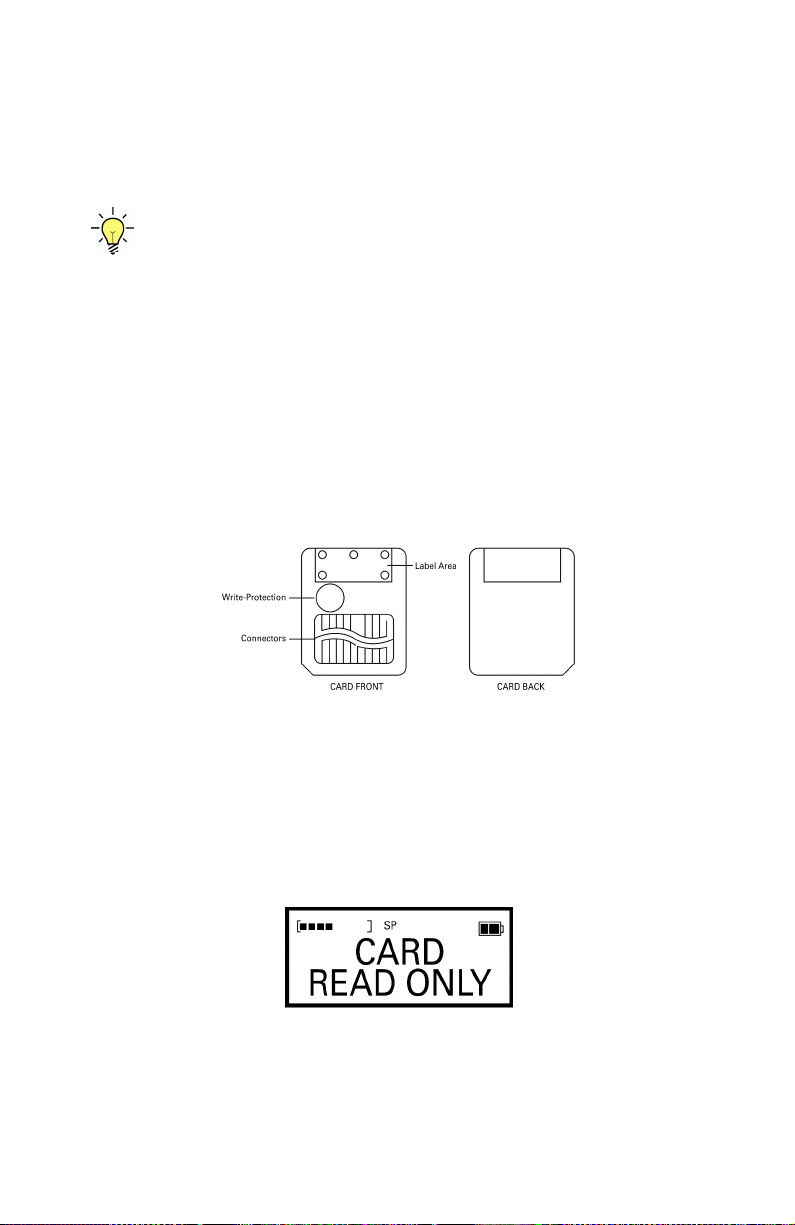
To format a memory card:
1. Press and hold Delete for approximately five seconds
until you see the words ERASE? CARD, ERASING
CARD, and ERASED CARD. This will erase all contents
and format the card.
Tip: The format introduced to the memory card by the Ultra
recorder will make the card incompatible with most other
applications, for instance, digital cameras and games.
Protecting the Recordings on Cards
Write-protection helps ensure that you won’t erase or write over a
recording that you want to keep. You can still listen to recordings
on a write-protected card.
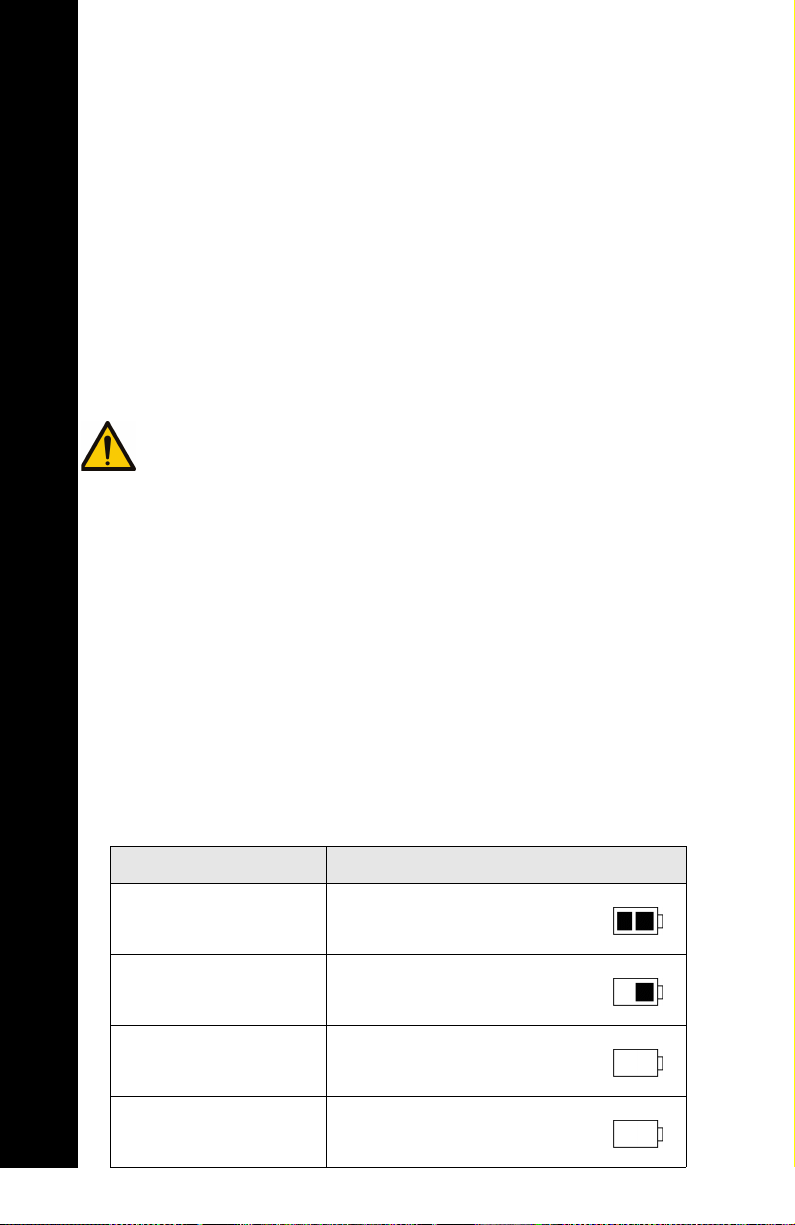
To prevent recording on a card, place the card’s special round
sticker in the recessed area on the top of the card. The Ultra
recorder will not let you record on such cards until the sticker is
removed.
Working with Memory Cards
Removing Write-protection
If you see the message CARD READ ONLY when you try to
record on a card, write-protection is active. The Ultra recorder
won’t allow you to store new recordings on the card unless you
disable write-protection.
Remove the round sticker from the recessed area. This will
remove write-protection and allow you to record on the card.
23
Page 30
Maintenance
Maintenance
General Care
Heat, moisture, and static electricity can damage your recorder. It
is important to keep the device out of the sun and away from
places in which it might get wet or be subjected to excessive
static electricity.
Installing/Replacing the Batteries
To install or replace the batteries:
1. Remove the battery door on the back of the recorder.
(Refer to the diagram on page 22.)
Caution: Be sure to turn off the unit when replacing
batteries. Recordings could be lost or the unit could be
damaged if the power remains on during this process.
AAA
2. Install two
battery compartment.
3. Replace the battery door. The unit will flash START and
a downward pointing arrow will direct you to the Power
button.
4. Press and release the Power button to continue startup.
The unit will start and display the Clock Set screen.
batteries as shown on the inside of the
24
Monitoring Battery Level
The battery-level icon, which appears on the upper right side of
the display, shows how much life remains on the Ultra recorder’s
batteries.
When the battery is: The display shows:
at full strength the two black boxes are full
at half strength only one black box appears
nearly empty only the outline appears
empty the empty battery outline
flashes
Page 31
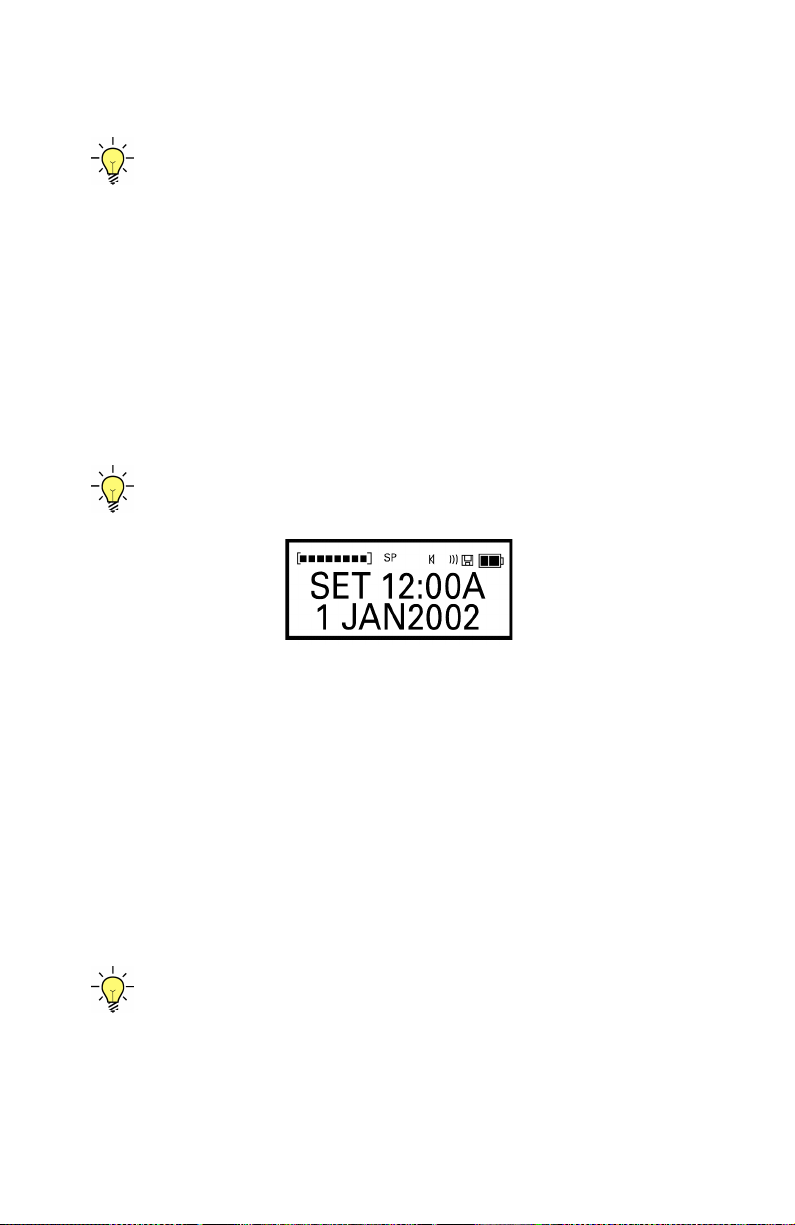
Batteries should be replaced when the empty battery outline
appears. When the empty battery outline flashes, your Ultra
recorder will not record until new batteries are installed.
Tip: Loss of battery power won’t cause you to lose your
recordings. Your recorder uses a technology called Flash
Memory that protects your stored data even when the unit is
without power.
Tip: Your recorder has an Auto Power Off feature to conserve
battery life. If no activity has occurred for 15 minutes, the
unit will automatically shut off.
Setting the Time and Date
The time and date for your Ultra recorder is set automatically
when the Ultra is connected to your system. If the time and date
is inadvertently changed, you can reset it as indicated here.
Tip: For a quick check of the time and date, press and quickly
release the Power button while the recorder is idle.
Maintenance
To set the clock on your recorder:
1. Press the Rewind or Fast Forward buttons to set the
clock to the correct time and date.
2. Press Play to move from one setting to another. Continue
in this manner until the clock shows the correct time and
date.
3. Press Delete or Power to exit the clock-setting mode.
To select military time, press the Folder button any time while in
the time-setting mode. To set seconds to zero, press Pause.
Tip: When adjusting the time or date, holding down the
Rewind or Fast Forward button will speed up the process. If
you press Record instead of Play, you will move backwards
through the time and date items.
25
Page 32
Maintenance
Memory Cards
Monitoring Memory Level
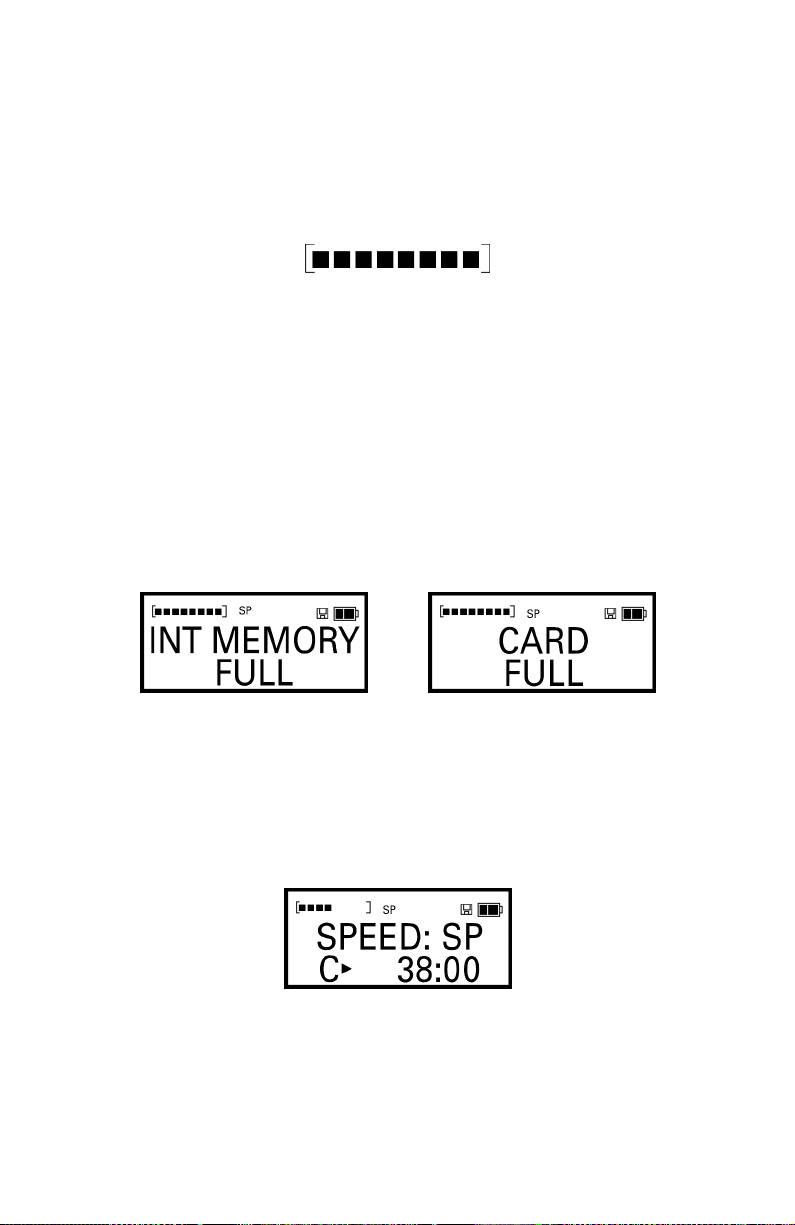
The memory bar, which appears on the upper left side of the
display, shows how much memory has been used on the
recorder’s internal memory or on the memory card that is
inserted.
The memory bar consists of eight boxes and two brackets. When
empty, only the two brackets show on the display. The black
boxes appear as the memory fills. When nearly full, the boxes
begin flashing. This warns you that your remaining memory is
down to a minute or less.
When the unit runs out of memory during a recording, the unit
beeps and the recording stops. The display will read either INT
MEMORY FULL or CARD FULL, depending on the memory
you are currently using.
26
Checking the Amount of Memory Remaining
1. Press and release the Menu button until you see SETUP.
The time left on the memory you are using shows on the
display.
2. Press Play to enter SETUP.
Page 33

Troubleshooting
Problems and Solutions
The Unit Will Not Operate
If your recorder does not operate properly:
• Check to see if you have battery power. If the battery icon in
the upper right corner of the display is blinking, the batteries
need to be replaced.
• Try removing the batteries. Wait 30 seconds and then reinsert
them.
• If you are using a memory card, check to see if it is properly
inserted. The recorder won’t operate if a card is partially
inserted.
The Unit Will Not Record
If your recorder does not make new recordings:
• Check to see if the memory is full. If the memory bar in the
upper left corner of the display is solid black, the memory is
full. To continue to record, delete stored recordings or insert a
memory card.
Troubleshooting
• Check to see if you have battery power. If the battery icon in
the upper right corner of the display is blinking, the batteries
must be replaced.
The Unit Locks Up
You r Ultra recorder can be reset entirely if it locks up or
experiences some other malfunction. Resetting the unit will not
affect your recordings.
• Turn power off, remove the batteries, wait 30 seconds, then
reinstall them or install new ones.
• Follow the usual procedures for setting the clock and other
menu items.
The Display Reads “Card Read Only”
Write-protection, which prevents you from deleting or changing
recordings, is active on the memory card you have inserted. Or,
the memory card has been improperly formatted.
27
Page 34

Troubleshooting
• To use the card for new recordings, remove the write-
•Refer to Installing a Memory Card on page 21 for directions
The Display Reads “Wrong Type of Card”
The memory card you inserted is not compatible with your Ultra
recorder. It may be compatible with some other digital product.
Use another type of card. Your Ultra recorder uses industrystandard 2
type).
The Display Reads “Int Memory Error F”
Memory was corrupted when you installed new batteries or the
batteries were removed while in a procedure. Press Delete to
restart the unit or press Play to continue using the unit. If the
problem persists, follow the steps below:
protection by removing the round sticker from the recessed
area on the card.
on how to format and erase the card.
MB
, 4 MB, and 8 MB SmartMedia 3.3V cards (
SSFDC
1. Press Play to Start.
2. Copy all your files onto your PC.
3. When finished copying, press and hold Delete to
completely erase internal memory.
4. Restore files from your PC.
28
Can’t Find a Folder
Folders can be lost because batteries were inserted or removed
during certain operations. In this case, a beep will sound (if beeps
are on) during scrolling when the location of the missing folder is
passed. The folder will have to be restored by the system
administrator.
Can’t Find a Recording
If you cannot find a recording:
• Make sure you are in the same folder that the recording was
stored in. Recordings can be filed in any of four folders on the
internal memory and four folders on each memory card. Press
the Folder button to move from folder to folder to search for
the recording.
Page 35

• Make sure that the memory you have active is the same as the
memory the file was recorded on. A file recorded on a card
won’t appear on the internal memory, and vice versa.
Card Doesn’t Fit in the Recorder Correctly
If the memory card you are trying to use does not fit in the
recorder:
• Don’t force the card. It may be a type of card that is
incompatible with your recorder.
Troubleshooting
• Check to make sure you are using a SmartMedia, or
type of card, and it is marked “3.3 V”.
SSFDC
,
29
Page 36

Warranty
Warranty
Limited Hardware Warranty
Dictaphone Corporation warrants to the original consumer or other enduser purchasers that this hardware product is free from defects in
materials or workmanship for a period of one (1) year from the date of
purchase. During the warranty period, and upon proof of purchase, the
product will be repaired or replaced (with the same or similar model) at
our option, without charge for either parts or labor. This warranty shall
not apply if the product is modified, tampered with, misused, or
subjected to abnormal working conditions, (including, but not limited to
lightning and water damage).
REPAIR OR REPLACEMENT AS PROVIDED UNDER THIS WARRANTY
IS THE EXCLUSIVE REMEDY OF THE PURCHASER. THIS WARRANTY
IS IN LIEU OF ALL OTHER WARRANTIES, EXPRESS OR IMPLIED,
INCLUDING ANY IMPLIED WARRANTY OF MERCHANTABILITY OR
FITNESS FOR A PARTICULAR USE OR PURPOSE, AND DICTAPHONE
SHALL IN NO EVENT BE LIABLE TO PURCHASER FOR INDIRECT OR
CONSEQUENTIAL DAMAGES OF ANY KIND OR CHARACTER.
Some jurisdictions do not allow the exclusion or limitation of incidental
or consequential damages or allow limitations on how long an implied
warranty lasts, so the above limitations or exclusion may not apply to
you. This warranty gives you specific legal rights, and you may also
have other rights that vary from jurisdiction to jurisdiction.
30
Page 37

Index
A
About Walkabout Ultra 1
Adding text to the end of a recording 16
B
Batteries
installing 24
level 24
remaining life 24
replacing 24
Beeps
turning on and off 7
Bookmarking text 20
Bookmarks
creating 20
finding 20
Buttons 1
C
Caring for your recorder 24
Clock
setting 25
Conference mode 10
Connecting to a PC 8
Continuous playback 15
Creating
bookmarks 20
index marks 20
new folders 6
recordings 10
Index
D
Decrease playback speed 14
Deleting
all files in memory 19
all the files in a folder 18
entire recording 17
files 17
folders 17, 18
text 16
text from the end of a recording 17
Dictation mode 10
Display screen 4
31
Page 38

Index
E
Earphones 15
Error messages 27
F
Fast Forward button 1
Features and functions 3
File
delete 17
Files
transferring to a PC 8
Folder button 1
Folders
creating 6
delete 18
missing 28
remove 18
H
Headphones 15
I
32
Illustration
memory card 21
memory card installation 23
screen display 4
Walkabout Ultra Digital Recorder 2
write-protection 23
Increase playback speed 14
Indexing
creating 20
Insert button 1
Inserting
memory card 21
recording 13
text 15
Installing batteries 24
L
Long play (LP) 11, 21
M
Maintaining your recorder 24
Making a recording 10
Page 39

Memory
delete 19
Memory cards 26
installing 21
protecting recordings 23
recording time 21
remaining memory 26
type 21, 29
using 21
working with 21
write-protection 23
Memory level 26
Memory usage 26
Menu button 1, 5
Microphone
built-in 11
external 13
remote 13
using 11
Microphone sensitivity
setting 10
N
New folders 6
Index
P
Pause button 1
Pausing
during a recording 12
during playback 14
PC
connection 8
Play button 1
Playback
continuous 15
decrease speed 14
increase speed 14
pause 14
scrolling 15
slow down 14
speed up 14
start 14
stop 14
Playing a recording 14
Playing recordings continuously 15
Power
33
Page 40

Index
off 5, 10
on 5, 10
Power button 5, 10
Problems and solutions 27
Protecting the recordings on memory cards 23
R
Record button 1
Recording
inserting 13
missing 28
new 11
pause 12
playing 14
starting 11
Recording speed 10
Recordings
basic information 13
statistics 13
Remote microphone 13
Replacing batteries 24
Rewind button 1
S
34
Screen display 4
Scrolling through a recording 15
Setting the clock 25
Setting the date 25
Setting the microphone sensitivity 10
Setting the time 25
Slowing down a recording 14
Speeding up a recording 14
Standard play (SP) 10, 21
Starting a recording 11
Stopping a recording that is playing 14
T
Technical support 22
Text
adding to the end 16
bookmarking 20
deleting 15
deleting from the end 17
inserting 15
Transfer files to a PC 8
Page 41

Troubleshooting 27
Turning beeps on and off 7
Turning the recorder on and off 5, 10
U
Using a remote microphone 13
Using headphones 14
Using the microphone 11
Using your Ultra recorder 10
V
Voice-to-text (VT) recording 10, 21
Voice-to-text recording 11
W
Walkabout Ultra
general information 1
illustration 2
Warranty 30
Working with memory cards 21
Write-protection
enabling 23
removing 23
Index
35
Page 42

Giving
New Meaning
To Voice…
Dictaphone World Headquarters
3191 Broadbridge Avenue
Stratford, CT, USA
06614-2559
Tel: 1-888-350-4836
E-mail: [email protected]
Web: www.dictaphone.com
Dictaphone Canada
2355 Skymark Avenue
Mississauga, Ontario, Canada
L4W 4Y6
Tel: 1-905-625-0300
Dictaphone Healthcare Solutions International
Commonwealth House
Chalk Hill Road, Hammersmith
London W6 8DW United Kingdom
Tel: +44 (0)20 7878 5000
Dictaphone Healthcare Solutions Benelux
Twin Squares, Building Vendôme
Culliganlaan 1b
B-1831 Diegem, Belgium
Tel: +32 (0)2 403 17 11
 Loading...