

Page 1

SINGLE-SPEED
Page 2
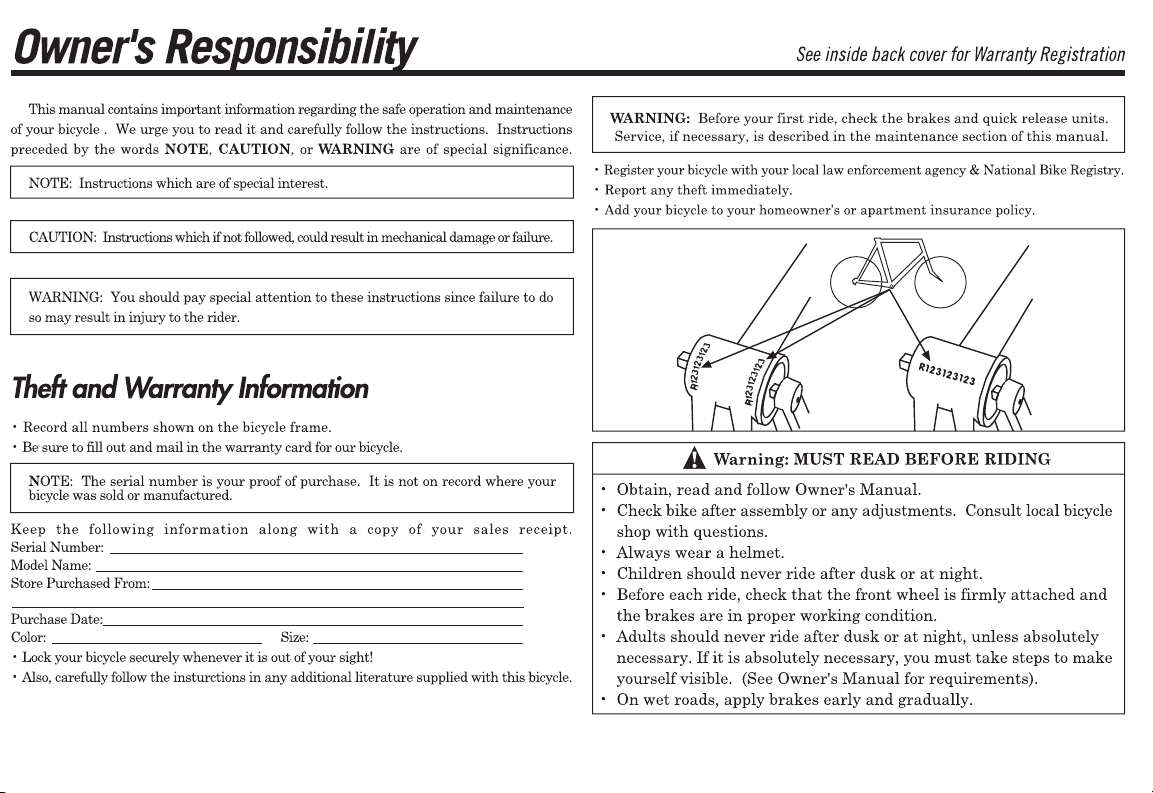
Serial Number Locations
Page 3

rd
Edition, 2003
This manual contains important safety,
performance and service information.
and keep it for reference.
AN IMPORTANT MESSAGE TO PARENTS:
This Manual contains important safety information. For your
child's safety, it is your responsibility to review this in for ma tion
with your child and make sure that your child understands
all warnings, cautions, instructions and safety topics. We
recommend that you periodically review and reinforce the
information in this Manual with younger riders.
Page 4

As a parent or guardian, you are responsible for the
activities and safety of your minor child, and that in cludes
making sure that the bicycle is properly tted to the child;
you and your child have learned and understand the safe
operation of the bicycle; and that you and your child have
learned, understand and obey not only the applicable local
motor vehicle, bicycle and traf c laws, but also the common
sense rules of safe and responsible bicycling. As a parent, you
should read this manual, as well as review its warnings and the
bicycle’s functions and operating procedures with your child,
before letting your child ride the bicycle.
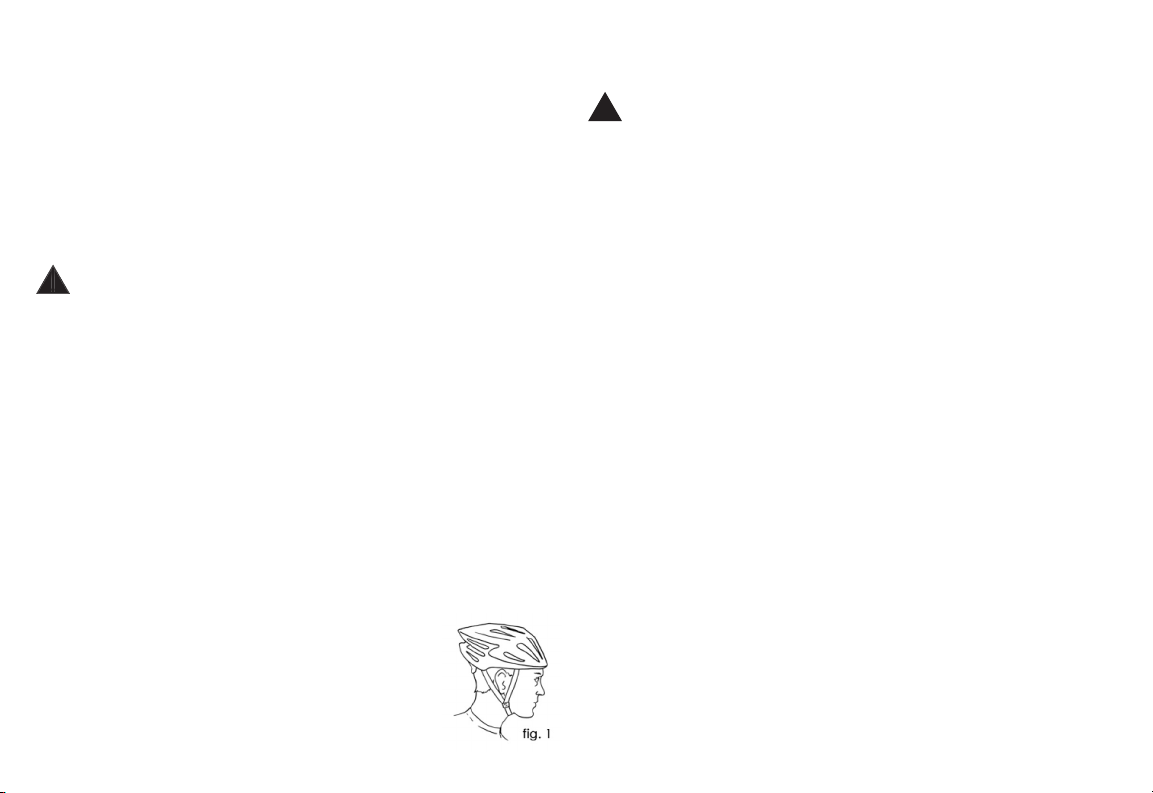
WARNING: Make sure that your child always wears an
your child understands that a bicycle helmet is for bicycling
serious injury or death.
This Manual contains many “Warnings” and “Cau tions”
your bicycle and of failure to follow safe cycling practices.
The combination of the
safety alert sym bol and
WARNING
indicates a potentially haz ard ous situation
which, if not avoided, could result in serious injury or death.
The combination of the
safety alert symbol and
indicates a potentially hazardous situation
which, if not avoided, may result in minor or moderate injury,
The word
used without the safety alert
symbol indicates a situation which, if not avoided, could
warranty.
Page 5

3
A special note for parents
A. Bike Fit
2. Safety
A. The Basics
Adding Accessories
3. Fit
A. Standover Height
4. Tech
A. Brakes
5. Service
Appendix A
Teaching Your Child The Rules
Appendix B
Appendix C
Page 6

We strongly urge you to read this Manual in its entirety
Please note that not all bicycles have all of the
A.
Bike t
2. Is the saddle at the right height? To check, see Section
4. Are the stem and handlebars at the right height for you?
Safety rst
2. Do you have all the other required and rec om mend ed
safety equipment? See Section 2. It’s your responsibility to
sure. Riding with an improperly adjusted wheel quick release
4. If your bike has clipless (“step-in”) pedals, make sure you
special techniques and skills. Follow the pedal manufacturer’s
Suspension can change the way a bicycle performs. Follow
your toe may be able to contact the front wheel when a pedal
See section 4.C.1.
Make sure nothing is loose. Lift the
Page 7

5
Tires & Wheels:
Make sure tires are correctly in ated (see
Section 4.G.1). Check by putting one hand on the saddle, one
your weight on the bike while look ing at tire deflection.
know
the
Tires in good shape? Spin each wheel slowly and look for
job correctly.
Check the brakes for proper operation (see Section
4.A). Squeeze the brake levers. Are the brake quick-releases
within an inch of brake lever movement? Can you apply full
If your bike has front wheel, rear wheel or
seat post quick releases, make sure they are properly adjusted
Make sure the saddle
Make sure the handlebar grips are
secure and in good condition. If not, replace them. Make
sure the handlebar ends are plugged. If not, plug them before
you ride.
WARNING: Loose or damaged handlebar grips can
weight toward the rear and gently applying the brakes, rear
Applying brakes too hard can lock up a wheel, which could
what can happen when a wheel locks up.
4.C.3.
Page 8
which might have been avoid ed if the rider had worn an
!
WARNING: Failure to wear a helmet when riding may result
2.
Always do the Mechanical Safety Check (Section 1.C)
3.
Be thoroughly familiar with the controls of your bicycle:
4.
your bicycle.
5.
Always wear:
Ride at a speed appropriate for conditions. In creased
speed means higher risk.
your bike, read and understand Section 2.G. Down hill, Stunt or
shifts. See paragraph B.5 above and Section 4.F.
WARNING: Many states require speci c safety devices.
the state where you ride and to comply with all ap pli ca ble
the law requires.
An important note to parents:
Appendix A of this Manual
A. The Basics
Always wear a cy cling helmet which
Always
Page 9

2.
You are sharing the road or the path with others —
3.
Ride defensively. Always assume that others do not
see you.
4.
Look ahead, and be ready to avoid:
5.
Ride in designated bike lanes, on designated bike paths
Stop at stop signs and traf c lights; slow down and look
Use approved hand signals for turning and stop ping.
8.
Never ride with headphones. They mask traf c sounds
Never carry a passenger, unless it is a small child wearing
Never carry anything which obstructs your vision or
your complete control of the bicycle, or which could become
Never hitch a ride by holding on to another ve hi cle.
Don’t weave through traf c or make any moves that
Observe and yield the right of way.
Never ride your bicycle while under the in uence of
If possible, avoid riding in bad weather, when visibility
Before you attempt to jump, do stunt riding or race with
your bike, read and understand Section 2.G. Down hill, Stunt or
We recommend that children not ride off-road unless
never
where you’re going and when you expect to be back. Always
who you are in case of an accident; and take a couple of
The variable conditions and hazards of off-road riding
safely before trying in creased speed or more dif cult terrain.
2.
Wear safety gear appropriate to the kind of riding
you plan.
Page 10

8
To make sure that you can slow down and stop safely in wet
See also Sec tion 4.A.
WARNING: Re ectors are not a substitute for required
CAUTION: Check re ectors and their mounting brackets
The mounting brackets of front and rear re ectors are
3.
Don’t ride alone in remote areas. Even when riding with
4.
Learn and obey the local laws regulating where and
5.
You may be sharing the trail with others — hikers,
Yield right of way to pedestrians and animals. Ride in
Stay on the designated trail. Don’t contribute to erosion
vegetation or streams. It is your responsibility to minimize your
8.
Be prepared. If something goes wrong while you’re riding
Before you attempt to jump with your bike, do stunt
2.G. Downhill, Stunt or Competition Biking.
WARNING: Wet weather impairs traction, braking and
visibility, both for the bicyclist and for other vehicles sharing
the road. The risk of an accident is dramatically increased in
wet conditions.
This makes it harder to control speed and easier to lose control.
Page 11

!
WARNING: Do not remove the front or rear re ectors or
The re ector brackets may protect you from the brake
straddle cable catching on the tire in the event of brake cable
failure. If a brake straddle cable catches on the tire, it can
such as a reflective vest, reflective arm and leg bands,
Bicycling in Traf c
Ride so that drivers can see you and
Ride defensively and expect the unexpected.
which are illustrated there.
WARNING: Although many catalogs, advertisements and
your limits and always wear a helmet and other appropriate
safety gear. Even with state-of-the-art protective safety gear,
you could be seriously injured or killed when jumping, stunt
CAUTION: Bicycles and bicycle parts have limitations with
Page 12

your skills before trying more dangerous riding
safety gear
your bike by this kind of activity may break or damage parts
your
re spon si bil i ty.
There are many components and accessories avail able
with your bicycle by checking with your dealer. Be sure to read,
!
WARNING: Failure to con rm compatibility, properly install,
!
CAUTION: Changing the components on your bike may
void the warranty. Refer to your warranty, and check with your
Page 13

!
WARNING: If your bicycle does not t properly, you may
to ex change it before you ride it.
A. Standover height
Standover height is the basic el e ment of bike t (see g. 2).
strad dling the bike and standing
you a min i mum standover height
WARNING: If you plan to use your bike for jumping or stunt
saddle position is not comfortable for you, see your dealer,
who has the tools and skill to change it.
The saddle can be adjusted in three di rec tions:
2.
Ask y our dealer to set th e s addle
Small changes in saddle position can
Always make sure that your seat post
WARNING: If your seat post projects from the frame beyond
the Minimum Insertion or Max i mum Ex ten sion mark (see g. 3)
without in sert ing your nger beyond its rst knuckle (see g.
4), the seat post may break, which could cause you to lose
Page 14

!
WARNING: After any saddle ad just ment, be sure that
the saddle adjusting mechanism is properly tightened before
will allow no saddle move ment in any di rec tion. Pe ri od i cal ly
WARNING: Some people have claimed that extended
term or long-term injury to nerves and blood vessels, or even
Your bike is equipped either with a “threadless” stem,
which clamps on to the outside of the steer er tube, or with a
yourself, as it requires special knowl edge.
A quill stem has an etched or stamped mark on its shaft
which des ig nates the stem’s “Minimum Insertion” or “Maximum
WARNING: The stem’s Min i mum Insertion Mark must not be
visible above the top of the head set. If the stem is extended
WARNING: On some bicycles, chang ing the stem or
stem height can affect the tension of the front brake cable,
when the stem or stem height is changed, the brakes must be
Your dealer can also change the angle of the han dle bar
WARNING: An insuf ciently tightened stem binder bolt,
Page 15

your legs and attempt to twist the handlebar/stem assembly.
The angle of the controls and their position on the
shorter reach brake levers.
WARNING: The shorter the brake lever reach, the more
travel. Brake lever travel in suf cient to apply full braking
section before you attempt them yourself, and that you have
your dealer check your work before you ride the bike. If you
something in this section of the Manual, talk to your dealer.
A. Brakes
Your bicycle is equipped either with a coaster brake
Be sur e th at you
your rst ride, by reading and understanding para graph 1 or
2
and
paragraph 3 below.
WARNING:
2. Applying brakes too hard or too suddenly can lock
Sudden or excessive application of the front brake may pitch
the rider over the handlebars, which may result in serious injury
3. Some bicycle brakes, such as disc brakes ( g. 6) and
4. Disc brakes can get extremely hot with extended use. Be
5. Pl ease see the bra ke
your dealer or contact the brake
Page 16

brake.
with both front and rear brakes, most
simultaneously.
(See also par.
!
WARNING: Sudden or excessive
the rider over the handlebars, which
Th e braking acti on of bi cyc le
your wheel rims, brake shoes and brake
before
riding the bike. The lever reach
Some hand brakes have a quick
The coaster brake is a sealed mechanism which is a part
rear
you apply, the more braking force, up to the point where the
CAU TION: Before riding, make sure that the brake is
working properly. If it is not working prop er ly, have the bicycle
before
you ride it.
2. Hand Brakes
A bicycle with hand brakes may have one hand lever
which operates a rear brake, or two hand levers, one of which
your bicycle has two hand brakes, it’s important to your safety
with the
right
brake lever con trol ling the
rear
brake, and the
left
Page 17

whether you have a quick release on your brakes; and if you
each time
to make sure both brakes
work correctly before you get on the bike.
!
WARNING: Some bicycle brakes, such as linear-pull ( g. 7)
these brakes and exercise particular
you to lose control and fall.
counterclockwise
clock wise
as far as it will go.
Safety Check, have your dealer check
!
CA UT ION:
Some bi cy cl es are
steering mech a nism to turn a full 360
with a Brake Rotor requires special
to adjust the front brake of a bicycle
A rotor may also decrease the clear ance be tween the front
wheel and the pedals when the wheel is turned back wards.
3. Braking technique
control your speed
stop the bike.
Maximum
braking force for a wheel occurs at
just before
the wheel “locks up” (stops ro tat ing) and
starts to skid. Once the tire skids, you actually
lose most of your
stopping force and all directional con trol
slowing and stopping smoothly without locking up a wheel.
The technique is called
pro gres sive brake mod u la tion
progressive
force on the pedal or
squeeze
release
pressure just a little
slowly in an un re strict ed area and applying dif fer ent amounts
Page 18

Secondary retention devices fall
The clip-on type is a part
which the man u fac tur er adds to
The integral type is molded,
The washer type is a hat-
shaped washer which fits into a
Ask your dealer to explain the particular secondary
WARNING: Removing or disabling the secondary retention
Some bicycles are equipped with a lever action
2.
4.A.2.a. above).
was going. This causes a transfer of weight to the front wheel
around the front
A wheel with more weight on it will accept greater brake
with less brake pressure. So, as you apply brakes and your
weight shifts for ward, you need to shift your body toward
wheel. With hand brakes, you can further improve brake
decreasing rear
braking
increasing front
braking force. Shifting weight to the rear
wheel is even more important on steep descents, because
The keys to effective speed control and safe stopping are
The way to maintain control on
Wheels
wheel retention device to keep the wheel from disengaging
Page 19

clip-on
type sec ond ary re ten tion
integral
or a
sec ond ary
3. Installing a Bolt-On Front Wheel
wheel rim in the fork, use a correctly sized socket, box, open
sure that it is centered in the frame and clears the brake
shoes, and squeeze the brake lever to make sure the brake is
4. Removing a Bolt-On Rear Wheel with Hand Brake
with a correctly sized open end
socket, box, open end or ad just able
wrench, loosen the two axle nuts.
5. Installing a Bolt-On Rear Wheel
with Hand Brake
wheel into the frame dropouts and push it all the way in to
and
the chain has
Page 20

with Coaster Brake
wrench, loosen the two axle nuts.
slacken the chain, and remove the
and
the chain has about 1/4 inches of up-and-
Spin the wheel to make sure it is straight in the frame.
Toe Overlap is when your toe can touch the front
wheel when you turn the han dle bars to steer while a pedal is
!
WARNING: Toe Overlap could cause you to lose con trol
turning. A brake rotor (see Section 4.A.2.b) may also decrease
the clearance between the front wheel and the pedal when
the wheel is turned backwards.
2.
Some higher performance bicycles come equipped
with pedals that have abrasive and potentially dangerous
sur faces. These surfaces are designed to add safety by
your bicycle has this type of high-performance pedal, you must
surfaces. Based on your riding style or skill level, you may prefer
shoes and cleats which are com pat i ble with the make and
Page 21

!
WARNING: Clipless pedals are intended for use with shoes
spe ci cal ly made to t them and are designed to rmly keep
the foot engaged with the pedal. Using shoes which do not
foot safely. Until engaging and disengaging the foot becomes
traf c; and be sure to follow the pedal manufacturer’s setup
There are many different types of suspension systems — too
WARNING: Failure to maintain, check and properly adjust
the suspension system may result in suspension malfunction,
which may cause you to lose control and fall.
See also Section 4.A.
WARNING: Changing suspension adjustment can change
the handling and braking characteristics of your bicycle. Never
familiar with the suspension system man u fac tur er’s instructions
suspension ad just ment by taking a careful test ride in a hazard-
free area.
Suspension can increase control and comfort by allowing
CAUTION: Not all bicycles can be safely retro tted with
some types of suspension systems. Before retro tting a bicycle
with any sus pen sion, check with the bicycle’s man u fac tur er
to make sure that what you want to do is compatible with the
Page 22

20
spec i ca tions, ranging from general-purpose designs to tires
your new bike, you feel that a different tire might better suit
your riding needs, your dealer can help you select the most
The size, pressure rating, and on some high-per for mance
side wall of the tire (see g. 16). The part of this in for ma tion
which is most important to you is Tire Pressure.
WARNING: Never in ate a tire beyond the maximum
The best and safest way to in ate
WARNING: There is a safety risk
for bicycle tires. They move a large
volume of air very rap id ly, and will
to explode.
Tire pressure is given either as maximum pressure or as a
weather con di tions depends largely on tire pres sure. In ating
Very low pressures, at the bottom of the rec om mend ed
such as deep, dry sand.
Tire pressure that is too low for your weight and the riding
CAUTION: Pencil type automotive tire gauges can be
Ask your dealer to recommend the best tire pressure for
Some special high-performance tires have uni di rec tion al
Page 23

2. Tire Valves
There are primarily two kinds of bicycle
valve stems on your bicycle.
The Schraeder valve ( g. 17) is like the
valve on a car tire. To in ate a Schraeder
valve tube, remove the valve cap and
valve, depress the pin in the end of the
valve stem with the end of a key or other
The Presta valve ( g. 18) has a narrower
To in ate a Presta valve tube using a Presta
valve stem once you’ve freed up the valve. The adapter ts
To let air out of a Presta valve, open up the valve stem lock
WARNING: Patching a tube is an emergency repair. If you
tube can fail, resulting in possible tube failure, which could
!
WARNING: Technological advances have made bi cy cles
!
WARNING: Many bicycle service and repair tasks require
special knowledge and tools. Do not begin any adjustments
service may result in dam age to the bicycle or in an accident
which can cause serious injury or death.
your bike, or contact the component manufacturer.
2. Ask your dealer to recommend a book on bicycle repair.
Page 24

4. After every long or hard ride or after every 10 to 20
with each forward or backward move ment of the bike, you
Any thing feel loose? If so, have your dealer check it.
still secure, and tighten any which are not.
just to make sure that you did everything correctly. Since that
will require the time of a mechanic, there may be a modest
A. Service Intervals
Some service and maintenance can and should be
The following are examples of the type of service you
should perform yourself. All other service, main te nance and
some things that need readjustment. But even if everything
seems ne to you, it’s best to take your bike back to the dealer
with the bike, take it to your dealer before riding it again.
2. Before every ride: Mechanical Safety Check
Page 25

23
!
WARNING: Like any mechanical device, a bicycle and its
fail, causing serious injury or death to the rider. Scratches,
fatigue and indicate that a part is at the end of its useful life and
your bicycle or of individual components may be covered by
this is no guarantee that the product will last the term of the
warranty. Product life is often related to the kind of riding you
5. As required: If either brake lever fails the Me chan i cal
Safety Check (Section 1.C), don’t ride the bike. Have your
Take your bike to your dealer for a complete checkup.
so you can get home. Then, take your bicycle to your dealer
!
WARNING: A crash or other impact can put ex traor di nary
stress on bicycle components, causing them to fatigue
fail suddenly and cat a stroph i cal ly, causing loss of control,
serious injury or death.
Page 26

Teaching your Child the Rules
The Basics
(page 6),
(page 8),
Wet Weather Riding
(page 9),
(page 9),
(page 10 and Appendix
with these rules and to teach them to your child before you
2. Lessons
The lessons that follow relate to some of the most com mon
by a car, that is called a rideout accident.
What can you do?
First, realize the danger of your own
your car in front of the drive way, if local ordinance permits. This
way, your child can’t use the driveway as a launching pad.
2) Look left, right and left again for traf c.
sign. Most cyclists who get hit riding through stop signs know
impress upon your child is that while he/she may not get hit every
What can you do?
Take your child to a stop sign near home.
2) Look in all directions for traf c.
4) Watch for cars behind you making right turns.
your own driving habits. If
you
creep through intersections
stop at stop signs.
Another major accident type involves cyclists who make
Page 27

25
do they signal. The key factor here is neglecting to look to the
rear. If the cyclist had looked, he/she would have seen the
danger coming up from behind.
What can you do?
Of course, you ought to teach your child
some ad vanced training and is old enough to understand
signal before turning
Take your child to a playground or a safe area away from
while looking behind. Stand alongside and hold up a different
should be able to look behind his/herself and identify how
at Dawn, at Dusk or at Night
Most car/bicycle accidents happen at night where an
overtaking car hits a bike. (An overtaking car is one that
comes up from behind and passes the cyclist on the left.)
These overtaking accidents can be very serious.
What can you do?
First, you should keep your youngster
sure your child understands that if he/she gets caught out at
There is increased risk of car/bike collision if children are
dangerous, those following may do it too.
What can you do?
Teach your child to always assess the
SUMMARY
Teach your child early - the earlier the better. Learning skills
such as looking and avoiding hazards takes time. Be prepared
knowing that your child is aware of safe riding skills.
Page 28

262728
Page 29

Page 30

Wheel and Seat Post Quick Release Mechanisms
A. Quick Release Wheels
WARNING: Riding with an improperly adjusted wheel quick
to install and remove your wheels safely.
2. Understand and apply the correct technique for
3. Each time, before you ride the bike, check that the
wheel is securely clamped.
The wheel quick release uses a cam action to clamp the
the wheel.
!
WARNING: The full force of the cam action is needed to
safely in the dropouts.
The wheel hub is clamped in place by the force of the
wheel retention device to keep the wheel from disengaging if its
Secondary retention devices fall into three basic categories
The clip-on type is a part which the manufacturer adds
The integral type is molded, cast or machined into the
The washer type is a hat-shaped washer which ts into
Page 31

29
Ask your dealer to explain the particular secondary
WARNING: Removing or disabling the secondary retention
2. Removing and Installing Quick Release Wheels
sec ond ary re ten tion device go to step (5).
sec ond ary retention device, disengage it
wheel with the palm of your hand to knock
!
CAUTION: If your bike is equipped with disk brakes, be
secondary retention device, engage it.
your right hand, tighten the tension adjusting nut with your left
To apply enough clamp ing force, you should have to wrap
your ngers around the fork blade for leverage, and the lever
should leave a clear imprint in the palm of your hand.
WARNING: Securely clamping the wheel takes con sid er able
force. If you can fully close the quick release without wrapping
your ngers around the fork blade for leverage, and the lever
tension is in suf cient. Open the lever; turn the tension adjusting
Page 32

30
Then turn the tension adjusting nut coun ter clock wise one-
WARNING: Secondary retention devices are not a
substitute for correct quick release adjustment. Failure to
wheel to wobble or disengage, which could cause you to loose
with the derailleur still pulled back, push the wheel forward
to damage the disk, caliper or brake pads when re-inserting
the disk into the caliper. Never activate a disk brake’s control
Then, insert the wheel into the frame dropouts and pull it all
WARNING: Securely clamping the wheel takes con sid er able
force. If you can fully close the quick release without wrapping
your ngers around the seatstay or chainstay for leverage, and
the lever does not leave a clear imprint in the palm of your
Page 33

31
!
WARNING: The full force of the cam action is needed to
seatpost safely.
!
WARNING: If you can fully close the quick release without
wrapping your ngers around a frame tube for leverage, and
the lever does not leave a clear imprint in the palm of your
Some bikes are equipped with a quick-release seat post
wheel quick-release (Appendix B. A. 1.) While a quick release
seat post (see g. 19).
WARNING: Riding with an improperly tightened seat post
1. Ask your dealer to help you make sure you know how to
2. Understand and apply the correct technique for clamping
your seat post quick release.
3. Before you ride the bike, rst check that the seatpost is
securely clamped.
The action of the quick release cam squeezes the seat
Page 34

32
an authorized Raleigh America, Inc. bicycle dealership with any questions on use and maintenance. Regardless of the length of the warranty, Raleigh America, Inc. does not infer that the bicycle will last forever
or cannot be broken. All Raleigh/Diamondback framesets and bicycles have a nite, limited useful product life cycle. The length of this useful life cycle will vary by environment, riding conditions, frame material
and construction, riding style, maintenance, and the amount as well as type of use the bicycle or frame is subjected to. A worn out bicycle does
indicate it is warrantable, rather that the bicycle has outlived
Warranty Term Length
Steel bicycle frames with wheel size less than 20˝
Steel bicycle frames with 20˝, 24˝, 26˝, or 700c wheels
Alloy bicycle frames with 20˝, 24˝, 26˝, or 700c wheels
Covered under the fork man u fac tur er’s warranty. Consult dealer for details.
Components, Non-branded
One year from the date of original retail purchase
Components, Branded
Covered under the component manufacturer’s warranty. Consult dealer for details.
One year from the date of original retail purchase
Suspension parts including but not limited to bushings, pivot bearing, link plates,
One year from the date of original retail purchase under the condition that the
bolts, fasteners, chain stays, seat stays, and shock units
bicycle is regularly maintained as well as operated under normal riding conditions
One year from the date of original retail purchase
Thirty days from the date of original retail purchase
This warranty only applies to the original retail purchaser and is not transferable.
2.
Speci c model exceptions to this warranty are noted with the bicycle documentation.
3.
AT RALEIGH AMERICA, INC.’S OPTION
AT RALEIGH AMERICA, INC.’S OPTION
construction, design, or value.
4.
To obtain service under this warranty, you must:
A bicycle that has had the components removed can not be evaluated or warranted.
*2.
3.
The proof of purchase must indicate the bicycle was sold fully assembled and adjusted by an authorized Raleigh America, Inc. dealer within the United States of America.
Sales where the bicycle was delivered in a carton to the end user (e.g. mail order or Internet sales) void the warranty.
This warranty does not apply to dama ge or failure due to
Accidents, alteration, abuse, neglect.
2.
3.
This warranty also excludes:
Commercial use, racing or competition, stunting, jumping, trick riding, ramp riding, aggressive riding, riding with excessive loads, lack of technical skill, competence, or experience of the user.
3.
4.
5.
Any additional costs associated with the incompatibility of existing parts and the replacement frame or fork.
Warranty replacement frames must be fully assembled by an authorized dealer to maintain the warranty coverage. The warranty for the replacement frame shall be the warranty offered for the equivalent bicycle’s
frame of that model year. If not assembled by the dealer, replacement frames are considered aftermarket frames. After market frames are only warranted for one year from the date of purchase for the original
This warranty is expressly in lieu of all other warranties, and any implied warranties of merchantability or tness for a particular purpose created hereby, are limited to the same duration as the express warranty
This warranty gives the original owner speci c legal rights. Other additional rights may vary from state to state.
bicycle is regularly maintained as well as operated under normal riding conditions
bolts, fasteners, chain stays, seat stays, and shock units
One year from the date of original retail purchase
Steel bicycle frames with wheel size less than 20˝
Steel bicycle frames with 20˝, 24˝, 26˝, or 700c wheels
Alloy bicycle frames with 20˝, 24˝, 26˝, or 700c wheels
Covered under the fork man u fac tur er’s warranty. Consult dealer for details.
One year from the date of original retail purchase
Components, Non-branded
Covered under the component manufacturer’s warranty. Consult dealer for details.
Components, Branded
One year from the date of original retail purchase
6004 S. 190th Street, Suite 101
warranty revised: 03/25/05
Page 35

•
If your bike is lost or stolen, the National Bike Registry (NBR
®
) could help you get it back.
Simple Activation.
Your NBR label is already attached to your bike. To activate your FREE 6-month registration,
www.nationalbikeregistry.com.
If your bike is lost or stolen, then recovered, it can be identi ed by your NBR label and returned to you.
NBR-registered bikes are 9 times more likely to be returned.
thousands of police departments nationwide.
This special offer is available only
by calling 1-800-226-6648.
To order:
For more information, go to www.NationalBikeRegistry.com.
The National Bike Registry is an of cial licensee of the National Crime Prevention Council. McGruff the Crime Dog and TAKE A BITE OUT OF CRIME are registered trademarks of the National Crime Prevention Council.
A portion of all NBR registration fees goes to fund National Crime Prevention Council programs.
Note:
The National Bike Registry cannot guarantee return of lost or stolen property. Subscribers must pay shipping & handling fees to facilitate return of items.
Complete details of National Bike Registry Terms of Service are listed at www.NationalBikeRegistry.com, or write to NBR at 1776 Fairway Dr., San Leandro, CA 94577.
Register your bike.
Activate your NBR label.
Then if your bike is
lost or stolen...
•
•
•
Make it easy for your bike to nd you...
Protect your bike for 10 years!
FREE LOST & FOUND SERVICE
Page 36

What is your bike’s serial number?
(see diagram on inside front cover for location)
Date of
Purchase:
Year
What model bike do you have?
Joker
Skin Dog
Venom
What is your bike’s
dealer name
)
state:
(
excluding sales tax
)
Received as a gift
Received as a gift
Color/Appearance
Color/Appearance
Quality/Durability
Quality/Durability
Comfort/Fit
Comfort/Fit
Advertisement
Advertisement
Frame/Design/Materials
Frame/Design/Materials
Family/Friend Recommendation
Family/Friend Recommendation
Value/Price
Value/Price
Component selection
Component selection
Weight of bicycle
Weight of bicycle
Prior experience with brand
Prior experience with brand
Sales person’s recommendation
Sales person’s recommendation
Diamondback’s Reputation
Diamondback’s Reputation
Other
Other
Other brands considered ?
Gender:
Address:
Street & Apt No.
City
Year
Address:
State
Zip Code
Country
Jr Viper
Orion
Session
Viper
Grind
Sherman
Viper X
If you do not have access to a computer, please complete the form below and return within the next 10 days. Notates required elds.
Other (specify)
Professional/Technical
Upper Management/Executive
Middle Management
Sales/Marketing
Occupation
(Check all
that apply)
You Spouse
Clerical/Service Worker
Tradesman/Machine Operator/Laborer
Student
Housewife
You Spouse
Annual
$20,000 – $50,000
$20,000 – $50,000
$50,000 – $75,000
$50,000 – $75,000
$75,000 – $100,000
$75,000 – $100,000
Over $100,000
Over $100,000
Under $20,000
Under $20,000
Retired
*
Page 37

www.diamondback.com.
fold and insert into envelope and mail to:
6004 S. 190th Street, Suite 101
Page 38

www.diamondback.com
www.diamondbackbmx.com
©2005 Raleigh America, Inc.
 Loading...