

Page 1
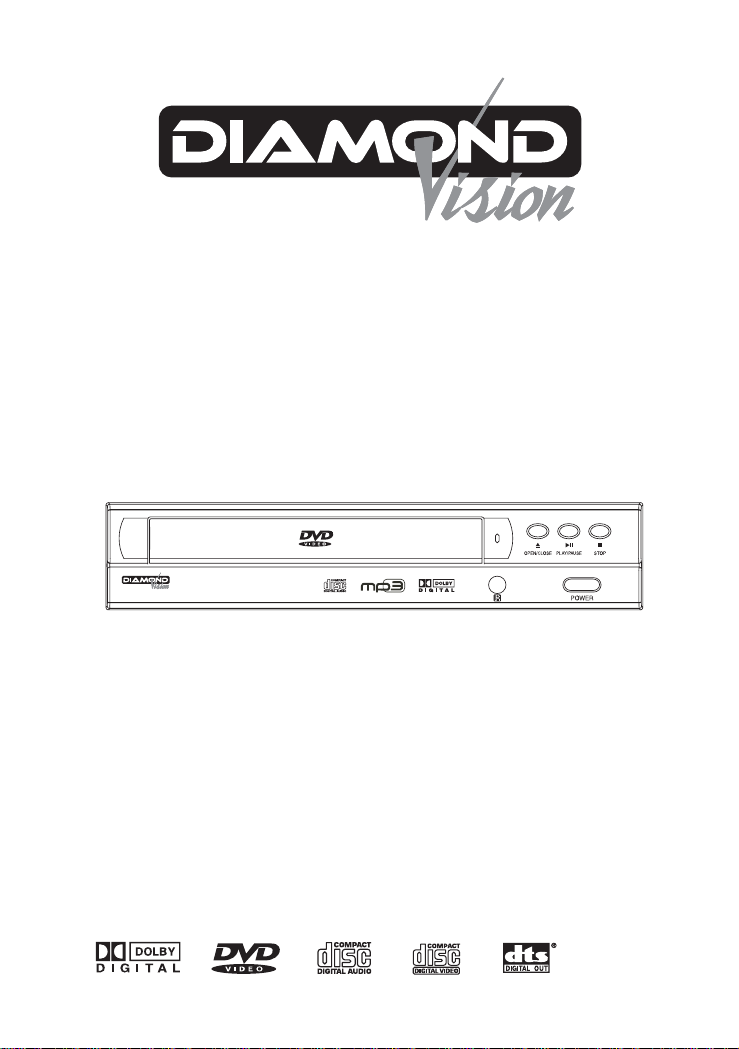
DVD / MP3 / CD PLAYER
LECTEUR DVD / MP3 / CD
DVDV805-03
DVDV805-04
THIS INSTRUCTION BOOK MAY CONTAIN ERRORS AND OMISSIONS.
DESIGN AND SPECIFICATION ARE SUBJECT TO CHANGE WITHOUT NOTICE.
CE LIVRET D’INSTRUCTIONS PEUT CONTENIR DES ERREURS ET DES OMISSIONS. LE
CONCEPT ET LES CARACTÉRISTIQUES SONT SUJETS À CHANGEMENT SANS PRÉAVIS.
OPERATION MANUAL
MANUEL DE FONCTIONNEMENT
mp3
Page 2
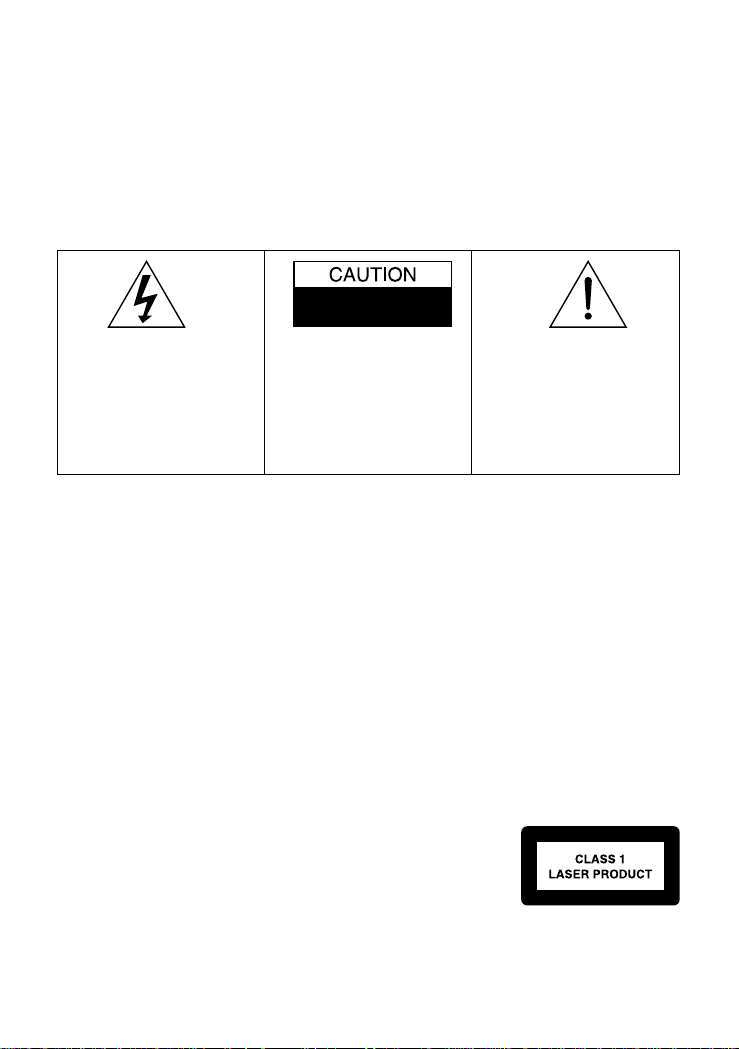
WARNING
To prevent fire or shock hazard, do not expose this appliance to rain or moisture.
The apparatus should not be exposed to dripping or splashing and that no objects filled with liquids, such
as vases, shall be placed on the apparatus.
The ventillation should not be impeded by covering the ventilation openings with items, such as
newspapers, table-cloths, curtains, etc.
No naked flame sources, such as lighted candles, should be placed on the apparatus.
CAUTION
TO PREVENT ELECTRIC SHOCK, DO NOT USE THIS (POLARIZED) PLUG WITH ANY EXTENSION
CORD, RECEPTACLE OR OTHER OUTLET UNLESS THE PLUG CAN BE FULLY INSERTED
WITHOUT EXPOSING ANY PARTS OF THE BLADES.
RISK OF ELECTRIC SHOCK
DO NOT OPEN
The lighting flash with arrowhead
symbol, within an equilateral triangle, is intended to alert the user to
the presence of uninsulated "dangerous voltage" within the
product's enclosure that may be of
sufficient magnitude to constitute
a risk of electric shock to persons.
WARNING: TO REDUCE THE
RISK OF ELECTRIC SHOCK,
DO NOT REMOVE COVER
(OR BACK). NO USERSERVICEABLE PARTS
INSIDE, REFER SERVICING
TO QUALIFIED SERVICE
PERSONNEL.
The exclamation point within
an equilateral triangle is intended to alert the user to
presence of important operating and maintenance
(servicing) instructions in the
literature accompanying the
appliance.
IMPORTANT
Since CD circuitry may cause interference with other radio tuners nearby, switch this recorder
off when not in use or move it away from an affected radio tuner.
This device complies with Part 15 of the FCC Rules. Operation is subject to the following two
conditions: (1) This device may cause harmful interference, and (2) this device must accept any
interference received, including interference that may cause undesirable operation.
Warning: Changes or modifications to this unit not expressly approved by the party responsible
for compliance could void the user's authority to operate the equipment.
NOTE: This equipment has been tested and found to comply with the limits for a Class B digital
device, pursuant to Part 15 of the FCC Rules. These limits are designed to provide reasonable
protection against harmful interference in a residential installation. This equipment generates
uses and can radiate radio frequency energy and, if not installed and used in accordance with
these instructions, may cause harmful interference to radio communications. There is no
guarantee that interference will not occur in a particular installation. If this equipment does
cause harmful interference to radio or television reception, which can be determined by turning
the equipment off and on, the user is encouraged to try to correct the interference by one or
more of the following measures:
• Increase the separation between the equipment and receiver.
• Connect the equipment into an outlet on a circuit different from that
to which the receiver is connected.
• Consult the dealer or an experienced radio / TV technician for help.
SAFETY CERTIFICATION
This CD player is made and tested to meet safety standards of the FCC, requirements and
compliance with safety performance of the U.S. Department of Health and Human Services,
and also with FDA Radiation Performance Standards 21 CFR Subchapter J.
2
Page 3
SAFETY INSTRUCTIONS -
This product was designed and manufactured to meet strict quality and safety standards. There are,
however, some installation and operation precautions which you should be particularly aware of.
1. Read Instructions — All the safety and operating instructions should be read before the
appliance is operated.
2. Retain Instructions — The safety and operating instructions should be retained for future
reference.
3. Heed Warning — All warnings on the appliance and in the operating instructions should be
adhered to.
4. Follow Instructions — All operating and use instructions should be followed.
5. Water and Moisture — The appliance should not be used near water – for example, near a
bathtub, washbowl, kitchen sink, laundry tub, in a wet basement, or near a swimming pool,
etc.
6. Carts and Stands — The appliance should be used only with a cart or stand that is recommended by the manufacturer.
6A. An appliance and cart combination should be moved with care. Quick stops, ex-
cessive force, and uneven surfaces may cause the appliance and cart combination
to overturn.
7. Wall or Ceiling Mounting — The appliance should be mounted to a wall or ceiling only as
recommended by the manufacturer.
8. Ventilation — The appliance should be situated so that its location or position does not
interfere with its proper ventilation. For example, the appliance should not be situated on a
bed, sofa, rug, or similar surface that may block the ventilation openings; or, placed in builtin installation, such as a book case or cabinet that may impede the flow of air through the
ventilation openings.
9. Heat — The appliance should be situated away from heat sources such as radiators, heat
registers, stoves, or other appliances (including amplifiers) that produce heat.
10. Power Sources — The appliance should be connected to a power supply only of the type
described in the operating instructions or as marked on the appliance.
11. Grounding or Polarization — The precautions that should be taken so that the grounding
or polarization means of an appliance is not defeated.
CAUTION: To prevent electric shock, match the wide blade of this plug
to the widle slot, fully insert. Do not use this (polarized) plug with an
extension cord, receptable or other outlet unless the blades can be fully
inserted to prevent blade exposure.
12. Power-Cord Protection — Power-supply cords should be routed so that they are not likely
to be walked on or pinched by items placed upon or against them, paying particular attention to cords at plugs, convenience receptacles, and the point where they exit from the
appliance.
13. Cleaning — The appliance should be cleaned only as recommended by the manufacturer.
14. Power Lines — An outdoor antenna should be located away from power lines.
15. Nonuse Periods — The power cord of the appliance should be unplugged from the outlet
when left unused for a long period of time.
16. Object and Liquid Entry — Care should be taken so that objects do not fall and liquids are
not spilled into the enclosure through openings.
17. Damage Requiring Service — the appliance should be serviced by qualified service personnel when:
A.The power-supply cord or the plug has been damaged; or
B.Objects have fallen, or liquid has spilled into the appliance; or
C.The appliance has been exposed to rain; or
D.The appliance does not appear to operate normally or exhibits a marked change in per-
formance; or
E.The appliance has been dropped, or the enclosure damaged.
18. Servicing — The user should not attempt to service the appliance beyond that described in
the operating instructions. All other servicing should be referred to qualified service personnel.
Read before operating equipment
3
Page 4

Getting Started
Before attempting to connect, operate or adjust this product, please read these instructions completely and keep this manual for future reference.
Dear customers :
May we take this opportunity to thank you for purchasing this DVD Player.
We strongly recommend that you carefully study the operating instructions before operating the unit.
Main Features
• Front loading DVD / MP3 / CD player.
• Built-in Dolby Digital.
Standards
Video : NTSC
Audio : PCM (48 or 96 kHz), 2 Channel MPEG layer 2, Dolby AC-3 & dts line out
Features of audio specifications
– DOLBY Digital 2 ch decoding output.
– DTS for Digital (Coaxial) output
– Linear PCM output.
4
Page 5
Getting Started
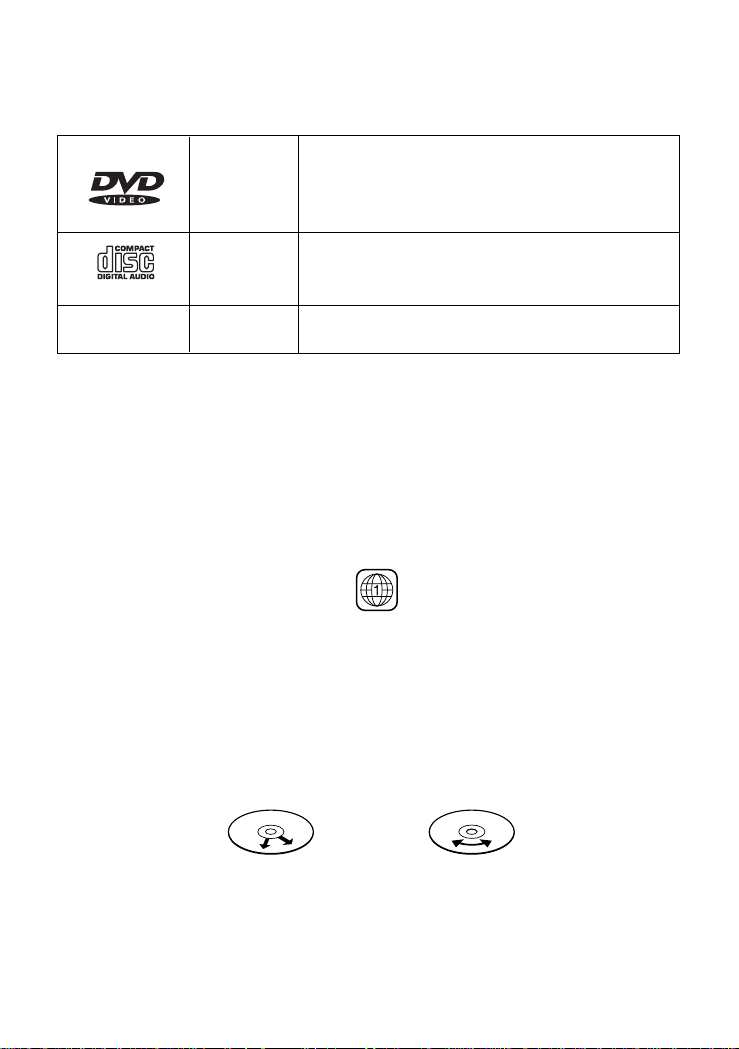
Disc types
Audio &
Video
Audio
Disc size 12cm
single side, single layer / single side, double layer
PAL and NTSC DVD disc
Playback time 135min / 240min max.
Disc size 12cm / 8cm
CD disc
Playback time 74min/20min max.
MP3
* Player is CD-R, CD-RW compatible.
Note: CD-R, CD-RW Discs recorded with writing device can only be used when they are
correctly treated.
Region Management Information
This DVD Player is designed and manufactured to respond to the Region Management
Information that is recorded on a DVD disc. If the Region number described on the DVD
disc does not correspond to the Region number of this DVD Player, this DVD player cannot play that disc.
This Region number of this DVD player is .
Disc manintenace
– Before playback, wipe the disc from the center hole toward the outer edge with a clean
cloth.
– Never use benzine, thinner, cleaning fluid, static electricity prevention liquids or any
other solvent.
Note : Dirty disc may cause bad picture.
Audio
From the center to the edge
MP3 format disc
Correct
Incorrect
5
Page 6
Safety precautions
Warning
To avoid electrical shock, do not open the
cabinet, refer servicing to qualified personnel only.
Warning
Keep the unit away from flower vases, tubs,
sinks, etc. If liquids are spilt into the unit,
serious damage could occur.
Warning
Do not expose this equipment to rain or
moisture.
Warning
Do not block ventilation holes of the unit so
that air can circulate freely,
Attention
If smoke, malodour or unrelated noise are
emitted from the unit, turn off the power and
disconnect the AC power cord.
Attention
Touching the unit is dangerous especially if
during thunder.
Attention
When left unused for a long period of time,
the unit should be unplugged from the household AC outlet.
Attention
Be sure to turn the unit off and disconnect the AC
power cord before cleaning the unit surface. If the
surface is dirty, wipe clean with a cloth which has
been dipped in a weak soap and water solution and
wrung out thoroughly, and then wipe again with a
dry cloth.
Note: This unit is a class 1 laser product and uses a visible laser beam which could
cause hazardous radiation exposure if directed. Be sure to operate it correctly as
instructed.
6
Page 7
Front Panel Control
1. Disc Tray
2. Power Indicator
a) Steady Light = play mode
b) Blinking Light = standby mode
3. Open/Close Button
Rear Panel Control
1. AC Power Cord
2. Y/Pb. Cb/Pr. Cr output
3. Video output (composite)
4. Play / Pause Button
5. Stop Button
6. Remote Sensor
7. Power ON/OFF
4. Analog Audio output
5. Digital Audio output (coaxial)
6. S-Video output
7
Page 8
Battery installation (remote control unit)
1. Remove the battery cover.
2.
Insert two batteries (AAA) making sure the polarity (+/-) matches the marks inside the unit.
3. Replace the cover.
– Do not attempt to recharge, short-circuit, disassemble, heat or throw the batteries into
the fire.
– Do not mix old and new batteries
– Dispose of properly in accordance with local law.
Note : Weak batteries can leak and severely damage
the remote control unit.
Remote Control Unit
1. Power on/off Button
2. Numeric Buttons
1
2
3
4
5
6
7
8
9
10
11
12
13
14
15
16
17
18
19
20
21
22
23
24
25
26
27
28
29
3. Display Button
4. Volume – Button
5. Setup Button
6. DVD Menu Button
7. Direction Buttons
( Up / Down/ Left/ Right)
8. Fast Backward Button
9. Play Button
10. Stop Button
11. Slow Button
12. Subtitle Button
13. P. Scan Button
14. Search Button
15. Audio Button
16. Zoom Button
17. Eject Button
18. Volume + Button
19. Mute Button
20. Previous Button
21. Next Button
22. Enter Button
23. Fast Forward Button
24. Step/Pause Button
25. Program Button
26. Angle Button
27. Cancel Button
28. Repeat Button
29. Repeat A-B Button
8
Page 9
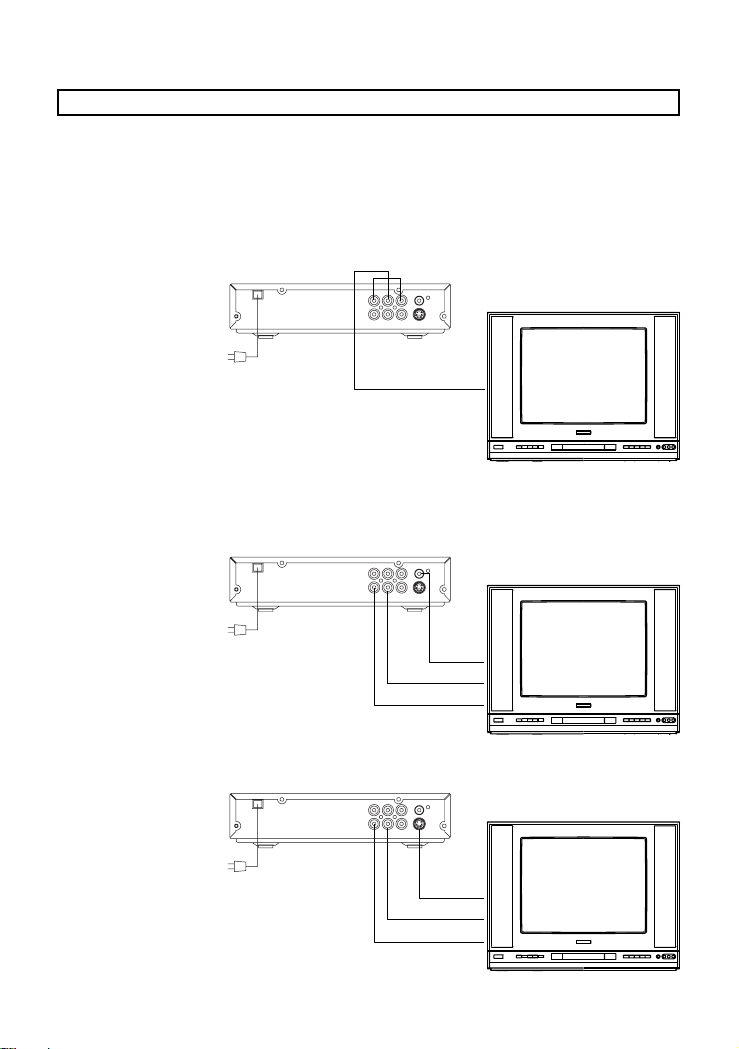
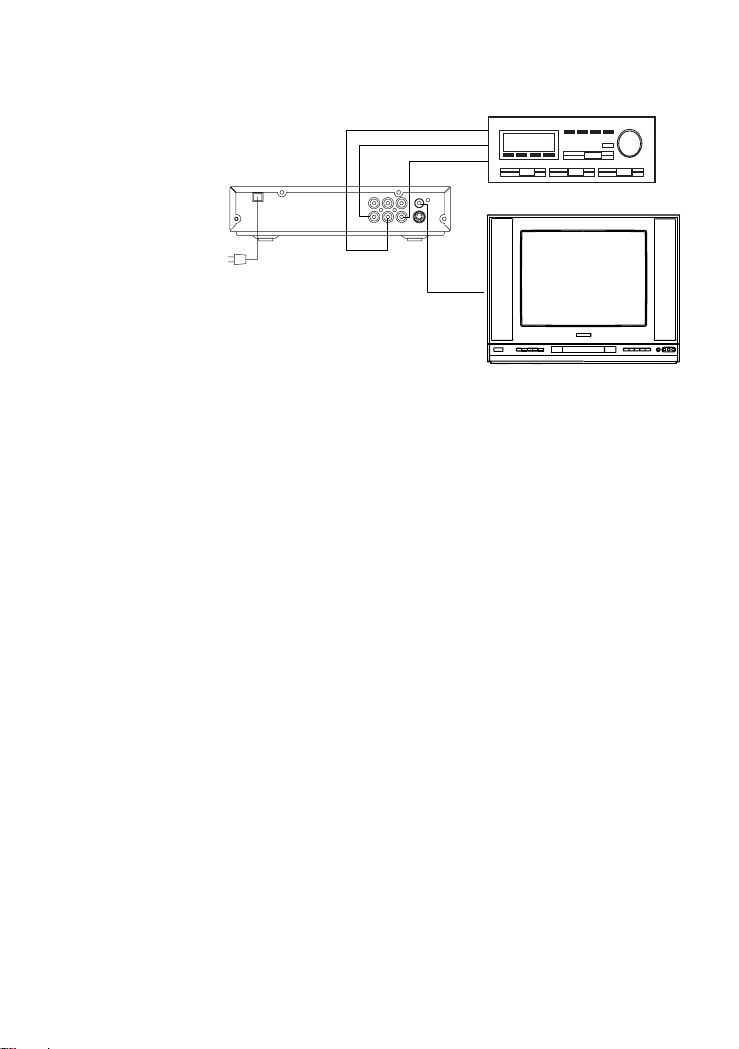
Connect To TV
Caution : Turn off all te equipment before any installation.
This unit provides several types of video and audio signals output. They are :
• Y/Pb, Cb/Pr, Cr output
• RCA output
• S-Video Output
User can choose a suitable connection type to connect the player to TV.
1. Y/Pb, Cb/Pr, Cr output
Component Video
(Y/Pb, Cb/Pr, Cr)
2. Connection via Composite (RCA) Cable
In this type of connection, we have to connect the Left/Right Audio Cables (Red and
White) and a Video signal (Yellow).
3. Connection via S-Video Cable
Video in
Audio in R
Audio in L
S-Video in
Audio in R
Audio in L
9
Page 10
Connection to Amplifier
There are four different types of connection between the DVD player and an amplifier.
2
3
1
Video output
• Digital output via Coaxial Cable (Connection 1).
• 2 channels (left/right) Audio Output (connection 2-3)
Note:
1. The Digital output cut off, when Analog output was selected.
2. The Analog output cut off, when Digital/Optical output was selected.
10
Page 11

Operation
TV Selection
Turn on the TV, the DVD player and the Audio Amplifer System (if any).
1. Press the “TV/VIDEO” button on the TV.
2. Select the Video Mode (TV).
Note: If there are more than 1 AV channel for the TV, select the channel you have
connected to the DVD player.
3. Select the Correct Audio Input on the AV Amplifier (if any)
Play Discs
1. Press the OPEN/CLOSE button ( ) on the front panel and load the Disc on the
tray. The label side should be facing upwars. For a Double-sided DVD Disc, put the
disc with label A/1 up.
2. Press the OPEN/CLOSE button ( ) again to close the tray and the disc will be
loaded.
3. The Disc will be played automatically.
• If it is a DVD disc, it will show the Menu/Title Page on the screen.
• If it is a CD, it will play the first track directly.
4. Press the STOP button ( ) if you want to stop the Disc playback. You can resume
playback by pressing the PLAY button and it will start at the location where you have
pressed stop (Resume Play).
5. Press the STOP button twice to have the Disc stop completely.
Pause /Step
This function is applicable for DVD and CD audio.
• For DVD, the picture will freeze.
• For CD audio, it will become muted.
1. Press the PAUSE button ( ) to pause play.
2. Press the PLAY button again to resume Play.
DVD Setup Mode
• Setup Mode provides the menu for the configuration of TV DISPLAY Mode, OSD
LANGUAGE Mode, AUDIO Mode, PARENTAL Mode, PASSWORD, etc.
• Item selection in the SETUP menu is done by using the Direction button and the
ENTER button.
• To exit the SETUP menu, press the SETUP button again.
• The initial password for PARANTAL Mode is set at 1369.
Note: To setup the TV display mode, must be in stop mode.
11
Page 12
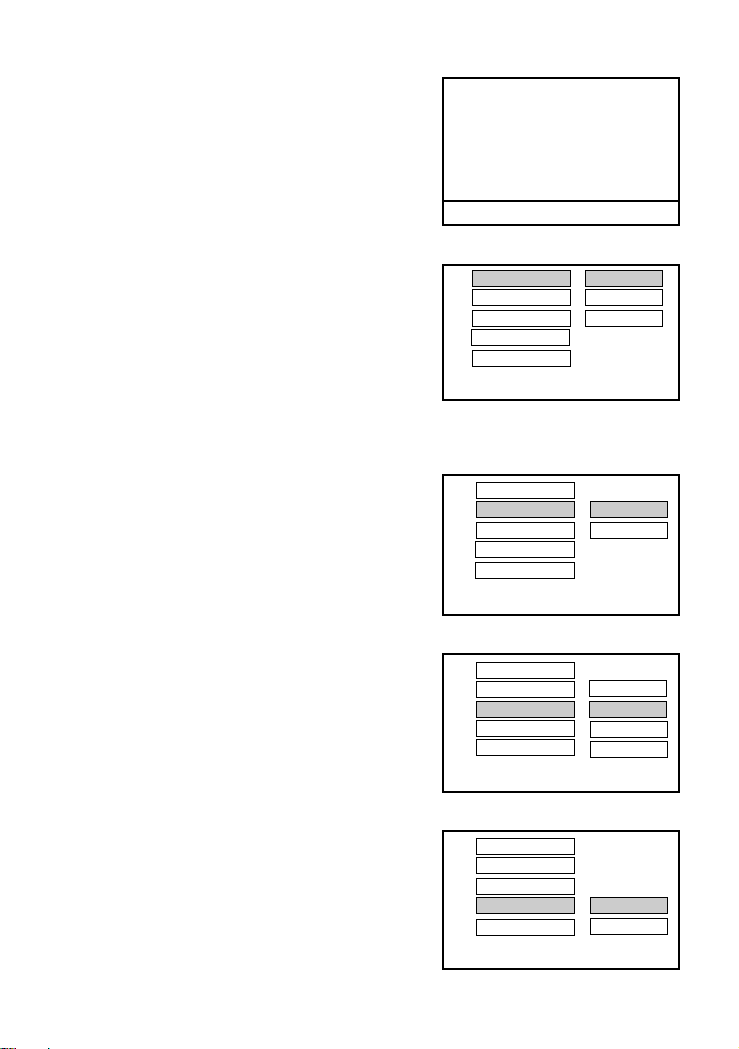
Setup Menu Items :
Press the SETUP button on the remote control.
The following menu will be shown:
-- GENERAL SETUP PAGE --
TV Display LB
Angle Mark On
OSD Lang ENG
Captions Off
Screen Saver On
1. GENERAL SETUP
TV DISPLAY
• Normal/PS
This is selected when the DVD player is connected to a normal TV. Wide-screen imaged are
shown on the screen, but with some parts cut
automatically.
• Normal/LB
This is selected when the player is connected to
a normal TV. Wide screen images are shown on
the screen, with black belt on the top and bottom.
Go To General Setup Page
-- GENERAL SETUP PAGE --
TV Display
Angle Mark
OSD Lang WIDE
Captions
Screen Saver
Set TV Display Mode
• WIDE
This is selected when the player is connected to a wide-screen TV.
-- GENERAL SET UP PAGE --
ANGLE MARK
This only works when there is an angle mark on
the disc. Select ON, the screen shows the mark
when playing DVD.
- ON
- OFF
OSD LANGUAGE
This used to select the OSD language.
- English
- Spanish
- German
- French
CAPTIONS
This option can show or hide the captions.
- On (Show captions)
- Off (Hide captions)
TV Display
Angle Mark
OSD Lang
Captions
Screen Saver
Set Angle Mark
-- GENERAL SETUP PAGE --
TV Display
Angle Mark English
OSD Lang
Captions
Screen Saver
Set OSD Language
-- GENERAL SETUP PAGE --
TV Display
Angle Mark
OSD Lang
CAPTIONS
Screen Saver
Closed Caption
NORMAL/PS
NORMAL/L2
ON
OFF
French
German
Spanish
ON
OFF
12
Page 13
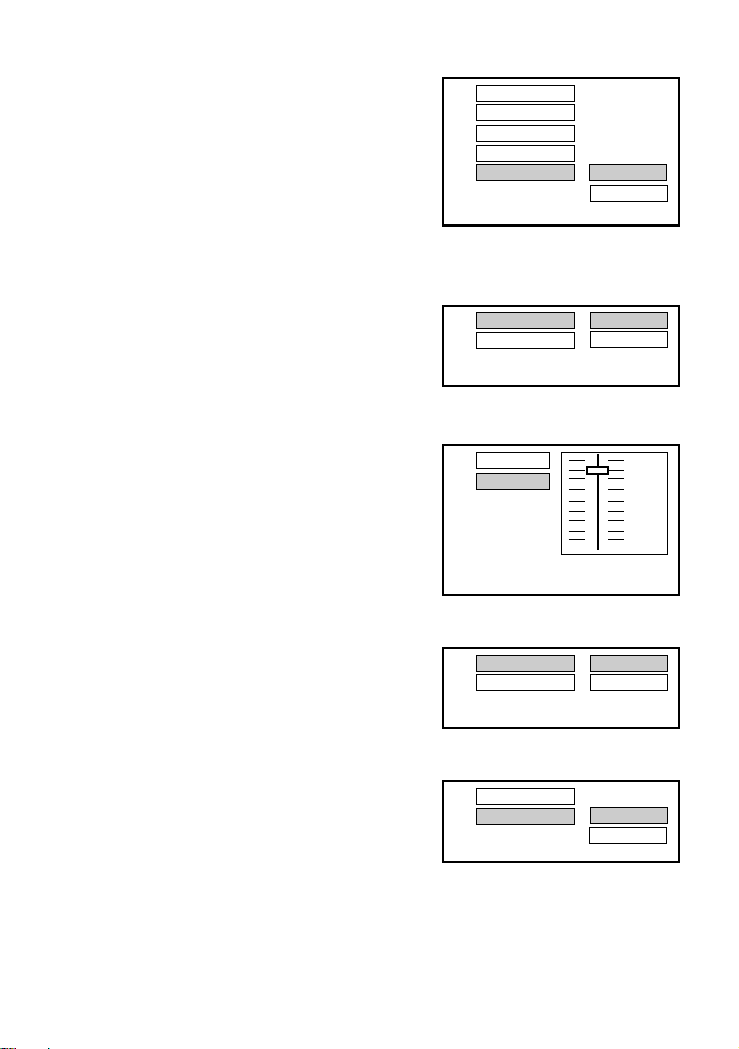
SCREEN SAVER
Start the screen saver, the screen saver image
appears when the player stops or the image is
frozen for a few minutes. This saver can keep
the screen from being damaged.
- ON (Start the screen saver)
- OFF (Remove the screen saver)
2. SPEAKER SETUP
When SPEAKER SETUP option is selected, the
following menu will be shown.
DOWNMIX
• LT/RT
A disc recorded multi channel soundtrack, the
output signal will be incorporated to left and right
channel.
• STEREO
A disc record multi channel soundtrack, the
output signal will be incorporated to stereo.
DOLBY DIGITAL SETUP
• DYNAMIC
This option is used to set the compression ratio in
order to control the sound (volume) contrast.
-- GENERAL SETUP PAGE --
TV Display
Angle Mark
OSD Lang
Captions
Screen Saver
SCREEN SAVER
ON
OFF
-- SPEAKER SETUP PAGE --
Downmix
Dynamic
Set Downmix Mode
LT/RT
Stereo
-- SPEAKER SETUP PAGE --
Downmix
Dynamic 3/4
Set DRC to 1/2 Conpression
FULL
1/2
1/4
0FF
3. VIDEO SETUP
When VIDEO SETUP option is selected, the
following menu will be shown. To select the
desired item use the direction ( /// )
button.
• VIDEO OUT : CVBX/S-VIDEO
YUV
• VIDEO TV : P-SCAN
INTERLACE
Note : To select P-SCAN mode, the P-SCAN
output must be connect to P-SCAN TV, otherwise
the picture will be unstable.
13
-- VIDEO SETUP PAGE --
Video Out
TV Mode
CVBS/S-VIDEO
YUV
-- VIDEO SETUP PAGE --
Video Out
TV Mode
P-SCAN
Interlace
Page 14

4. PREFERENCE SETUP
AUDIO
If a language listed below is recorded on the disc,
you can play the sound in such language. If not,
the language recorded will be used.
- English
- French
- Spanish
- German
SUBTITLE
If a language listed below is recorded on the disc,
you set the subtitle to be displayed in such
language. If not, the language recorded will be
used.
- English
- French
- Spanish
- German
-Off
DISC MENU
If a language listed below is recorded on the disc,
you can set the Menu to be displayed in such
language. If not, the language recorded will be
used.
- English
- French
- Spanish
- German
PARENTAL
When playing disc with parental lock function,
you may select an age control grade according to
grade of disc and your own preference.
For example, if PG is selected, DVD Video disc
rated higher than the PG guide cannot be played.
- KID SAF
-G
-PG
- PG 13
- PGR
-R
- NC 17
- ADULT
- OFF
--
PREFERENCE SET UP PAGE
Audio
Subtitle French
Disc Menu Spanish
Parental German
Password
Default
Preference Audio Languages
--
PREFERENCE SET UP PAGE
Audio
Subtitle
Disc Menu French
Parental Spanish
Password German
Default Off
Subtitle
--
PREFERENCE SET UP PAGE
Audio
Subtitle
Disc Menu
Parental French
Password Spanish
Default German
Preference Disc Menu Languages
--
PREFERENCE SET UP PAGE
Audio
Subtitle
Disc Menu
Parental
Password G
Default PG
Set Parental Control
English
English
English
KID SAF
PG-13
PGR
R
NC17
ADULT
OFF
--
--
--
--
14
Page 15

PASSWORD : OLD ______
NEW ______
VERIFY ______
Move the cursor to the “PASSWORD” item and press ENTER button to confirm and
then input the secret code “1369”. After confirmation, you are required to input new
secret code and then press ENTER button to confirm. and retreat to the “Custom
setup” interface.
Warning: Please remember the new secret code, otherwise you will not able to
change the Parental Control. Please contact the agent or our company if you forget
the secret code.
DEFAULT
User can load the original factory settings by
choosing RESET and pressing ENTER.
- RESET
--
PREFERENCE SET UP PAGE
Audio
Subtitle
Disc Menu
Parental
Password
Default
Preference Menu Languages
Reset
--
DVD Menu Play
The DVD Menu Play function is only applicable for DVD movie. User can access the
Casting informationm, Production History, Movie Introduction etc. directly through this
function.
1. Press the DVD MENU button on the remote control to enter the Root Menu.
2. Use the Direction button () or input the item index through the Number keys
(0-9) to do the selection.
3. Press ENTER to confirm the selection.
Progressive scan creates a picture with double the scan lines of traditional component
video pictures and creates a sharper image. The advantages of progressive scan video
output are reduced picture flickering and motion artifacts as well as a sharper image on
large screens.
Audio
This funciton is applicable for DVD and CD audio but with different effects.
- Pressing AUDIO button will change the Audio channel.
REW / F.F. ( / )
This function is applicable for DVD and CD audio but with different effects. The FAST
FORWARD key and FAST BACKWARD key are used to achieve fast play function.
- For DVD, there are 5 different levels of speed (2x, 4x, 8x, 16x, 32x). Every succes-
sive key press will increment the speed of quick play.
- For CD audio, the FORWARD/BACKWARD will perform quick rolling on the music
output.
Note : Press PLAY button at any stage will resume to normal speed.
15
Page 16

PREV. / NEXT ( / )
During playback, press one of the PREV. / NEXT buttons (PREVIOUS button and NEXT
button)
- When the PREV. button is pressed once, the pickup returns to the beginning of the
PREVIOUS playing chapter or track.
- When the NEXT button is pressed once, the pickup will go to the beginning of next
chapter or track.
P. SCAN (PROGRESSIVE SCAN)
Press this button to enter to the P-SCAN mode. Press this button again switch back to
normal interlace mode.
Note : To select P-SCAN mode, the P-SCAN output must be connect to P-SCAN TV,
otherwise the picture will be unstable.
Slow F.F.
The Slow Forward is applicable for DVD. There are 4 steps of slow motion speed, 1/2,
1/4, 1/8, 1/16. Successive key presses will decrement the playback speed.
Note: Press PLAY button to switch back to normal playback speed.
Repeat Mode
This function is applicable for DVD and CD audio but with different effects.
- For DVD disc playback, user can choose to repeat the current chapter, current title
or disc. Subsequent key press of the REPEAT key can change between these three
options.
- For CD, user can choose to repeat the current track or the whole disc (Repeat All).
Subsequent key press of the REPEAT key can change between these two options.
A – B
This function is applicable for DVD and CD audio. User can specify the repeating
interval by marking the starting point and the end point.
1. Press the A-B button to mark the starting point (Playback will continue).
2. Press the A-B button to mark the end point (The marked part will be repeated
automatically.)
Note : Press the A-B button during repetition will disable the Repeat mode.
Subtitle
This function is only applicable for DVD disc. It can change the subtitle language shown
on the screen.
Note : Number of subtitle available depends on the DVD disc.
Angle
Some discs may have multiple viewing angles during production. The ANGLE button is
to select the viewing angle shown on the screen.
Note : The number of Angle of View depends on the disc.
16
Page 17

Search
This function is applicable for DVD and CD audio. Through this function, the user can
access a specific location or a specific track by key in the target time or the track
number.
1. Press the SEARCH button to enter the Search Mode.
2. Input the target time through the Number keys (0-9) and the player will jump to the
target location immediately.
Display (Remain Time)
This function is applicable for DVD only. It will display the timing information of the
playback on the screen.
- For DVD playback, subsequent key presses on the DISPLAY button will show the
Title Elapsed Time, Title Remain Time, Chapter Elapse Time and Chapter Remain
Time one by one.
Press the DISPLAY Button TITLE ELAPSED
Press the DISPLAY Button TITLE REMAIN
Press the DISPLAY Button CHAPTER ELAPSED
Press the DISPLAY Button CHAPTER REMAIN
Press the DISPLAY Button DISPLAY OFF
TT 01/04 CH 01/02 0:02:13
TT 01/04 CH 01/02 1:33:30
TT 01/04 CH 01/02 0:02:15
TT 01/04 CH 01/02 0:02:18
Play
This function is applicable for DVD and CD audio. During the disc playback, when the
STOP button is pressed once, the player will enter the Resume Play mode. At this time,
if the PLAY button is pressed, the player will resume playback at the location where the
STOP button is pressed. If the STOP button is pressed (i.e. STOP button is pressed
twice), the player will be stop.
Zoom
This function is applicable for DVD. User can enlarge a static picture or a moving
picture by pressing the ZOOM button. There are 3 levels of zooming (2x, 3x and 4x)
and they can be achieved one by one through subsequent key presses on the ZOOM
key.
NOTE: user can select the portion of the picture to be enlarged by using the Direction
button ().
17
Page 18

Program Mode
This function is applicable for DVD and CD audio. User can assign the playback
sequence according to his/her preference. For CD audio, user can assign the track
sequence while for DVD disc, user can assign both the Title and Chapter sequence.
1. Press the PROGRAM button. The Program
Sequence tabel will be shown on the screen.
2. Enter the track number according to the user
preference through the Number keys (0-9).
3. After assigning the playback sequence, move
the highlight cursor to the START opiton by
using the Navigation Arrows. Press ENTER on
the remote control to confirm.
To remove the program:
Move the highlight cursor to desired Program by
using the Navigation arrows then press the CLEAR
button to remove the selected program.
PROGRAM
01 _ _ 06 _ _
02 _ _ 07 _ _
03 _ _ 08 _ _
04 _ _ 09 _ _
05 _ _ 10 _ _
EXIT START NEXT
PROGRAM
01 0 5 06 _ _
02 0 3 07 _ _
03 0 8 08 _ _
04 _ _ 09 _ _
05 _ _ 10 _ _
EXIT START NEXT
PROGRAM
01 0 5 06 _ _
02 0 3 07 _ _
03 0 8 08 _ _
04 _ _ 09 _ _
05 _ _ 10 _ _
EXIT START NEXT
I
I
I
18
Page 19

MP3 OPERATION
This unit can support ISO9660 file system CD-ROM navigation. Multi-Media files such
as MP3 can be played in the DVD player.
Operation
• Insert the MP3 disc into the tray. Navigation Menu will be displayed. The menu will
show the files in the root directory, and the MP3 files then be play automatically.
• In the MP3 menu shows a blue and an orange cursor. The blue cursor indicates the
currently playing MP3 song, the orange cursor indicates a title to be selected.
MP3
Blue cursor
Orange cursor
You can select the other songs by the nevigation arrow buttons or directly input the
song number by pressing the number keys. The orange cursor will move to the
selected song. Then press ENTER button to confirm.
Note :
• There are three digits displayed. If you want call up a title with only one or two digits,
you can either start the entry with “0” or “00”, or you can enter the number of the song
and then wait a few seconds until the cursor skips to the selected title.
• Press the REPEAT button to select : Random (playback in random order), Single
(play one title, then stop), Repeat One (repeat the current title), Repeat Folder (repeat
current folder).
SONG 001
MP3
SONG 002
MP3
SONG 003
MP3
SONG 004
MP3
SONG 005
MP3
SONG 006
Picture CD
Digital picture (JPEG) from a digital camera can be burnt to a disc and played on this
DVD Player. Insert a picture CD into the tray and the disc will be loaded automatically.
If the disc type can be identified, the player will start showing the pictures one by one
(Side Show Mode).
Operations:
During Slide Show Mode:
• Pressing the PAUSE button will freeze the screen, so that the current picture can be
held for a long time. To resume the slide show mode, press PLAY button.
• Pressing the NEXT button on the remote control will skip the next picture.
• Pressing the PREVIOUS button on the remote control will repeat the current picture.
19
Page 20

TROUBLE SHOOTING
Check the following guide for the possible cause of a problem before contacting service.
Symptom
No Power
The power is on, but DVD
player does not work
No Picture
No Sound
The playback picture is poor
The DVD player does
not start playback
The Remote Control
does not work properly
Cause
• The power cord is disconnected.
• No disc is inserted.
• The TV is not set to receive DVD
signal output.
• The video cable is not connected
securely.
•
The connected TV power is turned off.
• The equipment connected with the
audio cable is not set to receive
DVD signal output.
• The audio cable is not connected
securely.
•
The power of the equipment connected
with the audio cable is turned off.
• The Digital Audio Output is set to
the wrong position.
• The disc is dirty.
• No disc is inserted.
• An unplayable disc is inserted.
• The disc is placed upside down.
• The disc is not placed with the
guide.
• The disc is dirty.
• A menu is on the TV screen.
• The Rating level is set.
The remote control is not pointed at
•
the remote sensor of the DVD player.
• The remote control is too far from
the DVD player.
•
There is an obstacle in the path of the
remote control and the DVD player.
• The batteries in the remote control are exhausted.
Correction
• Plug the power cord into the wall
outlet and unit securely.
•
Insert a disc. (Check that the DVD or audio CD indicator in the DVD display is lit.)
•
Select the appropriate video input mode
on the TV so the picture from the DVD
player appears on the TV screen.
• Connect the video cable into the
jacks securely.
• Turn on the TV.
• Select the correct input mode of the
audio receiver so you can listen to the
sound from the DVD player.
• Connect the audio cable into the
jacks securely.
• T urn on the equipment connected with
the audio cable.
•
Set the Digital audio Output to the correct
position, then turn on the DVD player
again by pressing the POWER button.
• Clean the disc.
• Insert a disc
Insert a playable disc. (Check the disc
•
type, color system and Regional code.)
•
Place the disc with the playback side down.
• Place the disc on the disc tray correctly inside the guide.
• Clean the disc.
• Press the SET UP button to turn off
the menu screen.
• Cancel the Rating function or change
the rating level.
• Point the remote control at the remote
sensor of the DVD player.
• Operate the remote control within
about 23ft (7m).
• Remove the obstacle.
• Replace the batteries with new ones.
20
Page 21

SPECIFICATION
GENERAL
Power source AC 120V 60Hz
Power consumption 10W
Mass 2 Kg
External dimensions (WxHxD) 263 x 225 x 55 mm
Operating conditions Temperature: 5°C to 35°C
Operation status Horizontal
Operating humidity 5% to 90%
CD/DVD
Laser Semiconductor laser, wavelength 650nm
Signal system NTSC
Frequency response (audio) 4Hz to 20 KHz
Signal to noise ratio (audio) More than 90dB (1KHz, NOP, 20KHz LPF/A-Filter)
Dynamic range (audio) More than 95dB
Harmonic distortion (audio) 0.2% (1KHz)
VIDEO
Video output 1.0V (p-p), 75 ohm, negative sync., RCA jack
S-Video output (Y) 1.0V (p-p), negative sync., Mini DIN 4-pin x 1
(C) 0.3V (p-p), 75 ohm
Component video (Y, Pb/Cb, Pr/Cr) (Y) 0.7V (p-p), negative sync. RCA jack
(Pb/Cb) 0.7V (p-p), 75 ohm
(Pr/Cr) 0.7V (p-p), 75 ohm
* Design and specification are subject to change without notice.
21
Page 22

DIAMOND VISION
LIMITED WARRANTY
We at DIAMOND VISION believe you will be pleased with your new DIAMOND VISION Product. Please read this
Warranty carefully. DIAMOND VISION warrants this product to be free from manufacturing defects including original
parts and workmanship for a period of 90 days from the date of original purchase in and if used in Canada.
Should you find your unit is not operating properly during the terms of full coverage of this warranty (90
days), DIAMOND VISION will provide one of the following options (at DIAMOND VISION’s discretion),
providing the manufacturing defect is verified along with the date of purchase.
Repair service for 90 days from the date of original purchase at no charge for labour and parts. Replacement of your
defective unit with either a new, refurbished, or equivalent model at no charge for 90 days from the date of original purchase.
CUSTOMER OBLIGATIONS
This warranty applies to the product from the original date of purchase at retail. Therefore, the owner
must provide a copy of the original, dated bill of sale. No warranty service will be performed without a bill
of sale. Transportation to and from the service depot is the responsibility of the owner.
This warranty is void if the product is:
A) Damaged through negligence, abuse, misuse, accident or acts of God.
B) Used in commercial applications or rentals.
Modified or repaired by anyone other than DIAMOND VISION or their expressly authorized representative.
C)
D) Damage resulting from the improper connection to equipment of other manufacturers.
This warranty does not cover:
Cost incurred in the shipping of the product to and from the DIAMOND VISION authorized repair facility listed.
A)
B)
Damage or improper operation caused by the failure to follow the operating instructions provided with the product.
C)
Routine adjustments to the product which can be performed by the customer as outlined in the owner’s manual.
D) Damage to compact disc, or audio tape.
E) Signal reception problems caused by external factors.
F) Products not purchased in Canada.
G) Damage to the products used outside Canada.
THIS WARRANTY IS NON-TRANSFERABLE AND APPLIES SOLELY TO THE ORIGINAL PURCHASER
AND DOES NOT EXTEND TO SUBSEQUENT OWNERS OF THE PRODUCT. ANY APPLICABLE IMPLIED WARRANTIES, INCLUDING THE WARRANTY OF MERCHANTABILITY, ARE LIMITED IN DURATION T O A PERIOD OF THE EXPRESSED WARRANTY AS PROVIDED HEREIN BEGINNING WITH
THE DATE OF THE ORIGINAL PURCHASE A T RET AIL AND NO WARRANTIES, WHETHER EXPRESSED
OR IMPLIED SHALL APPLY TO THE PRODUCT THEREAFTER. DIAMOND VISION MAKES NO WARRANTY AS TO THE FITNESS OF THE PRODUCT FOR ANY PARTICULAR PURPOSE OR USE.
THE EXTENT OF DIAMOND VISION’S LIABILITY UNDER THIS LIMITED W ARRANTY IS THE REPAIR
OR REPLACEMENT PROVIDED ABOVE AT THE SOLE DISCRETION OF DIAMOND VISION IN NO
EVENT SHALL DIAMOND VISION’S LIABILITY EXCEED THE PURCHASE PRICE PAID BY THE
PRUCHASER. UNDER NO CIRCUMSTANCES SHALL DIAMOND VISION BE LIABLE FOR ANY LOSS,
DIRECT , INDIRECT, INCIDENTAL FORESEEN, UNFORESEEN, SPECIAL OR CONSEQUENTIAL DAMAGE ARISING OUT OF OR IN CONNECTION WITH THE USE OF THIS PRODUCT.
THIS WARRANTY IS VALID ONLY IN CANADA. THIS WARRANTY GIVES YOU SPECIFIC LEGAL
RIGHTS. HOWEVER, YOU MAY HAVE OTHER RIGHTS WHICH MAY VARY FROM PROVINCE TO
PROVINCE. SOME PROVINCES DO NOT ALLOW LIMITATIONS ON IMPLIED WARRANTIES OR EXCLUSION OF CONSEQUENTIAL DAMAGE, THEREFORE THESE RESTRICTIONS MAY NOT APPLY
TO YOU.
THIS INSTRUCTION BOOK MAY CONTAIN ERRORS AND OMISSIONS.
DESIGN AND SPECIFICATION ARE SUBJECT TO CHANGE WITHOUT NOTICE.
Cosmo Communications Service
55 Travail Road Unit 2
Markham, Ontario
L3S-3J1
Phone: (905) 209-0488 Fax: (905) 209-0489
Page 23

AVERTISSEMENT
Pour réduire le risque d’incendie ou de chocs électriques, ne pas exposer cet appareil à la pluie ou à l’humidité.
l’appareil ne devrait pas être exposé aux égouttements ou aux éclaboussures et aucun objet rempli de
liquide, tel que vases, ne devrait être placé sur l’appareil.
On devra éviter d’entraver la ventilation en recouvrant les ouvertures de ventilation avec des journaux,
nappes, rideaux, etc.
Aucune source de flammes nues, comme de bougies allumées, ne devrait être placée sur l’appareil.
IMPORTANT
Le signe d’éclair avec une pointe de flèche à l’intérieur d’un triangle équilatéral est conçu pour avertir
l’utilisateur de la présence d’une tension dangereuse non isolée à l’intérieur de l’enceinte de cet appareil,
qui peut avoir une magnitude suffisante pour constituer un risque de choc électrique à toute personne.
ATTENTION
RISQUE DE CHOC
ÉLECTRIQUE
NE PAS OUVRIR
The lightning flash with arrowhead
symbol, within an equilateral triangle,
is intended to alert the user to the
presence of uninsulated "dangerous
voltage" within the product's enclosure that may be of sufficient magnitude to constitute a risk of electric
shock to persons.
IMPORTANT
Le circuit CD risquant de causer du brouillage à d’autres syntonisateurs radio situés à proximité, fermez
cet appareil lorsqu’il n’est pas utilisé ou placez-le loin du syntonisateur radio affecté.
Ce dispositif se conforme à la partie 15 des règlements du FCC. Le fonctionnement est assujetti aux deux
conditions suivantes : (1) Ce dispositif ne peut pas causer des brouillages préjudiciables et (2) ce dispositif
doit accepter le brouillage reçu, y compris le brouillage qui peut causer un fonctionnement indésirable.
REMARQUE : Cet équipement a été testé et s’est avéré conforme aux limites d’un dispositif numérique
de classe B, conformément à la partie 15 des règlements du FCC. Ces limites sont conçues pour
fournir une protection raisonnable contre les brouillages préjudiciables dans une installation résidentielle.
Cet équipement crée, utilise et peut radier de l’énergie de fréquence radio et s’il n’est pas installé et
utilisé conformément aux instructions, il peut causer un brouillage dangereux aux communications
radio. Toutefois, il n’y a aucune garantie qu’un tel brouillage ne surviendra pas dans une installation en
particulier. Si cet équipement cause un brouillage préjudiciable à la réception de radio ou de télévision,
pouvant être déterminé en mettant en marche et en arrêtant l’équipement, nous encourageons l’utilisateur
à essayer de corriger tel brouillage en se conformant à l’une ou plusieurs des mesures suivantes :
• Augmentez la séparation entre l’équipement et le récepteur.
• Raccordez l’équipement à une prise sur un circuit différent de celui sur lequel le récepteur est
raccordé.
• Consultez le marchand ou un technicien expérimenté en radio/télévision pour obtenir de l’aide.
CERTIFICATION DE SÉCURITÉ
Ce lecteur CD est fabriqué et testé pour se conformer aux normes
de sécurité du FCC, ainsi qu’aux exigences concernant le US
Department of Health and Human Services ainsi qu’aux normes de
MISE EN GARDE : POUR
RéDUIRE LE RISQUE D’iNCENDIE
ET DE CHOC éLECTRIQUE, NE
RETIREZ PAS LE COUVERCLE
(OU LE DOS) DE L’aPPareil.
RéFéREZ LES RéP ARATIONS
SEULEMENT à UN PERSONNEL
DE RéPARATION QUALIFIé.
Le point d’exclamation à l’intérieur
d’un triangle équilatéral est conçu
pour avertir l’utilisateur de la
présence d’instructions de
fonctionnement et d’entretien
(service) importantes dans la
documentation accompagnant cet
appareil.
PRODUIT LASER
CLASSE 1
23
Page 24

INSTRUCTIONS DE SÉCURITÉ – à lire avant d’utiliser l’appareil
Cet appareil a été conçu et fabriqué pour se conformer à des normes très strictes de qualité et de sécurité. Il y a toutefois
certaines précautions d’installation et de fonctionnement auxquelles vous devriez apporter une attention particulière.
1. Lisez les instructions - Toutes les instructions de sécurité et de fonctionnement devraient être lues
avant d’utiliser l’appareil vidéo.
2. Conservez les instructions - Les instructions de sécurité et de fonctionnement devraient être
conservées pour pouvoir vous y référer par la suite.
3. Avertissements - Tous les avertissements sur l’appareil vidéo et dans le mode de fonctionnement
devraient être respectés.
4. Suivez les instructions - Toutes les instructions de fonctionnement devraient être respectées.
5. Eau et humidité - N’utilisez pas cet appareil près de l’eau – par exemple, près d’une baignoire, évier,
lavabo ou cuvette de buanderie, dans un sous-sol humide, près d’une piscine, ou endroits similaires.
6. Chariots et supports - Cet appareil devrait seulement être utilisé avec un chariot ou un support qui
soit recommandé par le fabricant.
6A. Déplacez avec soin les combinaisons de l’appareil vidéo et chariot. Des arrêts brutaux, une
7. Montage mural et au plafond - L’appareil devrait être monté au mur ou au plafond, seulement de la
8. Ventilation - Les fentes et les ouvertures dans le coffret sont prévues pour la ventilation et permettent
9. Chaleur - L’appareil devrait être situés loin des sources de chaleur tels que radiateurs, registres de
10. Source de courant - Cet appareil vidéo doit fonctionner seulement à partir du type de source de
11. Mise à la terre ou polarisation - Des précautions devraient être prises pour que
12. Protection du fil d’alimentation - Les fils d’alimentation en courant devraient être acheminés de
13. Nettoyage - L’appareil devrait être nettoyé seulement tel que recommandé par le fabricant.
14. Lignes de courant - Un système d’antenne extérieure ne devrait pas se trouver à proximité des lignes
15. Périodes de non utilisation - Le fil d’alimentation de l’appareil devrait être débranché de la prise
16.
17. Dommage nécessitant une réparation - Débranchez l’appareil vidéo de la prise murale et confiez la
18. Entretien - N’essayez pas de réparer vous-même ce produit vidéo étant donné que l’ouverture ou le
force excessive ou des surfaces inégales peuvent causer le renversement de l’ensemble de
chariot et appareil.
manière recommandée par le fabricant.
d’assurer un fonctionnement fiable du produit vidé et de le protéger contre la surchauffe. Ces ouvertures
ne devraient pas être bouchées ou couvertes. Les ouvertures ne devraient jamais être bouchées en
plaçant l’appareil vidéo sur un lit, un divan, un tapis ou un registre de chaleur. Cet appareil vidéo ne
devrait jamais être placé à proximité ou sur un radiateur ou une source de chauffage. Cet appareil ne
devrait pas être placé dans une installation encastrée, telle qu’une bibliothèque ou une clayette à
moins qu’une installation suffisante ne soit fournie ou que les instructions du fabricant aient bien été
respectées.
chaleur, poêle ou autres appareils (y compris les amplificateurs) produisant de la chaleur.
courant indiqué sur l’étiquette de classification.
la mise à la terre ou la polarisation ne soit pas supprimée.
ATTENTION: – Pour éviter un choc électrique, faites correspondre la lame large
de cette fiche à la fente large et insérez bien le tout. N’utilisez pas ce genre de
fiche (polarisée) avec un fil de rallonge, une prise multiple ou autre prise à moins
que la fiche puisse entrer complètement dans la prise de courant.
façon à ce que l’on ne risque pas de marcher dessus ou qu’ils ne soient pas coincés par des articles
placés au-dessus d’eux ou contre eux, en faisant particulièrement attention aux fils à proximité des
fiches, prises de rallonge et au point où ils sortent de l’appareil vidéo.
de courant aériennes.
lorsque l’appareil n’est pas utilisé sur une longue période
Entrée d’objet ou de liquide - On devra veiller à ne pas faire tomber d’objet ou de liquide à travers les ouvertures.
réparation à un personnel de service qualifié sous les conditions suivantes :
A. Lorsque le fil d’approvisionnement en courant ou la fiche est endommagé.
B. Si du liquide a été renversé ou des objets sont tombés dans l’appareil.
C. Si l’appareil a été exposé à la pluie ou à l’eau.
Si l’appareil ne fonctionne pas normalement ou fait preuve d’un changement marqué dans ses performances.
D.
E. Si l’appareil est tombé ou si le coffret est endommagé.
démontage des couvercles peut vous exposer à des tensions dangereuses ou à d’autres dangers.
Référez toute réparation à un personnel de service qualifié.
Fiche CA
polarisée
24
Page 25

Pour commencer
Avant d’essayer de raccorder, faire fonctionner ou ajuster ce produit, veuillez lire au
complet ces instructions et conservez ce manuel pour future référence.
Chers clients :
Nous tenons à profiter de l’occasion pour vous féliciter d’avoir acheté ce lecteur DVD.
Nous vous recommandons de bien étudier le mode de fonctionnement avant d’utiliser cet
appareil.
Caractéristiques principales
- Lecteur DVD / MP3 / CD à chargement à l’avant
- Dolby numérique incorporé
Normes
Vidéo : NTSC
Audio : PCM (48 ou 96 kHz), 2 canaux MPEG couche 2, Dolby AC-3 et dts line out
Caractéristiques des normes audio
- DOLBY numérique 2 c à sortie de décodage
- DTS pour sortie numérique (coaxial)
- Sortie linéaire PCM
25
Page 26

Pour commencer
Types de disques
Audio et
Vidéo
Audio
Dimension de disque 12 cm
Côté simple, couche simple/côté simple, couche double
Disque DVD PAL et NTSC
Temps de reproduction 135 min/ 240 min max
Dimension de disque 12 cm / 8 cm
Disque CD
Temps de reproduction 74 min/20 min max
MP3
* Le lecteur est compatible CD-R, CD-RW
Note : Les disques CD-R, CD-RW enregistrés avec un dispositif d’inscription peuvent
seulement être utilisés lorsqu’ils sont traités convenablement.
Information de gestion par région
Ce lecteur DVD est conçu et fabriqué pour répondre à l’information de code régional
enregistré sur chaque disque DVD. Si le numéro de région indiqué sur le disque DVD. Si
le numéro de région indiqué sur le disque ne correspond pas au numéro de région de ce
disque DVD, ce lecteur DVD ne peut pas jouer ce disque.
Le numéro de région de ce lecteur DVD est .
Entretien des disques
- Avant de jouer un disque, essuyez-le depuis le trou central vers le bord extérieur à
l’aide d’un linge propre
- N’utilisez jamais de benzine, liquide de nettoyage, liquide antistatique ou autre solvant.
Note : Les disques sales peuvent donner de mauvaises images.
Depuis le centre jusqu’au bord
Audio
Correct Incorrect
Disque format MP3
26
Page 27

Précautions de sécurité
Avertissement
Pour réduire le risque d’incendie et de choc
électrique, n’ouvrez pas l’appareil. Référez les
réparations seulement à un personnel de
réparation qualifié.
Avertissement
Gardez l’appareil loin des vases de fleurs,
baignoires et éviers. Si un liquide pénètre dans
l’appareil, il peut en résulter des dommages
graves.
Avertissement
N’exposez pas cet appareil à la pluie ou à
l’humidité.
Avertissement
Ne bloquez pas les trous de ventilation de
l’appareil. Laissez l’air circuler librement.
Attention
Si de la fumée, une mauvaise odeur ou un
bruit bizarre provient de l’appareil. Fermez
le courant et débranchez le fil d’alimentation
secteur.
Attention
Toucher l’appareil peut être dangereux,
particulièrement durant un orage.
Attention
Si l’appareil est laissé sur une longe période
de non utilisation, il devrait être débranché
de la prise.
Attention
N’oubliez pas de fermer l’appareil et de débrancher le
fil électrique avant de nettoyer la surface de l’appareil.
Si la surface est sale, essuyez-la à l’aide d’un chiffon
trempé dans une solution faible de savon et d’eau et
bien essoré. Utilisez
ensuite un chiffon sec.
Cet appareil est un produit laser de classe 1 et il utilise un rayon laser invisible qui pourrait
causer une exposition dangereuse aux rayonnements. Utilisez-le conformément aux instructions.
27
Page 28

Commandes du panneau avant
1. Plateau à disque
2. Témoin de courant
a) Continu pour mode de jeu
b) Clignotant pour mode d’attente
3. Bouton ouvert/fermé
Commandes du panneau arrière
1. Fil d’alimentation CA
2. Sortie Y/Pb.Cb/Pr.Cr
3. Sortie vidéo (composite)
4. Bouton jeu/pause
5. Bouton arrêt
6. Capteur à distance
7. Interrupteur
4. Sortie audio analogique
5. Sortie audio numérique (coaxiale)
6. Sortie S-vidéo
28
Page 29

Pour commencer
Installation des piles (commande à distance)
1. Retirez le couvercle des piles.
2. Insérez 2 piles (AAA) en vérifiant que la polarité (+/-) corresponde bien aux marques à
l’intérieur de l’appareil.
3. Remettez le couvercle en place.
- N’essayez pas de recharger, court-circuiter,
démonter, chauffer ou jeter les piles au feu.
- Ne mélangez pas les piles neuves aux anciennes.
- Jetez-les conformément aux lois locales.
Note : Les piles faibles peuvent fuir et endommager sérieusement la commande à distance.
Commande à distance
1. Interrupteur
1
2
3
4
5
6
7
8
9
10
11
12
13
14
15
16
P. SCAN
17
18
19
20
21
22
23
24
25
26
27
28
29
2. Boutons numériques
3. Bouton d’affichage
4. Bouton de volume
5. Bouton de configuration
6. Bouton de menu DVD
7. Bouton de direction
(haut/ bas/ gauche/ droite)
8. Bouton de recul rapide
9. Bouton de jeu
10. Bouton d’arrêt
11. Bouton lent
12. Bouton de sous-titres
13. Bouton de balayage
14. Bouton de recherche
15. Bouton audio
16. Bouton zoom
17. Bouton d’éjection
18. Bouton volume +
19. Bouton d’assourdissement
20. Bouton précédent
21. Bouton suivant
22. Bouton entrée
23. Bouton avance rapide
24. Bouton étape/pause
25. Bouton programme
26. Bouton d’angle
27. Bouton d’angle
28. Bouton répétition
29. Bouton répétition A-B
29
Page 30

Raccordement au téléviseur
Attention : Fermez bien l’appareil avant toute installation.
Cet appareil fournit plusieurs types de sorties de signaux vidéo et audio.
· Sortie Y/Pb.Cb/Pr.Cr
· Sortie RCA
· Sortie S-vidéo
L’utilisateur peut choisir un type de connexion pour raccorder le lecteur au téléviseur.
1. Sortie Y/Pb.Cb/Pr.Cr
Composé vidéo
Component Video
Sortie Y/Pb.Cb/Pr.Cr
(Y/Pb, Cb/Pr, Cr)
2. Connexion par câble composite (RCA)
Dans ce type de connexion nous devons raccorder les câbles audio gauche/droite (rouge
et blanc) et un signal vidéo (jaune).
3. Connexion par câble s-vidéo
30
Video in
Entrée vidéo
Entrée audio D
Audio in R
Entrée audio G
Audio in L
Entrée S-vidéo
S-Video in
Entrée audio D
Audio in R
Entrée audio G
Audio in L
Page 31

Connexion à l’amplificateur
Il y a quatre différents types de connexions entre le lecteur DVD et un amplificateur
2
3
1
Video output
- Sortie numérique par câble coaxial (connexion 1).
- 2 canaux (gauche/droite) de sortie audio (connexion 2 – 3)
NOTE :
1. La sortie numérique se coupe lorsque la sortie analogique est sélectionnée.
2. La sortie analogique se coupe lorsque la sortie numérique est sélectionnée.
31
Page 32

Fonctionnement
Sélection du téléviseur
Mettez le téléviseur en marche, le lecteur DVD et le système d’amplificateur audio (le cas
échéant)
1. Appuyez sur le bouton « TV/Vidéo » du téléviseur
2. Sélectionnez le mode vidéo (téléviseur)
Note : S’il y a plus d’un canal AV pour le téléviseur, choisissez le canal que vous avez
raccordé au lecteur DVD.
3. Sélectionnez la bonne entrée audio sur l’amplificateur AV (le cas échéant)
Pour jouer les disques
1. Appuyez sur le bouton OUVERT/FERMÉ ( ) sur le panneau avant et chargez le
disque sur le plateau. Le côté avec l’étiquette devrait être vers le haut. Pour les disques
DVD à deux côtés, placez le disque en gardant l’étiquette A1 vers le haut.
2. Appuyez à nouveau sur le bouton OUVERT/FERMÉ ( ) pour fermer le plateau et le
disque sera chargé.
3. Le disque sera joué automatiquement.
· S’il c’est un disque DVD, il indiquera sur l’écran Menu/Page de titre.
· Si c’est un disque CD il jouera directement la première piste.
4. Appuyez sur le bouton STOP ( ) i si vous voulez arrêter le jeu du disque. Vous
pouvez reprendre le jeu du disque en appuyant sur le bouton JEU et il recommencera
à l’endroit où vous avez appuyé sur STOP (reprise du jeu).
5. Appuyez deux fois sur le bouton STOP pour que le disque s’arrête vraiment.
(Pause) / Étape
Cette fonction est applicable pour DVD et CD audio.
· Pour DVD l’image s’arrêtera.
· Pour CD audio le son s’arrêtera.
1. Appuyez sur le bouton (||) pour arrêter le jeu.
2. Appuyez à nouveau sur le bouton JEU pour reprendre le jeu.
Mode de configuration DVD
• Le mode de configuration offre pour la configuration, mode AFFICHAGE TÉLÉ,
mode LANGUE OSD, mode DOLBY, mode AUDIO, mode PARENTAL, mode MOT
DE PASSE, etc.
• La sélection d’article dans le menu CONFIGURATION est réalisée en utilisant le
bouton de direction et le bouton ENTRER.
• Pour sortir le mode CONFIGURATION, appuyez à nouveau sur le mode
CONFIGURATION.
• Le mot de passe initial pour le mode PARENTAL est réglé à 1369.
Note : Pour configurer le mode d’affichage au téléviseur on doit être dans le mode stop.
32
Page 33

Articles du menu de configuration :
Appuyez sur le menu CONFIGURATION sur la
commande à distance. Le menu suivant apparaîtra.
1. CONFIGURATION GÉNÉRALE
AFFICHAGE SUR LE TÉLÉVISEUR
• Normal/PS
Ceci est sélectionné lorsque le lecteur DVD est
raccordé à un téléviseur normal. Les images
grand écran apparaissent mais certaines parties
sont coupées automatiquement.
• Normal/LB
Ceci est sélectionné lorsque le lecteur DVD est
raccordé à un téléviseur normal. Les images
grand écran apparaissent avec une ceinture
noire en haut et en bas.
• LARGE
Ceci est sélectionné lorsque le lecteur est
raccordé à un téléviseur à large écran.
AMARQUE D’ANGLE
Ceci fonctionne uniquement s’il y a une marque
d’angle sur le disque. Sélectionnez Marche (On)
et l’écran indiquera la marque en jouant le DVD.
• Marche
• Arrêt
--
PAGE DE CONFIGURATION GÉNÉRALE
TV Display LB
Angle Mark On
OSD Lang ENG
Captions Off
Screen Saver On
Go To General Setup Page
--
PAGE DE CONFIGURATION GÉNÉRALE-
TV Display
Angle Mark
OSD Lang WIDE
Captions
Screen Saver
Set TV Display Mode
--
PAGE DE CONFIGURATION GÉNÉRALE--
TV Display
Angle Mark
OSD Lang
Captions
Screen Saver
Set Angle Mark
NORMAL/PS
NORMAL/L2
ON
OFF
--
-
LANGUE OSD
Ceci sert à sélectionner la langue OSD
• Anglais
• Français
• Allemand
• Espagnol
SOUS-TITRES
Cette option peut montrer ou cacher les soustitres.
• Marche (montre les sous-titres)
• Arrêt (cache les sous-titres
33
--
PAGE DE CONFIGURATION GÉNÉRALE
TV Display
Angle Mark English
OSD Lang
Captions
Screen Saver
Set OSD Language
--
PAGE DE CONFIGURATION GÉNÉRALE
TV Display
Angle Mark
OSD Lang
CAPTIONS
Screen Saver
Closed Caption
French
German
Spanish
ON
OFF
--
--
Page 34

ÉCONOMISEUR D’ÉCRAN
Démarrer l’économiseur d’écran. L’image de
l’économiseur d’écran apparaît lorsque le lecteur
s’arrête ou si l’image est immobile pendant
plusieurs minutes. Cet économiseur permet
d’éviter les dommages à l’écran.
• Marche (Démarrer l’économiseur d’écran)
• Arrêt (Retirer l’économiseur d’écran)
2. CONFIGURATION DE HAUT-PARLEUR
Lorsque l’option CONFIGURATION DE HAUTPARLEUR est sélectionnée, le menu suivant
apparaît.
DOWNMIX
• LT/RT
Un disque a enregistré une trame sonore multicanaux, le signal de sortie sera incorporé au
canal de gauche et de droite.
• STÉRÉO
Un disque a enregistré une trame sonore multicanaux, le signal de sortie sera incorporé au
stéréo.
CONFIGURATION NUMÉRIQUE DOLBY
• DYNAMIC
Cette option sert à régler le rapport de compression de manière à contrôler le contraste du son
(volume).
--
PAGE DE CONFIGURATION GÉNÉRALE
TV Display
Angle Mark
OSD Lang
Captions
Screen Saver
SCREEN SAVER
-PAGE DE CONFIGURATION DE HAUTPARLEURDownmix
Dynamic
Set Downmix Mode
-PAGE DE CONFIGURATION DE HAUTPARLEURDownmix
Dynamic 3/4
Set DRC to 1/2 Conpression
ON
OFF
LT/RT
Stereo
--
FULL
1/2
1/4
0FF
3. CONFIGURATION VIDÉO
Lorsque l’option CONFIGURATION VIDÉO est
sélectionnée, le menu suivant apparaîtra. Pour
sélectionner l’article désiré on utilise le bouton
directionnel ( /// ) .
• SORTIE VIDÉO : CVBS/S-VIDÉO
YUV
• VIDÉO TÉLÉ : P-SCAN
INTERLACE
NOTE : Pour sélectionner le mode P-SCAN la
sortie P-SCAN doit être raccordée à P-SCAN TV,
sinon l’image sera instable.
34
--
PAGE DE CONFIGURATION VIDÉO
Video Out
TV Mode
--
PAGE DE CONFIGURATION VIDÉO
Video Out
TV Mode
CVBS/S-VIDEO
YUV
P-SCAN
Interlace
--
--
Page 35

4. CONFIGURATION DES PRÉFÉRENCES
AUDIO
Si une langue indiquée ci-dessous est
enregistrée sur le disque, vous pouvez faire jouer
le son dans cette langue. Sinon la langue
enregistrée sera utilisée.
• ANGLAIS
• FRANÇAIS
• ESPAGNOL
• ALLEMAND
-PAGE DE CONFIGURATION DES PRÉFÉRENCESAudio
Subtitle French
Disc Menu Spanish
Parental German
Password
Default
Preference Audio Languages
English
SOUS-TITRES
Si une langue indiquée ci-dessous est enregistrée
sur le disque, vous pouvez demander que les soustitres soient affichés dans cette langue. Sinon la
langue enregistrée sera utilisée.
• ANGLAIS
• FRANÇAIS
• ESPAGNOL
• ALLEMAND
• ARRÊT
MENU DE DISQUE
Si une langue indiquée ci-dessous est enregistrée
sur le disque, vous pouvez régler le menu pour qu’il
soit affiché dans cette langue. Sinon la langue
enregistrée sera utilisée.
• ANGLAIS
• FRANÇAIS
• ESPAGNOL
• ALLEMAND
PARENTAL
Lorsque vous jouez un disque avec la fonction de
verrouillage parental, vous pouvez choisir
l’indication de contrôle d’âge selon l’évaluation du
disque ou selon votre propre préférence. Par
exemple si PG est sélectionné, un disque vidéo
DVD dont l’indice est supérieur à l’évaluation PG
ne peut pas être joué.
• KID SAF
•G
•PG
• PG 13
• PGR
•R
• NC 17
• ADULT
• OFF
35
-PAGE DE CONFIGURATION DES PRÉFÉRENCESAudio
Subtitle
Disc Menu French
Parental Spanish
Password German
Default Off
Subtitle
-PAGE DE CONFIGURATION DES PRÉFÉRENCESAudio
Subtitle
Disc Menu
Parental French
Password Spanish
Default German
Preference Disc Menu Languages
-
PAGE DE CONFIGURATION DES PRÉFÉRENCES
Audio
Subtitle
Disc Menu
Parental
Password G
Default PG
Set Parental Control
English
English
-
KID SAF
PG-13
PGR
R
NC17
ADULT
OFF
Page 36

MOT DE PASSE : ANCIEN ____
NOUVEAU ____
VÉRIFIER _____
Déplacez le curseur sur l’article « MOT DE P ASSE » puis appuyer sur le bouton ENTRER
pour confirmer puis entrez le code secret « 1369 ». Après confirmation vous devez
entrer le nouveau code secret et appuyer ensuite sur ENTRER pour confirmer. Puis
vous retournez à l’interface « configuration spéciale ».
Mise en garde : Rappelez-vous bien votre nouveau code secret, sinon vous ne
pourrez plus changer la commande parentale. Veuillez contacter l’agent ou notre
compagnie si vous oubliez le code secret.
-
DÉFAUT
L’utilisateur peut charger la configuration originale
de l’usine en choisissant RESET et en appuyant
sur ENTRER.
• RESET
PAGE DE CONFIGURATION DES PRÉFÉRENCES
Audio
Subtitle
Disc Menu
Parental
Password
Default
Preference Menu Languages
Reset
Menu DVD
La fonction de menu DVD s’applique seulement aux films DVD. L’utilisateur peut accéder
à la distribution, à l’historique de la production, la présentation du film etc., directement
par l’entremise de cette fonction.
1. Appuyez sur le bouton MENU DVD sur la commande à distance pour entrer le menu
racine.
2. Utilisez le bouton directionnel () ou entrez le disque d’article par les touches
de chiffres (0-9) pour faire la sélection.
Le balayage progressif crée une image avec deux fois les lignes de balayage des images
vidéo à composante traditionnelles et créé des images plus nettes. Les avantages d’une
sortie vidéo à balayage progressif sont une réduction du clignotement de l’image et du
rejet d'artéfacts dus aux mouvements ainsi qu’une image plus nette sur les grands écrans.
-
Audio
Cette fonction est applicable aux DVD et CD audio mais avec des effets différents.
· Le fait d’appuyer sur le bouton AUDIO changera le canal audio.
REW / F.F. ( / )
Cette fonction est applicables aux DVD et CD audio mais avec des effets différents. La
touche D’AVANCE RAPIDE et la touche de RECUL RAPIDE sont utilisées pour réaliser la
fonction de jeu rapide.
· Pour DVD, il y a 5 niveaux de vitesse différents (2x, 4x, 8x, 16x, 32x). Chaque pression
successive de la touche augmentera la vitesse du jeu rapide.
· Pour CD audio, la commande AVANCE/RECUL donnera un déplacement rapide de la
sortie de musique.
Note : Appuyez sur le bouton JEU à n’importe quel stade pour revenir à la vitesse normale.
36
Page 37

PREV. / NEXT ( / )
Durant le jeu, appuyez sur l’un des boutons PREV./NEXT (bouton PRÉCÉDENT et bouton NOUVEAU).
· Lorsque le bouton PREV. Est enfoncé une fois, le pickup revient au début du chapitre
ou de la piste de jeu PRÉCÉDENT.
· Lorsque vous appuyez une fois sur le bouton SUIVANT , le pickup ira au début du chapitre
ou de la piste suivant.
P. SCAN (BALAYAGE PROGRESSIF)
Appuyez sur ce bouton pour entrer dans le mode P-SCAN. Puis appuyez à nouveau sur
ce bouton pour revenir au mode entrelacement normal.
Note : Pour sélectionner le mode P-SCAN, la sortie P-SCAN doit être raccordée à PSCAN TV, sinon l’image sera instable.
Avance lente
L’avance lente est applicable au DVD. Il y a 4 étapes de vitesse de ralenti 1⁄2, 1⁄4, 1/8, 1/
16. Des pressions successives sur la touche réduira la vitesse de jeu.
Mode de répétition
Cette fonction est applicable pour DVD et CD audio, mais avec des effets différents.
· Pour le jeu d’un disque DVD, l’utilisateur peut choisir de répéter le chapitre courant, le
titre courant ou le disque. Une pression subséquente de la touche RÉPÉTITION peut
changer entre ces trois options.
· Pour le CD, l’utilisateur peut choisir de répéter la piste courant ou le disque au complet
(répéter tous). Toute pression subséquente de la touche RÉPÉTITION peut changer
entre ces deux options.
A – B
Cette fonction est applicable pour DVD et CD audio. L’utilisateur peut spécifier l’intervalle
de répétition en marquant le point de départ et le point d’arrivée.
1. Appuyez sur le bouton A – B pour marquer le point de départ. (le jeu continuera).
2.Appuyez sur le bouton A – B pour marquer le point d’arrivée (la partie marquée sera
répétée automatiquement)
Note : Le fait d’appuyer sur le bouton A – B durant la répétition désengagera le mode de
répétition.
Sous-titres
Cette fonction est seulement applicable pour le disque DVD. Elle peut changer la langue
de sous-titres indiquée sur l’écran.
Note : Le nombre des sous-titres dépend du disque.
Angle
Certains disques peuvent avoir des angles de vues multiples durant la production. Le
bouton ANGLE sert à choisir l’angle de vue indiqué sur l’écran.
37
Page 38

Recherche
Cette fonction est applicable pour DVD et CD audio. Par cette fonction, l’utilisateur peut
accéder à un endroit particulier ou à une piste particulière en entrant le temps cible et le
numéro de piste.
1. Appuyez sur le bouton RECHERCHE pour entrer dans le mode de recherche.
2. Entrez le temps cible à l’aide du bouton de numéro (0~9) et le lecteur sautera
immédiatement à l’emplacement cible.
Affichage (temps restant)
Cette fonction est applicable au DVD seulement. Elle affichera l’information de temps de
jeu sur l’écran.
• Pour le jeu DVD, les pressions subséquentes sur le bouton AFFICHAGE indiqueront
le temps écoulé, temps restant de titre, temps écoulé de chapitre et temps de
chapitre restant, un par un.
Appuyez sur le bouton affichage TITLE ELAPSED
Appuyez sur le bouton affichage TITLE REMAIN
Appuyez sur le bouton affichage CHAPTER ELAPSED
Appuyez sur le bouton affichage CHAPTER REMAIN
Appuyez sur le bouton affichage DISPLAY OFF
TT 01/04 CH 01/02 0:02:13
TT 01/04 CH 01/02 1:33:30
TT 01/04 CH 01/02 0:02:15
TT 01/04 CH 01/02 0:02:18
Jeu
Cette fonction est applicable à DVD et à CD audio. Durant le jeu du disque, lorsque le
bouton STOP est enfoncé une fois, le lecteur entrera dans le mode de reprise de jeu. À ce
moment-là, si le bouton JEU est enfoncé, le lecteur reprendra le jeu à l’emplacement ou le
bouton STOP a été enfoncé. Si le bouton STOP est enfoncé (c.-à-d. si le bouton STOP
est enfoncé deux fois), le lecteur s’arrêtera.
Zoom
Cette fonction s’applique au DVD. L’utilisateur peut élargir ou réduire une image fixe ou
une image mobile en appuyant sur les boutons ZOOM. Il y a 6 niveaux de grossissement
(2x, 3x, 4x) et ils peuvent être réalisés l’un après l’autre par des pressions successives du
bouton ZOOM.
NOTE : L’utilisateur peut sélectionner la portion de l’image à élargir en se servant du
bouton directionnel ().
38
Page 39

Mode programme
Cette fonction s’applique au DVD et au CD audio. L’utilisateur peut assigner une séquence
de jeu en fonction de ses préférences. Pour CD audio, il est possible d’attribuer une
séquence de piste, tandis que pour un disque DVD, l’utilisateur peut attribuer une séquence
de titres et de chapitre.
PROGRAM
1. Appuyez sur le bouton PROGRAMME. Le
tableau de séquence de programme apparaîtra
sur l’écran.
01 _ _ 06 _ _
02 _ _ 07 _ _
03 _ _ 08 _ _
04 _ _ 09 _ _
05 _ _ 10 _ _
2. Entrez le numéro de piste en fonction des
préférences de l’utilisateur au moyen des
touches des chiffres (0-9).
3. Après avoir assigné la séquence de jeu,
déplacez le curseur sur l’option de
DÉMARRAGE à l’aide des flèches de
navigation. Appuyez sur ENTRER sur la
commande à distance pour confirmer.
EXIT START NEXT
PROGRAM
01 0 5 06 _ _
02 0 3 07 _ _
03 0 8 08 _ _
04 _ _ 09 _ _
05 _ _ 10 _ _
EXIT START NEXT
PROGRAM
01 0 5 06 _ _
02 0 3 07 _ _
03 0 8 08 _ _
04 _ _ 09 _ _
05 _ _ 10 _ _
EXIT START NEXT
I
I
I
Pour retirer le programme déplacez le curseur vers le programme désiré en utilisant les
flèches de navigation, puis appuyez sur le bouton d’effacement pour supprimer le
programme choisi.
39
Page 40

Fonction MP3
Cet appareil est conforme au système de fichier ISO9660 de navigation CD-ROM. Des
fichiers multimédia tels que MP3 peuvent être joués sur ce lecteur.
Fonctionnement
• Insérez le disque MP3 dans le plateau. Le menu de navigation sera affiché. Le
menu montrera les fichiers dans le répertoire racine et les fichiers MP3 pourront être
joués automatiquement.
• En MP3 le menu indique un curseur bleu et orange. Le curseur bleu indique la
chanson MP3 jouée actuellement, le curseur orange indique un titre à sélectionner.
MP3
Curseur bleu
Curseur orange
Vous pouvez sélectionner les autres chansons par les boutons de flèches de navigation
ou entrer directement le numéro de la chanson en appuyant sur les touches de chiffres.
Le curseur orange se déplacera vers la chanson sélectionnée. Appuyez alors sur ENTRER
pour confirmer.
Note :
• Il y a trois chiffres d’affichés. Si vous voulez appeler un titre avec seulement un ou
deux chiffres, vous pouvez, soit commencer l’entrée par « 0 », soit par « 00 », soit
vous pouvez entrer le numéro de la chanson et attendre quelques secondes pour que
le curseur saute vers le titre sélectionné.
• Appuyez sur le bouton de répétition pour sélectionner : Aléatoire (jeu dans n’importe
quel ordre), simple (jeu d’un seul titre puis arrêt), répétition un (répétition du titre
courant), répétition du répertoire (répétition du répertoire courant).
SONG 001
MP3
SONG 002
MP3
SONG 003
MP3
SONG 004
MP3
SONG 005
MP3
SONG 006
Images sur CD
Des photos numériques (JPEG) provenant d’un appareil photo numérique peuvent être
reproduites sur un disque et être jouées sur le téléviseur. Insérez un CD de photos dans
le plateau et le disque sera chargé automatiquement. Si le disque peut être identifié, le
lecteur commencera à montrer les photos une par une (mode diaporama).
Fonctionnement
Durant le mode diaporama :
• Le fait d’appuyer sur le bouton PAUSE immobilisera l’écran pour que l’image puisse
rester. Pour reprendre le mode diaporama, appuyez sur le bouton JEU.
• Appuyez sur le bouton SUIVANT de la commande à distance pour passer à la photo
suivante.
• Appuyez sur le bouton PRÉCÉDENT sur la commande à distance pour répéter la photo.
40
Page 41

DIAGNOSTIC
Recherchez ici la cause possible d’un problème avant d’appeler le service.
Symptôme Cause Remède
Pas de courant
Le courant est là, mais le lecteur
DVD ne fonctionne pas
Aucune image
Aucun son
L’image de jeu est
mauvaise
Le lecteur DVD ne commence pas le jeu
La commande à distance
ne fonctionne pas
convenablement.
• Le fil est débranché.
• Aucun disque n’est inséré.
• Le téléviseur n’est pas réglé pour
capter le signal DVD.
• Le câble vidéo n’est pas bien
raccordé.
• Le téléviseur est éteint
• L’équipement raccordé au câble
audio n’est pas réglé pour
recevoir les signaux DVD.
•
Le câble audio n’est pas bien raccordé.
• L’équipement raccordé par le
câble audio est fermé.
• La sortie audio numérique est à
la mauvaise position.
• Le disque est sale.
• Aucun disque n’est inséré
• Un mauvais disque est inséré.
• Le disque est placé à l’envers
• Le disque n’est pas placé avec
le guide.
• Le disque est sale.
• Un menu est sur l’écran.
• L’indice d’évaluation est réglé.
• La commande à distance n’est
pas dirigée vers le capteur du
lecteur DVD.
• La commande à distance est trop
loin du lecteur DVD.
• Il y a un obstacle entre la
commande et le lecteur DVD.
• Les piles de la commande à distance sont usées.
• Branchez bien le fil dans la prise
murale et dans l’appareil.
•
Insérez un disque. (Vérifiez que le
témoin DVD ou CD audio est allumé.
•
Sélectionnez le mode d’entrée vidéo
approprié sur le téléviseur pour que
l’image du lecteur arrive sur l’écran.
• Bien raccorder le câble vidéo
dans les prises.
• Mettez le téléviseur en marche.
•
Sélectionnez le bon mode d’entrée du
récepteur audio pour entendre le son
venant du lecteur DVD.
•
Raccordez bien le câble audio dans les prises.
• Mettez en marche l’appareil
raccordé au câble audio.
•
Réglez la sortie audio numérique à la bonne
position, puis mettez en marche à nouveau
le lecteur DVD en appuyant sur l’interrupteur.
• Nettoyez le disque.
• Insérez un disque
Insérez un bon disque. (Vérifiez le type, le
•
système de couleur et le code de région).
• Placez le disque à l’endroit.
•
Placez le disque sur le plateau
correctement à l’intérieur du guide.
• Nettoyez le disque.
•
Appuyez sur le bouton de configuration pour fermer l’écran de menu.
•
Annulez la fonction d’évaluation ou
changez le niveau d’évaluation.
• Pointez la commande à distance
vers le capteur du lecteur DVD.
• La commande doit se trouver à
moins de 23 pi (7 m).
• Retirez l’obstacle.
• Remplacez les piles par des
neuves.
41
Page 42

CARACTÉRISTIQUES
GÉNÉRALITÉS
Source de courant CA 120 v 60 Hz
Consommation de courant 10 W
Poids 2 kg
Dimensions extérieures (LxHxP) 263 x 225 x 55 mm
Conditions de fonctionnement 5 ºC à 35 ºC
Statut de fonctionnement Horizontal
Humidité de fonctionnement 5 % à 90 %
CD/DVD
Laser Semi-conducteurs, longueur d’ondes 650 mm
Système de signaux NTSC
Réponse de fréquence (audio) 4 Hz à 20 KHz
Rapport signal/bruit (audio) Plus de 90dB (1KHz, NOP,20KHz LPF/A-filtre
Gamme dynamique (audio) Plus de 95dN
Déformation harmonique (audio) 0,2 % (1KHz)
VIDÉO
Sortie vidéo 1,0V (p-p) 75 ohms, sync. négatif, prise RCA
Sortie S-vidéo (Y)1,0V (p-p), sync. négatif, mini DIN 4 ergotx1
(C) 0,3V (p-p), 75 ohms
Élément vidéo (Y,Pb/Cb Pr/Cr) (Y) 0,7V (p-p), sync. négatif, prise RCA
(Pb/Cb) 0,7V (p-p), 75 ohms
(Pr/Cr) 0,7V (p-p), 75 ohms
* Le concept et les caractéristiques sont sujets à changement sans préavis.
42
Page 43

DIAMOND VISION
GARANTIE LIMITÉE
Chez DIAMOND VISION, nous sommes persuadés que vous serez satisfait de votre nouvel appareil
DIAMOND VISION. Veuillez lire attentivement cette garantie. DIAMOND VISION garantit que ce produit,
y compris ses pièces d’origine, sont exempts de défauts de matières premières et de fabrication, pendant
une période de 90 jours la date d’achat par le premier acheteur, et à condition qu’il a été utilisé au Canada.
Si, pendant la période couverte par la garantie (90 jours), vous trouvez que l’appareil ne fonctionne pas comme il faut,
DIAMOND VISION, vous offrira une des options suivantes, si le défaut de fabrication a été vérifié, ainsi que la date d’achat.
Le service de réparations, pendant de 90 jours de la date d’achat, se fera sans frais, (pièces et maind’oeuvre inclus). Le remplacement de votre appareil défectueux par un autre, neuf ou remis à neuf, ou
par un autre appareil de valeur égale, sera sans frais pendant un an suivant 90 Jours date d’achat.
OBLIGATIONS DU CLIENT
L’appareil est couvert par la garantie à partir de la date de l’achat initial au détail. En cas de services
couverts par la garantie, le propriétaire de l’appareil doit présenter la facture originale, datée. Aucun
service ne sera effectué sans présentation de la facture. Le propriétaire est seul responsable pour
l’expédition ou le transport de l’appareil vers le centre de service et son retour.
Cette garantie devient nulle et non avenue si:
a) Les dommages ont été causés par la négligence, une mauvaise ulilsation, un abus, un accident ou
un acte indépendent de notre volonté.
b) L’appareil a été utilisé à des fins commerciales ou de location.
L’appareil a été modifié ou réparé par une personne étrangère au centre de service agréé par DIAMOND VISION.
c)
d) Les dommages de l’appareil sont causés par le raccordement incorrect à un appareil d’un autre fabricant.
Cette garantie ne couvre pas:
Les frais et les dommages subis pendant l’expédition de cet appareil vers le centre de service et son retour.
a)
b) Les dommages ou mauvais fonctionnement de l’appareil causés par le fait que l’utilisateur n’a pas
suivi les instructions données dans le manuel.
c) Les réglages ordinaires effectués par le client et décrits dans le manuel.
d) Les dommages au disque compact, ou à la cassette audio.
e) Les problèmes de réception du signal causés par des facteurs extérieurs.
f) Les produits non achetés ou Canada.
g) Les dommages aux produits utilisés hors du Canada.
CETTE GARANTIE EST NON TRANSFÉRABLE ET NE COUVRE QUE LE PREMIER ACHETEUR DE L’APPAREIL,
ET NE S’APPLIQUE PAS AUX PROPRIÉTAIRES SUBSÉQUENTS DE L’APPAREIL. TOUTE AUTRE GARANTIE
TACITE, Y COMPRIS LA GARANTIE DE VENDABILITÉ EST LIMITÉE À LA PÉRIODE DE LA GARANTIE EXPRIMÉE
CI-DESSUS, COMMENÇANT À PARTIR DE LA DATE D’ACHAT INITIAL AU DÉT AIL ET AUCUNE AUTRE GARANTIE
SOIT EXPRIMÉE SOIT TACITE NE S’APPLIQUERA ULTÉRIEUREMENT. L’ÉTENDUE DE CETTE GARANTIE
LIMITÉE S’APPLIQUE SEULEMENT AUX RÉPARATIONS OU AU REMPLACEMENT DU PRODUIT, TEL QUE
DÉCRITS C-DESSUS À LA SEULE DISCRÉTION DE DIAMOND VISION. EN AUCUNE CIRCONSTANCE, DIAMOND VISION N’EST RESPONSABLE DE PERTE OU DE DOMMAGES DIRECTS OU INDIRECTS, FOR TUITS
SPÉCIAUX OU INDIRECTS RÉSULTANT OU SE RAPPORTANT À L’UTILISATION DE CE PRODUIT.
LA PRÉSENTE GARANTIE EST SEULEMENT VALIDE AU CANADA, POUR LES PRODUITS VENDUS, DISTRIBUÉS
ET UTILISÉSAU CANADA, ET VOUS CONFÈRE DES DROITS JURIDIQUES PARTICULIERS. CEPENDANT, VOUS
AVEZ PEUT-ÊTRE D’AUTRES DROITS QUI PEUVENT VARIER SUIVANT LA PROVINCE. CERTAINES PROVINCES NE PERMETTENT PAS LES RESTRICTIONS SUR LES GARANTIE IMPLICITES OU L’EXCLUSION DES
DOMMAGES INDIRECTS. PAR CONSÉQUENT, LES RESTRICTIONS DE LA PRÉSENTE GARANTIE PEUVENT
NE PAS S’APPLIQUER À VOTRE CAS.
CE LIVRET D’INSTRUCTIONS PEUT CONTENIR DES ERREURS ET DES OMISSIONS.
LE CONCEPT ET LES CARACTÉRISTIQUES SONT SUJETS À CHANGEMENT SANS PRÉAVIS.
Cosmo Communications Service
55 Travail Road Unit 2
Markham, Ontario
Phone: (905) 209-0488 Fax: (905) 209-0489
L3S-3J1
0211-11795-11B
 Loading...