

Page 1
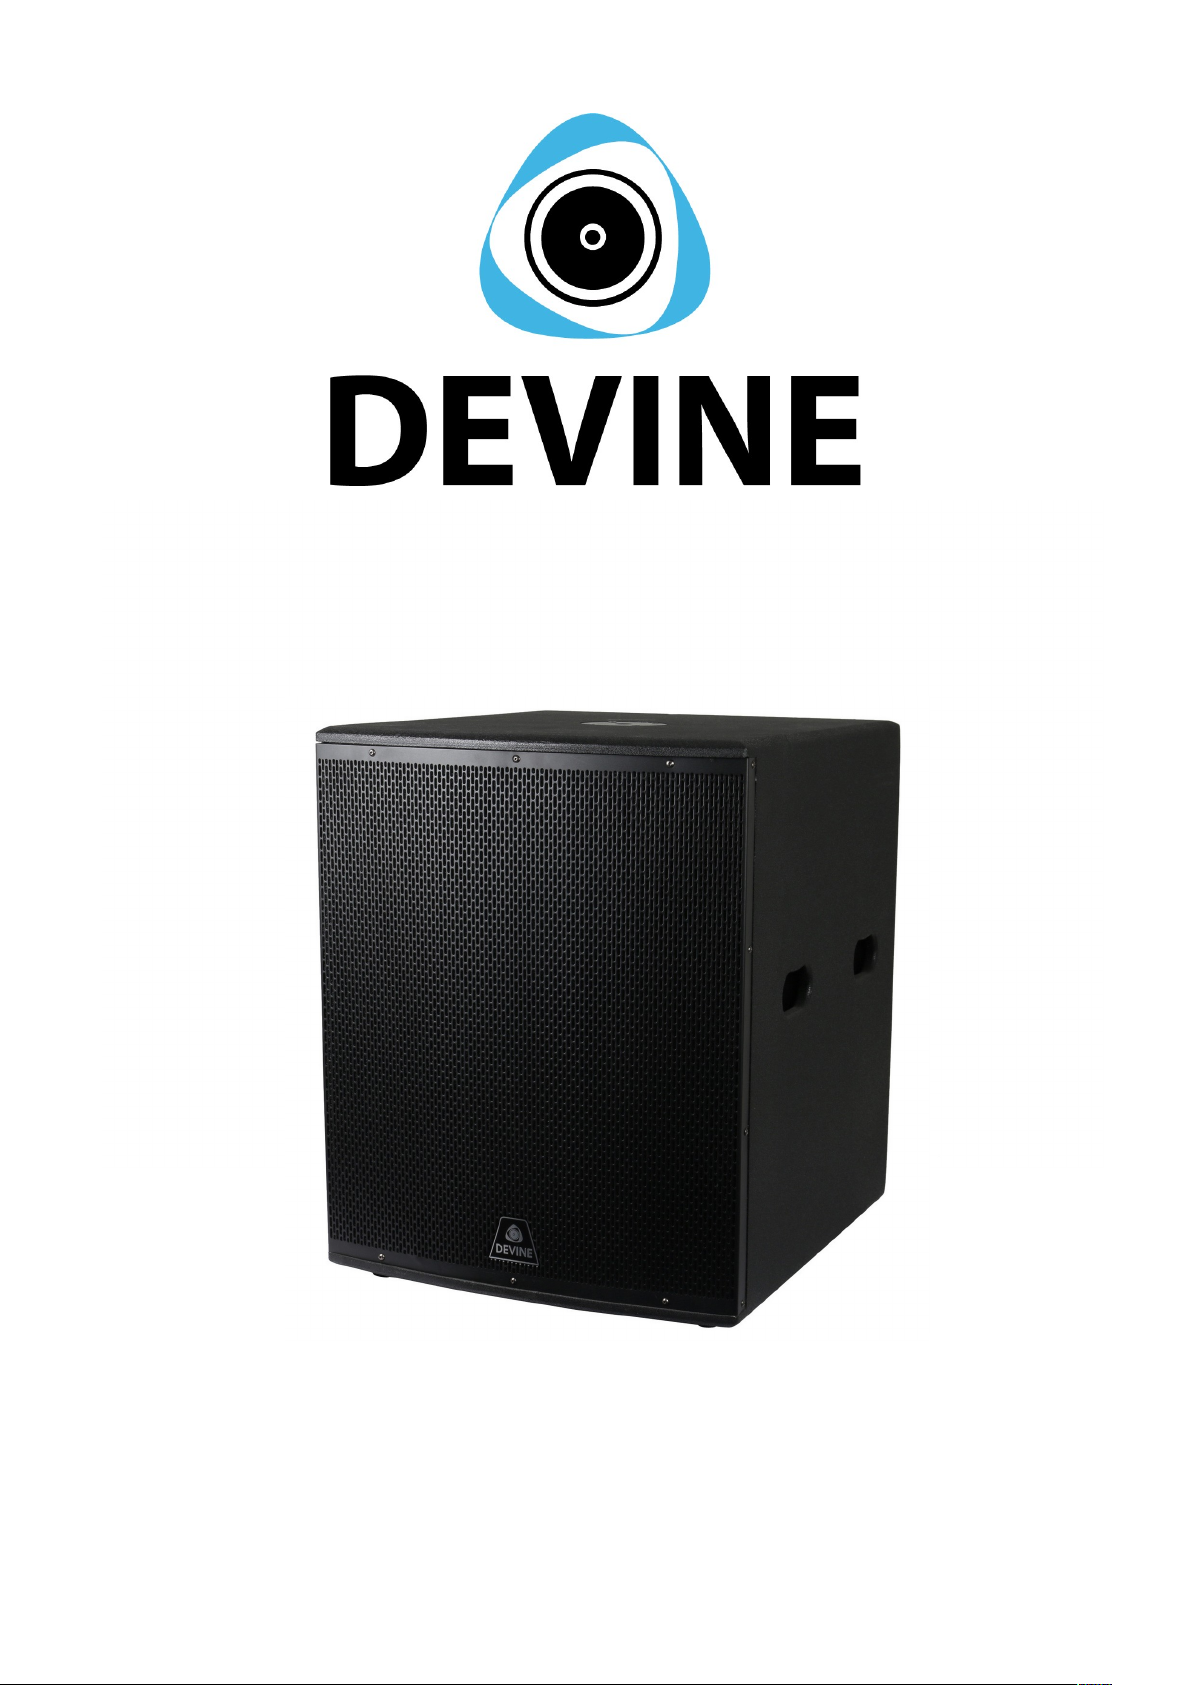
Onyx 10SXA
Active Subwoofer with Passive Outputs
User Manual
The information included in this manual is subject to change at any time and without notice
Version: 1.0 Date and Author Initials: 11-01-2020 RV Revision Date and Author Initials:
Page 2

Introduction
Thank you for purchasing the Devine Onyx SXA active subwoofer. We advise that you read this user manual
in its entirety before unpacking the contents of the box, so that you are familiar with all of the functionality
that this product has to offer. Please be sure to check that all of the components and accessories listed
under 'Box Contents' below are included in the box. In the event that any component or accessory does not
function properly, or if you have any issues while operating it, please remove the plug from the power socket
and contact your retailer for assistance.
Box Contents:
– Devine Onyx 10SXA Active Subwoofer
– Power Cable IEC C13 to Schuko
Please thoroughly inspect the device and included accessories.
Should you discover that either the device or one or more of the included accessories has been damaged or
rendered defective while in transit, please contact your retailer directly.
Please note that the pictures used in this user manual serve illustrative purposes only and may differ from
the actual product.
Contact:
Devine Pro Audio Products
Verrijn Stuartweg 18
4462 GE Goes
The Netherlands
Please do not send any physical products to this correspondence address.
Should you wish to send a product for repairs or for a refund, please contact your retailer for an RMA request
(Return Merchandise Authorisation)
The information included in this manual is subject to change at any time and without notice
Version: 1.0 Date and Author Initials: 11-01-2020 RV Revision Date and Author Initials:
Page 3
Safety Instructions
Everyone involved with the installation, operation and maintenance of this device must:
- Be qualified.
- Be skilled.
- Have read the instructions included in this user manual.
- Be sure that neither the device nor the included accessories are damaged. Should the device or the
included accessories be damaged, please contact your retailer for more information.
- Ensure that the device is in good working condition and is safe to operate. Please follow the advice and
instructions as they are described in this user manual.
Damage caused by misuse and/or modifications made to the device are not covered by the warranty.
This device does not contain any parts that can be repaired or replaced by the user. Should maintenance or
repairs be necessary, they must be handled by a qualified technician.
The light source of this device is not replaceable. If the light source no longer functions, the entire device
needs to be replaced.
Important information regarding health and safety:
- Do not remove any labels or stickers from this device.
- Do not leave any cables lying around.
- The device should not be opened up and any hardware or software that may be present should not be
modified.
- To achieve optimal performance, any inputs on the device should not be fed with a signal higher than
necessary.
- The device should only be used indoors; contact with water, rain and moisture should always be avoided.
Do not place any objects containing liquid on top of the device.
- Remove the device from any nearby flames or heat sources; do not place it near flammable fluids, gasses
The information included in this manual is subject to change at any time and without notice
Version: 1.0 Date and Author Initials: 11-01-2020 RV Revision Date and Author Initials:
WARNING!
Keep this device away from moisture, water and rain to avoid the chance of electric shocks!
WARNING!
Only connect this device to a suitable power socket. This device functions on a specific power
voltage. If it is plugged into a power socket with a different voltage, it could result in permanent
damage and even dangerous situations such as fire or electric shocks.
WARNING!
Be careful when operating this device. Touching the wires that are connected to the mains,
inside or outside the device, could result in electric shocks!
Page 4

or objects.
- Disconnect this device from a power source if it is not being used for a long period of time; if maintenance is
necessary, or if it needs to be cleaned.
– Do not pull or tug on the cable to remove a connector as this may cause damage.
- Do not use any cables other than the ones described in this manual. Do not use defective cables. Please
contact your retailer if the included or necessary cables do not function properly with this device.
- Only use this device with a stable AC power supply.
- Only use this device with power from a grounded power source.
- In the event that the device is exposed to extreme temperature changes (e.g. transported from a cold
outdoor environment into a warm indoor environment), it should not be turned on until it has reached room
temperature. This is necessary to prevent moisture (condensation) from forming inside the device, which
could lead to electric shocks.
Guidelines and operation of this device:
- This device is intended for use by professionals on stage, in theatres, in clubs and in similar entertainment
locations.
- This device is not suitable for use by children and should always be operated by an adult.
- This device is designed to create light effects for entertainment purposes. It is not suitable for household
illumination.
- This device may only be used in a suitable environment where no damage to the device can occur. Do not
use the device in moist or dusty environments such as:
- indoor swimming pools where chlorine is used
- beaches or any location where sand and/or salt is present
- outdoors
- indoors in spaces where intense heat sources are present, or where it can reach temperature
levels that would be considered uncomfortable for a person
- Avoid impact and collisions during use and transport. Do not move or transport the device while it is in use.
Avoid using excessive force when installing and operating the device.
- Any user must become familiar with the functions of this device before using it.
- Should the device not be used in the manner described in this user manual, damages or even injuries could
occur. Devine cannot be held responsible for any injuries or damages that occur as a result of improper use
of this product.
Storage and transport:
- This product was designed for mobile use. Please only transport the device in the original packaging, or in
a flight case with a suitable foam inlay.
- This device was not designed for permanent (24/7) use. The expected lifespan of the device will not be
affected by occasionally turning the device off. Disconnect the device or turn off the power when it is not
actively in use.
- If the device is not in use for a long period of time, it should be disconnected and stored in a dust-free
environment.
- Do not expose the device to extreme temperature differences.
Housing:
- Inspect the device's housing frequently and always just before use. Avoid operating the device if there are
any large dents or cracks, or if screws are missing. Do not use the device if the housing is not in good
condition.
Contact your dealer or a qualified technician if you are unsure about the state of the device.
- Check the device and the screws for corrosion. Corrosion must not be present on this device. Contact your
dealer or a qualified technician if you find any corrosion on the screws.
Every power and signal connector should be securely attached. Do not use the device if the connectors are
not secure.
- Avoid dust and dirt build-up. Clean the device once a month by disconnecting it from the power supply and
wiping it down with a dry or slightly moist cloth. If the device is used frequently, the cleaning intervals should
increase.
The information included in this manual is subject to change at any time and without notice
Version: 1.0 Date and Author Initials: 11-01-2020 RV Revision Date and Author Initials:
Page 5
Symbol Explanation:
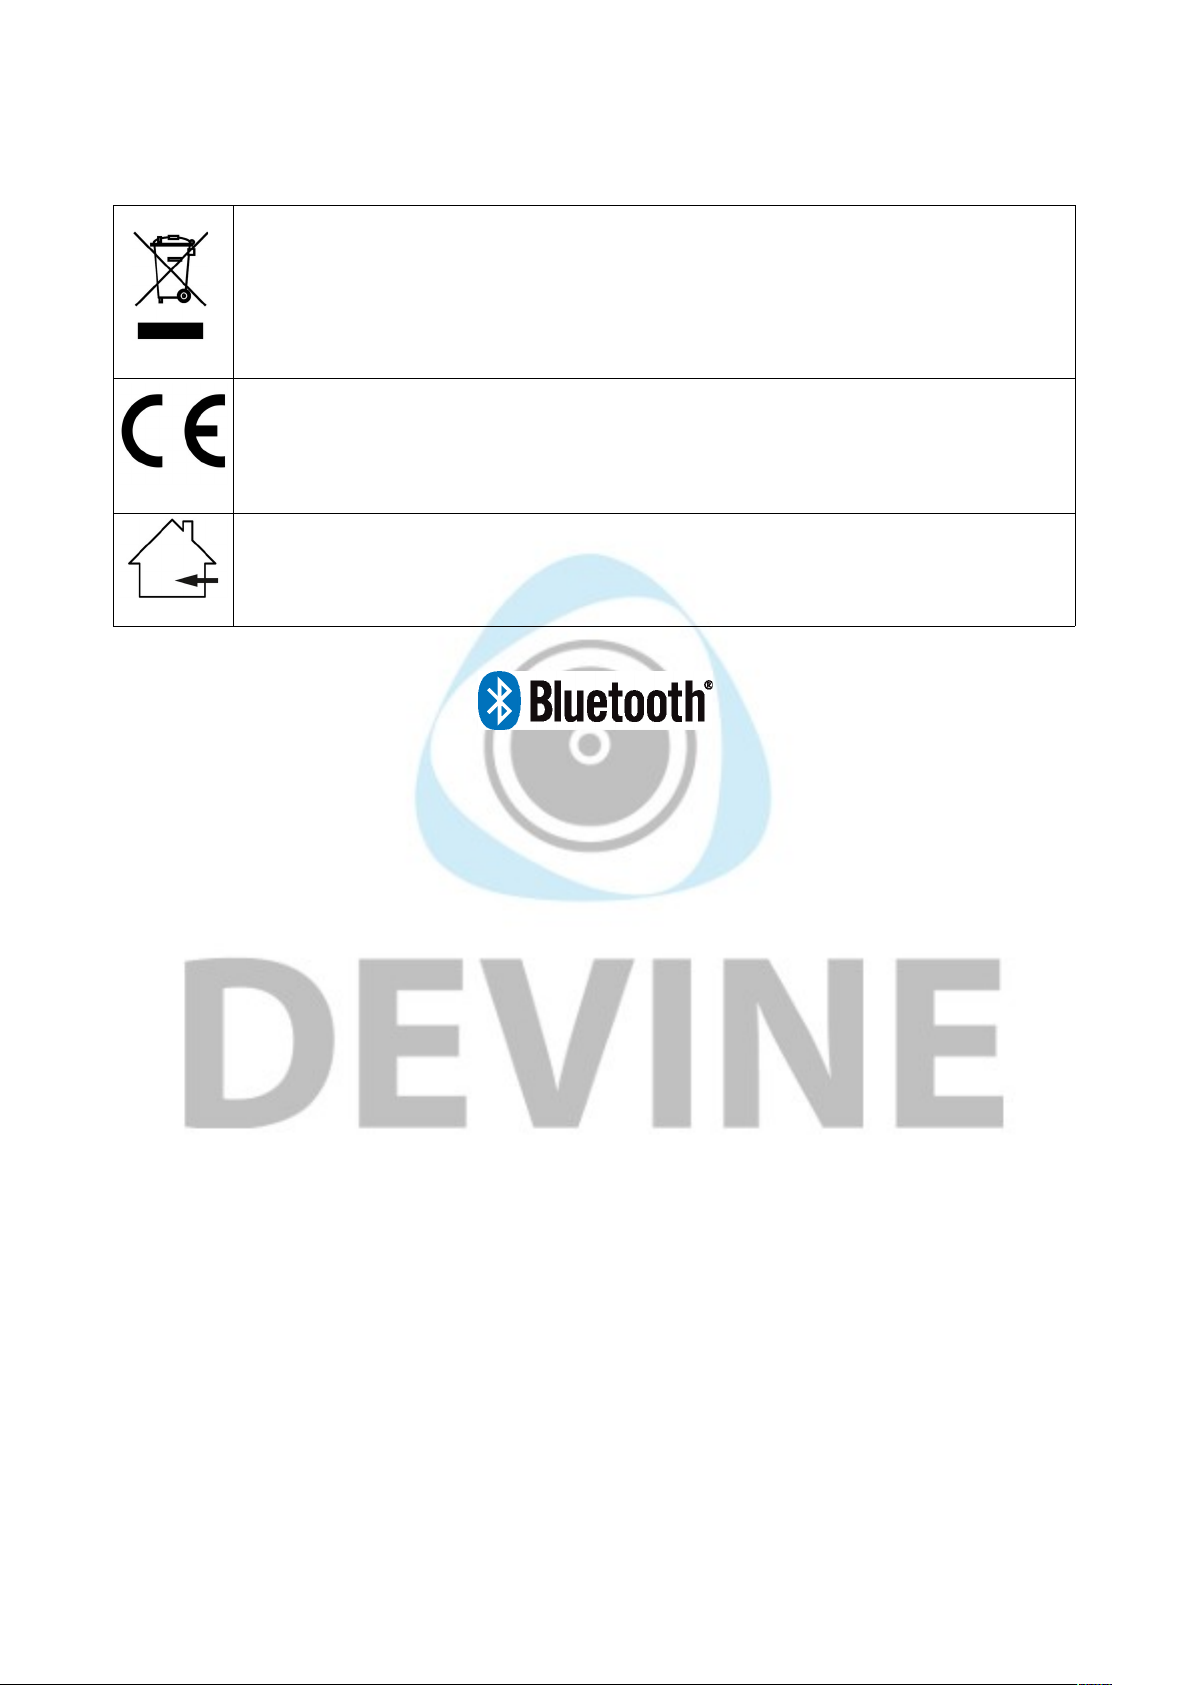
Ensure that this device is disposed of properly. This product falls under the WEEE (Waste
Electrical and Electronic Equipment) directive. The requirements of this directive apply to all
manufacturers and producers of electronic devices in the EU. Do not throw this product away
with regular rubbish. Please contact your local authority for more information about how to
recycle and dispose of these products in your region. By recycling this product in the proper
manner, we can work together to ensure that we can continue to enjoy these kinds of
products and still protect the environment as much as possible from pollution.
CE: The CE logo indicates that this product meets the European norms and requirements to
which it must legally conform.
Suitable for indoor use only: this product was designed for indoor use only. The maximum
environmental temperature must not exceed 40 degrees Celsius (104 degrees Fahrenheit).
Trademark Footnote:
The Bluetooth® image, brand and logo are all registered trademarks and are owned by Bluetooth SIG
Inc. And any use of such images, brands and logos by Devine is under license. Other trademarks and
trade names are the property of their respective owners.
The information included in this manual is subject to change at any time and without notice
Version: 1.0 Date and Author Initials: 11-01-2020 RV Revision Date and Author Initials:
Page 6
1
2
3
4 5
6
7 8
9
10
11
12
13
Operation Guidelines
Devine Onyx 10SXA
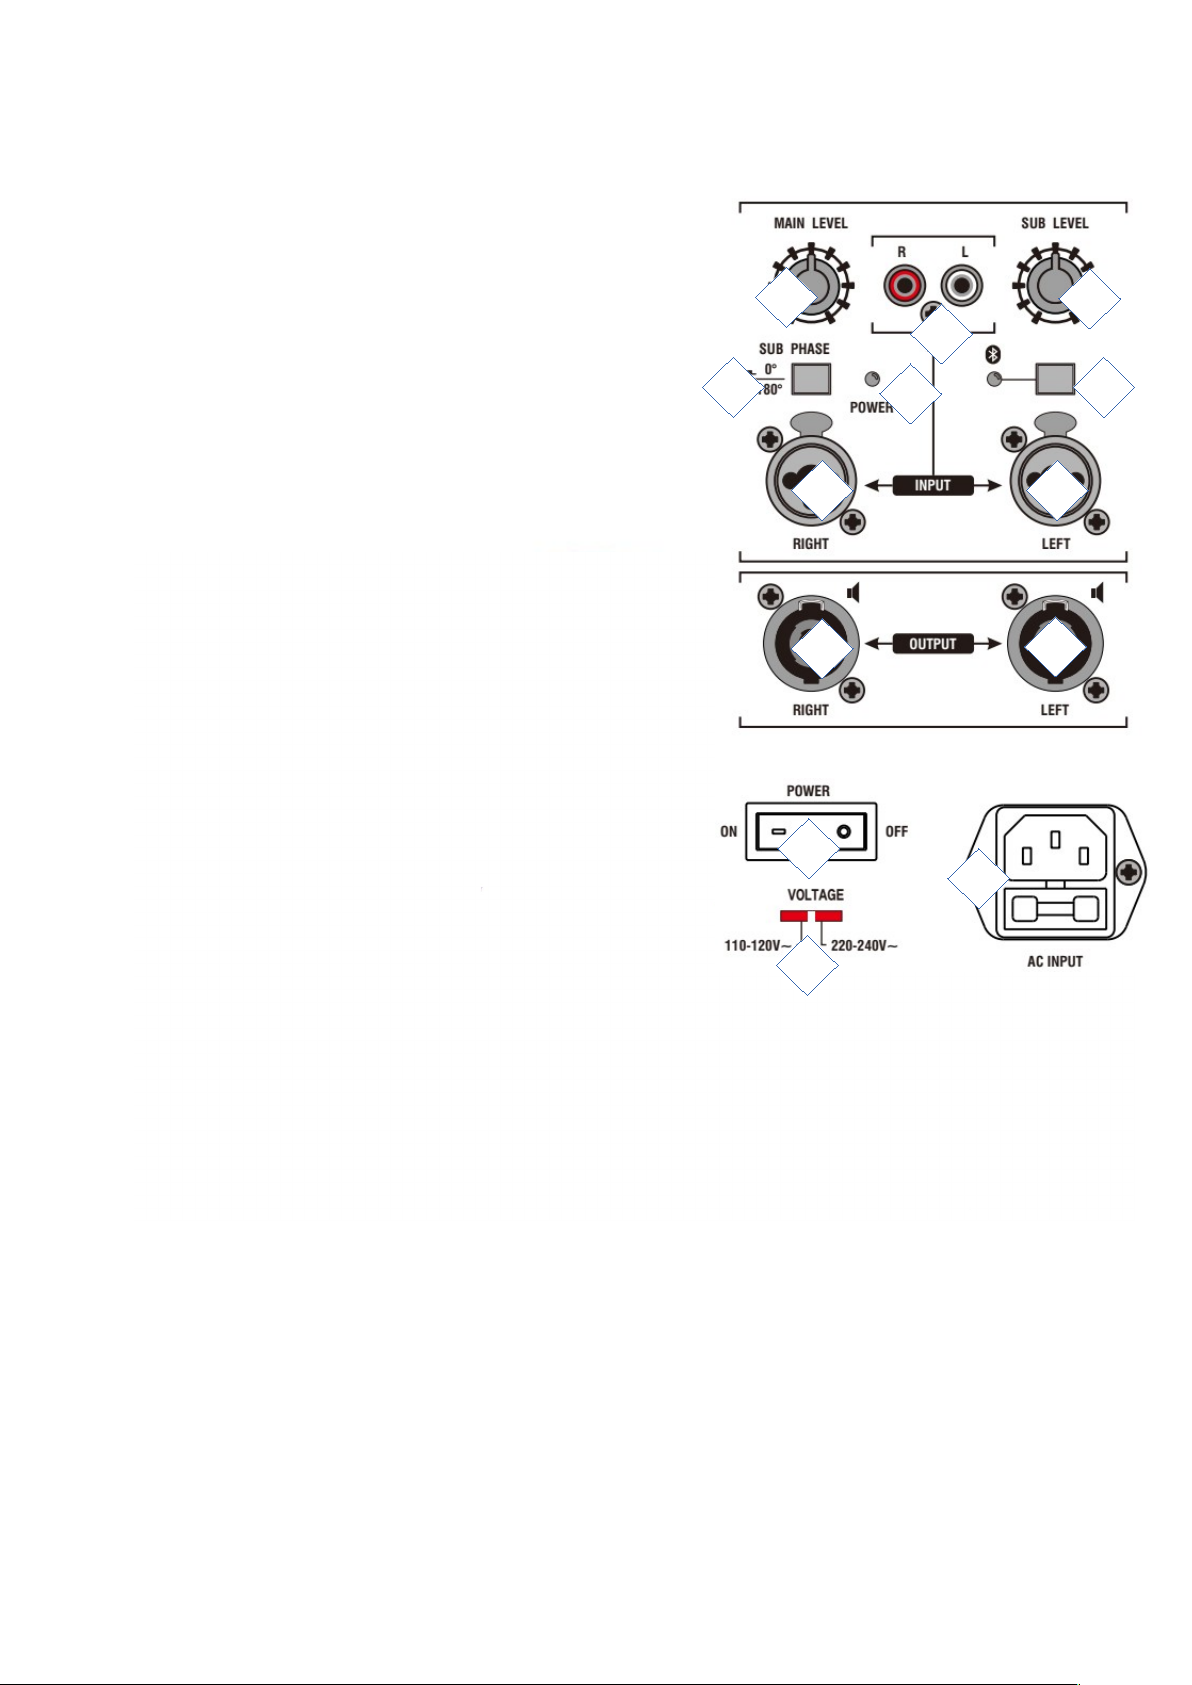
1. Volume control Main Level
2. Subwoofer volume control
3. Stereo RCA line input
4. Phase switch (0° - 180° )
5. Bluetooth pairing
6. LED power indicator
7. Line in RIGHT via balanced 3-pin XLR
8. Line in LEFT via balanced 3-pin XLR
9. Lockable speaker output RIGHT
10. Lockable speaker output LEFT
11. On / Off switch
12. Voltage switch (default 230V AC)
13. IEC C14 power socket with fuse
The information included in this manual is subject to change at any time and without notice
Version: 1.0 Date and Author Initials: 11-01-2020 RV Revision Date and Author Initials:
Page 7

Operating this Device
Devine Onyx speakers can be used for a wide variety of purposes, but it’s important to be aware of the
following information before use in order to achieve optimal performance.
Warning Before Use
Devine Onyx speakers are capable of producing volume levels that can cause temporary or permanent
hearing damage. Use these units with care and keep the volume at a reasonable level wherever possible.
The volume should ideally be set to a comfortable level when listening to music.
Devine cannot be held liable for any injuries or damage resulting from the use of this product.
General Use
Housing
The housing of this Onyx subwoofer is based on a wooden frame supported by internal bracing for a solid
build. The exterior is finished with a special lacquer that’s resistant to light impact and prevents unsightly
scratches.
Please make sure that during use, installation, moving, and transport, this subwoofer is not placed near any
objects that may fall or cause damage to its housing.
Handles
All Onyx subwoofers have handles fitted to each side. This is to make moving and transporting the
subwoofer easier.
Protection During Transport
While Onyx speakers are designed to be easily transported, they are not splash or water proof. Caution is
therefore advised if they taken outside when it’s raining or in adverse weather conditions. If they are exposed
to moisture of any kind, ensure that they are completely dry again before use. Failure to do so may result in a
short circuit which could cause permanent damage or injury. Exposure to moisture can also cause visible or
invisible corrosion which may cause damage in the long term.
Grille
All Onyx speakers are equipped with a metal grille on the front to protect the speaker components behind it.
There is also acoustic foam behind the grille to prevent any unwanted matter from getting inside the speaker.
The grille should, therefore, not be removed.
Distance Rod Flange
Devine Onyx subwoofers are fitted with a flange with an M20 screw thread into which a distance rod can be
securely screwed to form a stable base on which a full-range speaker (satellite speaker) can be mounted.
Using this kind of set up saves the space that a normal speaker stand would take up. Since the weight of a
subwoofer is usually greater than that of a standard speaker and has a larger top surface, it provides a more
stable base than a stand. Always make sure to place the subwoofer on a completely level surface that is able
to withstand the combined weight of a full-range set up.
Voltage Switch
This speaker is fitted with a voltage switch so that it can be used in multiple set ups. The voltage switch is
usually set correctly and should not be changed. The voltage switch is normally set at 230V as standard. If
you have any doubts, contact your retailer for further advice. Please note: when setting a different voltage, a
fuse with a different value needs to be installed. For more information about this, see the specifications.
The information included in this manual is subject to change at any time and without notice
Version: 1.0 Date and Author Initials: 11-01-2020 RV Revision Date and Author Initials:
Page 8

Audio Technology
The Onyx speaker series comes with various functions that aim to make the life of an audio technician that
bit easier. By following the tips and instructions below, you’ll be able to get the best possible performance
and sound quality out of your new speaker.
Connecting the SXA subwoofers to passive speakers
The Onyx SXA subwoofers operate at their best in combination with your retailer-selected Onyx speakers.
The SXA subwoofers come fitted with locking speaker sockets that can be used to connect passive speakers
using compatible cables (not included).
The lockable outputs are compatible with passive speakers with a minimum impedance of 4 Ohms.
Bluetooth® Wireless Technology
It is of course possible to use your SXA subwoofer for relatively simple applications. Here, it’s possible to
make a direct connection with the integrated Bluetooth module of the built-in amplifier.
Press the ‘Pair’ button to enable Bluetooth coupling with the subwoofer. The Bluetooth signal can then be
detected by any Bluetooth capable device like a smartphone, tablet or laptop. Once the connection is
established, music can be played back from the device and amplified by the subwoofer. The Bluetooth name
of this subwoofer is ‘Devine Onyx 10SXA’.
The volume of any music played back via Bluetooth is determined by the audio source and can therefore be
controlled on the smartphone, tablet, laptop, or other Bluetooth capable device that is being used. It’s also
possible to combine a Bluetooth signal with the signal of any source connected to the analogue inputs of the
subwoofer and to mix and balance these signals.
0-180° Phase Switch
This switch can help solve any low-frequency inhibiting acoustic problems. Normally, this switch is set to 0°
but it is possible to set it to 180° if you experience any acoustic problems in combination with the satellite
speakers being used.
Connecting Signal Sources with Cables
The Devine Onyx 10SXA is fitted with professional balanced combo-sockets to which both standard jack and
XLR plugs can be connected. These sockets are compatible with most professional audio equipment
including DJ controllers, DJ mixers, PA mixers and so on.
The 10SXA also comes fitted with stereo line inputs for equipment like entry-level DJ controllers, or
consumer-grade signal sources. As such, it’s possible to connect a keyboard, a laptop, tablet or other signal
source with RCA outputs or a 3.5mm mini-jack output. Please note that in some cases, an adapter or specific
cable is needed to connect such devices and is not included.
When Using a Microphone
It’s not possible to directly connect a microphone to any of the Onyx subwoofers. It is advisable to first
connect a microphone to a PA mixer so that you have control over the sound and volume. The master output
of the mixer can then be directly connected to the subwoofer.
For optimum sound quality, make sure to hold the microphone close to the mouth: a maximum of around
5cm from the lips. Speak loudly and clearly into the microphone so that minimum amplification and gain is
needed. Microphones are usually directionally sensitive and as such, will not pick up any sound that’s
directed at its sides or from behind.
The information included in this manual is subject to change at any time and without notice
Version: 1.0 Date and Author Initials: 11-01-2020 RV Revision Date and Author Initials:
Page 9

Never hold a microphone in front of the speakers since this will cause a feedback loop and result in a very
high and piercing tone. If feedback does occur, remove the microphone from the front of the speaker
immediately and turn the volume down so that the feedback loop is closed and the noise is stopped.
It is always advisable to have speakers or vocalists stand beside or behind the speakers to avoid any
possible feedback. If it’s directly in front of, or just to one side of a speaker, the microphone is likely to pick up
the sound coming from the speaker and cause feedback.
Use with External Peripheral Equipment
It’s possible to use Onyx speakers in combination with external peripheral equipment like crossovers,
equalisers, speaker management systems and other similar devices. Please note that the use of such
equipment may alter the audio characteristics of the speaker.
The information included in this manual is subject to change at any time and without notice
Version: 1.0 Date and Author Initials: 11-01-2020 RV Revision Date and Author Initials:
Page 10
Troubleshooting
If you have a problem with your speaker, please consult this troubleshooting section for possible solutions. If,
after consulting this section, the problem remains unresolved, please contact your dealer for more
information and/or help.
This troubleshooting section contains information on how to solve the most common speaker problems, but it
does not and cannot cover every eventuality. It is possible that you won't find your problem, cause and
solution in this section because product details may differ.
Problem Possible Cause Solution
Speaker is not switching on The fuse is defective Check the fuse that is found under
the power cable port. If it is
defective, replace it with the same
type of fuse with the same values.
There is a problem with the power
cable
Check that the power cable is
secure in the power port and that it
is connected to an active mains
power point. Swap the power
cable for the same type to check if
the power cable itself is causing
the problem.
Speaker not switched on Double check that the power
switch is in the ‘On’ position
Power LED is not lit If the speaker is connected to an
active mains power point, the
power switch is in the ‘On’ position
and the fuse is not defective, then
there is something wrong with the
speaker. Contact your retailer for
further advice.
No sound via one of the inputs Cable not connected properly Check that the cable is securely
connected at both the output and
input point.
Switch is incorrectly set Make sure that the switch on the
input channel is in the correct
position depending on the
connected source.
No audio via the master Volume is turned all the way down Raise the volume by slightly
turning the Master volume control.
Red Clip Limiter LED lights up
often or continually
Volume is too high Lower the volume of the input
signal or the amplifier. Overloading
the speaker can cause permanent
damage. Prolonged exposure to
distortion can cause permanent
damage to the speaker.
Distorted, clipping or crackling
sound
Connected device or equipment is
transferring a distorted signal
Check if any of the connected
source device is transferring a
distorted signal and turn down the
volume on the device if necessary.
Volume is too high Turn the volume down slightly
The information included in this manual is subject to change at any time and without notice
Version: 1.0 Date and Author Initials: 11-01-2020 RV Revision Date and Author Initials:
Page 11
The tone controls for treble and/or
bass are too high or too low.
Turn the tone control back to 12
o'clock and listen to check if
clipping is still audible.
Woofer or tweeter is defective If a speaker is exposed to a loud,
distorted, or clipped signal for a
longer period of time, this can
cause permanent damage to its
internal components. If you
suspect that the woofer or tweeter
is damaged, contact your local
retailer for assistance.
The sound from the subwoofer is
ducking out or is more present in
certain places
Incorrect positioning / acoustics Try to reposition the subwoofer to
see if this solves the problem. If it
does not, use the phase button.
This can help normalise the
acoustics of the room. If this
doesn’t solve the problem then two
or more subwoofers may be
required to further amplify the
sound.
The information included in this manual is subject to change at any time and without notice
Version: 1.0 Date and Author Initials: 11-01-2020 RV Revision Date and Author Initials:
Page 12

Specifications
General Specifications:
– solid subwoofer with strong plywood housing
– metal grille with acoustic foam on the inner side
– acoustic foam protects internal components from moisture, dust, confetti and other matter
– grille covers the entire front fro optimum protection of internal components and for a clean look
– high quality finish with black scratch-resistant lacquer
– rubber feet
– M20 flange for distance rod installation (distance rod not included)
– built-in 3-channel power amplifier
– two outputs for passive satellite speakers
– compatible with Onyx passive speakers with a minimum impedance of 8 Ohms
Technical Features:
– Bluetooth receiver built-in
– various line inputs also supported
– combo XLR-jack line inputs and stereo RCA
– bass capacity: 100W RMS
– treble capacity: 2x 75W RMS
– subwoofer frequency range: 40 – 125 Hz
– max. SPL subwoofer: 116 dB
– woofer type: 10” woofer with 2 inch voice-coil
– satellite outputs: 2x locking speaker connections
– dimensions: 350 x 400 x 400 mm
– weight: 12 kg
– power consumption: 300 W
– supply voltage:100 / 240V AC, 50/60 Hz
– fuse: T5AL 250V (in setting 220 – 240 V), T10AL 250V (in setting 100 – 120 V)
The information included in this manual is subject to change at any time and without notice
Version: 1.0 Date and Author Initials: 11-01-2020 RV Revision Date and Author Initials:
 Loading...