

Page 1
Pressure Washer
Operation Manual
for model PWH3635
Do Not return this product to the
retailer! Questions? 1-800-888-2468
Learn more about your pressure
washer, get answers to frequently
asked questions, and register on
line at www.devap.com
Table of Contents
Safety Guidelines/Definitions .................
Consumer Saftey Information ................
Important Safety Instructions ..............2-5
Carton Contents ......................................
Assembly Instructions .............................
Operating Instructions ...................... 7-11
Maintenance .................................... 12-13
Storage ..................................................14
Trouble Shooting Guide .................. 15-16
Warranty ................................................18
Español ............................................19-36
Français ........................................... 37-56
IMPORTANT
Please make certain that the
2
person who is to use this
2
equipment carefully reads and
understands these instructions
6
before operating.
6
Record All Information and attach sales
receipt here for future reference:
Purchase Date:_______________________
Serial #: _____________________________
Part No. A12495 Rev. 1 7/07/05
Page 2

SAFETY GUIDELINES - DEFINITIONS
This manual contains information that is important for you to know and understand.
This information relates to protecting YOUR SAFETY and PREVENTING EQUIPMENT
PROBLEMS. To help you recognize this information, we use the symbols below. Please
read the manual and pay attention to these symbols.
Indicates an imminently
hazardous situation
which, if not avoided, will result in death
or serious injury.
Indicates a potentially
hazardous situation
which, if not avoided, could result in death
or serious injury.
which, if not avoided, may result in minor
or moderate injury.
potentially hazardous situation which, if not
avoided, may result in property damage.
Indicates a potentially
hazardous situation
Used without the safety
alert symbol indicates a
CONSUMER SAFETY INFORMATION
This product may not be equipped with a spark arresting muffler.
If the product is not equipped and will be used around flammable
materials, or on land covered with materials such as agricultural crops, forest, brush,
grass, or other similar items, then an approved spark arrester must be installed and
is legally required in the state of California. It is a violation of California statutes
section 130050 and/or sections 4442 and 4443 of the California Public Resources
Code, unless the engine is equipped with a spark arrester, as defined in section 4442,
and maintained in effective working order. Spark arresters are also required on some
U.S. Forest Service land and may also be legally required under other statutes and
ordinances.
Engine exhaust contains chemicals known, in certain quantities, to
cause cancer, birth defects or other reproductive harm.
IMPORTANT SAFETY INSTRUCTIONS
Do not operate this unit until you have read and understand this
Operation, and Maintenance Instructions.
Operators Manual and the Engine Owners Manual for Safety,
READ AND SAVE THESE INSTRUCTIONS
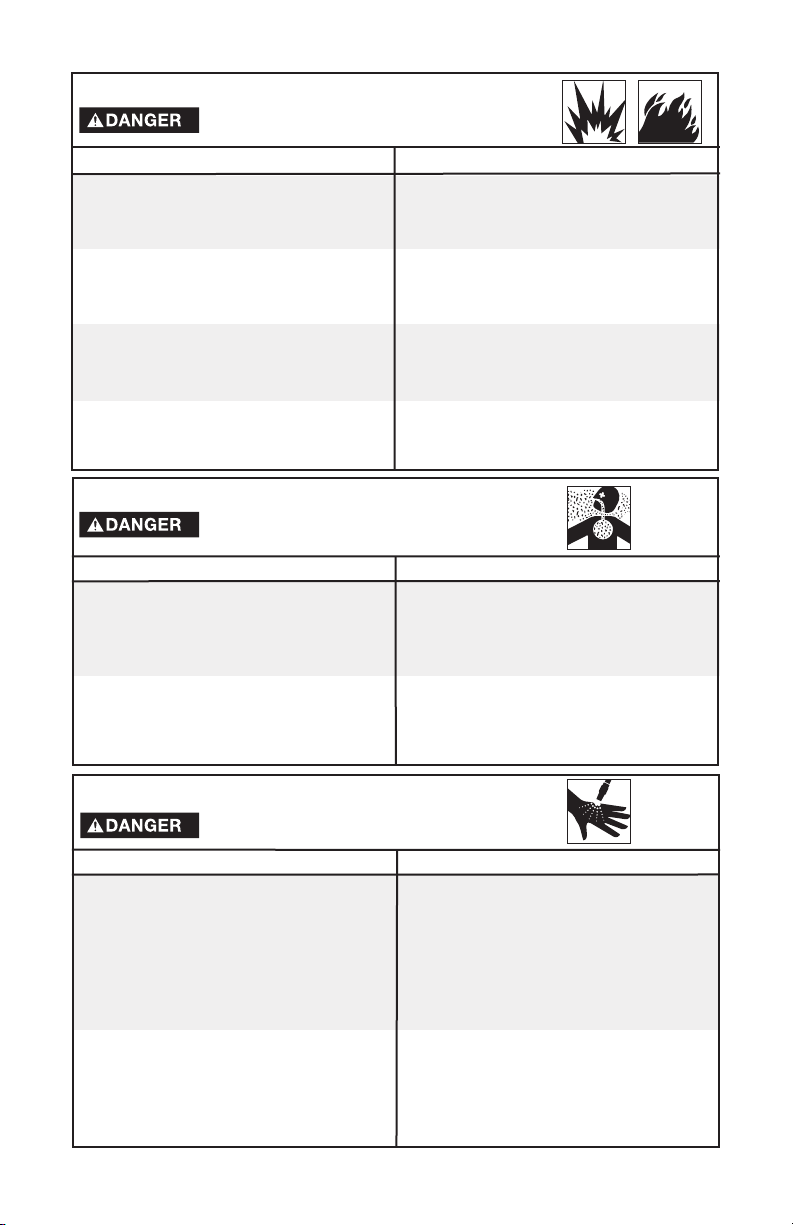
HAZARD
RISK OF EXPLOSION OR FIRE
WHAT CAN HAPPEN
• Spilled gasoline and it’s vapors can
become ignited from cigarette sparks,
electrical arcing, exhaust gases, and hot
engine components such as the muffler.
• Heat will expand fuel in the tank which
could result in spillage and possible fire
explosion.
• Operating the pressure washer in an explosive environment could result in a fire.
A12495
TO PREVENT IT
HOW
• Shut off engine and allow it to cool before
adding fuel to the tank.
• Use care in filling tank to avoid spilling fuel.
Move pressure washer away from fueling
area before starting engine.
• Keep maximum fuel level ½" below top of
tank to allow for expansion.
• Operate and fuel equipment in well ventilated areas free from obstructions. Equip
areas with fire extinguisher suitable for
gasoline fires.
2- ENG
Page 3
HAZARD
RISK OF EXPLOSION OR FIRE (continued)
WHAT CAN HAPPEN
• Materials placed against or near the
pressure washer can interfere with its proper
ventilation features causing overheating and
possible ignition of the materials.
• Muffler exhaust heat can damage painted
surfaces, melt any material sensitive to
heat (such as siding, plastic, rubber, or
vinyl), and damage live plants.
• Improperly stored fuel could lead to
accidental ignition. Fuel improperly
secured could get into the hands of
children or other unqualified persons.
• Use of acids, toxic or corrosive chemicals,
poisons, insecticides, or any kind of
flammable solvent with this product could
result in serious injury or death.
HAZARD
RISK TO BREATHING
WHAT CAN HAPPEN
• Breathing exhaust fumes will cause
serious injury or death! Engine exhaust
contains carbon monoxide, an odorless
and deadly gas.
• Some cleaning fluids contain substances
which could cause injury to skin, eyes, or
lungs.
TO PREVENT IT
HOW
• Never operate pressure washer in an area
containing dry brush or weeds.
• Always keep pressure washer a minimum of
four feet away from surfaces (such as houses,
automobiles, or live plants) that could be
damaged from muffler exhaust heat.
• Store fuel in an OSHA approved container,
in a secure location away from work area.
• Do not spray flammable liquids.
TO PREVENT IT
HOW
• Operate pressure washer in a well
ventilated area. Avoid enclosed areas such
as garages, basements, etc.
• Never operate unit in a location occupied
by humans or animals.
• Use only cleaning fluids specifically recommended for high pressure washers. Follow
manufacturers recommendations. Do not
use chlorine bleach or any other corrosive
compound.
HAZARD
RISK TO FLUID INJECTION
WHAT CAN HAPPEN
• Your washer operates at fluid pressures
and velocities high enough to penetrate
human and animal flesh, which could
result in amputation or other serious injury.
Leaks caused by loose fittings or worn
or damaged hoses can result in injection
injuries. DO NOT TREAT FLUID INJECTION
AS A SIMPLE CUT! See a physician
immediately!
• Injuries can result if system pressure is not
reduced before attempting maintenance or
disassembly.
TO PREVENT IT
HOW
• Never place hands in front of nozzle.
• Direct spray away from self and others.
• Make sure hose and fittings are tightened
and in good condition. Never hold onto the
hose or fittings during operation.
• Do not allow hose to contact muffler.
• Never attach or remove wand or hose
fittings while system is pressurized.
• To relieve system pressure, shut off
engine, turn off water supply, and pull gun
trigger until water stops flowing.
• Use only hoses and accessories rated
for pressure higher than your pressure
washer's PSI.
3- ENG
A12495
Page 4
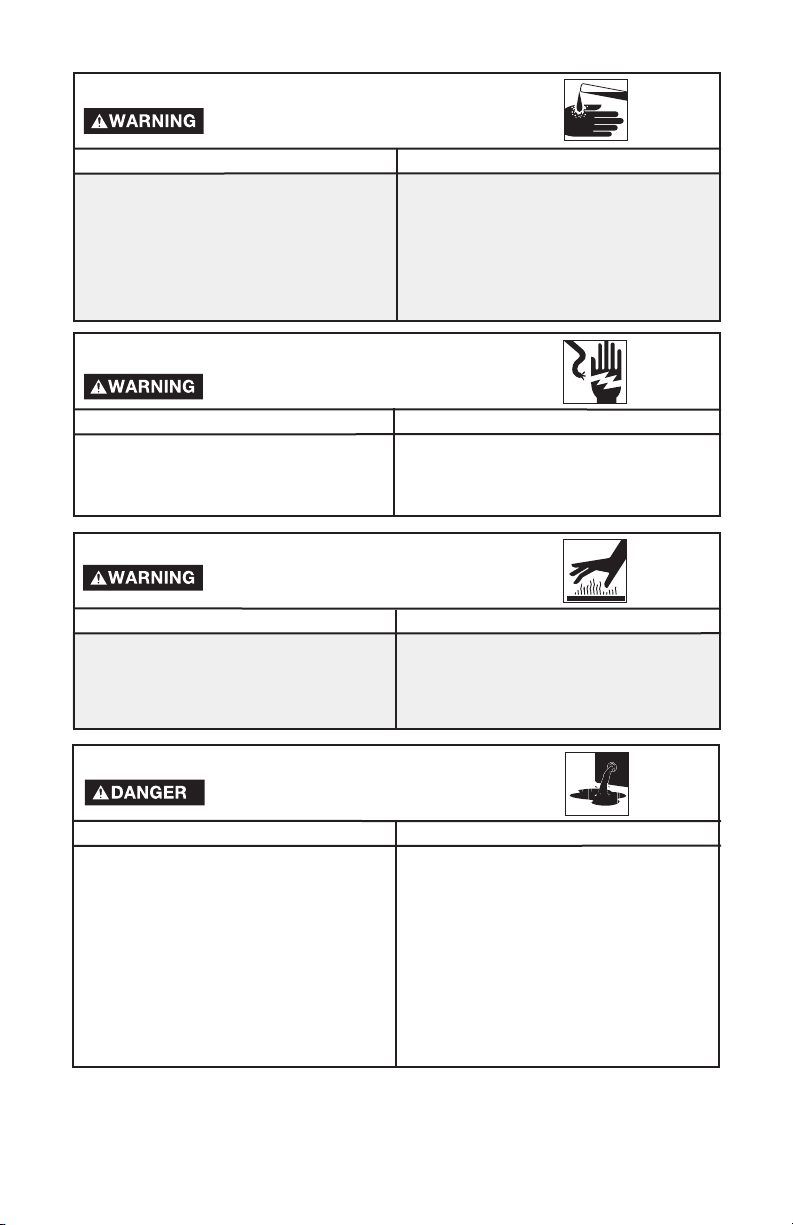
HAZARD
RISK OF
WHAT CAN HAPPEN
• Use of acids, toxic or corrosive chemicals,
poisons, insecticides, or any kind of
flammable solvent with this product could
result in serious injury or death.
RISK OF
WHAT CAN HAPPEN
• Spray directed at electrical outlets or
switches, or objects connected to an
electrical circuit, could result in a fatal
electrical shock.
RISK OF
ELECTRICAL SHOCK
WHAT CAN HAPPEN
• Contact with hot surfaces, such as
engines exhaust components, could
result in serious burn.
CHEMICAL
BURN
ELECTRICAL SHOCK
HAZARD
ELECTRICAL SHOCK
RISK OF HOT
HOW TO PREVENT IT
• Do not use acids, gasoline, kerosene,
or any other flammable materials in this
product. Use only household detergents,
cleaners and degreasers recommended
for use in pressure washers.
• Wear protective clothing to protect eyes
and skin from contact with sprayed
materials.
HAZARD
TO PREVENT IT
HOW
• Unplug any electrically operated product
before attempting to clean it. Direct spray
away from electric outlets and switches.
RISK OF
SURFACES
TO PREVENT IT
HOW
• During operation, touch only the control
surfaces of the pressure washer. Keep
children away from the pressure washer
at all times. They may not be able to
recognize the hazards of this product.
RISK OF INJURY OR PROPERTY DAMAGE
WHEN TRANSPORTING OR STORING
WHAT CAN HAPPEN
• Fuel or oil can leak or spill and could
result in fire or breathing hazard, serious
injury or death can result. Fuel or oil
leaks will damage carpet, paint or other
surfaces in vehicles or trailers.
A12495
HAZARD
TO PREVENT IT
HOW
• If pressure washer is equipped with a
fuel shut-off valve, turn the valve to the
off position before transporting to avoid
fuel leaks. If pressure washer is not
equipped with a fuel shut-off valve, drain
the fuel from tank before transporting.
Only transport fuel in an OSHA approved
container. Always place pressure washer
on a protective mat when transporting to
protect against damage to vehicle from
leaks. Remove pressure washer from
vehicle immediately upon arrival at your
destination.
4- ENG
Page 5
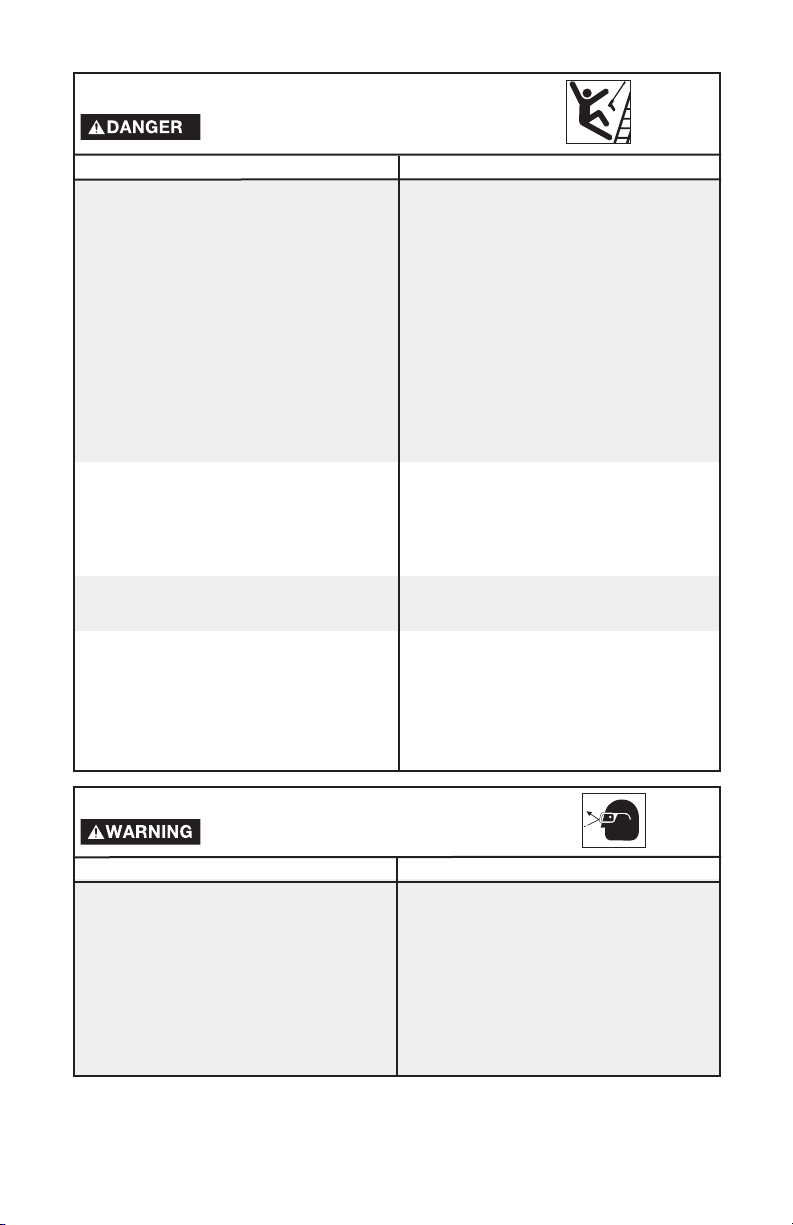
RISK OF UNSAFE OPERATION
WHAT CAN HAPPEN
• Unsafe operation of your pressure washer
could lead to serious injury or death to
you or others.
• If proper starting procedure is not
followed, engine can kickback causing
serious hand and arm injury.
• The spray gun/wand is a powerful cleaning tool that could look like a toy to a
child.
• Reactive force of spray will cause gun/
wand to kickback, and could cause the operator to slip or fall, or misdirect the spray.
Improper control of gun/wand can result in
injuries to self and others.
HAZARD
TO PREVENT IT
HOW
• Do not use chlorine bleach or any other
corrosive compound.
• Become familiar with the operation and
controls of the pressure washer.
• Keep operating area clear of all persons,
pets, and obstacles.
• Do not operate the product when
fatigued or under the influence of alcohol
or drugs. Stay alert at all times.
• Never defeat the safety features of this
product.
• Do not operate machine with missing,
broken, or unauthorized parts.
• Never leave wand unattended while unit
is running.
• If engine does not start after two pulls,
squeeze trigger of gun to relieve pump
pressure. Pull starter cord slowly until
resistance is felt. Then pull cord rapidly
to avoid kickback and prevent hand or
arm injury.
• Keep children away from the pressure
washer at all times.
• Do not overreach or stand on an unstable
support.
• Do not use pressure washer while
standing on a ladder.
• Grip gun/wand firmly with both hands.
Expect the gun to kickback when
triggered.
RISK OF INJURY FROM SPRAY
WHAT CAN HAPPEN
• High velocity fluid spray can cause
objects to break, propelling particles at
high speed.
• Light or unsecured objects can become
hazardous projectiles.
HAZARD
HOW
TO PREVENT IT
• Always wear ANSI approved Z87 safety
glasses.Wear protective clothing to protect
against accidental spraying.
• Never point wand at, or spray people or
animals.
• Always secure trigger lock when wand
is not in service to prevent accidental
operation.
• Never permanently secure trigger in pull
back (open) position.
5- ENG
A12495
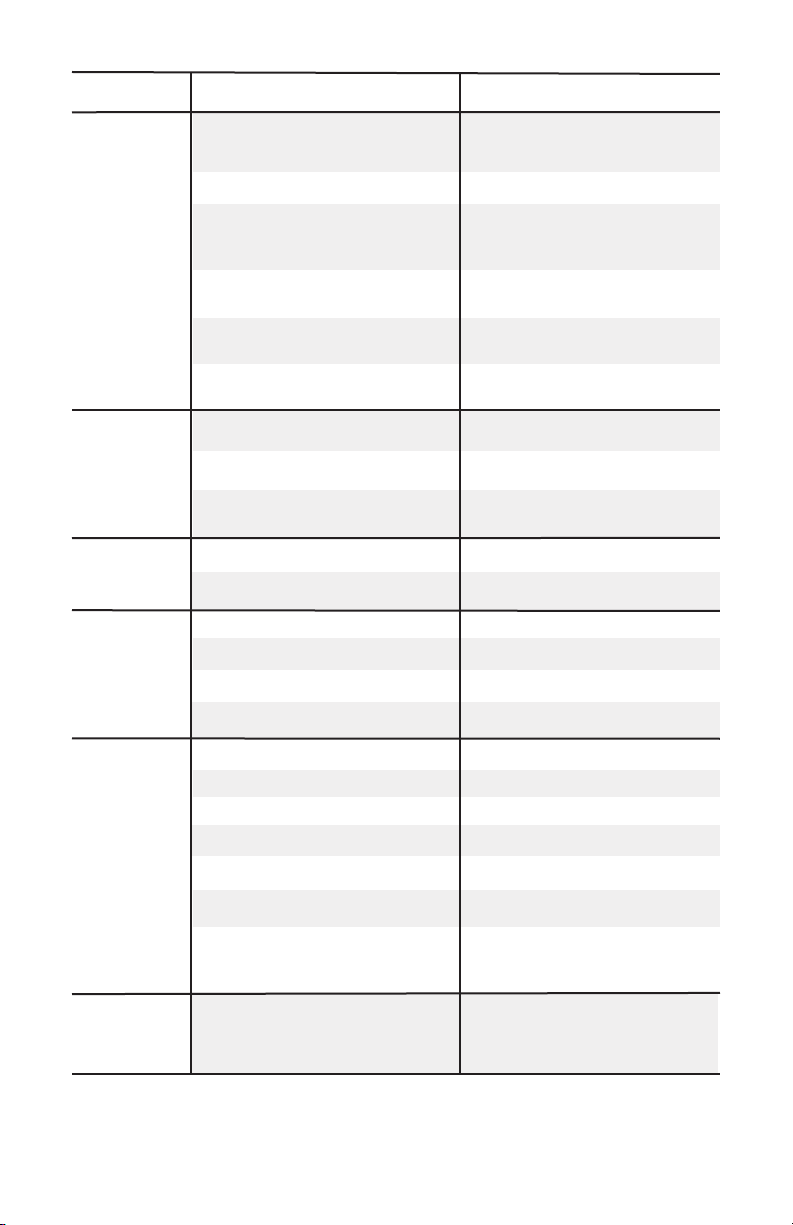
Page 6
Engine Frame and
Wheel Assembly
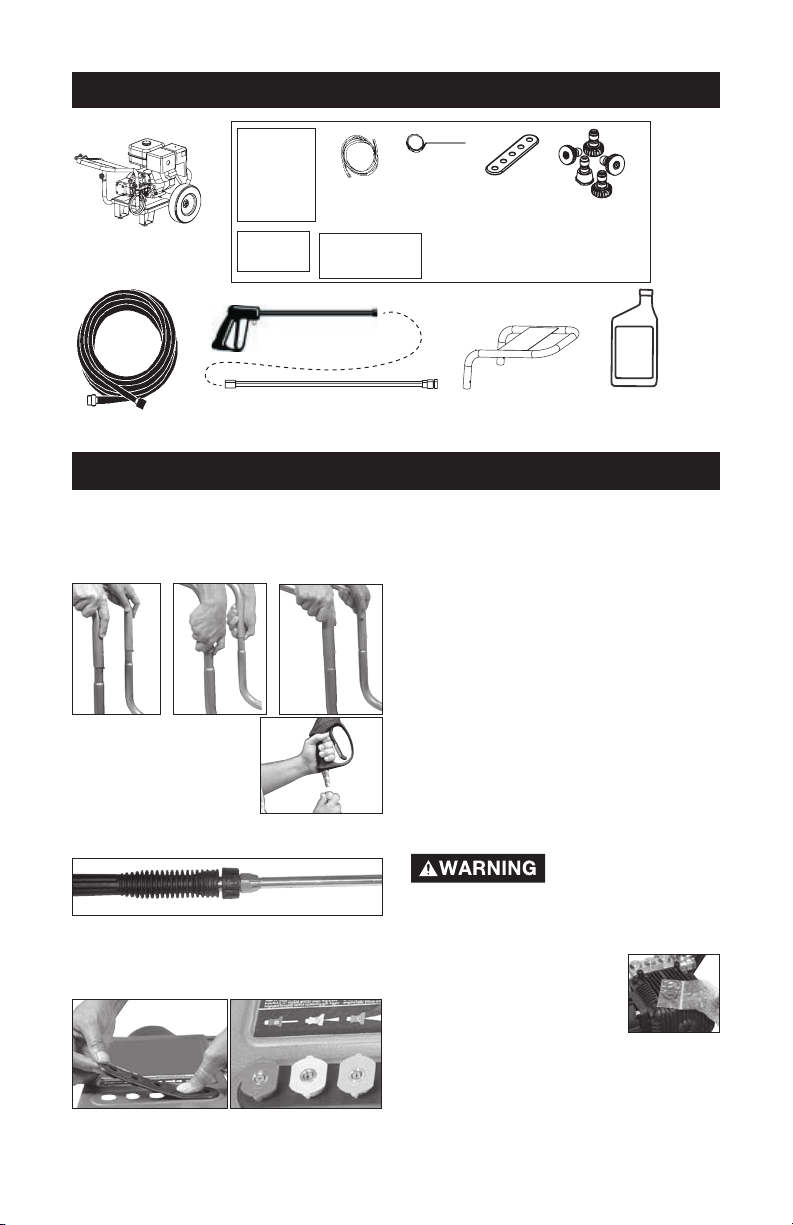
CARTON CONTENTS
English/
Spanish
Operation
Manual
Engine
Manual
Spray Gun
Chemical
Hose
Registration
card
Nozzle
Cleaning
Tool
Bagged Parts
Nozzle
Holder
Quick
Connect
Nozzles
High Pressure
Hose
Quick Connect Spray Wand
ASSEMBLY INSTRUCTIONS
1. Place handle assembly onto frame,
depress the snap buttons, and slide
the handle assembly onto the frame
until snap buttons snap into place.
2. Attach high
pressure hose
to gun. Tighten
securely.
3. Connect wand to gun. Tighten
securely.
4. Place the nozzle holder onto
the panel (located on the handle
assembly) and push each nozzle
holder into place.
Handle
Engine
Oil
5. Remove five colored quick
connect nozzles from plastic
bag and insert them into correct
grommet on the nozzle holder.
NOTE: Nozzles are color coded to
match colored nozzles on panel.
NOTE: The high pressure pump was
filled with oil at the factory. There is no
need to add oil at this time, see the
Maintenance section of this manual
for Maintenance information.
6. Add engine oil (supplied) to engine.
Refer to Engine Owners Manual
supplied by engine manufacturer
for correct procedure.
NOTE: There will be a slight amount of
oil in the engine from factory testing.
The shipping plug
must be removed
and replaced with the dipstick/oil
plug before operating pressure
washer.
7. Using a 11/16"
wrench, remove
shipping plug from
pump by turning it
counterclockwise.
Discard plug.
8. Remove dipstick/oil plug from
plastic bag and install into pump,
tighten securely.
A12495
6- ENG
Page 7
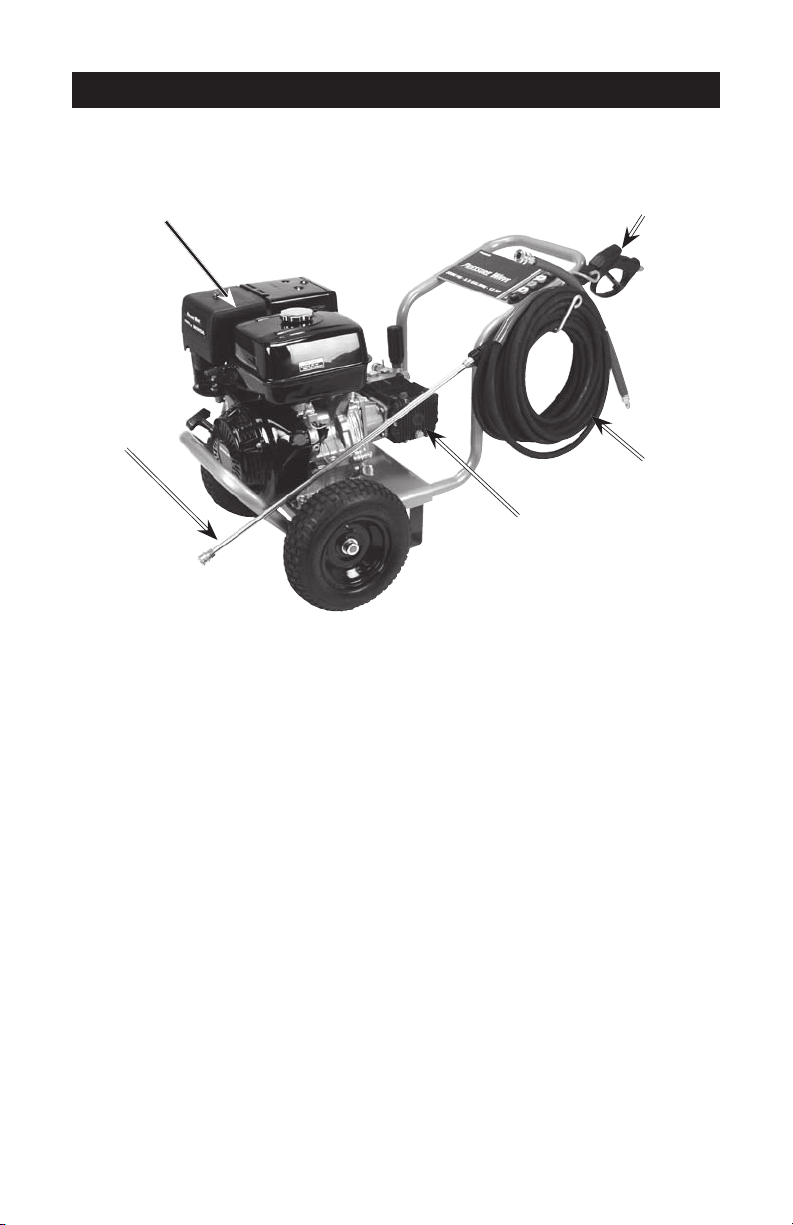
OPERATING INSTRUCTIONS
Compare the illustrations with your unit to familiarize yourself with the location
of various controls and adjustments. Save this manual for future reference.
Spray
Engine
Quick
Connect
Spray Wand
High Pressure Pump
Gun
High
Pressure
Hose
BASIC ELEMENTS OF A
PRESSURE WASHER
High Pressure Pump: Increases the
pressure of the water supply.
Engine: Drives the high pressure
pump.
High Pressure Hose:
pressurized water from the pump to
the gun and spray wand.
Spray Gun: Connects with spray
wand to control water flow rate,
direction, and pressure.
Quick Connect Spray Wand: Allows
the user to quickly change out highpressure nozzles. See How To Use
Spray Wand instructions in this section.
Chemical Hose (not shown): Feeds
cleaning agents into the pump to
mix with the water. See How To
Apply Chemicals/Cleaning Solvents
instructions in this section.
Carries the
BASIC ELEMENTS OF AN
ENGINE
Refer to the engine manual for
location and operation of engine
controls.
Choke Control:
carburetor choke valve.
Starter Grip: Pulling starter grip
operates recoil starter to crank
engine.
Fuel Valve Lever:
connection between fuel tank and
carburetor.
Engine Switch: Enables and disables
ignition system.
7- ENG
Opens and closes
Opens/closes
A12495
Page 8

PRESSURE WASHER
TERMINOLOGY
PSI: Pounds per Square Inch. The
unit of measure for water pressure.
Also used for air pressure, hydraulic
pressure, etc.
GPM: Gallons Per Minute. The unit of
measure for the flow rate of water.
CU: Cleaning Units. GPM multiplied
by PSI. GPM x PSI = CU
Bypass Mode: Allows water to
re-circulate within pump when the
gun trigger is not pulled.
Allowing the unit to
run for more than
two minutes without the gun trigger
pulled could cause overheating and
damage to the pump.
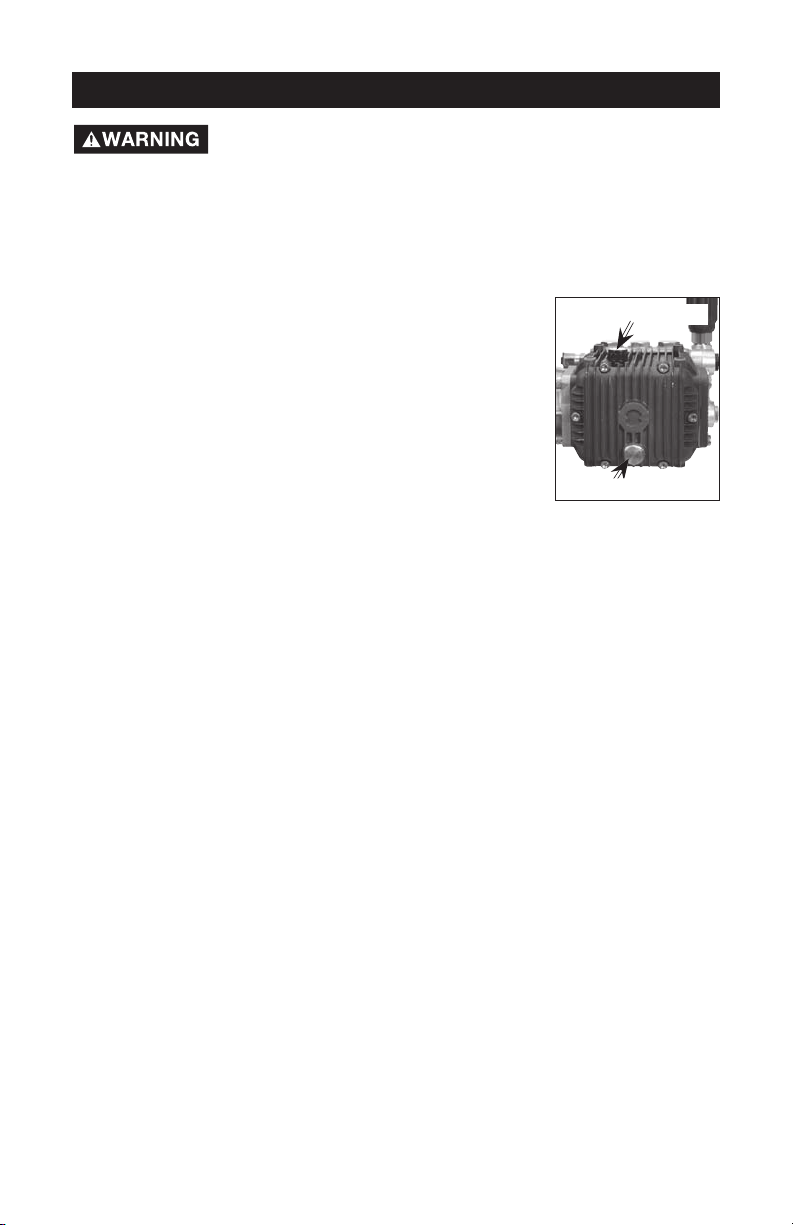
Thermal Relief Valve
When the temperature
inside the pump rises
too high the valve will
open and release a
gush of water in an
effort to lower the
temperature inside the pump. The
valve will then close.
Chemical Injection System: Mixes
cleaners or cleaning solvents with
the water to improve cleaning
effectiveness.
Water Supply: All pressure washers
must have a source of water. The
minimum requirements for a water
supply are 20 PSI and 5 gallons per
minute.
:
Thermal
Relief
Valve
PRESSURE WASHER
OPERATING FEATURES
PRESSURE ADJUSTMENTS
The pressure setting is preset at the
factory to achieve optimum pressure
and cleaning. If you need to lower the
pressure, it can be accomplished by
these methods.
1. Back away from the surface
to be cleaned. The further away
you are, the less the pressure will
be on the surface to be cleaned.
2. Change to the 40º nozzle (white) this nozzle delivers a less
powerful stream of water and a
wider spray pattern.
DO NOT attempt
pressure. A higher pressure setting
than the factory set pressure may
damage pump.
3. Adjust the
pressure regulator on the
pump. Turn
the pressure
regulator knob
counterclockwise to lower
pressure. Refer
to the illustrations to identify your
pressure regulator. Once you
have finished using your pressure
washer, return the pressure regulator to its original position by
turning it clockwise.
knob past the built-in stop or
damage to pump will result.
to increase pump
Pressure
Regulator
Knob
DO NOT try to turn
pressure regulator
A12495
8- ENG
Page 9
READ AND UNDERSTAND ALL WARNINGS BEFORE STARTING UNIT
When using the high pressure setting, DO NOT allow the high
or with any pets or animals. Serious injury can occur.
Your washer operates at fluid pressures and velocities high enough to penetrate
human and animal flesh, which could result in amputation or other serious injury.
Leaks caused by loose fittings or worn or damaged hoses can result in injection
injuries. DO NOT TREAT FLUID INJECTION AS A SIMPLE CUT! See a physician
immediately!
NEVER fill fuel tank completely. Fill tank to 1/2" below bottom of filler neck
to provide space for fuel expansion. Wipe any fuel spillage from engine and
equipment before starting engine.
NEVER run engine indoors or in enclosed, poorly ventilated areas. Engine exhaust
contains carbon monoxide, an odorless and deadly gas.
DO NOT let hoses come in contact with very hot engine muffler during or
immediately after use of your pressure washer. Damage to hoses from contact with
hot engine surfaces will NOT be covered by warranty.
DO NOT use hot water, use cold water only.
NEVER turn water supply off while pressure washer engine is running or damage to
pump will result.
DO NOT stop spraying water for more than two minutes at a time. Pump operates
in bypass mode when spray gun trigger is not pressed. If pump is left in bypass
mode for more than two minutes internal components of the pump can be
damaged.
If you do not understand these precautions, please call
speak to a service representative for further instructions.
pressure spray to come in contact with unprotected skin, eyes,
NEVER fill fuel tank when engine is running or hot. Do not
smoke when filling fuel tank.
NEVER pull water supply hose to move pressure washer. This
could damage hose and/or pump inlet.
1-800-888-2468 to
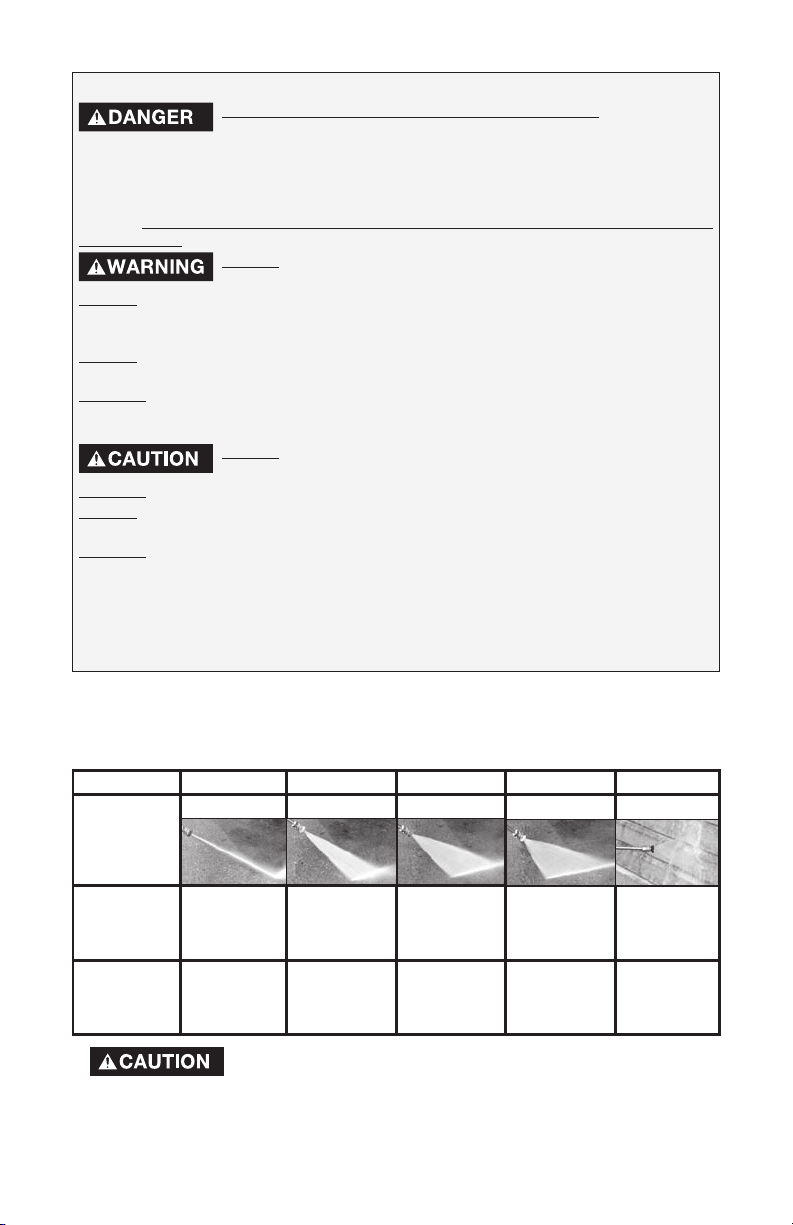
TO USE SPRAY WAND
The nozzles for the spray wand are stored in nozzle holder on the panel
assembly. Colors on the panel identify nozzle location and spray pattern. See
chart to choose the correct nozzle for the job to be performed.
Nozzle Color Red Yellow Green White Black
Spray
Pattern
Uses
Surfaces *
*
0º
powerful
pinpoint for
very intense
cleaning
Metal or
concrete
DO NOT use
on wood
The high pressure spray from your pressure washer is
capable of causing damage to surfaces such as wood,
15º
intense
cleaning of
small areas
metal,
concrete, or
wood
glass, automobile paint, auto striping and trim, and delicate objects such as
flowers and shrubs. Before spraying, check the item to be cleaned to assure
yourself that it is strong enough to resist damage from the force of the spray.
9- ENG
25º 40º low pressure
intense
cleaning of
larger areas
metal,
concrete, or
wood
covers wide
areas of
cleaning
metal,
concrete,
wood, or vinyl
applies
cleaning
solutions
metal,
concrete,
wood, or
vinyl
A12495
Page 10
CHANGING NOZZLES ON SPRAY
WAND
Risk of Flying
Object could
cause risk of serious injury. DO
NOT attempt to change nozzles
while pressure washer is running.
Turn engine off before changing
nozzles.
1. Pull quick
connect coupler
back and insert
nozzle.
2. Release quick
connect coupler
and twist nozzle to make sure it
is secure in coupler.
Risk of Flying
Object could
cause risk of serious injury. Ensure
nozzle is completely inserted in
QC socket, and QC snap ring is
fully engaged (forward) before
squeezing gun trigger.
Risk of injection or
injury to person.
Do not direct discharge stream
toward persons, unprotected
skin, eyes, or any pets or animals.
Serious injury can occur.
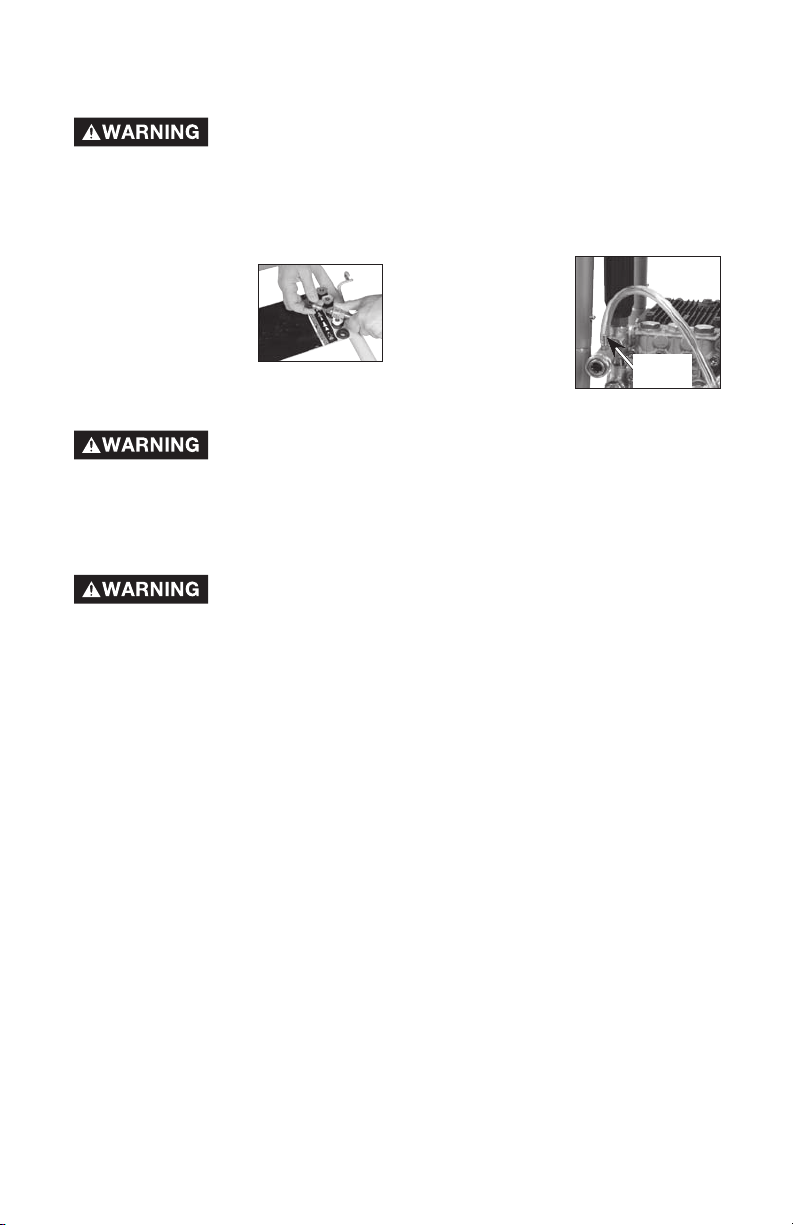
HOW TO APPLY CHEMICALS
AND CLEANING SOLVENTS
Applying chemicals or cleaning
solvents is a low pressure operation.
NOTE: Use only soaps and chemicals
designed for pressure washer use.
not use bleach.
To Apply chemicals:
1. Press
chemical hose
onto barbed
fitting located
near high
pressure hose
connection
of pump as
shown.
2. Place other end
of chemical
hose with filter on it into container
holding chemical/cleaning
solution. NOTE: For every 7
gallons of water pumped 1 gallon
of chemical/cleaning solution will
be used.
3. Install low pressure (black)
nozzle into quick connect fitting
of spray wand, see How To Use
Spray Wand paragraph in this
section.
4. After use of chemicals,
chemical hose into container
of clean water and draw
clean water through chemical
injection system to rinse
system thoroughly. If chemicals
remain in the pump it could be
damaged. Pumps damaged due
to chemicals will not be covered
under warranty.
NOTE: Chemicals and soaps will not
siphon when spray wand is in the high
pressure setting.
Do
Barbed
Fitting
place
A12495
10- ENG
Page 11

STARTING
Prior to starting, refer to your
engine manual for proper starting
procedure.
1. In a well ventilated outdoor area
add fresh, high quality, unleaded
gasoline with a pump octane
rating of 86 or higher. Do not
overfill. Wipe up spilled fuel before
starting the engine. Refer to
Engine Owners Manual for correct
procedure.
2. Check engine oil level.
Engine Owners Manual for correct
procedure. NOTE: There will
be a slight amount of oil in the
engine from factory testing.
3. Verify the filter
screen
is in
water inlet of
pump. NOTE:
Cone side
faces out.
4. Connect water source to pump
inlet. NOTE: Water source must
provide a minimum of 5 gallons per
minute at 20 PSI.
5. Connect high pressure hose to
pump outlet.
High Pressure Hose
Water Source
6. If applying a chemical or
cleaning solution, see How
To Apply Chemicals/Cleaning
Solvents instructions in this
section.
7. Turn water source on.
NOTE: Failure to do so could
cause damage to the pump.
See
Filter Screen
8. Start engine. See Engine
Owners Manual for correct
procedure.
NOTE: When engine
rope is pulled, pressure starts
building in the gun. If the engine
does not start after two pulls,
pull the gun trigger to relieve this
pressure.
9. Depress trigger on gun to
start water flow.
NOTE: Stand
on a stable surface and grip
gun/spray wand firmly with both
hands. Expect the gun to kick
when triggered.
10. Release trigger to stop water
flow.
11. Adjust spray for the task
being
performed by changing quick
connect nozzle. See How To Use
Spray Wand instructions in this
section.
SHUTTING DOWN
1. After each use, if you have
applied chemicals, place chemical
hose into container of clean water
and draw clean water through
chemical injection system to rinse
system thoroughly.
to do so could cause damage to
the pump.
2. Turn engine off.
Owner’s Manual.
turn the water off with the engine
running.
3. Turn water source off.
4. Pull trigger on spray gun
relieve any water pressure in
hose or spray gun.
5. See Storage section
manual for proper storage
procedures.
NOTE: Failure
See Engine
NOTE: NEVER
to
in this
11- ENG
A12495
Page 12
MAINTENANCE
When performing
maintenance, you
may be exposed to hot surfaces,
water pressure, or moving parts
that can cause serious injury or
death!
Before performing any maintenance
or repair, disconnect spark plug
wire, let engine cool and release
all water pressure. The engine
contains flammable fuel. DO NOT
smoke or work near open flames
while performing maintenance.
To ensure efficient operation and
longer life of your pressure washer,
a routine maintenance schedule
should be prepared and followed.
If the pressure washer is used in
unusual conditions, such as hightemperatures or dusty conditions,
more frequent maintenance checks
will be required.
ENGINE
Consult the Engine Owners
Manual for the manufacturer's
recommendations for any and all
maintenance. Consult the Engine
Owners Manual for the manufacturer's recommendations for any and
all maintenance. NOTE: The frame is
equipped with an oil drain hole to help
make changing the engine oil easier.
PUMP
NOTE: The pump was filled with oil at
the factory.
1. Change pump oil after the first ten
(10) hours of operation and every
fifty (50) hours thereafter.
To Check Oil:
1. Remove
dipstick/oil
plug from
pump and
wipe clean.
2. Insert
dipstick/oil
plug fully
into pump,
then
remove it.
3. Oil level is correct when oil covers
the lower 1/2 inch of end of
dipstick/oil plug.
How To Change Pump Oil
1. Loosen dipstick/oil plug.
2. Place a container under the oil
drain plug.
3. Remove oil drain plug.
4. After oil is drained replace oil
drain plug. Tighten securely.
5. Remove dipstick/oil plug and fill
with 18.54 oz (548.3 ml) of 30W
non detergent oil.
6. Replace dipstick/oil plug and
tighten securely.
Dipstick/oil plug
Oil Drain Plug
A12495
12- ENG
Page 13
NOZZLE CLEANING
If the nozzle becomes clogged
with foreign materials, such as dirt,
excessive pressure may develop. If
the nozzle becomes partially clogged
or restricted, the pump pressure will
pulsate. Clean the nozzle immediately
using the nozzle kit supplied and the
following instructions:
1. Shut off the pressure washer and
turn off the water supply.
2. Pull trigger on gun handle to
relieve any water pressure.
3. Disconnect the spray wand from
the gun.
4. Remove the high-pressure nozzle
from the spray wand. Remove
any obstructions with the nozzle
cleaning tool provided and
backflush with clean water.
5. Direct water supply into spray
wand to backflush loosened
particles for 30 seconds.
6. Reassemble the nozzle to the
wand.
7. Reconnect spray wand to gun
and turn on water supply.
8. Start pressure washer and place
spray wand into high pressure
setting to test.
HOW TO CLEAN THE WATER
INLET FILTER
This screen filter should be checked
periodically and cleaned if necessary.
1. Remove filter
by grasping
end and
removing it
from water inlet
of pump as
shown.
2. Clean filter by flushing it with
water on both sides.
3. Re-insert filter
of pump. NOTE: Cone side faces
out.
NOTE: Do not operate pressure
washer without filter properly installed.
into water inlet
Filter Screen
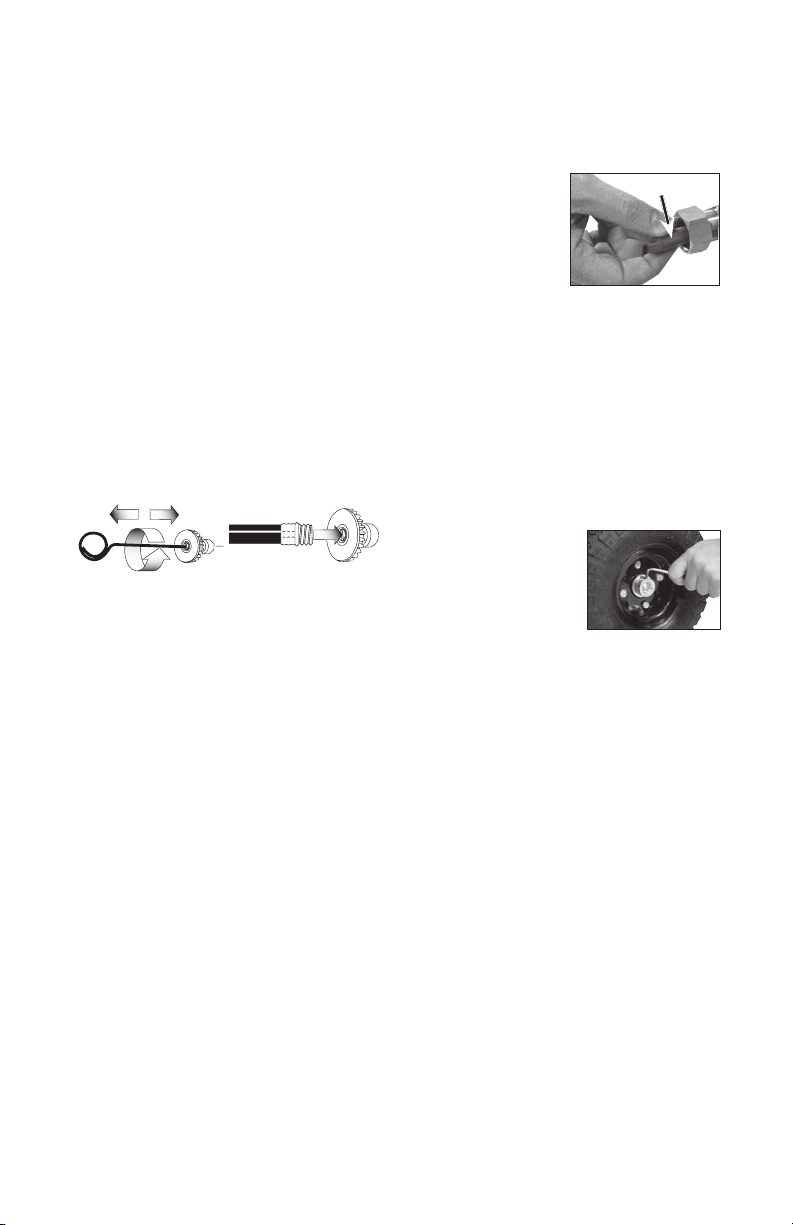
HOW TO REMOVE THE
WHEELS
1. Using a 1/8" hex
head wrench
loosen set screw
in hub collar.
2. Slide hub collar
from axle and
remove the tire.
13- ENG
A12495
Page 14
STORAGE
ENGINE
Consult the Engine Owners Manual for
the manufacturer's recommendations
for storage.
PUMP
The manufacturer recommends using
a pump protector/winterizer when
storing the unit for more than 30 days
and/or when freezing temperatures
are expected. If a pump protector/
winterizer is not available, *RV
antifreeze needs to be run through the
pump as outlined in the steps below.
NOTE: Using a pump protector/
winterizer or *RV antifreeze is to
provide proper lubrication to the
internal seals of the pump regardless
of temperature or environment.
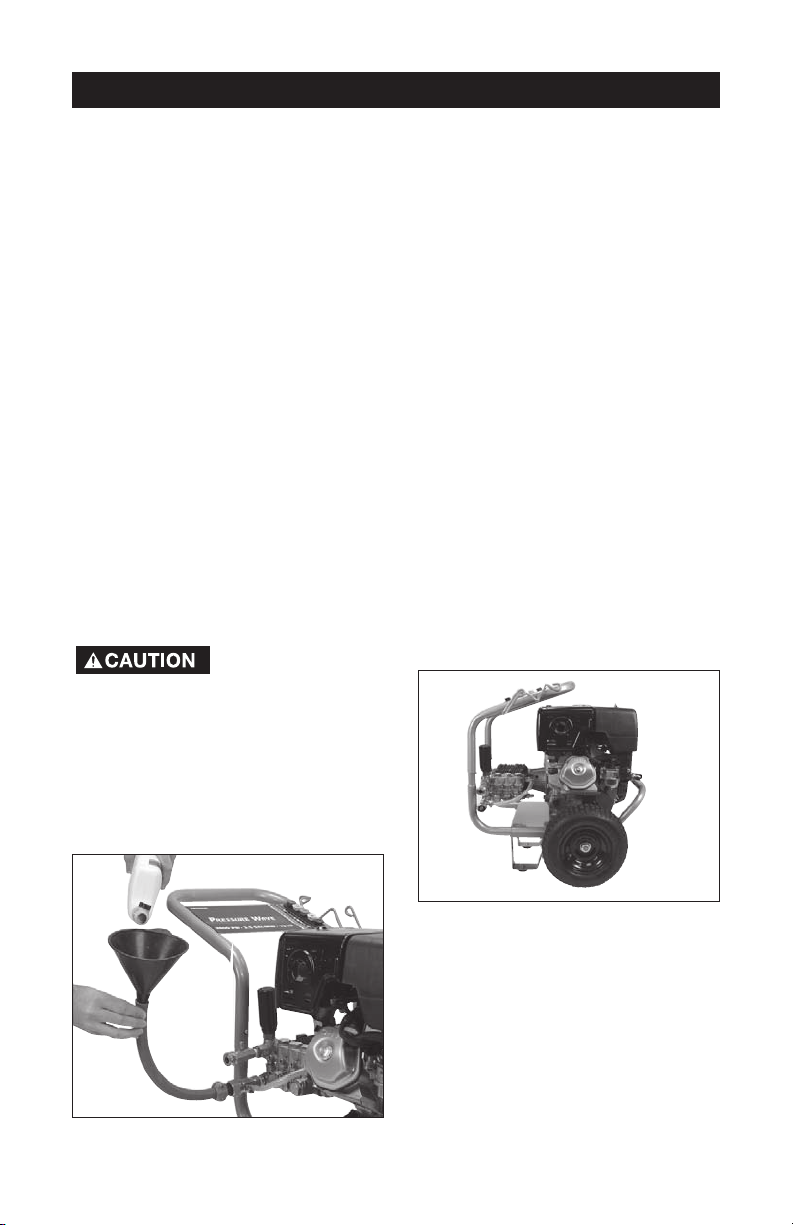
1. Obtain a funnel, six ounces
of *RV antifreeze, and 16 - 36
inches of garden hose with a
male hose connector attached to
one end.
Use only RV
antifreeze. Any
other antifreeze is corrosive and
can damage pump.
2. Disconnect spark plug wire.
3. Connect length of garden hose to
water inlet of pump.
4. Add *RV antifreeze to hose as
shown.
5. Pull engine starter rope slowly
several times until antifreeze
comes out of high pressure hose
connection of pump.
6. Remove garden hose from water
inlet of pump.
7. Reconnect spark plug wire.
*Windshield washer fluid may also be
used
PRESSURE WASHER
1. Drain all water from high
pressure hose, coil it, and store
it in cradle of the pressure
washer handle.
2. Drain all water from spray gun
and wand by holding spray
gun in a vertical position with
nozzle end pointing down and
squeezing trigger. Store in gun
holder.
3. Store chemical hose so it is
protected from damage.
4. If space is needed, remove
handles and replace as shown.
A12495
14- ENG
Page 15

PROBLEM
Engine will
not start (see
Engine Manual
for further
engine
troubleshooting)
No or low
pressure
(initial use)
TROUBLE SHOOTING GUIDE
CAUSE
No fuel.
Low oil
Pressure builds up after two pulls
on the recoil starter or after initial
use.
Choke lever in the "No Choke"
position.
Spark plug wire not attached. Attach spark plug wire.
Engine ON/OFF switch in OFF
position.
Choke lever in the "Choke"
position on a "hot" engine or an
engine that has been exposed to
thermal heat for a long period of
time.
Fuel valve closed
Spray wand not in high pressure. See How to Use Spray Wand
Low water supply.
Leak at high pressure hose fitting.
Nozzle obstructed.
Water filter screen clogged. Remove and clean filter.
Air in hose.
Choke lever in the "Choke" position. Move choke to the "No Choke"
High pressure hose is too long.
CORRECTION
Add Fuel.
Add required amount of oil.
Squeeze gun trigger to relieve
pressure.
Move choke to the "Choke"
position.
Place engine ON/OFF switch in
ON position.
Move choke to the "No Choke"
position.
Move the fuel valve lever to the
"Open" position.
instructions in the Operation
Section.
Water supply must be at least 5
GPM @ 20 PSI.
Repair leak. Apply sealant tape
if necessary.
See Nozzle Cleaning instructions
in the Maintenance section.
Turn off the engine, then the
water source. Disconnect the
water source from the pump inlet
and turn the water source on
to remove all air from the hose.
When there is a steady stream
of water present, turn water
source off. Re-connect water
source to pump inlet and turn on
water source. Squeeze trigger to
remove remaining air
position.
Use high pressure hose under
100 feet.
15- ENG
A12495
Page 16
PROBLEM
Will not draw
chemicals
CAUSE
Spray wand not in low pressure.
Chemical filter clogged.
Chemical screen not in cleaning
solution.
CORRECTION
See How to Use Spray Wand
paragraph in the Operation
Section.
Clean filter.
Make sure end of chemical hose
is fully submerged into cleaning
solution.
No or low
pressure
(after period
of normal
use)
Water leaking
at gun/
spray wand
connection
Water
leaking at
pump
Oil leaking
at pump
Pump
Pulsates
Chemical too thick.
Pressure hose is too long
Chemical build up in chemical
injector.
Worn seal or packing
Worn or obstructed valves.
Worn unloader piston.
Worn or broken o-ring.
Loose hose connection.
Loose connections.
Piston packings worn.
Worn or broken o-rings.
Pump head or tubes damaged
from freezing.
Oil seals worn. Have replaced by AWSC
Loose drain plug.
Worn drain plug o-ring
Worn fill plug o-ring.
Pump overfilled.
Incorrect oil used.
Vent plug is clogged.
Nozzle obstructed.
Dilute chemical. Chemical should
be the same consistency as water.
Lengthen water supply hose
instead of high pressure hose.
Have parts cleaned or replaced
by AWSC.
Have replaced by AWSC.
Have replaced by AWSC.
Have replaced by AWSC.
Check and replace.
Tighten.
Tighten.
Have replaced by AWSC.
Have replaced by AWSC.
Have replaced by AWSC.
Tighten.
Check and replace.
Check and replace.
Check for correct amount.
Drain and fill with correct amount
and type of oil.
Clean vent plug; blow air through
it to remove any blockage. If problem persists, replace plug.
See Nozzle Cleaning paragraph in
the Maintenance section for the
correct procedure.
A12495
16- ENG
Page 17

NOTES
17- ENG
A12495
Page 18

LIMITED WARRANTY
DeVilbiss Air Power Company warrants to the original purchaser that the commercial rated pressure
washers covered under this warranty are free from defects in material and workmanship for two years
from the date of purchase.
DeVilbiss Air Power Company will repair or replace, at DeVilbiss' option, products or components
which have failed within the warranty period. Service will be scheduled according to the normal work
flow and business hours at the service center location, and the availability of replacement parts. All
decisions of DeVilbiss Air Power Company with regard to this limited warranty shall be final.
This warranty gives you specific legal rights, and you may also have other rights which vary from state
to state.
RESPONSIBILITY OF ORIGINAL PURCHASER (initial User):
• To process a warranty claim on this product, DO NOT return it to the retailer. The product must be
evaluated by an Authorized Warranty Service Center. For the location of the nearest Authorized
Warranty Service Center call 1-800-888-2468, 24 hours a day, 7 days a week or visit our web site
@ devap.com.
• Retain original cash register sales receipt as proof of purchase for warranty work.
• Use reasonable care in the operation and maintenance of the product as described in the Owners
Manual(s).
• Deliver or ship the product to the nearest Authorized Warranty Service Center. Freight costs, if any,
must be paid by the purchaser.
• If the purchaser does not receive satisfactory results from the Authorized Warranty Service Center,
the purchaser should contact DeVilbiss Air Power Company.
THIS WARRANTY DOES NOT COVER:
• Merchandise sold as reconditioned, used as rental equipment, or floor or display models.
• Merchandise that has become damaged or inoperative because of ordinary wear, misuse*, cold,
heat, rain, excessive humidity, freeze damage, use of improper chemicals, negligence, accident,
failure to operate the product in accordance with the instructions provided in the Owners Manual(s)
supplied with the product, improper maintenance, the use of accessories or attachments not
recommended by DeVilbiss Air Power Company, or unauthorized repair or alterations.
• Repair and transportation costs of merchandise determined not to be defective.
• Costs associated with assembly, required oil, adjustments or other installation and start-up costs.
• Expendable parts or accessories supplied with the product which are expected to become
inoperative or unuseable after a reasonable period of use, including but not limited to springs,
nozzles,
o-rings, air jets, washers, and similar accessories.
• Merchandise sold by DeVilbiss Air Power Company which has been manufactured by and identified
as the product of another company, such as gasoline engines. The product manufacturer's
warranty, if any, will apply.
• ANY INCIDENTAL, INDIRECT OR CONSEQUENTIAL LOSS, DAMAGE, OR EXPENSE THAT
MAY RESULT FROM ANY DEFECT, FAILURE OR MALFUNCTION OF THE PRODUCT IS
NOT COVERED BY THIS WARRANTY. Some states do not allow the exclusion or limitation of
incidental or consequential damages, so the above limitation or exclusion may not apply to you.
• IMPLIED WARRANTIES, INCLUDING THOSE OF MERCHANTABILITY OR FITNESS FOR
A PARTICULAR PURPOSE, ARE LIMITED TO ONE YEAR FROM THE DATE OF ORIGINAL
PURCHASE. Some states do not allow limitations on how long an implied warranty lasts, so the
above limitations may not apply to you.
A12495
213 Industrial Drive • Jackson, TN 38301-9615
Telephone: 1-800-888-2468
FAX: 1-800-888-9036
18- ENG
Page 19

Lavadora a presión
Manual de operación
para el modelo PWH3635
¡No devuelva esta unidad al
establecimiento donde la compró!
¿Consultas? 1-800-888-2468
Familiarícese con su lavadora a
presión, obtenga respuesta rápida a las
preguntas más frecuentes y regístrela en
línea en:
www.devap.com
Contenido
Normas de seguridad/definiciones. . . . . . . .20
Información de seguridad para el
consumidor . . . . . . . . . . . . . . . . . . . . . . . . . .20
Instrucciones importantes de seguridad. . . . . .
. . . . . . . . . . . . . . . . . . . . . . . . . . . . . . . . . .20-23
Contenido de la caja . . . . . . . . . . . . . . . . . . .24
Instrucciones para armar. . . . . . . . . . . . . . . .24
Instrucciones de operación . . . . . . . . . . .25-29
Mantenimiento . . . . . . . . . . . . . . . . . . . . . 30-31
Almacenaje . . . . . . . . . . . . . . . . . . . . . . . . . . .32
Guía de diagnóstico de problemas . . . . 33-34
Garantía . . . . . . . . . . . . . . . . . . . . . . . . . . . . .36
English . . . . . . . . . . . . . . . . . . . . . . . . . . . .1-18
Français . . . . . . . . . . . . . . . . . . . . . . . . . .
37-56
IMPORTANTE
Asegúrese de que la persona que
va a usar esta herramienta lea
cuidadosamente y comprenda estas
instrucciones antes de utilizarla.
Registre toda la información y adhiera
el comprobante de compra aquí para
referencia futura.
Fecha de compra: ____________________
N° de serie: __________________________
o
Pieza N
. A12495 Rev. 1 7/07/05
Page 20

DEFINICIONES DE NORMAS DE SEGURIDAD
Este manual contiene importante información para que usted sepa y comprenda. Esta información se
relaciona con la protección de
Para ayudarlo a reconocer esa información, utilizamos los
leer el manual y prestar atención a dichos símbolos.
Indica una situación de
se evita, causará la muerte o lesiones serias.
riesgosa, que si no se evita, podría causar la
muerte o lesiones serias.
inminente riesgo, que si no
SU SEGURIDAD Y LA PREVENCIÓN DE PROBLEMAS AL EQUIPO.
Indica una situación
potencialmente
símbolos indicados más abajo. Sírvase
Indica una situación
peligrosa, que si no se evita,
lesiones menores o moderadas.
una situación potencialmente riesgosa la que, que si
no se evita, podría causar daños a la propiedad.
potencialmente
podría causar
Usado sin el símbolo de
seguridad de alerta indica
INFORMACIÓN DE SEGURIDAD PARA EL CONSUMIDOR
Esta unidad podría no estar equipada con un cortachispas en el
inflamables o en suelo cubierto con materiales tales como productos agrícolas, forestales,
arbustos u otros similares, se debe instalar un corta chispas autorizado, y en el estado de
California es obligatorio por ley que esté provisto de corta chispas y mantenido en buen estado
de funcionamiento de acuerdo a las secciones 130050 y/o secciones 4442 y 4443 del Código
de Recursos Públicos Naturales. El cortachispas también se requiere en algunas jurisdicciones
del Servicio Forestal del Gobierno de los EE.UU. y también puede ser obligatororio por otros
estatutos y ordenanzas
nacimiento u otras lesiones al sistema reproductivo.
silenciador del escape. Si esta unidad se usa alrededor de materiales
.
Los gases que escapan de esta máquina contienen químicos, que
en ciertas cantidades, se conoce que causan cáncer, defectos de
INSTRUCCIONES IMPORTANTES DE SEGURIDAD
No opere este equipo hasta haber leído y entendido las instrucciones
y en el Manual del Propietario del Motor.
de seguridad, operación y mantenimiento en este Manual del Operador
LEA Y CONSERVE ESTAS INSTRUCCIONES
RIESGO DE EXPLOSIÓN O INCENDIO
¿QUÉ PUEDE OCURRIR?
• La gasolina derramada y sus emanaciones
pueden incendiarse con las chispas de
cigarrillos, arcos eléctricos, el escape de la
combustión y componentes calientes del
motor tales como el silenciador.
• El calor hará expandir el combustible dentro
del tanque haciendo que se derrame y pueda
causar una explosión e incendio.
• Hacer funcionar la lavadora a presión dentro
de un ambiente explosivo podría ocasionar
una explosión.
• Los materiales colocados contra o cerca de
la lavadora a presión, pueden interferir con
su ventilación, causando el recalentamiento
y posible encendido de los materiales.
A12495
RIESGO
¿CÓMO PREVENIRLO?
• Apague el motor y permítale enfriarse antes
de agregar combustible al tanque.
• Ponga sumo cuidado al llenar el tanque y evite
derramar el combustible. Antes de poner el
motor en marcha, mueva la lavadora a presión
fuera del área donde se cargó de gasolina.
• Para permitir la expansión del combustible
sin que se derrame, mantenga el nivel
máximo 13 mm (1/2") por debajo de la boca
del tanque.
• Haga funcionar el equipo y agregue
combustible en áreas bien ventiladas y sin
obstrucciones. Equipe las zonas con extintores
apropiados para incendio de gasolina.
• Nunca haga funcionar la lavadora a presión
en un sector que contenga malezas o pasto
seco.
20- SP
Page 21

RIESGO
RIESGO DE EXPLOSIÓN O INCENDIO (continuación)
¿QUÉ PUEDE OCURRIR?
• El calor del silenciador del escape puede
dañar superficies pintadas, derretir cualquier
material sensible a la temperatura (como
revestimientos exteriores, plásticos, caucho o
vinilos) y dañar plantas vivas.
• El combustible almacenado en forma
inadecuada puede ocasionar un incendio
accidental. Asimismo, el combustible
protegido inadecuadamente puede caer
en manos de niños u otras personas no
calificadas para su manipulación.
• El uso de ácidos, productos químicos
tóxicos o corrosivos, venenos, insecticidas o
cualquier clase de solventes inflamables con
esta unidad, podría ocasionar lesiones serias
o la muerte.
RIESGO
RIESGO DE INHALACIÓN
¿QUÉ PUEDE OCURRIR?
• La inhalación de las emanaciones del escape
causará ¡lesiones serias o la muerte! Las
emanaciones del escape contienen monóxido
de carbono, un gas inodoro y mortal.
• Algunos líquidos para limpieza contienen
sustancias que pueden lesionar la piel, los ojos
o los pulmones.
¿CÓMO PREVENIRLO?
• Siempre mantenga la lavadora a presión
a una distancia mínima de 1,20 m (4’) de
superficies que podrían dañarse por el calor
del escape del silenciador (p. ej.: casas,
automóviles, o plantas vivas) .
• Almacene el combustible en un contenedor
aprobado por OSHA y en un lugar seguro y
alejada del sitio de trabajo.
• No rocíe líquidos inflamables .
¿CÓMO PREVENIRLO?
• Haga funcionar la lavadora a presión en un
sector bien ventilado. Evite los ambientes
cerrados como garajes, sótanos, etc.
• Nunca haga funcionar la unidad en lugares
ocupados por personas o animales.
• Use solamente líquidos para limpieza
específicamente recomendados para lavadoras
a alta presión. Siga las recomendaciones del
fabricante. No use blanqueador clorado ni
compuesto corrosivo alguno.
RIESGO DE INYECCIÓN DE LÍQUIDO
¿QUÉ PUEDE OCURRIR?
• Su lavadora funciona con líquido a presiones
y velocidades muy elevadas, capaces de
penetrar el tejido humano y animal; que
podría terminar en una amputación u otras
lesiones serias. Las pérdidas causadas por
conexiones flojas o gastadas o mangueras
dañadas podrían causar lesiones por
inyección. ¡NO TRATE LA INYECCIÓN DE
LÍQUIDO COMO A UN SIMPLE CORTE!
¡Consulte a un médico inmediatamente!
• Se pueden producir lesiones si no se
despresuriza la unidad antes de intentar
darle mantenimiento o desarmarla.
RIESGO
¿CÓMO PREVENIRLO?
• Nunca coloque las manos delante de la
boquilla.
• No dirija el chorro hacia usted ni hacia otras
personas.
• Asegúrese que las mangueras y acoples estén
ajustados y en buenas condiciones. Nunca
sujete de la boquilla o los acoples durante su
funcionamiento.
• No permita que la manguera haga contacto
con el silenciador.
• Nunca conecte o desconecte el tubo
aplicador o los acoples de la manguera
mientras el sistema esté presurizado.
• Para liberar la presión del sistema, detenga
el motor, cierre el suministro de agua y
mantenga apretado el gatillo hasta que el
agua deje de salir.
• Use solamente mangueras y accesorios
especificados para una presión (PSI) mayor a
la de su lavadora.
21- SP
A12495
Page 22

RIESGO
RIESGO DE QUEMADURA QUÍMICA
¿QUÉ PUEDE OCURRIR?
• El uso de ácidos, productos químicos
tóxicos o corrosivos, venenos, insecticidas o
cualquier clase de solventes inflamables con
esta unidad, puede producir una lesión seria
o la muerte.
RIESGO DE DESCARGA ELÉCTRICA
¿QUÉ PUEDE OCURRIR?
• El rociado directo sobre tomacorrientes,
interruptores u objetos conectados a un
circuito eléctrico puede causar una descarga
eléctrica fatal.
RIESGO DE SUPERFICIES CALIENTES
¿QUÉ PUEDE OCURRIR?
• El contacto con superficies calientes, como
los componentes del escape de motores,
puede ocasionar serias quemaduras.
¿CÓMO PREVENIRLO?
• No utilice ácidos, gasolina, kerosén o
cualquier otro material inflamable en esta
unidad. Utilice únicamente detergentes
domésticos, limpiadores y desengrasantes
recomendados para el uso en lavadoras a
presión.
• Use atuendo protector adecuado para
proteger los ojos y la piel del contacto con
los materiales rociados.
RIESGO
¿CÓMO PREVENIRLO?
• Desenchufe cualquier artefacto eléctrico antes
de intentar limpiarlo. No dirija el chorro hacia
tomacorrientes ni interruptores.
RIESGO
¿CÓMO PREVENIRLO?
• Durante el funcionamiento, toque solamente
las superficies de control de la lavadora
a presión. Mantenga a los niños alejados
en todo momento de la lavadora a presión
porque podrían no darse cuenta de los
riesgos de esta unidad.
RIESGO DE LESIONES O DAÑOS A LA
PROPIEDAD AL TRANSPORTAR O ALMACENAR
¿QUÉ PUEDE OCURRIR?
• Las fugas o derrames de combustible o
aceite pueden originar un riesgo de incendio
o para la respiración, causando lesiones
serias o la muerte. Las fugas de combustible
o aceite pueden dañar alfombras, pintura u
otras superficies en vehículos o remolques.
A12495
RIESGO
¿CÓMO PREVENIRLO?
• Para evitar fugas de combustible durante
el transporte, si la lavadora a presión está
equipada con una válvula de corte de
combustible, póngala en su posición de
corte antes del transporte. Si no la tuviese,
drene el combustible del tanque antes de
su transporte. Transporte el combustible
únicamente en contenedores aprobados por
OSHA. Siempre que transporte la unidad,
colóquela sobre una alfombra para proteger
el vehículo contra daños por derrames.
Retire la lavadora a presión del vehículo
inmediatamente después de su arribo al
destino.
22- SP
Page 23

RIESGO
RIESGO POR OPERACIÓN INSEGURA
¿QUÉ PUEDE OCURRIR?
• La operación insegura de su lavadora a
presión puede causar lesiones serias o la
muerte a usted u otras personas.
• Si no se sigue el procedimiento adecuado
para el arranque, el motor puede golpear
de retroceso y causar lesiones en la mano
y el brazo.
• La pistola/tubo aplicador es una herramienta
potente de limpieza que a un niño puede
parecerle un juguete.
• La fuerza reactiva del chorro hará que la
pistola/tubo aplicador "patee de retroceso" y
puede hacer que el operador se resbale, se
caiga o apunte el chorro en dirección errada.
El control inadecuado de la pistola/tubo
aplicador puede causar lesiones al operador
u otras personas.
¿CÓMO PREVENIRLO?
• No use soluciones clorinadas ni otros
compuestos corrosivos.
• Familiarícese con el funcionamiento y los
controles de la lavadora a presión.
• Mantenga la zona de trabajo sin personas,
animales domésticos y obstáculos.
• No opere la unidad si está fatigado o bajo la
influencia del alcohol o drogas. Manténgase
alerta en todo momento.
• Nunca desactive los mecanismos de
seguridad de esta unidad.
• No haga funcionar la máquina con piezas
faltantes, rotas o desautorizadas.
• Nunca deje el tubo aplicador desatendido
mientras la unidad esté funcionando.
• Si el motor no arrancara después de dos
intentos, presione el gatillo de la pistola
para aliviar la presión de la bomba.
Vuelva a tirar del cordón lentamente
hasta percibir resistencia. Luego tire
rápidamente del mismo para evitar el
retroceso y evitar la lesión en su mano o
brazo.
• Mantenga a los niños alejados en todo
momento de la lavadora a presión.
• No se estire ni se pare sobre una superficie
inestable.
• No use la lavadora a presión estando parado
en una escalera.
• Agarre la pistola/tubo aplicador firmemente
con ambas manos y prepárese para que
"patee" cuando apriete el gatillo.
RIESGO DE LESIONES POR EL CHORRO
¿QUÉ PUEDE OCURRIR?
• El chorro de líquidos a alta velocidad
puede causar la rotura de algunos objetos y
proyectar sus partículas violentamente.
• Los objetos livianos o los que no estén
sujetos se pueden convertir en proyectiles
peligrosos.
RIESGO
¿CÓMO PREVENIRLO?
• Use siempre anteojos de seguridad que
cumplan con la norma Z87 de ANSI. Use
siempre ropa especial para protegerse del
rociado accidental.
• Nunca apunte el tubo aplicador ni rocíe
sobre personas o animales.
• Para evitar que se dispare accidentalmente,
siempre coloque el seguro del gatillo cuando
el tubo aplicador no esté en uso.
• Nunca fije el gatillo permanentemente en la
posición presionada (abierta).
23- SP
A12495
Page 24

CONTENIDO DE LA CAJA
Manual
Bastidor del
motor y conjunto
de ruedas
Manguera de
alta presión
del
operador
Manual
del motor
Tubo aplicador de conexión rápida
Manguera
de químicos
Tarjeta de
registro
Pistola rociadora
INSTRUCCIONES PARA ARMAR
1. Coloque el mango en el bastidor,
presionando los botones sujetadores
y deslizando el mango en el bastidor
hasta que los botones enganchen en
posición.
2. Conecte la
manguera de alta
presión a la pistola y
ajústela firmemente.
3. Conecte el tubo aplicador a la pistola
y ajústelo firmemente.
4. Coloque el portaboquillas en el panel
(ubicado en el mango) y presione
cada boquilla en su abrazadera en el
portaboquillas.
A12495
Herramienta
limpiadora
de boquillas
Portaboquillas
Piezas embolsadas
Boquillas
de conexión
Manillar
rápida
Aceite
para
motor
5. Saque las cinco boquillas de conexión
rápida de la bolsa plástica e insértelas en
las abrazaderas correspondientes en el
portaboquillas. NOTA: Las boquillas están
codificadas por colores que coinciden con
su abrazadera en el panel.
6. Agregue el aceite (provisto) al motor.
Para informarse del procedimiento
correcto, refiérase al Manual del
propietario del motor suministrado por
su fabricante.
NOTA:
Habrá una pequeña cantidad de
aceite remanente en el motor, proveniente
de las verificaciones de fábrica.
NOTA: La bomba de alta presión se llenó
con aceite en la fábrica. No hay necesidad
de agregarle aceite en este momento; vea
la sección Mantenimiento en este manual
para efectuar el mantenimiento de esta
bomba.
Antes de hacer
funcionar la
lavadora a presión, extraiga el tapón
usado para el embarque y reemplácelo
por el tapón con varilla medidora de
aceite.
7. Utilizando una llave
de 17 mm (11/16"),
extraiga el tapón de
embarque que viene
en la bomba, girándolo
en sentido antihorario
y descártelo.
8. Extraiga el tapón con varilla medidora
de aceite de la bolsa plástica e
instálelo en la bomba ajustándolo
firmemente.
24- SP
Page 25

INSTRUCCIONES DE OPERACIÓN
Compare las ilustraciones con su unidad para familiarizarse con la ubicación de sus
controles y regulaciones. Conserve este manual para referencias futuras.
Pistola
Motor
Tubo
Aplicador
de
Conexión
Rápida
Bomba de alta
presión
rociadora
Manguera
de alta
presión
ELEMENTOS BÁSICOS DE UNA
LAVADORA A PRESIÓN
Bomba de alta presión : Incrementa la
presión del suministro de agua.
Motor: Acciona la bomba de alta presión.
Manguera de alta presión:
a presión desde la bomba a la pistola y el
tubo aplicador.
Pistola rociadora:
Se conecta al tubo
aplicador para controlar el volumen del
flujo del agua, su dirección y la presión.
Tubo Aplicador de Conexión Rápida:
Permite que el usuario cambie las boquillas
de alta presión rápidamente. Refiérase
a las instrucciones para su uso en esta
sección.
Manguera para Químicos (no mostrada):
Alimenta los líquidos limpiadores a
la bomba para mezclarlos con agua.
Refiérase a las instrucciones para la
aplicación de químicos y solventes
limpiadores en esta sección.
Lleva el agua
ELEMENTOS BÁSICOS DEL
MOTOR
Refiérase al manual del motor para
conocer la ubicación y el manejo de sus
controles.
Control de cebado: Abre y cierra la
válvula de cebado del carburador.
Manija de arranque: Tirando esta manija
se acciona el arrancador con resorte de
retroceso que arranca el motor.
Leva de la válvula combustible: Abre
y cierra la conexión entre el tanque de
combustible y el carburador.
Llave interruptora del motor: Conecta
y desconecta el sistema de ignición del
motor.
25- SP
A12495
Page 26

TERMINOLOGÍA DE LA LAVADORA
A PRESIÓN
PSI: (Pounds per Square Inch) Lb/Pulg2.
Es una unidad de medida para la presión
del agua. También se usa para medir la
presión neumática, presión hidráulica, etc.
Equivale a 49 pascales.
GPM: (Gallons per Minute). Galones por
minuto. Es la unidad de medida para el
flujo de agua. Equivale a 6,89 kPa.
CU: (Unidades de limpieza) GPM
multiplicadas por psi.
l/min • kPa = Unidades limpiadoras
Modo de Derivación: Permite que el agua
recircule dentro de la bomba cuando el
gatillo no está presionado.
No permita
funcione por más de dos minutos
sin apretar el gatillo porque se
recalentará y se dañará bomba.
Válvula térmica de
seguridad: Cuando
la temperatura dentro
bomba se eleva
demasiado, la válvula se
abre y deja escapar un
chorro de agua para bajar
la temperatura. Luego se cierra la válvula.
Sistema de Inyección de Productos
Químicos: Mezcla los limpiadores o
solventes con agua para mejorar la
eficiencia del lavado.
Suministro de agua:
lavadoras a presión deben tener un
suministro de agua. Los requerimientos
mínimos para el suministro del agua son
137,8 kPa y 22,7 L/min (5 Gal/min).
que la unidad
Válvula térmica
de seguridad
Todas las
CARACTERÍSTICAS DE
OPERACIÓN DE LA LAVADORA
A PRESIÓN
REGULACIÓN DE LA PRESIÓN
La presión viene regulada de fábrica con
el objeto de lograr la presión óptima para
la limpieza. Si usted necesitase reducir la
presión, podrá hacerlo con los siguientes
métodos:
1. Retírese de la superficie por
lavarse. Cuanto más alejado usted
se encuentre, menor presión habrá
sobre la superficie a lavarse.
2. Cambie a la boquilla de 40°-
(blanca), esta boquilla produce un
chorro menos potente de agua y un
patrón de rociado más amplio.
NO intente
presión de la bomba. Una graduación
superior a la que trae de fábrica puede
dañar la bomba.
3. Gradúe el
regulador de
presión de
la bomba.
Para reducir
la presión,
gire la perilla
del regulador
en sentido
antihorario. Para
identificar el regulador de presión,
refiérase a las ilustraciones. Una
vez que termine de usar la lavadora
a presión, retorne el regulador a su
posición inicial, girándolo en sentido
horario
presión de la bomba. Una graduación
superior a la que trae de fábrica porque
se puede dañar la bomba.
incrementar la
Perilla
reguladora
de presión
No intente
incrementar la
A12495
26- SP
Page 27

LEA Y COMPRENDA TODAS LAS ADVERTENCIAS ANTES DE PONER LA
UNIDAD EN MARCHA
Cuando trabaje con alta presión, NO PERMITA que el chorro haga
porque puede causar lesiones serias.
Su lavadora funciona con presiones y velocidades de fluido suficientemente elevadas
para penetrar el tejido humano y animal, lo que podría conducir a una amputación u otras
lesiones serias. Las pérdidas causadas por conexiones flojas gastadas o mangueras
dañadas pueden causar lesiones por inyección. ¡NO TRATE LAS LESIONES DE FLUIDO
COMO UN SIMPLE CORTE! ¡Consulte inmediatamente a un médico!
tanque de combustible.
NUNCA llene el tanque de combustible completamente, deje libre unos 13 mm (1/2") por
debajo del cuello de la toma para la expansión del combustible. Limpie cualquier derrame
de combustible del motor y del equipo antes de poner el motor en marcha.
NUNCA opere el motor en interiores ni en lugares encerrados o con poca ventilación; el
escape del motor contiene monóxido de carbono, un gas inodoro y mortal.
NO DEJE que las mangueras hagan contacto con el silenciador extremadamente caliente
del motor, durante o inmediatamente después del uso de la lavadora a presión. El daño a
las mangueras su contacto con superficies calientes NO ESTÁ cubierto por la garantía.
NO UTILICE agua caliente; solamente use agua fría.
NUNCA cierre el suministro del agua mientras el motor esté en marcha porque se dañará
la bomba.
NO interrumpa el rociado de agua por más de dos minutos a la vez. La bomba funciona
en modo de derivación (bypass) cada vez que el gatillo de la pistola rociadora no está
presionado. Si se deja que la bomba opere así por más de dos minutos, sus componentes
internos pueden dañarse.
Si no comprende estas instrucciones, sírvase llamar al
con un representante de servicio que le provea información adicional.
contacto con la piel o los ojos desprotegidos, mascotas ni animales,
NUNCA rellene el tanque de combustible mientras el motor
esté en marcha o caliente. No fume mientras esté llenando el
NUNCA tire de la manguera para mover la lavadora a presión, porque
podría dañar la manguera y/o la conexión de entrada de la bomba.
1-800-888-2468
, para conversar
USO DEL TUBO APLICADOR
La boquillas para el tubo aplicador se guardan en el portaboquillas ubicado en el panel.
Los colores en el panel identifican la ubicación de cada boquilla y su patrón de rociado.
Refiérase a la cartilla para seleccionar la boquilla correcta para el trabajo a realizarse.
Color de la
Boquilla
Patrón
(Abanico) de
Rociado
Usos
Superficies *
*
molduras y decoraciones de automóviles y objetos delicados tales como flores y
arbustos. Antes de rociar, examine el objeto a lavarse para asegurarse que sea lo
suficientemente robusto como para que no se dañe con la fuerza del chorro.
Rojo Amarillo Verde Blanco Negro
0º 15º 25º 40º baja presión
Chorro fino y
potente para
lavado muy
intenso
Metal o
concreto
NO USAR en
madera
Lavado
intenso
de áreas
pequeñas
metal,
concreto, o
madera
El chorro de alta presión de la lavadora puede dañar
superficies como: madera, vidrio, pintura de automóviles,
Lavado
intenso de
áreas grandes
metal,
concreto, o
madera
27- SP
Cubre áreas
amplias de
lavado
metal,
concreto,
madera o
vinilo
Aplica
soluciones
limpiadoras
metal,
concreto,
madera o
vinilo
A12495
Page 28

Cambio de Boquillas en el Tubo
Aplicador
Riesgo de
lesiones serias
por objetos disparados por el chorro.
NO INTENTE cambiar de boquilla
mientras la lavadora a presión esté
funcionando. Apague el motor antes de
cambiar la boquilla.
1. Jale el anillo del
conector rápido
hacia atrás e inserte
la boquilla.
2. Suelte el anillo y gire
la boquilla para cerciorarse que esté
segura en el conector.
Riesgo de
lesiones
serias por objetos disparados por
el chorro. Asegúrese que la boquilla
esté completamente insertada en el
conector rápido (CR) y que el anillo del
CR esté totalmente enganchado (hacia
adelante) antes de apretar el gatillo de
la pistola.
Riesgo de
inyección o
lesión a las personas. No dirija el chorro
de descarga hacia otras personas,
la piel desprotegida, los ojos, las
mascotas o animales; porque podría
causar lesiones serias.
CÓMO EMPLEAR PRODUCTOS
QUÍMICOS Y SOLVENTES PARA
LIMPIEZA
El empleo de productos químicos o
solventes para limpieza es una operación
de baja presión. NOTA: Utilice solamente
jabones y productos químicos diseñados
para el uso en lavadoras a presión. No use
blanqueadores.
Aplicación de productos químicos:
1. Presione la
manguera de
productos químicos
en el acople arponado
ubicado cerca de
la conexión de la
manguera de alta
presión de la bomba tal como se
muestra.
2. Coloque el otro extremo de la
manguera de productos químicos
(con su filtro instalado) dentro del
contenedor del producto químico
o solución de limpieza. NOTA: Se
usa 3,785 litros de solución química
limpiadora por cada 26,495 litros de
agua que se bombea.
3. Instale la boquilla de baja presión
(negra) en el conector rápido del
tubo aplicador, lea el párrafo "Uso
del tubo aplicador" en esta sección.
4. Luego de usar productos químicos,
coloque la manguera dentro de
un recipiente con agua limpia y
succiónela a través del sistema de
inyección química, a fin de enjuagar
el sistema completamente. Si los
productos químicos permaneciesen
en la bomba, ésta podría dañarse.
Los daños a las bombas ocasionados
por productos químicos no están
cubiertos por la garantía.
Cuando el tubo aplicador esté
NOTA:
regulado para presión alta, no succionará
los productos químicos o jabón.
Conexión
arponada
A12495
28- SP
Page 29

ARRANQUE
Antes de arrancar, refiérase al
procedimiento de arranque en el manual
de su motor.
1. En una zona bien ventilada externa,
agregue gasolina nueva, de alta
calidad, sin plomo, identificada
en el surtidor de combustible con
86 octanos o más. No llene en
exceso. Limpie cualquier derrame de
combustible del motor y del equipo
antes de poner el motor en marcha.
Para informarse del procedimiento
correcto, refiérase al manual del
motor.
2. Verifique el nivel de aceite del motor.
Para informarse del procedimiento
correcto, refiérase al manual del
propietario del motor.
contendrá una ligera cantidad de
aceite, correspondiente a las pruebas
de fábrica.
3. Verifique que la
malla del filtro
esté en la entrada
de agua de la
bomba. NOTA: El
cono hacis afuera.
4. Conecte el
suministro de agua a la entrada de la
bomba.
NOTA: El agua suministrada debe tener un
flujo de 18,925 litros (5 galones) por minutoa
137,8 kPa.
5. Conecte la manguera de alta presión
a la salida de la bomba.
Conexión de
manguera de
alta presión
6. Si intenta aplicar una solución
química o de limpieza, refiérase a
las instrucciones para su uso en esta
sección.
7.
Abra el suministro de agua
Dejar de hacerlo podría causar daño a
la bomba.
NOTA:
Malla del filtro
Alimentación
del agua
El motor
. NOTA:
8. Ponga el motor en marcha;
refiérase al manual del motor para
informarse del procedimiento
correcto. NOTA: La presión
comienza a acumularse en la pistola
rociadora cuando se tira de la soga
del arrancador. Si el motor no
arranca tras dos intentos, apriete el
gatillo para aliviar la presión.
9. Presione el gatillo de la pistola para
iniciar el flujo del agua. NOTA:
Párese sobre una superficie estable
y sostenga firmemente el mango de
la pistola/tubo aplicador con ambas
manos. Prevea el retroceso de la
pistola cuando se apriete el gatillo.
10. Suelte el gatillo para detener el
flujo de agua.
11.
Regule el patrón de rociado para la
operación que ejecutará, cambiando
la boquilla de conexión rápida. Lea las
instrucciones en Cómo usar el tubo
rociador en está sección.
APAGADO
1. Luego de cada uso, si usted ha
utilizado productos químicos,
coloque la manguera de productos
químicos dentro de un recipiente
con agua limpia y succiónela a
través del sistema de inyección
química, a fin de enjuagar el
sistema completamente. NOTA:
Dejar de hacerlo podría causar
daño a la bomba.
2. Apagado del motor. Refiérase al
manual del propietario del motor.
NOTA: NUNCA corte el suministro
del agua mientras el motor esté en
marcha.
3. Corte el suministro del agua
4. Presione el gatillo de la pistola
rociadora para aliviar cualquier
presión de agua dentro de la
manguera o la pistola rociadora.
5. Ver la sección almacenaje en
este manual para informarse del
procedimiento adecuado.
.
29- SP
A12495
Page 30

MANTENIMIENTO
Al efectuar el
mantenimiento,
usted quedará expuesto a las superficies
calientes, agua a presión o piezas en
movimiento ¡que pueden causar lesiones
serias o muerte!
Antes de hacer cualquier tipo de
mantenimiento o reparación, desconecte
el cable de la bujía, deje enfriar el motor
y alivie toda la presión del agua. El
motor contiene combustible inflamable.
NO FUME ni trabaje cerca de llamas
abiertas cuando haga el mantenimiento.
Para asegurar el funcionamiento eficiente
y una larga vida de su lavadora a presión,
se debe preparar y seguir un programa
rutinario de mantenimiento. Si la lavadora
a presión se usa en condiciones inusuales,
como de alta temperatura o polvo, se
requiere un mantenimiento más frecuente.
MOTOR
Para cualquier operación de mantenimiento
del motor, refiérase a las recomendaciones
del fabricante en su Manual del Propietario.
NOTA: El casco tiene un orificio para
drenaje de aceite que ayuda a facilitar el
cambio de aceite al motor.
BOMBA
NOTA: La bomba se llenó con aceite en la
fábrica.
1. Cambie el aceite de la bomba luego
de las primeras diez (10) horas de
operación y cada cincuenta (50) horas
en lo sucesivo.
Verificación del nivel de aceite:
1. Saque
el tapón
con varilla
medidora
de aceite de
la bomba y
límpielo con
un trapo.
2. Inserte
el tapón
con varilla
medidora
de aceite
completamente dentro de la bomba,
luego extráigalo.
3. El nivel del aceite será el correcto
cuando el aceite cubra los 13mm
(1/2 pulgada) del extremo inferior de
la varilla medidora.
Como cambiar el aceite a la bomba:
1. Afloje la varilla medidora de aceite.
2. Coloque un recipiente debajo del
tapón del purgado de aceite.
3. Saque el tapón de drenaje de aceite.
4. Después de drenar el aceite,
reinstrale el tapón y ajústelo
firmemente.
5. Saque la tapa con varilla medidora y
llene con 548ml (18,5 Oz.) de aceite
grado 30W sin detergente.
6. Reinstale la tapa de la toma de aceite
(con varilla medidora) y ajústela
firmemente.
Tapón con varilla
medidora de aceite
Tapón de drenaje
de aceite
A12495
30- SP
Page 31

LIMPIEZA DE LA BOQUILLA
Si la boquilla comienza a obstruirse con
materiales extraños como suciedad, se
puede una presión excesiva. Si se obstruye
o restringe parcialmente, la presión de
la bomba pulsará. Límpie la boquilla
inmediatamente usando el juego limpiador
provisto y las siguientes instrucciones:
1. Apague la lavadora a presión y corte
el suministro de agua.
2. Apriete el gatillo de la pistola para
aliviar la presión del agua.
3. Desconecte el tubo aplicador de la
pistola.
4. Saque la boquilla del extremo del
tubo aplicador. Elimine cualquier
obstrucción de la boquilla con la
herramienta limpiadora para boquilla
provista y lávela en dirección contraria
con agua limpia.
5. Para eliminar las partículas sueltas,
dirija el chorro de agua de la llave
por 30 segundos a la boquilla por su
extremo de salida
6. Reinstale la boquilla en el tubo
aplicador.
7. Reconecte el tubo aplicador a la
pistola y abra la llave de agua.
8. Para probar la boquilla, ponga en
marcha la lavadora a presión y gradúe
la boquilla del tubo aplicador para el
máximo de presión.
CÓMO LIMPIAR EL FILTRO DE
ENTRADA DEL AGUA
Este filtro de malla debe revisarse
periódicamente y limpiarse cuando sea
necesario.
1. Quite el filtro
agarrándolo
firmemente del
extremo y sáquelo
de la entrada del
agua a la bomba,
como se muestra.
2. Limpie el filtro enjuagándolo con
agua por ambos lados.
3. Reinserte el filtro en la entrada de
agua de la bomba. NOTA: La parte
cónica hacia arriba.
NOTA: No opere la lavadora a presión sin
el filtro instalado adecuadamente.
Malla del filtro
COMO SE SACAN LAS RUEDAS
1. Aflojar el tornillo de fijación del collar
del cubo con una
llave hexagonal
de 3,175 mm.
2. Saque el collar
deslizándolo fuera
del eje y saque la
rueda.
31- SP
A12495
Page 32

STORAGE
MOTOR
Vea las recomendaciones para el
almacenaje en el Manual del Propietario de
su motor.
BOMBA
El fabricante recomienda usar anticongelante
para bombas cuando se guarde la unidad
por más de 30 días y/o cuando se esperan
temperaturas congelantes. Si no se
dispone anticongelante para bombas, se
debe pasar anticongelante para vehículos
recreacionales (*RV) por la bomba como se
indica en los pasos a continuación. NOTA:
Se usa anticongelante para bombas o para
vehículos recreacionales (*RV) para proveer
lubricación adecuada a los sellos internos
de la bomba, independientemente de la
temperatura o el ambiente.
1. Obtenga un embudo, 178
ml de anticongelante tipo *RV
y una manguera de jardín de
aproximadamente 90 cm (40,64 cm91,44 cm) con un conector macho en
un extremo.
Use solamente
anticongelante
tipo RV. Cualquier otro tipo de
anticongelante es corrosivo y puede
dañar la bomba.
2. Desconecte el cable de la bujía.
3. Conecte un tramo de manguera
de jardín en la entrada de agua de la
bomba.
4. Agregue el anticongelante tipo *RV
a la manguera como se muestra.
5. Tire varias veces lentamente de
la cuerda de arranque hasta que el
anticongelante salga por la conexión
de la manguera de alta presión en la
bomba.
6. Retire la manguera de jardín de la
entrada de la bomba.
7. Reconecte el cable de la bujía.
*También puede utilizarse líquido
lavaparabrisas
LAVADORA A PRESIÓN
1. Drene toda el agua de la manguera
de alta presión, enróllela y guárdela
sobre el soporte del manillar de la
lavadora a presión.
2. Drene toda el agua de la pistola
y la varilla rociadora, sujetándola
en posición vertical, con la boquilla
apuntando hacia abajo, mientras
presiona el gatillo. Cuelgue las
mangueras en el soporte para
mangueras / pistola.
3. Guarde la manguera de químicos
protegida contra daños.
4. Si se necesita espacio, saque
los mangos y póngalos como se
muestra.
A12495
32- SP
Page 33

GUÍA DE DIAGNÓSTICO DE PROBLEMAS
PROBLEMA
El motor no
arranca (vea el
diagnóstico de
problemas en
el manual del
motor).
No hay presión
o está baja al
comenzar a usar.
CAUSA
Sin combustible.
Bajo nivel de aceite.
Acumuláción de presión después
de tirar dos veces de la cuerda del
arrancador o después de iniciar
su uso.
La leva de cebado (choke) está en
la posición de "No Choke".
El cable de la bujía está desconectado
El interruptor del motor está en
apagado en la posición "OFF"
La leva de cebado (choke) está en la
posición de "Choke" cuando el motor
está "caliente" o ha estado expuesto
al calor por un largo periodo.
Válvula de combustible cerrada.
La boquilla del tubo aplicador no
está graduada para alta presión.
Poca agua en el suministro.
Fuga en la conexión de la
manguera de alta presión.
Boquilla obstruida.
La malla filtrante de agua está
obstruida.
Aire en la manguera.
La leva de cebado (choke) está en
la posición de "Choke".
La manguera de alta presión es
demasiado larga.
CORRECCIÓN
Agregue combustible.
Agregue la cantidad adecuada
de aceite.
Apriete el gatillo de la pistola
para aliviar la presión.
Mueva la leva de cebado a la
posición de "Choke".
Conecte el cable de la bujía.
Encienda el motor moviendo el
interruptor a la posición "ON".
Mueva la leva de cebado
(choke) a la posición de "No
Choke".
Abra la válvula de combustible
moviendo la leva a la posición
"Open".
Refiérase a las instrucciones
para el uso del tubo aplicador
en la sección "Operación".
El suministro de agua debe
tener por lo menos 19 L/min a
138 kPa (5 GPM a 20 PSI).
Repare la fuga. Aplique cinta
selladora si fuese necesario.
Refiérase a las instrucciones
para el uso del limpiador
de boquillas en la sección
"Mantenimiento".
Elimine la obstrucción y limpie
la malla filtrante.
Apague el motor, luego corte el
suministro de agua y desconéctelo
de la entrada a la bomba. Abra
el suministro de agua para
eliminar todo el aire que haya en
la manguera. Cuando el flujo de
agua sea constante, cierrérrelo,
conéctelo a la entrada de la
bomba y ábralo. Apriete el gatillo
para eliminar el aire restante.
Mueva la leva a la posición de
"No Choke".
Utilice una manguera de alta
presión de menos de 30 m
(100').
33- SP
A12495
Page 34

PROBLEMA
No succiona
productos
químicos.
No hay presión
o está baja
después de un
tiempo normal
de uso.
CAUSA
El tubo aplicador no está
graduado para baja presión .
El filtro de productos químicos
está obstruído.
La malla para químicos no está
en la solución limpiadora.
El producto químico está
demasiado espeso.
La manguera de alta presión es
demasiado larga.
Acumulación de sedimentos
químicos en el inyector.
Sello o empaquetadura gastada.
Válvulas gastadas u obstruídas.
Pistón de descarga gastado.
CORRECCIÓN
Vea el procedimiento para el "Uso
del Tubo Aplicador" en la sección
"Operación".
Limpie el filtro.
Asegúrese que el extremo de la
manguera para químicos esté
sumergida completamente en la
solución limpiadora.
Diluya más el producto químico.
Debe tener la misma consistencia
del agua.
Alargue la manguera de
suministro de agua en vez de la
manguera de alta presión.
Hágalo cambiar en un SADG.
Haga cambiar las piezas en un
SADG.
Hágalas cambiar en un SADG.
Hágalo cambiar en un SADG.
Agua goteando
por la conexión
de la pistola /
tubo aplicador.
Agua goteando
de la bomba.
Fuga de aceite
en la bomba.
La bomba pulsa.
A12495
Anillo "O" gastado o roto.
Acople de manguera flojo.
Acoples flojos.
Empaquetaduras del pistón
gastadas.
Anillo "O" gastados o rotos.
Cabezal de la bomba o tubos
dañados por congelamiento.
Sellos de aceite gastados.
Tapón de drenaje flojo.
Anillo "O" del tapón de drenaje
gastado.
Anillo "O" del tapón de llenado
gastado.
Bomba sobrellenada.
Uso de aceite incorrecto.
La tapa del respiradero está
obstruida.
Boquilla obstruida.
34- SP
Revíselo y cámbielo.
Ajústelo.
Ajústelos.
Hágalas cambiar en un SADG.
Hágalos cambiar en un SADG.
Haga cambiar las piezas en un
SADG.
Hágalos cambiar en un (SADG).
Ajústelo.
Revíselo y cámbielo.
Revíselo y cámbielo.
Revise que la cantidad sea correcta.
Drene y llene con la cantidad y
tipo de aceite correctos.
Limpie la tapa sopleteándole
a través del respiradero para
desatorarlo. Si el problema
persiste, cambie la tapa.
Refiérase a las instrucciones para
el uso del limpiador de boquillas
en la sección "Mantenimiento".
Page 35

NOTAS
35- SP
A12495
Page 36

GARANTÍA LIMITADA
DeVilbiss Air Power Company garantiza al comprador original todas las unidades cubiertas por esta garantía
contra defectos de materiales o de fabricación por dos años a partir de la fecha de su compra.
DeVilbiss Air Power Company, a su criterio, reparará o reemplazará, las unidades o componentes que
hubiesen fallado dentro del periodo de la garantía. El servicio se programará de acuerdo al flujo y horario
normal de trabajo del servicentro autorizado y a la disponibilidad de piezas de repuesto. Las decisiones de
DeVilbiss Air Power Company relacionadas con esta garantía limitada son definitivas.
Esta garantía le otorga derechos legales específicos y usted también podría tener otros derechos que varían
de un estado a otro.
RESPONSABILIDAD DEL COMPRADOR ORIGINAL (Usuario Inicial):
• Para procesar un reclamo bajo esta garantía, NO devuelva la unidad al lugar donde se compró. La unidad
debe evaluarse en un servicentro de garantías autorizado. Para ubicar el servicentro más cercano, llame
al 1-800-888-2468 durante las 24 horas del día, los 7 días de la semana, o visite nuestro sitio web en
www.devap.com.
• Conserve el recibo del pago original como comprobante de su compra para hacer reclamos cubiertos por
la garantía.
• Tener cuidado razonable al operar la unidad y darle mantenimiento según se describe en el Manual del
Propietario.
• Remita o entregue la unidad al servicentro de garantías autorizado más cercano. El costo de los fletes, si
alguno, debe pagarlo el comprador.
• Si el comprador no estuviese satisfecho con el servicio recibido del servicentro de Garantías Autorizado
por, el comprador debe comunicarse con DeVilbiss Air Power Company.
ESTA GARANTÍA NO CUBRE:
• Mercadería vendida como reacondicionada, equipos usados para alquiler ni modelos de exhibición.
• Mercadería que se ha dañado o vuelto inoperante debido a su desgaste normal, uso inadecuado*, frío,
calor, lluvia, humedad excesiva, daños de congelamiento, uso con productos químicos inadecuados,
negligencia, accidente, operación sin seguir las instrucciones suministradas en el Manual del Propietario,
uso de accesorios o aditamentos no recomendados ni autorizados por DeVilbiss Air Power Company o
reparaciones o alteraciones no autorizadas.
• Los costos de reparación y transporte de mercadería determinada como no defectuosa.
• Los costos de ensamblaje, el aceite requerido, ajustes u otro gasto de instalación o puesta en operación.
• Piezas sujetas a desgaste que se proveen con la unidad y que se espera que se vuelvan inoperantes o
inusables después de un tiempo razonable, incluyendo, pero no limitándose resortes, boquillas,
anillos "O", arandelas y accesorios similares.
• Mercadería vendida por DeVilbiss Air Power Company que ha sido fabricada por terceros e identificada
como tal; p. ej.: motores de gasolina. La garantía que se aplica, si alguna, es la de su fabricante.
• LAS PÉRDIDAS, DAÑOS O PERJUICIOS INCIDENTALES, INDIRECTOS O CONSECUENCIALES QUE
PUDIESEN RESULTAR DE CUALQUIER DEFECTO, FALLA O MAL FUNCIONAMIENTO DE LA UNIDAD
NO ESTÁN CUBIERTOS POR ESTA GARANTÍA. Algunos estados no permiten la exclusión o limitación
de los daños incidentales o consecuenciales, por lo que estas limitaciones o exclusiones podrían no
aplicarse a usted.
• LAS GARANTÍAS IMPLÍCITAS, INCLUIDAS AQUELLAS DE COMERCIALIZACIÓN O IDONEIDAD
PARA UN PROPÓSITO PARTICULAR, ESTÁN LIMITADAS A UN AÑO A PARTIR DE LA FECHA
ORIGINAL DE COMPRA. Algunos estados no permiten limitaciones a la duración de las garantías
implícitas, por lo que estas limitaciones podrían no aplicarse a usted.
A12495
213 Industrial Drive • Jackson, TN 38301-9615
Teléfono: 1-800-888-2468
FAX: 1-800-888-9036
36- SP
Page 37

Laveuse à pression
Guide d’utilisation
pour modèle PWH3635
Apprenez encore plus en ce qui concerne votre
laveuse à pression, obtenez des réponses aux
questions les plus fréquentes et enregistrez votre
Ne pas retourner ce produit au détaillant
!Questions ? 1-800-888-2468
produit en ligne à
www.devap.com
Table des matières
Mesures de sécurité/Définitions……… ........38
Renseignements sur la sécurité du
consommateur…. ..........................................38
Mesures de sécurité importantes ...........38-41
Contenu de la boîte .......................................42
Instructions d’assemblage ............................42
Instructions d’utilisation ...........................43-47
Entretien ....................................................48-49
Entreposage ...................................................50
Guide de dépannage ...............................51-52
Garantie ..........................................................56
English ........................................................1-18
Español .....................................................19-36
IMPORTANT
Assurez-vous que toute personne
qui utilisera cet équipement lise
attentivement ces instructions
avant de l’utiliser.
Inscrivez tous les renseignements
et agrafez le reçu de caisse ici pour
références futures :
Date d’achat
N° de série : ________________________
N° de pièce A12495 Rév. 1 7/07/05
:_______________________
Page 38

MESURES DE SÉCURITÉ - DÉFINITIONS
Ce guide contient des renseignements importants que vous deviez bien saisir. Cette
information porte sur VOTRE SÉCURITÉ et sur LA PRÉVENTION DE PROBLÈMES
D'ÉQUIPEMENT. Afin de vous aider à identifier cette information, nous avons utilisé
les symboles ci-dessous. Veuillez lire attentivement ce guide en portant une attention
particulière à ces symboles.
Indique un danger
imminent qui, s'il n'est
pas évité, causera de graves blessures
ou la mort.
Indique la
possibilité d’un
danger qui, s’il n’est pas évité, pourrait
causer de graves blessures ou la mort.
s'il n'est pas évité, peut causer des
blessures mineures ou moyennes.
possibilité d’un danger qui, s’il n’est pas
évité, peut causer des dommages à la
Indique la possibilité
d'un danger qui,
Sans le symbole
d’alerte. Indique la
propriété.
RENSEIGNEMENTS SUR LA SÉCURITÉ DU CONSOMMATEUR
Il se peut que ce produit ne soit pas équipé d’un
équipé, et s’il est utilisé près de matériaux inflammables ou sur de la terre couverte
de produits agricoles, forêts, broussailles, gazon ou autres articles semblables, un
pare-étincelles approuvé doit être posé, et est exigé par la loi en Californie. Selon
la section 130050 de la loi de la Californie, et les sections 4442 et 4443 du Code
sur les ressources publiques de la Californie, ce produit ne peut pas être utilisé
en Californie, à moins que le moteur ne soit équipé d’un pare-étincelles, tel que
décrit dans la section 4442, et à moins que l’appareil ne soit maintenu en bon état
de fonctionnement. Des pare-étincelles sont également requis sur certaines terres
forestières des États-Unis et peuvent être exigés légalement sous certains autres
lois et arrêtés.
causer le cancer, les anomalies congénitales ou d’autres maux de reproduction.
silencieux à pare-étincelles. Si le produit n’en est pas
Les gaz d’échappement du moteur contiennent des
produits chimiques qui, dans certaines quantités, peuvent
MESURES DE SÉCURITÉ IMPORTANTES
N'utilisez pas cet appareil avant d'avoir lu et compris les
Guide de l'utilisateur et du Guide du propriétaire du moteur.
RISQUE D'EXPLOSION OU D’INCENDIE
RISQUE
• L'essence répandue par déversement
et les vapeus qui en émanent risquent
de s'enflammer en présence d'étincelles
provenant d'une cigarette allumée, d'un arc
électrique, de gaz d'échappement et de pièces
chaudes du moteur, telles que le silencieux.
• La chaleur peut causer l'expansion de
carburant dans le réservoir pouvant aboutir à
un déversement et provoquer un incendie ou
une explosion.
• Le fait d'utiliser la laveuse à pression dans un
milieu explosif peut aboutir à un incendie.
A12495
instructions sur la sécurité, l'utilisation et l'entretien de ce
LISEZ ET CONSERVEZ CES INSTRUCTIONS
DANGER
PRÉVENTION
• Couper le moteur et le laisser refroidir avant
d'ajouter de carburant au réservoir.
• Prendre des précautions lors du remplissage
du réservoir pour éviter le déversement de
carburant. Placer la laveuse à pression loin du
lieu de remplissage avant de démarrer le moteur.
• Maintenir le niveau maximal de carburant à environ
13mm (½ po) du haut du réservoir afin de permettre
l'expansion de l'essence.
• Faire le plein et utiliser l'équipement dans un
endroit bien aéré et libre de toutes obstructions.
Équiper ces lieux d'extincteurs appropriés pour
combattre les incendies à base d'essence.
38- FR
Page 39

DANGER
RISQUE D'EXPLOSION OU D’INCENDIE (SUITE)
RISQUE
• Des matières placées contre ou à proximité de la
laveuse à pression peuvent nuire à une ventilation
adéquate provoquant ainsi une surchauffe et un
risque d'inflammation de ces matières.
• La chaleur des gaz d'échappement du silencieux
peut endommager les surfaces peintes, faire fondre
des matériaux sensibles à la chaleur (tels que le
revêtement d'extérieur, le plastique, le caoutchouc
et le vinyle) et endommager les plantes.
• Un entreposage inapproprié du carburant
peut causer une inflammation accidentelle.
Le carburant qui n'est pas rangé de façon
sécuritaire peut tomber entre les mains d'un
enfant ou autres personnes non compétentes.
• L'utilisation d'acides, de produits chimiques toxiques
ou corrosifs, de poisons, d'insecticides ou de toute
sorte de solvant inflammable dans ce produit pourrait
provoquer des blessures graves ou la mort.
DANGER
RISQUE PAR INHALATION
RISQUE
• L'inhalation des émanations d'échappement
peut causer de graves blessures ou la mort ! Les
gaz d'échappement du moteur contiennent du
monoxyde de carbone, un gaz inodore et mortel.
• Certains nettoyeurs liquides contiennent des
substances pouvant causer des lésions à la
peau, aux yeux et aux poumons.
PRÉVENTION
• Ne jamais faire fonctionner la laveuse à
pression dans un endroit comprenant des
herbes ou buissons secs.
• Toujours garder la laveuse à pression à une
distance minimum de 1,2 m (4 pieds) des
surfaces qui pourraient être endommagées par
les gaz d'échappement du silencieux (telles
que les maisons, automobiles ou plantes).
• Placer le carburant dans un contenant
approuvé par l'OSHA et le ranger dans un lieu
sûr, loin de l'aire de travail.
• Ne pas vaporiser des liquides inflammables.
PRÉVENTION
• Utiliser la laveuse à pression dans un endroit
bien aéré. Éviter les endroits clos tels que les
garages, sous-sols, etc.
• Ne jamais utiliser l'appareil dans un endroit
occupé par d'autres personnes ou des
animaux.
• N'utiliser que des liquides de nettoyage
recommandés pour des laveuses à pression. Suivre
les recommandations du fabricant. Ne pas utiliser
d'eau de Javel ou tout autre produit corrosif.
RISQUE D'INJECTION D'UN FLUIDE
RISQUE
• La laveuse à pression fonctionne à une
pression et à une vitesse suffisamment
élevées pour faire pénétrer le fluide dans la
peau de personnes ou d'animaux et causer
des blessures graves ou la nécessité d'une
amputation. Une fuite causée par des
raccords desserrés ou usés ou par un boyau
endommagé peut aboutir à une blessure par
injection. NE PAS TRAITER L'INJECTION
D'UN FLUIDE COMME UNE SIMPLE
COUPURE ! Consulter immédiatement un
médecin !
• On risque de subir des blessures si la
pression du système n'est pas diminuée
avant de tenter tout entretien ou démontage.
DANGER
PRÉVENTION
• Ne jamais placer la main devant la buse.
• Diriger le jet de vaporisation loin de soi et
d'autrui.
• S'assurer que le boyau et les raccords sont
bien serrés et en bon état. Ne jamais se
cramponner au boyau ou aux raccords lors de
l'utilisation de l'appareil.
• Éviter tout contact du boyau avec le silencieux.
• Ne jamais mettre ni enlever les raccords de
la lance ou du boyau lorsque l'appareil est
pressurisé.
• Pour dégager la pression de l’appareil, couper
le moteur, couper l’alimentation d’eau et
enfoncer la détente du pistolet jusqu’à ce que
l’eau arrête de s’écouler.
• N'utiliser qu'un boyau et des accessoires
à haute pression classés pour un service
nominal plus élevé que la puissance
nominale (lb/po2) de l'appareil.
39- FR
A12495
Page 40

RISQUE DE BRÛLURES CHIMIQUES
RISQUE
• L'utilisation d'acides, de produits chimiques
toxiques ou corrosifs, de poisons,
d'insecticides ou de toute sorte de solvant
inflammable dans ce produit pourrait
provoquer des blessures graves ou la mort.
RISQUE DE CHOCS ÉLECTRIQUES
RISQUE
• Une vaporisation dirigée vers des prises de
courant, des interrupteurs ou des objets
branchés sur un circuit électrique peut causer
des chocs électriques mortels.
RISQUE DE SURFACES CHAUDES
RISQUE
• Le contact avec les surfaces chaudes, telles
que les pièces d'échappement du moteur,
peut provoquer des brûlures graves.
DANGER
PRÉVENTION
• Ne pas utiliser d'acides, d'essence, de
kérosène ou toute autre matière inflammable
avec cet appareil. N'employer que des
détergents, nettoyeurs ou dégraisseurs
d'entretien ménager qui sont recommandés
pour une utilisation avec une laveuse à
pression.
• Porter un équipement et des vêtements de
protection pour se protéger les yeux et la
peau contre tout contact avec des matières
vaporisées.
DANGER
PRÉVENTION
• Débrancher tout appareil électrique avant
de tenter de le nettoyer. Diriger le jet de
vaporisation loin de toutes prises de courant
et interrupteurs.
DANGER
PRÉVENTION
• Durant le fonctionnement de l'appareil, ne
toucher qu'aux surfaces de commande de
la laveuse à pression. Garder les enfants
loin de la laveuse à pression en tout temps.
Les enfants ne sont pas nécessairement
capables de reconnaître les dangers que
comporte cet appareil.
RISQUE DE BLESSURES ET DE DOMMAGES À LA PROPRIÉTÉ
PENDANT LE TRANSPORT OU L'ENTREPOSAGE
RISQUE
• Des fuites ou des déversements de carburant
ou d'huile peuvent se produire et entraîner
des risques d'incendie ou des problèmes
aux voies respiratoires, des blessures graves
ou la mort. Des fuites de carburant ou
d'huile endommagent les tapis, la peinture
et d'autres surfaces dans les véhicules et les
remorques.
A12495
DANGER
PRÉVENTION
• Si la laveuse à pression est munie d'une
soupape d'arrêt, tourner la soupape à la
position fermée avant le transport pour
éviter tout risque de fuite. Si l'appareil n'est
pas muni d'une soupape d'arrêt, vidanger
le carburant du réservoir avant le transport.
Ne transporter le carburant que dans des
contenants approuvés par l'OSHA. Pour
le transport, toujours placer la laveuse à
pression sur un tapis protecteur pour éviter
l'endommagement du véhicule par des fuites.
Retirer la laveuse à pression du véhicule
immédiatement à l'arrivée.
40- FR
Page 41

DANGER
RISQUE D'UNE UTILISATION NON SÉCURITAIRE
RISQUE
• Une utilisation de la laveuse à pression qui
n'est pas conforme aux mesures de sécurité
peut causer de graves blessures ou la mort
de l'utilisateur ou d'autres personnes.
• Si la procédure de démarrage appropriée
n'est pas suivie, le moteur peut provoquer
des contre-coups et causer des blessures
graves aux mains ou aux bras.
• Le pistolet/la lance de vaporisation est
un outil de nettoyage puissant qui peut
ressembler à un jouet aux yeux d'un enfant.
• La force de réaction du jet de vaporisation
causera le pistolet/la lance de reculer, ce qui
pourrait faire glisser ou tomber l'utilisateur
ou diriger le jet de vaporisation dans une
mauvaise sens. Une maîtrise insuffisante du
pistolet/de la lance peut causer des blessures
à l'utilisateur ou à d'autres personnes.
PRÉVENTION
• Ne pas utiliser d'eau de Javel ou tout autre
produit corrosif.
• S'habituer au fonctionnement et aux
commandes de la laveuse à pression.
• Garder toutes les personnes non autorisées,
les animaux domestiques et les obstacles
loin de l'aire de vaporisation.
• Ne pas utiliser l'appareil lorsque vous
êtes fatigué ou sous l'effet de boissons
alcooliques ou de drogues. Restez alerte à
tout moment.
• Ne jamais contourner un dispositif de
sécurité de cet appareil.
• Ne jamais utiliser un appareil auquel il
manque des pièces, qui comprend des
pièces brisées ou non autorisées par le
fabricant.
• Ne jamais s'éloigner de la lance lorsque
l'appareil est en marche.
•
Si le moteur ne démarre pas après deux essais,
appuyer sur la détente du pistolet afin de dégager
la pression de la pompe. Tirer lentement sur le
cordon de démarrage jusqu'à ce qu'on sente une
résistance. Tirer ensuite rapidement sur le cordon
pour éviter les contre-coups et les blessures aux
mains ou aux bras.
• Garder les enfants éloignés de la laveuse à
pression à tout moment.
• Ne pas trop éloigner le pistolet du corps et ne
pas se tenir sur une surface instable.
• N'utilisez pas la laveuse à pression lorsque
vous êtes sur une échelle.
• Saisissez le pistolet/la lance solidement avec
les deux mains. Attendez-vous à ce que le
pistolet recule lorsqu'il est déclenché.
RISQUE DE BLESSURES PAR VAPORISATION
RISQUE
• Un fluide vaporisé à haute vélocité peut
causer le bris d’objets et la propulsion de
particules à vitesse élevée.
• Les objets légers ou qui ne sont pas fixés
peuvent devenir de dangereux projectiles.
DANGER
PRÉVENTION
• Toujours porter des lunettes de sécurité
Z87 homologuées par l’ANSI. Porter des
vêtements de protection pour se protéger
contre toute vaporisation accidentelle.
• Ne jamais vaporiser ni pointer la lance en
direction de personnes ou d’animaux.
• Toujours s’assurer que la détente est
verrouillée lorsque la lance n’est pas utilisée
afin de prévenir toute mise en marche
accidentelle.
• Ne jamais fixer la détente en position
enfoncée (ouverte) de façon permanente.
41- FR
A12495
Page 42

CONTENU DE LA BOÎTE
Guide de
Ensemble de
châssis de moteur
avec roues
Boyau à haute
pression
l’utilisateur
Guide du
moteur
Boyau de
produit
chimique
Pistolet de
vaporisation
Lance à connexion rapide
INSTRUCTIONS D'ASSEMBLAGE
1. Placez l'ensemble de poignée sur le
cadre, enfoncez les boutons-poussoirs
et glissez l'ensemble de poignée dans
le cadre jusqu'à ce que les boutonspoussoirs s'enclenchent dans les trous.
2. Attachez le boyau
à haute pression
au pistolet et bien
serrer.
3. Attachez la lance au pistolet et bien
serrer.
4. Placez le porte-buses sur le panneau
(situé sur l'ensemble de poignée) et
poussez chaque partie du porte-buse
jusqu'à ce qu'il soit en place.
A12495
Outil de
nettoyage
de buse
d’enregistrement
Pièces dans un sac
Carte
Portebuses
Buses à
connexion
rapide
Poignée
5. Retirez du sac en plastique les
cinq buses à connexion rapide de
couleurs différentes et insérez-les
dans les trous appropriés du portebuses. REMARQUE : Les buses sont
codées par couleur selon les couleurs
indiquées sur le panneau.
6. Ajoutez de l’huile moteur (fournie) au
moteur. Consultez le guide du moteur
fourni par le fabricant du moteur pour
connaître la procédure appropriée.
REMARQUE : Une petite quantité d’huile
a été versée dans le moteur pour effectuer
les essais à l’usine.
REMARQUE : La pompe haute pression
a été remplie d’huile à l’usine. Il n’est pas
nécessaire d’ajouter de l’huile à ce moment.
Consultez la section « Entretien » de ce
guide pour de plus amples renseignements
sur l’entretien.
Le bouchon
d'expédition
doit être retiré et le bouchon à jauge
d'huile doit être posé avant d'utiliser la
laveuse à pression.
7. À l'aide d'une clé de 17
mm, retirez le bouchon
d'expédition de la
pompe en tournant
dans le sens contraire
des aiguilles d'une montre. Jetez le
bouchon retiré.
8. Retirez le bouchon à jauge d'huile
du sac en plastique, posez-le sur la
pompe et serrez-le bien.
42- FR
Huile à
moteur
Page 43

UTILISATION
Comparez les illustrations avec votre appareil afin de vous familiariser avec l’emplacement
des commandes et des réglages. Conservez ce guide pour les références futures.
Moteur
Lance de
vaporisation
à connexion
rapide
ÉLÉMENTS DE BASE D’UNE
LAVEUSE À PRESSION
Pompe à haute pression : Augmente la
pression de la source d’eau.
Moteur : Entraîne la pompe à haute pression.
Boyau à haute pression :
sous pression de la pompe vers le pistolet
et la lance de vaporisation.
Pistolet de vaporisation : S'attache à la lance
pour régler le débit d'eau, la direction et la
pression.
Lance de vaporisation à connexion
rapide : Permet à l'utilisateur de changer
rapidement les buses à haute pression.
Consultez la partie intitulée « Utilisation de
la lance de vaporisation » de cette section.
Boyau de produit chimique (N'est pas
montré sur le schéma) : Alimente les agents
de nettoyage dans la pompe pour les mélanger
avec l'eau. Consultez la partie intitulée «
Application des produits chimiques/solvants de
nettoyage » de cette section.
Achemine l'eau
Pistolet de
vaporisation
Boyau à
haute
Pompe
à haute
pression
pression
ÉLÉMENTS DE BASE DU MOTEUR
Consultez le guide du moteur pour
connaître l’emplacement et l’utilisation des
commandes du moteur.
Commande d'étrangleur : Ouvre et ferme la
soupape de l'étrangleur dans le carburateur.
Poignée du démarreur : Tirer sur la poignée
du démarreur fait fonctionner le démarreur à
rappel pour démarrer le moteur.
Levier de la soupape de carburant :
Ouvre et ferme la connexion entre le
réservoir de carburant et le carburateur.
Interrupteur du moteur : Met en fonction
ou hors fonction le système d'allumage.
43- FR
A12495
Page 44

TERMINOLOGIE DES LAVEUSES À
PRESSION
PSI : livres par pouce carré. Une unité
de mesure de pression d'eau. Également
utilisé pour la pression d'air, la pression
hydraulique, etc.
GPM : Gallons par minute. L'unité de mesure
du débit d'eau.
CU : Unités de nettoyage.
GAL. PAR MIN. x PSI = CU
Mode de dérivation : Permet à l'eau
de recirculer dans la pompe lorsque la
détente n'est pas actionnée.
Si vous laissez
marche pendant plus de deux minutes
sans actionner la détente, cela risque
de surchauffer et d'endommager la
pompe.
Soupape de décharge
thermique : Si la
température dans la
pompe augmente à un
niveau trop élevé, la
soupape s'ouvrira et
émettra un jet d'eau pour
abaisser la température
dans la pompe. La soupape se fermera
ensuite.
Système d'injection de produit chimique
: Mélange les nettoyants ou les solvants
de nettoyage avec l'eau pour augmenter
l'efficacité de nettoyage.
Source d'eau : Toutes les laveuses à
pression ont besoin d'une source d'eau.
Les exigences minimums pour la source
d'eau sont de 20 PSI et de 19 litres (5
gallons) à la minute.
l'appareil en
Soupape de
décharge
thermique
CARACTÉRISTIQUES DE
FONCTIONNEMENT DE LA
LAVEUSE À PRESSION
RÉGLAGE DE LA PRESSION
La pression est préréglée à l'usine
afin d'obtenir une pression ainsi qu'un
nettoyage optimums. La pression peut être
diminuée de la façon suivante.
1. Éloignez-vous de la surface à
nettoyer.
moins sera la pression sur la surface
à nettoyer.
2. Remplacez la buse par la buse de
40° (blanche) - cette buse produit un
jet d'eau moins puissant et plus large.
pression de la pompe. Une pression
plus élevée que celle réglée à l'usine
peut endommager la pompe.
3. Ajustez le
régulateur de
pression de la
pompe. Tournez
le bouton du
régulateur de
pression dans le
sens contraire
des aiguilles
d'une montre pour abaisser la
pression. Consultez les illustrations
pour identifier votre régulateur de
pression. Lorsque vous n'avez plus
besoin de votre laveuse àpression,
remettez le régulateur de pression à
la position originale en tournant dans
le sens des aiguilles d'une montre.
bouton du régulateur de pression plus loin
que la position d'arrêt intégrée car cela
endommagera la pompe.
Plus vous êtes éloigné,
NE tentez PAS
d'augmenter la
Bouton du
réglage de
pression
NE tentez PAS
de tourner le
A12495
44- FR
Page 45

LISEZ ATTENTIVEMENT TOUS LES AVERTISSEMENTS AVANT DE DÉMARRER L'APPAREIL
causer des blessures graves.
Votre laveuse à pression fonctionne à une pression et à une vitesse suffisamment élevées
pour faire pénétrer le fluide dans la peau de personnes ou d'animaux, ce qui peut causer
des blessures graves ou nécessiter une amputation. Une fuite causée par des raccords
desserrés ou par un boyau usé ou endommagé peut aboutir à une blessure par injection.
TRAITEZ PAS L'INJECTION D'UN FLUIDE COMME UNE SIMPLE COUPURE ! Consultez
immédiatement un médecin !
NE remplissez JAMAIS le réservoir à carburant au complet. Remplissez-le jusqu'à 13 mm
(1/2 po) au-dessous de la partie inférieure du goulot de remplissage afin de laisser assez
d'espace pour l'expansion du carburant. Essuyez tout carburant renversé sur le moteur ou
l'équipement avant de dé marrer le moteur.
NE faites JAMAIS tourner le moteur à l'intérieur ou dans un espace fermé, qui n'est pas bien aéré.
Les émanations du moteur comprennent du monoxyde de carbone, un gaz inodore et mortel.
NE laissez PAS les boyaux entrer en contact avec le silencieux très chaud du moteur durant ou
immédiatement après l'utilisation de la laveuse à pression. Tout dommage d'un boyau causé
par le contact avec une surface chaude du moteur NE sera PAS couvert par la garantie.
N'utilisez PAS d'eau chaude. Utilisez seulement de l'eau froide.
Ne fermez JAMAIS le robinet de la source d'eau lorsque le moteur de la laveuse à pression est
en marche puisque cela risque d'endommager la pompe.
N'arrêtez PAS de vaporiser pendant plus de deux minutes à la fois. La pompe fonctionne en
mode de dérivation lorsque la détente du pistolet de vaporisation n'est pas tirée. Si la pompe
est laissée en mode de dérivation pendant plus de deux minutes, cela risque d'endommager
les composantes internes de la pompe.
Si vous ne comprenez pas ces mises en garde, veuillez téléphoner le 1-800-888-2468 et
communiquer avec un représentant du service à la clientèle pour obtenir de plus amples instructions.
Lors de la vaporisation à haute pression, NE laissez PAS le jet d'eau à haute
pression atteindre la peau non protégée, les yeux ou les animaux. Cela risque de
NE
NE remplissez JAMAIS le réservoir à carburant lorsque le moteur tourne ou
lorsqu'il est chaud. Ne pas fumer en remplissant le réservoir à carburant.
NE tirez JAMAIS sur le boyau d'alimentation d'eau pour déplacer la laveuse à
pression. Cela risque d'endommager le boyau et(ou) l'entrée de la pompe.
UTILISATION DE LA LANCE DE VAPORISATION
Les buses à utiliser avec la lance de vaporisation sont entreposées dans le porte-buses
situé sur l'ensemble de panneau. Les couleurs sur le panneau indiquent l'emplacement
des différentes buses et le type de jet. Consultez le tableau pour déterminer la buse
appropriée pour le travail à effectuer.
Couleur de
buse
Type de jet
Rouge Jaune Vert Blanc Noir
0º 15º 25º 40º
basse pression
Usages
jet étroit
puissant pour
le nettoyage
intense
nettoyage
intense
de petites
surfaces
nettoyage
intense de
surfaces plus
grandes
couvre une
surface plus
grande
applique des
solutions de
nettoyage
métal ou
Surfaces *
béton; NE
PAS utiliser
métal, béton
ou bois
métal, béton
ou bois
métal, béton,
bois ou vinyle
métal, béton,
bois ou vinyle
sur le bois
*
Le jet à haute pression de la laveuse à pression est capable
d'endommager les surfaces fragiles telles que le bois, le
verre, la peinture d'automobiles, les garnitures d'auto ainsi que les objets délicats
tels que les fleurs et arbustes. Avant de vaporiser, vérifiez l'objet à nettoyer afin de
vous assurer qu'il est assez robuste pour résister à la puissance du jet sans subir des
dommages.
45- FR
A12495
Page 46

Changement de buse de la lance de
vaporisation
Risque
projetés Les objets projetés posent un
risque de blessures graves.
PAS de remplacer la buse lorsque la laveuse
à pression est en marche. Arrêtez le moteur
avant de remplacer la buse.
1. Tirez le raccord à
connexion rapide
vers l'arrière et
insérez la buse.
2. Relâchez le raccord
à connexion rapide
et tournez la buse afin de vous assurer
qu'elle est bien fixée dans le raccord.
projetés Les objets projetés posent un
risque de blessures graves. Assurezvous que la buse est complètement
insérée dans le raccord rapide et que
le jonc d'arrêt du raccord rapide est
entièrement engagé (vers l'avant) avant
d'appuyer sur la détente du pistolet.
d’un liquide ou de blessures corporelles.
Ne dirigez jamais le jet de sortie vers
une personne, vers la peau nue, vers
les yeux ou vers les animaux. Cela peut
causer des blessures graves.
d'objets
NE tentez
Risque
d'objets
Risque
d’injection
APPLICATION DES PRODUITS
CHIMIQUES/SOLVANTS DE
NETTOYAGE
L'application des solutions de nettoyage
devrait être effectuée à basse pression.
REMARQUE : Utilisez seulement des
savons ou des produits chimiques qui sont
conçus spécialement pour une laveuse à
pression. Ne pas utiliser de l'eau de Javel.
Application de produits chimiques
1. Poussez le
boyau de produit
chimique dans le
raccord cannelé,
près du point de
connexion du
boyau à haute
pression de la
pompe, tel qu'illustré.
2. Placez l'autre extrémité du boyau
de produit chimique (l'extrémité
avec le filtre) dans le contenant
avec le produit chimique/solution
de nettoyage. REMARQUE : Pour
chaque quantité de 26,5 litres (7
gallons) d'eau pompée, 3,8 litres (1
gallon) de produit chimique/solution
de nettoyage seront utilisés.
3.
Insérez la buse à basse pression (noir)
dans le raccord à connexion rapide
de la lance. Voir le paragraphe intitulé «
Utilisation de la lance de vaporisation » de
cette section.
4.
Après avoir utilisé un produit
chimique, placez le boyau de produit
chimique dans un récipient d'eau
propre et aspirez de l'eau propre
à travers le système d'injection
de produit chimique pour bien
rincer le système. Si les produits
chimiques restent dans la pompe,
celle-ci pourrait être endommagée.
Les pompes endommagées par
un produit chimique ne sont pas
couvertes par la garantie.
REMARQUE :
savons ne peuvent pas être siphonnés
lorsque la lance est réglée à la position de
haute pression.
Les produits chimiques et
Raccord
cannelé
A12495
46- FR
Page 47

DÉMARRAGE
Avant de démarrage, l'appareil, consultez
le guide du moteur pour connaître la
procédure de démarrage appropriée.
1. Dans un endroit extérieur bien aéré,
ajoutez de l'essence pure, sans plomb, de
haute qualité et ayant un indice d'octane
de 86 ou plus. Ne pas trop remplir.
Essuyez l’essence déversée avant de
démarrer le moteur. Consultez le guide
du moteur pour connaître la procédure
appropriée.
2.
Vérifiez le niveau d’huile. Consultez
le guide du moteur pour connaître la
procédure appropriée.
Une petite quantité d’huile a été versée
dans le moteur pour effectuer les essais
à l’usine.
3.
Assurez-vous que
l'écran filtrant
est dans l'orifice
d'entrée d'eau
de la pompe
.
REMARQUE: Le
côté conique doit
être dirigé vers l'extérieur.
4. Branchez la source d'eau à l'orifice
d'entrée de la pompe.
REMARQUE : La source d'eau doit
fournir un minimum de 19 litres (5
gallons) par minute à 20 PSI.
5. Attachez le boyau à haute pression à
la sortie de la pompe.
Boyau à haute
pression
Source
d’eau
6. Si vous appliquez un produit
chimique ou une solution de
nettoyage. Si vous voulez appliquer
un produit chimique ou une solution
de nettoyage, consultez la partie
intitulée « Application des produits
chimiques/solvants de nettoyage » de
cette section.
REMARQUE-:
Écran filtrant
7. Ouvrez le robinet de la source
d'eau. REMARQUE : Si vous
n'exécutez pas cette étape, cela
risque d'endommager la pompe.
8. Démarrez le moteur. Consultez le guide
du moteur pour connaître la procédure
appropriée. REMARQUE:
Lorsque vous
tirez le cordon de démarrage du
moteur, la pression commence à
augmenter dans le pistolet. Si le
moteur ne démarre pas après deux
essais, appuyez sur la détente du
pistolet pour dégager la pression
9. Appuyez sur la détente du pistolet
pour commencer la vaporisation d'eau.
REMARQUE: Tenez-vous sur une surface
stable et saisissez le pistolet ou la lance
fermement avec les deux mains. Attendezvous à ressentir un contre-coup lors du
déclenchement.
10. Relâchez la détente pour arrêter le
débit d’eau.
11.
Réglez le jet de vaporisation pour
correspondre à la tâche à effectuer en
remplaçant la buse à connexion rapide.
Consultez les directives intitulées «
Utilisation de la lance
de vaporisation
» de
cette section.
ARRÊT DE L'APPAREIL
1. Après chaque usage, si vous avez
appliqué des produits chimiques,
placez le boyau de produit chimique
dans un récipient d'eau propre et
aspirez de l'eau propre à travers
le système d'injection de produit
chimique pour bien rincer le système.
REMARQUE : Si vous n'exécutez
pas cette étape, cela risque
d'endommager la pompe.
2. Arrêtez le moteur. Consultez le
Guide du moteur.
REMARQUE : NE fermez JAMAIS
le robinet d'eau lorsque le moteur
tourne.
3. Fermez le robinet de la source d'eau.
4. Appuyez sur la détente du pistolet
de vaporisation pour dégager l’eau
sous pression dans le boyau ou dans
le pistolet.
5. Consultez la section sur
l'entreposage de ce guide
pour connaître les procédures
d'entreposage appropriées.
47- FR
A12495
Page 48

ENTRETIEN
En
effectuant
l'entretien, vous pouvez être exposé
à des surfaces chaudes, à l'eau sous
pression ou à des pièces en mouvement
qui peuvent causer des blessures
graves ou la mort !
Avant d'effectuer tout entretien ou
toute réparation, débranchez le fil de la
bougie d'allumage, attendez jusqu'à ce
que le moteur soit refroidi et dégagez
l'eau sous pression. Le moteur contient
du carburant inflammable. NE FUMEZ
PAS et ne travaillez pas près d'une
flamme nue en effectuant l'entretien.
Afin d'assurer le bon fonctionnement
et une durée de vie prolongée de votre
laveuse à pression, vous devez préparer
et suivre un calendrier d'entretien régulier.
Si votre laveuse à pression est utilisée
dans un environnement défavorable, tel
qu'à des températures élevées ou des
conditions poussiéreuses, les vérifications
d'entretien doivent être exécutées plus
souvent.
MOTEUR
Consultez le guide du moteur pour
connaître les recommandations du
fabricant concernant tous les services
d’entretien. REMARQUE : Le cadre est
muni d'un trou de vidange d'huile pour
faciliter le changement de l'huile.
POMPE
REMARQUE : La pompe a été remplie
d'huile à l'usine.
1. Changez l'huile de la pompe après les
premières dix (10) heures d'utilisation
et à toutes les 50 heures ensuite.
Vérification du niveau d'huile :
1. Retirez le
bouchon à
jauge d'huile
de la pompe
et essuyez-le.
2. Insérez le
bouchon à
jauge d'huile
complètement
dans
la
pompe et
retirez-le de
nouveau.
3. Le niveau
d'huile est correct si l'huile couvre 13
mm (1/2 pouce) de l'embout inférieur
du bouchon à jauge d'huile.
Changement de l'huile de la pompe :
1. Desserrez le bouchon à jauge d'huile.
2. Placez un récipient approprié sous le
bouchon de vidange d'huile.
3. Retirez le bouchon de vidange d'huile.
4. Une fois que l'huile est vidangée,
remettez en place le bouchon de
vidange d'huile. Serrez-le bien.
5. Enlevez e bouchon à jauge d'huile et
versez 548 ml (18,54 oz) d'huile non
détergente 30W.
6. Remettez en place le bouchon à jauge
d'huile et serrez-le bien.
Bouchon à
jauge d'huile
Bouchon de
vidange d'huile
A12495
48- FR
Page 49

NETTOYAGE DE LA BUSE
Si la buse devient obstruée par des
matériaux étrangers comme la poussière,
une pression excessive peut se développer.
Si la buse devient partiellement obstruée
ou le débit est restreint, la pression de la
pompe commencera à pulser. Nettoyez la
buse immédiatement en vous servant de la
trousse de nettoyage de buse fournie et en
suivant les directives suivantes :
1. Arrêtez la laveuse à pression et fermez le
robinet de la source d'eau.
2. Appuyez sur la détente du pistolet afin de
dégager l’eau sous pression.
3. Détachez la lance du pistolet.
4. Retirez la buse à haute pression de la
lance. Retirez toute obstruction à l'aide
de l'outil de nettoyage de buse fourni et
rincez à l'eau propre.
5. Dirigez la source d'eau dans la buse la
lance de vaporisation et rincez les de
particules libérées pendant 30 secondes.
6 Réassemblez la buse sur la lance.
7. Attachez la lance au pistolet et ouvrez le
robinet de la source d'eau.
8. Démarrez la laveuse à pression et réglez la
lance à la position de haute pression pour
l’essayer.
NETTOYAGE DU FILTRE
D'ENTRÉE D'EAU
Cet écran filtrant devrait être vérifié
périodiquement et nettoyé au besoin.
1. Saisissez
l'extrémité du
filtre et retirez-
le de l'orifice
d'entrée d'eau
de la pompe, tel
qu'illustré.
2. Nettoyez le filtre
sur les deux côtés.
3. Réinsérez le filtre dans l'orifice
d'entrée d'eau de la pompe.
REMARQUE : Le côté conique doit
être dirigé vers l'extérieur.
REMARQUE : N'utilisez pas la laveuse à
pression lorsque le filtre n'est pas posé de
façon appropriée.
Écran filtrant
en le rinçant à l'eau
RETRAIT DES ROUES
1. À l'aide d'une clé
hexagonale de 1/8
po, desserrez la vis
de serrage dans le
collet du moyeu.
2. Glissez le collet du
moyeu de l'essieu et retirez le pneu.
49- FR
A12495
Page 50

ENTREPOSAGE
MOTEUR
Consultez le Guide du propriétaire
du moteur pour connaître les
recommandations du fabricant en ce qui
concerne l'entreposage.
POMPE
Le fabricant vous recommande d'utiliser
un produit de protection de pompe/
préparation pour l'hiver, tel que le produit,
lorsque vous devez entreposer l'appareil
pendant plus de 30 jours et(ou) lorsque
des températures de gel sont prévues. Si
aucun produit de protection de pompe/
préparation pour l'hiver n'est disponible, un
*antigel pour véhicules récréatifs doit être
alimenté à travers la pompe, tel qu'indiqué
dans les étapes ci-dessous.
REMARQUE : L'utilisation d'un produit
de protection de pompe/préparation pour
l'hiver ou d'un antigel pour véhicules
récréatifs assure une lubrification
appropriée des joints internes de la
pompe, quelle que soit la température ou
l'environnement.
1. Obtenez un entonnoir, 177 ml (6 oz)
d'antigel pour véhicules récréatifs,
un boyau d'arrosage d'une longueur
d'environ 40 à 90 cm (16 à 36
pouces) doté d'un raccord mâle à
une extrémité.
N'utilisez que
de l'antigel pour
véhicules récréatifs. Tout autre antigel
est corrosif et risque d'endommager la
pompe.
2. Débranchez le fil de la bougie
d'allumage.
3. Connectez le morceau de boyau
d'arrosage à l'entrée d'eau de la
pompe.
4. Ajoutez l’antigel pour véhicules
récréatifs, tel qu'illustré.
5. Tirez à plusieurs reprises sur le
cordon de démarrage du moteur,
jusqu'à ce que l'antigel déborde du
raccord du boyau à haute pression de
la pompe.
6. Retirez le boyau d'arrosage de
l'entrée d'eau de la pompe.
7.
Rebranchez le fil de la bougie d’allumage.
* Vous pouvez également utiliser du liquide
de lave-glace
LAVEUSE À PRESSION
1. Vidangez toute l'eau du boyau à
haute pression, enroulez-le et rangezle dans le berceau de la poignée de la
laveuse à pression.
2. Vidangez toute l'eau du pistolet et
de la lance. Pour ce faire, maintenez
le pistolet en position verticale, en
dirigeant la buse vers le bas, et
appuyez sur la détente du pistolet.
Rangez ces pièces dans le portepistolet.
3. Entreposez le boyau de produit
chimique de façon à éviter tous
dommages.
4. Si vous avez besoin de plus
d'espace, enlevez les poignées et
placez-les tel qu'illustré.
A12495
50- FR
Page 51

PROBLÈME
Le moteur ne
démarre pas
(voir le Guide
du moteur
pour plus de
renseignements
sur le dépannage
du moteur)
GUIDE DE DÉPANNAGE
CAUSE
Aucun carburant.
Accumulation de pression après
avoir tiré deux fois sur le cordon de
démarrage ou après l'utilisation initiale.
Le levier d'étrangleur est en position
sans étranglement « No Choke ».
Fil de bougie n'est pas branché. Branchez le fil de la bougie d'allumage.
Interrupteur ON/OFF du moteur est
en position OFF.
CORRECTION
Ajoutez du carburant.
Appuyez sur la détente du pistolet pour
dégager la pression.
Déplacez le levier d'étrangleur à la
position d'étranglement « Choke ».
Placez l'interrupteur ON/OFF du
moteur en position ON.
Aucune pression
ou basse pression
(à l'utilisation
initiale)
Le levier d'étranglleur est en position
« Choke » lorsque le moteur est chaud
ou lorsque le moteur a été exposé
à une source de chaleur pour une
période prolongée.
Soupape de carburant fermée
La lance n'est pas en position de haute
pression.
Alimentation en eau insuffisante.
Fuite au raccord de boyau à haute
pression.
Buse obstruée.
Écran de filtrage d'eau obstrué. Retirez le filtre et nettoyez-le.
De l'air se trouve dans le boyau.
Le levier d'étrangleur est en
position « Choke » .
Déplacez le levier d'étrangleurr à
la position sans étranglement.
Déplacez le levier de la soupape
de carburant à la position ouverte.
Consultez les instructions
« Utilisation de la lance de
vaporisation » de la section
« Utilisation ».
La source d'eau doit acheminer au
moins 5 gal./min à 20 PSI.
Réparex la fuite. Appliquez du ruban
d'étanchéité au besoin.
Consultez les instructions
« Nettoyage de la buses » de la
section « Entretien ».
Arrêtez le moteur et fermez ensuite le
robinet de la source d'eau. Débranchez
la source d'eau de l'orifice d'entrée
de la pompe et ouvrez le robinet de la
source d'eau pour purger l'air du boyau.
Lorsqu'un jet continu d'eau paraît, fermez
le robinet de la source d'eau. Rebranchez
la source d'eau à l'orifice d'entrée de la
pompe et ouvrez la source d'eau. Appuyez
sur la détente pour purger l'air qui reste.
Déplacez le levier d'étrangleur à la
position sans étranglement « Choke ».
Le boyau à haute pression est trop long.
51- FR
Utilisez un boyau à haute pression
d'une longueur inférieure à 30 mètres
(100 pieds).
A12495
Page 52

PROBLÈME
Aucun produit
chimique n'est
aspiré
Aucune
pression ou
basse pression
(après un
certain temps
d'utilisation
normale)
Fuite d'eau au
niveau de la
connexion du
pistolet/lance
Fuite d'eau au
niveau de la
pompe
Fuite d'huile
au niveau de
la pompe
La pompe
fonctionne de
façon pulsée
CAUSE
La lance n'est pas en position de basse
pression.
Filtre de produit chimique obstrué.
L'écran filtrant de produit chimique n'est pas
submergé dans le produit chimique.
Le produit chimique est trop épais.
Le boyau à haute pression est trop
long.
Une accumulation de produit chimique
dans l'injecteur de produit chimique.
Joint d'étanchéité ou garniture usés.
Soupapes usées ou obstruées.
Piston de déchargeur usé.
Joint torique usé ou brisé.
Connexion de boyau desserrée.
Connexions desserrées.
Garnitures de piston usées.
Joints toriques usés ou brisés.
La tête de la pompe ou les tubes sont
endommagés à cause du gel.
Joints d'huile usés. Faire remplacer par un CSGA.
Bouchon de vidange desserré.
Joint torique de bouchon de vidange usé.
Joint torique de bouchon de remplissage usé.
Pompe trop remplie.
Huile non appropriée utilisée.
Bouchon d'aération obstrué.
Buse obstruée.
CORRECTION
Consultez le paragraphe « Utilisation de
la lance de vaporisation » de la section
« Utilisation ».
Nettoyez le filtre.
Assurez-vous que l'embout du boyau
de produit chimique est entièrement
submergé dans le produit chimique.
Diluez le produit chimique. Le produit
chimique devrait avoir la consistance
d'eau.
Utilisez un boyau d'eau plus long au lieu
d'un boyau à haute pression plus long.
Apportez les pièces à un CSGA pour le
nettoyage ou le remplacement.
Faire remplacer par un CSGA.
Faire remplacer par un CSGA.
Faire remplacer par un CSGA.
Vérifiez et remplacez.
Serrez.
Serrez.
Faire remplacer par un CSGA.
Faire remplacer par un CSGA.
Faire remplacer par un CSGA.
Serrez.
Vérifiez et remplacez.
Vérifiez et remplacez.
Vérifiez la quantité correcte.
Vidangez l'huile et remplissez avec la
quantité et le type appropriés d'huile.
Nettoyez le bouchon d'aération. Soufflez
de l'air dans le bouchon pour enlever
toute obstruction. Si le problème n'est
pas éliminé, remplacez le bouchon.
Consultez les instructions
« Nettoyage de la buses » de la
section « Entretien ».
A12495
CSGA = Centre de service sous garantie autorisé
52- FR
Page 53

NOTES
53- FR
A12495
Page 54

NOTES
A12495
54- FR
Page 55

NOTES
55- FR
A12495
Page 56

GARANTIE LIMITÉE
DeVilbiss Air Power Company garantit à l’acheteur original que les laveuses à pression de qualité
commerciale couvertes par cette garantie sont exemptes de défauts de matériaux et de fabrication
pour une période de deux ans de la date d’achat.
DeVilbiss Air Power Company réparera ou remplacera, à sa discrétion, les produits ou composants
s’étant avérés défectueux dans les limites de la période de garantie. Les services seront effectués en
respectant l’ordre normal des travaux et les heures ouvrables du Centre de service après-vente agréé
et selon la disponibilité des pièces de rechange nécessaires. Toute décision prise par DeVilbiss Air
Power Company en ce qui concerne cette garantie limitée est finale.
Cette garantie vous donne certains droits particuliers. Il se peut que vous ayez d’autres droits, variant
d’une province à l’autre et d’un état à l’autre.
RESPONSABILITÉ DE L’ACHETEUR D’ORIGINE (utilisateur initial):
• Pour faire une réclamation de garantie pour ce produit, NE retournez PAS le produit au détaillant.
Le produit doit être évalué par le personnel d’un Centre de service après-vente agréé. Pour
connaître l’emplacement du Centre de service après-vente agréé le plus près de chez vous,
composez le 1-800-888-2468, 24 heures par jour, 7 jours par semaine ou visitez notre site Web à
www.devap.com.
• Conservez le reçu de caisse original comme preuve d’achat pour toute réparation sous garantie.
• Appliquez tous soins raisonnables lors de l’utilisation et de l’entretien du produit, conformément
aux recommandations dans le ou les guide(s) de l’utilisateur.
• Livrez ou expédiez le produit au Centre de service après-vente agréé le plus proche. Le fret doit, le
cas échéant, être acquitté par l’acheteur.
• Tout acheteur qui n’est pas satisfait de l’intervention du Centre de service après-vente agréé est
prié de communiquer directement avec DeVilbiss Air Power Company.
CETTE GARANTIE NE COUVRE PAS CE QUI SUIT :
• Marchandise remise à neuf, utilisée comme équipement de location ou modèles de salon ou d’exposition.
• Marchandise ayant cessé de fonctionner en raison d’usure normale, d’usage abusif*, d’exposition
au froid, à la chaleur, à la pluie, à l’humidité excessive ou au gel, d’usage de produits chimiques
non appropriés, de négligence, d’accidents, de tout manquement à observer les directives
d’utilisation du produit figurant dans le ou les guide(s) de l’utilisateur fournis avec le produit,
d’un entretien non approprié, de l’utilisation d’accessoires ou de pièces non recommandées par
DeVilbiss Air Power Company, ou de réparations ou de modifications non approuvées.
• Frais de réparation et de transport de marchandise non reconnue comme étant défectueuse.
• Coûts associés à l’assemblage, l’ajout nécessaire d’huile, les réglages ou autres frais d’installation
et de mise en marche.
• Pièces ou accessoires consommables, fournis avec le produit, et qui deviennent inutilisables
ou inopérants après une période raisonnable d’utilisation, y compris, mais sans être limités aux
ressorts, buses, joints toriques, gicleurs d’air, rondelles et accessoires similaires.
• Marchandise vendue par DeVilbiss Air Power Company mais fabriquée par et identifiée comme
étant le produit d’une autre compagnie, tels que les moteurs à essence. Dans ce cas, la garantie
du fabricant du produit s’applique, si une telle garantie est offerte.
• TOUTE PERTE, TOUT DOMMAGE DIRECT OU INDIRECT OU TOUT FRAIS POUVANT
RÉSULTER D’UN DÉFAUT QUELCONQUE, D’UNE DÉFAILLANCE OU D’UN MAUVAIS
FONCTIONNEMENT DU PRODUIT. Certaines provinces et certains états ne permettent pas
l’exclusion ni la limitation des dommages directs ou indirects. Par conséquent, il se peut que les
exclusions ou limitations mentionnées ci-dessus ne s’appliquent pas dans votre cas.
• TOUTES GARANTIES IMPLICITES, Y COMPRIS CELLES PORTANT SUR LA VALEUR
MARCHANDE ET L’APPLICATION DU PRODUIT POUR UNE UTILISATION PARTICULIÈRE,
SONT LIMITÉES À UN AN À COMPTER DE LA DATE D’ACHAT D’ORIGINE. Certaines provinces
et certains états ne permettent pas la limitation de la période d’une garantie implicite. Par
conséquent, il se peut que les limitations mentionnées ci-dessus ne s’appliquent pas dans votre cas.
A12495
213 Industrial Drive * Jackson, TN 38301-9615
Téléphone : 1-800-888-2468
Télécopieur : 1-800-888-9036
 Loading...