

Page 1

SERVICE MANUAL
RA SERIES INDEX DRIVES
MODELS 400RA, 401RA, 512RA & 662RA
WARNING
This is a controlled document. It is your responsibility to deliver this information to the end user of the
CAMCO/FERGUSON product. Failure to deliver this could result in your liability for injury to the user or damage
to the machine. For copies of this manual call your Customer Service Representative 800-645-5207.
The Driving Force in Automation
Page 2

TABLE OF CONTENTS
INTRODUCTION................................................................................................................................... 2
WARNINGS AND CAUTIONS............................................................................................................... 2
OIL SEAL REMOVAL............................................................................................................................2
SP ARE P AR TS KIT ............................................................................................................................... 2
DISASSEMBL Y ..................................................................................................................................... 3
REMOVAL OF BEARINGS ................................................................................................................... 4
INPUT SHAFT / CAM REMOVAL ......................................................................................................... 4
PRIOR TO REASSEMBL Y .................................................................................................................... 4
ASSEMBL Y ........................................................................................................................................... 4
ASSEMBLING INPUT SHAFT .............................................................................................................. 5
ASSEMBLY OF OUTPUT SHAFT........................................................................................................ 5
SETTING CAM...................................................................................................................................... 6
HOW TO ORDER PARTS ..................................................................................................................... 7
EXPLODED P AR TS DRAWING............................................................................................................ 8
P ARTS LIST .......................................................................................................................................... 9
Page 3

INTRODUCTION
This service manual pertains to the disassembly and assembly of CAMCO’s RA Series Index Drive MODELS
400RA, 401RA,512RA, & 662RA.
The manual is to be used in conjunction with the General Service Manual which describes the lubrication and
general maintenance of CAMCO Index Drives.
An exploded view of your specific Index Drive is included in this manual. Also included is a complete Bill of
Materials for your convenience in identifying and ordering spare or replacement parts.
Some users of Index Drives have the facilities and trained personnel to accomplish service repair. You must
determine the extent to which intricate servicing should be done in your own facility. When in doubt, CAMCO
recommends that CAMCO trained servicemen make the repairs.
WARNINGS AND CAUTIONS
Statements in this manual preceded by the words WARNING or CAUTION and printed in italics are very
important. We recommend you take special notice of these during service or repair.
WARNING
Means there is the possibility of personal injury to yourself or others.
CAUTION
Means there is the possibility of damage to the CAMCO unit.
OIL SEAL REMOVAL
The only repair possible without disassembly of the indexer is replacement of oil seals. To remove oil seals, drill
a number of holes into the case of the seal. The seal may then be removed with a pointed tool. Be sure to
remove all metallic chips created during the drilling of removal holes. A new seal may be installed as outlined in
the “Oil Seal Installation Recommendations” section of the “General Service Manual”.
SPARE PARTS KIT
CAMCO offers a Spare Parts Kit for all CAMCO index drive models CAMCO builds. These kits include oil seals,
bearings, shims and cam followers. These are components that will most likely require replacement during
repair of your index drive. CAMCO recommends a Spare Parts Kit be purchased and kept on hand prior to any
disassembly of your CAMCO drive.
A compete list of components supplied in the Spare Parts Kit can be found in the parts list located in the rear of
this manual. The asterisk behind the item number indicates those parts supplied with the Spare Parts Kit.
BEFORE STARTING
Before starting disassembly of your CAMCO unit you should read and review the following instructions. These
provide important information on parts and procedures necessary to successfully complete your repair.
Comply with all Warnings and Cautions
Read the “Trouble Shooting Guide” section of your “General Service Manual” before disassembling CAMCO
units. CAMCO recommends returning defective equipment for inspection and repair whenever possible.
CAMCO uses Loctite™ to secure all screws and setscrews, If you encounter a fastener that is difficult to
remove, apply heat to the screw and remove while still warm.
.
2
Page 4
Page 5
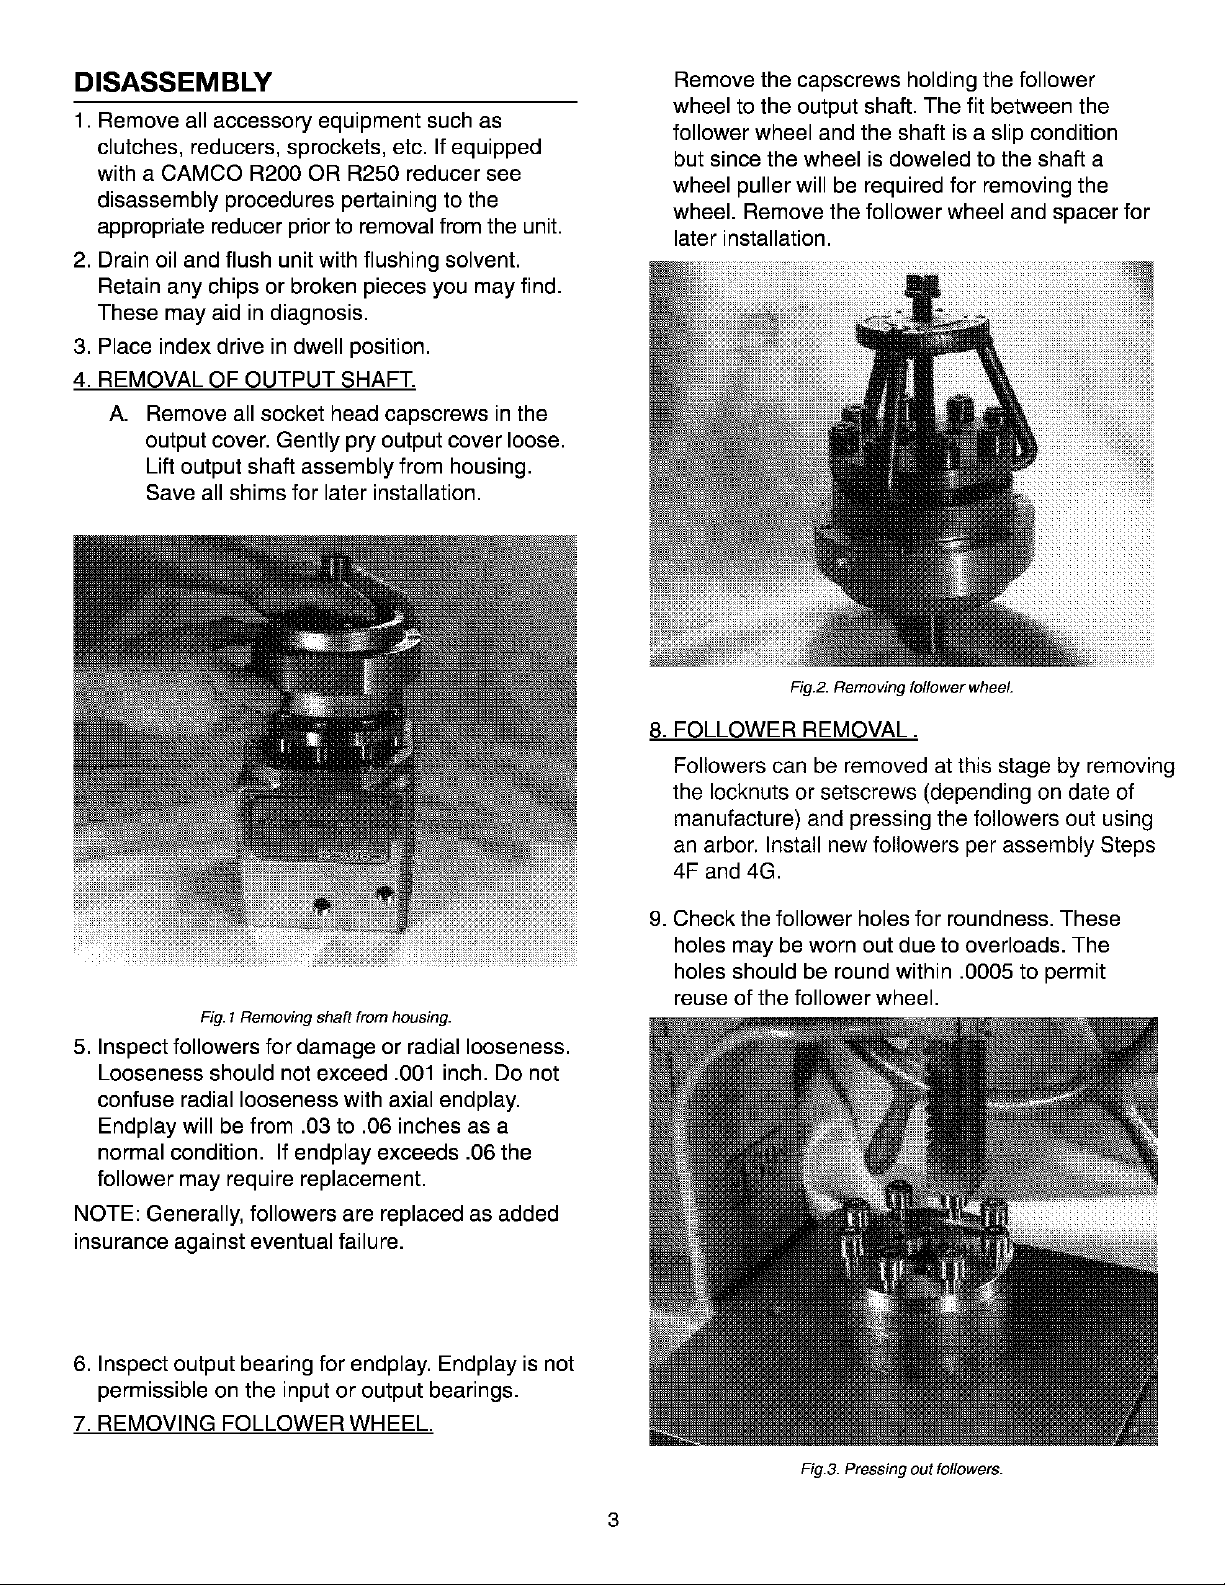
10. REMOVING SHAFT FROM OUTPUT
ASSEMBL Y.
To remove the output shaft from the cover it will
be necessary to use an arbor press and
push from the back side of the shaft using
caution not to damage the parts.
C. Tap on the end of the input shaft to drive the
opposite cartridge from the housing. Then
drive the shaft in the opposite direction for
removal of other cartridges.
NOTE: Keep shims with their respective cartridges
you will be asked to reinstall or replace with the
same shim thickness during assembly .
D. Remove the input shaft/cam assembly
through the large cartridge hole (does not
apply to 662RA see Step E).
E. The 662RA requires removal of the cam
locknuts while still in the housing and
pressing the shaft through the hole
previously occupied by the input cartridge
and removed in Step C. This will
automatically remove the bearing cone from
one end of the input shaft. The use of an
arbor press is recommended but this
procedure can be accomplished by driving
the shaft through with a soft faced hammer.
Fig. 4 Pressing out shaft.
11. REMOVAL OF BEARINGS.
A. Use a wheel puller to remove the cone
portion of bearing from the shaft.
B. Removal of the upper bearing cup from the
output cover will require light tapping on the
backside of the cup with a round aluminum
bar and a hammer working around the
perimeter as you tap to prevent binding.
Continue this procedure until the cup is free
of the cover.
C. Removal of the lower output bearing cup
from the output cover requires prying from
the backside or drilling and tapping of jack
screw holes or the use of a pulley puller.
12. INPUT SHAFT REMOVAL.
NOTE: The output shaft must be removed prior to
input shaft removal
A. Rotate the input shaft and inspect all parts
for damage. Endplay in the output shaft is
not permissaable.
B. Remove all input bearing cartridge
capscrews.
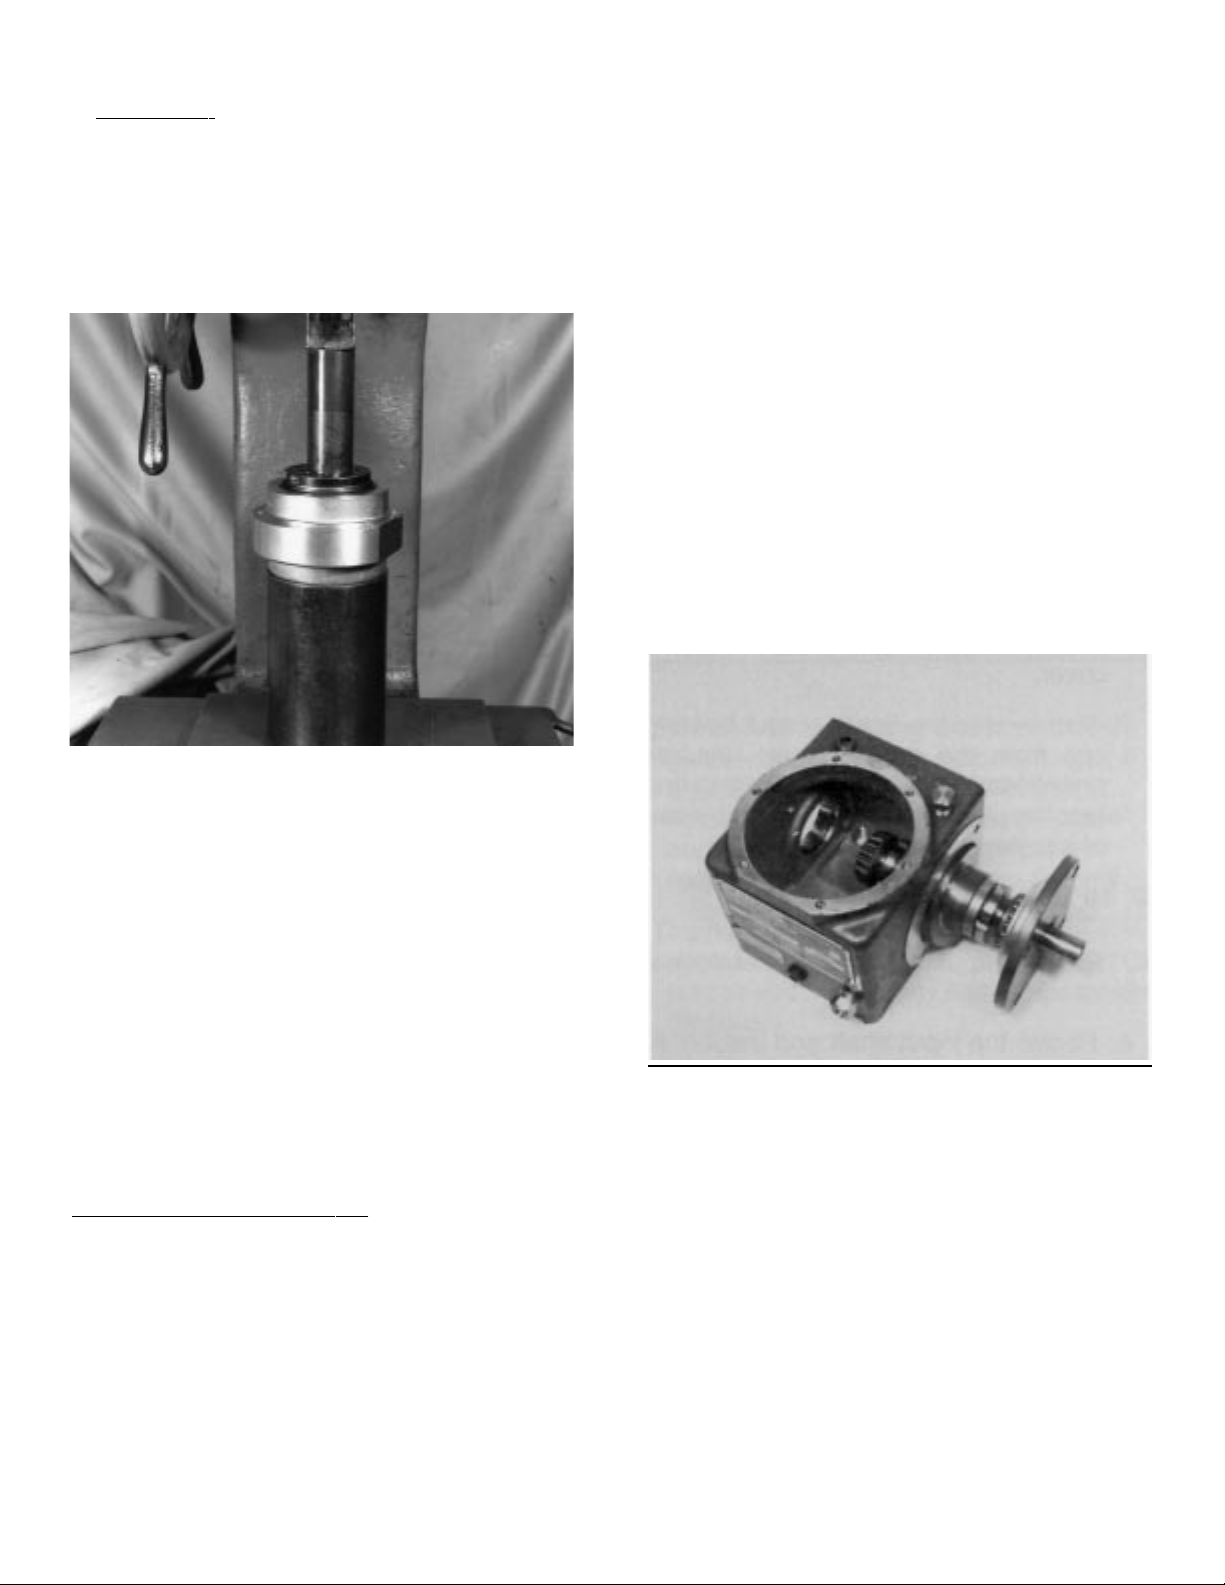
Fig. 5 Removing input shaft.
F. Remove cam through the output opening.
13. REMOV AL OF CAM FROM OUTPUT SHAFT
(400RA, 401RA AND 512RA)
A. Use a wheel puller to remove the bearing
cones from the input shaft.
B. Using a spanner wrench remove the cam
locknuts.
C. Remove the spacers from the shaft.
D. Use an arbor press to remove cam from
shaft, using caution not to damage parts.
4
Page 6
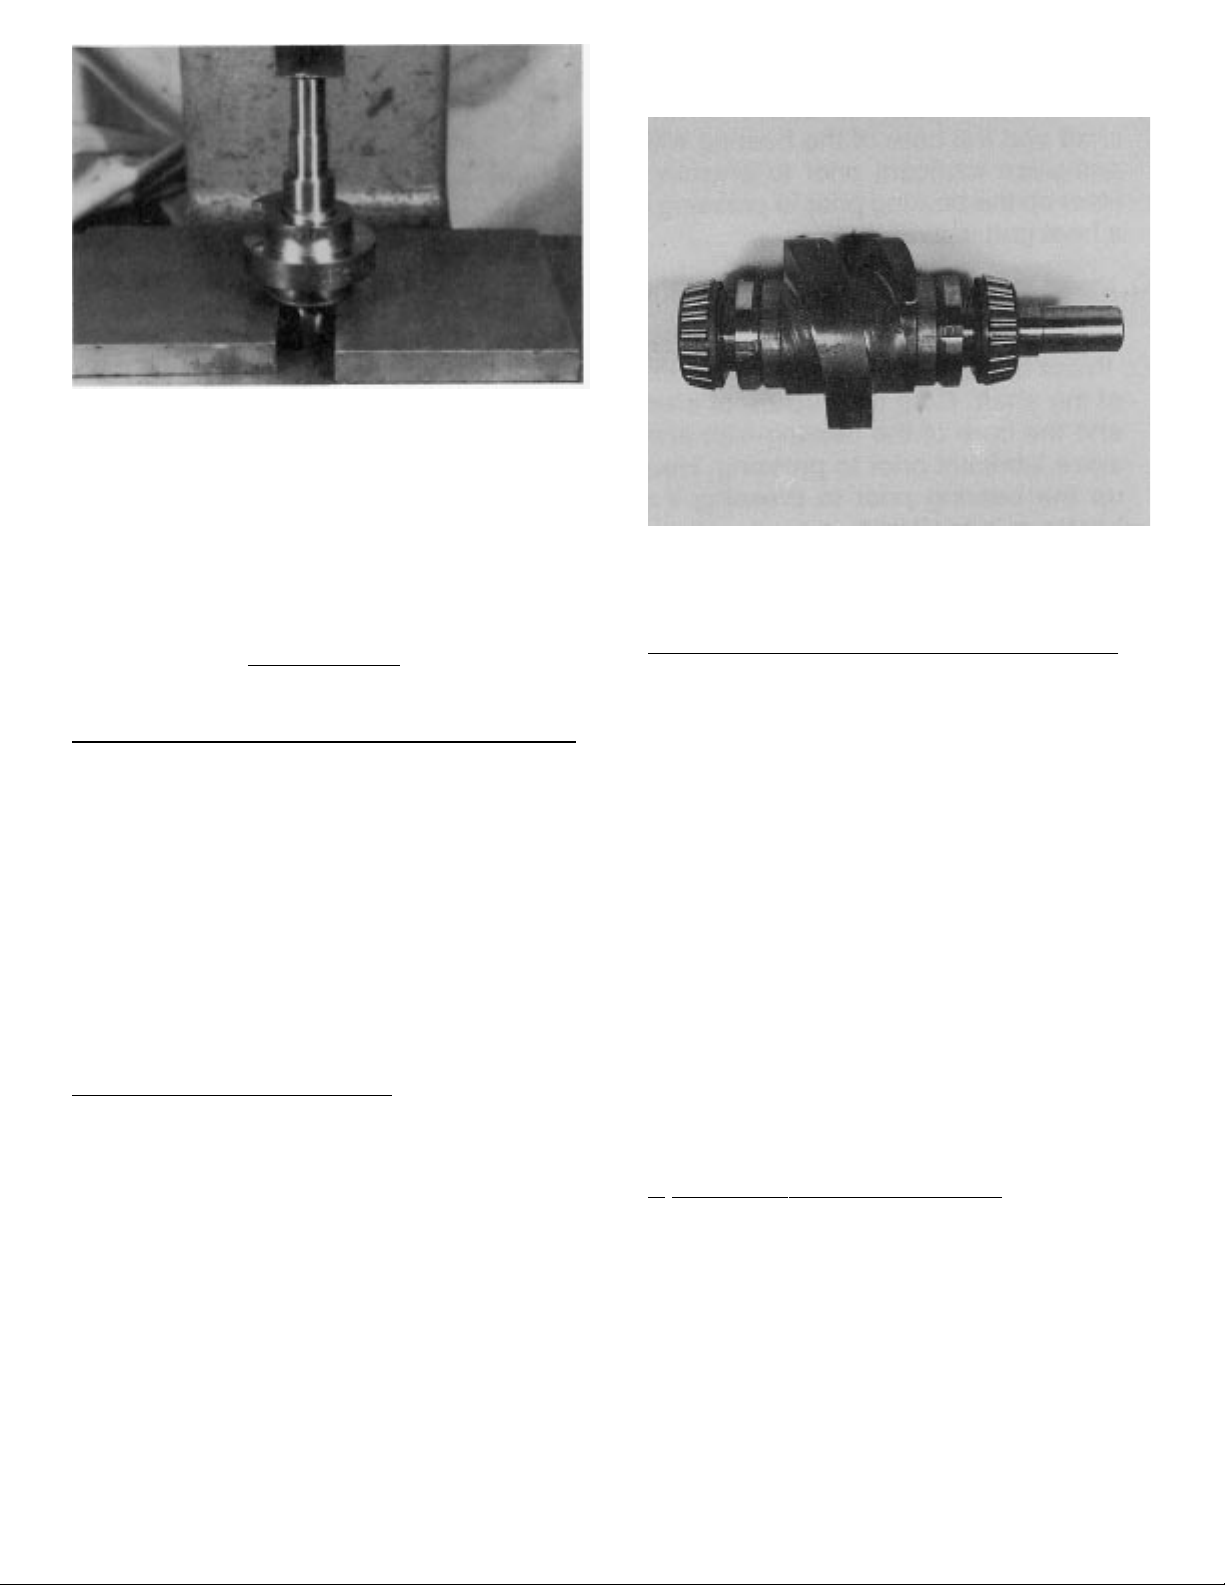
Fig. 6. Pressing out camshaft.
14. Remove the input bearing cups from the
cartridges with a pulley puller, by prying or by
drilling and tapping for jack screws.
Fig. 7. Assembled camshaft.
ASSEMBLY
PRIOR TO REASSEMBLY .
Clean and deburr all parts before reassembling.
Follow tightening torque and Loctite™
recommendations as outlined in the “General
Service Manual”.
1. Use an arbor to press the bearing cups into the
cartridges. Coat the outside of the cup and the
bore of the cartridge with an anti-seize lubricant
prior to pressing. Fill cavity of cartridge with
bearing grease recommended in the “General
Service Manual”.
2. ASSEMBLING INPUT SHAFT.
A. Use an arbor to press the cam into shaft.
Be sure key is installed into shaft first.
Apply anti-sieze lubricant to shaft and bore
prior to pressing.
B. Install spacers on both sides of the cam as
removed in disassembly Step 13C.
C. Use a spanner wrench to install the cam
locknuts. Adjust nut to center cam on shaft.
D. Use arbor to press bearing cones onto
shaft. Coat shaft and bearing bore with antisieze lubricant prior to pressing. The bore
of the bearing should be heated prior to
pressing if a heat gun is available.
3. INST ALLING INPUT SHAFT INT O HOUSING.
(On the 662RA the prior assembly steps were
done inside the housing).
A. Slip the input/cam shaft assembly through
the large cartridge opening.
B. Install the input cartridges. Be sure to install
the same exact shims or equivalent height
as was removed in disassembly Step 12C.
C. Tighten cartridge mounting screws.
D. If endplay exists remove an equal amount of
shims from each side until there is a small
amount of drag from the bearings. In rare
instances it may be necessary to remachine
the cartridges if all shims have been
removed and endplay still exists.
H. Loosen input cartridge screws and rotate
the cartridge top to the most rearward
position attainable within the slots provided
in the cartridge.
4. ASSEMBLY OF OUTPUT SHAFT.
A. Press bearing cups into cover. Coat the
outside of the cup and the bore in the cover
with an anti-sieze lubricant prior to pressing.
B. Press bearing cone on the output end of the
shaft. Coat the outside of the shaft and the
bore of the bearing with anti-sieze lubricant
prior to pressing. Heat up the bearing prior
to pressing if a heat gun is available.
5
Page 7

Page 8

Page 9

Page 10

Page 11

Page 12

Page 13

Page 14

Page 15

PARTS LIST FOR 512RA INDEX DRIVE (STANDARD CONFIGURATION CONT.)
26 ....................................................06C01055009300 OUTPUT RISINGLE EXTENDEDR (REQUIRED ON 90 AND
........................................................ SOME 120 DEGREE MOTION UNITS)
27 ....................................................95A33001010000 SIGHT PLUG 3/8-18 N.P .T. *FS
28 ....................................................95A33004010000 GREASINGLE EXTENDED FITTING #B-1610 *FS
29 ....................................................95A26000600000 S.H.C.S. 5/16-18 X 2 *FS
30 ....................................................86D07328640021 BEARING CONE 34300 CLASS 2
31 ....................................................86D07328640022 BEARING CUP 34478 CLASS 2
32*...................................................86D07328300022 BEARING CUP 13621 CLASS 2
33*...................................................86D07328300021 BEARING CONE 13687 CLASS 2
34 ....................................................84D07329240000 OIL SINGLE EXTENDEDAL C/R 14262
35 ....................................................06B01809008700 GASKET COVER CC *FS
36 ....................................................06A02638009000 “SPACER, OUTPUT -CC”
37 ....................................................06A02663018800 “SHIM, .002 THK”
37 ....................................................06A02663028800 “SHIM, .003 THK”
38 ....................................................95A26016450000 SHCS 3/8-16 X 3/4
39 ....................................................80C64329009100 MTG PLATE AL T R225
39 ....................................................80L07456009100 “MTG PLATE, SSV-7300C REDUCER”
39 ....................................................80L07457009100 MOUNT PLATE 7300 CONE REDUCER
14
Page 16

Page 17

P ARTS LIST FOR 662RA INDEX DRIVE (STANDARD CONFIGURATION CONT .)
ITEM NO. PART NUMBER DESCRIPTION
34 ....................................................84D07329320000 OIL SINGLE EXTENDEDAL C/R 19400
35 ....................................................08C01810008700 GASKET COVER CCM *FS
36 ....................................................08B02624009000 SPACER OUTP CCM
37*...................................................08A01325018800 SHIM .002 THK
37*...................................................08A026710298800 SHIM .003 THK
37*...................................................08A01325028800 SHIM .005 THK
37*...................................................08A01325038800 SHIM .010 THK
38 ....................................................95A26016470000 SHCS 3/8-24 X 1
39 ....................................................80C01938009100 MOUNTING PLATE 7300 REDUCER
39 ....................................................80C02238009100 MOUNTING PLATE 7350 REDUCER
........................................................
*.......................................................Indicates parts supplied with Spare Parts Kit # 662RA SPK
16
Page 18

© Industrial Motion Control, LLC 2004 All rights reserved
This publication is for information purposes only and should not be considered a binding Printed in U.S.A.
description of the product except if confirmed in writing by Industrial Motion Control, LLC. SKU 0069 / Revision 3/1/04
Michigan Office
550 Forest Avenue, Unit #14
Plymouth, Ml 48170
USA
ph: 734-459-8080
fax: 734-459-8110
UK Office
432 Perth Avenue
Slough Trading Estate
Slough, Berkshire SL1 TS
United Kingdom
ph: +44 (0)1753-786-100
fax: +44 (0)1753-786-101
Belgium Office
33 Parc Industriel
B-1440 Braine-le-Château
Belgium
ph: +32 (0)2 367-1311
fax: +32 (0)2 366-1891
Industrial Motion Control, LLC 1444 S. Wolf Road, Wheeling, IL 60090 Phone: 847-459-5200 Fax: 847-459-3064
www.camcoindex.com www.ferguson-co.com
The Driving Force in Automation
 Loading...