

Page 1
Save for future reference.
For more information, visit www.desatech.com
GB38 AND GB43 BLACK FIREPLACE SURROUND
WITH BLACK TRIM
For Use With DESA Heating Products VI33NR/PR Vent-Free
Fireplace Inserts Only
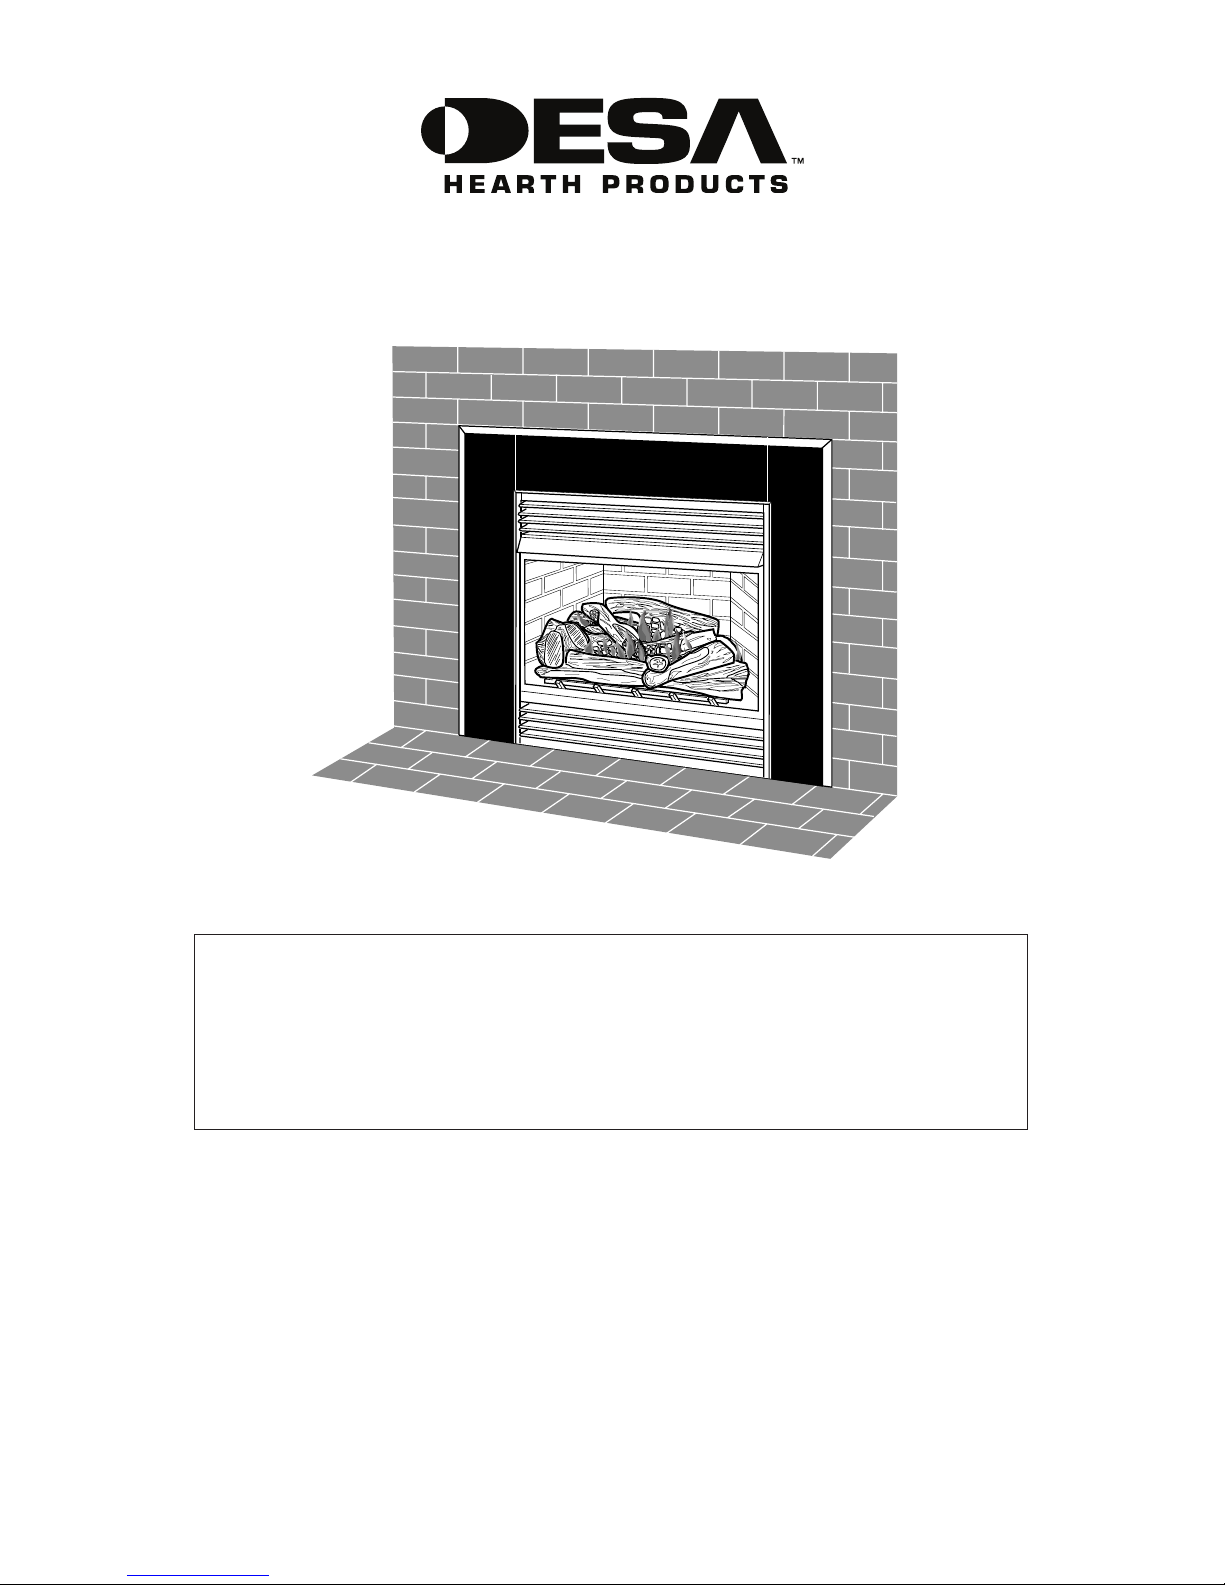
Installed Vent-Free Insert and Surround Kit
IMPORTANT: Read entire instruction sheet before assembling or installing replace surround kit. This replace surround is only approved for use with heater
models VI33NR and VI33PR natural and propane/LP gas.
Do not use replace surround with any other product.
This replace surround kit contains the following:
GB43 GB38
Perimeter Trim Kit 101240-03 101240-04
Surround, Left 105234-01CK 105234-02CK
Surround, Right 105235-01CK 105235-02CK
Surround, Top 105236-01CK 105236-02CK
Screw, 6-20 x 0.38 100587-01 (4) 100587-01 (4)
Screw, 10 x 0.38 098304-01 (14) 098304-01 (10)
Tools required:
• #2 Phillips Screwdriver
• 5/16" Socket or Nut Driver
Page 2
www.desatech.com
122101-01A2
If any pieces are missing or damaged, contact
dealer where you purchased this kit or call
DESA Heating Products at 1-866-672-6040.
CAUTION: Close replace
damper securely before install-
ing heater insert. If chimney does
not have a damper, block or cap
top of chimney. Failure to cap
an open chimney could cause
drafts that can affect the heater’s
performance and increase sur-
face temperatures.
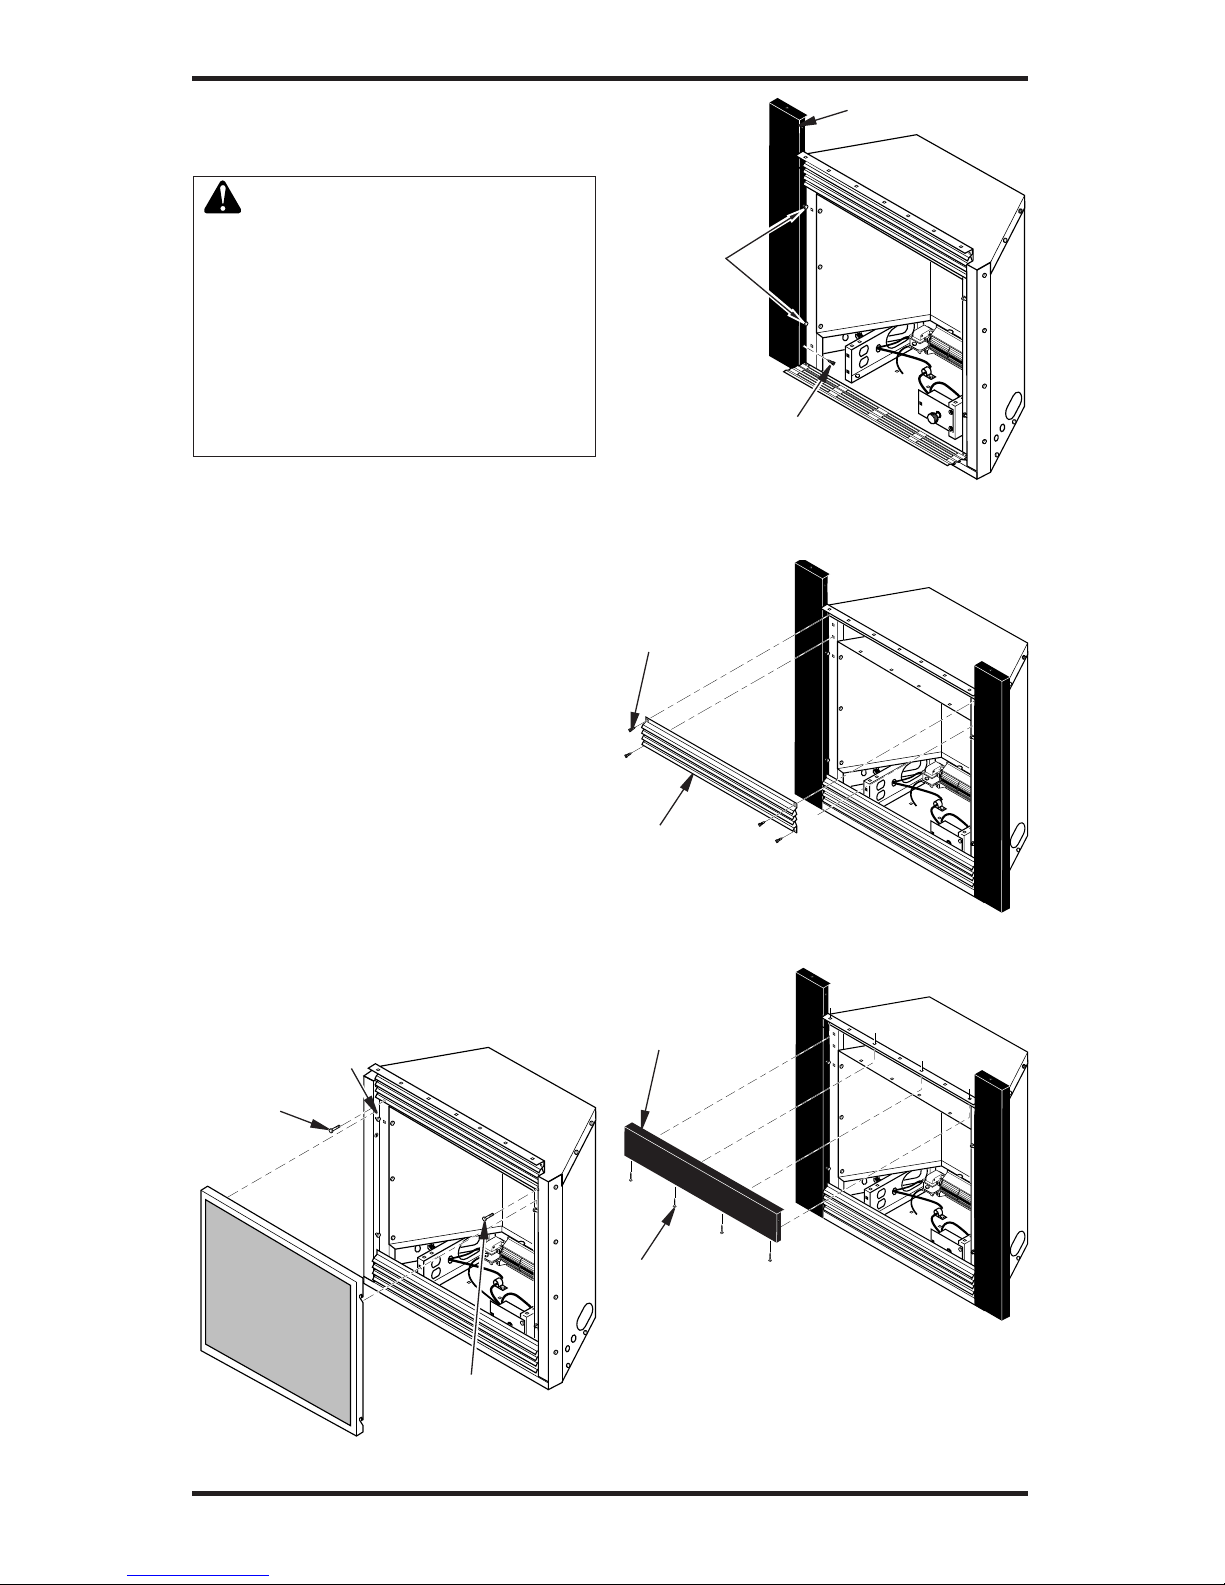
1. Using a 5/16" nut driver, remove 2 shipping screws and screen (see Figure 1).
Discard screws. Remove 5/16" screen
mounting shoulder screws (do not discard).
2. Remove log packaging from firebox
cavity.
3. Align holes in left surround side panel with
screen mounting screw holes. Replace
5/16" screen mounting shoulder screws
removed in step 1 (see Figure 2). Do not
tighten. Install Phillips screw in bottom
(see Figure 2). Repeat for right side.
4. Using Phillips screwdriver, remove 4 screws
attaching top louver (see Figure 3).
5. Place top surround panel at top of replace insert. Bottom edge of panel will
slide under top edge of insert. Align top
panel screw holes with those in insert.
Install four #10 Phillips screws, do not
tighten.
Screen Mounting
Shoulder Screw (4)
(Do Not Discard)
Shipping
Screw
(Discard)
Shipping Screw
(Discard)
Figure 1 - Removing Screws and Screen
Figure 2 - Attaching Left Surround Side
Panel
Surround Side
Phillips Screw
Screen
Mounting
Shoulder
Screws
(5/16")
Phillips
Screws
Top Louver
Figure 3 - Remove Louver
Figure 4 - Attaching Top Surround Panel
Top
Surround
Panel
Phillips Screws
(4)
Page 3
www.desatech.com
122101-01A 3
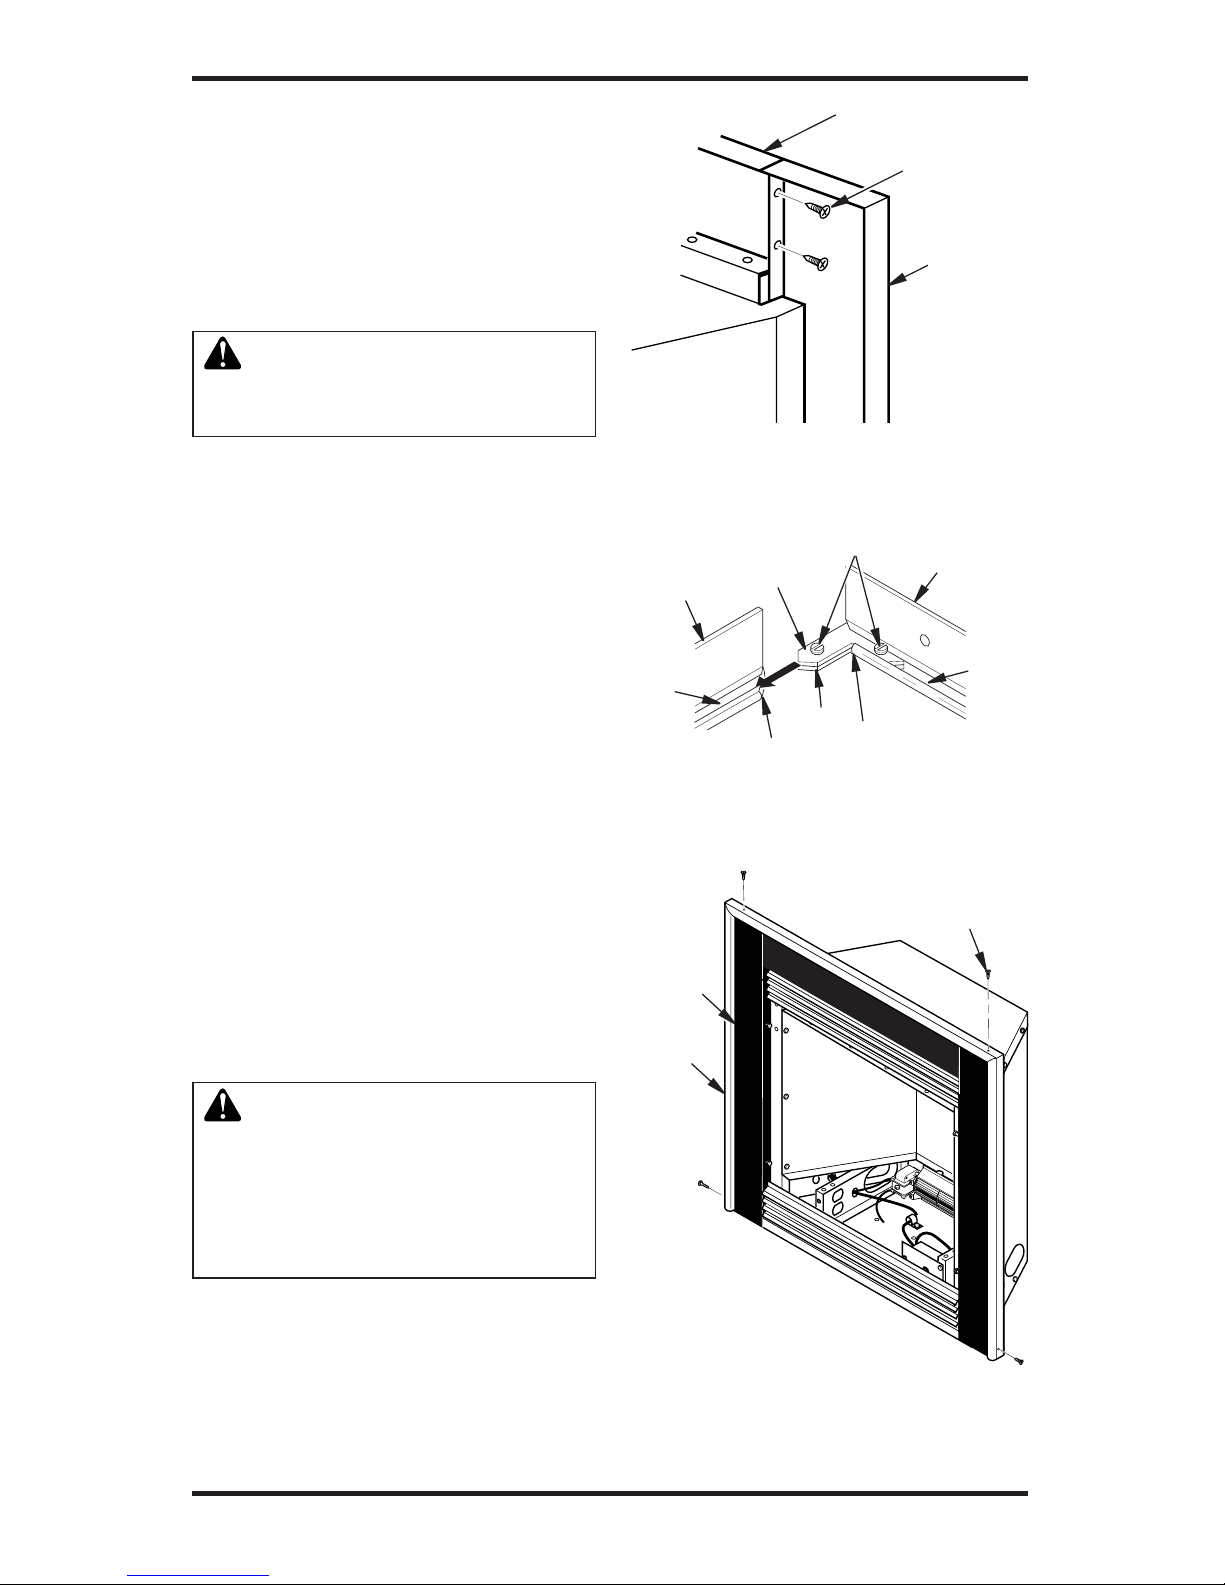
6. Align screw holes in side panels with
holes in top panel (see Figure 5). Insert
and tighten #10 Phillips screws.
7. Reinstall louver removed in step 4,
page 2.
8. Carefully inspect replace surround assembly. Make sure each part ts properly.
Firmly tighten all screws installed during
assembly.
CAUTION: Do not over-
tighten. Metal can bend, warp, or
break under excessive strain.
9. Remove 3 pieces of surround trim from
packaging.
10. Locate four #6 screws, 2 adjusting plates
with set screws, and 2 shims in hardware
packet.
11. Align shim under adjusting plate as shown
in Figure 6.
12. Slide one end of adjusting plate/shim in
slot of top surround trim (see Figure 6).
13. Slide other end of adjusting plate/shim in
slot on mitered edge of side surround trim
(see Figure 6).
14. While rmly holding edges of trim together,
tighten both set screws on adjusting plate
with slotted screwdriver.
15. Repeat steps 11 through 14 for other
side.
16. Line up holes in surround trim with holes
on side panels of replace surround assembly. Attach with screws provided (see
Figure 7).
17. Move heater and surround assembly to
replace opening. Make sure heater and
surround assembly t properly.
WARNING: A qualied ser-
vice person must install gas
piping to heater. Follow installation instructions included in
replace insert owners manual
and all local codes.
Proceed with installation instructions included
with unit.
Figure 5 - Attaching Side Panels to Top
Panel
Phillips
Screws
Top Panel
Side Panel
Slot
Side
Surround
Trim
Top
Surround
Trim
Set
Screws
Adjusting
Plate
Mitered
Edge
Shim
Mitered
Edge
Slot
Figure 6 - Assembling Surround Trim
Figure 7 - Attaching Trim to Fireplace
Surround
Trim
Fireplace
Surround
#6 Screws (4)
Page 4

2701 Industrial Drive
P.O. Box 90004
Bowling Green, KY 42102-9004
www.desatech.com
122101-01
Rev. A
06/07
NOT A UPC
122101 01
 Loading...