

Denver TVD-2114 User Manual


Thank you for your purchasing this color television.
To ensure your complete understanding, please read this manual thoroughly before operation.
CONTENTS
SPECIFICATIONS… ……………………………………………………………………………………………1
SAFETY PRECAUTIONS………………………………………………… ……………………………………2
LOCATION OF CONTROLS……………………………………………………………………………………3
INTRODUCTION ……………………………………………………………………………………. ……. …3
INITIAL OPERATION…… …………………… ………………………………………………………………6
TV PLAYER OPERATION ………………………………………………………………………………… 6
DVD PLAYER OPERATION… ……………………………………………………………………………… 15
BASIC OPERATION……………………… ……………………………………………………………….… 18
DVD MENU SETUP………………………………………………………………………………………..… 21
PLAY MP3…………………………………………………………………………………………...…….. … 26
JPEG FILE DECODE PLAY………………………………………………………………………………. … 27
SPECIFICATIONS
z Receiving system: RF: PAL B/G ,I
AV: NTSC3.58 NTSC4.43 PAL
z Channel range:VHF: E2-E12
UHF: E21-E69
S band: S1-S41
z Power consumption:≤90W
z Number of stored programs: 99
z Power supply: AC200V-240V 50Hz
z Sound output: ≥2W×2
Note:All specifications are subject to change without notice.
EN 1
SAFETY PRECAUTIONS
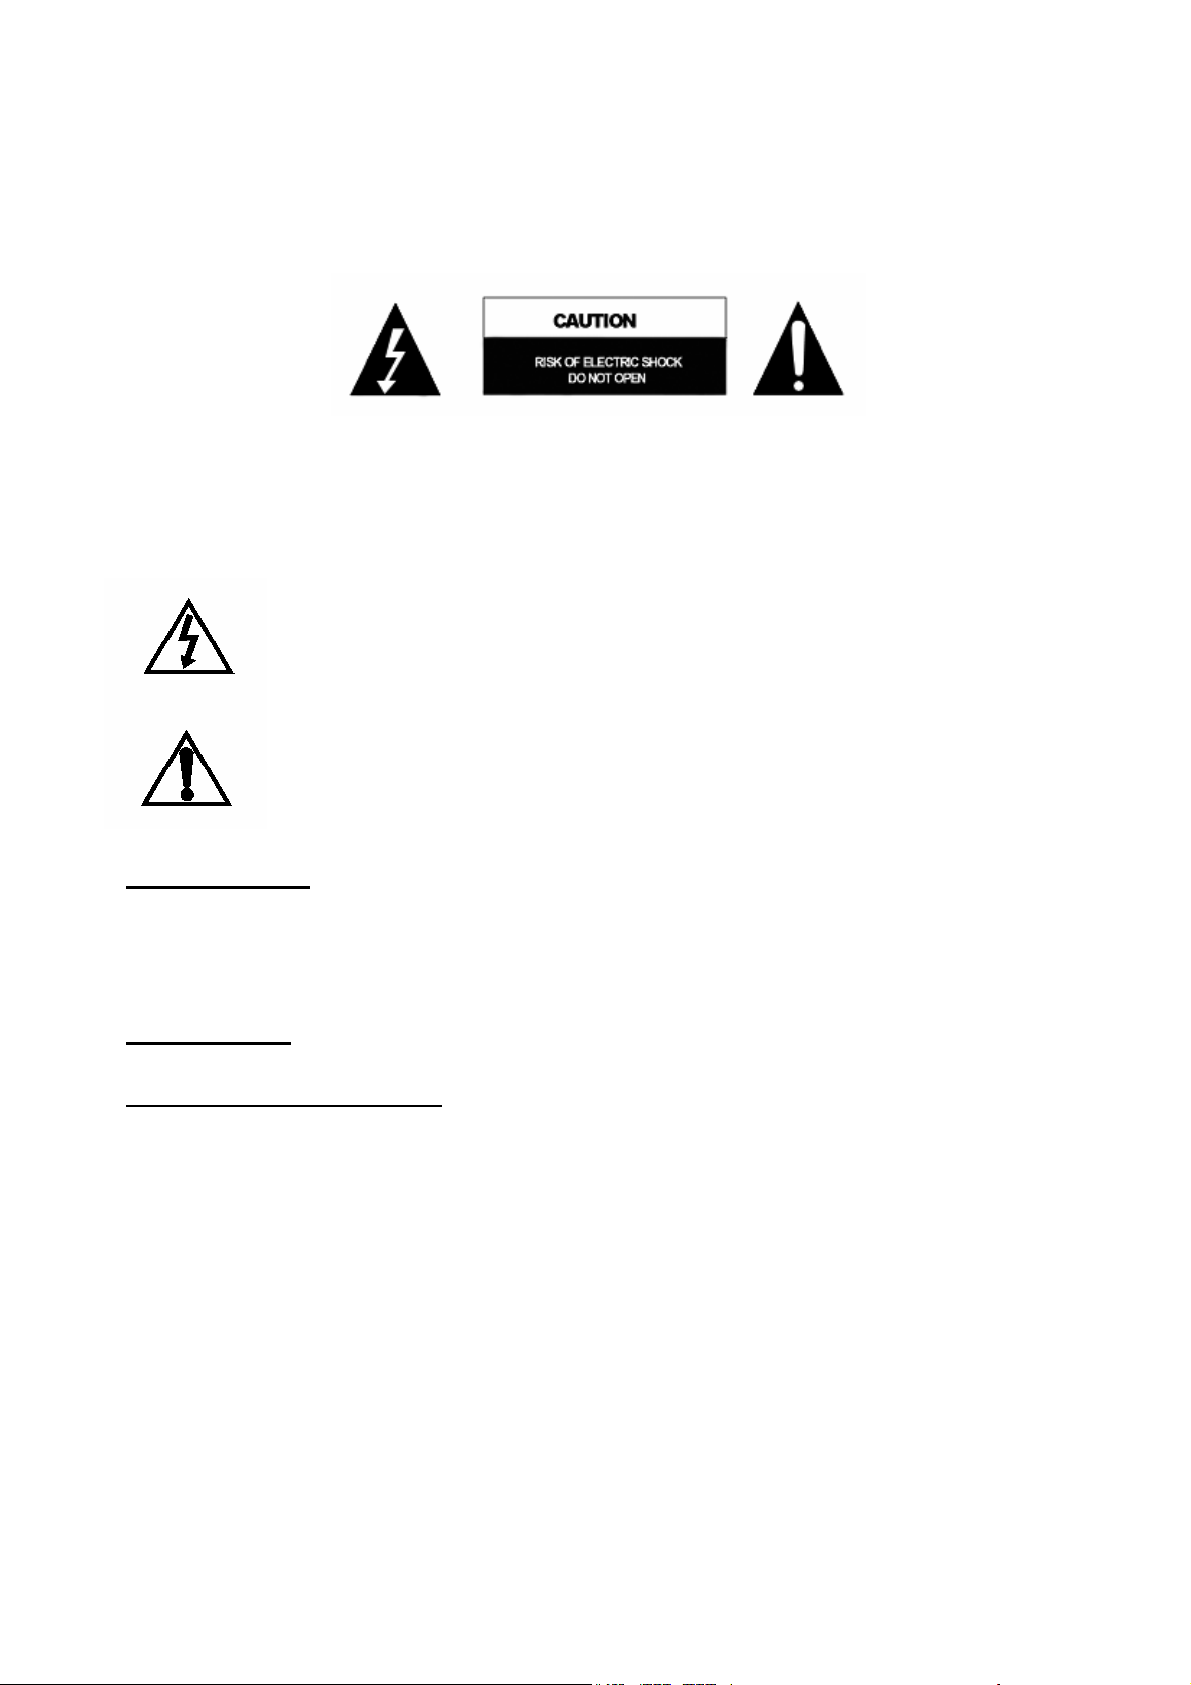
CAUTION: TO REDUCE THE RISK OF ELECTRIC SHOCK. DO NOT REMOVE COVER(OR BACK).
NO USER SERVICEABLE PARTS INSIDE. REFER SERVICING TO QUALIFIED SERVICE
PERSONNEL.
The graphic symbols on the back cover of the set mean the following:
The lightning flash with arrowhead symbol within an equilateral triangle is intended to alert
the user to the presence of uninsulated "dangerous voltage" within the product's enclosure
that may be of sufficient magnitude to constitute a risk of electric shock to persons.
The exclamation point within an equilateral triangle is intended to alert the user to the
presence of important operating and maintenance (servicing) instructions in the literature
accompanying the appliance.
WARNING: TO REDUCE THE RISK OF FIRE OR ELECTRIC SHOCK, DO NOT
EXPOSE THIS APPLIANCE TO RAIN OR MOISTURE.
INSTALLATION
LOCATE the receiver in the room where direct light does not strike the screen. Total darkness or a reflection on
the picture screen can cause eyestrain. Soft and indirect lighting is recommended for comfortable viewing.
ALLOW enough space between the receiver and the wall to permit proper ventilation.
AVOID excessive warm locations to prevent possible damage to the cabinet or component failure.
CONNECTION
This TV receiver can be connected to 200V-240V ~ 50Hz, NEVER connect to DC supply or any other power.
AUTOMATIC DEGAUSSING
All colour television receivers are sensitive to magnetic influences, usually caused by either moving the receiver
from one place to another or using certain electrical appliances near the receiver. This residual magnetism as it
is called, sometimes causes distortion which gives rise to "blotchy" areas of colour in the picture. To avoid these
effects the receiver incorporates an automatic degaussing circuit which operates for a short while immediately
each time the receiver is switched on using the mains switch. This circuit removes any residual magnetism in
the metal parts of the picture tu be and therefore ensu res that each time the receiver is switched "ON" using the
Mains switch, the purity of the colours displayed on the screen remain true and lifelike. If the set is moved or
faced in a different direction, the mains switch must be switched off at least 10 minutes in order that the
automatic degaussing circuit operates properly.
EN 2

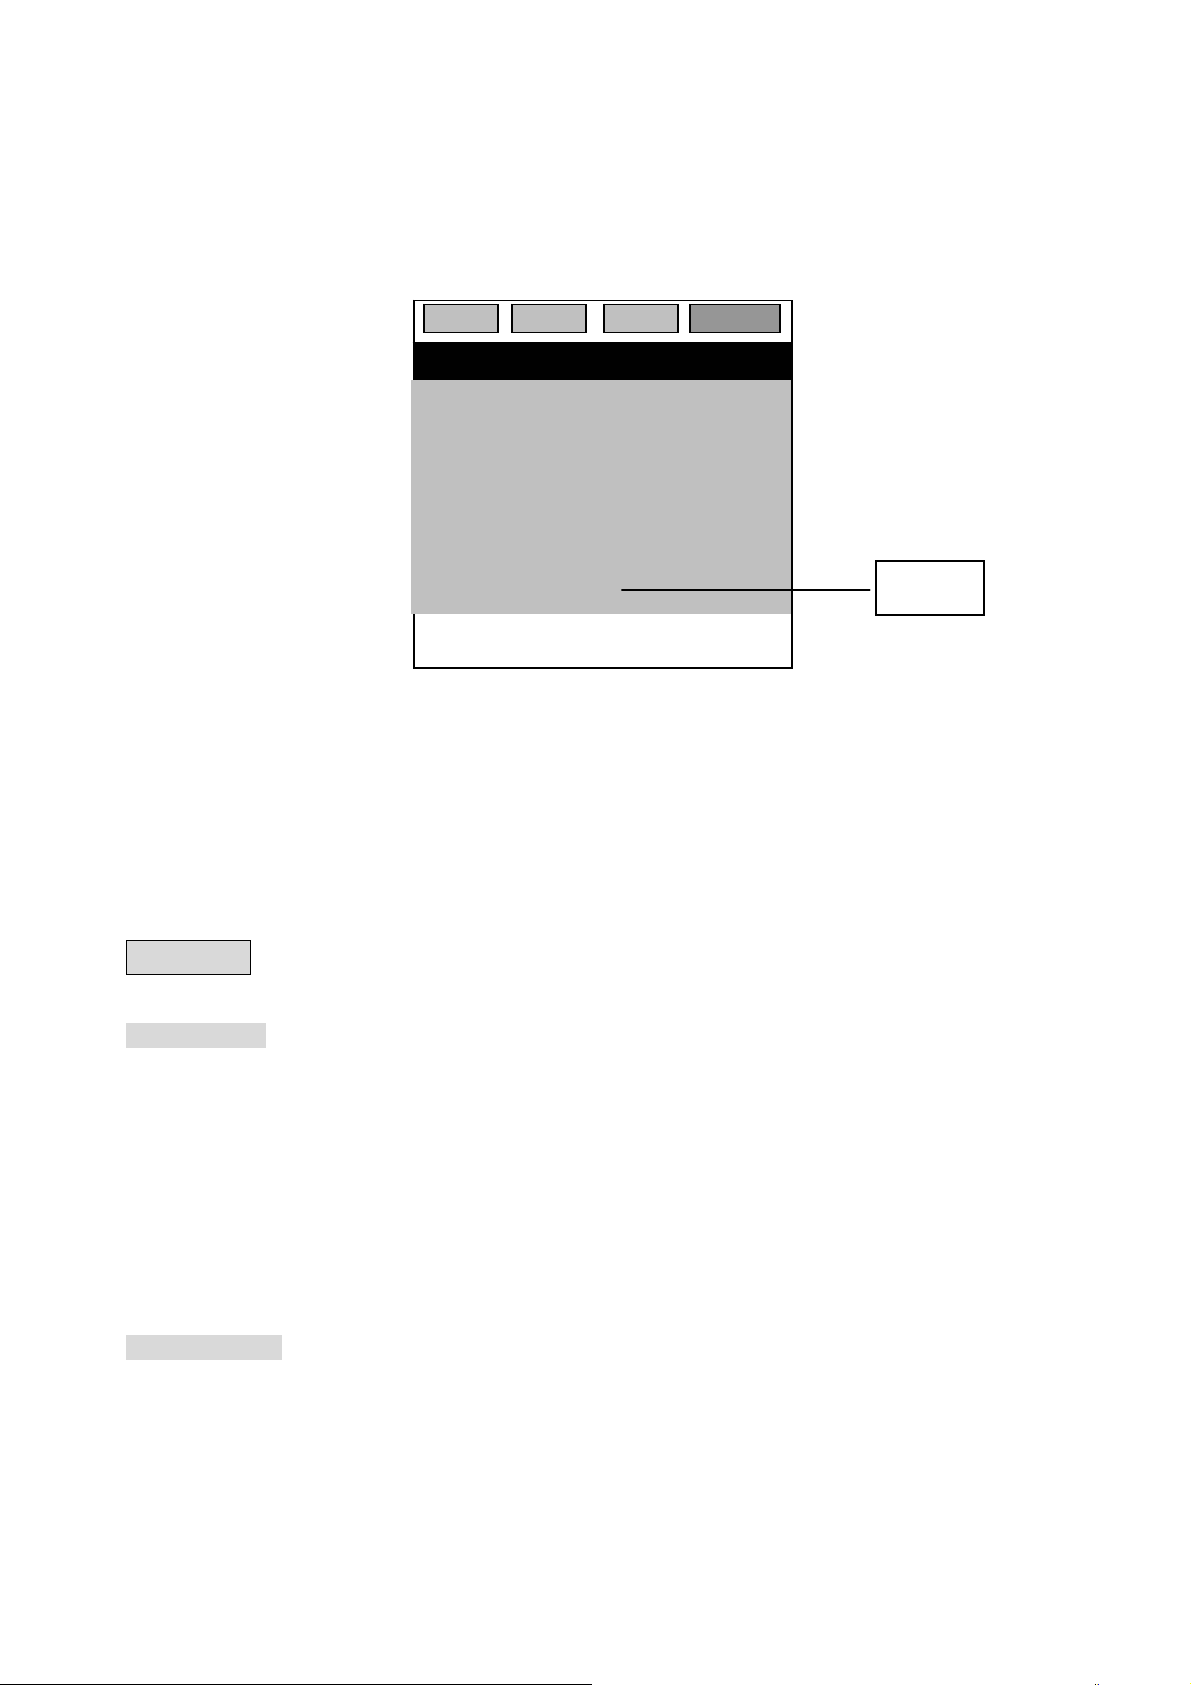
LOCATION OF CONTROLS
1. Speaker
2. Remote control receiving window
3. Indicator
4. Menu Button
5. Main power switch
6. DVD Play/Pause Button
7. Open/Close Button
8. Channel Button (CH-)
9. Channel Button (CH+)
10. Volume Button (V-)
11. Volume Button (V+)
12. OK Button
13. Side AV
14. 75 ohm Antenna Socket
15. Scart Connector (TV input and output)
16. SCRAT Connector (DVD output)
17.Optical Out
18. Coaxial Out
Interface description:
1 Side AV: AV2 signal input in TV mode.
2 AV SCRAT : FULL SCART,AV1 signal input and AV signal output an d R/G/B signal input in TV mode.
3 DVD SCRAT: in DVD mode,containing one AV(CVBS) output.
4 Optical fiber: in DVD mode,optical fiber signal(digital and audio) output.
5 Coaxial: in DVD mode,coaxial signal(digital and audio) output.
INTRODUCTION
FEATURE
TV PART
z Multi-System
z New I
z 99 Programs Ready
z AV Input/Output;
z Auto Search; Auto Memory; Program Fine Adjustment
z Multi-menu Display
z Blue Background Without Signal
z Program Preset; Program Scan; Recall
2
C Bus Control; New Super Chip Chassis
EN 3
z Full Function Remote Control
z AV Stereo
DVD PART
z Full Compatibility With DVD, CD, MP3, VCD, PHOTO-CD, CD+R(W), CD-R(W);
z Adjustable Screen Aspect Ratio (4:3 or 16:9);
z 32 Subtitles/8 Languages Supporting;
z Parental Lock Control;
z Program/ Repeat/Repeat AB;
z Build-in Dolby Digital AC-3 Surround Sound Decoder;(optional)
z 10 Bit Video DAC;
z Multiple Viewing An gle;
z Smart Upgrade Function
STATIC ELECTRICITY
If touch the screen while turning on/off the power, you may feel current. Anyway it is harmless.
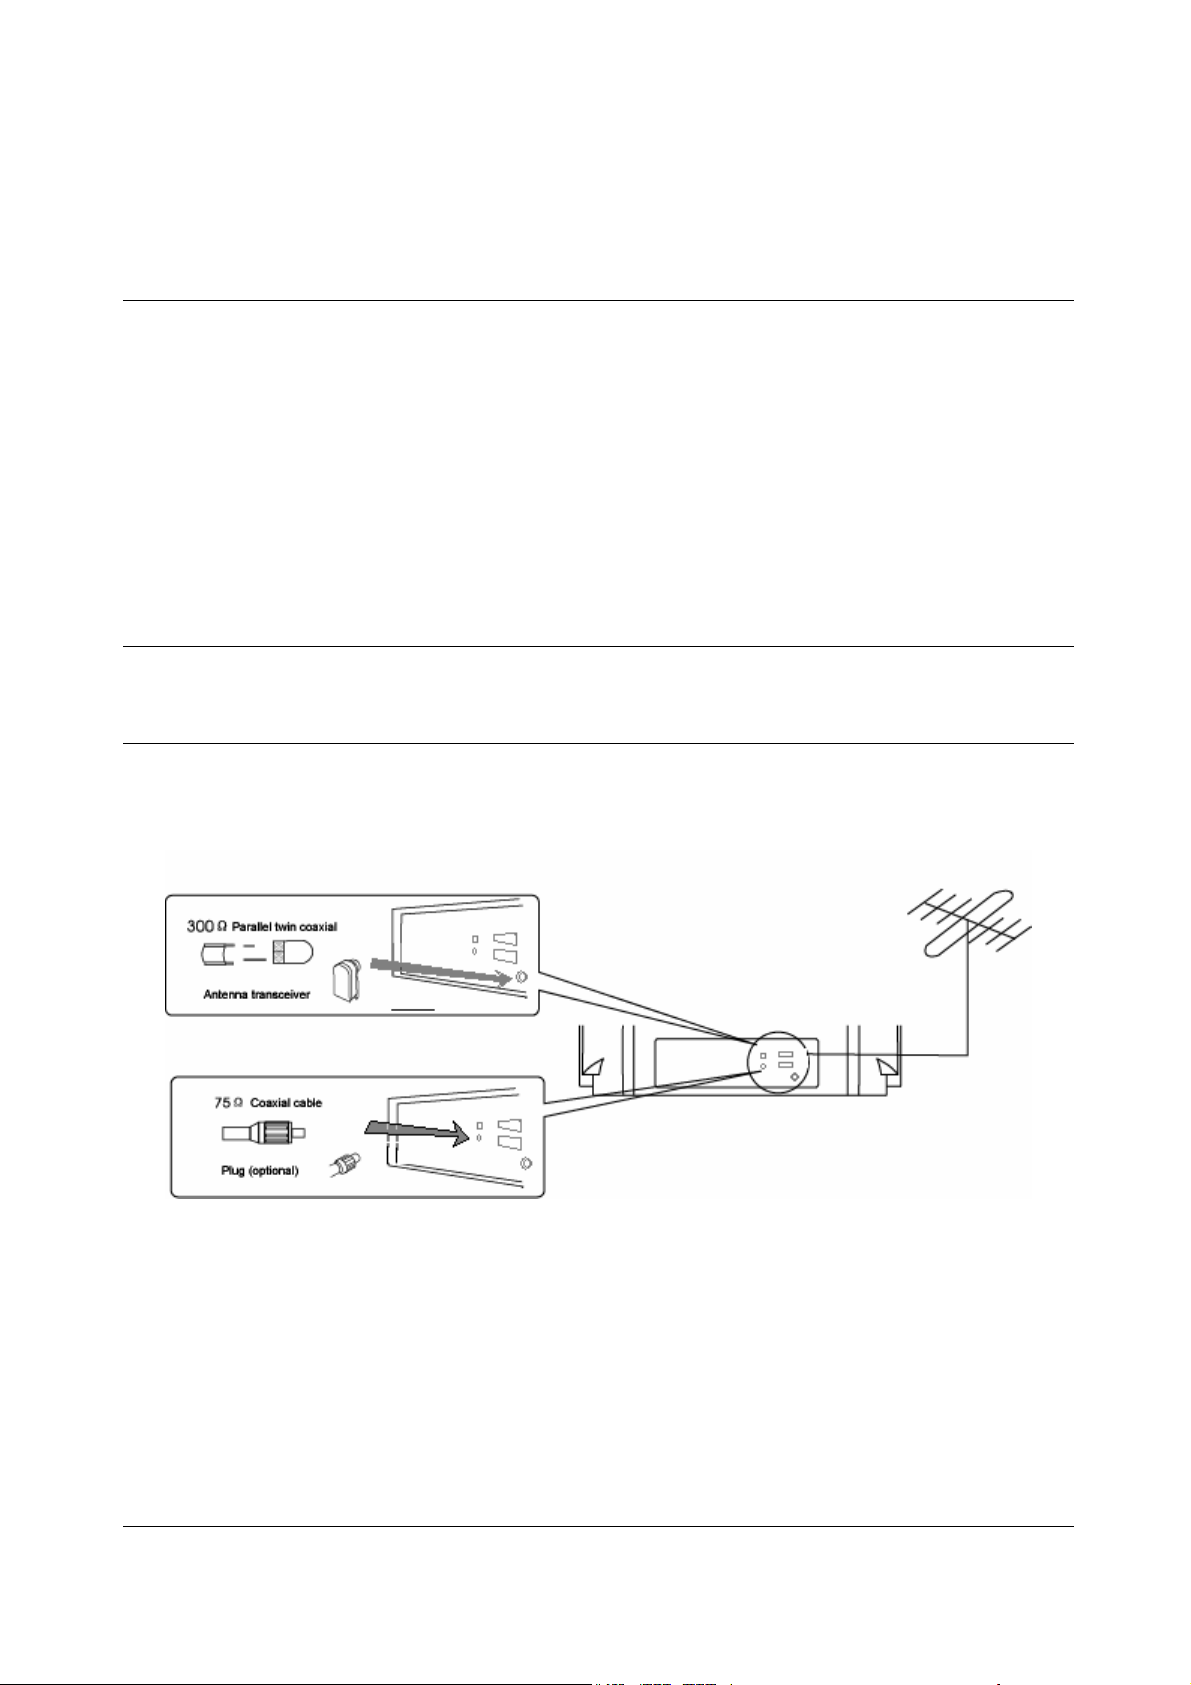
ANTENNA CONNECTION
The performance of the receiver may be better if outdoor antenna is connected. Which type of antenna is most
suitable to the receiver may depend on local condition. If you need any help, please contact your local
distributors.
NOTE:
Disconnect the indoor antenna when using outdoor antenna. It is advisable to use 75 coaxial cable to eliminate
the interference and noise caused by radio waves. Do not bind antenna cable and power cord together.
EURO-SCART CONNECTORS
When using a satellite receiver (or a video recorder) for TV reception with a SCART connection cable, you
must connect additionally the antenna cable (antenna cable and SCART cable) as with using the SCART cable
only, the reception of Teletext will not be possible.
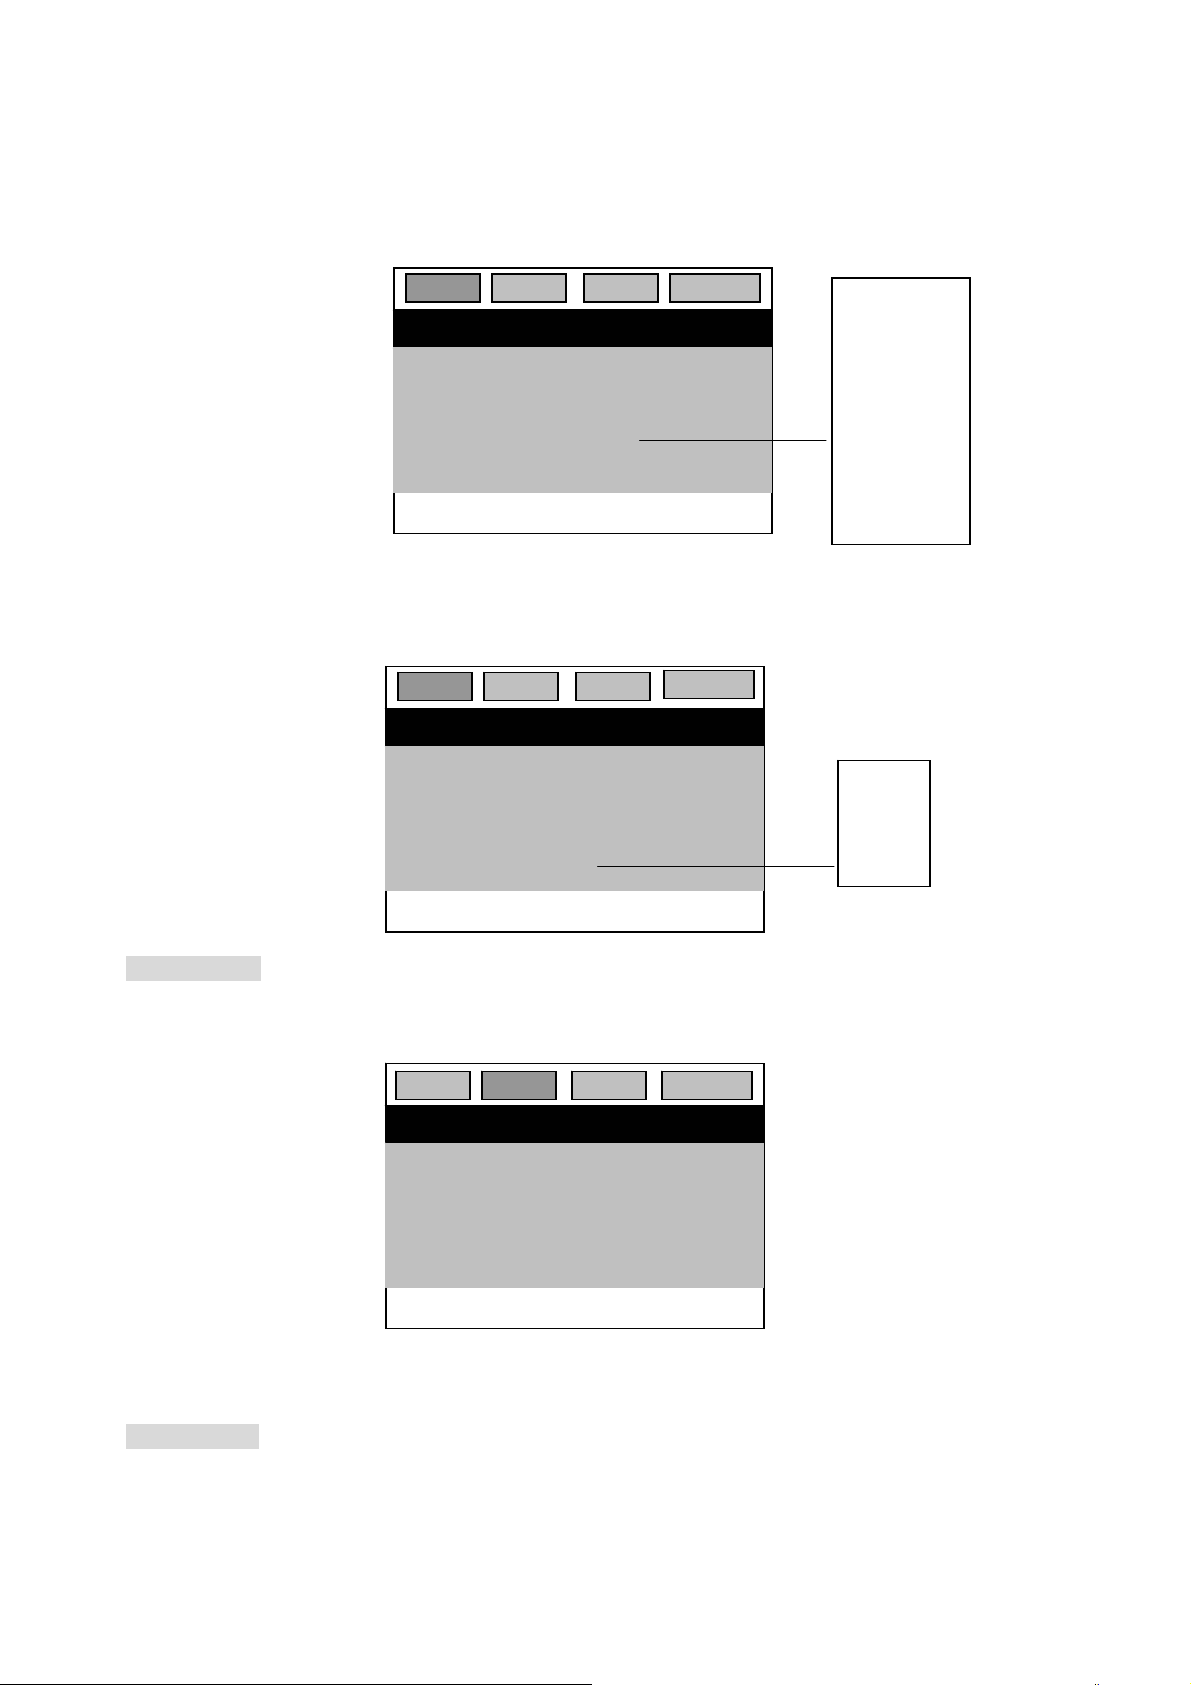
REMOTE CONTROLLER
EN 4

DVD/TV
key
TV and Teletext
key
TV or DVD
digits key
T eletext or DVD
key
Power/Standby
key
DVD key
TV(Text) or
DVD mode
key (red light)
NOTE:
1. Open the cover.
2. Insert two 1.5v batteries and make sure that the polarity of "+/-" matches with the polarity marked
in the remote control case respectively.
NOTE:
1. If The Remote Controller Will Not Be Used For A Long Period Of Time Or If The Batteries Run Out,
EN 5
Please Take Out The Batteries T o Prevent Leakage.
2. Do not drop the batteries into fire.
3. Make sure not to drop, dampen, disassemble the remote.
INITIAL OPERATION
CONTROL YOUR TV
HOW TO POWER ON/OFF THE RECEIVER
1. Press the main power switch on the set board. The indicator will turn on.
2. If no picture shows on screen, it indicates the set in standby. There after press "
controller.
NOTE:
Besides the "
preferred channel has been preset, selecting the corresponding number button (0~9) can direct to the
target program.
If the remote controller is not currently available, the receiver can also power on by the press of
"CH+,CH-" on the set board.
NOTE:
This only works when the set is receiving TV Signal.
3. Press the "
4. Press the main switch to power off the receiver. The power indicator will turn off.
NOTE:
1. If the power is cut-off electrically when appreciating programs, the receiver shall be turned off
completely or disconnect the power plug;
2. Turn off the receiver completely if long period of non-use for the power consumption is about 10W in
standby mode.
" button, pressing the direct select button (0~9) is effective to activate the receiver. If any
" button on the remote controller to switch the receiver to standby mode.
" button on the remote
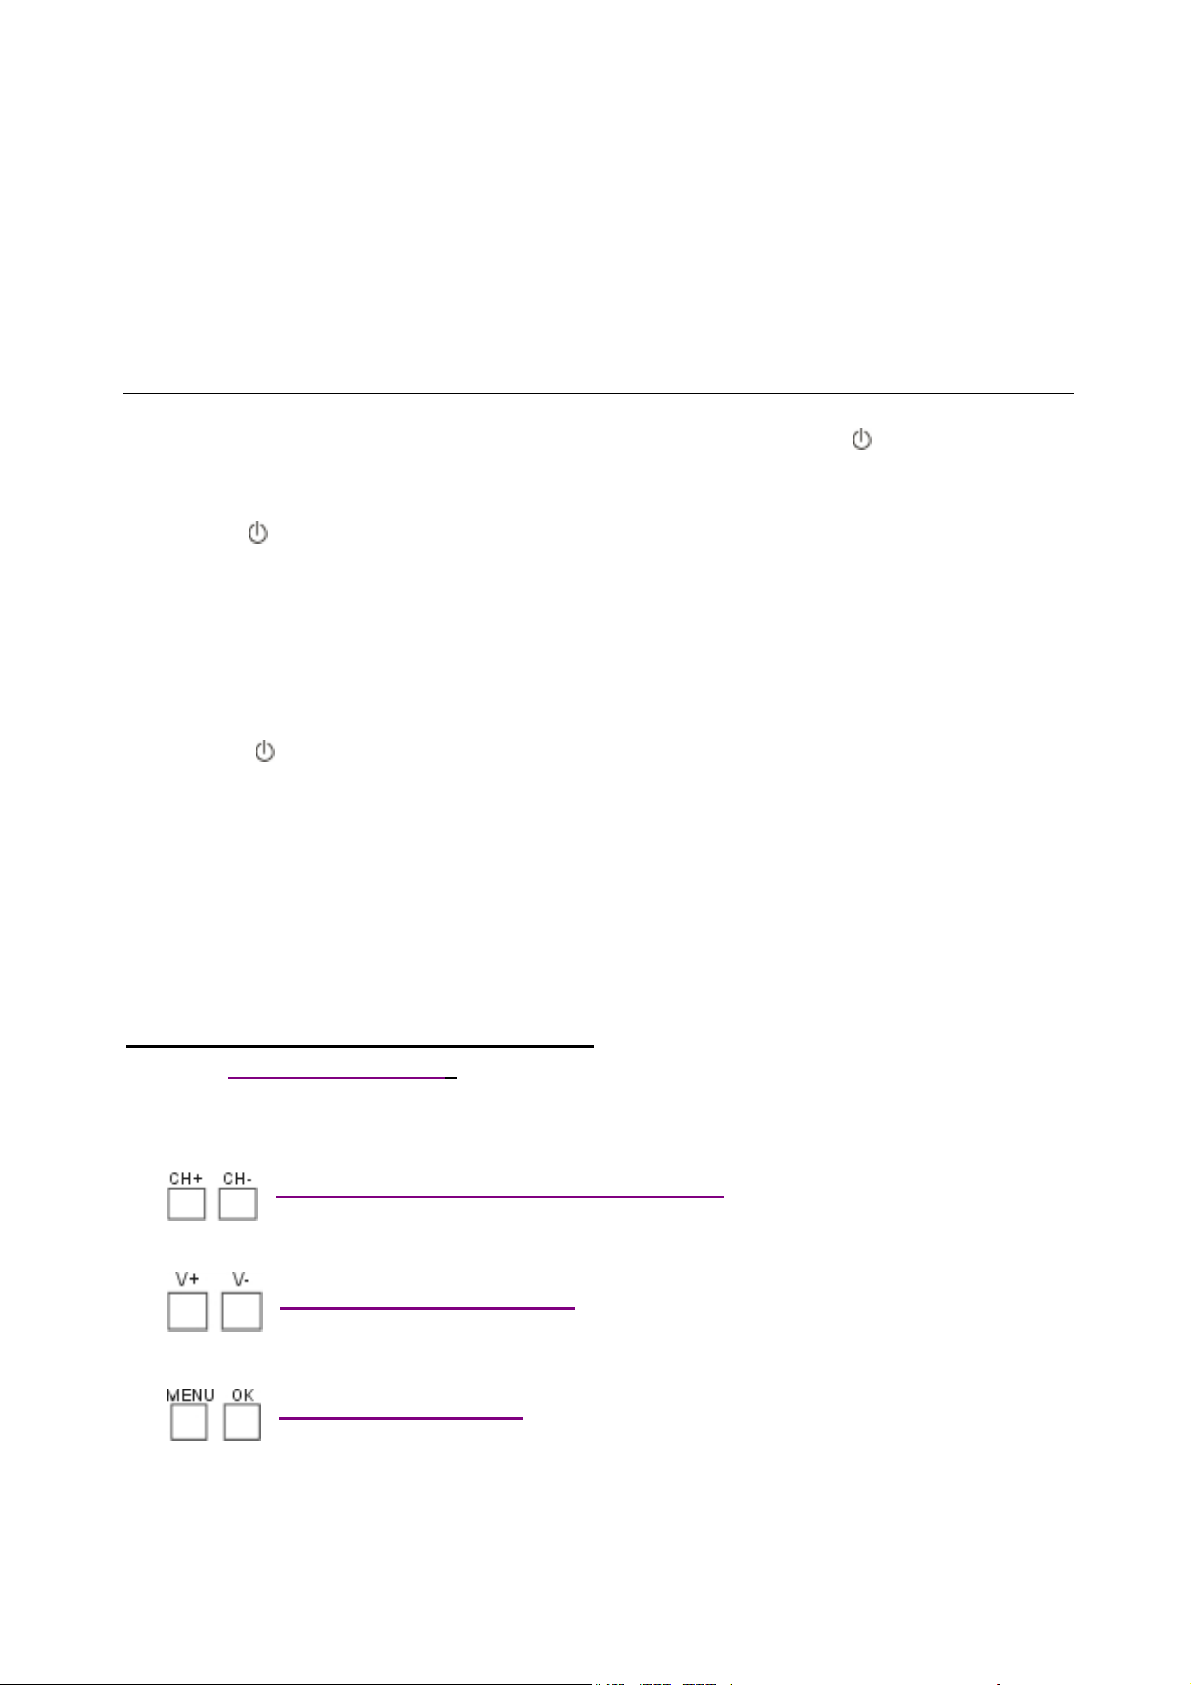
TV PLAYER OPERATION
Operations by the keys on the Front Cabinet
1
indicator will be alight . When it is pressed again,TV set can be turned off.
2
TV channel or CH- to select downwards the TV channel, program number will be displayed for 4 sec.
3
will be displayed.
4
functions are only accessible via menus. These menus are controlled by following keys.
MENU button select the different menus. It is also used to return from a submenu to
Main Power Switch
Press to switch on the main power. The set will go into power on or standby mode and the
Program Selector CH+ and CH- buttons
Under standby mode, press CH + or CH - to turn the set on. Press CH+ to select upwards the
Volume V+ and V- buttons
Press V + to increase the sound level or V - to decrease the sound level, volume bar
MENU and OK button
To minimize the number of keys on remote , the less frequent used
EN 6
menu.
CH+ and CH- keys for selecting items in a particular menu.
V+ and V- keys for changing the value of selected item .
OK key to enter a Sub menu.
5
SCRAT )and AV2( Front AV Socket).
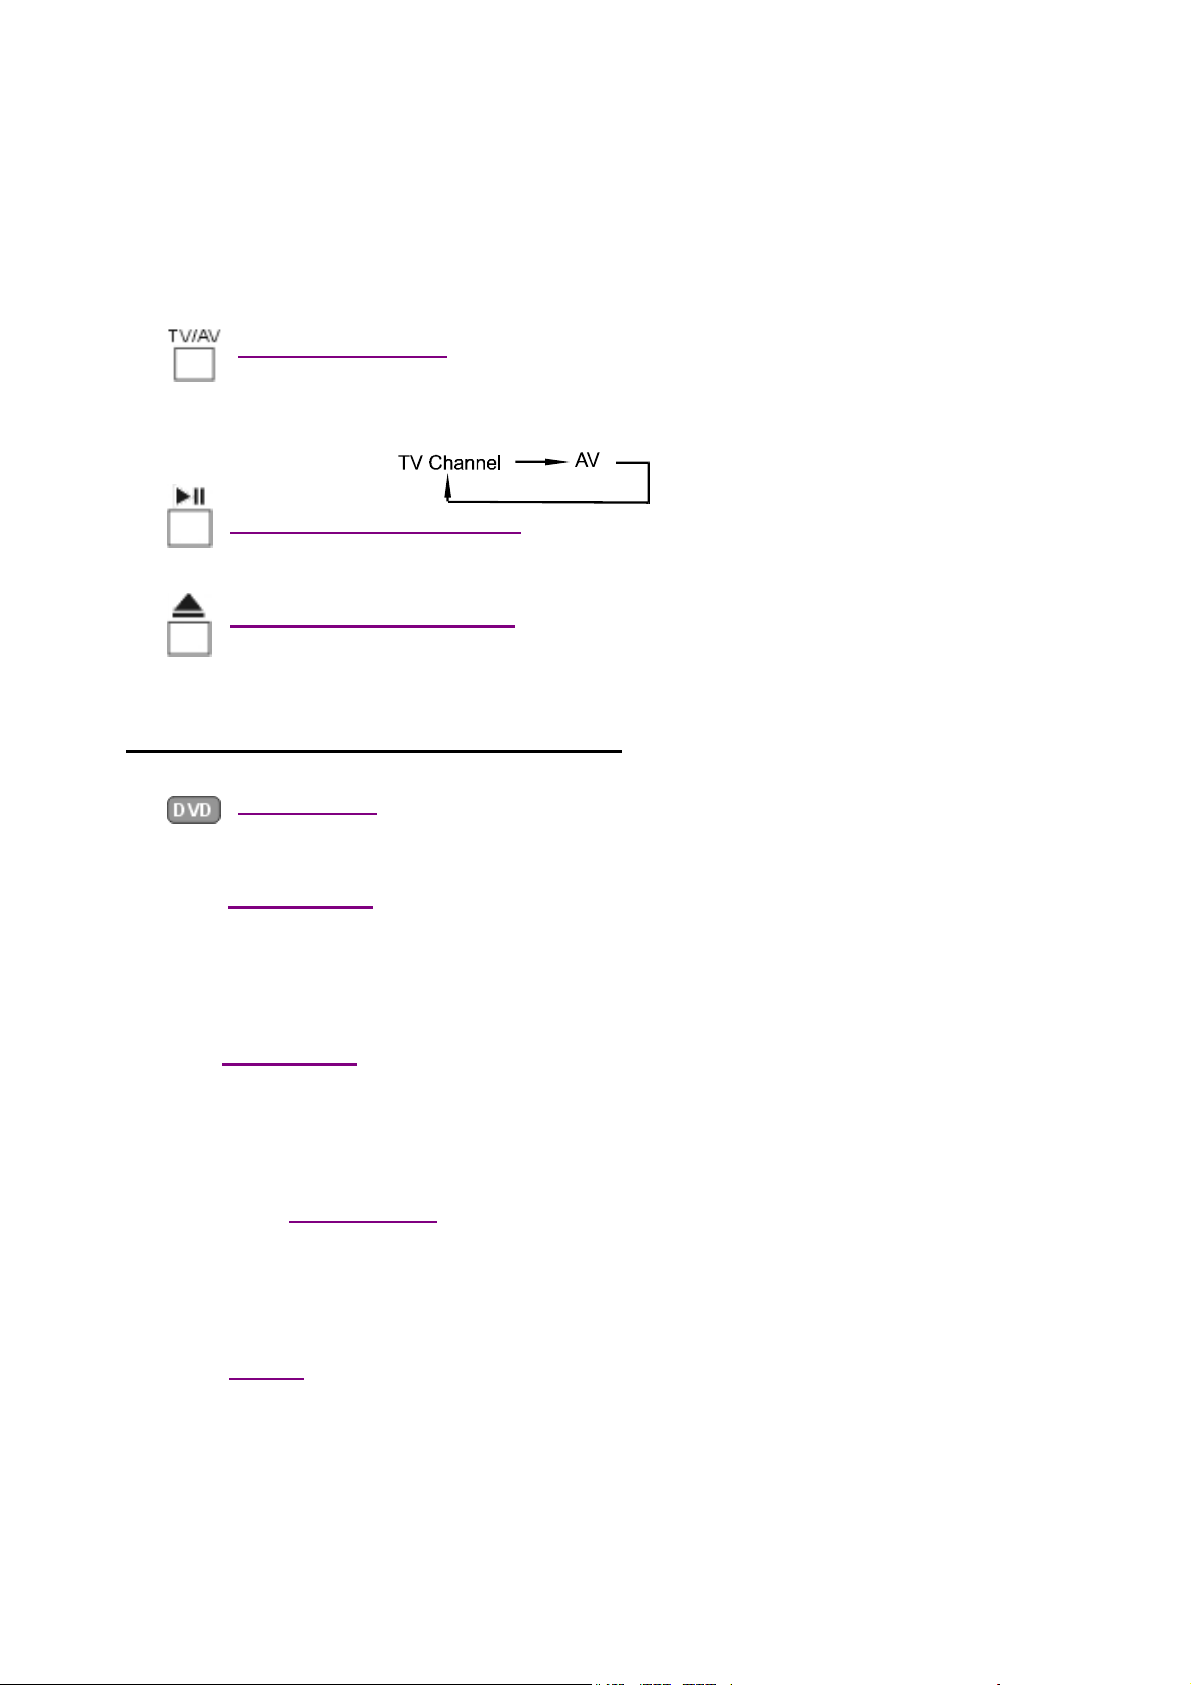
AV Switch button
Select external video to view. Press the button once to viewing program from AV1 (AV
6
7
pressed, and comes out when it is pressed again.
DVD Play/Pause buttons
The play will be paused when this key is pressed once. When it is pressed again, play will conti n ue.
DVD Open/Close buttons
This key is used to control the entry and exit of discs. The tray enters when it is
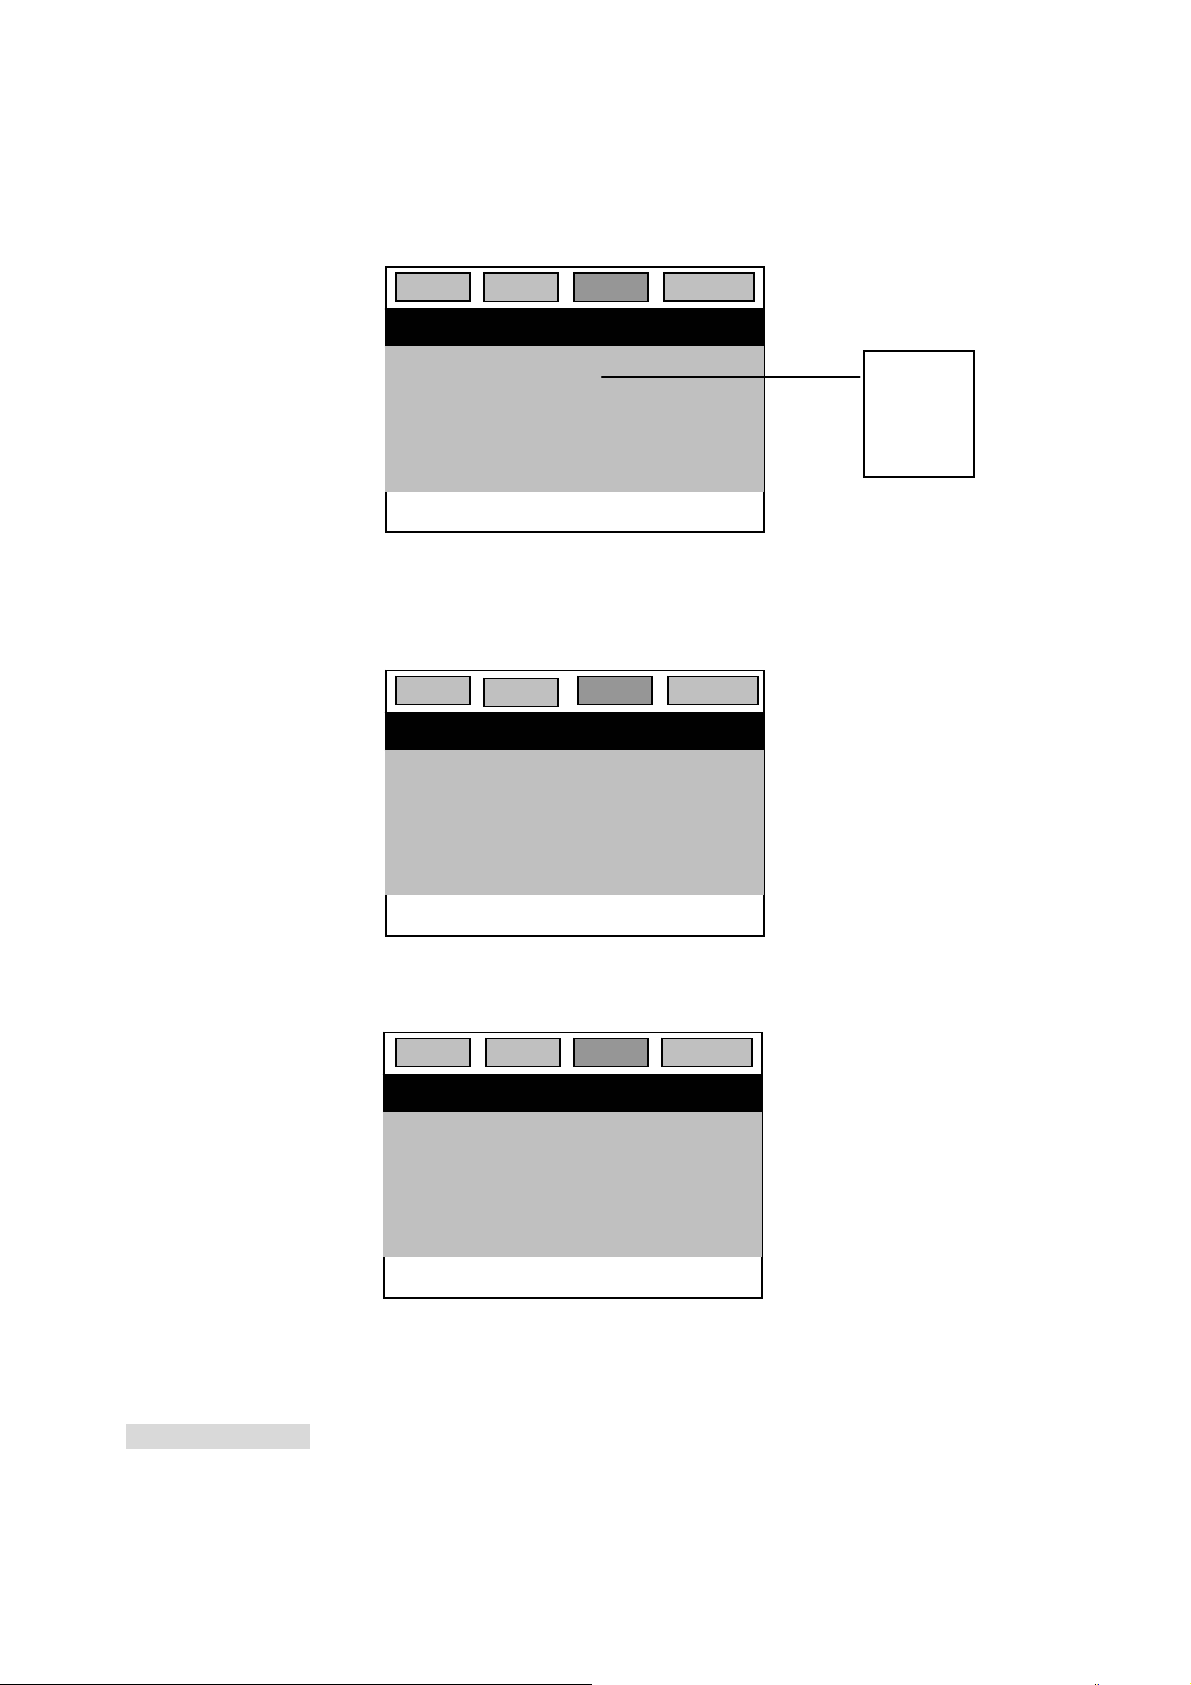
Operations by the keys on the Remote Controler
1
2
controller use for TV mode and teletext mode.The TV mode key is red light when press TV or TELETEXT
key .
3
Press again into standby .
4
5
program 23 , press key --/- to see -- on the screen , then press 2 and within 2 seconds of pressing 2 ,
press key 3. If key 3 is not pressed within 2 seconds the program accessed is program number 2.
DVD /TV key
Press "DVD/TV" key to turn on the DVD, When it is pressed again, to turn on the TV.
TV mode key
Press TV mode key, the red light shows the remote controller changed to TV mode. This remote
POWER key
This key turns the set from the standby condition into ON. Picture and sound will appear,
0-9 digits key
Press to select TV stations directly, program number will be displayed on the screen for 4
sec.
--/- key
For programs 10~99, it can be accessed by pressing key --/- first, Say if you want to access
EN 7
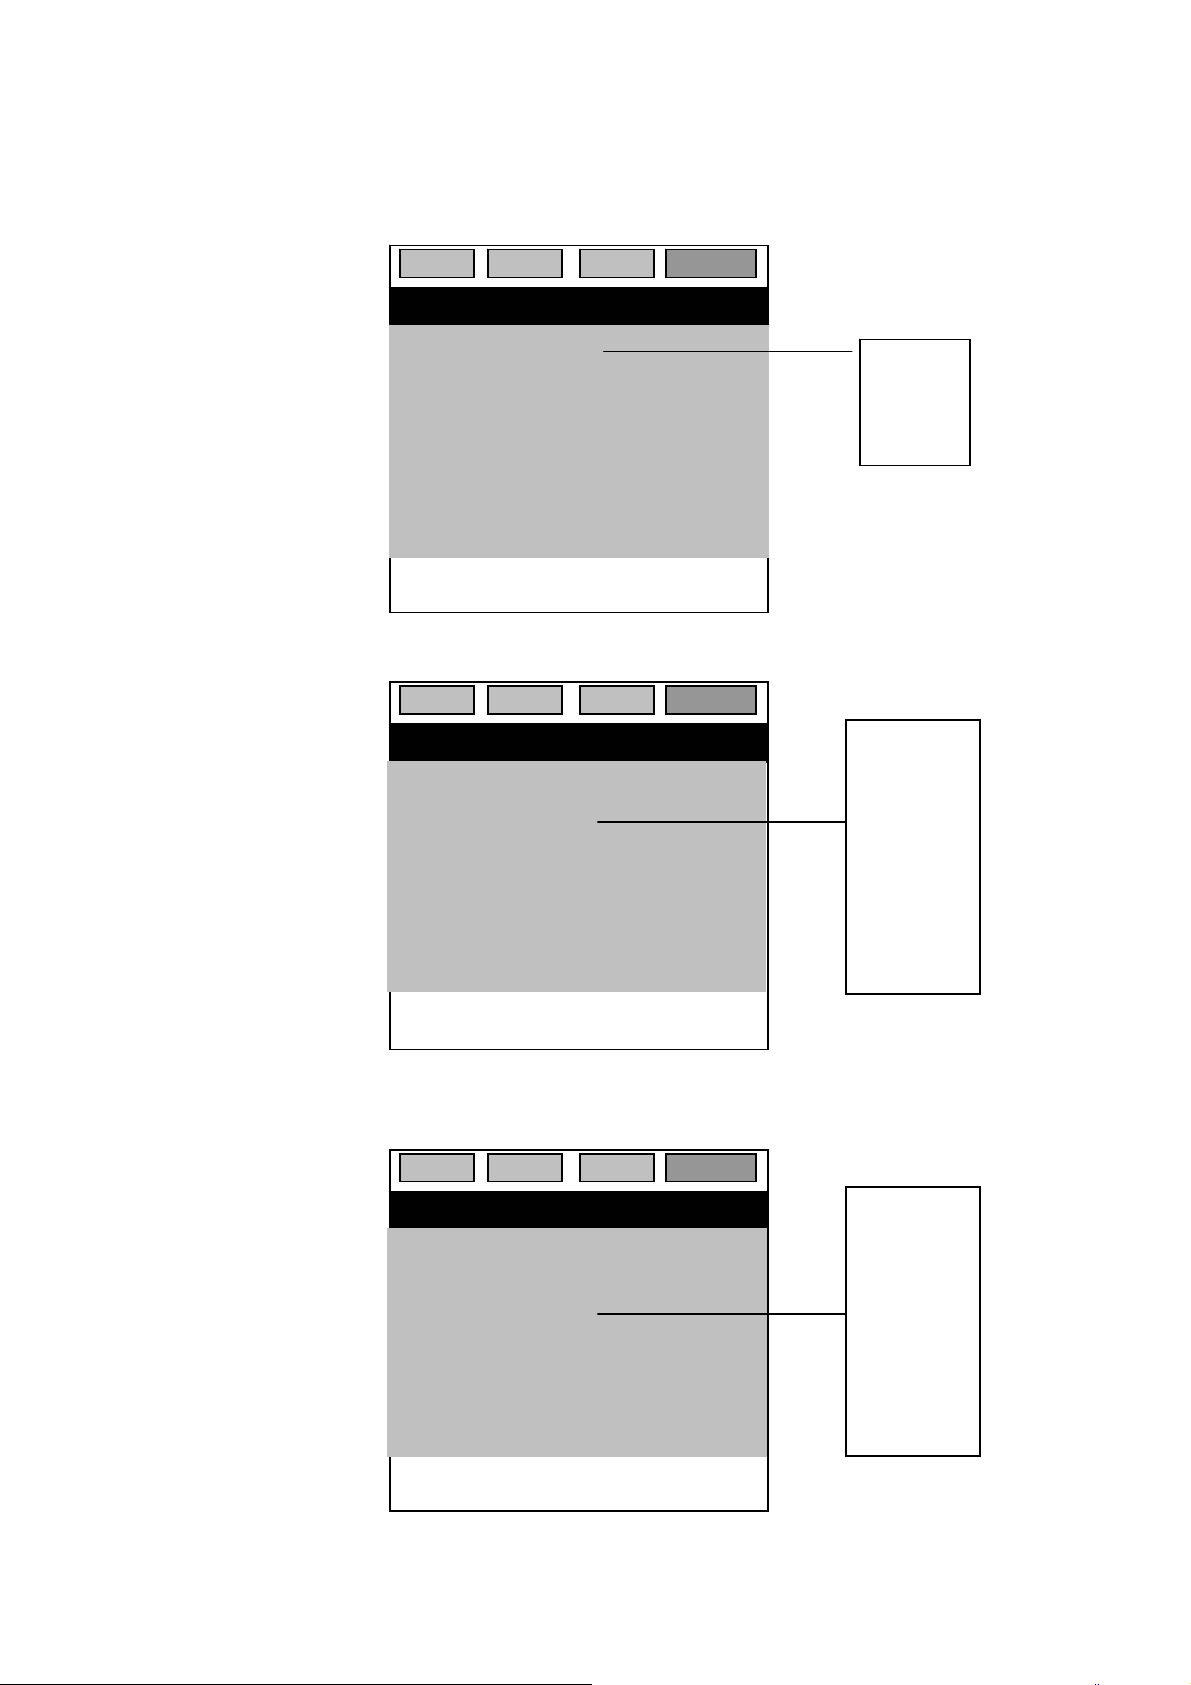
AV key
6
Select external video to view. Press the button once to viewing program from AV1 (AV
SCRAT Full Scart) and AV2 (Video, Audio).
7 CH+/CH- key
Press CH+ to select the stations upward and CH- to select downwards, program
number will be displayed for 4 sec. When Teletext is active, these keys increase or
decrease the current teletext page.
8 V+/V- key
Press the V+ or V- to set the sound level higher or lower, volume bar will be
displayed.
9
10
MUTE key
Press to switch off the sound temporarily. The mute sign will be displayed. Press again to recover
the sound from mute.
STATUS key
Press to view present program number, system, Status display will last for 4 sec.
11
SLEEP key
The set will switch OFF if the sleep timer expires . The Sleep timer can be
set in steps of 10 minutes with a maximum of 120 minutes.
12
RECALL key
Press it for the first time to view the previous program. Press it for the second time to
return the present program.
13
P.P. key
The TV picture can be adapted to suit the current lighting conditions. Press
Successively to select the desired settings. The same key is used in TXT.
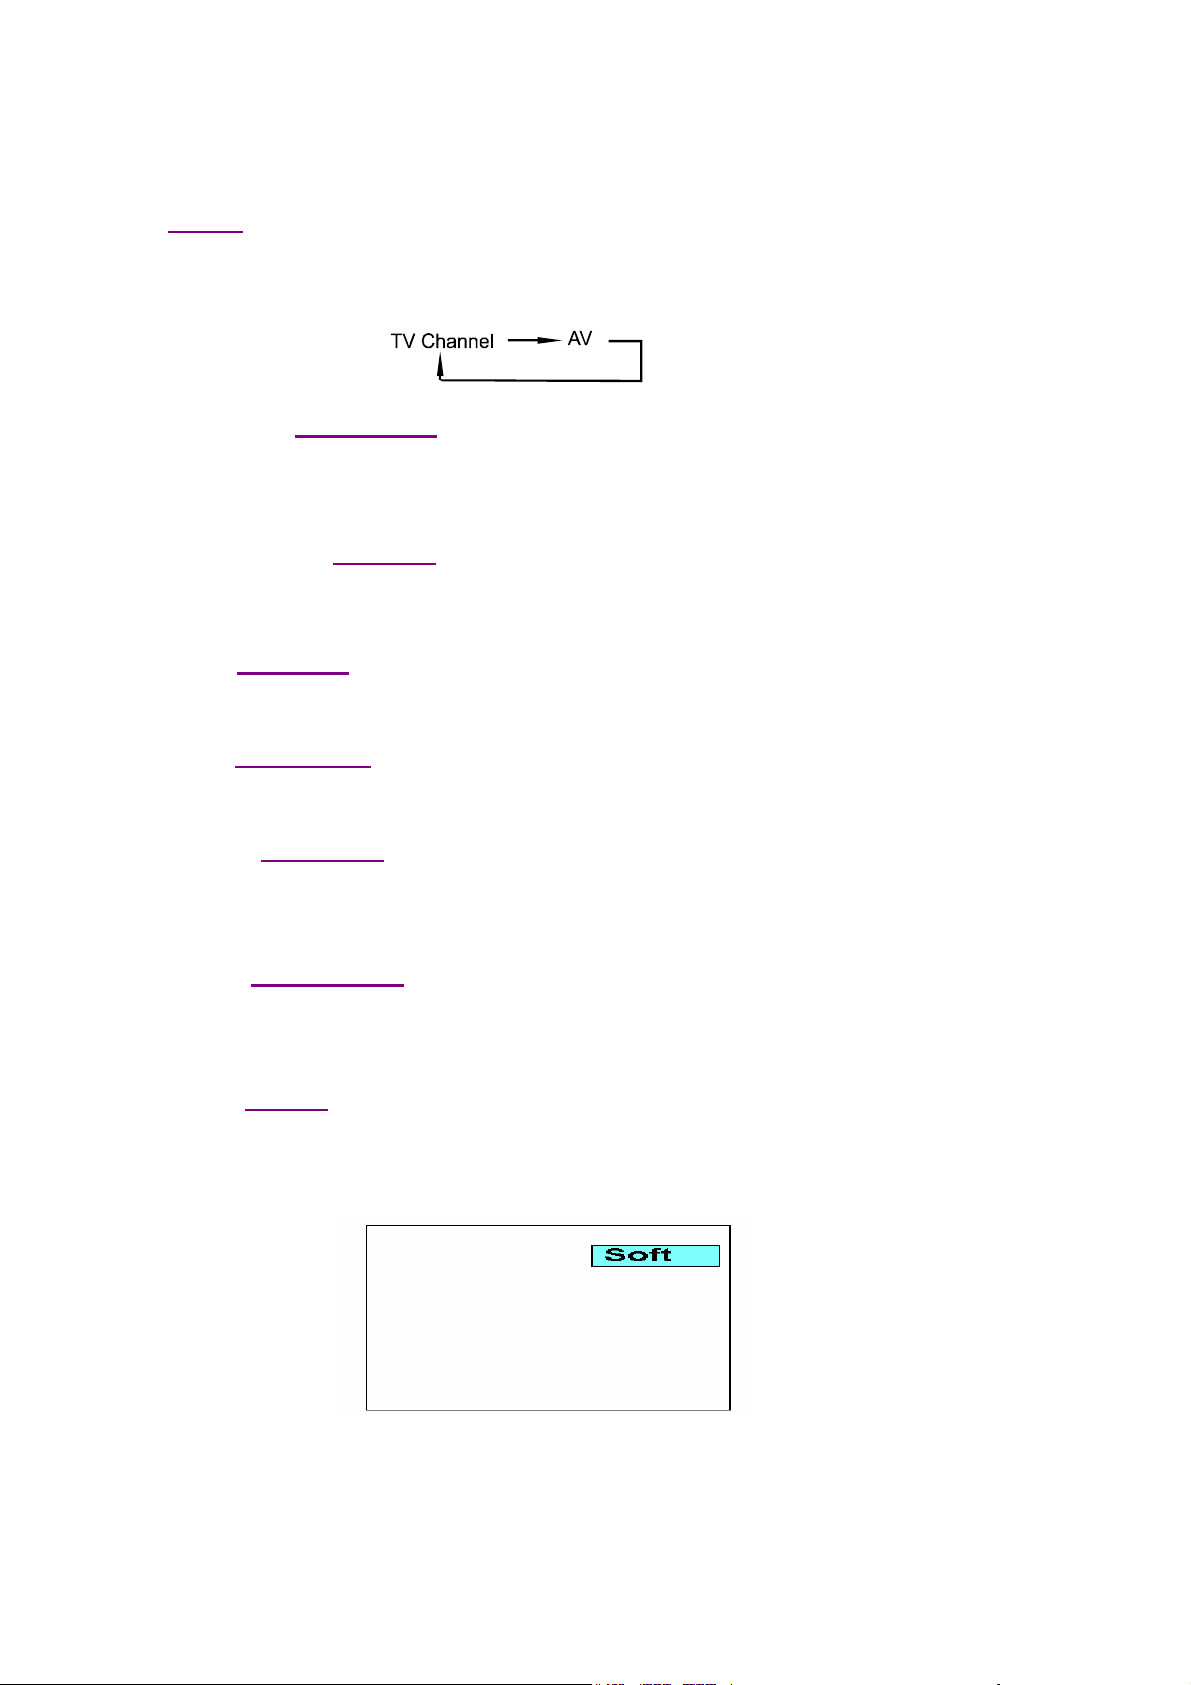
Soft Dynamic Favourite Standard
STANDARD, SOFT and DYNAMIC are preset values of Brightness, Contrast and
Colour, whereas F AVOURITE is the last analog setting that the user had set.
EN 8
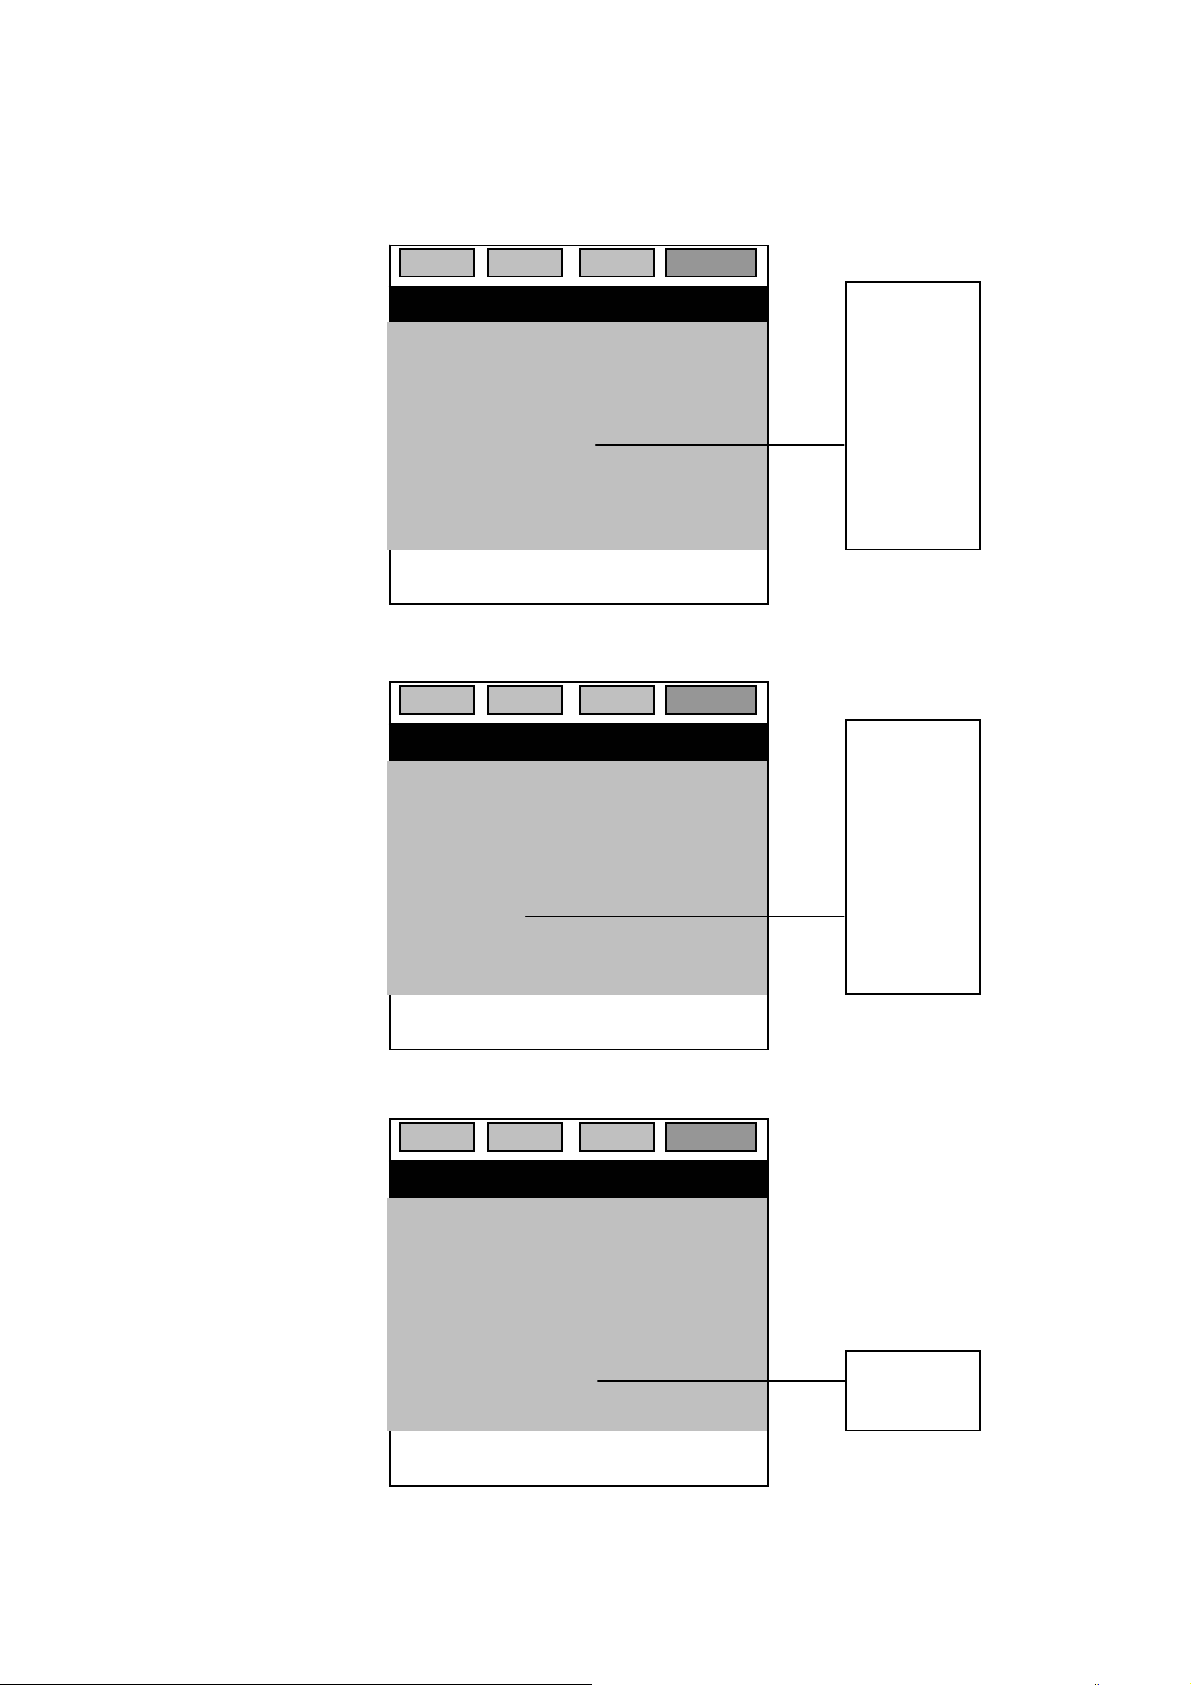
14 ANALOG key
Press key ANALOG you will have the right to choose the picture and sound settings
as follow:
VOLUMEÆBRIGHTNESSÆCONTRASTÆCOLORÆSHARPNESS
The same key is used in TXT.
15
MENU and OK keys
This menu contains four sub-menus used for selecting various
parameters of picture and sound or various Ti mer, tuning functions.
Press the MENU key continuously, the following menus will appear in turn:
Picture MenuÆ Install Menu Æ Setup Menu Æ Menu Off.
It is also used to return from a submenu to menu.
CH+ and CH- keys for selecting items in a particular menu.
V+ and V- keys for changing the value of selected item .
OK key to enter a Sub menu. The key is also used in TXT.
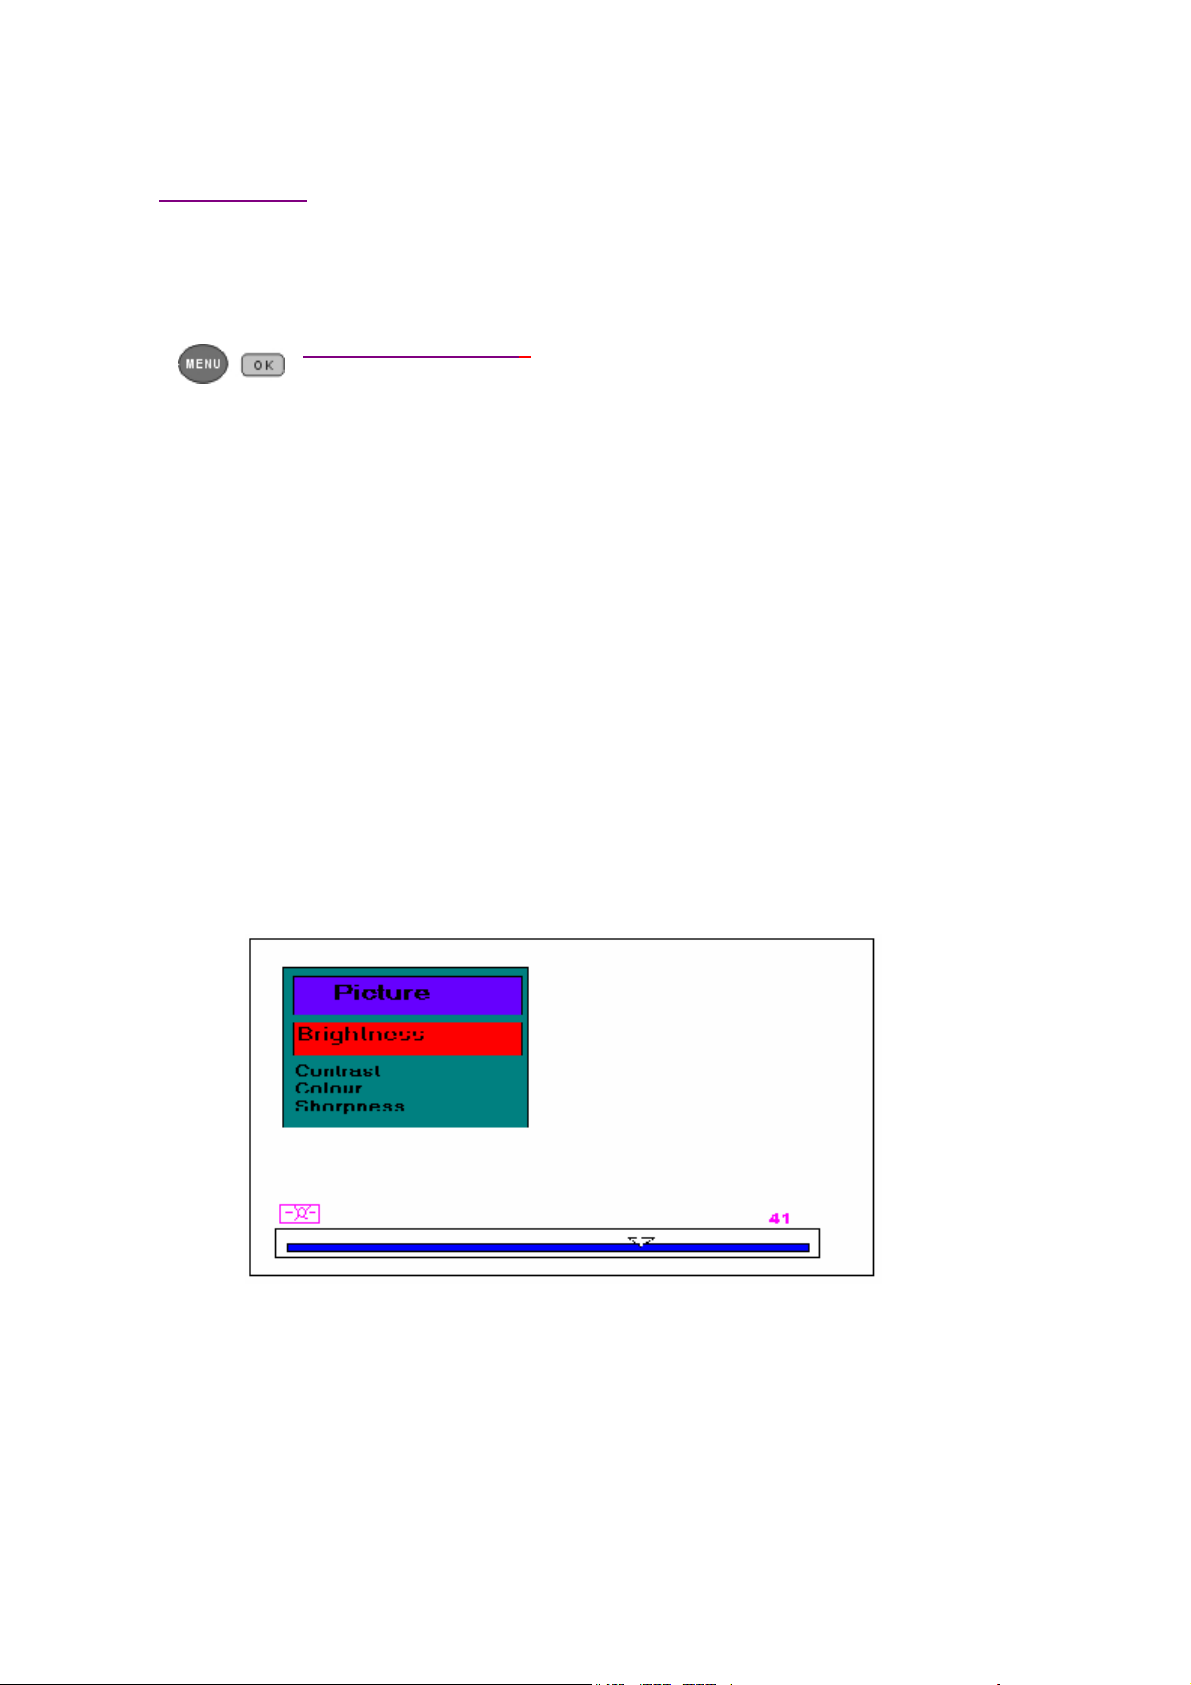
15.1 PICTURE MENU :
If press the Menu key for the first time, we can get Picture menu.
The Picture menu has following Sub menus :
a) Brightness (64 Steps )
b) Contrast (64 Steps )
c) Colour (64 Steps )
d) Sharpness (16 Steps )
These items could be selected through CH+ / CH- keys. All items could be varied using
V+ / V- keys. The graphic and numeric display of the control level of selected item is
displayed at the bottom of the screen.
15.2 INSTALL MENU :
The Install menu has following 4 items :
a) Auto Tune
b) Manual Tune
c) Fine Tune
d) Store
These items are accessed using CH+ / CH- key.
EN 9
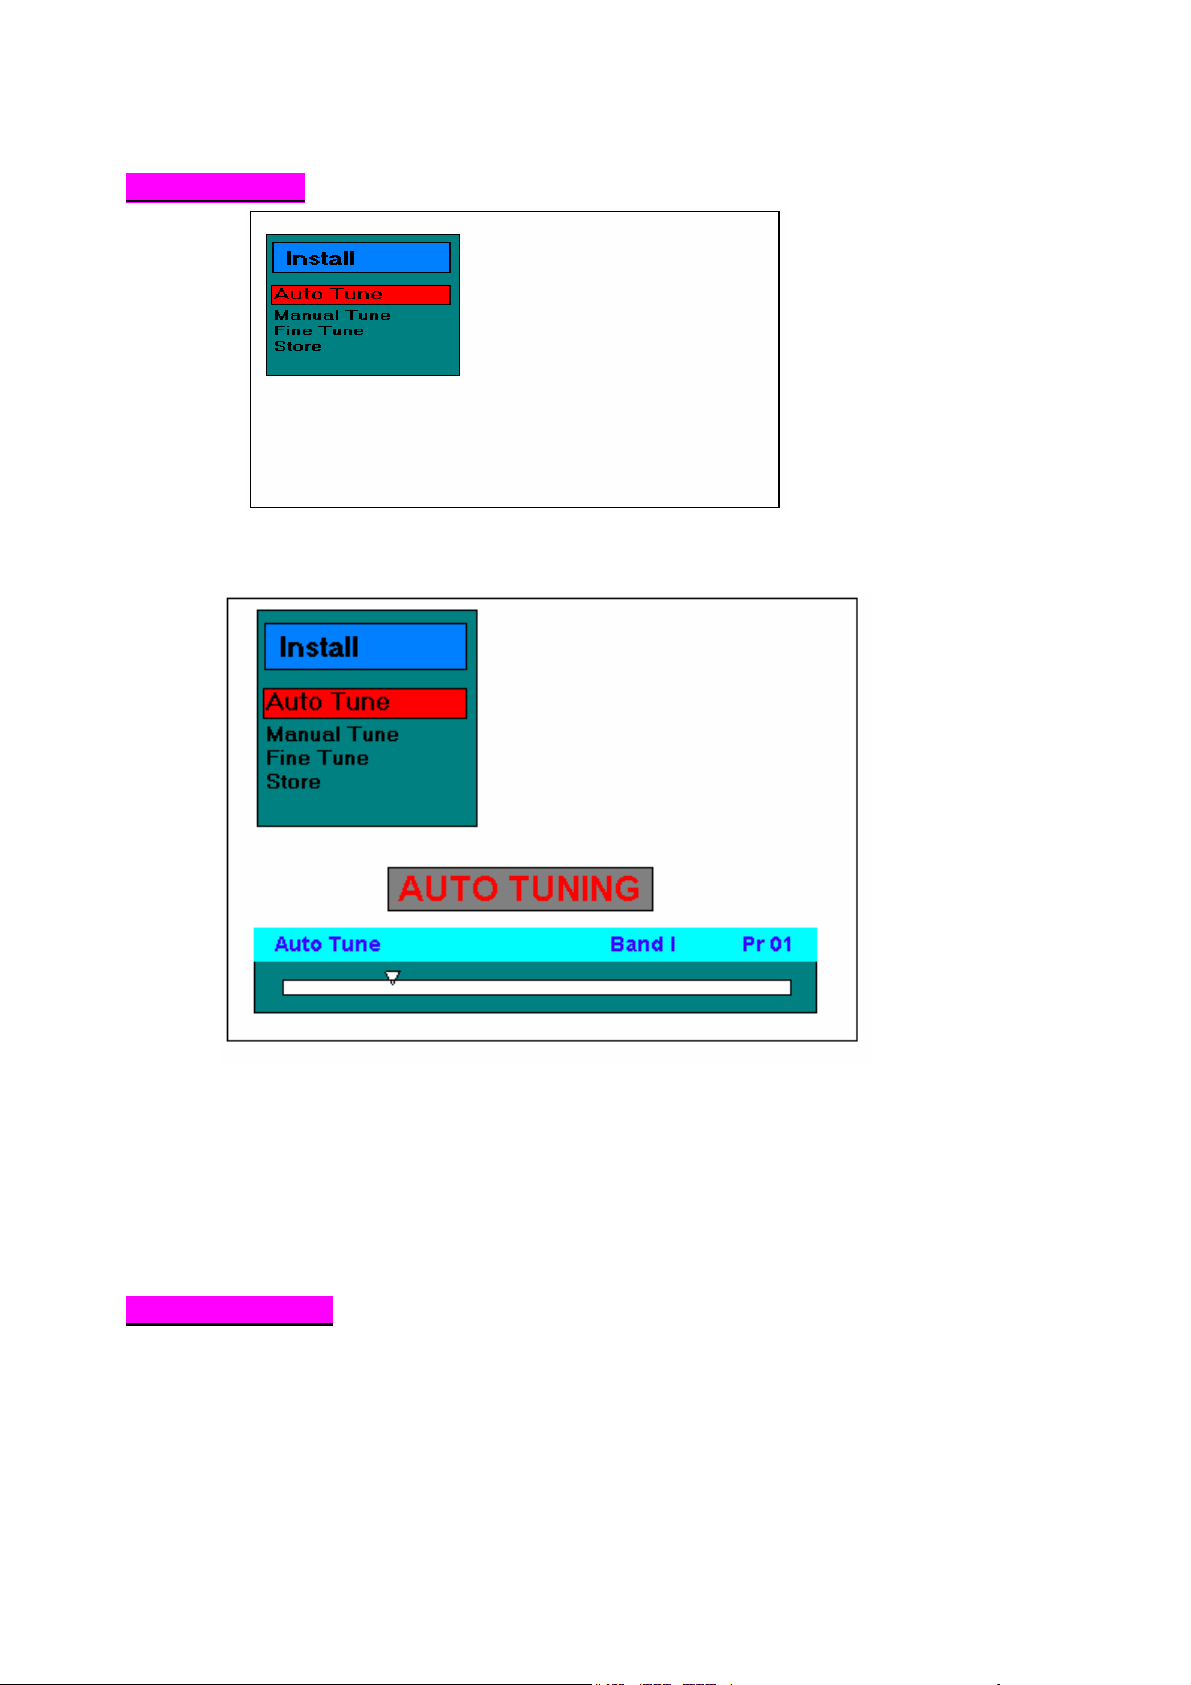
For Auto Tune :
If Auto Tune is selected in this menu, then by pressing OK key on Auto Tune will start
the auto search process.
Auto Tune will automatically search through all the bands for any available stations in
transmission and store them consecutively into program numbers 01 onwards.
Progression of operation will be indicated by moving of bar display , changing of band
and program number. The Auto Tune can be aborted using MENU or POWER Key.
Whenever a program is stored the Colour system is put as AUTO . For sound system the
Carrier levels ( 4.5 / 5.5/ 6.0 / 6.5 MHz) are compared and the one with the highest level is
tagged with the program. Also the label is reset back to - - - -.
For Manual Tune :
If Manual Tune is selected, by pressing V+/V- key , Manual Tune will start and display as
following will appear on screen.
EN 10
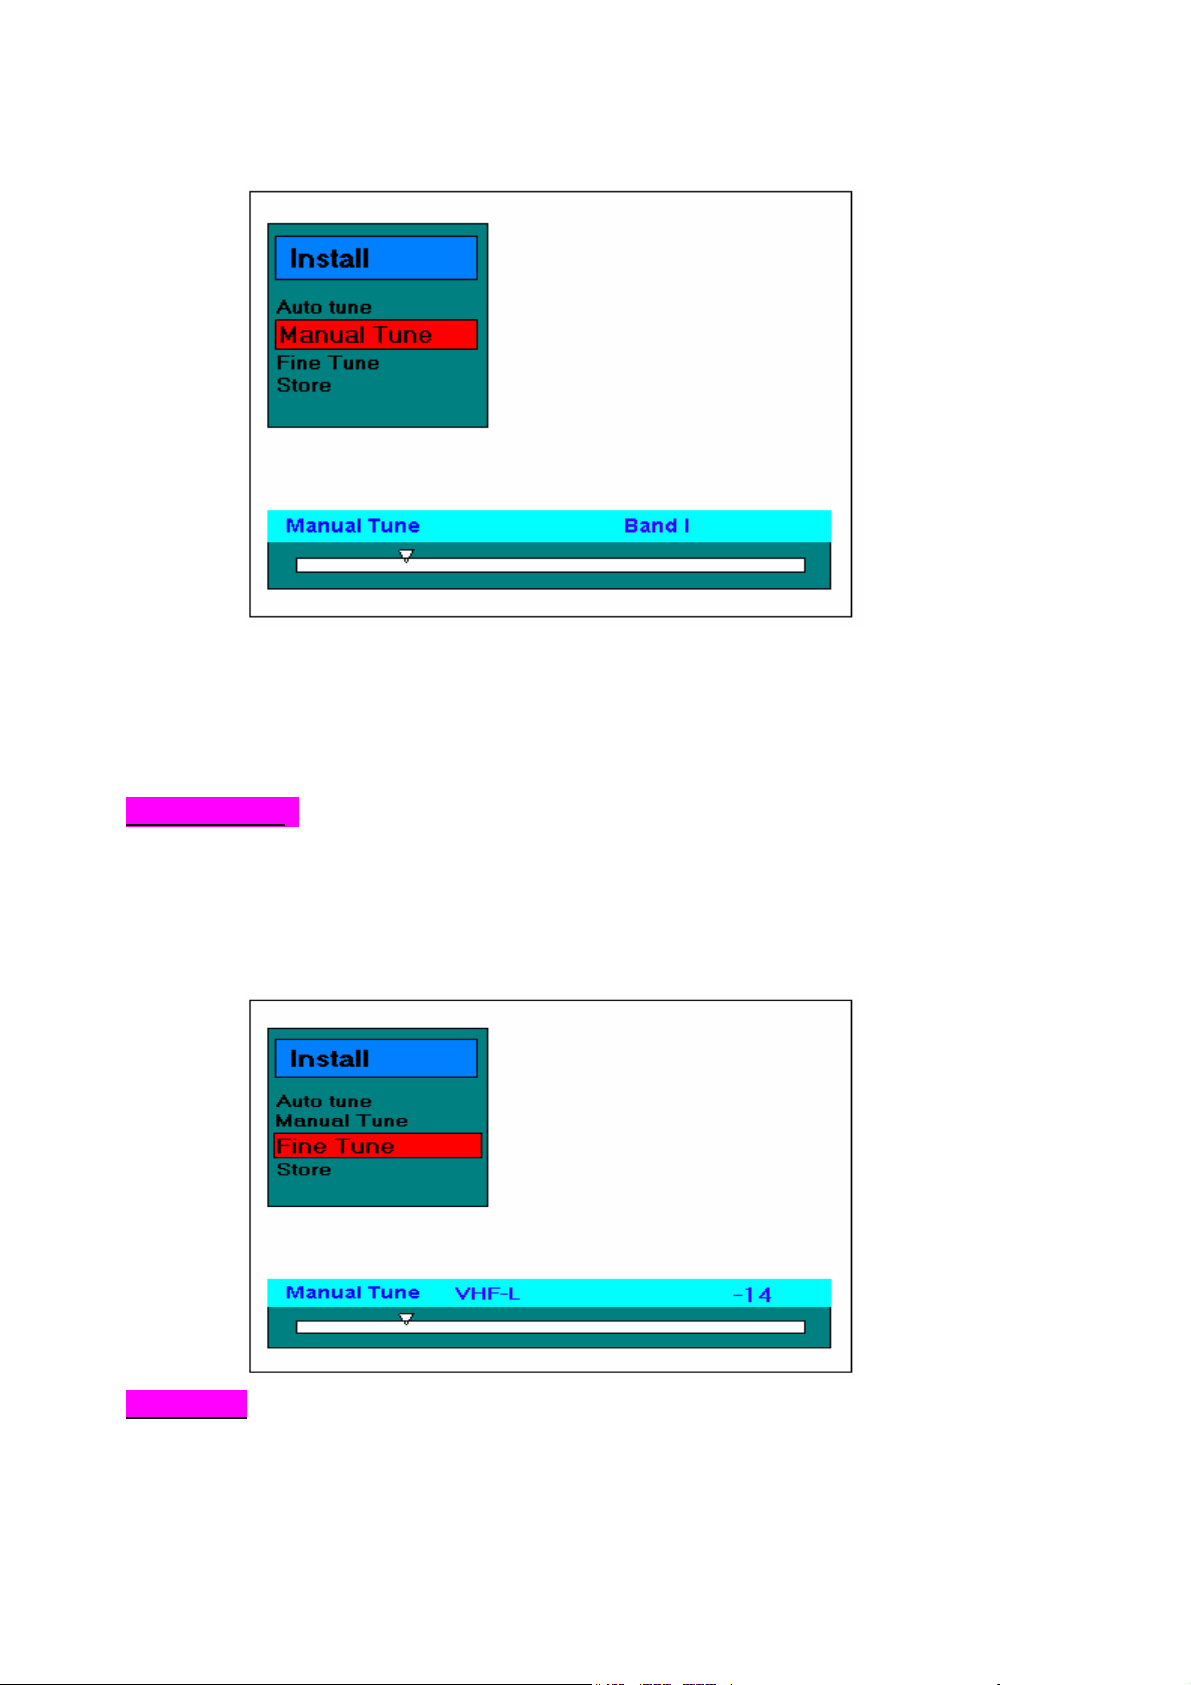
If V+ key was pressed in Manual Tune ,it will search for next available station and Stop
where the signal is received. If V- key is pressed it searches in the negative direction and
will search for the previous channel.
During Manual Tune only MENU and POWER key is recognised , rest of the keys are
ignored.
For Fine Tune :
If Fine Tune is selected, activation of V+/V- key will tune forward / backward. The bar
graph will show the deviation in positive or negative direction with repect to the Stored
tuning information.
If user stores the fine tune value by using the STORE function, the value will effective
even if the TV set have been shutdown.
For Store :
When OK key is pressed from item Store , another submenu appears with 2 items
namely Program ( Program number to which you want to store the tuning info ) and
Store.
EN 11
If item Program is selected , activation of V+ / V- keys will increase/decrease the program
number entry. It can also be done by direct digit keys (Key 0 to 9 on remote handset).
When item Store is selected and OK key is pressed ,the existing tuning information along
with AUTO colour standard and sound standard (based on sound carrier strength level)
will be stored in the Program number entered in item PROGRAM and OK display will
appear beside item Store.
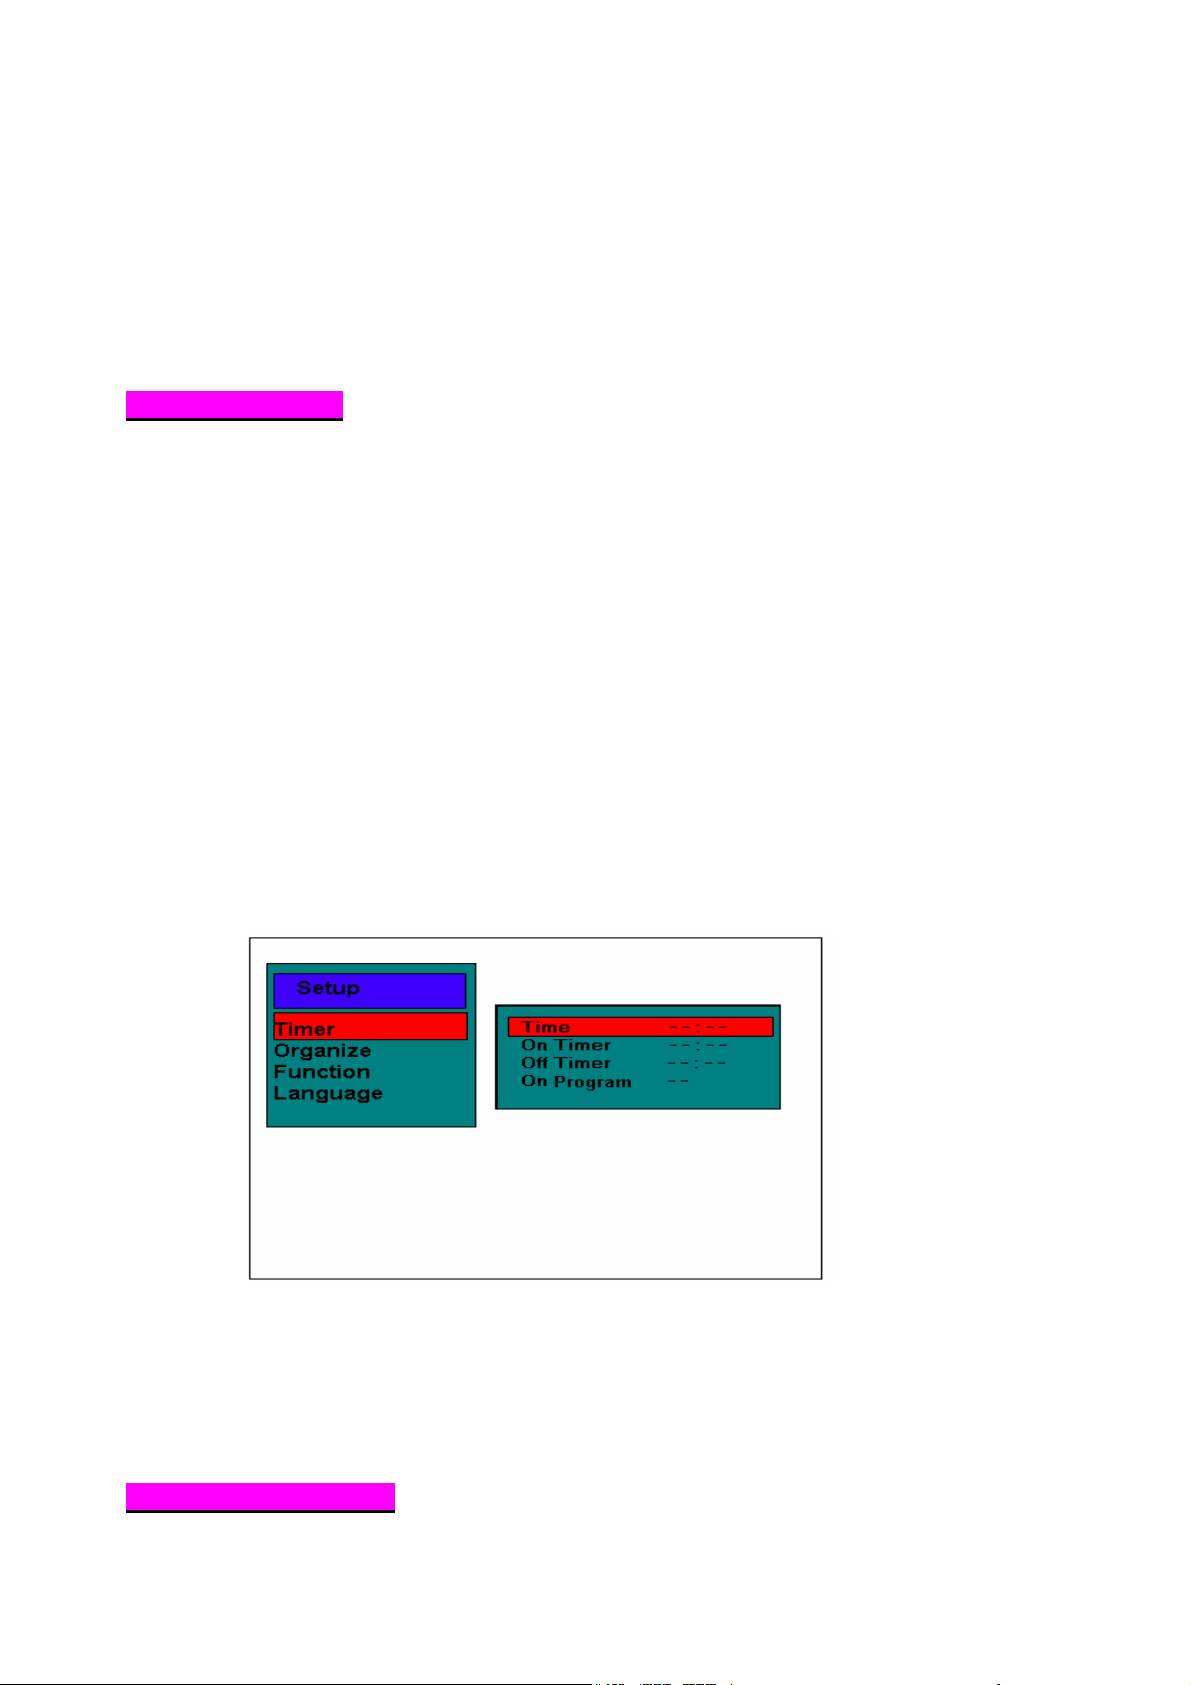
15.3 SETUP MENU
TIMER SUBMENU :
The Timer submenu has following items :
a) Time _ _ : _ _
b) On Timer _ _ : _ _
c) Off Timer _ _ : _ _
d) On Timer Pr_ _
Sub-menu is accessed using OK key.
For items (a) to (c) the V- key is used to change the hour (0 to 23) and V+ Key to change
minutes (0 to 59 ) . For item (d) V- key is used to decrement On Timer Program number
and V+ key is used to increment On Timer Program number(0 to 99).
The On/Off Timer and Program number will be disabled when the TV set is Power on.
However, these setting will keep on when TV in Standby mode.
Auto ShutOff Timer :
When no Front end IDENT (from RF) is detected for APP. 5 minutes, the set will switch to
standby automatically .
ORGANIZE SUBMENU :
EN 12
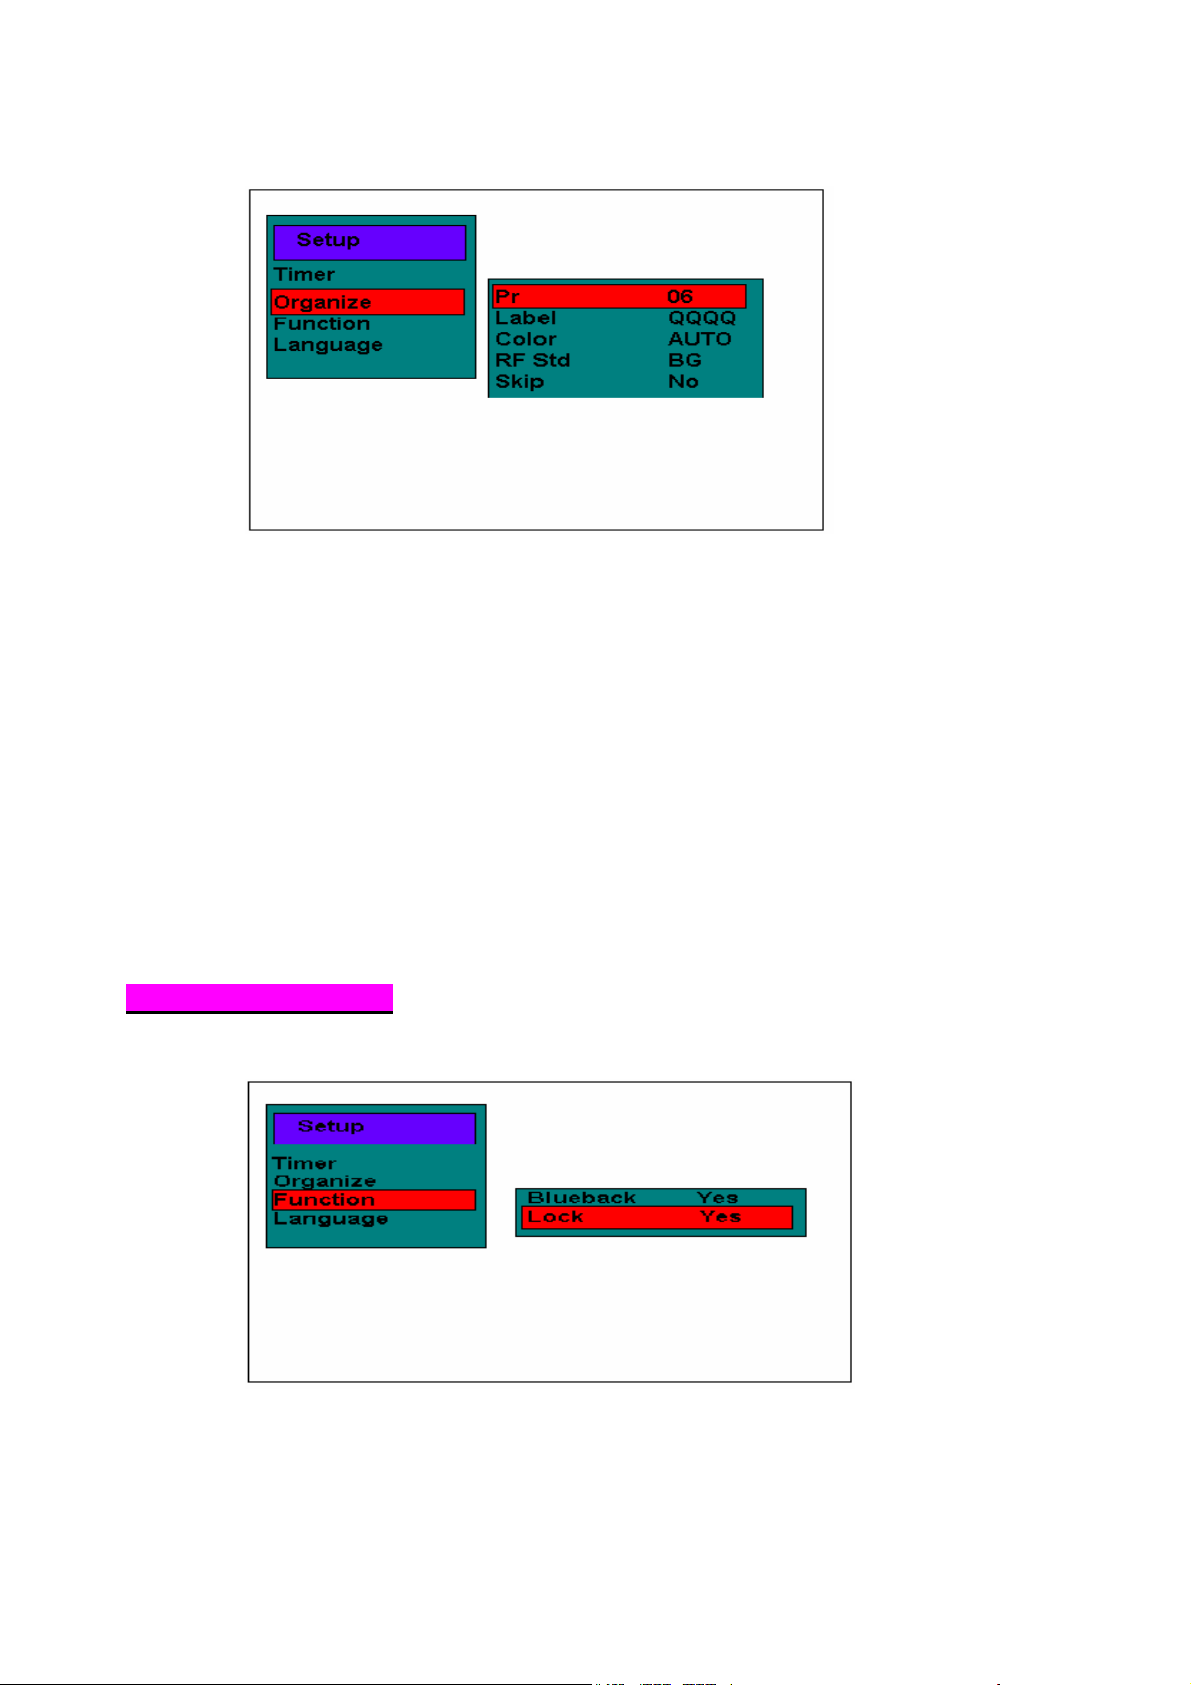
For Pr : Press V+/V- keys to Select a particular program.
For Label (ACTIVE ONLY IN ENGLISH): V+/V- keys are used to jump from one column
to other. Red background shows the row selected and the selected column is blue and
flash.
To access alphanumeric characters in the sequence A to Z ,+ , -, SPACE and 0 to 9 for
CH- key and in reverse order of sequence for CH+ key.The label hence gets tagged to
the particular program.
For Picture : Select Colour standard as AUTO, PAL , SECAM, NTSC1(4.43MHz),
NTSC2 (3.58MHz) by pressing V+/V- keys.The Standard selected gets tagged to the
particular program.
For RF Std : Select RF standard as BG/ DK/ I/ MN by pressing V+/V- keys. The Standard
selected gets tagged to the particular program.
For Skip : To Skip or not the particular channel by pressing V+/V- keys. You can still use
the direct number keys to enter into the skipped channels.
FUNCTION SUBMENU :
If the Function selected and press OK key, the Function submenu will displayed. One of
the items is accessed using CH+/CH- keys, the setting changed by using V+/V- keys.
If the lock is changed from No to Yes, the lock menu will appear. In this mode, three digit
can be keyed in and saved as the locking number. When the next time the TV is power
on, the user must key in the locked numbers to enter the TV. And it’s convenience for
user to use the P.P. when they forget the lock number.
EN 13
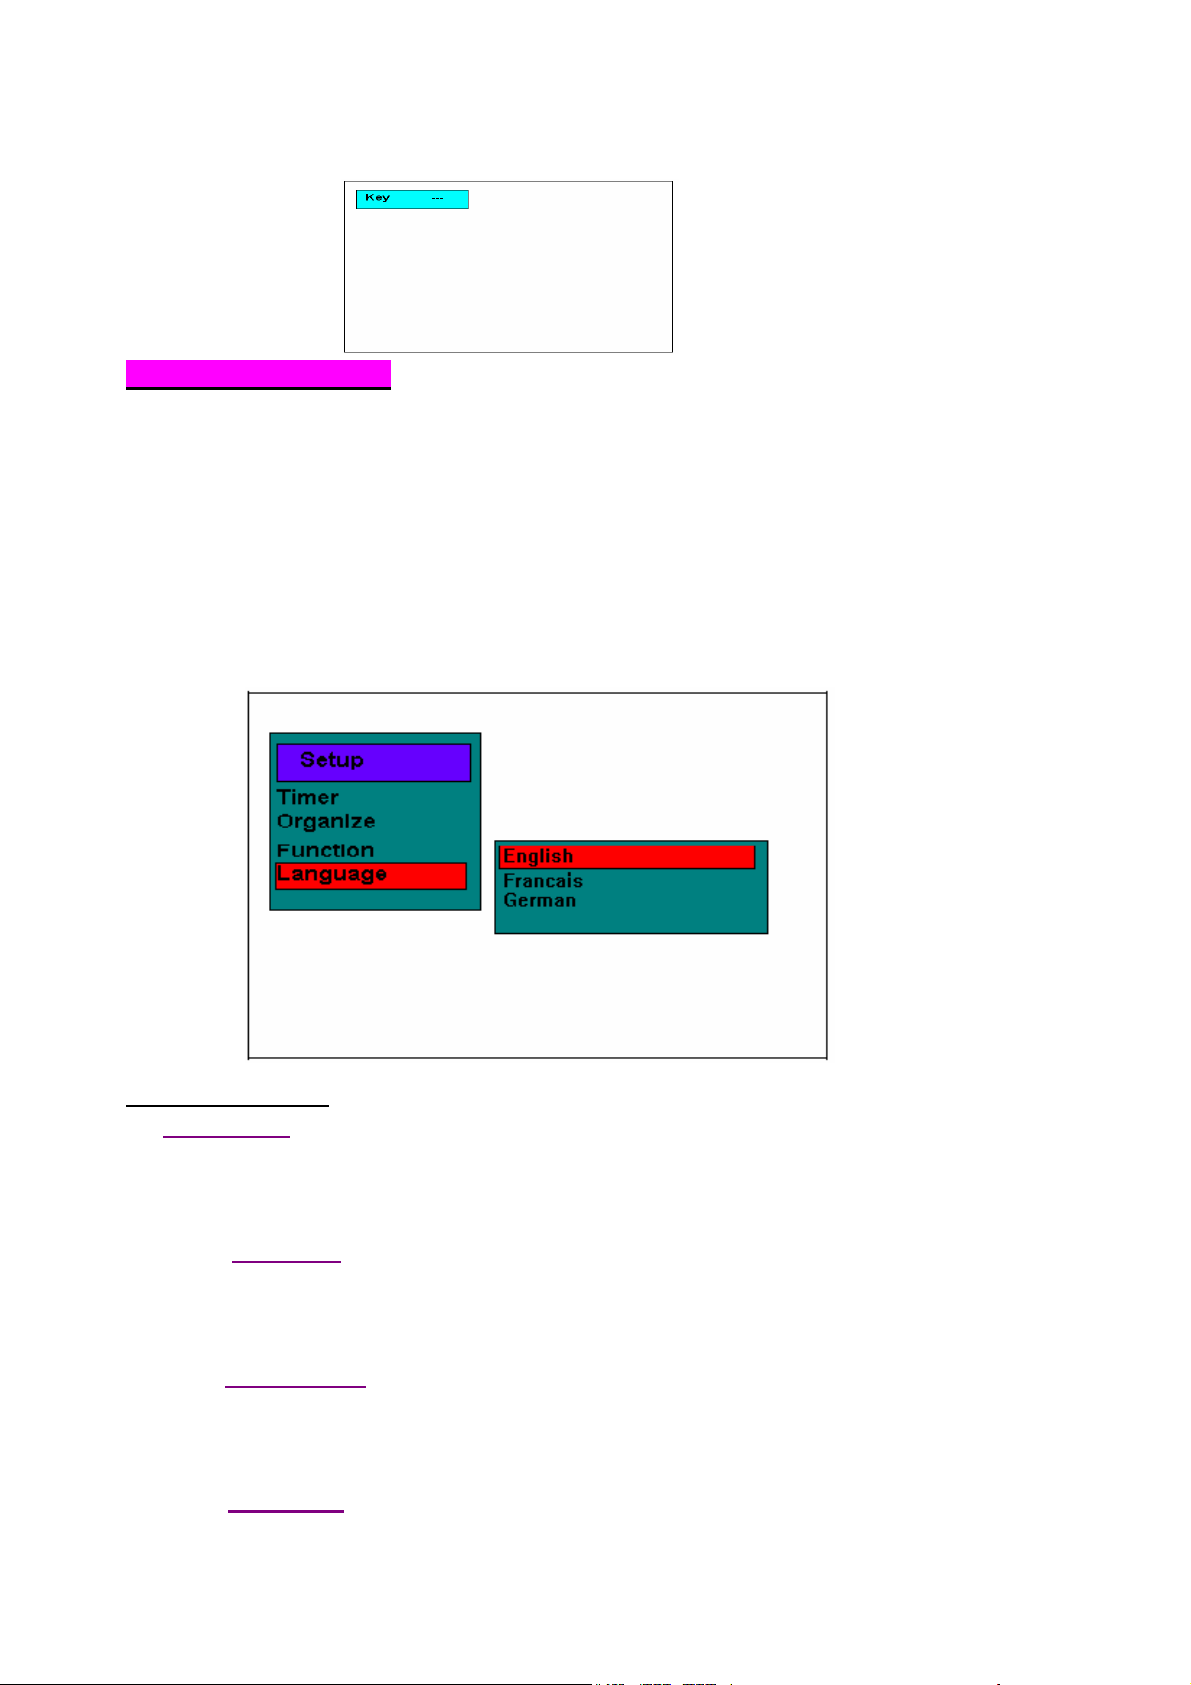
LANGUAGE SUBMENU :
If compilation option LANGUAGE is selected, Language menu appears on the screen.
The Language menu has Following twelve items :
ENGLISH, FRENCH, GERMAN(Deutsch), ITALIAN, DANISH, SWEDISH, NORWEGIAN,
SPANISH, PORTUGUESE, DUTCH(Nederlands), FINNISH(Suomi), GREEK.
One of the languages is accessed by using CH+/CH- keys.
TELETEXT mode
1 TV/TXT key
Press the TV/TXT key to change the viewing condition from TV to Teletext if TV stations in
your local have teletext broadcasting.
2
STOP key
This is a toggle function key which stops the current page acquisition to prevent teletext
update. STOP can be released by requesting 3 digits page number again.
3
REVEAL key
This is a toggle function key to display hidden characters.
4
ZOOM key
EN 14

This key is to expand character size and display half teletext page. Each press will display upper
– tower – normal page.
5
Mix key
This is a toggle function key to display TV picture and teletext together or teletext only.
6
SUBCODE key
This key allows the user to enter 4 digits subcodes for the current page. If subsequent digit
is not entered within 5 sec, previous page number will be recalled and displayed on
the screen.
7
Index key
Press this key will show the index page.
8
OK/ P.P. /ANALOG and P.S. key with Color key
These 4 color keys in teletext mode can quickly enter the pre-captured teletext pages.
9
CH+/CH- keys
CH+/CH- key can be used as a page up/down key in teletext mode.
10
CANCEL key
This is a toggle function key to display the latest TV picture from the current teletext
page or vice versa.
DVD Player Operation
DVD Mode operation key
0
remote controller use for DVD mode , The DVD mode key is red light when press DVD key .
1 OPEN/CLOSE key
2 0-9 digits and --/- keys
DVD mode key
Press DVD mode key, the red light shows the remote controller changed to DVD mode. This
This key is used to control the entry and exit of discs. The tray enters when it is pressed, and
comes out when it is pressed again.
"0-9"、"--/-" are number keys for program selection.
EN 15

3 ZOOM key
With this function, you can view an enlarged picture and the expanded view range with ease.
4 REPEAT key
By pressing this key, a chapter, title or the whole program can be repeated
5 TITLE key
When this key is pressed, player will stop and it will go back to the title menu of the disc.
6 PROGRAM key
You can display with your own programming by pressing this key.
7 ANGLE key
When a displaying disc contains multi-angle video flow, it can be used to change view angles for
your favorite angles.
8 A-B key
You can repeat the play of specific chapter from A to B by pressing this key to set point A and then
pressing it again to set point B.
9 FAST FORWARD and BACKWARD key
By pressing this key, you can look for your favorite pictures by fast forward or backward at 2, 4, 8 ,16and 32
times normal speed.
10 PLAY key
The set will Enter play when this key is pressed once.
11 PREVIOUS and NEXT key
During display, you can press the corresponding keys to directly jump to the next or previous music or program.
12 PAUSE key
The play will be paused when this key is pressed once. When it is pressed again, play will conti n ue.
13 STOP key
Display is interrupted when it is pressed. When the play button is pressed this time, display will continue from
the interrupted point. The continual display function is cancelled when this key is pressed two times in
succession.
14 SLOW key
It enables slow display at 1/2, 1/4, 1/8,and 1/16 times normal speed.
EN 16

15 L/R key
Pressing “L/R" key, you can switch over between different audio channels, providing multiple
choices for users.
16 SETUP key
This key is used to set DVD internal function menu.
17 DIRECTION (UP,DOWN,LEFT,RIGHT) key
By pressing these keys, you can select sub-menus in a menu.
18 ENTER key
After a function is selected, this key is used to determine the function or the display.
19 LANGU (LANGUAGE) key
Pressing "LANGU" key, you can switch between different languages built in on the DVD disc.
20
button to access this feature.
The TV screen will show menu picture and use arrow button to scroll. To confirm selection, press (PLAY) button.
Alternatively, use the Number button to select.
MENU key
When playing DVD discs, some discs contain title menus or chapter menus, press (MENU)
21 CLEAR key
The clear button is only available in certain mode Alternatively press. For example .Press
CLEAR button to clear a bookmark.
22
DISPLAY key
You can press this key to control the DVD information display.
23 SUB-T(SUB TITLE) key
With this key, you can switch over subtitles of different languages built-in on the DVD disc.
24 STEP key
For DVD Discs, when playing the picture frame-by-frame the step function is used.
To enter this mode, press the step button.
Pressing the (STEP) button each time will advance to the next frame.
EN 17

Basic Operation
1. Press "DVD/TV" key on the remote control to turn on the DVD.
2. Press "DVD" mode key on the remote control ,the red light shows, the remote control have changed the
DVD mode,now some TV or teletext key stop working and DVD key start.
3. Press the Open/Close button on the unit or remote control, and put in the Disc when the disc tray open.
4. Press Open/Close button , the disc tray close and DVD player starts play.
DVD Menu Operation
1. Press the Direction buttons or Number buttons to select the relevant subtitle.
2. Press ENTER.
Press STOP to Stop Play.
Press Stop once to stop play, then press PLAY, it will play from the stoppage. Open the disc tray or press the
STOP twice, and continuous playing function will be canceled.
Screen Display
When DVD player play different disc, press DISPLAY button continuously, screen will display as follows:
DVD Disc: Press this button first time, it display working time of the chapter; Press it second time, display
information of OSD, caption, angle etc.
VCD or SVCD: Press the button, it will display trace play time, track no, PBC etc information.
Select Title
1. Press TITLE, play will be stopped and return to subtitle menu of the disc.
2. Press the direction key or number key to select the subtitle.
3. Press ENTER to enter into chapter menu. (If user presses number key during the second step, enter
the chapter menu without pressing ENTER key.)
NOTE:
Title button are workable when DVD player plays DVD disc only.
Select Menu
1. Press LIST button, play will stop and return to chapter menu of the disc, user can enter into the
chapter menu by select subtitle, too.
2. Press direction key or number key to select the chapter.
3. Press ENTER, (If user uses number key during the second step, it plays without pressing ENTER to
play .)DVD Player will play according to the subtitle and chapter you selected.
Return to root directory
During play DVD disc, continuously presses MENU key, it will enter root directory menu directly with playing
multi-directory menu disc.
Return to favorite title and chapter during the playing
Use return function, user can start play from any place.
EN 18

1. Press TITLE, screen will display “TITLE_/_ CHAPTER_/_”
2. Press the relevant number key to select favorite title or chapter.
3. Press ENTER,DVD Player will start play from the title and chapter you selected.
NOTE:
The function is workable when play DVD disc only.
Express browse
1. Press ►► button every time, F.FWD will be circled according to as following:
F.FWD ×2: play at 2 times speed than normal speed;
F.FWD ×4: play at four times speed than normal speed;
F.FWD ×8:play at 8 times speed than normal speed;
F.FWD ×16: play at 16 times speed than normal speed;
F.FWD ×32: play at 32 times speed than normal speed;
return normal play
2. Press ◄◄ button every time, F.BWD function will cycle as following
F.BWD ×2 play F.BWD at 2 times speed than normal speed;
F.BWD ×4, play F.BWD at 4 times speed than normal speed;
F.BWD ×8, play at 8 times speed than normal speed;
F.BWD ×16, play at 16 times speed than normal speed;
F.BWD ×32, play at 32 times speed than normal speed;
return normal speed.
Slow play
When play the disc, press SLOW button continuously, SLOW BROWSE will cycle as following
SLOW PALY 1/2, play at 1/2 speed than normal;
SLOW PLAY 1/4, play at 1/4 speed than normal;
SLOW PLAY 1/8, play at 1/8 speed than normal;
SLOW PLAY 1/16, play at 1/16 speed than normal;
return normal speed.
Skip function
When play disc, press (
, ) PREVIOUS (NEXT) button, it will play previous (next) program.
Repeat play
Repeating subtitle, chapter and track
For DVD disc, press REPEAT button continuously, screen displays Chapter, Title and All in turn;
For VCD/super VCD,press REPEAT button continuously, screen displays repeating one track, repeating
whole disc and off.
Repeating given segment
1. During playing, at the start (A point) of the segment that user want to repeat, press A-B button.
2. At the end (B point) of the segment that you want to repeat, press A-B button.
3. DVD disc will return A point, and begin to repeat the selected segment (A-B).
EN 19

4. Press A-B button again, DVD player will return to normal play.
Picture ZOOM
This function can be used to enlarged picture and enjoy w ider watc hi n g range.
During play, press ZOOM button, ZOOM mode will cycle as following,
ZOOM ×2, picture is enlarged 2 times;
ZOOM ×3, picture is enlarged 3 times;
ZOOM ×4, picture is enlarged 4 times;
Note: Playing CD, MP3, this function is not workable.
PROGRAM PLAY
Program function can play in favorite order.
1. Press PROG button,
2. Use DIGIT button and direction buttons to input the track number or subtitle or chapter number,
3. Then press ENTER button.
DVD player will begin to play in selected order.
Changing viewing angles
DVD disc have 9 angles picture at most. During play, user can select one discretionary angle to watch.
Select one favorite angle to watch.
During play, press ANGLE button, and DVD player will play another angle.
If disc have the menu for selection angle, you are able to select viewing angles by menu button.
NOTE:
This function is workable with multiple angles DVD disc, and the sign “ANGLE” on VFD is light when
DVD player plays multiple angles disc.
Selection caption languages and of/off caption
DVD disc have 32 languages at most. During play, select on or off caption, or select one discretional
language.
Selecting wanted caption language
During play, press LANGU button, caption languages mode cycles as following,
Caption1/N -the first caption language-caption 2/N – the second language – the N language – caption
cancel – no caption
N is the total languages included in disc.
NOTE:
This function is workable with multiple caption languages DVD or super VCD disc.
Sound channel switch and sound volume adjustment
During play, press L/R button of remote control to switch sound channel, and press V- button and V+ button to
decrease or increase sound volume to get favorite effect.
NOTE:
1. Above instruction is only for basic functions. For different discs, exact operation isn’t very same,
such as displaying different signs on CTV screen, operation is to be done according to exact
instruction.
2. Some discs permits special operation or limits some operation, so some functions of DVD player
maybe not workable. This is not fault of DVD player, and please refers to instruction of disc.
EN 20
3. When some operation is limited or forbidden, forbidden sign will be displayed at up left of screen.
4. Except for MP3, play operation of other discs (for example VCD, SVCD, DVCD, CD) is referred to
DVD play operation.
Enter setting menu
By entering the SETTING menu, all DVD options can be set. Once setup, all DVD discs can be played
with these settings.
1. Press SETUP button. The DVD player will stop playback, and the function setting menu will be
displayed.
2. Press the direction arrow buttons to move the cursor to select the required sub-menu.
3. Press ENTER button to confirm.
Press SETUP button again, return directly.
DVD menu setup
Following options can be selected in menu:
General SETUP
General setup includes TV Display, Angle Mark, OSD Lang, Screen Saver.
a. TV Display
Press up/down buttons to move the cursor to select following option, and press ENTER button to
confirm.
b. Angle Mark
Press up/down buttons to move the cursor to select following option, and press ENTER button to
confirm.
General Audio Video
-- General Setup Page--
Preference
TV Display 4:3/ps
Angle Mark ON
OSD Lang Eng
Screen Saver ON
Go To General Setup Page
General Audio Video Preference
-- General Setup Page--
TV Display 4:3
Angle Mark ON
OSD Lang Eng
Screen Saver ON
Go To General Setup Page
4:3/ps
4:3/lb
16:9
ON
OFF
EN 21
c. OSD Lang
Press up/down buttons to move the cursor to select following option, and press ENTER button to
confirm.
General Audio Video Preference
-- General Setup Page--
TV Display 4:3
Angle Mark ON
OSD Lang Eng
Screen Saver ON
Go To General Setup Page
English
Italian
German
French
Portugese
Spanish
Danish
Swedish
d. Screen Saver
Press up/down buttons to move the cursor to select following option, and press ENTER button to
confirm.
General Audio Video
-- General Setup Page--
TV Display 4:3
Angle Mark ON
OSD Lang Eng
Screen Saver ON
Go To General Setup Page
Preference
ON
OFF
Audio SETUP
Audio SETUP includes Downmix
Press up/down buttons to move the cursor to select following option, and press ENTER button to
confirm.
General Audio Video Preference
-- Audio Setup Page--
Downmix Lt/Rt
Stereo
Go T o Audio Setup Page
Video SETUP
Video SETUP includes Sharpness, Brightness, Contrast.
EN 22
a. Sharpness
Press up/down buttons to move the cursor to select following option, and press ENTER button to
confirm.
General
-- Video Setup Page--
Audio Video
Sharpness Low
Brightness 00
Contrast 00
Go T o Video Setup Page
Preference
High
Medium
Low
b. Brightness
Press up/down buttons to move the cursor to select following option, and press ENTER button to
confirm.
General
-- Video Setup Page--
Audio
Sharpness Low
Brightness 00
Contrast 00
Go T o Video Setup Page
Video Preference
c. Contrast
Press up/down buttons to move the cursor to select following option, and press ENTER button to
confirm.
General Audio Video
-- Video Setup Page--
Sharpness Low
Brightness 00
Contrast 00
Go T o Video Setup Page
Preference
Sharpness
Preference SETUP
Preference SETUP includes TV Type, Audio, Subtitle, Disc Menu, Parental, Password, Default.
EN 23
a. TV Type
Press up/down buttons to move the cursor to select following option, and press ENTER button to
confirm.
General Audio Video Preference
-- Preference Page--
TV Type Pal
Audio Eng
Subtitle Eng
Disc Menu Eng
Parental
Password
Default
Go To Preference Page
Pal
Auto
Ntsc
b. Audio
Press up/down buttons to move the cursor to select following option, and press ENTER button to
confirm.
General Audio Video Preference
-- Preference Page--
TV Type Pal
Audio Eng
Subtitle Eng
Disc Menu Eng
Parental
Passwold
Default
Go To Preference Page
English
Italian
Swedish
French
German
Portuguese
Spanish
Chinese
c. Subtitle
Press up/down buttons to move the cursor to select following option, and press ENTER button to
confirm.
General Audio Video Preference
-- Preference Page--
TV Type Pal
Audio Eng
Subtitle Eng
Disc Menu Eng
Parental
Password
Default
Go To Preference Page
English
Italian
Swedish
French
German
Portuguese
Spanish
Chinese
EN 24
d. Disc Menu
Press up/down buttons to move the cursor to select following option, and press ENTER button to
confirm.
General Audio Video Preference
-- Preference Page--
TV Type Pal
Audio Eng
Subtitle Eng
Disc Menu Eng
Parental
Password
Default
Go To Preference Page
English
Italian
Swedish
French
German
Portuguese
Spanish
Chinese
e. Parental
Press up/down buttons to move the cursor to select following option, and press ENTER button to
confirm.
General Audio Video Preference
-- Preference Page--
TV Type Pal
Audio Eng
Subtitle Eng
Disc Menu Eng
Parental
Password
Default
Go To Preference Page
1 Kid Saf
2 G
3 Pg
4 Pg 13
5 Pgr
6 R
7 Nc17
8 Adult
f. Password
Press up/down buttons to move the cursor to select following option, and press ENTER button to
confirm.
General Audio Video Preference
-- Preference Page--
TV Type Pal
Audio Eng
Subtitle Eng
Disc Menu Eng
Parental
Password
Default
Go To Preference Page
Change
Set-in password is 3308, it is input by digit buttons directly to pass or lock
EN 25
g. Default
Press up/down buttons to move the cursor to select following option, and press ENTER button to
confirm.
Note:
1. SETUP button is workable during play, but some operations are not with displaying note on
screen. Then user can stop it and try it again.
3. Some DVD player have no the language user want to select, here, DVD player will play
initially set language automatically.
General Audio Video Preference
-- Preference Page--
TV Type Pal
Audio Eng
Subtitle Eng
Disc Menu Eng
Parental
Password
Default
Go To Preference Page
Reset
Play MP3
Play MP3 disc
1. Play disc, after DVD player finishes search, it will display directory main menu.
2. Move up/down buttons to select favorite song directory.
3. Press ENTER button.
4. Press left/right buttons or digit buttons to select favorite track number.
5. Press ENTER button.
DVD player will play selected track.
Press REPEAT button, user is able to select single track repeat, directory repeat, whole disc repeat or
off.
Other functions
During playing MP3 disc, DVD player have such as mute, sound volume control, pause, skip functions,
too. Exact operation is to be referred above setting play content.
EN 26

JPEG file decode play
Play picture by direct selection by digit buttons
1. During play, after DVD player finishes search, it will display directory main menu.
2. Move direction buttons to select audio frequency or JPEG picture at bottom of screen, and press
ENTER to confirm.
3. Press digit buttons to select favorite option.
Selecting play by menu
1. During playing disc, after DVD player finishes search, it will display directory main menu.
2. Move direction buttons to select menu on screen, and press ENTER button to confirm.
3. Move direction buttons to select one option under menu, and press ENTER button to confirm.
Other functions
1. When play JPEG file, DVD player have same functions such as pause or repeat.
2. When plays JPEG file, press (title/return) button, DVD player will be returned to menu.
3. During play, press (previous) and (next) buttons, up/down pictures are to be selected.
4. Press (ZOOM) button to enlarge or shrink pictures, and finally press (ZOOM) button to off ZOOM
function.
5. On ZOOM function, press direction buttons to move picture directionally.
EN 27

p
ENGLISH
Instructions on environment protection
Do not dispose of this product in the usual household garbage at the end of its lifecycle;
hand it over at a collection point for the recycling of electrical and electronic appliances.
The symbol on the product, the instructions for use or the packing will inform about the
methods for disposal.
The materials are recyclable as mentioned in this marking. By recycling, material
recycling or other forms of re-utilization of old appliances, you are making an important
contribution to
rotect our environment.
ALL RIGHTS RESERVED
COPY RIGHT DENVER ELECTRONICS A/S
www.denver-electronics.com
EN 28

Tak fordi du valgte at købe dette farve TV.
Sæt dig venligst ind i betjeningen ved at læse denne vejledning, inden du betjener dit nye TV.
INDHOLD
SPECIFIKATIONER …………………………………………………………………………………………1
SIKKERHEDSOPLYSNINGER …………………………………………………………………………… 2
KNAPPER OG KONTROLLER …………………………………………………………………………… 3
INTRODUKTION …………………………………………………………………………………. ……. …3
KOM GODT I GANG ……...........................………………………………………………………………6
BETJENING AF TV'ET …………………....……………………………………………………………… 6
BETJENING AF DVD AFSPILLEREN …………………………………………………………………… 16
GRUNDLÆGGENDE BETJENING ……………......………………………………………………….… 18
DVD MENUEN SETUP (opsætning) …………………………………………………………………..… 22
AFSPILNING AF MP3 …………………………………………………………………………...…….. …28
AFSPILNING AF JPEG FILER…………………………………………………………………………. …29
SPECIFIKATIONER
z Modtagesystem: RF: PAL B/G, I
AV: NTSC3.58 NTSC4.43 PAL
z Kanalområder: VHF: E2-E12
UHF: E21-E69
Hyperbånd: S1-S41
z Strømforbrug: ≤90W
z Antal faste stationer: 99
z Strømkrav: AC200V-240V 50Hz
z Udgangseffekt: ≥2W×2
Bemærk: Ret til ændring i design og specifikationer forbeholdes.
DK 1
 Loading...