

Denver TFD-2214MC User Manual
TFD-2214MC
22" TFT LCD DVBT+ DVD COMBODVBC+
Operating Instructions
PAL/SECAM B/G,D/K,I
AC 110-240V 50/60Hz
TERMINALS INPUT: HDMI, YPBPR ,AV, SCART, PC, USB, CI..
TELETEXT
NTSC PLAYBACK
SLOT IN DVD PLAYER

Table Of Contents
Table of Contents
Important Safety Instruction
Warnings and Cautions
Functional Parts(TV)
Functional Parts(DVD)
Rear View Of TV Set
Connecting External Equipment
Operation-Remote Control
Basic Operation
Inital Settings(DVD)
Troubleshooting Tips
1
2
3
4
5
6
7-9
10-11
12-21
22-23
24
1
Important Safety Instruction
RISK OF ELECTRIC SHOCK
WARNING: TO REDUCE THE RISK OF ELECTRIC SHOCK DO NOT
REMOVE COVER OR BACK. NO USER-SERVICEABLE PARTS INSIDE.
REFER SERVICING TO QUALIFIED SERVICE PERSONNEL.
The lighting flash with arrow head within a triangle is intended to tell the user that
parts inside the product are a risk of electric shock to persons.
The exclamation point within a triangle is intended to tell the user that important
operating and servicing instructions are in the papers with the appliance.
WARNING
DO NOT OPEN
WARNING: TO REDUCE THE RISK OF ELECTRIC SHOCK DO NOT EXPOSE THIS
APPARATUS TO RAIN OR MOISTURE AND OBJECTS FILLED WITH LIQUIDS,
SUCH AS VASES, SHOULD NOT BE PLACED ON THIS APPARATUS.
CAUTION
Never tamper w ith any c ompon ents in side yo ur set, o r any oth er adju stmen t contr ols not m entio ned in
this manual. Th e LCD pa nel used in thi s p roduc t is made of gl ass. Ther efore ,it can brea k Wh en the
product
the
cord should be pu lled
During thund er and light ing ,
damage. Al l tel evisi on recei vers are
be per forme d on ly by the TV servi ce
If some a bnorm al phen omena h appens , may be yo u have so me mis- opert ion,p lease t ake off p ower an d
resta rt your T V set .
is d roppe d or app lied with impac t. Be car eful not t o b e injured by br oken gl ass piece s in ca se
LCD pa nel
breaks.Whe n you c lean u p dust or stic k of a wa ter dro p on th e LCD panel.
out from th e p lug rec eptac le, the n w ipe the re ceive r with dried so ft Cl oth.
unplug the pow er cord an d antenna co rd to prevent yo ur TV set fro m
high vo ltage ins trume nts. Al l "in side work" on your recei ver sho uld
personnel.
The power
2
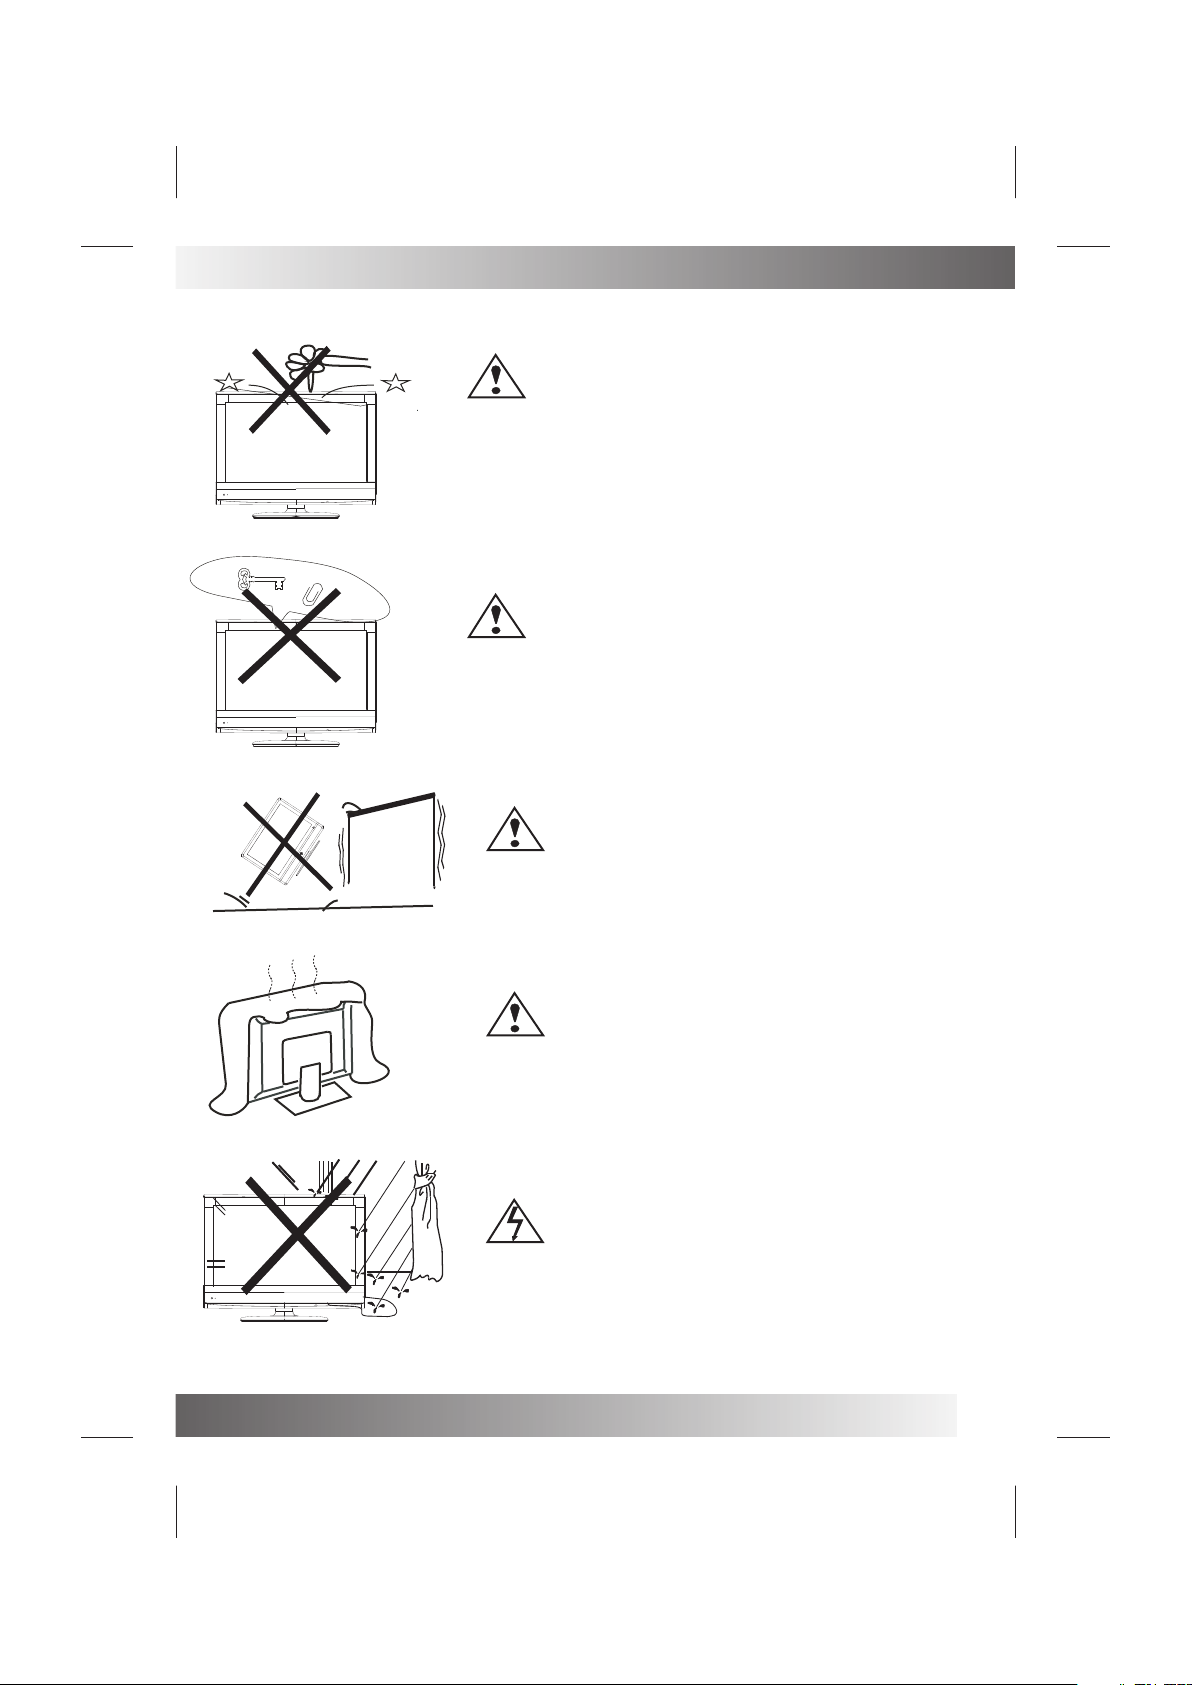
Warnings And Cautions
Do not drop or push objects into t he tele visio n cabin et slot s
or openings. Never sp ill any kind of li quid on the tele visio n
receiver.
Do not insert an ythin g in the ve ntila tion ho les. If m etal or
something fl ammab le ente rs, it ma y resul t in fire o r elect ric sho ck.
介
简
Caution
Caution
Caution
Do not place your telev ision o n an unstable ca rt , stan d , shelf o r
table. Serio us inju ry to an in divid ual, an d damag e to the te levis ion,
may res ult if it s hould f all.
Caution
Do not block the v entil ation h oles in t he back c over.
Adequate ventilat ion is es senti al to pre vent fa ilure o f elect rical
component.
Warning
To prevent fire or e lectr ical sh ock haz ard, Do n ot expo se the
television receiver to rai n or mois ture.
3
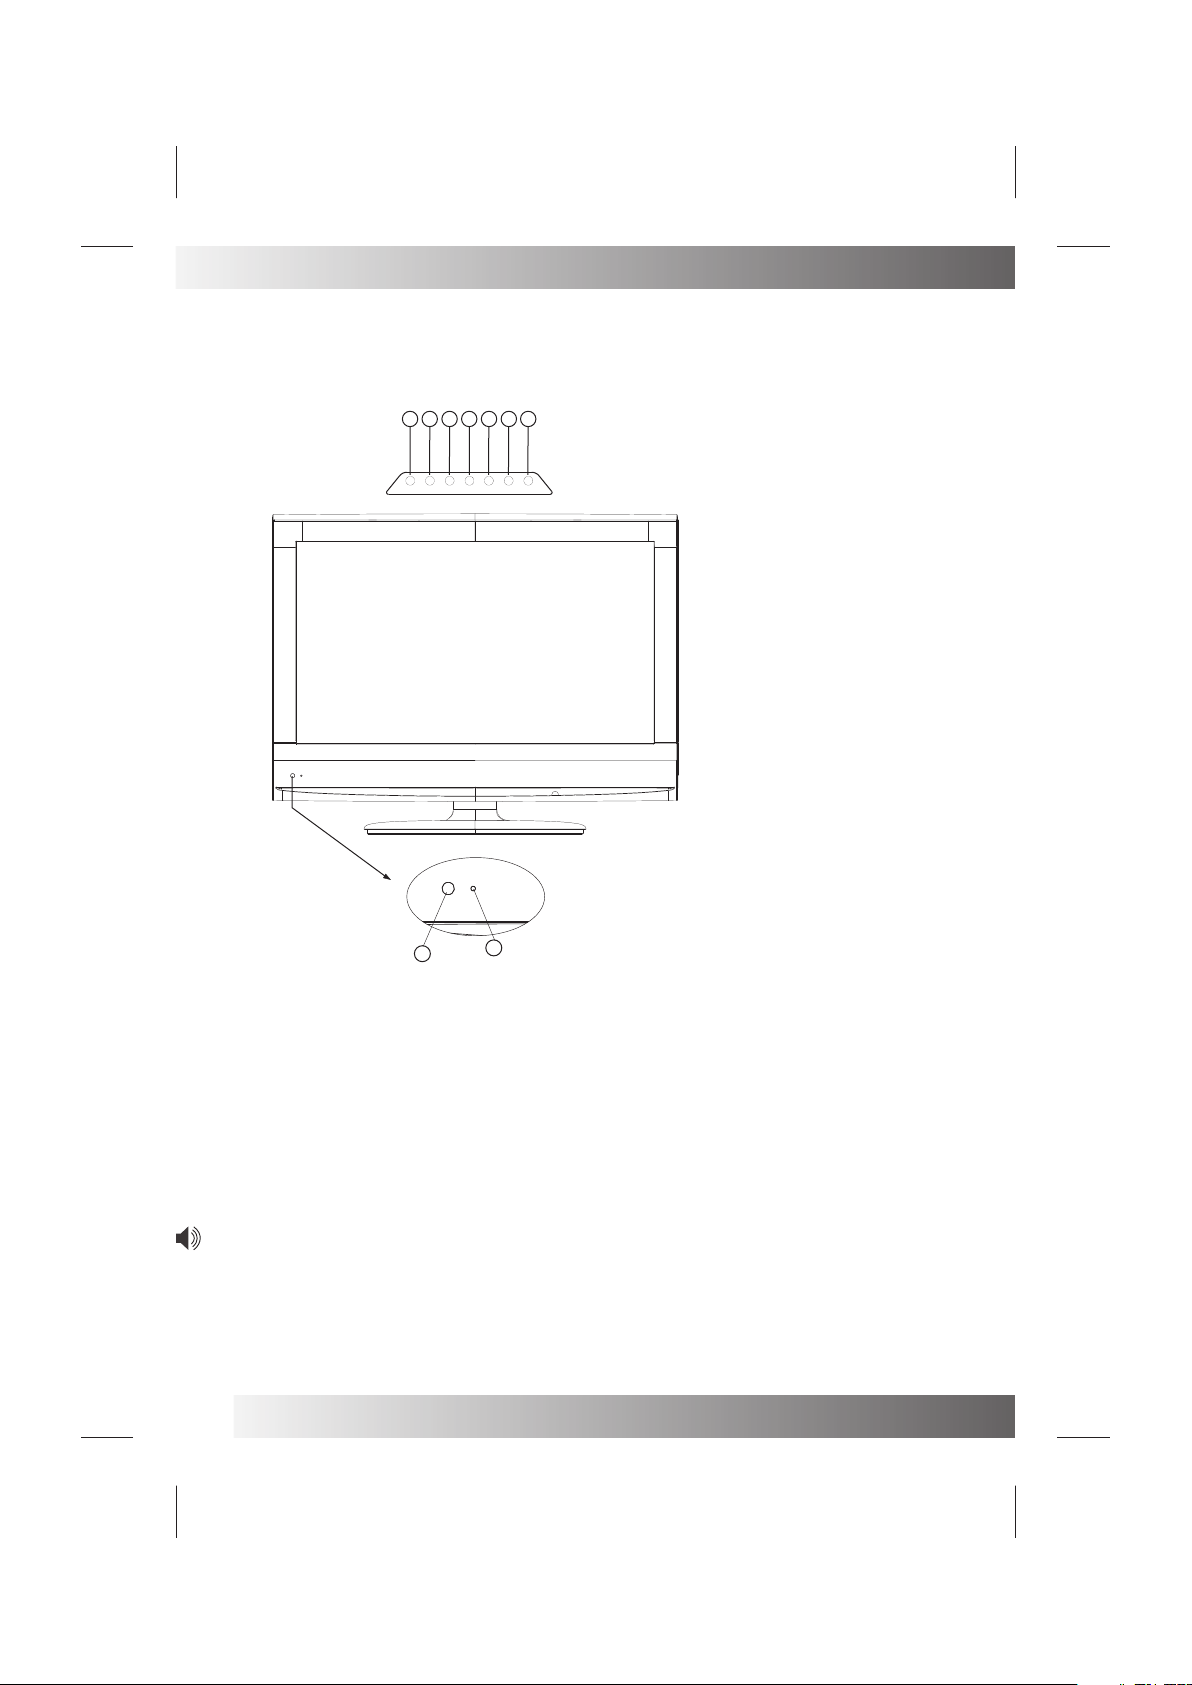
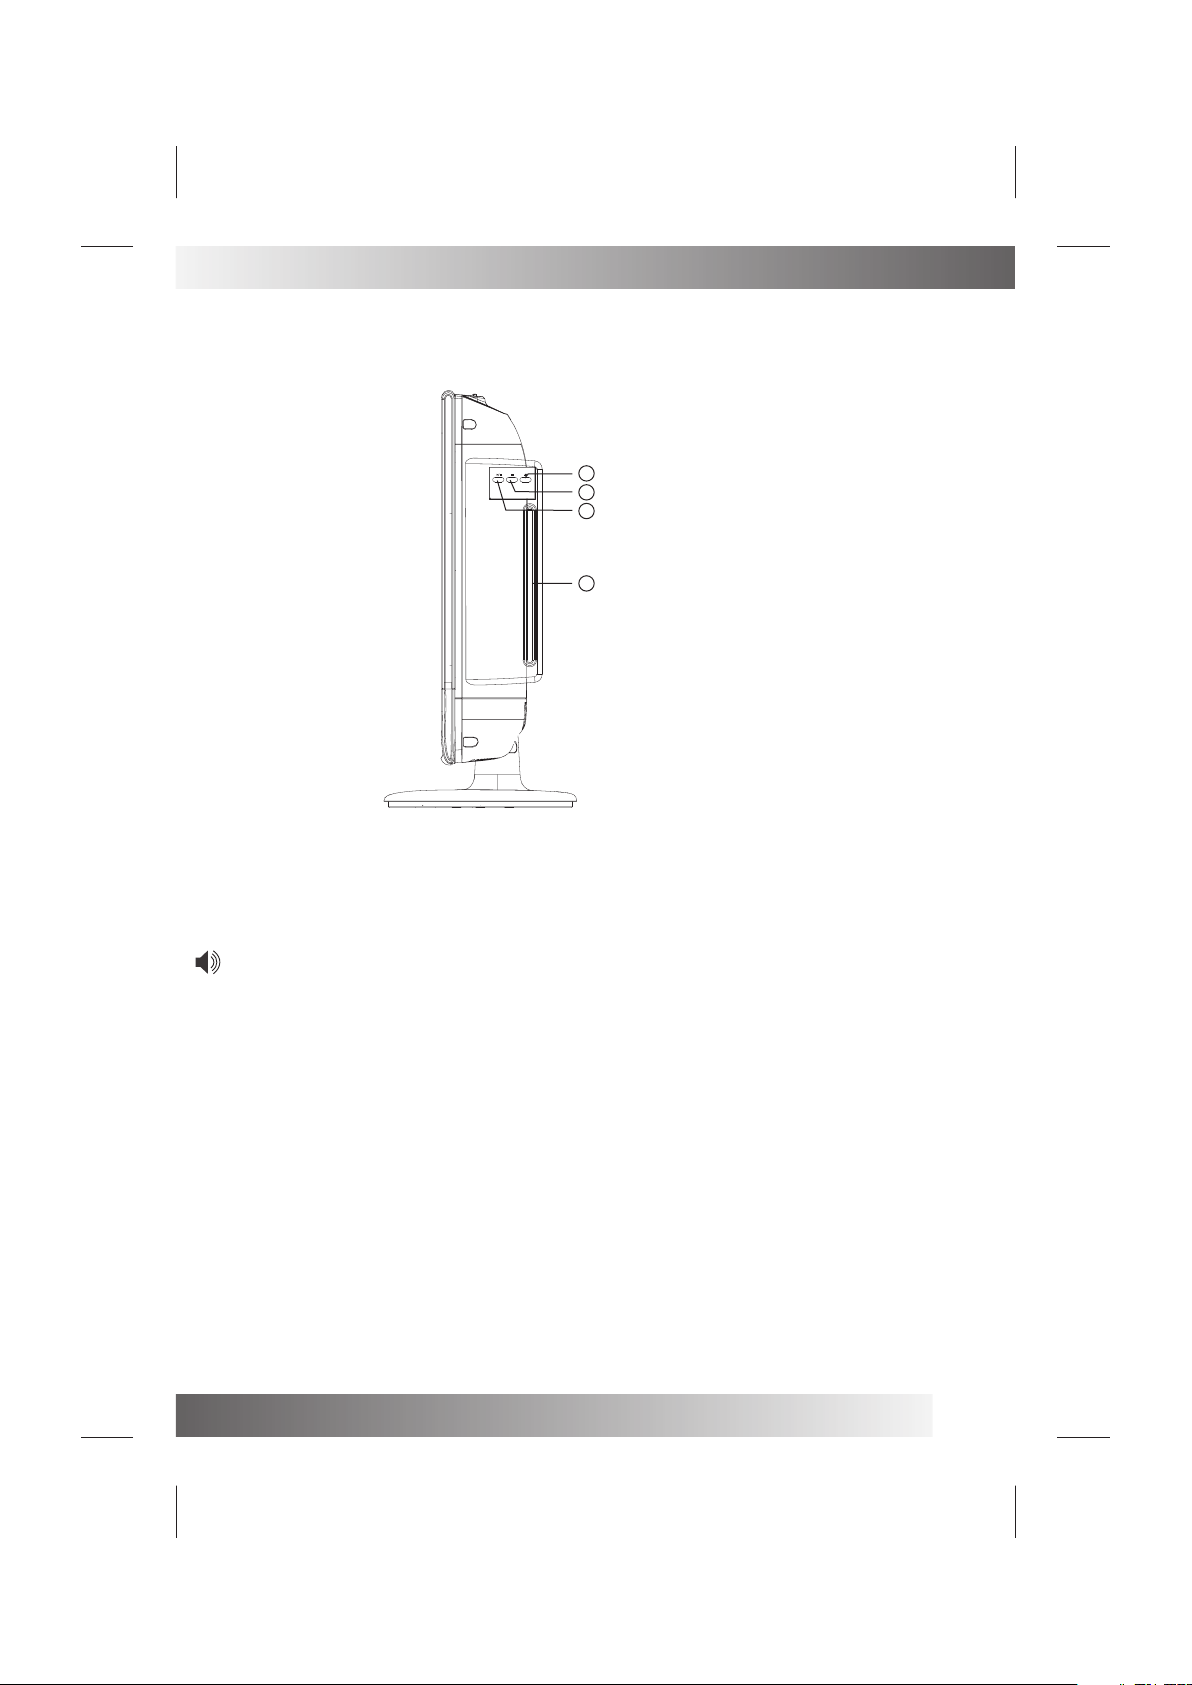
Functional Parts( TV )
Front V iew of LC D Set
7 6 5 4 3
89
V- V+ P - P+
MENU
SOUR CE
STAND BY
1. Remote Sensor
2. LED indicator lamp
3. Standby Button
4. SOURCE Button
5. MENU Button
6. P+ Button
7. P- Button
8. V+Button
9. V- Button
1
2
To turn the T V power O N
Put the T V set on th e corre ct plac e, then c onnec t the DC pl ug of the AC -DC ada ptor to t he DC 12V s ocket
at the ba ck of the T V set. Co nnect t he adap tor mai n cord to t he wall o utlet , then th e LED ind icato r lamp
turns r ed/bl ue and th e TV set is a t Stand by/wo rk Mode . At Stand by Mode , if Standby Button is pressed
the power indicator will change to blue. It ta kes a few s econd s befor e the pic ture ap pears .
To turn the T V power O FF
Press t he Stan dby But ton to ma ke the TV s et in Sta ndby Mo de, the n disco nnect the powe r plug from the
wall outlet.
NOTE:
If TV is th e selec ted inp ut with out sig nal rec eived a nd NO ope ratio n is perf ormed f or abou t 5 minut es
conti nuously, the TV set wi ll ente r stand by mode . For any i nputs o ther th an TV, the TV set wi ll not en ter
stand by mode a utoma tical ly with out use rs inst ructi on. If yo u are not g oing to u se this T V set for a long
time, s witch o ff the se t and dis conne ct the po wer plu g from th e wall ou tlet.
4
Functional Parts(DVD)
4
3
2
1
Switc h this LC D-TV Se t to DVD st atus, i nsert t he disk t o DVD slo t, and th e playe r will su ck it in.
Notes :
1.Do no t attac h any sea l or labe l to eith er side ( the lab eled si de or the r ecord ed side ) of a disc.
2.Do no t use irr egula rly sha ped CDs ( e.g., H earts haped o r octag onal) since t hey may r esult in
malfu nctio ns.
1. DVD Slot
2. Play/Pause
3. Stop
4. Open/Close
3.Som e playb ack ope ratio ns of DVD s and Vid eo CDs ma y be inte ntion ally pr ogram med by
softw are man ufact urers . This un it play s DVDS an d Video C Ds acco rding t o disc co ntent
desig ned by th e softw are man ufact urer, t heref ore som e playb ack fea tures m ay not be
avail able or o ther fu nctio ns
may be ad ded.
5
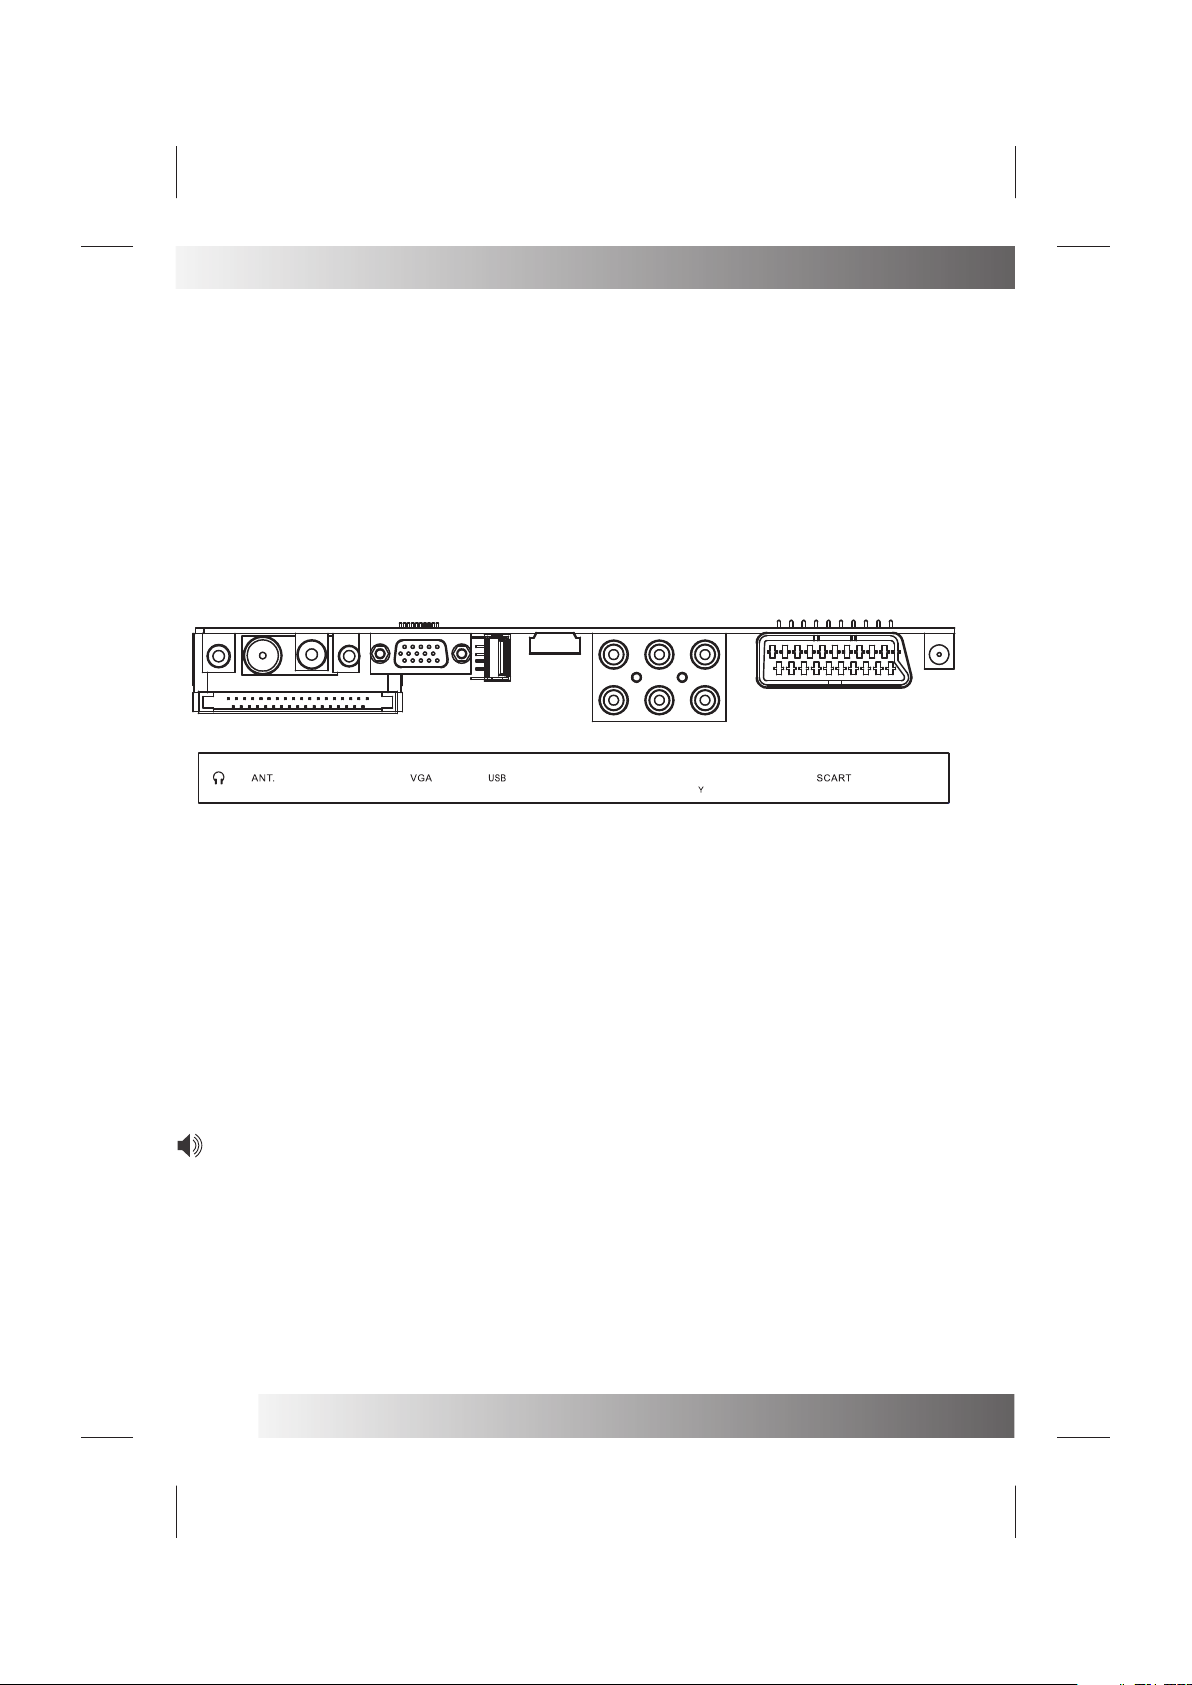
Rear View Of TV Set
EARPHONE
ANT
SPDIF
PC-A IN
VGA
USB
HDMI
YPbPr
VIDEO
SCART
DC IN 12V
PC- A IN
SPD IF
CI
HDM I
L
R
VID EO
Pb
Pr
DC-12V
NOTE:
Precautions when connecting to other equipment
When using external equipment with this TV set, please read the instruction manual of the external equipment.
Switch off all power supplies to the equipment and TV set before connection.
Always ensure that the input and output terminals are correctly connected.
The UPDATE terminals just use to update the system software.
6
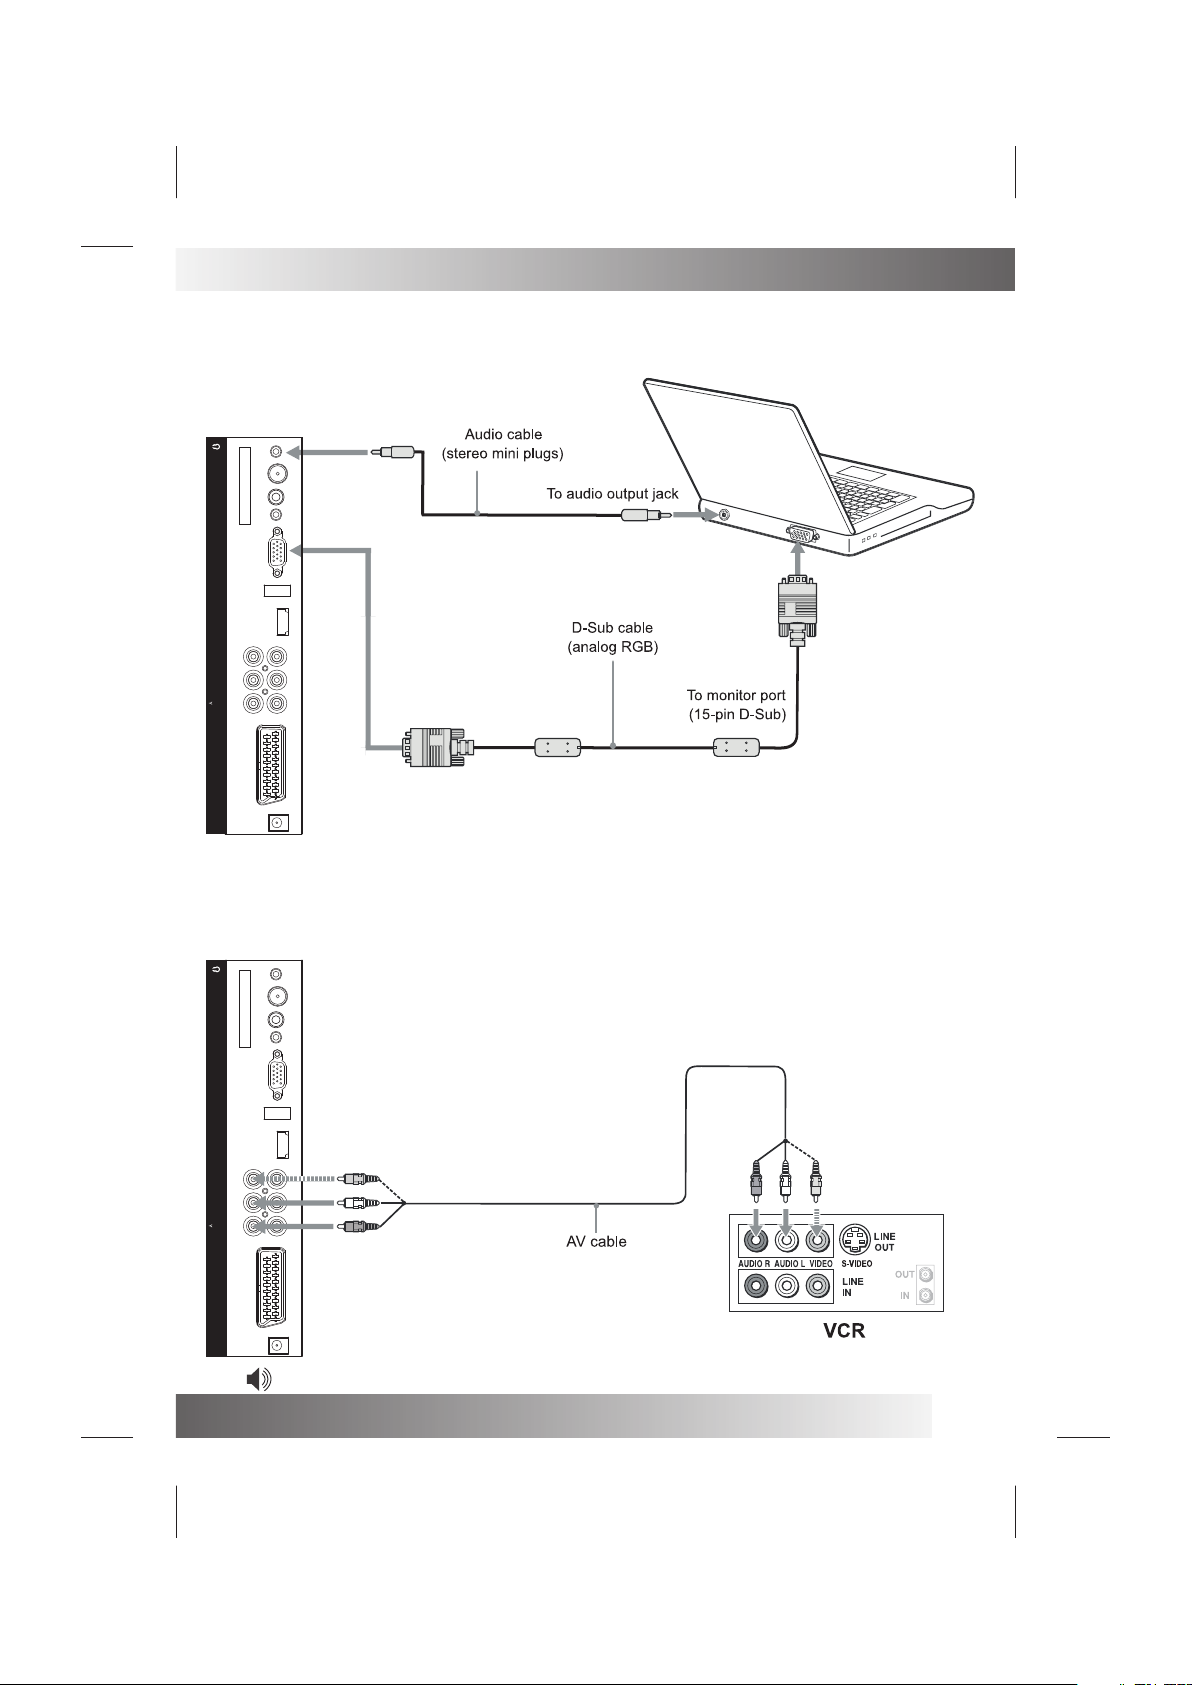
Connecting External Equipment
Conne cting a P C
When yo ur PC is co nnect ed to the T V with D- SUB cab le and au dio cab le.
You ca n view an d liste n to the PC 's vide o and aud io outp ut on the TV. Use the VASE 1280 X 800@60Hz
forma t to obta in the be st imag e quali ty for yo ur TV.
LEFT SIDE
ANT
CI
PC-A IN
VGA HDMI DC-12V USB
Pr
L
Pb
R
VIDEO
SCART
Conne cting a V CR or oth er devi ce(E. G. DVD/ Digit al cabl e Box/S atell ite Rec eiver ) with co mposi te
video c onnec tors.
Connect the vi deo output of th e devic e to the co mposi te vide o input ( yello w RCA) on t he TV. Conn ect the
line-level audio output of the devi ce to the a udio in puts( R ed and Wh ite RCA ) on the TV w ith AV ca ble.
LEFT SIDE
ANT
CI
PC-A IN
VGA HDMI DC-12V USB
Pr
L
Pb
R
VIDEO
SCART
Note: C able are often c olor- coded t o conne ctors . Conne ct red to r ed, whi te to whi te ,etc .
7
 Loading...