

Page 1
The power behind competitiveness
Delta UPS - Amplon Family
RT Series, Single Phase
1/ 1.5/ 2/ 3 kVA
External Battery Pack
User Manual
www.deltapowersolutions.com
Page 2

Save This Manual
This manual contains important instructions and warnings that you should follow
during the installation, operation, storage and maintenance of this product.
Failure to heed these instructions and warnings will void the warranty.
Copyright © 2019 by Delta Electronics Inc. All Rights Reserved. All rights of this User
Manual (“Manual”), including but not limited to the contents, information, and figures
are solely owned and reserved by Delta Electronics Inc. (“Delta”). The Manual can
only be applied to the operation or the use of this product. Any disposition,
duplication, dissemination, reproduction, modification, translation, extraction, or
usage of this Manual in whole or in part is prohibited without the prior written
permission of Delta. Given that Delta will continuously improve and develop the
product, changes may be made to the information in this Manual at any time without
obligation to notify any person of such revision or changes. Delta will make all
possible efforts to secure the accuracy and the integrity of this Manual. Delta
disclaims any kinds or forms of warranty, guarantee, or undertaking, either expressly
or implicitly, including but not limited to the completeness, faultlessness, accuracy,
non-infringement, merchantability or fitness for a particular purpose of the Manual.
Amplon RT Series I
Page 3

Table of Contents
Table of Contents
Chapter 1 : Product Introduction ........................................................ 1
Chapter 2 : Important Safety Instructions .......................................... 2
Chapter 3 : Package List ...................................................................... 4
Chapter 4 : Installation Procedures .................................................... 6
Chapter 5 : Operation Procedures .................................................... 12
Chapter 6 : Technical Specifications ................................................ 13
II
Page 4

When the UPS is operating during a power outage, the battery pack provides DC
power, which maintains inverter operation to supply power to the critical loads
connected to the UPS.
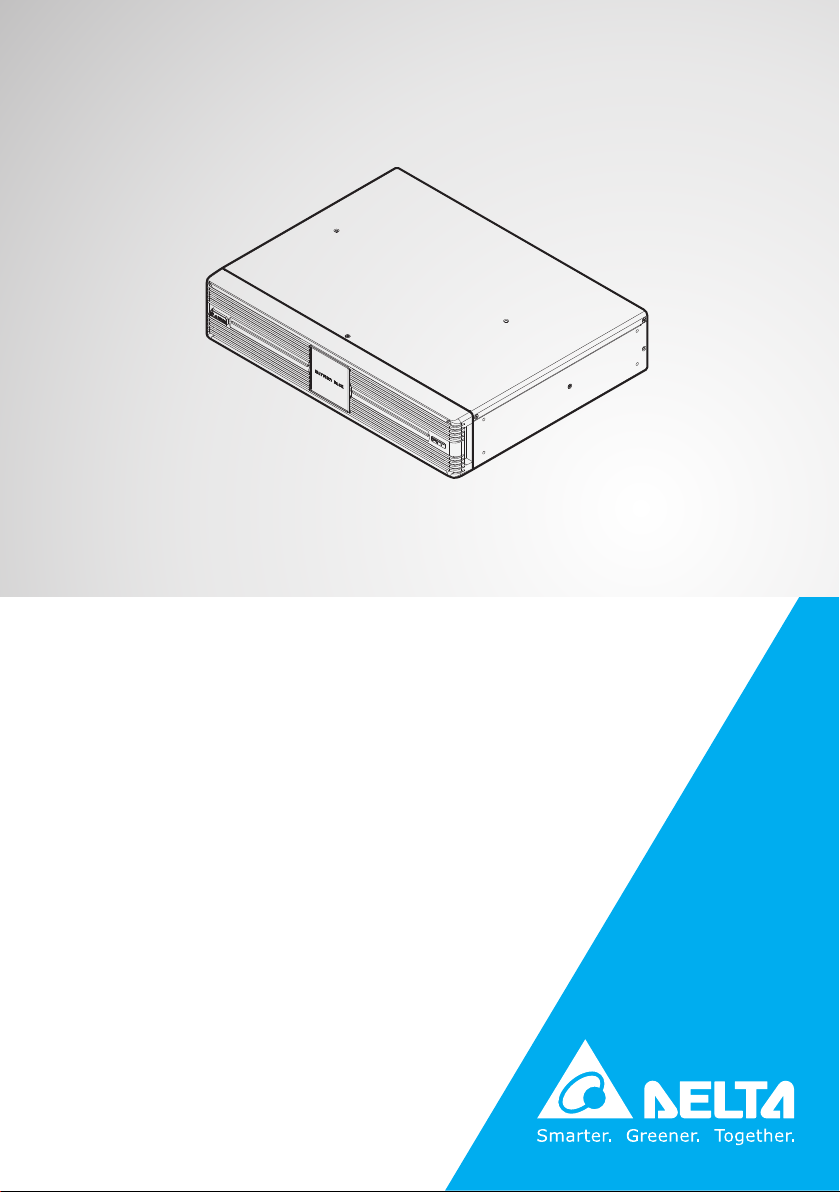
Chapter 1 : Product Introduction
(Figure 1: Delta External Battery Pack Front View)
Amplon RT Series 1
Page 5

Chapter 2 : Important Safety Instructions
Chapter 2 : Important Safety Instructions
Servicing of batteries and battery packs must be performed or supervised by
qualified service personnel knowledgeable in batteries, battery packs and the
required precautions. Keep unauthorized personnel away from batteries and
battery packs.
A battery can present a risk of electric shock and high short-circuit current.
To reduce the risk of fire or electric shock, install the battery pack in a
temperature and humidity controlled indoor area free of conductive
contaminants.
Forbid opening or removing the cover of the battery pack to avoid high voltage
electric shock.
The risk of dangerous high voltage is possible when the batteries are still
connected to the UPS even though the UPS is disconnected from the mains.
Do not forget to disconnect the battery cable to completely cut off the battery
source.
Turn off the UPS and cut off the AC source before performing battery/ battery
pack replacement.
Only use the same type of batteries from the same supplier. Never use old,
new and different Ah batteries at the same time.
The number of batteries must meet UPS requirements.
Do not reverse or short circuit the polarity + and – when connecting the
batteries because this will destroy the device and constitute a risk of electric
shock or fire.
2
Page 6

Use a voltage meter to measure whether the total voltage, after battery pack
connection, is around 12.5Vdc × the total number of batteries.
The external slits and openings of the battery pack are provided for ventilation.
To ensure reliable operation of the battery pack and to protect the battery pack
from overheating, these slits and openings must not be blocked or covered.
Do not insert any object into the slits and openings that may hinder ventilation.
Do not allow liquid or any foreign object to enter the battery pack.
Do not place beverages or any other liquid-containing vessels on or near the
battery pack.
Do not dispose of the battery or batteries in a fire. The batteries may explode.
Do not open or mutilate the battery or batteries. The released electrolyte is
harmful to the skin and eyes and may be toxic.
Observe the following before replacing batteries:
1. Remove watches, rings, or other metal objects.
2. Use tools with insulated handles.
3. Wear rubber gloves and boots.
4. Do not lay tools or metal parts on the top of batteries.
5. Disconnect the charging source prior to connecting or disconnecting the
batteries’ terminals.
Amplon RT Series 3
Page 7

Chapter 3 : Package List
No. ITEM Q’ty Drawing
External
1
Battery Pack
2 User Manual 1 PC
Tower Stand
3
Extender
4 Rail Kit 1 SET
Chapter 3 : Package List
1 PC
4 PCS
External
5
Battery Cable
6 Fastener 1 SET
1 PC
x2 x8
4
Page 8

7 Bracket Ear 1 SET
x2 x4
x4 x4
Amplon RT Series 5
Page 9

Chapter 4 : Installation Procedures
Rack Mounting
Chapter 4 : Installation Procedures
1. Attach the included bracket ears to the lateral mounting holes of the Delta
external battery pack. See Figure 2.
(Figure 2: Mount the Bracket Ears)
2. Follow steps ① to ④ to install the Delta external battery pack in Delta’s
rail kit (provided). See Figure 3.
Step ① : Adjust the length of the rails according to your rack.
Step ② : Tighten the rails’ nuts.
Step ③ : Fix the rails on your rack.
Step ④ : Insert the Delta external battery pack in your rack and
tighten the provided screws.
6
Page 10

(Figure 3: Insert the Delta External Battery Pack to Your Rack)
NOTE:
If you want to use a non-Delta rail kit, please only follow step ④.
Tower Mounting
1. Connect your UPS’s tower stands with the provided tower stand
extender(s) according to the width of your UPS and the Delta external
battery pack. See Figure 4.
(Figure 4: Connect the Tower Stands with the Tower Stand Extender(s))
2. Pull out the Delta external battery pack’s control panel ( ① ), rotate
it 90° clockwise ( ② ) and re-insert the control panel. After that,
rotate the Delta logo nameplate 90° clockwise ( ③ ). See Figure 5.
Amplon RT Series 7
Page 11

Chapter 4 : Installation Procedures
(Figure 5: Rotate the Delta External Battery Pack’s
Control Panel & Delta Logo Nameplate)
3. Carefully lift the Delta external battery pack upright with the Delta logo
facing up. A minimum of two people are required. See Figure 6.
(Figure 6: Place the Delta External Battery Pack Upright)
8
Page 12

4. Place the Delta external battery pack and the UPS into the tower stands. See
Figure 7.
(Figure 7: Place the Delta External Battery Pack and
the UPS into the Tower Stands)
5. Use the provided fasteners to join the top of the UPS and Delta external battery
pack together. Please refer to Figure 7.
Connect the Delta External Battery Pack with the UPS
1. Connect one end of the provided battery cable to the external battery
connector on the UPS, and connect the other end to one of the external
battery connectors on the Delta external battery pack. Make sure that the
positive cable (+) connects to the positive pole (+) and the negative cable
(-) connects to the negative pole (-). See Figure 8.
Amplon RT Series 9
Page 13

Chapter 4 : Installation Procedures
(Figure 8: Connect the UPS and the Delta External Battery Pack)
NOTE:
There are two identical external battery connectors on the Delta external
Parallel the Delta External Battery Packs
battery pack, and you may use either of the battery connectors to connect
to the UPS.
To extend the backup time, you may parallel the Delta external battery packs
before connecting them to the UPS.
WARNING:
For parallel application, only use the same type of Delta external
battery packs (same material No.)
Use the provided battery cable to connect the Delta external battery pack’s
battery connector to the other Delta external battery pack’s battery connector.
Each Delta external battery pack has two external battery connectors; please
choose one for the connection mentioned above. Make sure that the positive
cable (+) connects to the positive pole (+) and the negative cable (-)
connects to the negative pole (-). Please see Figure 9.
NOTE:
If you want to connect more than two Delta external battery packs,
follow the steps mentioned above.
10
Page 14

(Figure 9: Parallel the Delta External Battery Packs)
NOTE:
Once the parallel connection is completed, please refer to the steps
mentioned in ‘Connect the Delta External Battery Pack with the UPS’ to
connect any of the parallel Delta external battery packs to the UPS.
Amplon RT Series 11
Page 15

Chapter 5 : Operation Procedures
1. Follow Delta Amplon RT Series 1/ 1.5/ 2/ 3kVA UPS User Manual to execute
input/ output connection.
2. Follow Chapter 4 : Installation Procedures to connect the UPS and the Delta
external battery pack.
3. Follow Delta Amplon RT Series 1/ 1.5/ 2/ 3kVA UPS User Manual to turn on
the UPS.
Chapter 5 : Operation Procedures
12
Page 16

Dimensions (W × D × H)
Environment
Chapter 6 : Technical Specifications
Delta External
Battery Pack
Applicable to Amplon
RT Series UPS
Battery
Weight
Operating
Temperature
Relative
Humidity
RT-1KB RT-1.5KB
1kVA 1.5kVA
Type VRLA
Q’ty 2 × 2 × 12V/9Ah 2 × 3 × 12V/9Ah
440 × 335 × 88.2 mm
(17.3 x 13.2 x 3.5 inch)
16 Kg
(35.3 lb)
0°C~50°C (32°F~122°F)
5%~95% (No condensing)
440 × 430 × 88.2 mm
(17.3 x 16.9 x 3.5 inch)
23.1 Kg
(50.9 lb)
Amplon RT Series 13
Page 17

Delta External
Battery Pack
Applicable to Amplon
RT Series UPS
Battery
Dimensions (W × D × H)
Weight
Environment
Temperature
NOTE:
1. Please refer to the rating label for the safety rating.
2. All specifications are subject to change without prior notice.
RT-2KB RT-3KB
2kVA 3kVA
Type VRLA
Q’ty 2 × 4 × 12V/9Ah 2 × 6 × 12V/9Ah
Operating
Relative
Humidity
440 × 430 × 88.2 mm
(17.3 x 16.9 x 3.5 inch)
28.1 Kg
(62 lb)
0°C~50°C (32°F~122°F)
5%~95% (No condensing)
440 × 565 × 88.2 mm
(17.3 x 22.2 x 3.5 inch)
44 Kg
(97 lb)
No. : 501327030000
Version : V 0.0
Release Date : 2019_4_11
14
Page 18

Page 19

Page 20

5013270300
 Loading...