

Delta PW124HDF Series, RPW324HDF Series, RPW136HDF Series, RPW336HDF Series Installation Instructions Manual
Page 1
204337 204337 204337 204337 204337
Models/Modelos/Modèles
RPW124HDF, RPW136HDF,
RPW324HDF, RPW336HDF,
Series/Serie/Seria
Write purchased model number here
Escriba aquí el número del modelo comprado
Inscrivez le numéro de modèle ici
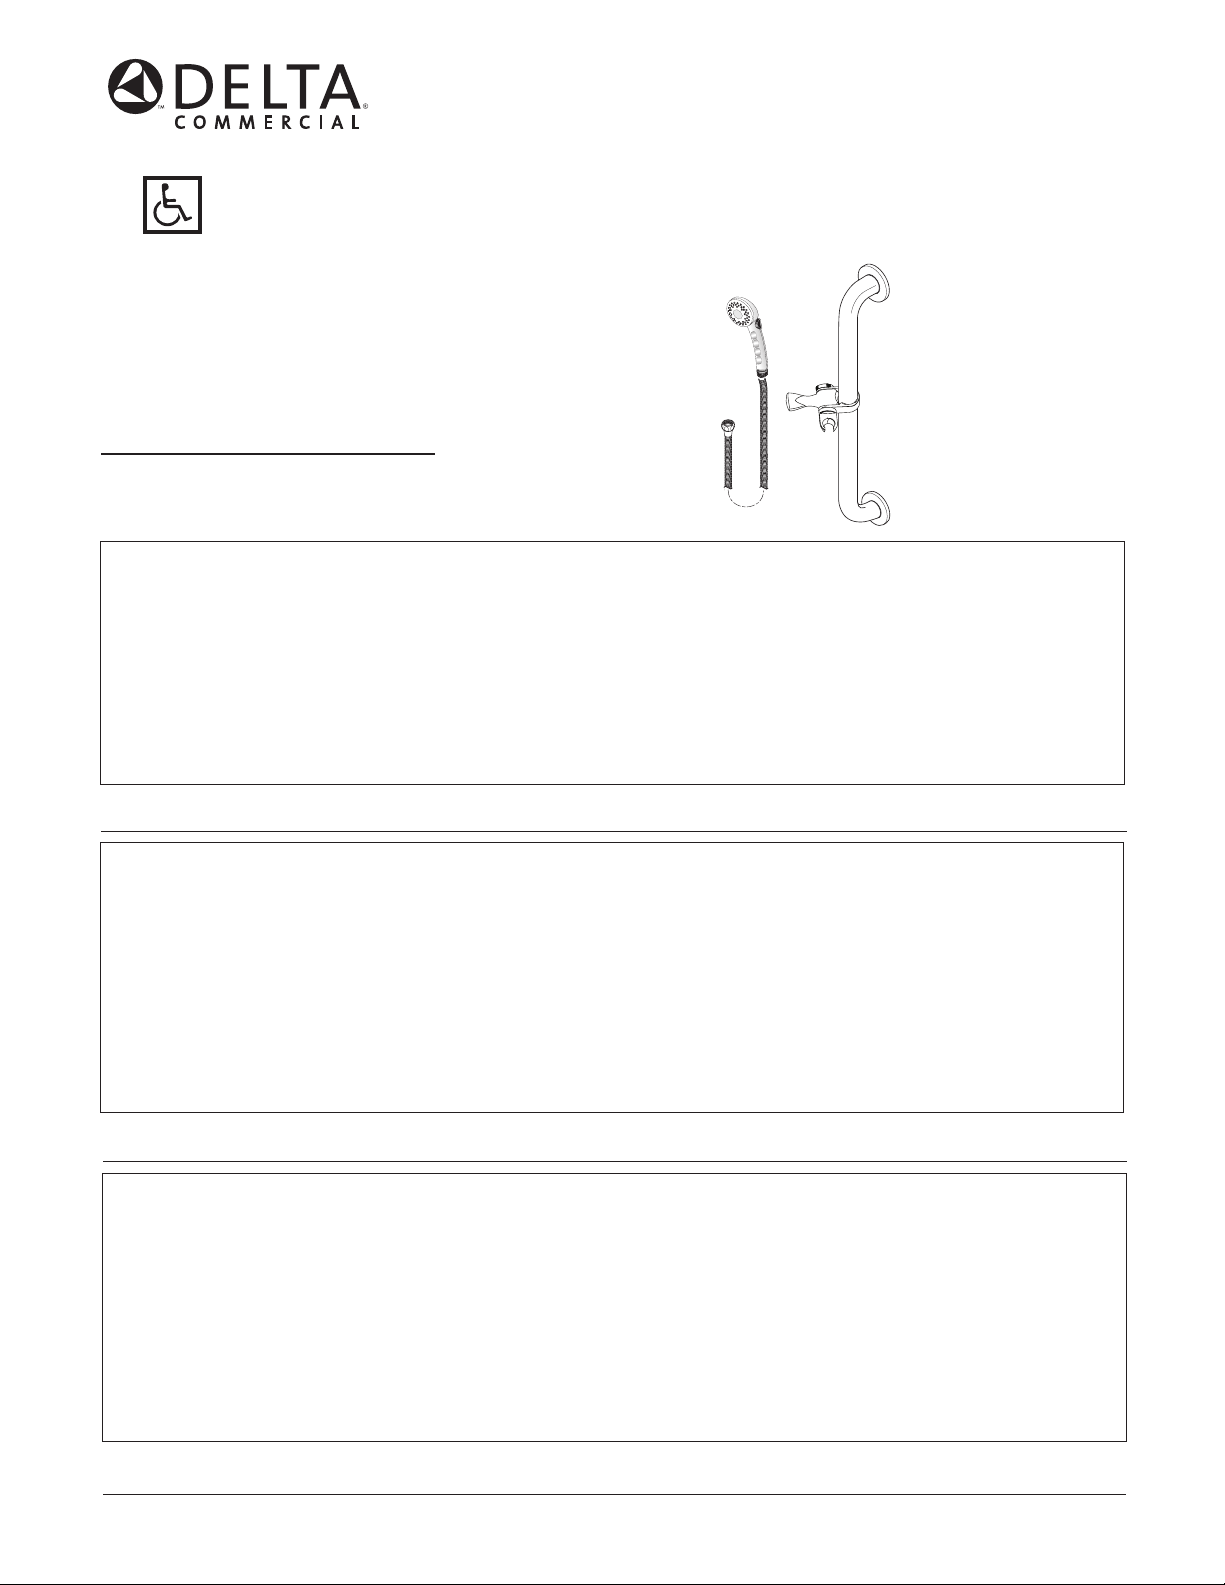
WALL GRAB BAR & HAND SHOWER WITH
ADA ADJUSTABLE SLIDE
BARRA DE PARED PARA AGARRARSE Y
REGADERA DE MANO CON MECANISMO
DESLIZABLE POR ADA
BARRE D’APPUI MURALE ET DOUCHE À
MAIN AVEC FIXATION COULISSANTE ADA
Care Instructions
Your Wall Grab Bar is designed and engineered in accordance with the highest
quality and performance standards. With proper care, it will give you years of
trouble free service. Care should be given to the cleaning of this product.
Although its finish is extremely durable, it can be damaged by harsh abrasives
or polish.
To clean hand shower face plate:
Remove the shower handle from the hose. Soak the hand shower in a 50/50
solution of white vinegar and water for 30 minutes to dissolve mineral build up.
Reassemble, do not over- tighten handle to the hose. Turn on the shower to
flush any impurities from the hand shower.
To clean wall grab bar or arm mount unit:
Wipe gently with a damp cloth and blot dry with a soft towel. Do not use
detergent or cleansers that may be harmful to the finish.
PLEASE LEAVE this M&I sheet with the owner, maintenance plumber, etc. as items relating to
ongoing maintenance suggestions and procedures are included.
Instrucciones Sobre el Cuidado
Su Barra de pared para agarrarse está diseñada y fabricada de acuerdo con
los estándares más altos de calidad y funcionamiento. Con un cuidado
apropiado, le dará años de servicio sin dificultades. Se debe tener cuidado con
la limpieza de este producto. Aunque su acabado es extremadamente
resistente, puede ser dañado por abrasivos o pulimentos ásperos.
Para limpiar la cara de la regadera de mano:
Quite la manija de la regadera de la manguera. Remoje la regadera de mano
en una solución (50/50) de vinagre blanco y agua por unos 30 minutos para
disolver la acumulación de minerales. Reensamble, no apriete demasiado la
manija a la manguera. Abra el agua de la regadera para limpiar cualquier
impureza de la regardera de mano.
Para limpiar la barra de pared para agarrarse o la unidad de
montura del brazo:
Simplement frote con un paño húmedo y séquela con una toalla suave. No use
detergente o limpiadores que puedan dañar el acabado.
POR FAVOR deje esta hoja con el propietario, plomera de mantenimiento, etc., tiene incluída información
relativa a sugerencias y procedimientos para el mantenimiento.
Maintenance
When performing routine maintenance, do not void your warranty by installing
non-genuine parts. Use only authorized parts that carry the Delta genuine parts
logo. You will find detailed maintenance installation instructions on the back of all
our carded repair kits. Important: After any maintenance, thoroughly flush the
faucet as stated in the installation instructions.
Backflow Protection System
Your Delta Faucet hand shower incorporates a backflow protection system that
has been tested to be in compliance with ASME A112.18.3 and ASME A112.18.1
/ CSA B125.1. It incorporates two certified check valves in series, which operate
independently and are integral, non-serviceable parts of the wand assembly.
Mantenimiento
Cuando lleve a cabo un servicio de mantenimiento rutinario, no anule su garantía
instalando piezas que no son genuinas. Use solamente los repuesto autoizados
que llevan el emblema de los repuestos genuinos Delta. Usted encontrará
instrucciones detalladas para el mantenimiento e instalación en la parte trasera
de la tarjeta de todos nuestros equipos para reparaciones. Importante:
Después de hacer cualquier mantenimiento, deje correr el agua a través de la
llave por un minuto, como se indica en las instrucciones para la instalación.
Sistema de protección contra el contraflujo
Ducha de mano Delta tiene un sistema de protección contra el contraflujo,
incorporado, que ha sido probado para cumplir con los requisitos de ASME
A112.18.3 y ASME A112.18.1 / CSA B125.1. Este incorpora en la pieza de mano
dos válvulas de retención o checadoras certificadas en una serie, las cuales
operan independientemente y son piezas integrantes que no requieren servicio.
204337 204337 204337 204337 204337
Instructions de Nettoyage
Cette barre d’appui murale est conforme aux plus hautes normes de qualité. Il
vous donnera entière satisfaction pendant des années pour autant qu’il soit
bien entretenu. Nettoyez-le avec soin. Même si son fini est extrêmement
durable, il peut être abîmé par des produits fortement abrasifs ou des produits
de polissage.
Pour nettoyer la plaque trouée de la douche à main :
Retirez le tuyau souple de la douche à main. Faites tremper la douche à main
dans une 50/50 solution de vinaigre et d’eau pendant 30 minutes pour
dissoudre les dépôts de minéraux. Raccordez le tuyau souple à la douche à
main tout en prenant de garde de trop serrer le raccord. Ouvrez le robinet pour
évacuer les saletés de la douche à main.
Pour nettoyer la barre d’appui murale ou le support de douche à main :
Il vous suffit de le frotter doucement avec un chiffon humide et le sécher à l’aide
d’un chiffon doux. N’utilisez pas de détergent ou de nettoyant qui peuvent
endommager la finition.
PRIÈRE DE REMETTRE cette fiche au propriétaire, préposé à l’entretien, etc., car elle contient des articles
relatifs aux suggestions et procédures d’entretien courant.
Entretien
L’utilisation de pièces autres que des pièces d’origine au cours de l’entretien
entraîne l’annulation de la garantie. N’utiliser que des pièces autorisées qui
portent le logo Delta Genuine Parts. Les instructions d’installation en cours
d’entretien figurent en détail à l’endos de nos emballages. Après un entretien
quel qu’il soit, bien purger le robinet conformément aux instructions d’installation.
Dispositif anti-siphonnage
Douche à main Delta comporte un dispositif anti-siphonnage qui a été éprouvé et
qui est conforme aux normes ASME A112.18.3 et ASME A112.18.1 / CSA
B125.1. Ce dispositif se compose de deux clapets indépendants homologués,
montés en série dans le tube rigide, qui sont non réparables.
1
204337 Rev. A
Page 2

INSTALLATION INSTRUCTIONS
WARNING
GRAB BAR MAY NOT PROVIDE DESIGNED AMOUNT OF
SUPPORT UNLESS THESE INSTALLATION INSTRUCTIONS
ARE STRICTLY FOLLOWED.
For proper installation, both ends of Grab Bar MUST be installed
into a wall stud. For solid support, at least two (2) of the three (3)
screws on each end of the Grab Bar MUST go through the wallboard or tile and be tightly secured into the wall stud. Given
standard stud sizes, only two (2) of the three (3) screws may
screw into the wall stud.
Grab Bar may be installed vertically, horizontally or at an
angle, so long as at least two (2) of the three (3) mounting
screws on each end of the Grab Bar are secured into a wall
stud. Locate the wall studs behind the wall before beginning
installation (a stud finder can be obtained from a hardware store).
WARNING
THE FOLLOWING STEPS REQUIRE DRILLING INTO THE WALL.
When drilling into the wall, exercise care to avoid any electrical
wiring or plumbing that may be located behind the wall. Damaged
electrical wiring can cause electrical shock and/or fire. Since older
homes do not always fall in line with current housing codes and
requirements, know where internal wall wiring is located so that no
wires will interfere with your installation.
PROPER INSTALLATION IS EXTREMELY IMPORTANT. IF IN
DOUBT, INSTALLATION SHOULD BE DONE BY A QUALIFIED
PROFESSIONAL.
USING GRAB BAR
1. Read, understand and follow the information in the SAFETY
WARNINGS section of this instruction sheet. Delta shall have
no liability for any damage or injury caused by improper install ation or use of this Grab Bar.
2. Grasp the Grab Bar when exiting or entering the bathtub or
shower.
3. Use EXTREME caution on wet tub or floor surfaces.
4. DO NOT put entire weight on Grab Bar. Grab Bar is rated for
persons weighing up to 300 pounds when properly installed.
5. DO NOT stand, sit or step on Grab Bar. DO NOT use Grab Bar
as a step or platform to reach area above the tub. Use the bar
for assistance ONLY.
CARE AND MAINTENANCE
1. Use of mild soap and water or a non-abrasive cleaner is recom mended for cleaning.
2. Periodically inspect the Grab Bar for damage or looseness. DO
NOT use if any damage or looseness exists. Contact your
authorized dealer for assistance.
3. SAVE THESE INSTRUCTIONS FOR FUTURE REFERENCE.
BEFORE INSTALLING THE GRAB BAR:
1. Remove the Grab Bar and parts from the package. If concealed
mount Grab Bar is used, move cover plates away from mounting
holes.
2. Determine where you want to install Grab Bar.
3. Place Grab Bar on wall at desired position. If mounting horizon tally or vertically, check that the Grab Bar is level.
4. With a pencil, mark the centres of the mounting hole positions
on one end. These are the points where you will later drill holes
for putting in the screws.
5. Repeat Step 4 for the other end of the Grab Bar.
TO INSTALL INTO WOOD WALL STUDS:
6. Put on safety glasses before starting.
7. Use the 3/8” power drill and 5/32” drill bit to drill all holes into
the wall and wood wall studs at the marked positions. NOTE:
If installing Grab Bar over ceramic tiles, the 1/4” carbide tip drill
bit will be needed for drilling through the tile, in order to prevent
damage to the tiles. Drill pilot holes through the tiles by using a
1/4” carbide tip drill bit. Once a hole has been drilled through
the ceramic tiles, use the 5/32” drill bit to drill a pilot hole in the
wood wall stud itself.
8. Place Grab Bar on wall, aligning mounting holes with the holes
in the wall.
9. Insert the wood screws provided into one end of the Grab Bar.
Screw into wall and wall stud (HAND TIGHTEN ONLY).
10. Repeat Step 4 for opposite end of the Grab Bar.
11. Securely tighten all mounting wood screws with a screwdriver.
12. If concealed mount Grab Bar is used, move cover plates over
mounting holes and firmly press against the wall.
IMPORTANT NOTE: PULL ON GRAB BAR TO ENSURE THAT
A SECURE INSTALLATION HAS BEEN ACHIEVED.
Snap the two cover flanges into place, pressing tightly so the three
catches on each wall flange lock into place.
Install Mount/Slide Bracket. Reference Mount/Slide Bracket
instruction installation (separate sheet).
For installations with an existing showerhead:
1. Remove the old showerhead. NOTE: if existing shower arm
has an integral ball connector, replace it with a standard 1/2”
threaded shower arm.
2. Apply Teflon® tape to shower arm. Hand tighten hose end to
shower arm (or water supply). Tighten with wrench.
CAUTION: Be careful not to damage finish.
3. Carefully thread opposite end of those to the hand shower.
4. Place the hose from the hand shower into the holder (or
bracket) section of the arm mount and slip down. NOTE: The
hose will take a “natural drape” after warm water has been run
through it. CAUTION: Do not force the handle in or out of the
arm mount unit. The hand shower is easily removed from the
arm mount by lifting the handle upward.
NOTE: This “water saver” shower is designed to limit water usage
to 2.5 gallons per minute maximum. A flow control disc is preinstalled in the end of the handle where the handle attaches to the
hose.
This hand shower is equipped with a push button volume control.
It is not intended as a shut-off valve. A slight trickle of water in the
closed position is normal and indicates the system is still under
water pressure.
Adjusting arm mount unit:
1. The arm mount unit (for the hand shower) can be adjusted by
pushing up or down on the extended lever. Move arm mount
unit to desired position, return lever to “locked” position.
NOTE: Extended lever will move left and right on a horizontally
mounted grab bar.
2. The arm mount unit can also be adjusted by turning either
clockwise or counter-clockwise for desired positioning.
204337 Rev. A
2
Page 3

INSTRUCCIONES PARA LA INSTALACIÓN
ADVERTENCIA
LA BARRA DE SUJECIÓN PUEDE NO LLEGAR A BRINDAR EL
SOPORTE PARA LA QUE FUE DISEÑADA A MENOS QUE SE
SIGAN ESTRICTAMENTE ESTAS INSTRUCCIONES DE
INSTALACIÓN.
Para una instalación correcta, ambos extremos de la barra de sujeción
deben instalarse sobre vigas de la pared. Para un soporte sólido, al
menos dos (2) de los tres (3) tornillos de cada extremo de la barra de
sujeción DEBEN atravesar la placa de pared o azulejos y atornillarse
bien a una viga de la pared. Considerando las vigas de tamaño estándar, sólo dos (2) des los tres (3) tornillos pueden atornillarse en una
viga.
La barrra de sujeción se puede instalar de forma vertical,
horizontal o en un ángulo, siempre y cuando por lo menos dos
(2) de los tres (3) tornillos de montaje de cada extremo de la
barra queden atornillados en una viga de la pared. Ubique las
vigas detrás de la pared antes de comenzar con la instalación (puede
obtener un localizador de vigas en una ferretería).
ADVERTENCIA
LOS SIGUIENTES PASOS REQUIREN AGUJEREAR LA PARED.
Al perforar la pared, tenga cuidado para evitar cualquier cableado
eléctrico o caños de agua que pudiera haber detrás de la pared. El
daño al cableado eléctrico puede causar electrocución y/o incendios.
Como las casas viejas no cumplen con las normas y requisitos
actuales de construcción, averigüe dónde están los cables dentro de
la pared para evitar que interfieran con su instalación.
LA INSTALACIÓN CORRECTA ES SUMAMENTE IMPORTANTE.
SI TIENE ALGUNA DUDA, LA INSTALACIÓN DEBE SER REALIZADA POR UN PROFESIONAL CALIFICADO.
USO DE LA BARRA DE SUJECIÓN
1. Lea, comprenda y siga la información de la sección ADVERTEN-
CIAS DE SEGURIDAD de estas instrucciones. Delta no será
responsable por ningún daño o herida causada por la instalación
inadecuada o el uso de la barra de sujeción.
2. Sujete la barra al salir o entrar en la bañera o la ducha.
3. Tenga MUCHO cuidado con la bañera o el piso mojado.
4. NO sostenga todo su peso en la barra. La barra está diseñada
para personas que pesen hasta 300 libras cuando se instala
correctamente.
5. NO se pare, siente o se suba a la barra. NO use la barra de
sujeción como escalón o plataforma para alcanzar un área por
encima de la bañera. Use la barra como ayuda ÚNICAMENTE.
CUIDADO Y MANTENIMIENTO
1. Se recomienda el uso de un jabón suave y agua a un limpiador no
abrasivo para su limpieza.
2. Verifique periódicamente que la barra no esté dañada o floja.
NO la use si presenta cualquier daño o está floja. Llame a su
distribuidor autorizado por asistencia.
3. GUARDE ESTAS INSTRUCCIONES PARA REFERENCIA
FUTURA.
ANTES DE INSTALAR LA BARRA DE SUJECIÓN:
1. Saque la barra de sujeción y las partes de su embalaje. Si usa
una barra de sujeción con montaje oculto, retire las placas de
cubierta de los agujeros de montaje.
2. Determine dónde quiere instalar la barra de sujeción.
3. Coloque la barra de sujeción sobre la pared en la posición
deseada. Al montarla de forma horizontal o vertical, verifique
que esté nivelada.
4. Marque los centros de los orificios de montaje de un extremo
con un lápiz. Estos son los lugares donde deberá perforar para
colocar los tornillos.
5. Repita el Paso 4 para el otro extremo de la barra de sujeción.
INSTALACIÓN SOBRE VIGAS DE MADERA:
6. Colóquese las gafas protectoras antes de comenzar.
7. Use un taladro eléctrico de 3/8” y una broca de 5/32” para hacer
todoas los agujeros en la pared y las vigas de madera en las
posiciones marcadas. NOTA: Al instalar la barra de sujeción
sobre azulejos cerámicos, necesitará una broca de 1/4” con
punta de carburo para perforar los azulejos y evitar que se
dañen. Haga orificios piloto en los azulejos usando una broca
de 1/4” con punta de carburo. Una vez que haya hecho el
agujero a través del azulejo, use la broca de 5/32” para hacer
un orificio piloto en la viga de madera de la pared.
8. Coloque la barra de sujeción sobre la pared, alineando los
orificios de montaje con los agujeros en la pared.
9. Inserte los tornillos para madera incluidos en cada extremo de
la barra de sujeción. Atorníllelos en la pared y la viga de la
pared (AJÚSTELOS LEVEMENTE).
10. Repita el Paso 4 para el otro extremo de la barra de sujeción.
11. Ajuste firmemente todos los tornillos de montaje con un destor nillador.
12. Si usa una barra de sujeción con montaje oculto, coloque las
placas de cubierta sobre los orificios de montaje y presione
firmemente contra la pared.
NOTA IMPORTANTE: HALE LA BARRA PARA AGARRARSE
PARA ASEGURAR QUE SE HA LOGRADO UNA INSTALACIÓN
SEGURA.
Coloque a presión los dos rebordes de cubierta en su sitio, presionado bien de manera que los tres enganches en cada reborde de
pared queden fijos en su sitio.
Instale el soporte deslizable. Use las instrucciones de instalación
del soporte deslizable como referencia (hoja separada).
Para instalaciones con una cabeza de regadera existente:
1. Quite la cabeza de la regardera vieja. NOTA: si el brazo de la
regadera existente tiene una conexión de bola integrada,
reemplácela con un brazo de regadera estándar de rosca de 1/2”.
2. Aplique cinta Teflon® al brazo de la regadera. Apriete a mano el
extremo de la manguera al brazo de la regadera (o al suministro
del agua). Apriete con una llave de tuerca. ADVERTENCIA:
Tenga cuidado de no dañar el acabado.
3. Enrosque con cuidado el extremo opuesto de la manguera a la
regadera de mano.
4. Coloque la manguera de la regadera de mano dentro de la
sección del sujetador (o soporte) de la montura del brazo y
deslice hacia abjao. NOTA: La manguera tomará una “cortina
natural” después de haber corrido agua caliente por ésta.
ADVERTENCIA: No saque o coloque a la fuerza la manija de la
unidad de montura del brazo. La regadera de mano se saca
fácilement de la montura del brazo al alzar la manija hacia arriba.
NOTA: Esta regadera que le ‘ahorra agua’ está diseñada para limitar
el uso del agua a un máximo de 2.5 galones por minuto. Un disco
para el control de flujo es instalado previamente en el extremo de la
manija donde ésta se conecta a la manguera.
Esta regadera de mano está equipada con un botón a presión que
controla el volumen. No es para cerrar la válvula. Un pequeño
goteo de agua en la posición cerrada es normal e indica que el
sistema todavía está bajo presión de agua.
Ajustando la unidad de la montura del brazo:
1. La unidad de la montura del brazo (para la regadera de mano)
puede ajustada al empujar la palanca extendida hacia arriba o
hacia abajo. Mueva el soporte deslizable hasta la posición
deseada mueva la palanca a la posición “trabado”. Empuje hacia
abajo la palanca extendida. NOTA: La palanca extendida se
overá hacia la izquierda y hacia la derecha en una barra para
agarrarse montada horizontalmente.
2. La unidad de montura del brazo también puede ser ajustada al
girar en sentido de las manijas del reloj o al contrario para la
posición deseada.
204337 Rev. A
3
Page 4

INSTRUCTIONS D’INSTALLATION
ADVERTISSEMENT
LA BARRE D’APPUI PEUT NE PAS FOURNIR LE SUPPORT POUR
LEQUEL ELLE EST CONÇUE À MOINS QUE CES INSTRUCTIONS
D’INSTALLATION NE SOIENT STRICTEMENT OBSERVÉES.
Pour une installation appropriée, les deux extrémités de la barre d’appui
DOIVENT être installées dans un poteau mural. Pour obtenir un support
solide, au moins deux (2) des trois (3) vis de chacune des extrémités
de la barre d’appui DOIVENT traverser le panneau de revêtement ou
de carreau et être solidement fixées dans le poteau mural. Étant donné
la taille habituelle des poteaux, seulement deux (2) des trois (3) vis
peuvent être vissées dans le poteau mural.
La barre d’appui peut être installée verticalement, horizontalement
ou en angle pourvu que deux (2) des trois (3) vis de montage de
chacune des extrémités de la barre d’appui soient fixées dans le
poteau mural. Situez les poteaux muraux derrière le mur avant
d’entreprendre l’installation (un localisateur de poteau peut être trouvé
dans une quincaillerie).
ADVERTISSEMENT
LES ÉTAPES SUIVANTES NÉCESSITENT DE PERCER À TRAVERS
LE MUR.
Lorsque vous percez à travers un mur, faites attention d’éviter tous les
fils électriques ou les tuyaux de plomberie qui peuvent être situés
derrière le mur. Un fil électrique endommagé peut occasionner une
décharge électrique et/ou un incendie. Étant donné que les anciennes
maisons ne suivent pas toujours les codes du bâtiment et les exigences
actuelles, vous devez connaître le positionnement des fils dans le mur
afin qu’aucun fil n’interfère avec votre installation.
UNE INSTALLATION APPROPRIÉE EST EXTRÊMEMENT IMPORTANTE. SI VOUS ÊTES DANS LE DOUTE, L’INSTALLATION DEVRAIT
ÊTRE EFFECTUÉE PAR UN PROFESSIONNEL QUALIFIÉ.
UTILISATION DE LA BARRE D’APPUI
1. Prenez le temps de lire, de comprendre et de suivre l’information
contenue dans la section AVERTISSEMENTS DE SÉCURITÉ de
ce feuillet d’instruction. Delta ne sera pas tenu responsable de tout
dommage ou blessure causé par une installation ou une utilisation
inadéquate de cette barre d’appui.
2. Saisissez la barre d’appui lorsque vous sortez ou entrez dans le bain
ou la douche.
3. Soyez TRÈS prudent dans les bains ou sur les surfaces de plancher
mouillés.
4. N’appuyez PAS votre poids au complet sur la barre d’appui. La
barre d’appui est évaluée pour une personne pesant jusqu’à 300
livres lorsqu’elle est installée correctement.
5. Ne vous tenez PAS debout, ne vous assoyez pas ou ne montez
pas sur la barre d’appui. N’utilisez PAS la barre d’appui comme
étant une marche ou une plate-forme pour atteindre la zone située
au-dessus du bain. Utilisez la barre pour vous assister
SEULEMENT.
SOIN ET ENTRETIEN
1. L’utilisation d’un savon doux et de l’eau ou d’un nettoyant non abrasif
est recommandée pour le nettoyage.
2. Inspectez périodiquement la barre d’appui pour voir s’il n’y a pas de
dommages ou pour vérifier sa solidité. NE l’utilisez PAS si elle est
endommagée ou si elle manque de solidité. Contactez votre
marchand autorisé pour obtenir de l’assistance.
3. CONSERVEZ CES INSTRUCTIONS POUR RÉFÉRENCE FUTURE.
AVANT D’INSTALLER LA BARRE D’APPUI :
1. Retirez la barre d’appui et les pièces de l’emballage. Si le montage
dissimulé de la barre d’appui est utilisé, éloignez les plaques de
finition des trous de montage.
2. Déterminez où vous désirez installer la barre d’appui.
3. Placez la barre d’appui sur le mur à l’endroit désiré. Si vous
l’installez horizontalement ou verticalement, vérifiez que la barre
d’appui est au niveau.
4. Avec un crayon, marquez le centre des trous de montage à une
extrémité. Ce seront les points où vous allez ensuite percer les
trous pour insérer les vis.
5. Répétez l’Étape 4 pour l’autre extrémité de la barre d’appui.
POUR INSTALLER DANS DES POTEAUX MURAUX EN BOIS :
6. Mettez-vous des lunettes de sécurité avant de commencer.
7. Utilisez la perceuse électrique de 3/8 po et la mèche de 5/32 po
pour percer tous les trous dans le mur et dans les poteaux muraux
aux endroits déterminés. REMARQUE : Si vous installez la barre
d’appui sur des carreaux de céramique, une mèche de 1/4 po au
carbure sera nécessaire pour percer à travers les carreaux pour
éviter de les endommager. Percez des trous de guidage à travers
les carreaux en utilisant la mèche au carbure de 1/4 po. Une fois
qu’un trou a été percé à travers les carreaux de céramique,
utilisez la mèche de 5/32 po pour percer un trou de guidage dans
le poteau mural en bois.
8. Placez la barre d’appui sur le mur en alignant les trous de montage
avec les trous dans le mur.
9. Insérez les vis à bois fournies dans l’une des extrémités de la
barre d’appui. Vissez dans le mur et le poteau mural (SERREZ
À LA MAIN SEULEMENT).
10. Répétez l’Etape 4 pour l’autre extrémité de la barre d’appui.
11. Serrez fermement toutes les vis à bois de montage avec un
tournevis.
12. Si le montage dissimulé de la barre d’appui est utilisé, placez les
plaques de finition par-dessus les trous de montage et poussez les fermement contre le mur.
NOTE IMPORTANT : TIREZ SUR LA BARRE D’APPUI POUR
VOUS ASSURER QU’ELLE EST FIXÉE SOLIDEMENT.
Replacez les deux collerettes de finition, puis appuyez fermement
sur celles-ci pour faire pénétrer les trous ergots de blocage de chaque
collerette murale dans leurs logements.
Installation de montage de la fixation coulissante Montage de
référence/instruction d’installation de la fixation coulissante (feuille
séparée).
Remplacement d’une pomme de douche existante :
1. Enlevez la vielle pomme de douche. NOTE : Si le tuyau de la
pomme de douche est muni d’un raccord à rotule intégré,
remplacez-le par un tuyau de pomme de douche 1/2 po standard.
2. Appliquez de ruban de Teflon® sur les filets du tuyau de la pomme
de douche. Raccordez le tuyau souple au tuyau de la pomme de
douche (ou au tuyau d’alimentation) et serrez-le à la main.
Finessez le serrage avec une clé. ATTENTION : Prenez garde
d’abîmer le fini.
3. Raccordez soigneusement l’autre extrémité du tuyau souple à la
douche à main.
4. Introduisez le tuyau souple de la douche à main dans l’étrier du
support et glissez-le vers le bas. NOTE : Le tuyau prendra sa
forme normale lorsque de l’eau chaude aura circulé à l’interieur.
ATTENTION : Ne forcez pas pour placer douche à main dans le
support ou pour la retirer. Il est facile de retirer la douche du
support en la tirant vers le haut.
NOTE : Cette douche à économiseur d’eau est conçue pour
consommer au plus 2,5 gallons d’eau par minute. Un opercule régulateur de débit est monté près du point de raccordement avec le
tuyau souple.
La douche à main est équipée d’un poussoir de régulation de débit.
Ce n’est pas un robinet d’arrêt. Il est normal qu’un peu d’eau
s’écoule lorsque le régulateur de débit est fermé. Cela est indique
que la douche à main est sous pression.
Réglage du support de la douche à main :
1. Il est possible de régler le support de douchette en relevant ou
en abaissant le levier. Déplacez le support de douche à main
dans la position désirée, retournez le levier à la position
« verrouillée ».
2. Il est également possible de faire pivoter le support dans le sens
horaire ou le sens antihoraire.
204337 Rev. A
4
Page 5

RP7405
Hand Shower Assembly
Ensamble para la regadera de mano
Douche à main
50560
Wall Supply Elbow
Codo de pared para el suministro
Coude mural d’alimentation
060731A
Hose
Manguera
Tuyau souple
#10 x 2½" Scr
Tornillo #10 x 2½”
Vis #10 x 2½ po
Extended Lever
Palanca extendida
Levier
Arm Mount Unit
Unidad de la Montura del Brazo
Support de douche à main
RP32796
24” Grab Bar w/Adjustable Slide
Barra de pared para agarrarse de 24” y regadera
de mano con mecanismo deslizable
Barre d’appui murale de 24 po et douche à main
avec fixation coulissante ADA
W
all Flan
g
Reborde para la pared
Collerette murale
C
o
ver Flan
g
e
w
Tapa de reborde
Collerette de
finition
060970A
ADA Adjustable Slide
Mecanismo
Deslizable Aprobado
por ADA
Fixation
coulissante ADA
e
e
RP32797
36” Grab Bar w/Adjustable Slide
Barra de pared para agarrarse de 36” y regadera
de mano con mecanismo deslizable
Barre d’appui murale de 36 po et douche à main
avec fixation coulissante
5
204337 Rev. A
Page 6

6
204377 Rev. A
TECK
®
Delta Commercial Faucet Limited Warranty
Garantía Limitada de las Llaves de Agua Comerciales Delta
Garantie Limitée Delta Commercial
For further technical assistance call Delta Commercial Technical Service at 1-800-387-8277
www.deltafaucet.com
All parts of the Delta® HDF® and TECK® faucets are warranted to the original consumer purchaser to be free from defects in material, finish and workmanship for a period of
five (5) years unless otherwise specifically stated in the catalogue and price book. This warranty is made to the original consumer purchaser and shall be effective from date
of purchase as shown on purchaser’s receipt.
Delta will, at its option, repair or replace, FREE OF CHARGE, during the warranty period, any part which proves defective in material or workmanship under normal installation,
use and water and service conditions. If Delta Faucet concludes that the returned part was manufactured by Delta Faucet and is, in fact, defective, then Delta Faucet will
honour the warranty stated herein. Replacement parts can be obtained from your local dealer or distributor listed in the telephone directory or by returning the part along
with the purchaser’s receipt to our factory, TRANSPORTATION CHARGES PREPAID, at the address listed. THIS WARRANTY IS THE ONLY EXPRESS WARRANTY MADE BY DELTA.
ANY CLAIMS MADE UNDER THIS WARRANTY MUST BE MADE DURING THE FIVE YEAR PERIOD REFERRED TO ABOVE. ANY IMPLIED WARRANTIES, INCLUDING THE IMPLIED
WARRANTY OF MERCHANTABILITY OF FITNESS FOR A PARTICULAR PURPOSE, ARE LIMITED IN DURATION TO THE DURATION OF THIS WARRANTY. LABOUR CHARGES AND/OR
DAMAGE INCURRED IN INSTALLATION, REPAIR OR REPLACEMENT AS WELL AS INCIDENTAL AND CONSEQUENTIAL, SPECIAL, INDIRECT OR PUNITIVE DAMAGES CONNECTED
THEREWITH ARE EXCLUDED AND WILL NOT BE PAID BY DELTA FAUCET.
Some states do not allow limitations on how long an implied warranty lasts, or the exclusion or limitation of incidental or consequential damages, so the above limitations or
exclusions may not apply to you. This warranty gives you specific legal rights, and you may also have other rights which vary from state to state.
This warranty is for commercial products only from Delta Faucet Company and Delta Faucet Canada (a division of Masco Canada Limited) and is void for any damage to this
faucet due to misuse, abuse, neglect, accident, improper installation, any use in violation of instructions furnished by Delta Faucet or any use of replacement parts other than
genuine Delta parts.
Todas las piezas de las llaves de agua (grifos) Delta® HDF®, TECK® están garantizadas al comprador consumidor original de estar libres de defectos de material, acabado y
fabricación por un periodo de cinco (5) años a menos que sea establecido específicamente de otra manera en el catálogo o libro de precios. Esta garantia se le hace al
comprador consumidor original y será efectiva desde la fecha de compra como mostrado en el recibo del comprador.
Delta, a su opción, reparará o reemplazará, GRATUITAMENTE, durante el periodo de garantía, cualquier pieza que pruebe ser defectuosa en material o fabricación bajo
instalación, usu, agua y condiciones de servicio normales. Si Delta Faucet concluye que la pieza devuelta fue fabricada por Delta Faucet y es, de hecho, defectuosa, entonces
Delta Faucet honrará la garantía establecida en este documento.
Las piezas de repuesto se pueden obtener de su comerciante o distribuidor local listado en el libreto telefónico o devolviendo la pieza junto con el recibo del comprador a
nuestra fábrica, CARGOS DE TRANSPORTE PRE-PAGADOS, a la dirección incluida. ESTA GARANTÍA ES LA ÚNICA GARANTÍA EXPRESA HECHA POR DELTA. CUALQUIER
RECLAMO HECHO BAJO ESTA GARANTÍA DEBE SER HECHO DURANTE EL PERÍODO DE CINCO AÑOS ARRIBA MENCIONADO. CUALQUIER GARANTÍA IMPLÍCITA, INCLUYENDO
LA GARANTÍA IMPLÍCITA DE COMERCIABILIDAD DE EMPLEO PARA UN PROPÓSITO PARTICULAR, TIENE UNA DURACIÓN LIMITADA A LA DURACIÓN DE ESTA GARANTÍA. LOS
CARGOS DE LABOR Y/O DAÑO INCURRIDO DURANTE LA INSTALACIÓN, REPARACIÓN O REPUESTO COMO TAMBIÉN DAÑOS INCIDENTALES O RESULTANTES, ESPECIALES,
INDIRECTOS O PUNITIVOS RELACIONADOS CON LO MENCIONADO SON EXCLUIDOS Y NO SERÁN PAGADOS POR DELTA FAUCET.
Algunos estados no permiten limitaciones de la duración de una garantía implícita limitada, o la exclusión o limitación de daños incidentales o consecuentes, de manera que
las limitaciones o exclusiones arriba mencionadas puedan no aplicarle a usted. Esta garantía le da derechos legales especificos, y usted también puede tener otros derechos
que varían de estado a estado.
Esta garantía es solo para productos comerciales de Delta Faucet Company y Delta Faucet Canada, una división de Masco Canada Limitada, y es nula por cualquier daño
hecho a esta llave de agua resultante del mal uso, abuso, descuido, accidente, instalación incorrecta, cualquier uso en violación de las instrucciones proporcionadas por Delta
Faucet o cualquier uso de piezas de repuesto que no sean de piezas genuinas de Delta.
Toutes les pièces des robinets de marque Delta® HDF® et TECK® sont garanties contre tout défaut de matière, de finition et de main-d’oeuvre pour une période de cinq (5)
ans, sauf indication contraire stipulée dans le catalogue et la liste des prix. Cette garantie est offerte à l’acheteur original et entre en vigueur à compter de la date d’achat
indiquée sur la preuve d’achat.
Delta procédera, à son entière discrétion, à la réparation ou au remplacement, SANS FRAIS, durant la période de garantie, de toute pièce qui présente un défaut de matière ou
de main-d’oeuvre dans des conditions d’installation, d’usure, d’eau et de service normales. Si Delta Faucet détermine que la pièce retournée a été fabriquée par Delta Faucet
et qu’en effect, cette pièce fait défaut, Delta Faucet respectera alors la garantie stipulée aux présentes. Les pièces de rechange peuvent être obtenues chez votre marchand
local ou le distributeur inscrit dans votre annuaire téléphonique, ou en retournant la pièce ainsi que la preuve d’achat à notre usine, FRAIS DE TRANSPORT PRÉPAYÉS, à
l’adresse indiquée. CETTE GARANTIE EST LA SEULE GARANTIE EXPRESSE FAITE PAR DELTA.
TOUTE RÉCLAMATION FAITE EN VERTU DE CETTE GARANTIE DOIT ÊTRE PRÉSENTÉE DURANT LA PÉRIODE DE CINQ ANS MENTIONÉE CI-DESSUS. TOUTE GARANTIE IMPLICITE,
Y COMPRIS LA GARANTIE IMPLICITE DE VALEUR COMMERCIALE RELATIVEMENT À L’APTITUDE À LA FONCTION, EST LIMITÉE EN TERMES DE DURÉE POUR LA DURÉE DE CETTE
GARANTIE.
LES FRAIS DE MAIN-D’OEUVRE ET/OU DE DOMMAGES ENCOURUS DURANT L’INSTALLATION, LA RÉPARATION OU LE REMPLACEMENT AINSI QUE LES DOMMAGES-INTÉRÉTS
ACCESSOIRES OU IMMATÉRIELS, SPÉCIAUX, INDIRECTS OU PUNITIFS S’Y RAPPORTANT SONT EXCLUS ET NE SERONT PAS PAYÉS PAR DELTA FAUCET.
Certains états ne permettent pas la limitation de la durée de la garantie implicite, ou l’exclusion ou la limitation des dommages-intérêts accessoires ou immatériels, et par
conséquent, les limitations ou les exclusions stipulées ci-dessus peuvent ne pas s’appliquer dans votre cas. Cette garantie vous accorde certains droits reconnus par la loi et
vous avez peut-être aussi d’autres droits qui varient d’un état à l’autre.
Cette garantie s’applique seulement aux produits commerciaux des sociétés Delta Faucet et Delta Faucet Canada, une filiale de Masco Canada Limited et est nulle de plein
droit pour tout dommage causé à ce robinet en raison d’usage excessif, d’abus, de négligence, d’accident, de mauvaise installation, tout usage en contravention des
directives fournies par Delta Faucet ou tout usage de pièces de rechange autres que des pièces originales Delta.
Delta Faucet Canada, a division of Masco Canada Limited
Box 5750, 420 Burbrook Place, London, ON, Canada N6A 4L6
1-800-567-3300 (English) 1-800-265-9245 (French)
Delta Faucet Company
Box 40980, 55 East 111th St., Indianapolis, IN, U.S.A. 46280
(317) 848-1812
 Loading...