

Page 1
Quick
Installation
Guide
AG9032 V1
Local Console Configuration
The Switch can be accessed and managed by
using the Command Line Interface via a direct
connection to the RJ45 Console port.
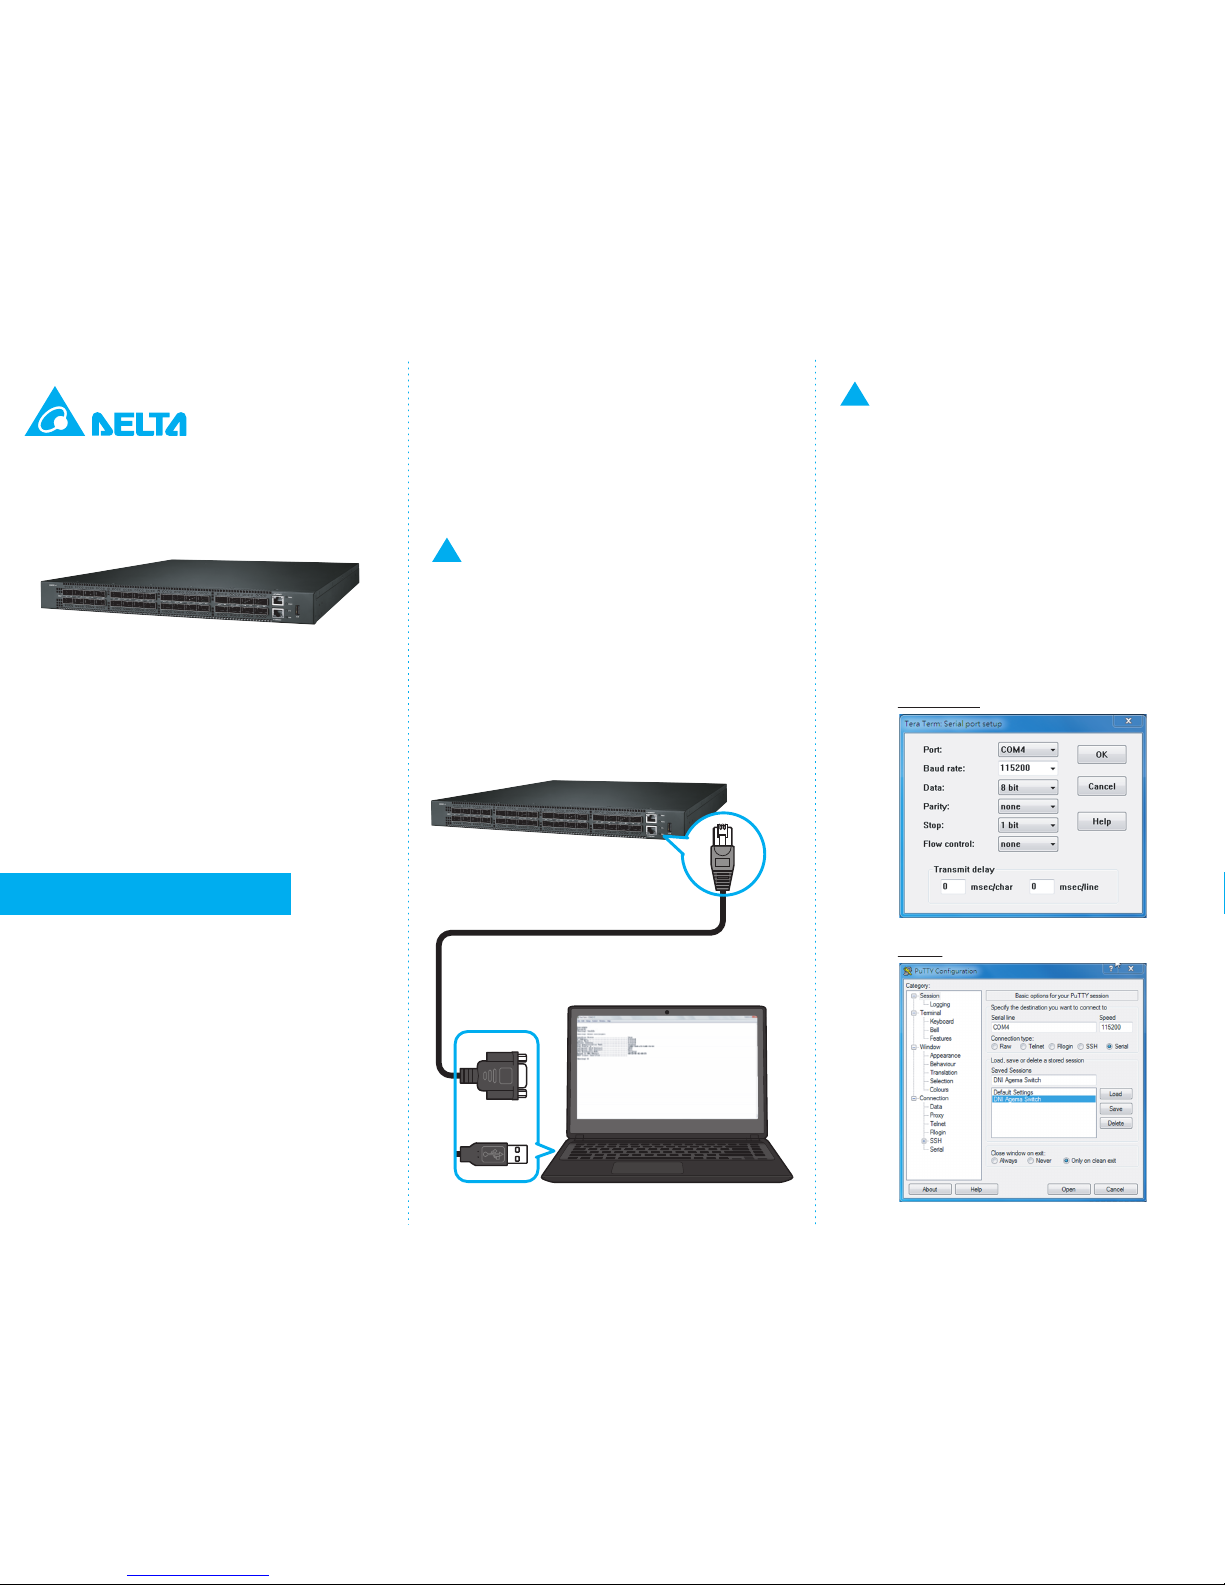
1 Connect Console
Delta Switch supports (1) RJ45 type Console
port and (1) 10/100/1000 Mb/s Management
port and (1) USB port for NOS recovery/
installation. Connect to Console port using
preferably a RJ45 to USB or RJ45 to DB9 to
USB cable as appropriate.
2 Set Up your Switch Using
Console Access
- Download and install Tera Term Pro terminal
or Putty software.
- Connect to Console port, and set the
software parameter as follows:
• USB port configured to use COM1 to COM4
• Speed (Baud rate): 115200
• Data width: 8bits
• Parity: none
• Stop bits: 1
• Flow control: none
Tera Term:
Putty:
or
The AG9032 V1 is a high performance, high density
next generation switch with target application for Data
Center Networks. It has Thirty-Two 100GbE QSFP28
ports which support 100GE Applications. In addition to
the rich bandwidth, the AG9032 V1 provides
comprehensive capability on layer 2 and layer 3
features, including SNMP, Spanning Tree, VLAN, QinQ,
Trunk, QoS, RIP, OSPF, IGMP, DVMRP, PIM-DM,
PIM-SM, Access Control, etc. This product which aims
for Data Center Networks also supports advance
features such as MPLS, TRILL, PFC, VEPA, QCN,
VxLAN and NVGRE to meet the high-demanding Data
Center high performance and virtualization requirement.
Page 2
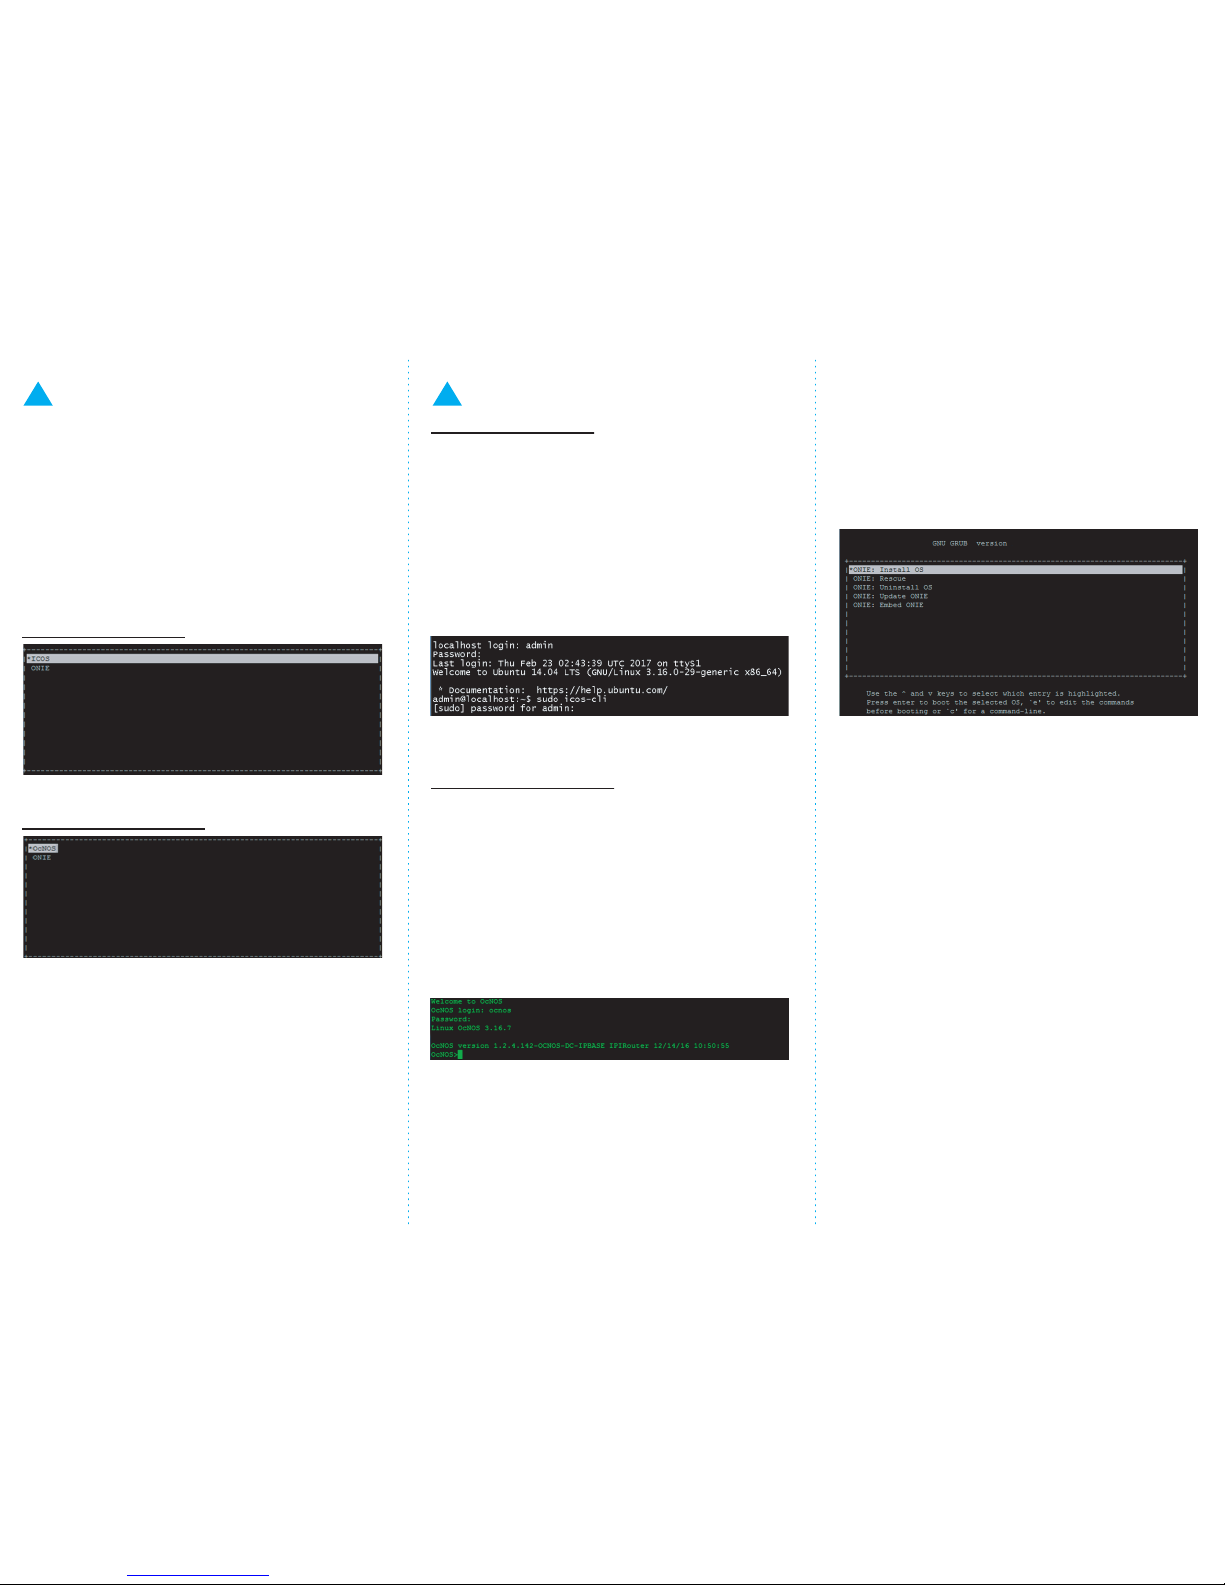
3 Select NOS
During boot up sequence, select appropriate
NOS (e.g. Broadcom ICOS or IP Infusion
OcNOS), use the ^ or v key to select the entry
as highlighted and press ENTER.
Note: GRUB menu will show NOS selection
only if the system is delivered with appropriate
NOS.
For Broadcom ICOS:
For IP Infusion OcNOS:
4 Login and Accessing the CLI
For Broadcom ICOS:
At the login prompt, enter the user name
(“admin”) and password (“broadcom”) [Enter].
Linux prompt $ >> sudo icos-cli [Enter].
Password: broadcom [Enter]
System will prompt as “Routing>> “.
Enter “enable” at the prompt and the system is
ready.
For IP Infusion OcNOS:
At the login prompt, enter the user name
(“ocnos”) and password (“ocnos”).
OcNOS login: ocnos [Enter].
Password: ocnos [Enter].
System will prompt as “OcNOS> “.
Enter “enable” at the prompt and the system is
ready.
For Bare Metal Models
Use the ^ or v key to select which entry is
highlighted and press ENTER.
For more information about ONIE instruction,
please visit:
http://agemasystems.com/documentation.php
Technical Support
• For software related technical support and
product return policy, please contact your
software providers.
• For hardware related technical support,
please send your e-mail to
techsupport@agemasystems.com.
• For network Operating System (NOS)
installation and configuration guide,
please visit:
http://agemasystems.com/documentation.php
 Loading...