

Page 1
*2701878_Rev.1*
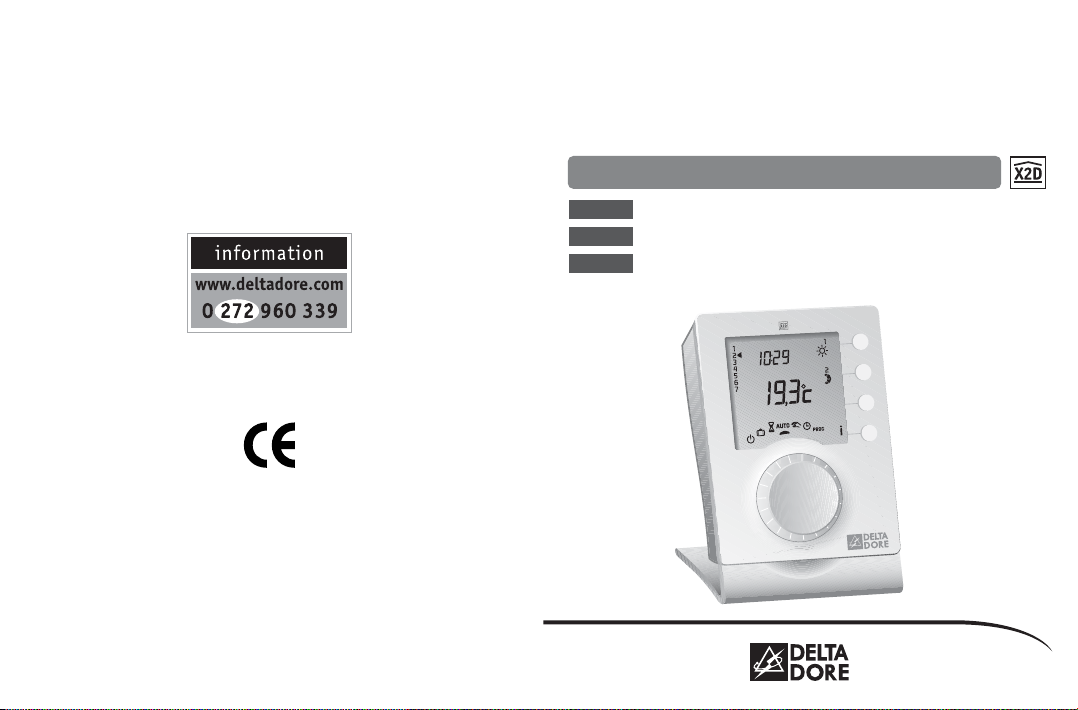
RADIO DRIVER
User guide
Wireless programmer
RADIO DRIVER 610 - 1 zone
6051117
6051118
6051119
RADIO DRIVER 620 - 2 zones
RADIO DRIVER 630 - 3 zones
RADIO DRIVER
Device complying with the requirements of the directives:
R&TTE 1999/5/CE
Because of changes in standards and equipment, the characteristics
given in the text and the illustrations in this document are not binding
unless confirmed by Delta Dore.
DELTA DORE - Bonnemain - 35270 COMBOURG - FRANCE
E-mail: deltadore@deltadore.com
Page 2

Contents
• Carefully read these instructions prior to use.
• Do not attempt to repair the unit yourself;
an after-sales service is available.
Warnings
Description
Presentation . . . . . . . . . . . . . . . . . . . . . . . . . . 4
Automatic Mode . . . . . . . . . . . . . . . . . . . . . . . 6
Override . . . . . . . . . . . . . . . . . . . . . . . . . . . . . 8
Timer mode . . . . . . . . . . . . . . . . . . . . . . . . . . 9
Absence mode . . . . . . . . . . . . . . . . . . . . . . . 10
Continuous mode . . . . . . . . . . . . . . . . . . . . . 11
Shutdown mode . . . . . . . . . . . . . . . . . . . . . . 12
Information button . . . . . . . . . . . . . . . . . . . . 13
Time setting . . . . . . . . . . . . . . . . . . . . . . . . . 15
Programming . . . . . . . . . . . . . . . . . . . . . . . . . 16
1. Create your program . . . . . . . . . . . . . . . . . . . . . 16
2. Copy the program . . . . . . . . . . . . . . . . . . . . . . . 16
3. Confirm the program . . . . . . . . . . . . . . . . . . . . . 16
PLC RADIO GP8 OPTION . . . . . . . . . . . . . . . . . . 19
Home automation functions . . . . . . . . . . . . . . 20
Tempo tariff . . . . . . . . . . . . . . . . . . . . . . . . . 26
Replacing batteries . . . . . . . . . . . . . . . . . . . . 27
Troubleshooting . . . . . . . . . . . . . . . . . . . . . . . 29
RADIO DRIVER
Modification
buttons
Selector
knob
position
Selector
knob
Off mode
Absence mode
Timer mode
Automatic mode
Continuous mode
Time setting
Programming
Page 3

Independent from the power supply of the heat emitter,
the Pilot Wire is used to send the Comfort ,
Economy , Frost Protection or Shutdown orders
requested by the programmer.
The required temperature is set on the thermostat of
each heat emitter (convectors, panel heaters, underfloor
heating or radiant ceiling heating, towel rail radiators,
storage heaters, etc.).
Presentation
RADIO DRIVER allows Comfort or Economy programming of the heating for 1 zone (RADIO DRIVER 610),
2 zones (RADIO DRIVER 620) or 3 zones (RADIO
DRIVER 630).
It can be associated:
- either with radio/Pilot Wire receivers (example: TYXIA
RF 660) to control Pilot Wire heating,
- or with PLC/Pilot Wire receivers (example: TC51089)
via the PLC RADIO GP8 option,
- or with a wireless/infrared gateway
(example: Radio D30) to control the split,
- etc.
Pilot Wire principle:
IMPORTANT: PThe heat emitter must be in automatic
mode (PROG, AUTO, etc. depending on model) to
receive orders from the programmer.
- 5 -- 4 -
Programmer
Pilot Wire orders
Receiver
(e.g. Wireless/Pilot Wire)
Heat emitters
Pilot Wire
Pilot Wire
order
(mode)
Comfort
Economy
Absence
Off
Comfort setting (thermostat knob)
example: 19°C
Economy setting (thermostat knob)
example: 16°C
or Comfort –X°C (depending on heat
emitter model)
Frost protection set to 7°C or 8°C
(depending on model)
Heating shutdown
Setting on
the heat emitter
Room
temperature
19°C
16°C
7°C or 8°C
No
Heating
Page 4

RADIO DRIVER 630 follows the programming
in the 3 zones.
- 7 -
- 6 -
Automatic mode
Turn the knob to AUTO.
RADIO DRIVER 610 follows the programming.
RADIO DRIVER 620 follows the programming in both
zones.
Time
Current day
Room
temperature
Display in automatic mode
Time
Current day
Room
temperature
Current mode
Information button
Current mode
in zones 1 and 2
Override
for zone 1
Override
for zone 2
Information button
Override
Current mode
Time
Current day
Room
temperature
Display in automatic mode
in zones 1, 2 and 3
Override
for zone 1
Override
for zone 2
Override
for zone 3
Information
button
Display in automatic mode
Page 5

- 9 -
Timer mode
Override
- 8 -
In automatic mode, override is used to go from
Comfort to Economy mode (or conversely) until
the next program change.
E.g. it is 15:30 and you would like to switch to Comfort
mode before the set time (17:00).
6:00 8:00
Current day programming on zone 1
To cancel the current override,
press the button once more.
Press the override button
of zone 1.
Current override
on zone 1.
17:0015:30 23:00
At 17:00, the program will return
00:0000:00
to its usual program.
This mode is used to select a mode for a given
time and for one zone only.
Turn the knob to .
Zone selection
(the other zones are in AUTO mode)
Confirm
Choice of mode:
Economy or Comfort
Confirm
Adjustment of the duration from 15 minutes
to 72 hours (in increments of 15 minutes)
Confirmation
and start of
the countdown
To cancel the current timer mode,
turn the knob.
Return to AUTO mode
at the end of the countdown
Page 6

- 11 -
- 10 -
Absence mode
Note: The water heater (DHW) is shutdown during
the absence mode. If you want the water heater to be
in automatic mode, refer to the “installation guide”
or contact your installer or our customer service
department.
Continuous mode
This mode allows you to choose a continuous mode for
each of the zone.
Turn the knob to , then press the modification button
of the relevant zone to select the Comfort or
Economy mode.
RADIO DRIVER 610
RADIO DRIVER 620
This mode lets you place your home under Frost Protection
if you need to leave for several days.
Turn the knob to .
Adjustment of the number of days
(1 to 365)
E.g. for a departure on 1 March and a
return on 10 March, program 9 days
of absence.
Automatic operation will resume on
10 March at midnight.
Confirm and start the calendar
countdown.
To cancel the current absence
mode, turn the knob.
Return to AUTO mode at
the end of the countdown
Room
temperature
Room
temperature
Current mode
Modification of the mode
Current modes
in zones 1 and 2
Modification of
the mode in zone 1
Modification of
the mode in zone 2
Page 7

During the AUTO, or , modes, press the i button
repeatedly to find out:
• the outside temperature
If, in your installation, you have the PLC RADIO GP8
option with an outdoor probe,
• total consumption of your installation
If, in your installation, you have the Radio TYWATT
option or a PLC RADIO GP8,
To reset all meters, press and hold the
init. button for 5
seconds.
- 13 -
Information button
The display of all information related to home
automation features (outside temperature, consumption
indication, etc.) requires an “activation”phase from
the RADIO DRIVER (see the home automation
features section).
RADIO DRIVER 630
To exit this mode, turn the knob.
This mode allows you to shut
down your heating system
(in this case, the water
heater stays in automatic
mode).
Turn the knob to .
Off Mode
- 12 -
Continuous mode
Room
temperature
Current modes
in zones 1, 2 and 3
Modification of
the mode in zone 1
Modification of
the mode in zone 2
Modification of
the mode in zone 3
Room
temperature
Reset
Consumption
Press successively
Page 8

Turn the knob to .
The days flash.
Press + or - to change the day, then press OK to
confirm and continue on to the minute setting.
To leave the “time setting”mode, turn the knob.
Time setting
- 15 -
NOTE: If the unit is configured for a daily program,
the days setting is not offered.
- 14 -
• the electrical consumption in euros of the
heating, water heater (DHW) and other electrical
appliances (lights, household appliances, etc.).
If, in your installation, you have the Radio TYWATT
option or a PLC RADIO GP8 with additional CTs,
• the program of the current day per zone.
Information button
Mise à zéro
Mise à zéro
e.g. zone 1
Comfort periods
Minutes
Days
(1 : Monday… 7 : Sunday)
Hours
Page 9

- 17 -
Programming
Turn the knob to PROG.
The default program is a Comfor t per iod from 6:00 to
23:00.
1. Creating your program
Programming starts on day 1 at midnight.
Press the or buttons to create different Economy
or Comfort periods.
2. Confirming and copying the program
Press and hold the OK button for 3 seconds to confirm
the program you created and copy it to
the next day.
3. Confirming the program
Press the OK button to confirm and continue on to
the next day to program it separately.
- 16 -
Day
Zone
to program
1st time
slot
Comfort period
adjustment
Economy period
adjustment
E.g. Comfort from 6:00 to 8:00 and from 17:00 to 23:00
6:00 8:00
Press and hold until you reach 06:00
17:00 23:00
Press and hold until you reach 23:00
00:00 00:00
Press and hold until you reach 08:00
Press and hold until you reach 17:00
Press and hold until you reach 00:00
Copy and confirm
or simply confirm
Page 10

- 19 -
PLC RADIO GP8 option
The PLC RADIO GP8 option is an energy manager for
new or existing housing.
Associated with the RADIO DRIVER, it lets you:
- control the heating through receivers by using line
carrier transmission (no modification of the electric
installation),
- provide load-shedding for up to 8 channels (single or
three-phase),
- display the total consumption (if associated with
an electronic meter). Possibility of also measuring
consumption per appliance (heating, DHW, other)
by adding additional CTs (ref.6330004),
- associate home automation products (door/window
magnetic contact, alarm control unit, telephone
transmitter, etc.),
- display the outside temperature (with wireless outdoor
probe ref. 6300036).
- 18 -
Checking your program
Press the button repeatedly to check the accuracy of
the Comfort and Economy periods you created.
Press the OK button to check the next day.
Programming the other zones
The programming for the other zones is available after
pressing (
OK) of the day 7 of the current zone.
Exiting the programming mode
Turn the knob to another mode.
COMMENTS: Depending on the configuration made
during installation, programming can be weekly or daily.
Likewise, this programming may be done in increments
of one hour, 30 minutes, or 15 minutes. To change these
settings, refer to the “installation guide”, or contact our
customer service department or your installer.
Programming
Time
slot
consulted
Program
Profile
Verification
of the different
or periods
Page 11

/
OK
RF
With a door/window magnetic contact
When a door/window magnetic contact is associated
with several heating zones, these zones are switched
to frost protection mode when the contact is opened.
- 21 -
PLC RADIO GP8 can associate up to 7 home
automation products (door/window magnetic contacts,
alarm control unit, remote controls, etc.) for each of
the heating zones + 7 products to act on all the heating
zones (telephone transmitter, outdoor probe, etc.).
Refer to the CP8 RADIO CPL installation guide to
associate the different products.
Activating the RADIO DRIVER
PLC RADIO GP8 instantly accounts for all changes in
the installation and transmits them to the receivers.
To display these changes on the RADIO DRIVER
(e.g. open entry), it must be “activated” by pressing
a button.The update can take a few seconds.
Home automation functions
- 20 -
E.g. door
Activating the RADIO DRIVER
window magnetic contact associated with zone 2
Zone 2
OK
RF
Amp.
CE
90 5
75 7,5
63 10
15
60
50
20
45
25
40
30
35
GP8 RADIO CPL
Frost Protection
E.g. Zone 2 in
Open
Window
Frost Protection
mode
RADIO DRIVER
is on standby
Press a button
RADIO DRIVER is
“activated” and displays
the status of the installation
Page 12

Home automation functions
With a TYXAL alarm control unit
When a TYXAL alarm control unit is associated with
one or more heating zones.
When you enable the alarm, the associated zone(s)
automatically switch to Economy mode until the next
program change.
Conversely, when you disable the alarm, the associated
zone(s) automatically switch to Comfor t mode until
the next program change.
This override can be cancelled on the RADIO DRIVER,
by pressing the buttons of each zone or by tur ning
the selector knob.
- 23 -
With a TYXIA Transmitter
When a TYXIA transmitter is associated with one or
more heating zones.
Pressing the button switches the associated
zone(s) to Comfort mode until the next program
change.
Pressing the button switches the associated zone(s)
to Economy mode until the next program change.
The command can be cancelled:
- on the TYXIA transmitter, by pressing ,
- on the RADIO DRIVER, by pressing the zone 1
button or by turning the selector knob.
- 22 -
E.g. remote control associated with zone 1
E.g. control unit associated with all the zones
Page 13

With a TYDOM 200 remote control
From the home domain , pressing the tactile
button switches off all the zones.
This off command is cancelled by pressing the
button (return to automatic mode).
Pressing the tactile or button switches the
zone(s) associated with these buttons to Economy or
Comfort mode until the next program change.
The command can be cancelled:
- on the TYDOM 200 remote control, by pressing
the tactile button,
- on the RADIO DRIVER, by pressing the zone 3
button or by turning the selector knob.
- 25 -
Home automation functions
With a TYDOM telephone transmitter
By calling the TYDOM telephone transmitter, let
the synthetic voice guide you to determine or modify
the status of the heating system or hot water tank
(see the telephone transmitter guide).
- 24 -
E.g. transmitter associated with all the zones
123
456
9
78
#
0
E.g. and buttons of the TYDOM 200
associated with zone 3
Page 14

- 27 -
Replacing batteries
When the battery level symbol appears, you have
around 1 month to change the batteries
(two 1.5 V alkaline batteries, LR03 or AAA).
The following precautions must be respected:
- Ensure that the +/- polarities are correctly placed
when the battery is fitted into the unit.
- Do not dispose of used batteries in unauthorized
places (you should respect the environment by taking
the batteries to a suitable collection site).
- Do not recharge the batteries.
- You have approximately 30 seconds to change
the batteries before the time is reset to zero
(if this happens, reset the date and time).The other
settings are unchanged.
- 26 -
Only with an associated PLC RADIO GP8,
the price programming is used to select a lower
temperature (economy) in periods when electricity is
most expensive (e.g.peak hours, red day).
The electronic meter informs the PLC RADIO GP8 of
the current price using the teleinfo line.
Periods of tariff reduction can be programmed on your
electronic meter (refer to the meter’s instructions).
The symbol flashes during a tar iff reduction.
The symbol flashes if you are in Médio (-1°C) or
Modérato (-2°C) comfort mode.
Tempo tariff
Tariff reduction
in progress
Battery level symbol
Page 15

Nothing is displayed on the room unit screen.
There is no power supply.
Check the batteries or their polarity.
The i symbol flashes.
A fault has been detected in the system.
Press the button to consult the fault or faults.
The unit displays: dEF7.
Communication fault with the electronic meter.
Check the connection with the meter.
The unit displays: dEF and a number other than dEF 7
There is a fault on the unit that requires it to be returned to
our after-sales service.
Contact our customer service department.
The symbol flashes.
You are in tariff reduction mode.
Refer to the Tempo tariff section.
Troubleshooting
- 29 -
The purpose of this section is to help you quickly solve
the most common problems that you may encounter
with your product during use.
If you're unsure, or if the problem persists or isn't in
this list, contact our customer service department.
- 28 -
Replacing batteries
Separate the thermostat
1
from its support
2
Replace the batteries, making sure
they are the right way round
Position the thermostat
3 4
on its base
Lock the thermostat
Page 16

When setting the time, there is no option to set the day.
You are in daily programming mode.
To switch to weekly programming, refer to the installation guide
or contact your installer or our customer service department.
The temperature displayed does not match the temperature
measured in the room (thermometer).
Refer to the installation guide or contact your installer or our
customer service department.
The unit is in time setting mode.
There was a power supply disruption that lasted more than
30 seconds.
Set the time. All other settings have remained unchanged.
The heating elements are in Frost Protection mode
You are in programming mode, the absence mode or time setting mode.
Turn the knob to select another mode.
You cannot change the programs.
Program changes were locked during installation.
Troubleshooting
- 30 - - 31 -
The consumption displayed by the unit does not
correspond to the consumption shown on the bill sent
by the electricity supplier.
To check the cost of the kWh per tariff period, refer to
the installation guide or contact your installer or our customer
service department.
Important: the consumption value that you can read on the unit
is a non-contractual indication and cannot be substituted for the
consumption value mentioned on your electricity supplier’s bill.
 Loading...