

Page 1
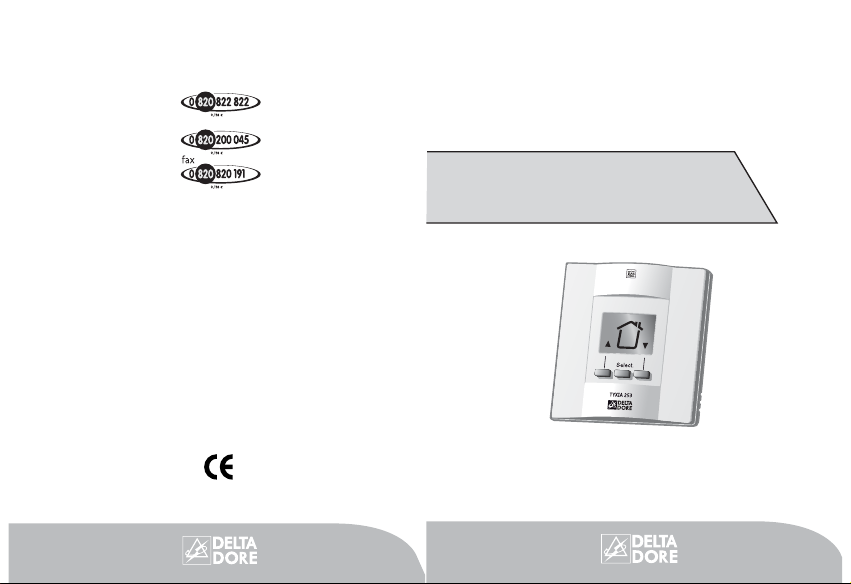
TYXIA 253
Installation and use
Centralised control unit for control systems
Ref.: 6351034
DELTA DORE TALCO - Bonnemain - 35270 COMBOURG
E-mail: deltadore@deltadore.com
pro.deltadore.com
France:
DELTA DORE ELECTRÓNICA, S.A
C/ AntoniBorja, 13
Semi-sótano, local 1 y 2 - 08191 Rubí (Barcelona)
Tlf.: 93 699 65 53 - Fax.: 93 588 19 66
E-mail: deltadore@deltadore.es
www.deltadore.es
España:
DELTA DORE Schlüter GmbH
Fichtenstraße 38 a
D - 76829 Landau
Telefon: 0049 7276 96690 - Telefax: 07276 502120
Email: info@delta-schlueter.de
Deutschland:
Commercial info
Technical info
f
r
o
m
a
l
a
n
d
l
i
n
e
i
n
c
l
.
t
a
x
e
s
/
m
i
n
f
r
o
m
a
l
a
n
d
l
i
n
e
i
n
c
l
.
t
a
x
e
s
/
m
i
n
f
r
o
m
a
l
a
n
d
l
i
n
e
i
n
c
l
.
t
a
x
e
s
/
m
i
n
2701473 Rev.1
Device complying with the requirements of the
R&TTE 1999/5/EC directive
Page 2
Contents
Because of changes in standards and equipment, the
characteristics given in the text and the illustrations of this
document are not binding unless confirmed by Delta Dore.
Presentation
Tyxia 253 is a centralized control for X2D roller
blind receivers (or other X2D control systems).
Tyxia 253 is used to:
• control the raising or lowering of 4 groups or all
of your shutters.
• activate or deactivate the 24 hour repetition of
4 groups or all of your 24 hour repetitions.
• switch on 2 scenarios.
For use with the lighting:
- the button controls the switching on.
- the button controls the switching off.
Description ................................................ p 4
Installation ................................................ p 5
Starting up
Power supply....................................................... p 6
Enter association mode ....................................... p 6
Associate raise/lower receivers............................ p 7
Associate the repetition of
the raise or lower operation ................................ p 8
Create a scenario................................................. p 9
Exit the association mode.................................... p 9
Remove the associations .......................... p 10
Use
Activate the raise or lower operation................. p 12
Activate or deactivate the repetition...................p 12
Starting up a scenario ....................................... p 13
Characteristics.......................................... p 14
Questions / Answers ............................... p 15
Page 3
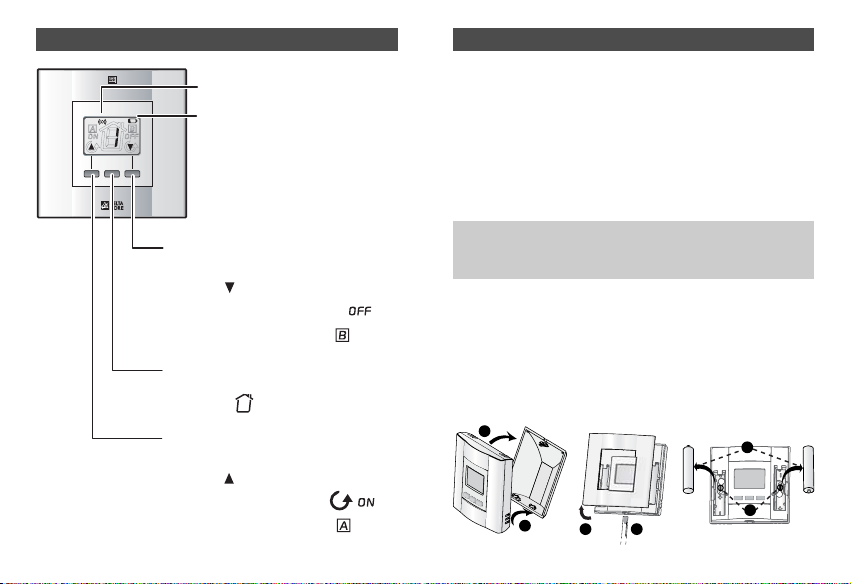
Select.
InstallationDescription
Wall-mounted or placed on accessible furniture at a
height of 1.50 m.
Installation precautions for correct transmission
In dwellings, the propagation of radio waves is
reflected and attenuated by the structures encountered. This propagation can be altered, so avoid
installing products near large metal masses
(beams) or an electrical switchboard.
Wall mounting
Remove the TYXIA 253 from its support
➊ ➋
.
Using the flat screwdriver, unclip ➌then remove
the cover ➍, then the batteries ➎ to access the
mounting holes ➏.
It is advisable to test the radio transmission with
the X2D receivers before finally installing the
transmitter.
- 4 - - 5 -
TYXIA 253
Radio transmission signal
Low battery signal
This button is used to:
• lower the blinds or switch
off the control systems
• deactivate the repetition
• switch on the scenario
This button is used to select
the different groups
(1 to 4 or )
This button is used to:
• raise the blinds or switch
on the control systems
• activate the repetition
• switch on the scenario
1
2
5
+
+
4
3
6
Page 4

- 7 -
Associate raise/lower receivers
On the TYXIA 253, briefly press
the Select. button, to select. a
raise / lower group (1 to 4 or ).
Example: group 2.
On each of the receivers that you
want to associate with group 2,
simultaneously press on and
buttons until the
LED switches on. Release.
On the TYXIA 253, press one of
the or
buttons, the symbols
become steady
.
Check that the LED of each
receiver is no longer flashing.
Starting up
Power supply
Using a flat screwdriver,
unclip ➊then remove the
cover
➋
.
Remove the battery tab
➌
,
then fit the cover back.
Enter the association mode
Press Select.
until the display flashes (~5 sec.).
If you want to select another group
(1 to 4 or ), briefly press the
Select. button.
- 6 -
Note: After 2 minutes without any button being
pressed, the TYXIA 253 automatically exits the
association mode.
Select.
2
1
Select.
5 s.
3
Press
briefly
Select.
Page 5

- 9 -
On the TYXIA 253, briefly press
the Select. button, to select a
repetition group (1 to 4 or ).
On each of the receivers that
you want to associate with the
repetition group, press for
the repetition of the raise action
and/or for the repetition
of the lower action until the
LED flashes.
On the TYXIA 253, press one
of the buttons, the symbols
become steady.
Check that the LED of each
receiver is no longer flashing.
Starting up
- 8 -
Associate the repetition of the raise or
lower operation
If you want to activate or deactivate the repetition
of a group of roller blinds, choose the same group
number as the one assigned when associating the
receivers for the raise / lower operation.
Example: associate the receivers of the raise /
lower group 1 on the repetition group 1.
10 s.
Note: You must associate the TYXIA 253 with the
receivers, before choosing the time for the raise
or lower operation of your blinds (see receiver
instructions).
Receivers associated with
Select.
Select.
the raise / lower group 1
Select.
10 s.
Select.
Page 6

Remove the associations
Remove an association group or a
scenario
On the TYXIA 253, press the Select. button until
the display flashes (~5 sec.).
Then briefly press the Select. button to select the
group or scenario to remove. Then press one of
the buttons , , , or for 5 seconds.
On each receiver of the group, press and hold the
association button(s) of the receiver (the LED
flashes after 3 seconds). Keep it pressed down
until the LED extinguishes to confirm that all the
receiver associations are deleted.
On the TYXIA 253, select another group to remove
or press the Select. button for 5 seconds to exit
the association mode.
- 11 -
Create a scenario
On the TYXIA 253, briefly press
the Select. button to select the
association screen for a scenario.
Set the receiver(s) to the
required state (blinds lowered,
lights on at 70%, etc.). Next,
set the receiver(s) to association
mode (see their respective
instructions).
On the TYXIA 253, press the
scenario or
scenario
button.
Check that the LEDs of the
receivers are no longer flashing.
Exit the association mode
Press the Select. button for 5 sec.
- 10 -
Starting up
Select.
Via an X20 receiver
70%
Select.
Page 7

Use
During use, only associated groups or scenarios
will be proposed.
Activate the raise or lower operation
With the Select. button, select the raise/lower
group of your choice. Then press the or
button.
Example:
Lower the roller
blinds associated
with group 2.
Activate or deactivate the repetition
With the Select. button, select the repetition
group of your choice.
Next, press the
ON button to activate or the OFF
button to deactivate the repetition.
Starting up a scenario
With the Select. button, select the screen
corresponding to the scenarios, then press the
button of the scenario of your choice or .
- 13 -
Remove the associations
Remove all the association groups
On the TYXIA 253, press the Select. button until the
display flashes (~5 sec.).
Then, from group that has already been associated,
press one of the
, , , or buttons for
30 seconds.
At the end of the 30 seconds, the raise /lower
group 1 displays steady on the screen.
On each receiver, press and hold the association
button(s) of the receiver (the LED flashes after
3 seconds). Keep it pressed down until the LED
extinguishes to confirm that all the receiver
associations are deleted.
- 12 -
Select.
Select.
Press
briefly
Page 8

Questions / Answers
In the same group, one of the blinds lowers or
raises 10 seconds after the other blinds.
➥➥
A recycling command was given 10 seconds
later to ensure that all the receivers had received
the order.
The battery symbol is displayed.
➥➥
The batteries are low.
In the association mode, on some screens,
the symbols , , , or do not flash.
➥➥
Receivers are already associated with these
screens.
- 15 -- 14 -
Characteristics
• Power supply: two 1.5V, LR03 alkaline batteries
• Autonomy: approximately 2 years
• Transmission frequency: 868 MHz, class I
(standard EN 300 220)
• Radio range 100 to 300 metres outside
depending on the associated equipment
(the range can be altered depending on the
installation conditions and the electromagnetic
environment)
• Protection index: IP30
• Storage temperature: -10°C to +70°C
• Operating temperature: 0°C to 40°C
• Dimensions: 80 x 80 x 23 mm
• Installation in an environment with normal
pollution levels
• Radio remote control device
 Loading...