

Page 1
Mira Mobile Computer
Quick Start Guide
THE PACKAGE
The Mira package includes the following items:
− 1 Mira mobile computer
− 1 AC/DC power supply
− 1 plug kit
− 1 standard Micro USB cable (laser and 2D Imager models only)
− 1 guitar pick + cord
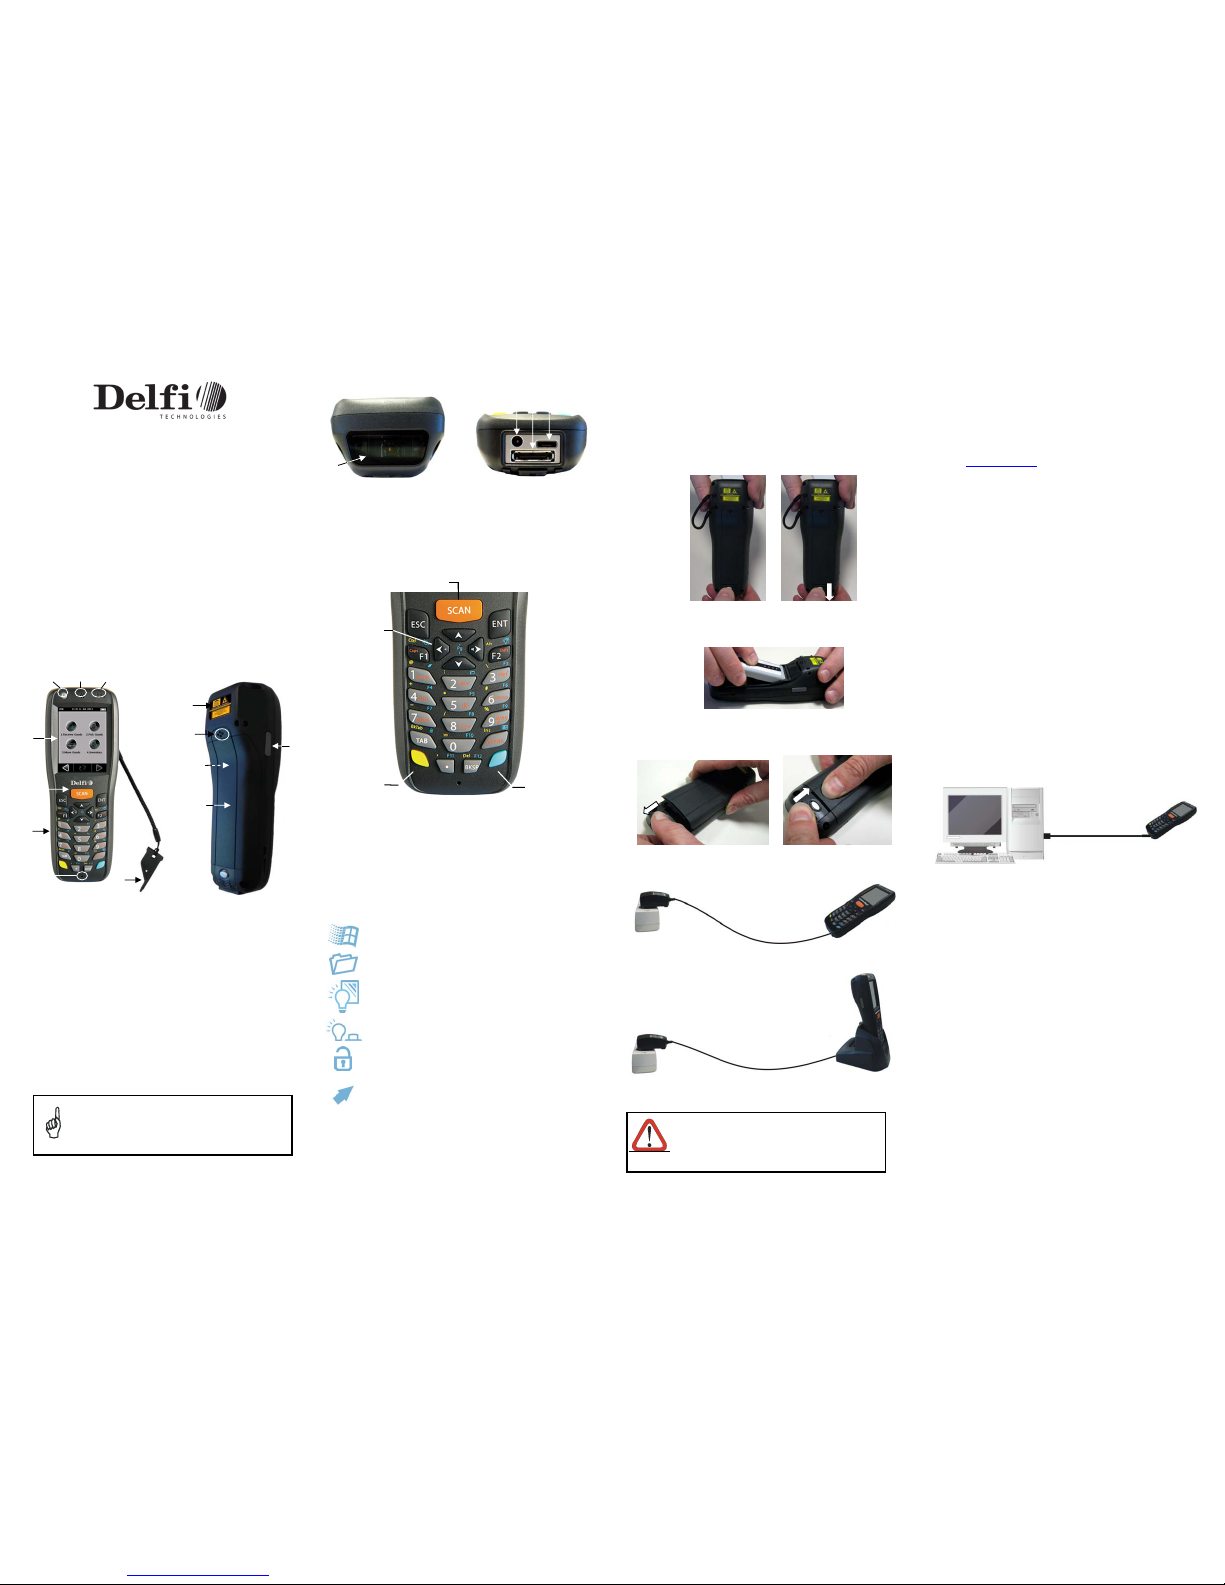
THE TERMINAL
A) QVGA 64K color display
B) ON/OFF power key
C) Speaker
D) LEDs
E)
Scan
key
F)Key
board
G) Microphone
H) Guitar pick stylus
I) Laser safety label
J) Rear speaker
K) Product label (under
battery)
L) Battery cover
M) Programmable side key (on
both sides of the mobile
computer)
Before using the
term
inal, remember
to re
move the
protective film covers in front of the display and of the
Data Capture window.
NOTE
r. 0.9.0.1
N) Data capture window*
O)
DC charger conn
ector
P)
Communication/charger
connector (thr
ough cradle)
Q) MicroUSB communication
connector (through cable)
KEYPADS
1. Cursor Keys
2. Scan Key
3.
Yellow Modifier
4. Blue Modifier
Special Function Icons
ICON FUNCTION
After a blue modifier key press, it opens
the Start
menu.
After a blue modifier key press, it opens the file
manager.
After a blue modifier key press, it switches ON/OF
F the
display backlight.
After a blue modifier key press, it switches ON/OFF the
keyboard backlight.
After a blue modifier key press, it locks and unlocks the
keyboard.
After a blue modifier key
press, it disables the
touchscreen and allows the user to control the device
through a joystick-driven cursor, with Mira side keys
acting as left and right buttons
GETTING STARTED
Insert the Battery
1. Push the latch release button and pull the latch down; then remove
the battery cover.
2. First insert the upper side (contacts), then the bottom side of
the
battery pack into the slot:
3. Reinsert the cover. First insert the upper side and then press the
latch release button and pull the latch down to insert the bottom.
Push the knurled section of the latch upwards to close the cover:
Charge the Battery
With Power Supply
With Single Cradle
Do not use the Mira until batteries are charged for
minimum 4 hours.
CAUTION
SYNCHRONISE YOUR DEVICE WITH THE PC
Set up Synchronisation using Windows Mobile®
Device Center
Windows Mobile® Device Center can be downloaded from Microsoft
website www.microsoft.com. It is only compatible with Windows Vista
and Windows 7; if you run Windows XP or earlier, you have to
download Microsoft ActiveSync.
You can establish a connection to your Mira through the
following interfaces:
USB either directly or through the Single Dock
RS232 either directly or through the Single Dock
Bluetooth®
To establish a partnership between the Mira and a host PC, start
Windows Mobile® Device Center and follow the steps below:
1.
Connect the Mira to the host PC. Windows Mobile®
Device Center configures itself and then opens.
2. On the license agreement screen, click Accept.
3. On the Windows Mobile® Device Center’s Home screen, click
Set up your device.
4.
Select the information types that you want to synchronize, then
click Nex
t.
5. Enter a device name and click Set Up.
When you finish the setup wizard, Windows Mobile® Device Center
synchronizes the mobile computer automatically. Microsoft® Office
Outlook® emails and other information will appear on your device
after synchronization.
Communicate with Host
N
2
1
4
3
L
I
J
K
M
P
Q
O
F
B
C
A
E
D
G
H
PUSH
Page 2
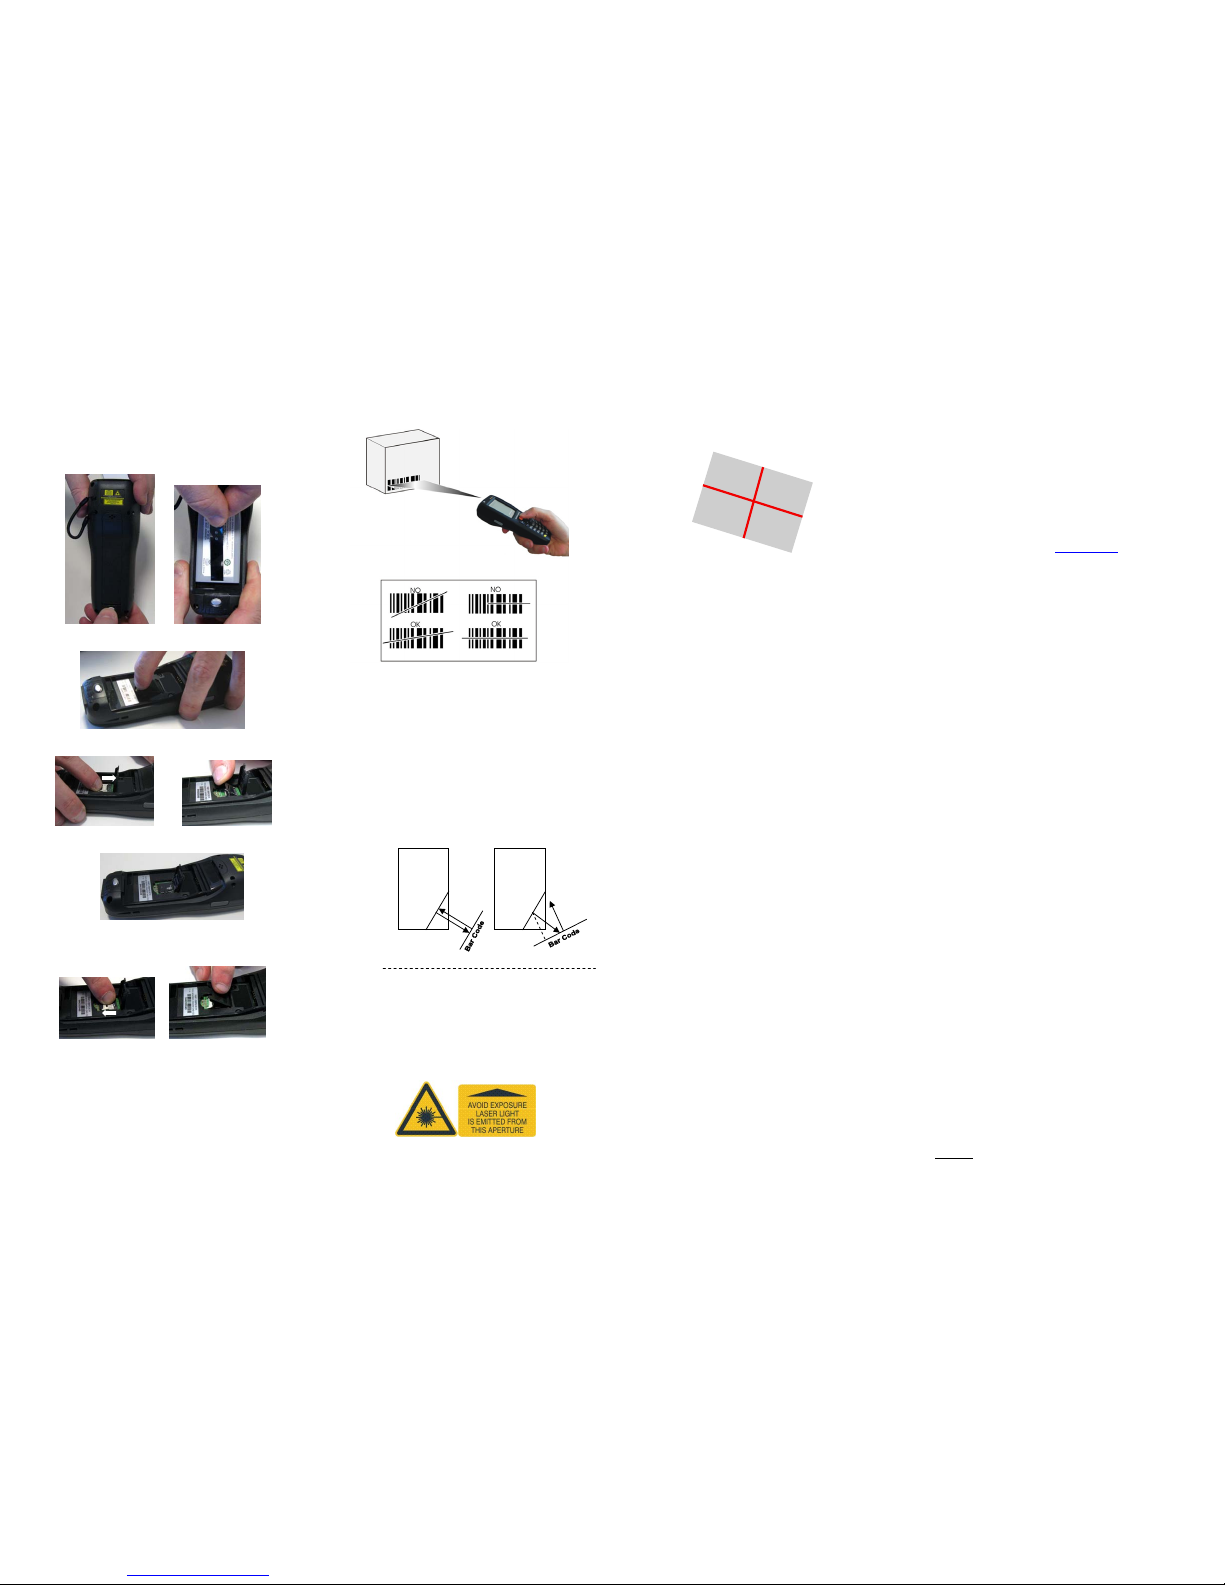
INSTALLING A MICROSD CARD
1. Turn off the Mira.
2. Push the latch release button and pull the latch down (see
section GETTING STARTED); then remove the cover and
the battery pack:
3. Open the microSD card slot by lifting up the locking plate:
4. Shift the cardholder upwards and then pull it up:
5. Insert the microSD card with the written part upward:
6. Lock the card into place by pushing the cardholder down
and then shifting it downwards; push the locking plate
down:
7. Reinsert the battery cover (see section GETTING
STARTED).
SCANNING
Linear Imager Data Capture
Linear barcode
ÌBX3ÉÎ
Relative Size and Location of Aiming System Pattern
Scanning with a Mira Linear Imager
When beams reflect directly back into the scanner from the bar code,
they can “blind” the scanner and make decoding difficult.
To avoid this, don’t keep the terminal perpendicular to the barcode:
moving it of a small angle of ±2° is usually enough to enable proper
reading. But don’t scan at too oblique an angle either: keep the scanner
within an angle of ±30° from the perpendicular to the barcode in order to
guarantee effective scanning.
Side Views
REFERENCE DOCUMENTATION
For further information regarding Delfi Mira refer to the Mira User’s
Manual.
For information regarding safety and regulatory refer to the Safety and
Regulatory Addendum or to the dedicated section of the Delfi Mira
User’s Manual.
SERVICE AND SUPPORT
Delfi provides several services as well as technical support
through its website.
Please check our website at www.delfi.com/en for further
information.
WARRANTY TERMS AND CONDITIONS
The warranty period is 1 year for the device and 90 days for
consumables (e.g. battery, power supply, cable etc.) from date of
purchase at our company.
Delfi Technologies A/S
Galoche Allé 1
DK-4600 Køge
Denmark
Phone: +45 70 222 555
Copyright © 2014 Delfi Technologies A/S. All rights reserved. No part
of the contents of this document or the procedures described therein
may be reproduced or transmitted in any form or by any means
without prior written permission of Delfi Technologies A/S. Owners of
Delfi products are hereby granted a non-exclusive, revocable license
to reproduce and transmit this document for the purchaser’s own
internal business purposes. Purchaser shall not remove or alter any
proprietary notices, including copyright notices, contained in this
documentation and shall ensure that all notices, appear on any
reproductions of the documentation.
Electronic versions may be downloadable from Delfi website
(www.delfi.com).
Disclamer:
Delfi has taken reasonable measures to provide information in this
manual that is complete and accurate. However, Delfi reserves the
right to change any specification at any time without prior notice.
Specular reflection.
Reflected beam
is within specular
dead zone and
prevents decode.
No specular
reflection.
Decode can
occur.
Tilt Bar Code At Slight Angle (Up to 30°)
Light
Source
Light
Source
 Loading...