

Page 1
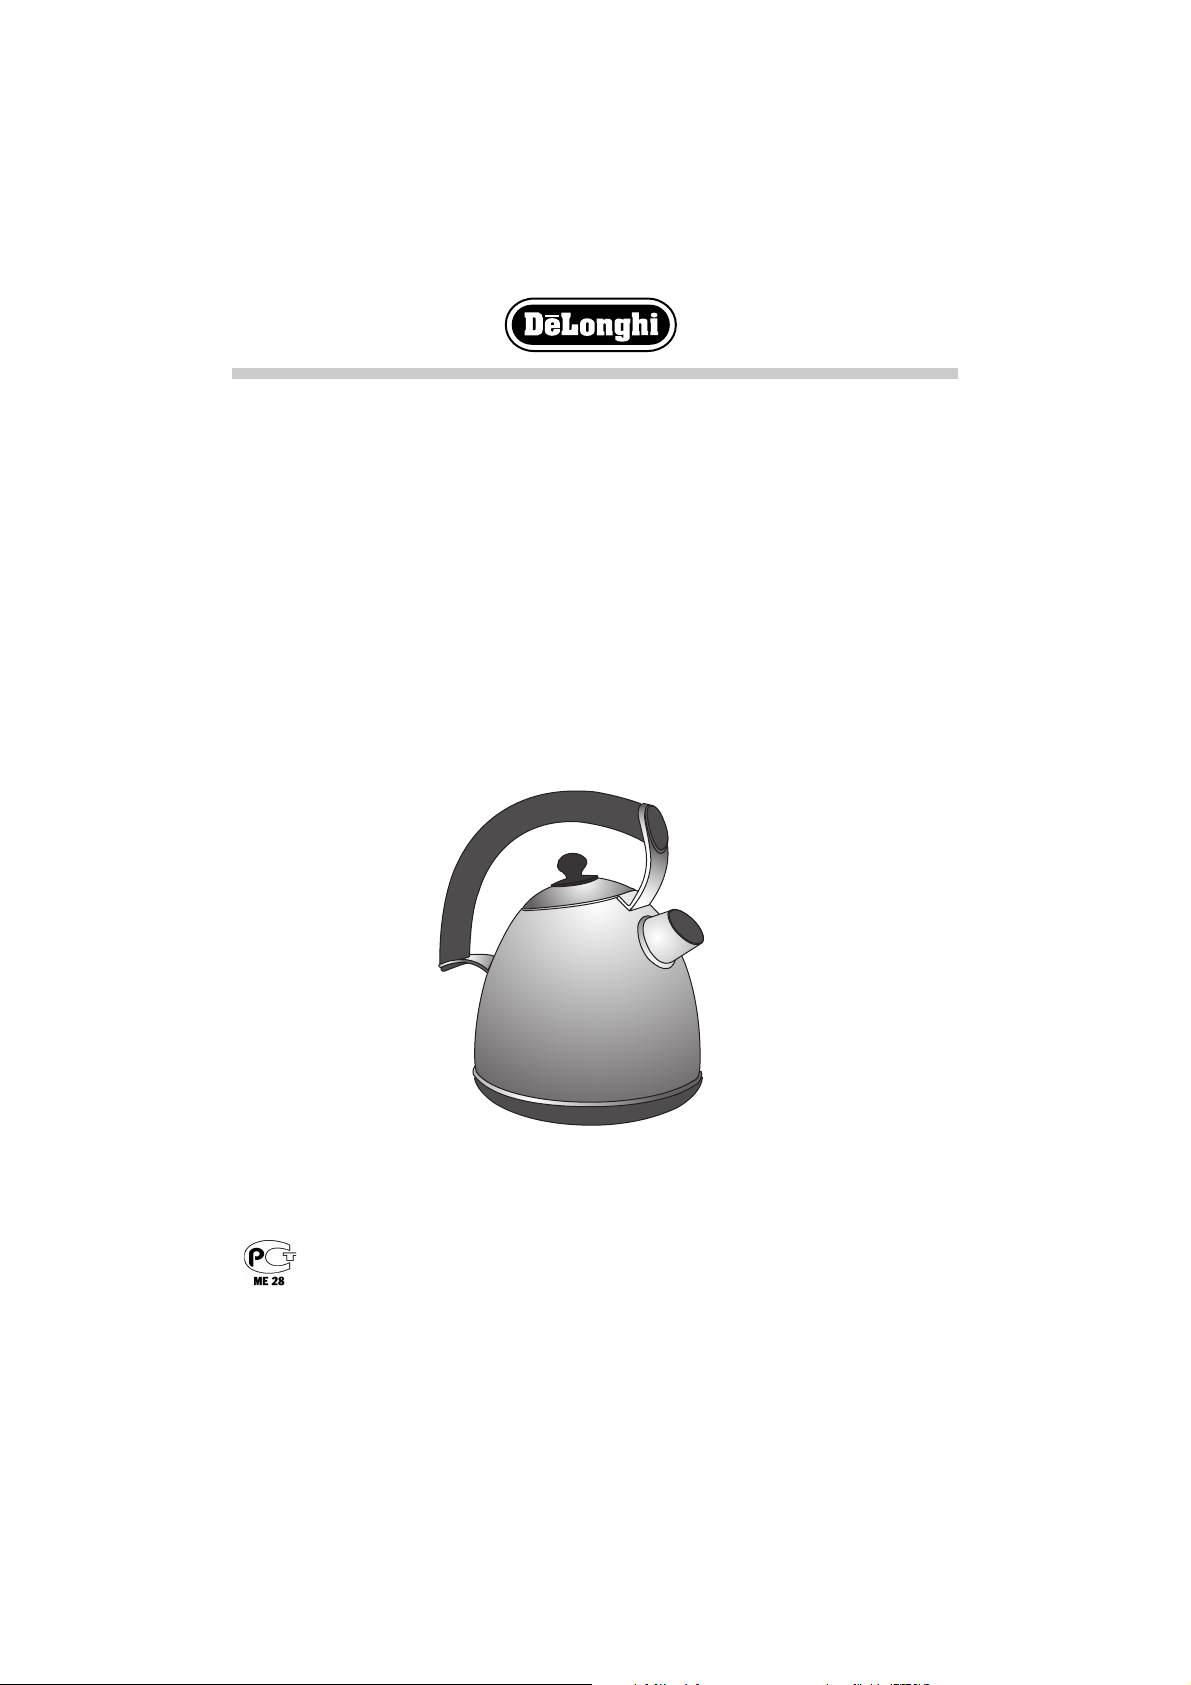
CORDLESS METAL TRADITIONAL KETTLE
BOLLITORE TRADIZIONALE IN METALLO SENZA FILO
BOUILLOIRE TRADITIONNELLE EN MÉTAL SANS CORDON
CORDLESS WASSERKOCHER AUS EDELSTAHL
SNOERLOZE TRADITIONELE METALEN WATERKOKER
HERVIDOR TRADICIONAL DE METAL SIN FILTRO
FERVEDOR TRADICIONAL EM METAL SEM FIO
ª∂∆∞§§π∫√™ µƒ∞™∆∏ƒ∞™ / ∫∞¡∞∆∞ Ãøƒπ™ ∫∞§ø¢π√
ЕЦликйЗйСзйв еЦнДггауЦлдав щгЦднкауЦлдав
уДвзад
Instructions for use
Istruzioni per l’uso
Mode d’emploi
Gebrauchsanweisung
Gebruiksaanwijzing
Instrucciones para el uso
Instuções de uso
√¢∏°π∂™ Ã∏™∏™
азлнкмдсаа ий щдлигмДнДсаа
Page 2
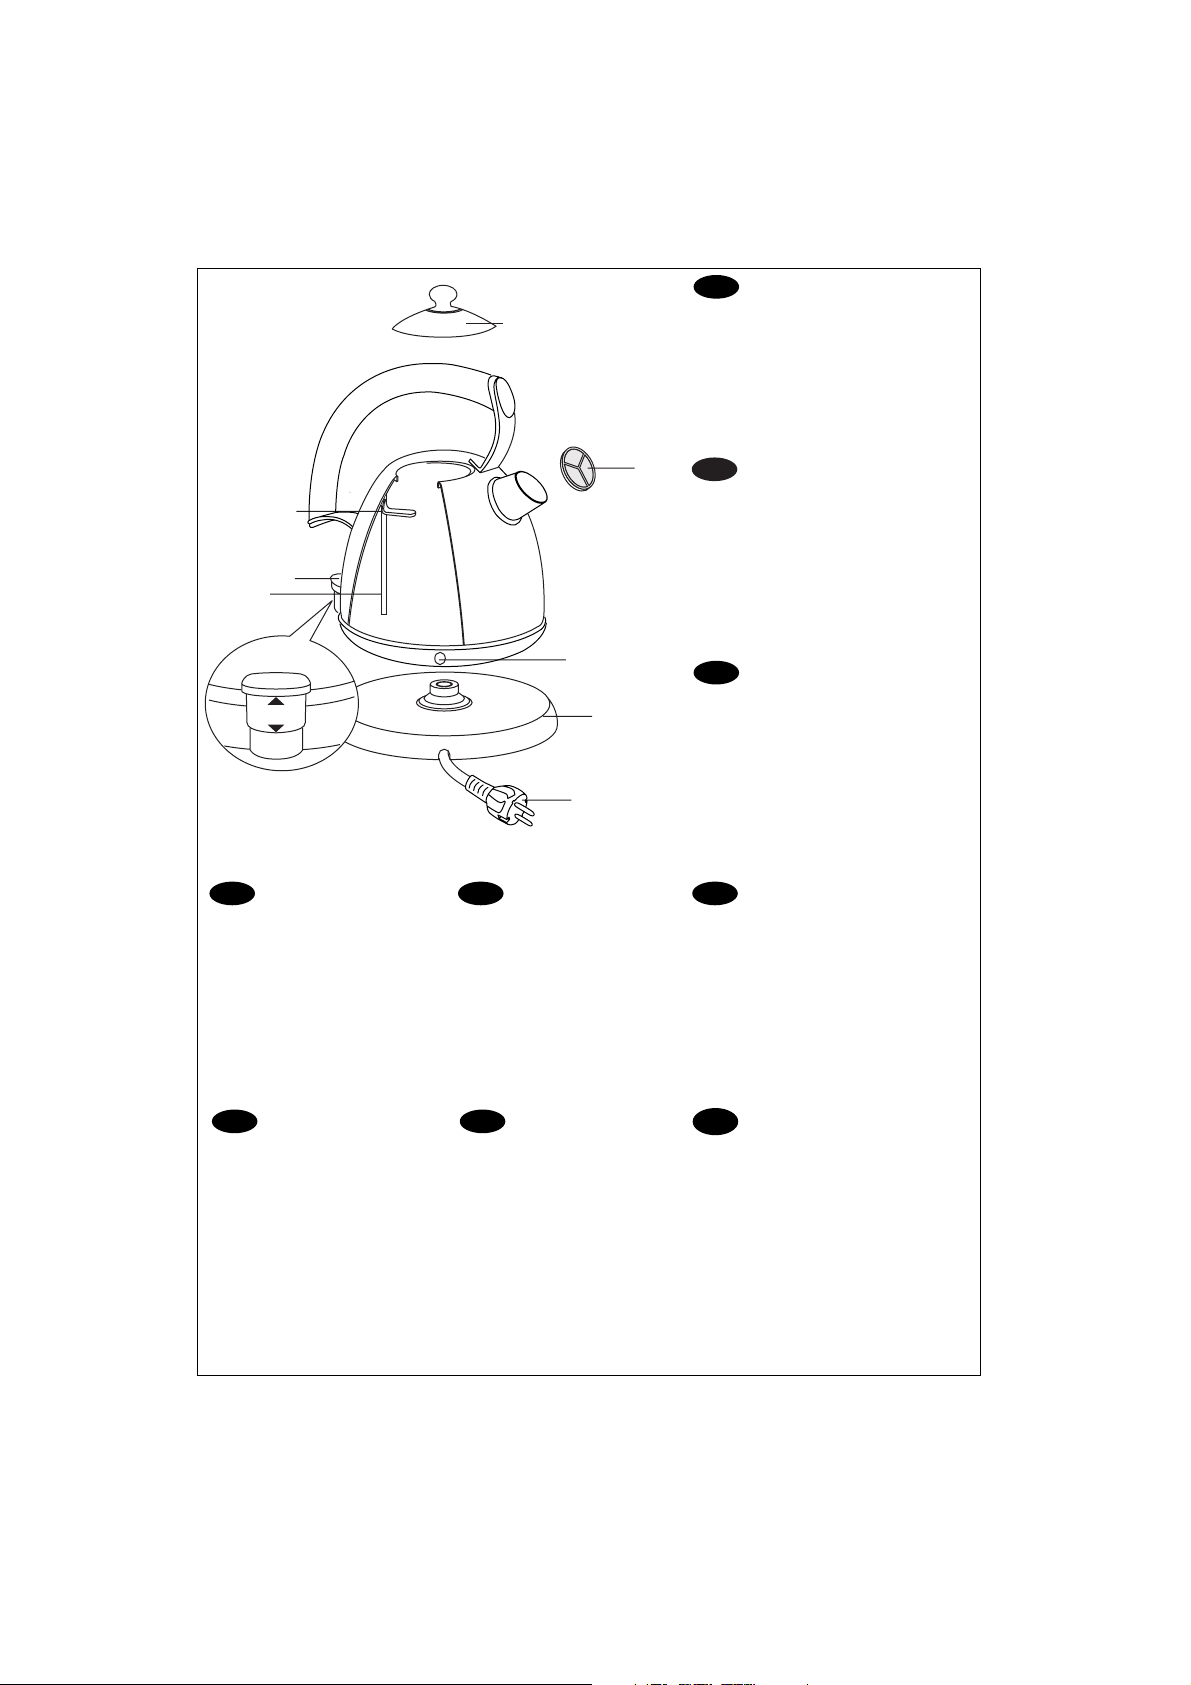
A
A LID
B FILTER
C PILOT LIGHT
D 360° BASE WITH CORD ESTORAGE
E PLUG
F STEAM TUBE
G ON/OFF SWITCH
H MAX LEVEL INDICATOR
A COPERCHIO
B FILTRO
C SPIA LUMINOSA
D BASE A 360° CON AVVOLGICAVO
E SPINA
F TUBICINO A VAPORE
G PULSANTE DI ACCENSIONE
ON/OFF
H INDICATORE DI LIVELLO MAX.
A DECKEL
B FILTER
C KONTROLLEUCHTE
D 360°-SOCKEL MIT
KABELAUFWICKLUNG
E NETZANSCHLUSS
F DAMPFVENTIL
G EIN-AUS SCHALTER
H WASSERSTANDSANZEIGE MAX
A COUVERCLE
B FILTRE
C TÉMOIN LUMINEUX
D SOCLE À 360° AVEC ENROULEUR DE
CORDON
E FICHE
F TUBE VAPEUR
G INTERRUPTEUR MARCHE/ARRÊT
ON/OFF
H INDICATEUR NIVEAU MAXIMAL
A TAPADERA
B FILTRO
C SEÑAL LUMINOSA
D BASE A 360° CON RECOGECABLE
E ENCHUFE
F TUBO DE VAPOR
G PULSADOR DE ENCENDIDO ON/OFF
H INDICADOR DE NIVEL MÁX.
A DEKSEL
B FILTER
C CONTROLELAMPJE
D 360°VOET MET SNOEROPBERGING
E STEKKER
F STOOMPIJPJE
G ON/OFF-SCHAKELAAR
H MAX. NIVEAU AANDUIDING
A ∫∞¶∞∫π
B ºπ§∆ƒ√
C ∂¡¢∂π∫∆π∫∏ §Àáπ∞
D µ∞™∏ 360Æ ª∂ Ãøƒ√
∞¶√£∏∫∂À™∏™ ∫∞§ø¢π√À
E ºπ™
F ™ø§∏¡∞™ ∞∆ª√À
G ¢π∞∫√¶∆∏™ ON/OFF
H ∂¡¢∂π•∏ MAX ª∂°π™∆∏™
™∆∞£ª∏™
A дкхтдД
B оагънк
C лаЙзДгъзДь гДеиД ЗдгыуЦзаь
D ийСлнДЗдД л ийЗйкйнйе зД 360°
еЦлнйе Сгь мдгДСда икйЗйСД
E ЗагдД
F иДкйЗДь нкмЕдД
G дзйидД ЗдгыуЦзаь Здг/Зхдг
(ON/OFF)
H азСадДнйк еДдлаеДгъзйЙй
мкйЗзь
A TAMPA
B FILTRO
C LMPADA AVISADORA
D BASE A 360º COM ENROLADOR
DO CABO
E FICHA
F TUBO DE VAPOR
G BOTÃO DE ON/OFF
H INDICADOR DE NÍVEL MÁX.
I
GB
F
D NL E
P GR
RUSS
H
G
F
0
I
B
C
D
E
Page 3
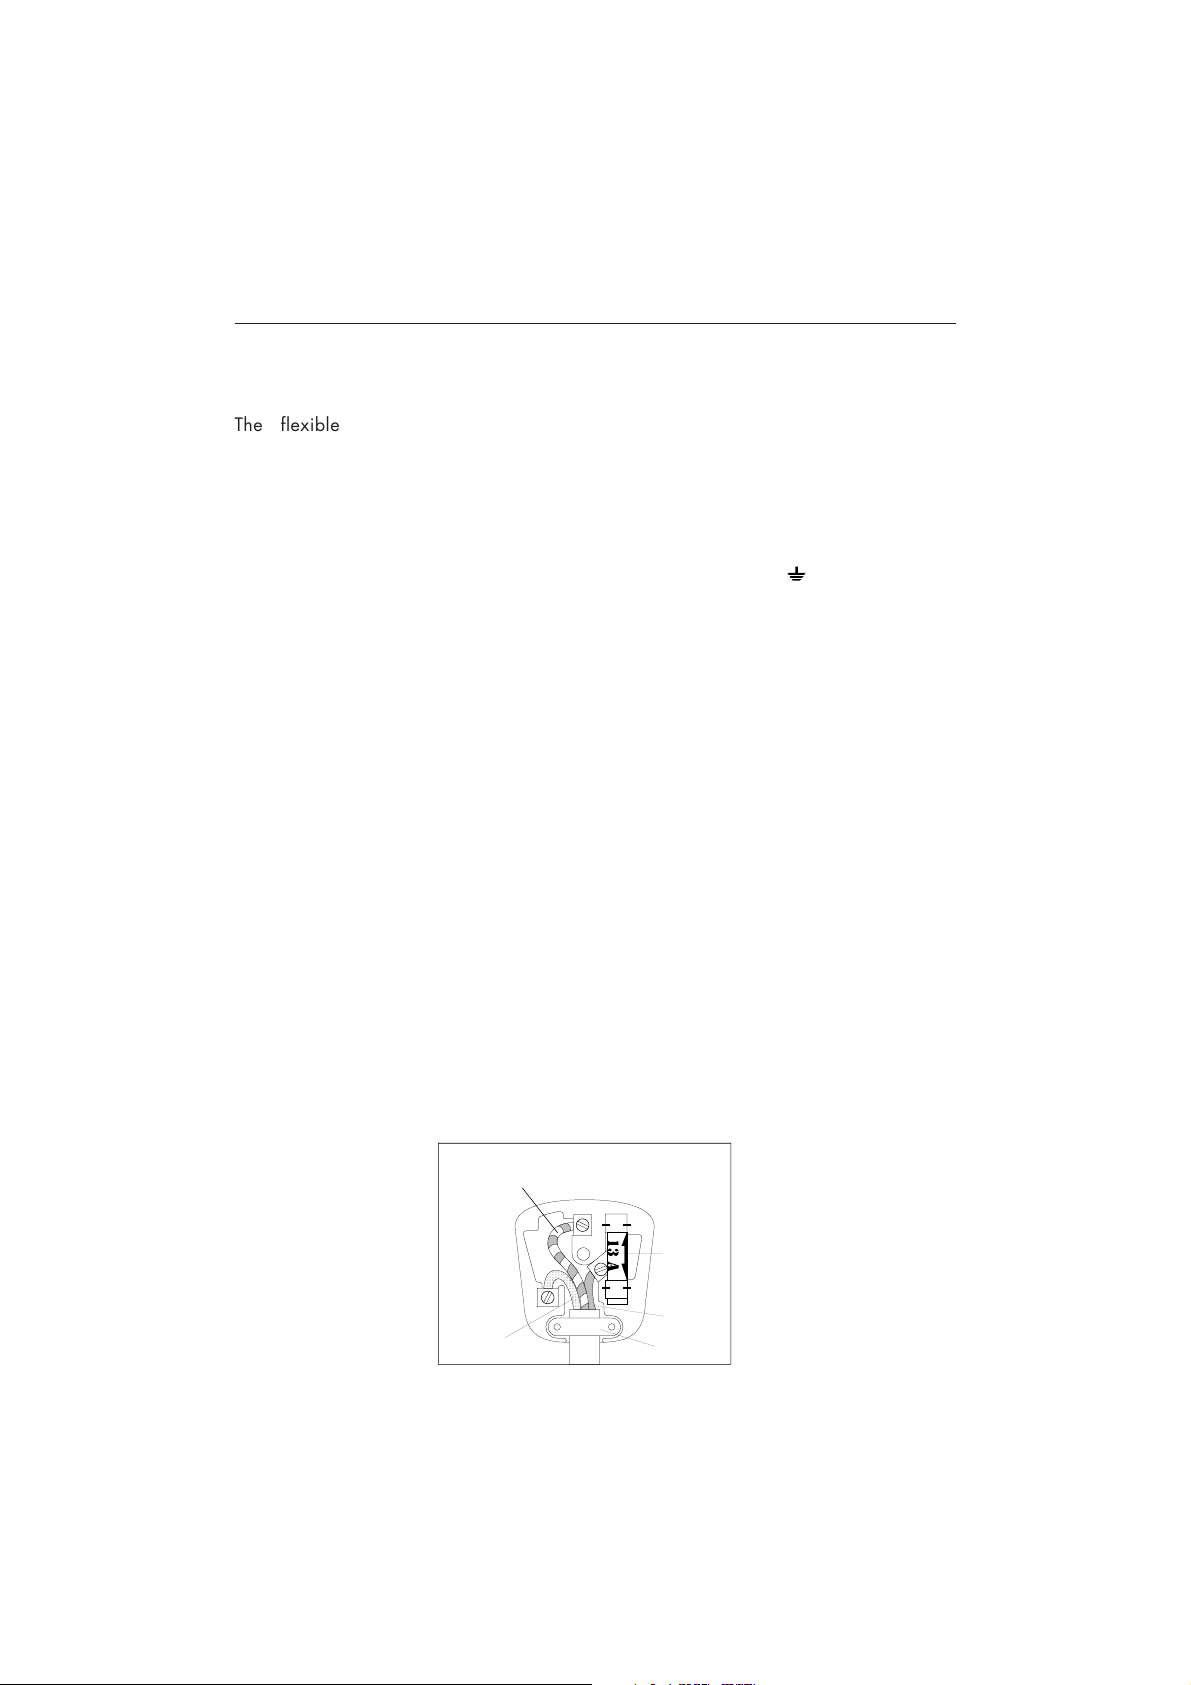
ELECTRICAL REQUIREMENTS
The flexible mains lead is supplied
connected to a B.S. 1363 fused plug having
a fuse of 13 amp capacity.Should this plug
not fit the socket outlets in your home, it should
be cut off and replaced with a suitable plug,
following the procedure outlined below.
Note: Such a plug cannot be used for any
other appliance and should therefore be
properly disposed of, (having removed the
fuse) and not left where children might find it
and plug it into a supply socket - with the
obvious consequent danger.
If the plug is a moulded-on type the fuse cover
must be refitted. If the fuse cover is lost, the plug
must not be used until a replacement cover is
obtained. The colour of the correct replacement
fuse cover is that of the coloured insert in the
base of the fuse recess or elsewhere on the plug.
Always state this colour when ordering a
replacement fuse cover.
N.B. We recommend the use of good quality
plugs and wall sockets that can be switched
off when the machine is not in use.
IMPORTANT: the wires in the mains lead
fitted to this appliance are coloured in
accordance with the following code:
As the colours of the wires in the mains lead
of this appliance may not correspond with
the coloured markings identifying the
terminals in your plug, proceed as follows:
The wire which is coloured green and
yellow must be connected to the terminal in
the plug which is marked with the letter E or
by the earth symbol or coloured green
or green and yellow.
The wire which is coloured blue must be
connected to the terminal which is marked
with the letter
N or coloured black.
The wire which is coloured brown must be
connected to the terminal which is marked
with the letter
L or coloured red.
When wiring the plug, ensure that all
strands of wire are securely retained in
each terminal. Do not forget to tighten the
mains lead clamp on the plug. If your
electricity supply point has only two pin
socket outlets, or if you are in doubt, consult
a qualified electrician.
Should the mains lead ever require
replacement, it is essential that this
operation be carried out by a qualified
electrician and should only be replaced
with a flexible cord of the same size.
Only 13amp replacement fuses which are
ASTA approved to B.S. 1362 should be fitted.
This appliance conforms to the Norms EN
55014 regarding the suppression of radio
interference.
Before using this appliance ensure that the voltage indicated on the product
corresponds with the main voltage in your home, if you are in any doubt
about your supply contact your local electricity company.
GREEN AND YELLOW
BLUE
BROWN
EARTH
NEUTRAL
LIVE
WARNING - THIS APPLIANCE MUST BE EARTHED
Green and Yellow to
Earth
Blue to
Neutral
13 amp
Fuse
Brown to
Live
Cord Clamp
Page 4

IMPORTANT SAFEGUARDS
Please read these instructions before operating and retain for future reference.
• Ensure that your mains supply voltage is the same as that marked on the underside of your
kettle.
•To protect against electrical hazards do not immerse the mains lead, plug power base or
kettle in water or any other liquid. Do not use in the bathroom or near any source of water.
Do not use outdoors.
•
Do not touch hot surfaces i.e. body or lid. Use handles or knobs.
• Do not remove the lid while the kettle is boiling.
•Take care when pouring - do not over-tilt the kettle as water may enter into the switch
mechanism.
•Water can remain hot for a long time after boiling, and can present a scald hazard. Keep
the kettle and the mains lead away from the edge of the work surface and out of the reach
of children.
• Do not allow the mains lead to hang over the edge of the table or work surface, or anywhere
it may be accidentally caught or tripped over.
• Children or infirm persons should not be allowed to use this product unsupervised
• Children should not be allowed to play with this appliance
• Close supervision is necessary when any appliance is used near children.
• Remove the plug from the mains socket when not in use and before cleaning. Allow the kettle
to cool before cleaning.
• Remove the kettle from its power base before filling.
•Never move the kettle whilst it is in use.
• Do not use the kettle if you have wet hands.
• Keep the kettle, the power base, and the mains lead away from hotplates, hobs or burners.
• Do not use the kettle for any purpose other than heating water. Do not place any utensils into
the kettle. The use of accessory attachments not recommended by the appliance
manufacturer may result in fire, electric shock or personal injury.
• Never use the kettle without it’s lid.
• Position the kettle properly on the power base before switching on.
• Use the kettle only with the power base supplied (and vice versa).
• Do not operate this kettle if the mains lead or plug is damaged, if the kettle malfunctions, or
has been damaged in any manner. It must be returned to a service agent for repair or
replacement in order to avoid hazard.
•The power cable must not be replaced by the user, as this requires the use of special tools.
If the power cable is damaged, contact an authorized Service Centre.
• If the kettle is overfilled, boiling water may overflow.
4
GB
Page 5

BEFORE USE
• Remove all packaging from the kettle and power base.
•Remove any labels from the outer stainless steel surfaces.
• Remove the filter by pushing as shown in fig. 1 and wash with water (fig. 2). Refer to page
7. “Removing the scale filter”
• Fill the kettle and boil.
• The boiled water should be discarded and the kettle rinsed out with cold water. This
procedure should be carried out three times, to remove any manufacturing dust, etc.
• After the kettle has been rinsed out, re-fit the filter (fig. 3).
IN USE
Power base with 360° access
With the specially designed power base and central connector, you
can now set the kettle on the base at any angle, from any position.
• Release cord from storage base and adjust length by winding
around the base to give the correct cord length to reach the plug
socket to be used (fig. 4).
• Do not leave loose cord hanging over the edge of work surfaces.
Filling
• Remove the kettle from the base unit before filling.
• Open lid and fill kettle to desired level.
Do not fill with less than 0,25 litre of water to prevent the kettle
running dry while operating; misuse of this kind will shorten the
life of the element.
Do not fill with more than 1,7 litres of water (up to the MAX
indication located inside the kettle) (fig. 5).
If the kettle is
overfilled, there is a risk that boiling water may be ejected
causing burns.
5
MAX 1,7 litres
MIN 0,25 litres
Storage cable
1 3
2
4
55
Page 6

Switching on
• Plug the power base into the mains socket.
• Place kettle on power base.
•Press the ON/OFF switch down (fig. 6) to switch the kettle on.
• The pilot lights will switch on.
• The kettle will automatically switch off once the water is boiled
(the ON/OFF switch will click upwards and the lights will go
out).
•To turn the kettle off before the water boils, you may move the
ON/OFF switch up to the OFF position, or simply lift the kettle
from its base - it will switch off and the switch will return to the OFF position automatically.
Pouring
• Remove the kettle from the power base and carefully pour out the water. Do not tilt kettle
suddenly or pour out at too sharp an angle.
• When you lift the kettle from the base, you may see moisture on the top surface of the base.
This is condensation from the steam that causes the kettle to turn off automatically after
boiling. Steam is allowed to escape via vents in the underside of the kettle.
Condensation on
the base is perfectly normal, and should not be a cause for alarm.
SAFETY DEVICES
1) Automatic ON/OFF switch
Your kettle is fitted with an ON/OFF switch which automatically switches off once the water has
boiled. If the kettle has just boiled, wait a minute or so before re-boiling the kettle.
Do not
attempt to hold the ON/OFF switch in the ON position or adjust the switch mechanism.
2) Safety cut-out
If the kettle is switched ON with too little or no water, it is protected against damage by a safety
cut-out which will switch off the power.
If this cut-out operates, disconnect the kettle from the mains supply and
leave to cool down
before refilling with cold water (otherwise the element could be damaged).
3) If kettle is lifted from base while operating (ON), it will automatically switch off.
CARE AND MAINTENANCE
Cleaning the kettle
• Allow the kettle to cool down fully and disconnect the appliance from the mains before
cleaning.
• Do not immerse the kettle or base in water.
• Use a soft dampened cloth to wipe the outside of the kettle and dry with a soft, dry cloth.
•DO NOT use metal polish or harsh scouring agents.
• Ensure that all connectors and sockets are kept dry.
6
0
I
6
Page 7

7
Scale
Scale is mainly calcium carbonate (chalk), a harmless, naturally occurring mineral found in most
water supplies. “Hard” water contains more of this mineral than “soft” water.
When the water is heated, the minerals in the water solidify, making the water appear cloudy.
These minerals form a thin film on the walls, element and on the surface of the water. The water
may look like it has white coloured pieces of plastic floating on the surface.
On traditional kettle elements, scale forms a hard white “crust” which adversely affects
performance and reduces the life of the element.
As soon as you notice a film forming on the water, or, when cleaning the filter, if you notice a
film on the walls or the element, simply rinse the kettle and wipe it out.
Scale filter
Your kettle is fitted with a scale filter to prevent loose particles of scale being poured into your
beverage. This filter is both removable and washable.
The frequency with which you will need to clean any scale deposits from your filter will depend
on the hardness of water in your area and how often you use the kettle.
You should remove and clean the water filter when you notice any deposits being left on the filter
or if the pouring efficiency is impaired.
Removing the scale filter
• Allow the kettle to cool down fully.
• Disconnect the appliance from the mains electrical supply.
• Make sure that your hands are clean and free from soap, cream or anything which might
taint the water.
• Empty the kettle and remove the filter by pushing as shown in fig. 1.
• Rinse under a tap whilst brushing with a soft brush (fig. 2).
• Replace the filter (fig. 3).
To clean the scale filter
It is vital to clean and descale regularly in order to maintain good working order
• Use a proprietary descaling product e.g. citric acid crystals.
We recommend using citric acid crystals as follows:
• Pour into kettle about 50 gr. or 2 oz. of citric acid cristal and then fill with water up to the
max level indicated and then boil. Allow the contents to cool, and then rinse thoroughly.
• Do not use a more concentrated solution. If the filter requires descaling, remove the filter and
place into the citric acid solution.
• Ensure that the electrical connections are completely dry before using the kettle.
• Citric acid crystals are available from most pharmacies.
 Loading...