

Page 1
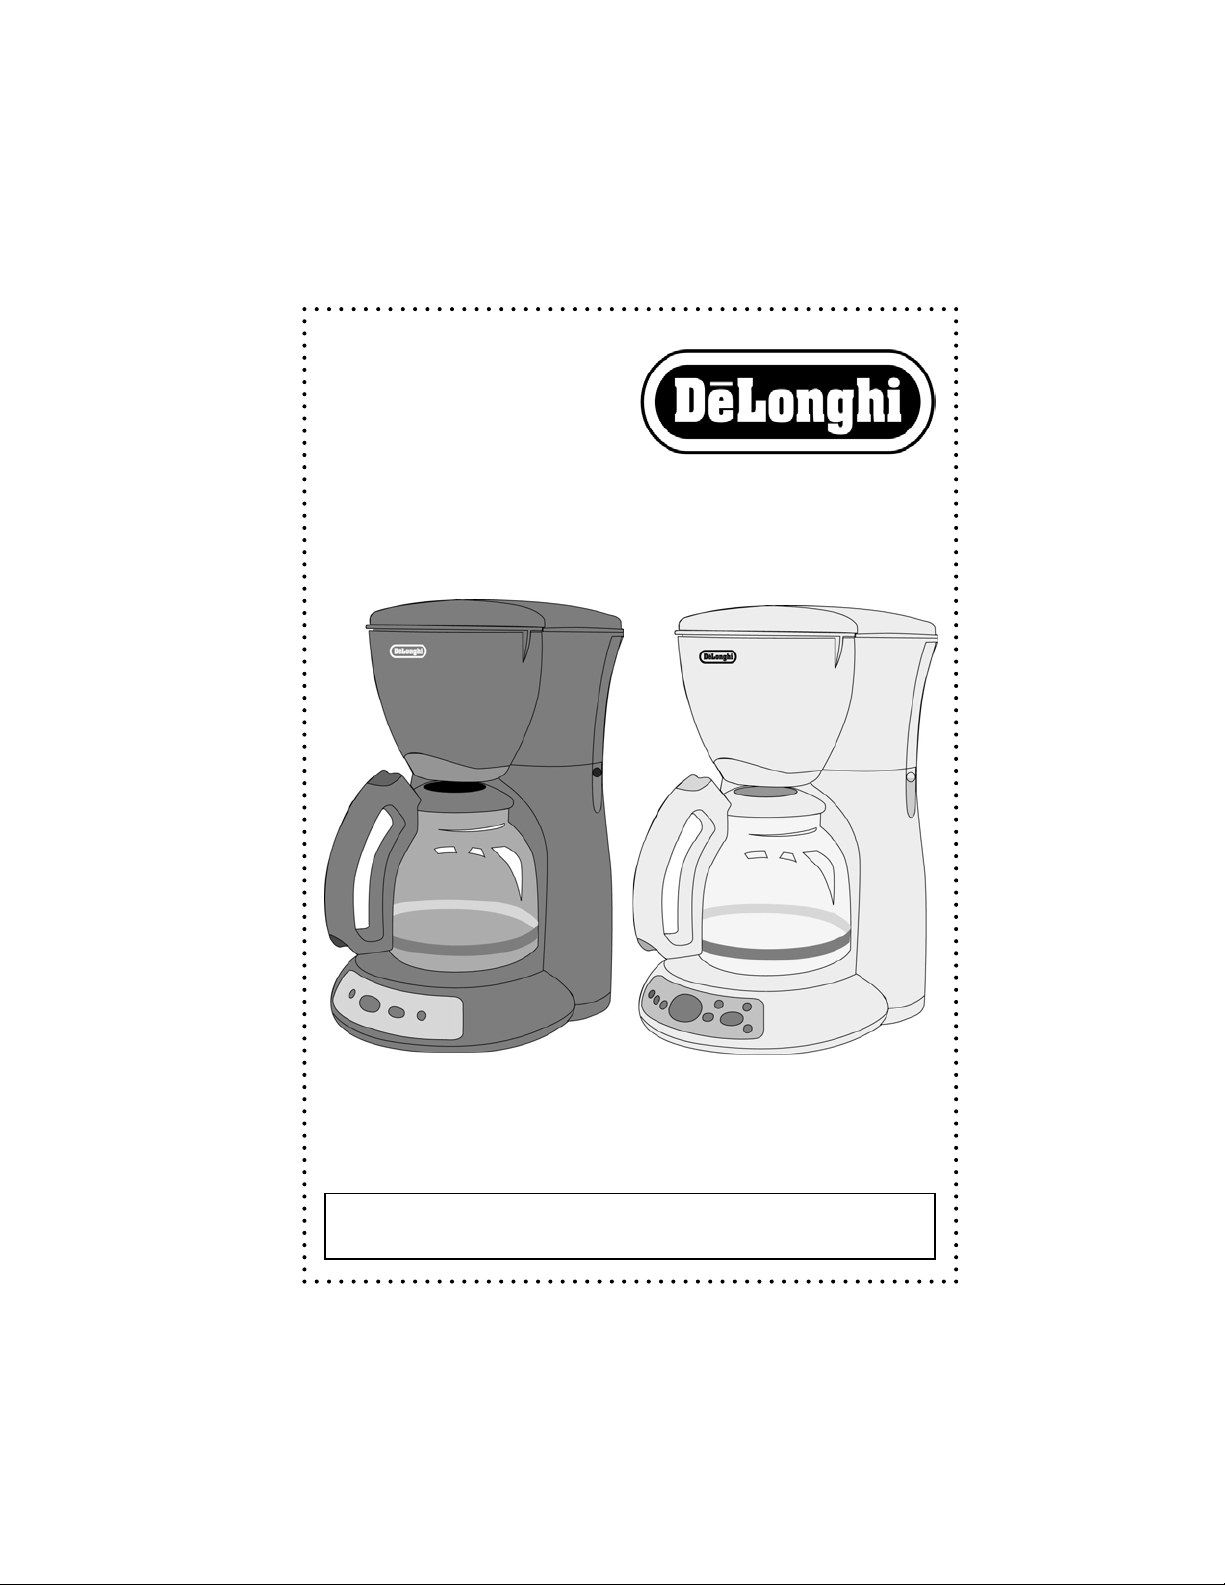
Instruction Manual
Coffee Makers
Mode D’emploi
Cafetières
Read and Save These Instructions Lisez et conservez ces instructions
DC56 and DC56T Series
DC56 et DC56T Séries
Page 2

IMPORTANT SAFEGUARDS
When using electrical appliances, basic safety precautions should always be
followed to reduce the risk of fire, electrical shock and/or personal injury.
1. Read all instructions carefully.
2. Do not touch hot surfaces. Use the handle on the carafe.
3. To protect against electrical shock, do not place cord, plug or coffee maker in
water or other liquid.
4. Close supervision is necessary when any appliance is used by or near
children.
5. Unplug from outlet when not in use and before cleaning. Allow to cool before
putting on or taking off parts, and before cleaning the appliance.
6. Do not operate any appliance with a damaged cord or plug or after the
appliance malfunctions or has been damaged in any manner. Return appliance
to authorized service facility for examination, repair or adjustment.
7. The use of accessory attachments is not recommended by the manufacturer.
It may be dangerous and should be avoided.
8. Do not use outdoors.
9. Do not let cord hand over edge of table or counter, or touch hot surfaces.
10. Do not place on or near hot gas or electric burner, or in heated oven.
11. Always plug cord into the wall outlet before turning on any controls. To
disconnect turn power OFF, then remove plug from wall outlet.
12. Always use cold water to make coffee. Warm water or other liquids could
cause damage to the coffee maker.
13. Scalding may occur if the cover is lifted or removed during the brewing cycle.
14. Do not use this appliance for other than intended use.
15. Do not set a hot carafe on a wet or cold surface.
16. Do not place hot carafe on or near paper, cloth or other flammable material.
17. Never use the carafe on a range top or in a microwave oven.
18. Do not allow liquid to evaporate from carafe. Do not heat carafe when empty.
19. Do not move entire unit when carafe contains hot liquid.
20. Use the lid on the glass carafe while brewing and pouring coffee.
21. Discard carafe if damaged in any manner, or a carafe having a loose or
weakened handle. A chip or crack could result in breakage or contaminate
liquid contents with glass particles.
22. Do not clean carafe with scouring powders, steel wool pads or other abrasive
materials.
23. This carafe is designed for use with this coffee maker only.
-2-
Page 3

IMPORTANT SAFEGUARDS (continued)
24. WARNING: To reduce the risk of fire or electrical shock, do not remove the
bottom cover. No user serviceable parts inside. Repairs should be performed
by authorized service personnel only. CAUTION: Do not immerse in any liquid.
SHORT CORD INSTRUCTIONS
A short power cord is provided to reduce the risk resulting from entanglement or
tripping over a longer cord. Longer detachable power supply cords are available and
may be used if care is exercised in their use. If a longer detacahable power cord or
extension cord is used (1) the marked electrical rating of the extension cord should be
at least as great as the electrical rating of the appliance, and (2) the longer cord should
be arranged so that it will not drape over the countertop or table top where it can be
pulled on by children or tripped over unintentionally. The electrical rating of the appliance is listed on the bottom of the unit. If the appliance is of the grounded type, the
extension cord should be a grounded type 3 wire cord. This appliance has a polarized
plug. One blade is wider than the other. To reduce the risk of electrical shock this plug
will fit in a polarized plug only one way. If the plug does not fit, contact a qualified
electrician. Do not attempt to modify the plug in any way.
WARNING: TO REDUCE THE RISK OF FIRE OR ELECTRICAL SHOCK, DO NOT REMOVE THE BOTTOM COVER. NO USER SERVICEABLE PARTS INSIDE. REPAIRS
SHOULD BE PERFORMED BY AUTHORIZED SERVICE PERSONNEL.
CAUTION: DO NOT IMMERSE UNIT IN LIQUID.
BEFORE FIRST USE
Carefully unpack your coffee maker and remove all packaging material. Remove any
labels or stickers from the coffee maker. To remove any dust that may have accumulated during packaging, you may wipe the unit with a clean, damp cloth. Dry thoroughly.
Do not immerse the coffee maker in water or other liquid. Clean the carafe, carafe lid,
filter basket and filter in warm water with mild detergent. Rinse and dry thoroughly. Do
not use harsh or abrasive cleaners. (See “Cleaning Your Coffee Maker” section of this
manual for detailed instructions.)
NOTE: We recommend that prior to brewing your first pot of coffee, operate the coffee
maker once or twice with water only, without ground coffee. This will remove any dust
that may have settled inside the coffee maker, which may affect the flavor of the
coffee. IMPORTANT: Use cold water only. The automatic drip system works best with
cold water.
-3-
Page 4
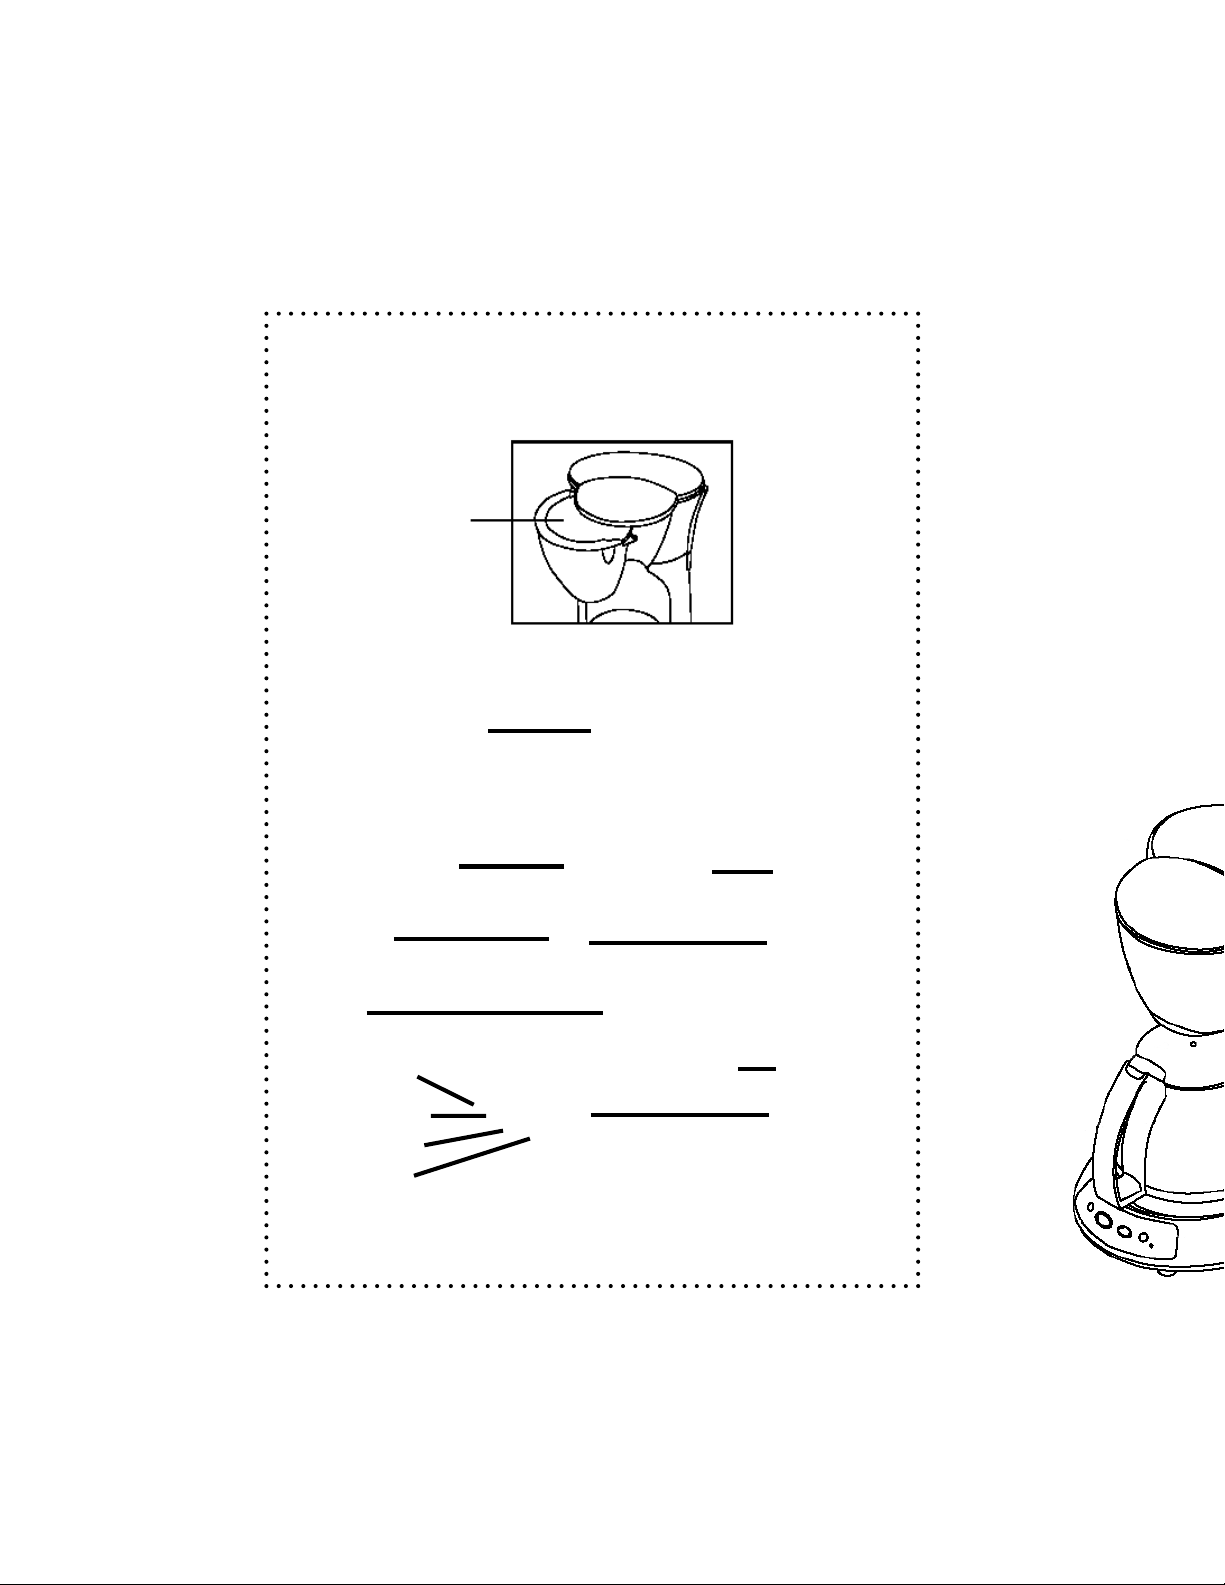
KNOW YOUR COFFEE MAKER
FIGURE 1: DC56 SERIES
Filter Basket
Water Reservoir Cover
Filter Basket Door
Carafe Lid
Carafe
ON / OFF Light
ON / OFF Button
AROMA Button
AROMA Light
Water Level
Indicator
Pause & Serve
Activator
Cord Storage
Warming Plate
-4-
Page 5
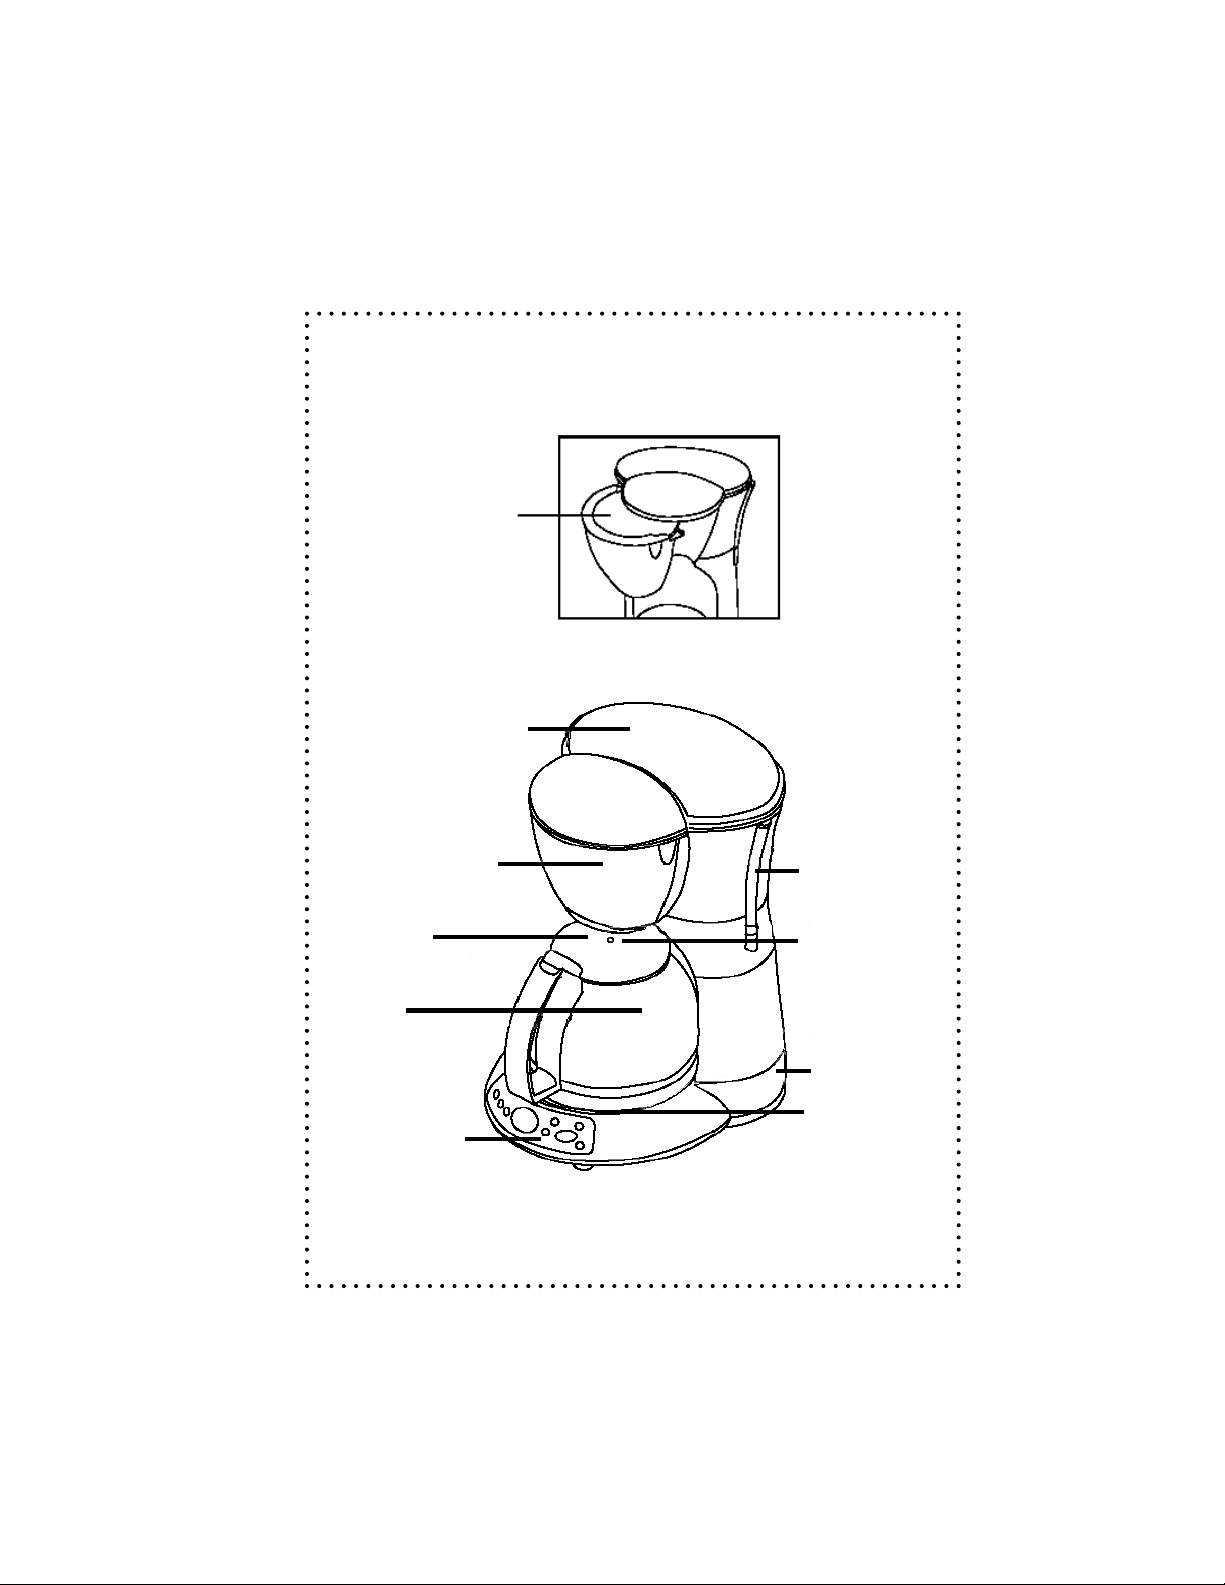
KNOW YOUR COFFEE MAKER (continued)
FIGURE 2: DC56T SERIES
Filter Basket
Water Reservoir Cover
Filter Basket Door
Carafe Lid
Carafe
Control Panel:
Details on
Page 7
Water Level
Indicator
Pause & Serve
Activator
Cord Storage
Warming Plate
-5-
Page 6

KNOW YOUR COFFEE MAKER (continued)
FEATURES:
1. 2-HOUR AUTOMATIC SHUT-OFF: For safety, this coffee maker is equipped with
an auto shut-off feature. The coffee maker shuts off automatically 2 hours
after the brewing cycle is completed. To restart the coffee maker, simply press
the ON/OFF / TIMER button twice and the ON/OFF light will illuminate.
2. PAUSE ‘N SERVE: Allows you to interrupt the brewing cycle and pour a cup of
coffee before the entire carafe is finished brewing. To restart the brewing
process, return the carafe to warming plate and coffee will automatically begin
flowing through filter basket. Make sure carafe is placed all the way on the
warming plate. CAUTION: Do not remove carafe for longer than 30 seconds or
the filter basket will overflow.
3. CLOCK / TIMER DIGITAL DISPLAY: The 24-hour digital clock, built into the
control panel of the coffee maker, will keep the correct time even after the unit
has been shut off. Timer can be programmed up to 24 hours in advance to
automatically begin flowing through the filter basket. Make sure carafe is
placed all the way on the warming plate.
4. WATER LEVEL INDICATOR: Large easy-to-read numbers indicate how many
cups of water have been poured into the coffee maker.
5. SEALED CARAFE: Carafe lip and lid seal help to preserve coffee’s natural
flavor and temperature by preventing excessive evaporation.
6. EASY POUR CARAFE: Uniquely designed carafe with all-around lip and
traditional pour spout allow you to conveniently pour from any side. Cup
markings on each side of the handle make it easier to measure the water level
when filling the carafe.
7. NON-STICK WARMING PLATE: Makes cleanup quick and easy.
8. CORD STORAGE: Hidden cord storage allows you to hide excess cord for a
neat appearance and for easy storage.
9. SWING-AWAY FILTER BASKET: Filter door swings open for convenient filling.
10. FILTER BASKET WITH HANDLE: Cone shaped filter basket enriches flavor and
prevents bitter taste. A permanent, washable filter is included.
-6-
Page 7

KNOW YOUR COFFEE MAKER (continued)
UNDERSTANDING THE CONTROL PANEL:
1. CLOCK / TIMER DIGITAL DISPLAY: Displays the clock and timer settings. See
“Setting the Clock” section of this manual for programming the time.
2. PROG BUTTON: This button allows you to program the coffee maker up to 24
hours before the desired brewing time. See the section on “Brew Cycle Delay”
for details on activating the TIMER function.
3. HOUR AND MIN BUTTONS: These buttons advance the hour and minute display
for the clock and timer. See the section on “Setting the Clock”.
4. TIMER LIGHT: When illuminated, indicates that the Brew Cycle Delay (TIMER)
function is being used.
5. ON/OFF / TIMER BUTTON: Activates the ON / OFF (power) and TIMER (Brew
Cycle Delay) functions.
6. ON / OFF LIGHT: When the light is illuminated it indicates that the unit has begun
the brewing cycle.
7. AROMA BUTTON: Extracts the best flavor and aroma from your coffee by time-
releasing the water, so that coffee grounds are saturated a little at a time. So
no matter how many cups you brew, your coffee always has a perfect, fullbodied flavor.
8. : When illuminated, indicates that the AROMA function has been activated.
HOW TO SET THE CLOCK (only on DC56T Series)
To set the correct time of day, first press the HOUR button until the desired hour is
reached. Then, press the MIN button until the desired minutes are reached. Use the
AM / PM indicator on the left side of the digital display when setting the time. NOTE:
Unplugging the unit will reset the clock to 12:00.
HOUR Button
MIN Button
PROG Button
FIGURE 3: DC56T Series Control Panel
AROMA Light
ON/OFF Light
ON/OFF /
TIMER Button
TIMER LightAROMA Button
-7-
Page 8
BREW CYCLE DELAY FEATURE (TIMER FUNCTION)
1. To preset your coffee maker to brew at a later time first verify that the clock is
set to the correct time. See “How to Set the Clock” section for details.
2. Press and hold the PROG button. Continuing to hold the PROG button, press
the HOUR button until the desired brew time hour is reached. NOTE: Be sure
to check the AM / PM indicator, located on the left side of the digital clock
display. Then press the MIN button until the desired minutes have been
reached. Release the PROG button.
3. Press the ON/OFF / TIMER button once. The TIMER light will illuminate indicating
that the coffee maker is waiting for the preset brew time to be reached before
it will begin the brewing cycle.
4. NOTE: If you wish to use the AROMA function, press the AROMA button
immediately after TIMER light is illuminated. When the AROMA function is
activated, the indicator will illuminate. NOTE: If the ON/OFF / TIMER button
is pressed before the PROG button, the Brew Cycle Delay (TIMER) feature will
not activate.
OPERATING YOUR COFFEE MAKER
PREPARING COFFEE MAKER FOR BREWING COFFEE:
1. Place the coffee maker on a flat, level surface away from any edge.
2. Plug the unit into a 120V / 60Hz only outlet.
3. The lid of the carafe must be fitted properly during the brewing process. And
the carafe must be set on the carafe warming plate.
4. The filter basket door must be properly closed during the brewing process.
CAUTION: If the filter basket door is not completely closed, the Pause ‘N Serve
feature will not function properly. It could cause hot water or hot coffee to
overflow.
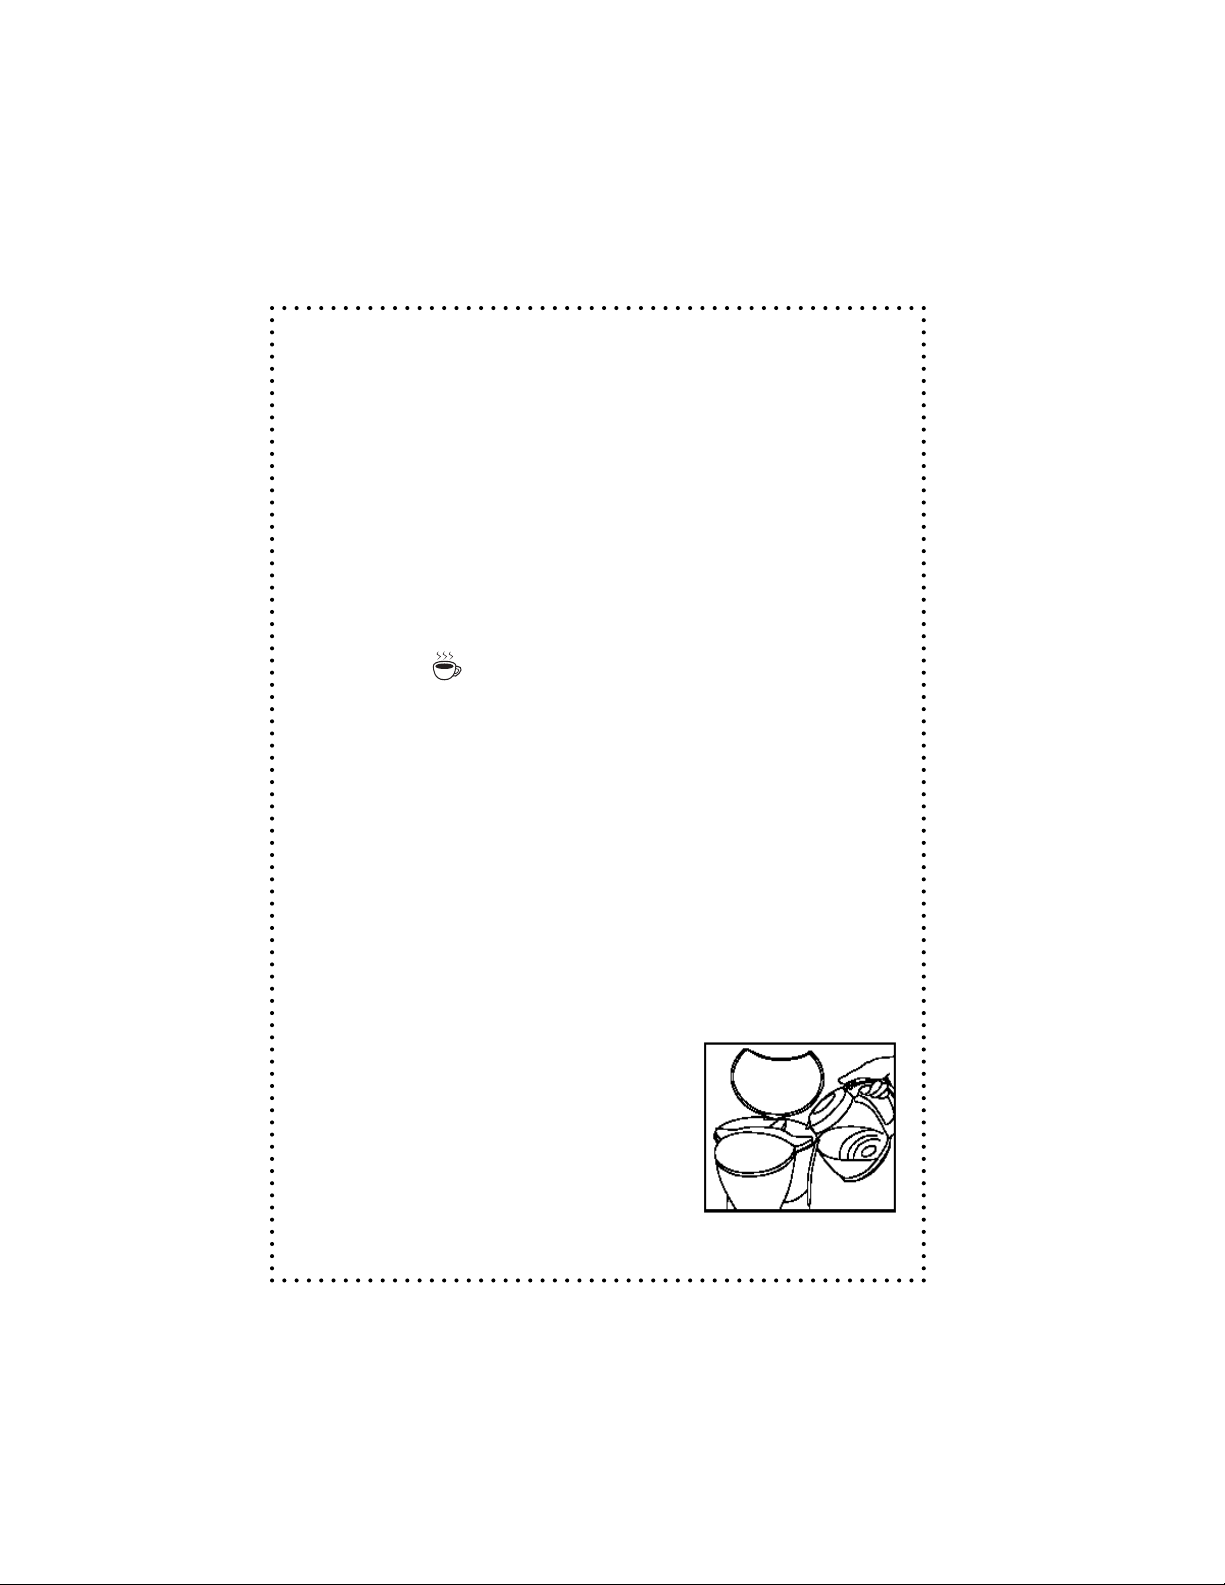
FILLING THE WATER RESERVOIR: FIGURE 4
5. Open the hinged water reservoir cover located at
the top of the coffee maker.
6. Fill the carafe with the desired amount of cold
water. Empty the water from the carafe into the
water reservoir.
7. The water level indicator lets you know much
water is in the water reservoir.
8. Close the hinged lid. Place the carafe with the lid in
place on the warming plate.
-8-
FIGURE 4
Page 9

OPERATING YOUR COFFEE MAKER (continued)
NOTE: The amount of brewed coffee after the brewing process is complete will
always be slightly less than the amount of water placed in the coffee maker’s water
reservoir, since some water is absorbed by the coffee grounds and filter. Add a
little extra water at the beginning so that you have the exact number of cups
desired.
PREPARING THE COFFEE: FIGURE 5
1. Swing the filter basket door outward to your left. Lift out removable filter
basket. The included permanent filter may be used instead of or in addition to
the paper filter. If using paper filters, insert a #4 cone-shaped filter into the filter
basket before filling with coffee. Fill the filter with the required amount of
coffee.
2. Place the desired amount of ground coffee in the filter. According to coffee
industry standards, use one standard coffee measure (2 level tablespoons) of
grounds for each six ounces of water. After using your coffee maker several
times, the amount of coffee may be adjusted to suit your particular taste by
decreasing or increasing the amount of coffee used.
NOTE: Be sure to use coffee grounds prepared specifically for use with
automatic drip coffee makers.
3. Return the filter basket with the filled filter to the door. Be sure the filter basket
is seated properly in the door. Swing the door closed and snap into place.
CAUTION: Do not operate your coffee maker if the door does not close
completely. If the door does not close completely, check to see that the filter
basket is properly sealed, and snap door into place.
4. Press the ON/OFF / TIMER button and the TIMER light will illuminate. Press the
ON/OFF / TIMER button again, and then the ON/OFF
light will illuminate indicating that the coffee maker
has begun the brewing cycle. NOTE: If you wish
to use the AROMA function, press the AROMA
button immediately after ON/OFF light is illuminated.
When the AROMA function is activated, the
indicator will illuminate.
FIGURE 5
-9-
Page 10

OPERATING YOUR COFFEE MAKER (continued)
5. In a few minutes the coffee maker will complete the brewing cycle and
automatically switch over to the warming mode, which will keep the coffee hot
for two hours.
6. Press the ON/OFF / TIMER button to turn the unit OFF when the carafe is empty
or when the coffee maker is not in use. After brewing cycle is complete,
discard the grounds and rinse the permanent filter and filter basket thoroughly
with water. (See “Cleaning Your Coffee Maker” section of this manual for more
details).
HINTS FOR GREAT TASTING COFFEE
1. A clean coffee maker is essential for making great tasting coffee. Regular
cleaning is recommended, as specified in the “Cleaning Your Coffee
Maker” section of this manual.
2. Always use fresh, cold water in your coffee maker.
3. Fine grind coffee promotes fuller extraction and provides rich, full-tasting
coffee. Regular grind will require slightly more coffee grounds per cup to
provide the strength of a finer grind.
4. Store coffee grounds in a cool, dry place. Once coffee has been opened,
keep it tightly sealed in refrigerator to maintain freshness.
5. For optimum coffee, buy whole beans and grind them just before brewing.
6. Do not reuse coffee grounds since this will lessen coffee flavor.
7. Reheating coffee is not recommended. Coffee is at its peak flavor
immediately after brewing.
8. Small oil droplets on the surface of brewed black coffee are due to the
extraction of oil from the coffee grounds. Oiliness may occur more
frequently if heavily roasted coffee is used. Over-extraction may also
cause oiliness, indicating a need to clean your coffee maker.
CLEANING YOUR COFFEE MAKER
1. CAUTION: Make sure your coffee maker is unplugged before attempting to
clean. To protect against electric shock, do not immerse cord, plug or unit in
water or other liquid.
2. The outside of your coffee maker can be cleaned by wiping the surface with a
damp, soft cloth. CAUTION: Never immerse the coffee maker in water or other
liquid.
-10-
Page 11

CLEANING YOUR COFFEE MAKER (continued)
3. Clean inside of coffee maker with a damp cloth and mild detergent. Do not use
harsh abrasives or scouring pads on carafe.
4. Carafe lid and removable filter basket may be washed with warm, soapy water
or placed in the top rack of the dishwasher. Do not place any other parts of
the coffee maker in the dishwasher.
5. To clean the permanent filter, empty the grounds and rinse thoroughly.
6. Do not clean the inside of the water reservoir with a cloth as the cloth may
have a lint residue that could clog the coffee maker.
7. For stubborn stains, us a nylon or plastic pad with a non-abrasive cleanser.
Do not use metal scouring pads or abrasive cleansers.
8. Calcium deposits may build up in the coffee maker as a result of minerals
commonly found in drinking water. The build-up is normal and may result in a
slow down of the coffee maker’s brewing time. The slow down can be
eliminated by periodically decalcifying the coffee maker.
9. To decalcify, fill the carafe with cold water and two tablespoons of white
vinegar. Pour the solution into the water reservoir, and then close the lid. Place
the carafe on the warming plate and allow the coffee maker to brew the
vinegar solution. While decalcifying, do not use a filter in the filter basket.
When the vinegar solution has finished brewing, empty the carafe and rinse it
out with cold water. Refill the water reservoir with cold water only and run
another brew cycle to remove any remaining vinegar solution. Repeat if
necessary.
-11-
Page 12

PRÉCAUTIONS IMPORTANTES
Lorsque vous utilisez des appareils électriques, vous devriez toujours respecter
des précautions élémentaires pour réduire les risques d’incendie, d’électrocution ou
de blessures.
1. Lisez soigneusement toutes les instructions.
2. Ne touchez pas les surfaces chaudes. Utilisez la poignée de la verseuse.
3. Pour vous protéger des électrocutions, ne plongez pas le cordon, la fiche ou
l’appareil dans l’eau ou dans un autre liquide.
4. Une surveillance attentive est nécessaire lorsqu’un appareil est utilisé en
présence d’enfants.
5. Débranchez l’appareil de la prise électrique lorsqu’il n’est pas en service ou
avant de le nettoyer. Laissez-le refroidir avant d’y replacer ou d’en retirer des
pièces et avant de le nettoyer.
6. N’utilisez aucun appareil qui a été endommagé, dont la fiche ou le cordon
électrique est abîmé ou dont le fonctionnement est anormal. Retournez l’appareil
à un centre de réparation autorisé pour y être examiné, réparé ou réglé.
7. L’utilisation d’accessoires n’est pas recommandée par le fabricant. Cela pourrait
être dangereux et devrait être évité.
8. Ne l’utilisez pas à l’extérieur.
9. Ne laissez pas le cordon électrique pendre sur le côté d’une table ou d’un
comptoir et ne le laissez pas toucher des surfaces chaudes.
10. Ne la placez pas à proximité d’un brûleur électrique ou à gaz chaud ou dans un
four chaud.
11. Branchez toujours le cordon dans la prise électrique murale avant d’allumer les
commandes. Pour débrancher la cafetière, éteignez-la d’abord (en position
OFF) puis débranchez la fiche de la prise murale.
12. Utilisez toujours de l’eau froide pour faire du café. De l’eau tiède ou d’autres
liquides pourraient endommager la cafetière.
13. Vous risquez de vous ébouillanter si le couvercle est soulevé ou retiré pendant
le cycle d’infusion.
14. N’utilisez pas cet appareil à des fins autres que son utilisation prévue.
15. Ne placez pas la verseuse chaude sur une surface mouillée ou froide.
16. Ne placez pas la verseuse chaude près ou sur du papier, du tissu ou d’autres
matériaux inflammables.
17. N’utilisez jamais la verseuse sur une cuisinière ou dans un four à micro-ondes.
18. Ne permettez pas au liquide de s’évaporer de la verseuse. Ne faites pas
chauffer la verseuse lorsqu’elle est vide.
19. Ne déplacez pas l’appareil entier lorsque la verseuse contient un liquide chaud.
20. Laissez le couvercle sur la verseuse lorsque vous préparez le café et lorsque
vous le versez.
21. Jetez la verseuse si elle est endommagée ou si sa poignée est lâche ou
abîmée. Une verseuse ébréchée ou fissurée pourrait se casser ou contaminer
le contenu liquide avec des morceaux de verre.
22. Ne nettoyez pas la verseuse avec des poudres à récurer, des tampons en
laine de fer ou d’autres matériaux abrasifs.
23. Cette verseuse est conçue pour être utilisée uniquement avec cette cafetière.
-12-
Page 13

PRÉCAUTIONS IMPORTANTES (suite)
24. AVERTISSEMENT : Pour réduire les risques d’incendie ou d’électrocution, ne
retirez pas le couvercle du fond de la cafetière. Il ne contient aucune pièce
réparable par l’utilisateur. Les réparations devraient être effectuées uniquement
par un personnel agréé. ATTENTION : Ne la plongez pas dans un liquide.
INSTRUCTIONS SPÉCIALES POUR LE CORDON
ÉLECTRIQUE
Le cordon électrique est court pour réduire les risques d’entortillement et de
trébuchement associés à un cordon électrique plus long. Un prolongateur peut être
utilisé s’il est utilisé avec soin. Cependant, en cas d’utilisation d’un prolongateur, son
régime électrique devrait être au moins aussi grand que celui de l’appareil. Le
prolongateur devrait être disposé afin qu’il ne pende pas du comptoir ou de la table là
où il pourrait être tiré par des enfants ou faire trébucher quelqu’un par accident. Le
régime électrique de la cafetière est inscrit sur le panneau inférieur de l’appareil.
Cet appareil possède une fiche polarisée (une branche est plus large que l’autre). À
titre de sécurité, cette fiche ne peut être insérée que d’une seule façon dans une prise
murale. Si elle ne s’insère complètement dans un sens ou dans l’autre, contactez un
électricien qualifié pour faire remplacer la prise obsolète. N’essayez en aucun cas
d’en modifier les branches.
AVERTISSEMENT : POUR RÉDUIRE LES RISQUES D’INCENDIE OU
D’ÉLECTROCUTION, NE RETIREZ PAS LE COUVERCLE DU FOND DE LA CAFETIÈRE.
IL NE CONTIENT AUCUNE PIÈCE RÉPARABLE PAR L’UTILISATEUR. LES
RÉPARATIONS DEVRAIENT ÊTRE EFFECTUÉES UNIQUEMENT PAR UN PERSONNEL
AGRÉÉ.
ATTENTION : NE LA PLONGEZ PAS DANS UN LIQUIDE.
-13-
Page 14

AVANT LA PREMIÈRE UTILISATION
Déballez soigneusement votre cafetière et retirez-en tous les matériaux d’emballage.
Retirez toutes les étiquettes et tous les autocollants de la cafetière. Pour retirer la
poussière qui a pu s’accumuler pendant l’emballage, vous pouvez essuyer l’appareil
avec un chiffon propre et humide. Séchez-le bien. Ne plongez pas la cafetière dans
l’eau ou dans un autre liquide. Nettoyez la verseuse, le couvercle de la verseuse, le
panier à filtre et le filtre à l’eau tiède avec un détergent doux. Rincez bien et séchez
bien. N’utilisez pas de produits de nettoyage rêches ou abrasifs. (Consultez la section
« Nettoyage de la cafetière » dans ce manuel pour des instructions plus détaillées.)
REMARQUE : Avant de préparer votre première tasse de café, nous vous
recommandons de faire fonctionner votre cafetière une ou deux fois en utilisant
uniquement de l’eau, sans café moulu. Cela éliminera toute la poussière qui aurait pu
s’accumuler dans la cafetière.
IMPORTANT : Utilisez uniquement de l’eau froide. Le système de perfusion automatique
fonctionne mieux avec de l’eau froide.
-14-
Page 15

VOTRE CAFETIÈRE
FIGURE 1: DC56 Série
Panier à filtre
Couvercle du réservoir d’eau
Porte du panier à filtre
Indicateur de
niveau d’eau
Couvercle de la verseuse
Verseuse
Voyant MARCHE/ARRÊT \
(ON/OFF)
Interrupteur MARCHE/ARRÊT
(ON/OFF)
Déclencheur
de la fonction
Pauser et
Servir (Pause
& Serve)
Rangement
du cordon
électrique
Plaque
chauffante
Voyant ARÔME (AROMA)
Bouton ARÔME (AROMA)
-15-
Page 16

VOTRE CAFETIÈRE (suite)
FIGURE 2: DC56T Série
Panier à filtre
Couvercle du réservoir d’eau
Porte du panier à filtre
Indicateur de
niveau d’eau
Couvercle de la verseuse
Verseuse
Panneau de
commande : Détails
en page 18
Déclencheur
de la fonction
Pauser et
Servir (Pause
& Serve)
Rangement
du cordon
électrique
Plaque
chauffante
-16-
Page 17

VOTRE CAFETIÈRE (suite)
FONCTIONS :
1.
ARRÊT AUTOMATIQUE APRÈS 2 HEURES : Pour votre sécurité, cette cafetière
est équipée d’une fonction d’arrêt automatique. La cafetière s’éteint
automatiquement 2 heures après la fin du cycle de préparation. Pour la
rallumer, appuyez sur le bouton MARCHE/ARRÊT/MINUTEUR (ON/OFF/TIMER) et
le voyant MINUTEUR (TIMER) s’allumera.
2. PAUSER ET SERVIR (PAUSE ‘N SERVE) : Vous permet d’interrompre le cycle
d’infusion et de verser une tasse de café avant que la verseuse soit remplie.
Pour redémarrer le cycle d’infusion, replacez la verseuse sur la plaque de la
verseuse et le café commencera automatiquement à couler au travers du
panier à filtre. Veillez à placer la verseuse complètement sur la plaque de la
verseuse.
ATTENTION : Si vous retirez la verseuse de la plaque de la verseuse pendant
plus de 30 secondes, le panier à filtre pourrait déborder.
3. AFFICHAGE NUMÉRIQUE HORLOGE/MINUTEUR : L’horloge numérique de 24
heures intégrée au panneau de commande de la cafetière indiquera l’heure
correcte même après que l’appareil a été éteint. Le minuteur peut être
programmé jusqu’à 24 heures à l’avance pour commencer à préparer
automatiquement du café. Veillez à ce que la verseuse soit placée
complètement sur la plaque chauffante.
4. INDICATEUR DE NIVEAU D’EAU : De gros chiffres faciles à lire indiquent
combien de tasses d’eau ont été versées dans la cafetière.
5. VERSEUSE SCELLÉE : Le couvercle de la verseuse et le joint d’étanchéité du
couvercle permettent de préserver l’arôme naturel et la température du café en
empêchant une évaporation excessive.
6. VERSEUSE PRATIQUE : Cette verseuse de forme unique avec son rebord
circulaire et son bec traditionnel vous permet de verser pratiquement de
n’importe quel côté. Avec les repères de tasses sur chaque côté de la
poignée, il est plus facile de mesurer la quantité d’eau lorsque vous remplissez
la verseuse.
7. PLAQUE CHAUFFANTE ANTIADHÉSIVE : Rend le nettoyage rapide et facile.
8. RANGEMENT DU CORDON : La longueur de cordon inutilisé peut être facilement
rangée hors de vue et donner à la cafetière une apparence soignée.
9. PANIER À FILTRE ESCAMOTABLE : La porte du filtre s’ouvre en poussant un
bouton pour faciliter le remplissage du filtre.
-17-
Page 18

VOTRE CAFETIÈRE (suite)
10. PANIER À FILTRE AVEC POIGNÉE : Le panier à filtre conique enrichit l’arôme et
élimine l’amertume. Un filtre permanent lavable est inclus.
LE PANNEAU DE COMMANDE :
1. AFFICHAGE NUMÉRIQUE HORLOGE/MINUTEUR : Affiche l’heure et le réglage du
minuteur. Consultez la section « Réglage de l’horloge » dans ce manuel pour
savoir comment programmer l’horloge.
2. BOUTON DE PROGRAMMATION : Ce bouton vous permet de programmer la
cafetière jusqu’à 24 heures avant l’heure de préparation désirée. Consultez la
section « Délai du cycle de préparation » pour plus de détails sur cette
fonction.
3. BOUTONS HEURES ET MINUTES : Ces boutons font avancer l’affichage des
heures et des minutes pour l’horloge et le minuteur. Consultez la section
« Réglage de l’horloge ».
4. VOYANT DU MINUTEUR : Lorsqu’il est allumé, il indique que la fonction de délai
du cycle de préparation est utilisée.
5. BOUTON MARCHE/ARRÊT/MINUTEUR : Ce bouton permet d’allumer et éteindre
la cafetière et de déclencher la fonction de minuteur (Délai du cycle de
préparation).
6. VOYANT MARCHE/ARRÊT : Lorsqu’il est allumé, il indique que l’appareil a
commencé le cycle de préparation du café.
7. BOUTON ARÔME : Cela permet d’extraire le meilleur arôme de votre café en
libérant l’eau au bon moment afin que la mouture de café soit progressivement
saturée. Quel que soit le nombre de tasses préparées, votre café a toujours un
arôme parfait et riche.
8. VOYANT ARÔME : Lorsqu’il est allumé, il indique que la fonction ARÔME est
déclenchée.
-18-
Page 19

RÉGLAGE DE L’HORLOGE (Série DC56T uniquement)
Pour régler l’heure, enfoncez d’abord le bouton HEURES (HOUR) des heures jusqu’à
ce que l’affichage correct des heures soit obtenu. Puis, enfoncez le bouton MIN des
minutes jusqu’à ce que l’affichage correct des minutes soit obtenu. Utilisez
l’indicateur AM/PM dans le coin gauche de l’affichage numérique pour régler
correctement l’heure. REMARQUE : Le débranchement de l’appareil remettra
l’affichage de l’horloge à 12:00.
FIGURE 3: Panneau de commande de la série DC56T
Bouton HEURES
(HOUR)
Bouton MIN
Bouton PROG
Affichage Numerique
Horloge / Minuteur
Bouton ARÔME
Voyant ARÔME
Voyant MARCHE/
ARRÊT
Bouton MARCHE/
ARRÊT/
MINUTEUR
Voyant DU
MINUTEUR
FONCTION DE DÉLAI DU CYCLE DE PRÉPARATION
(FONCTION DE MINUTEUR)
1. Pour régler votre cafetière afin qu’elle prépare le café à une heure ultérieure,
vérifiez d’abord que l’horloge est réglée à l’heure correcte. Consultez la section
« Réglage de l’horloge » pour plus de détails.
2. Enfoncez le bouton PROG et, sans le relâcher, enfoncez le bouton HEURES
(HOUR) jusqu’à ce que les heures de l’heure désirée de préparation soient
obtenues. REMARQUE : Vérifiez l’indicateur AM/PM situé dans le coin gauche de
l’affichage numérique de l’horloge. Puis enfoncez le bouton MIN des minutes
jusqu’à ce que les minutes de l’heure désirée de préparation soient obtenues.
3. Enfoncez une fois le bouton MARCHE/ARRÊT/MINUTEUR. Le voyant MINUTEUR
s’allumera, indiquant que la cafetière attendra jusqu’à l’heure de préparation
programmée pour commencer le cycle de préparation. REMARQUE : Si vous
désirez utiliser la fonction ARÔME, enfoncez le bouton ARÔME immédiatement
après que le voyant MINUTEUR s’allume. Lorsque la fonction ARÔME est
déclenchée, le voyant ARÔME s’allume. REMARQUE : Si le bouton MARCHE/
ARRÊT/MINUTEUR est enfoncé avant le bouton PROG, la fonction de délai du
cycle de préparation ne se déclenchera pas.
-19-
Page 20

UTILISATION DE VOTRE CAFETIÈRE
PRÉPARATION DE LA CAFETIÈRE POUR SON UTILISATION:
1. Placez la cafetière sur une surface horizontale loin de tout rebord.
2. Branchez l’appareil à une prise de courant de 120 V/60 Hz uniquement.
3. Le couvercle de la verseuse doit être correctement placé sur la verseuse
pendant la préparation du café et la verseuse doit reposer sur la plaque
chauffante.
4. La porte du panier à filtre doit être correctement fermée pendant la préparation
du café. ATTENTION : Si la porte du panier à filtre n’est pas complètement
fermée, la fonction Pauser et Servir (Pause ‘N Serve) ne fonctionnera pas
correctement. Cela pourrait forcer l’eau chaude ou le café chaud à déborder.
REMPLISSAGE DU RÉSERVOIR D’EAU : FIGURE 4
5. Ouvrez le couvercle à charnière du réservoir d’eau situé sur le dessus de la
cafetière.
6. Remplissez la verseuse de la quantité désirée d’eau froide. Videz la verseuse
dans le réservoir d’eau.
7. L’indicateur de niveau d’eau vous permet de connaître la quantité d’eau dans le
réservoir.
8. Fermez le couvercle à charnière. Placez la verseuse, avec son couvercle en
position, sur la plaque chauffante.
REMARQUE : La quantité de café préparé en fin de cycle sera toujours légèrement
inférieure à la quantité d’eau placée dans le réservoir de la cafetière, car la mouture
et le filtre absorbent un peu d’eau. Ajoutez un petit d’eau supplémentaire au début
afin d’obtenir le nombre exact désiré de tasses.
PRÉPARATION DU CAFÉ : FIGURE 5
1. Ouvrez la porte du panier à filtre vers la gauche. Retirez le panier à filtre en le
soulevant. Le filtre permanent fourni peut être utilisé avec ou sans filtre en
papier. Avec un filtre en papier, placez un cornet-filtre no 4 dans le panier à filtre
avant de le remplir de café moulu. Remplissez le filtre de la quantité nécessaire
de café moulu. Après la préparation, videz le filtre du café moulu et rincez bien
à l’eau.
FIGURE 4
FIGURE 5
-20-
Page 21

UTILISATION DE VOTRE CAFETIÈRE (suite)
PRÉPARATION DU CAFÉ : FIGURE 5 (suite)
2. Remplissez le filtre de la quantité désirée de café moulu. Selon les normes de
l’industrie du café, utilisez une mesure nominale de café (2 cuillerées à soupe
rases) de café moulu pour six onces d’eau. Après plusieurs utilisations de
votre cafetière, vous pouvez augmenter ou diminuer la quantité de café moulu
selon votre goût.
REMARQUE : Veillez à utiliser du café moulu préparé spécialement pour les
cafetières automatiques goutte-à-goutte.
3. Replacez le panier à filtre avec le filtre rempli dans la porte. Veillez à ce que le
panier à filtre soit bien inséré dans la porte. Refermez bien la porte.
ATTENTION : N’utilisez pas votre cafetière si la porte n’est pas bien fermée. Si
la porte ne ferme pas bien, vérifiez-la pour voir si le panier à filtre est bien
inséré et refermez la porte.
4. Enfoncez le bouton MARCHE/ARRÊT/MINUTEUR et le voyant MINUTEUR
s’allumera. Enfoncez de nouveau le bouton MARCHE/ARRÊT/MINUTEUR et le
voyant MARCHE/ARRÊT s’allumera pour indiquer que la cafetière a commencé
le cycle de préparation.
REMARQUE : Si vous désirez utiliser la fonction ARÔME, enfoncez le bouton
ARÔME immédiatement après que le voyant MARCHE/ARRÊT s’allume. Lorsque
la fonction ARÔME est déclenchée, le voyant ARÔME s’allume.
5. Dans quelques minutes, la cafetière aura terminé le cycle de préparation puis
passera automatiquement en mode de chauffage qui maintiendra la
température du café pendant deux heures.
6. Enfoncez le bouton MARCHE/ARRÊT/MINUTEUR pour éteindre l’appareil lorsque
la verseuse est vide ou lorsque vous n’utilisez pas la cafetière.
CONSEILS POUR UN BON CAFÉ
1. La propreté de la cafetière est essentielle au goût du café. Un nettoyage
régulier, comme le décrit « Nettoyage de votre cafetière », est fortement
recommandé.
2. Utilisez toujours de l’eau douce froide dans votre cafetière.
3. Un café à mouture fine permet une extraction plus poussée et donne un
café riche en goût. Une mouture ordinaire exigera légèrement plus de café
moulu par tasse pour donner la force d’une mouture plus fine.
4. Rangez le café moulu dans un endroit sec et frais. Une fois ouvert,
conservez le café dans un récipient fermé et étanche pour en préserver
la fraîcheur.
-21-
Page 22

NETTOYAGE DE VOTRE CAFETIÈRE
1. ATTENTION : Veillez toujours à ce que la cafetière soit débranchée avant
d’essayer de la nettoyer. Pour vous protéger des électrocutions, ne plongez
pas le cordon, la fiche ou la cafetière dans l’eau ou dans un autre liquide.
2. L’extérieur de votre cafetière peut être nettoyé en essuyant la surface avec un
chiffon doux et humide. ATTENTION : Ne plongez jamais la cafetière dans l’eau
ou dans un autre liquide.
3. Nettoyez l’intérieur de la verseuse avec un chiffon mouillé et un détergent
doux. N’utilisez pas de produits abrasifs ni de tampons à récurer sur la
verseuse.
4. Le couvercle de la verseuse et le panier à filtre amovible peuvent être lavés à
l’eau tiède et savonneuse ou au lave-vaisselle dans le panier supérieur. Ne
placez aucune autre pièce de la cafetière dans le lave-vaisselle.
5. Pour laver le filtre permanent, videz-en le café moulu et rincez-le bien.
6. Ne nettoyez pas l’intérieur du réservoir d’eau avec un chiffon car le chiffon
peut avoir des peluches qui pourraient boucher la cafetière.
7. Pour les tâches coriaces, utilisez un tampon en nylon ou en plastique avec un
produit de nettoyage non abrasif. N’utilisez pas de tampons métalliques ni de
produits de nettoyage abrasifs.
8. Des dépôts de calcium peuvent s’accumuler dans la cafetière en raison des
minéraux qui se trouvent généralement dans l’eau potable. L’accumulation est
normale et la préparation du café peut en être ralenti. Ce problème peut être
corrigé en décalcifiant régulièrement la cafetière.
9. Pour décalcifier la cafetière, remplissez la verseuse d’eau froide et de deux
cuillerées à soupe de vinaigre blanc. Versez la solution dans le réservoir
d’eau, puis fermez le couvercle. Placez la verseuse sur la plaque de la
verseuse et faites fonctionner la cafetière avec la solution de vinaigre.
N’utilisez pas de filtre dans le panier filtre pendant la décalcification. Lorsque
toute la solution de vinaigre se trouve dans la verseuse, videz-la et rincez-la à
l’eau froide. Remplissez d’eau froide le réservoir d’eau et faites fonctionner de
nouveau la cafetière pour éliminer toute trace de la solution de vinaigre.
Répétez la dernière procédure si nécessaire.
-22-
Page 23

••Limited Warranty••
WHAT DOES THE WARRANTY COVER?
We warrant each appliance to be free from defects in material and workmanship. Our
obligation under this warranty is limited to replacement or repair, free of charge at our
factory or authorized service centers of any defective part or parts thereof other than
parts damaged in transit, which shall be returned to us, transportation prepaid. This
warranty shall apply only if the appliance is used in accordance with the factory
directions which accompany it, and on an Alternating Current (AC) circuit.
HOW LONG DOES THE COVERAGE LAST?
This warranty runs for one year from the date of delivery and applies only to the original
purchaser for use.
WHAT IS NOT COVERED BY THE WARRANTY?
The warranty does not cover defects or damage of the appliance which result from
repairs or alterations to the appliance outside our factory or authorized service centers,
nor shall it apply to any appliance which ahs been subject to abuse, misuse, negligence
or accidents. Also, consequential and incidental damage resulting from the use of this
product or arising out of any breach of contract or breach of this warranty are not
recoverable under this warranty. Some states do not allow the exclusion or limitation of
incidental or consequential damage, so the above limitation may not apply to you.
HOW DO YOU GET SERVICE?
If repairs become necessary or spare parts are needed, please contact:
De’ Longhi America Inc. De’ Longhi Canada Inc.
Park 80 West, Plaza One 1040 Ronsa Court
Saddle Brook, NJ 07663 Mississauga, Ontario
Or call us at: 1-800-322-3848 L4W 3Y4 Canada
The above warranty is in lieu of all other express warranties and representations. All
implied warranties are limited to the applicable warranty period set forth above. This
limitation does not apply if you enter into an extended warranty with DeLonghi. Some
states do not allow limitations on how long an implied warranty lasts, so the above
exclusions may not apply to you. DeLonghi does not authorize any othe person or
company to assume for it any liability in connection with the sale or use of its appliance.
HOW DOES STATE LAW APPLY?
This warranty gives you specific legal rights, and you may also have other rights which
vary from state to state.
Page 24

••••
••Garantie limitée
••••
QU’EST-CE QUE CETTE GARANTIE COUVRE?
Nous garantissons que chaque appareil sera exempt de tout vice de matériau ou de maind’œuvre. Notre obligation selon cette garantie est limitée au remplacement ou la
réparation, sans frais, à notre usine ou aux centres de réparation autorisés, de toutes les
pièces défectueuses qui nous seront retournées, port payé, à l’exception des pièces
endommagées pendant le transport. Cette garantie n’entre en vigueur que si l’appareil
est utilisé conformément aux instructions de l’usine qui l’accompagnent et sur un circuit
électrique à courant alternatif (c.a.).
COMBIEN DE TEMPS DURE LA GARANTIE?
Cette garantie dure une année à partir de la date de livraison et s’applique uniquement à
l’acheteur et utilisateur initial.
QU’EST-CE QUE CETTE GARANTIE NE COUVRE PAS?
Cette garantie ne couvre pas les défauts de l’appareil ou les dégâts résultants de travaux
de réparation ou de modifications effectués en dehors de notre usine ou des centres de
réparation autorisés. Elle ne couvre pas non plus les appareils qui ont fait l’objet d’une
utilisation abusive, incorrecte ou négligente ou d’accidents. En outre, les dommages
indirects ou consécutifs résultant de l’utilisation de ce produit ou d’une rupture de
contrat ou de la violation de cette garantie ne sont pas remboursables par cette garantie.
Certains états ou provinces n’autorisent pas l’exclusion ou la limitation des dommages
indirects ou consécutifs; les restrictions ci-dessus peuvent ne pas s’appliquer à votre
cas.
COMMENT OBTENIR DU SERVICE?
S’il faut réparer l’appareil ou obtenir des pièces de rechange, veuillez écrire à :
DeLonghi Canada Inc.
1040 Ronsa Court
Mississauga (Ontario)
L4W 3Y4 Canada
Ou appelez-nous au: 1-888-335-6644
••••
••
••••
La garantie ci-dessus remplace toute autre garantie et représentation expresse. Toute
garantie implicite est limitée à la période de garantie applicable établie ci-dessus. Cette
limitation ne s’applique pas si vous concluez un contrat de garantie prolongée avec
DeLonghi. Certains états ou provinces n’autorisent pas les limitations sur la durée d’une
garantie implicite; les restrictions ci-dessus peuvent ne pas s’appliquer à votre cas.
DeLonghi n’autorise aucune personne ou société à assumer en son nom une
responsabilité liée à la vente ou à l’utilisation de ses appareils.
COMMENT S’APPLIQUE LA LOI DE L’ÉTAT OU DE LA PROVINCE?
Cette garantie vous donne des droits juridiques précis et vous pouvez aussi avoir
d’autres droits qui peuvent varier d’un état ou province à un autre.
Page 25

DC56 and DC56T Series
DC56 et DC56T Séries
Made in PRC / Fabriqué en RPC
Power Requirement / Caractéristiques électriques: 120 Volts / 60 Hz
Power Consumption / Puissance consommée: 900 Watts
www.delonghiusa.com
DeLonghi America, Inc.
Park 80 West, Plaza One
Saddle Brook, NJ 07663
1-800-322-3848
DeLonghi Canada, Inc.
1040 Ronsa Court
Mississauga, Ontario
L4W 3Y4 Canada
1-888-335-6644
© DeLonghi 2002
 Loading...