

Page 1

Instruction Manual
Coffee Makers
Manual de instrucciones
de cafeteras automáticas
Mode D’emploi
Cafetières
DC54TC Series / Serié DC55TC Series / Serié
Manuale di istruzioni
Macchine da caffè
Read and Save These Instructions
Lisez et conservez ces instructions
Guardar estas instrucciones después de haberlas leído.
Leggete e conservate queste istruzioni
Page 2

IMPORTANT SAFEGUARDS
When using electrical appliances, basic safety precautions should always be
followed to reduce the risk of fire, electrical shock and/or personal injury.
1. Read all instructions carefully.
2. Do not touch hot surfaces. Use the handle on the carafe.
3. To protect against electrical shock, do not place cord, plug or coffee maker in
water or other liquid.
4. Close supervision is necessary when any appliance is used by or near
children.
5. Unplug from outlet when not in use and before cleaning. Allow to cool before
putting on or taking off parts, and before cleaning the appliance.
6. Do not operate any appliance with a damaged cord or plug or after the
appliance malfunctions or has been damaged in any manner. Return appliance
to authorized service facility for examination, repair or adjustment.
7. The use of accessory attachments is not recommended by the manufacturer.
It may be dangerous and should be avoided.
8. Do not use outdoors.
9. Do not let cord hang over edge of table or counter, or touch hot surfaces.
10. Do not place on or near hot gas or electric burner, or in heated oven.
11. Always plug cord into the wall outlet before turning on any controls. To
disconnect turn power OFF, then remove plug from wall outlet.
12. Always use cold water to make coffee. Warm water or other liquids could
cause damage to the coffee maker.
13. Scalding may occur if the cover is lifted or removed during the brewing cycle.
14. Do not use this appliance for other than intended use.
15. Do not set a hot carafe on a wet or cold surface.
16. Do not place hot carafe on or near paper, cloth or other flammable material.
17. Never use the carafe on a range top or in a microwave oven.
18. Do not allow liquid to evaporate from carafe. Do not heat carafe when empty.
19. Do not move entire unit when carafe contains hot liquid.
20. Use the lid on the thermal carafe while brewing and pouring coffee.
21. Discard carafe if damaged in any manner, or a carafe having a loose or
weakened handle. A chip or crack could result in breakage or contaminate
liquid contents with glass particles.
22. Do not clean carafe with scouring powders, steel wool pads or other abrasive
materials.
23. This carafe is designed for use with this coffee maker only.
-2-
Page 3

IMPORTANT SAFEGUARDS (continued)
24. WARNING: To reduce the risk of fire or electrical shock, do not remove the
bottom cover. No user serviceable parts inside. Repairs should be performed
by authorized service personnel only. CAUTION: Do not immerse in any liquid.
SHORT CORD INSTRUCTIONS
A short power cord is provided to reduce the risk resulting from entanglement or
tripping over a longer cord. Longer detachable power supply cords are available and
may be used if care is exercised in their use. If a longer detachable power cord or
extension cord is used (1) the marked electrical rating of the extension cord should be
at least as great as the electrical rating of the appliance, and (2) the longer cord should
be arranged so that it will not drape over the countertop or table top where it can be
pulled on by children or tripped over unintentionally. The electrical rating of the appliance is listed on the bottom of the unit. If the appliance is of the grounded type, the
extension cord should be a grounded type 3 wire cord. This appliance has a polarized
plug. One blade is wider than the other. To reduce the risk of electrical shock this plug
will fit in a polarized plug only one way. If the plug does not fit, contact a qualified
electrician. Do not attempt to modify the plug in any way.
WARNING: TO REDUCE THE RISK OF FIRE OR ELECTRICAL SHOCK, DO NOT REMOVE THE BOTTOM COVER. NO USER SERVICEABLE PARTS INSIDE. REPAIRS
SHOULD BE PERFORMED BY AUTHORIZED SERVICE PERSONNEL.
CAUTION: DO NOT IMMERSE UNIT IN LIQUID.
BEFORE FIRST USE
Place the box on a large, sturdy flat surface. Carefully unpack your coffee maker and
remove all packaging material and literature. Remove any labels or stickers from the
coffee maker. To remove any dust that may have accumulated during packaging, you
may wipe the unit with a clean, damp cloth. Dry thoroughly. Do not immerse the coffee
maker in water or other liquid. Clean the carafe, carafe lid, filter basket and filter in
warm water with mild detergent. Rinse and dry thoroughly. Do not use harsh or
abrasive cleaners. (See “Cleaning Your Coffee Maker” section of this manual for
detailed instructions.) Keep all plastic bags away from children.
NOTE: We recommend that prior to brewing your first pot of coffee, operate the coffee
maker once or twice with water only, without ground coffee. This will remove any dust
that may have settled inside the coffee maker, which may affect the flavor of the
coffee. IMPORTANT: Use cold water only. The automatic drip system works best with
cold water.
-3-
Page 4

KNOW YOUR COFFEE MAKER
FIGURE 1: DC54TC SERIES
Water Reservoir Cover
Water Level Indicator
Filter Basket Door
Carafe Lid
Thermal Carafe
Warming Plate
Power Switch
FIGURE 2: DC55TC SERIES
Water Reservoir Cover
Water Level Indicator
Filter Basket Door
Swing-Out
Filter Basket
Carafe Lid
Thermal Carafe
Warming Plate
Digital Timer and
Electronic Control
-4-
Page 5

KNOW YOUR COFFEE MAKER (continued)
FEATURES:
1. BREW AUTO SHUT-OFF: For safety, this coffee maker is equipped with a brew
auto shut-off feature. The coffee maker shuts off automatically after the
brewing cycle is completed. To restart the coffee maker, simply press the ONOFF / TIMER button twice and the ON/OFF light will illuminate for the DC55TC
series or press the ON-OFF button once for the DC54TC series.
2. PAUSE ‘N SERVE: Allows you to interrupt the brewing cycle and pour a cup of
coffee before the entire carafe is finished brewing. To restart the brewing
process, return the carafe to warming plate and coffee will automatically begin
flowing through filter basket. Make sure carafe is placed all the way on the
warming plate. CAUTION: Do not remove carafe for longer than 30 seconds or
the filter basket will overflow.
3. CLOCK / TIMER DIGITAL DISPLAY:(DC55TC Series Only) The 24-hour digital
clock, built into the control panel of the coffee maker, will keep the correct time
even after the unit has been shut off. Timer can be programmed up to 24
hours in advance to automatically begin flowing through the filter basket.
Make sure carafe is placed all the way on the warming plate.
4. SEALED CARAFE: Carafe lip and lid seal help to preserve coffee’s natural
flavor and temperature by preventing excessive evaporation.
5. EASY POUR CARAFE: Uniquely designed carafe with all-around lip and
traditional pour spout allow you to conveniently pour from any side.
6. NON-STICK WARMING PLATE: Makes cleanup quick and easy.
7. CORD STORAGE: Hidden cord storage allows you to hide excess cord for a
neat appearance and for easy storage.
8. FILTER BASKET WITH HANDLE: Cone shaped filter basket enriches flavor and
prevents bitter taste. A permanent, washable filter is included.
9. WATER LEVEL INDICATOR: Large easy-to-read numbers indicate how many
cups of water have been poured into the coffee maker.
-5-
Page 6

KNOW YOUR COFFEE MAKER (continued)
10. SWING-AWAY FILTER BASKET: Filter door swings open for convenient filling.
11. GOLD-TONE FILTER (IF INCLUDED): A permanent, washable filter. This durable
filter has a special design that keeps even the finest grounds out of your
coffee.
12. STAINLESS STEEL DOUBLE-WALL THERMAL CARAFE: Special double-wall
design retains heat, to keep coffee hot for hours.
The thermal carafe lid has three positions:
a) For brewing, turn the lid clockwise to the closed position. Note: Even after
brewing is finished, it is recommended that you keep the lid in the closed
position to retain the heat of the coffee.
b) When the arrow points toward the center of the handle, the lid is in the
pouring position.
c) To remove the lid, move the arrow towards the “unscrew” position.
FIGURE 3: Carafe Lid
-6-
Page 7

KNOW YOUR COFFEE MAKER (continued)
UNDERSTANDING THE CONTROL PANEL: (D55TC Series Only)
1. CLOCK / TIMER DIGITAL DISPLAY: Displays the clock and timer settings. See
“Setting the Clock” section of this manual for programming the time.
2. PROG BUTTON: This button allows you to program the coffee maker up to 24
hours before the desired brewing time. See the section on “Setting the Timer”
for details on activating the TIMER function.
3. HOUR AND MIN BUTTONS: These buttons advance the hour and minute display
for the clock and timer. See the section on “Setting the Clock”.
4. TIMER LIGHT: When illuminated, indicates that the TIMER function is being used.
5. ON-OFF / TIMER BUTTON: Activates the ON / OFF (power) and TIMER func-
tions.
6. ON / OFF LIGHT: When the light is illuminated it indicates that the unit has begun
the brewing cycle.
7. AROMA BUTTON: Extracts the best flavor and aroma from your coffee by time-
releasing the water, so that coffee grounds are saturated a little at a time. So
no matter how many cups you brew, your coffee always has a perfect, fullbodied flavor.
8. : When illuminated, indicates that the AROMA function has been activated.
SETTING THE CLOCK (DC55TC Series Only)
To set the correct time of day, first press the HOUR button until the desired hour is
reached. Then, press the MIN button until the desired minutes are reached. Use the
AM / PM indicator on the left side of the digital display when setting the time. NOTE:
Unplugging the unit will reset the clock to 12:00.
HOUR Button
MIN Button
PROG Button
FIGURE 4
AROMA Light
ON/OFF Light
ON/OFF /
TIMER Button
TIMER LightAROMA Button
-7-
Page 8

SETTING THE TIMER (DC55TC Series Only)
1. To preset your coffee maker to brew at a later time first verify that the clock is
set to the correct time. (See “Setting the Clock” section of this manual for
details).
2. Press and hold PROG button. While continuing to hold the PROG button, press
the HOUR button until the desired brew time hour is reached. NOTE: Be sure
to check the AM / PM indicator, located on the left side of the digital clock
display. Then press the MIN button until the desired minutes have been
reached. Release the PROG button.
3. Follow the “Operating Your Coffee Maker” steps 1 through 10. Then, press the
ON-OFF / TIMER button only once, the TIMER light will illuminate. Your coffee
maker is now set to start brewing at the programmed time. When the ON / OFF
light illuminates, this indicates that your programmed brew time has now been
activated. NOTE: If you wish to deactivate the TIMER function, press the ONOFF / TIMER button repeatedly until the TIMER light is no longer illuminated.
4. NOTE: If you wish to use the AROMA function, press the AROMA button
immediately after TIMER light is illuminated. When the AROMA function is
activated, the indicator will illuminate. NOTE: If the ON-OFF/ TIMER button
is pressed before the PROG button, the TIMER function will not activate.
OPERATING YOUR COFFEE MAKER
PREPARING COFFEE MAKER FOR BREWING:
1. Place the coffee maker on a flat, level surface away from any edge.
2. Plug the unit into a 120V / 60Hz only outlet.
3. The lid of the carafe must be fitted properly during the brewing process. And
the carafe must be set on the warming plate.
4. The filter basket door must be properly closed
during the brewing process. CAUTION: If the filter
basket door is not completely closed, the Pause ‘N
Serve feature will not function properly. It could
cause hot water or hot coffee to overflow.
FILLING THE WATER RESERVOIR: Figure 5
5. Open the hinged water reservoir cover located at the
top of the coffee maker. Fill the carafe with the desired amount of cold water.
Empty the water from the carafe into the water reservoir.
6. Close the hinged lid. Place the carafe with the lid in place on the warming plate.
-8-
FIGURE 5
Page 9

OPERATING YOUR COFFEE MAKER (continued)
NOTE: The amount of brewed coffee after the brewing process is complete will
always be slightly less than the amount of water placed in the coffee maker’s water
reservoir, since some water is absorbed by the coffee grounds and filter. Add a
little extra water at the beginning so that you have the exact number of cups
desired.
PREPARING THE COFFEE:
7. Swing the filter basket door outward to your left. The included permanent filter
may be used instead of a paper filter. If using paper filters, insert a #4 coneshaped filter into the filter basket before filling with coffee grounds.
8. Place the filter (either paper or permanent) into the
filter basket. Then place the desired amount of
ground coffee in the filter. According to coffee
industry standards, use one standard coffee
measure (2 level tablespoons) of coffee grounds
for each six ounces of water. NOTE: We recommend using coffee grounds specifically for
automatic drip coffee makers. After using your drip
coffee maker several times, the coffee may be
adjusted to suit your particular taste by decreasing or increasing the amount of
coffee grounds used.
9. Swing the filter basket door closed and snap into place. CAUTION: Do not
operate your coffee maker if the door does not close completely. If the door
does not close completely, check to see that the filter basket is properly seated
inside the filter basket holder, and snap door into place.
FIGURE 6
10. Close the hinged water reservoir cover. Place the carafe with the lid in place
on the warming plate.
11. DC55TC Series: Press the ON-OFF / TIMER button and the TIMER light will
illuminate. Press the ON-OFF / TIMER button again, and the ON-OFF light will
illuminate indicating that the coffee maker has begun the brewing cycle.
DC54TC Series: Press the ON-OFF button. The ON-OFF button will illuminate
indicating the coffee maker is “on” and that the brewing process has started.
-9-
Page 10
OPERATING YOUR COFFEE MAKER (continued)
PREPARING THE COFFEE:
12. NOTE: If you wish to use the AROMA function, press the AROMA button
immediately after ON-OFF light is illuminated. When the AROMA function is
activated, the indicator will illuminate.
13. NOTE: If you would like a cup of coffee before the full pot is brewed, the
Pause ‘N Serve feature allows you to interrupt the brewing process. The
brewing process does not stop during this period; only the flow of coffee from
the basket. Do not remove the carafe for longer than 30 seconds or the coffee
may overflow from the basket stops. While we offer this feature, we do not
recommend you pour coffee before the cycle has reached completion, since
the coffee brewed at the beginning of the cycle has a flavor which is very
different from the flavor at the end of the cycle. Removing a cup during the
brewing cycle will alter the flavor of the finished pot.
14. Coffee is ready when “bubbling” sound and dripping have completely stopped.
After the brew cycle is completed, the unit will automatically shut itself off.
15. The thermal carafe will keep coffee hot after brewing is complete.
16. Press the ON-OFF / TIMER button (DC55TC Series) or the ON-OFF button
(DC54TC Series) to turn the unit “off” when the carafe is empty or when the
coffee maker is not in use. After the brewing cycle is complete, remove the
filter basket and discard the grounds and rinse the permanent filter (See
“Cleaning Your Coffee Maker” section of this manual for more details). If a
paper filter was used, be sure to discard the paper filter immediately after use.
Use caution when removing the filter basket or paper filter, contents
may be hot. Always unplug the coffee maker from the electrical outlet after
every use.
17. NOTE: Never operate your coffee maker without the carafe lid in place on the
carafe, doing so will cause your coffee maker to overflow.
-10-
Page 11

HINTS FOR GREAT TASTING COFFEE
1. A clean coffee maker is essential for making great tasting coffee. Regular
cleaning is recommended, as specified in the “Cleaning Your Coffee Maker”
section of this manual.
2. Always use fresh, cold water in your coffee maker.
3. Fine grind coffee promotes fuller extraction and provides rich, full-tasting
coffee. Regular grind will require slightly more coffee grounds per cup to
provide the strength of a finer grind.
4. Store coffee grounds in a cool, dry place. Once coffee has been opened,
keep it tightly sealed in refrigerator to maintain freshness.
5. For optimum coffee, buy whole beans and grind them just before brewing.
6. Do not reuse coffee grounds since this will lessen coffee flavor.
7. Reheating coffee is not recommended. Coffee is at its peak flavor immediately
after brewing.
8. Small oil droplets on the surface of brewed black coffee are due to the
extraction of oil from the coffee grounds. Oiliness may occur more frequently
if heavily roasted coffees are used. Over-extraction may also cause oiliness,
indicating a need to clean your coffee maker.
CLEANING YOUR COFFEE MAKER
1. CAUTION: Make sure your coffee maker is unplugged before attempting to
clean. To protect against electric shock, do not immerse cord, plug or unit in
water or other liquid.
2. The outside of your coffee maker can be cleaned by wiping the surface with a
damp, soft cloth. CAUTION: Never immerse the coffee maker in water or other
liquid. The warming plate can be wiped with a clean, damp cloth as necessary. Be sure to wait a couple hours after the coffee maker has been turned
“off” and unplugged before cleaning the warming plate, to allow time to cool.
3. Clean inside of coffee maker with a damp cloth and mild detergent. Do not use
harsh abrasives or scouring pads on carafe.
4. Carafe lid and removable filter basket may be washed by hand with warm,
soapy water or placed in the top rack of the dishwasher. Do not place any
other parts of the coffee maker in the dishwasher. Wash all other detachable
parts by hand with warm, soapy water and then rinse and dry thoroughly.
5. To clean the permanent filter, empty the grounds and rinse and dry thoroughly.
-11-
Page 12

CLEANING YOUR COFFEE MAKER (continued)
6. Do not clean the inside of the water reservoir with a cloth as the cloth may
have a lint residue that could clog the coffee maker. Just rinse with cold water
periodically.
7. For stubborn stains, us a nylon or plastic pad with a non-abrasive cleanser.
Do not use metal scouring pads or abrasive cleansers.
8. Calcium deposits may build up in the coffee maker as a result of minerals
commonly found in drinking water. The build-up is normal and may result in a
slow down of the coffee maker’s brewing time. The slow down can be
eliminated by periodically decalcifying the coffee maker.
9. To decalcify, fill the carafe with cold water and two tablespoons of white
vinegar. Pour the solution into the water reservoir, and then close the lid.
Place the carafe on the warming plate and allow the coffee maker to brew the
vinegar solution. While decalcifying, do not use a filter in the filter basket.
When the vinegar solution has finished brewing, empty the carafe and rinse it
out with cold water. Refill the water reservoir with cold water only and run
another brew cycle to remove any remaining vinegar solution. Repeat if
necessary. We recommend that you decalcify the machine 4 times a year.
-12-
Page 13

PRÉCAUTIONS IMPORTANTES
Lorsque vous utilisez des appareils électriques, vous devriez toujours respecter
des précautions élémentaires pour réduire les risques d’incendie, d’électrocution ou
de blessures.
1. Lisez soigneusement toutes les instructions.
2. Ne touchez pas les surfaces chaudes. Utilisez la poignée de la verseuse.
3. Pour vous protéger des électrocutions, ne plongez pas le cordon, la fiche ou
l’appareil dans l’eau ou dans un autre liquide.
4. Une surveillance attentive est nécessaire lorsqu’un appareil est utilisé en
présence d’enfants.
5. Débranchez l’appareil de la prise électrique lorsqu’il n’est pas en service ou
avant de le nettoyer. Laissez-le refroidir avant d’y replacer ou d’en retirer des
pièces et avant de le nettoyer.
6. N’utilisez aucun appareil qui a été endommagé, dont la fiche ou le cordon
électrique est abîmé ou dont le fonctionnement est anormal. Retournez
l’appareil à un centre de réparation autorisé pour y être examiné, réparé ou
réglé.
7. L’utilisation d’accessoires n’est pas recommandée par le fabricant. Cela
pourrait être dangereux et devrait être évité.
8. Ne l’utilisez pas à l’extérieur.
9. Ne laissez pas le cordon électrique pendre sur le côté d’une table ou d’un
comptoir et ne le laissez pas toucher des surfaces chaudes.
10. Ne la placez pas à proximité d’un brûleur électrique ou à gaz chaud ou dans un
four chaud.
11. Branchez toujours le cordon dans la prise électrique murale avant d’allumer les
commandes. Pour débrancher la cafetière, éteignez-la d’abord (en position
OFF) puis débranchez la fiche de la prise murale.
12. Utilisez toujours de l’eau froide pour faire du café. De l’eau tiède ou d’autres
liquides pourraient endommager la cafetière.
13. Vous risquez de vous ébouillanter si le couvercle est soulevé ou retiré pendant
le cycle d’infusion.
14. N’utilisez pas cet appareil à des fins autres que son utilisation prévue.
15. Ne placez pas la verseuse chaude sur une surface mouillée ou froide.
16. Ne placez pas la verseuse chaude près ou sur du papier, du tissu ou d’autres
matériaux inflammables.
17. N’utilisez jamais la verseuse sur une cuisinière ou dans un four à micro-ondes.
18. Ne permettez pas au liquide de s’évaporer de la verseuse. Ne faites pas
chauffer la verseuse lorsqu’elle est vide.
19. Ne déplacez pas l’appareil entier lorsque la verseuse contient un liquide chaud.
20. Laissez le couvercle sur la verseuse lorsque vous préparez le café et lorsque
vous le versez.
21. Jetez la verseuse si elle est endommagée ou si sa poignée est lâche ou
abîmée. Une verseuse ébréchée ou fissurée pourrait se casser ou contaminer
le contenu liquide avec des morceaux de verre.
22. Ne nettoyez pas la verseuse avec des poudres à récurer, des tampons en
laine de fer ou d’autres matériaux abrasifs.
-13-
Page 14

PRÉCAUTIONS IMPORTANTES (suite)
23. Cette verseuse est conçue pour être utilisée uniquement avec cette cafetière.
24. AVERTISSEMENT : Pour réduire les risques d’incendie ou d’électrocution, ne
retirez pas le couvercle du fond de la cafetière. Il ne contient aucune pièce
réparable par l’utilisateur. Les réparations devraient être effectuées uniquement
par un personnel agréé. ATTENTION : Ne la plongez pas dans un liquide.
INSTRUCTIONS SPÉCIALES POUR LE CORDON
ÉLECTRIQUE
Le cordon électrique est court pour réduire les risques d’entortillement et de
trébuchement associés à un cordon électrique plus long. Un prolongateur peut être
utilisé s’il est utilisé avec soin. Cependant, en cas d’utilisation d’un prolongateur, son
régime électrique devrait être au moins aussi grand que celui de l’appareil. Le
prolongateur devrait être disposé afin qu’il ne pende pas du comptoir ou de la table là
où il pourrait être tiré par des enfants ou faire trébucher quelqu’un par accident. Le
régime électrique de la cafetière est inscrit sur le panneau inférieur de l’appareil.
Cet appareil possède une fiche polarisée (une branche est plus large que l’autre). À
titre de sécurité, cette fiche ne peut être insérée que d’une seule façon dans une prise
murale. Si elle ne s’insère complètement dans un sens ou dans l’autre, contactez un
électricien qualifié pour faire remplacer la prise obsolète. N’essayez en aucun cas
d’en modifier les branches.
AVERTISSEMENT : POUR RÉDUIRE LES RISQUES D’INCENDIE OU
D’ÉLECTROCUTION, NE RETIREZ PAS LE COUVERCLE INFÉRIEUR. IL NE CONTIENT
AUCUNE PIÈCE RÉPARABLE PAR L’UTILISATEUR. LES RÉPARATIONS DEVRAIENT
ÊTRE EFFECTUÉES UNIQUEMENT PAR UN PERSONNEL AGRÉÉ.
ATTENTION : NE PLONGEZ PAS L’APPAREIL DANS UN LIQUIDE.
AVANT LA PREMIÈRE UTILISATION
Placez la boîte sur une grande surface solide et horizontale. Déballez soigneusement
votre cafetière et retirez-en tous les matériaux d’emballage et toute la documentation.
Retirez toutes les étiquettes et tous les autocollants de la cafetière. Pour retirer la
poussière qui a pu s’accumuler pendant l’emballage, vous pouvez essuyer l’appareil
avec un chiffon propre et humide. Séchez-le bien. Ne plongez pas la cafetière dans
l’eau ou dans un autre liquide. Nettoyez la verseuse, le couvercle de la verseuse, le
panier à filtre et le filtre à l’eau tiède avec un détergent doux. Rincez bien et séchez
bien. N’utilisez pas de produits de nettoyage rêches ou abrasifs. (Consultez la section
« Nettoyage de la cafetière » dans ce manuel pour des instructions plus détaillées.)
Gardez tous les sacs en plastique hors de portée des enfants.
-14-
Page 15

AVANT LA PREMIÈRE UTILISATION (suite)
REMARQUE : Avant de préparer votre première tasse de café, nous vous recommandons
de faire fonctionner votre cafetière une ou deux fois en utilisant uniquement de l’eau,
sans café moulu. Cela éliminera toute la poussière qui aurait pu s’accumuler dans la
cafetière et qui pourrait gâcher le goût du café.
IMPORTANT : Utilisez uniquement de l’eau froide. Le système de perfusion automatique
fonctionne mieux avec de l’eau froide.
VOTRE CAFETIÈRE
FIGURE 1: DC54TC Série
Couvercle du réservoir d’eau
Indicateur de niveau d’eau
Panier à filtre
Couvercle de la verseuse
Verseuse Thermique
Plaque chauffante
Interrupteur
Panier à filtre
-15-
Page 16

VOTRE CAFETIÈRE (suite)
FIGURE 1: DC55TC Série
Couvercle du réservoir d’eau
Indicateur de niveau d’eau
Panier à filtre
Couvercle de la verseuse
Verseuse Thermique
Plaque chauffante
Minuteur numérique et
commande électronique
FONCTIONS :
1. ARRÊT AUTOMATIQUE DE LA PRÉPARATION : Pour votre sécurité, cette
cafetière est équipée d’une fonction d’arrêt automatique de la préparation. La
cafetière s’éteint automatiquement une fois que le cycle de préparation du café
est terminé. Pour rallumer la cafetière, appuyez simplement deux fois sur le
bouton MARCHE-ARRÊT/MINUTEUR (ON-OFF/TIMER) et le voyant MARCHE/
ARRÊT (ON/OFF) s’allume, pour la série DC55TC, ou appuyez simplement une
fois sur le bouton MARCHE/ARRÊT (ON/OFF), pour la série DC54TC.
2. PAUSER ET SERVIR (PAUSE ‘N SERVE) : Cette fonction vous permet
d’interrompre le cycle d’infusion et de verser une tasse de café avant que la
verseuse soit remplie. Pour redémarrer le cycle d’infusion, replacez la
verseuse sur la plaque de la verseuse et le café commencera automatiquement
à couler au travers du panier à filtre. Veillez à placer la verseuse complètement
sur la plaque de la verseuse. ATTENTION : Si vous retirez la verseuse de la
plaque de la verseuse pendant plus de 30 secondes, le panier à filtre pourrait
déborder.
3. AFFICHAGE NUMÉRIQUE HORLOGE/MINUTEUR : (série DC55TC
uniquement) L’horloge numérique de 24 heures intégrée au panneau de
commande de la cafetière indiquera l’heure correcte même après que l’appareil
a été éteint. Le minuteur peut être programmé jusqu’à 24 heures à l’avance pour
commencer à préparer automatiquement du café. Veillez à ce que la
verseuse soit placée complètement sur la plaque chauffante.
-16-
Page 17

VOTRE CAFETIÈRE (suite)
4. VERSEUSE SCELLÉE : Le couvercle de la verseuse et le joint d’étanchéité du
couvercle permettent de préserver l’arôme naturel et la température du café en
empêchant une évaporation excessive.
5. VERSEUSE PRATIQUE : Cette verseuse de forme unique avec son rebord
circulaire et son bec traditionnel vous permet de verser pratiquement de
n’importe quel côté. Avec les repères de tasses sur chaque côté de la poignée,
il est plus facile de mesurer la quantité d’eau lorsque vous remplissez la
verseuse.
6. PLAQUE CHAUFFANTE ANTIADHÉSIVE : Rend le nettoyage rapide et facile.
RANGEMENT DU CORDON : La longueur de cordon inutilisé peut être facilement
7.
rangée hors de vue et donner à la cafetière une apparence soignée.
8.
PANIER À FILTRE AVEC POIGNÉE : Le panier à filtre conique enrichit l’arôme et
élimine l’amertume. Un filtre permanent lavable est inclus.
9. INDICATEUR DE NIVEAU D’EAU : De gros chiffres faciles à lire indiquent
combien de tasses d’eau ont été versées dans la cafetière.
10. PANIER À FILTRE ESCAMOTABLE : La porte du filtre s’ouvre en poussant un
bouton pour faciliter le remplissage du filtre.
11. FILTRE DORÉ (SI ELLE EST INCLUSE): Un filtre permanent lavable. Ce filtre
durable a une conception spéciale qui garde même les raisons les plus fines
hors de votre café.
12. VERSEURE THERMIQUE EN ACIER INOXYDABLE À DOUBLE PAROI : La
construction spéciale à double paroi retient la chaleur pour que le café reste
chaud pendant des heures.
Le couvercle de la verseuse thermique a trois positions :
a) Pour brasser, tournez le couvercle dans le sens des aiguilles d'une montre à
la position fermée. REMARQUE : Même lorsque la préparation est terminée, il
est recommandé de laisser le couvercle en position fermée pour maintenir la
température du café.
b) Quand la flèche se dirige au centre de la poignée, le couvercle est en
position versante.
c) Pour retirer le couvercle, pointez la flèche vers la position « dévisser »
(unscrew).
FIGURE 3: Couvercle de la verseuse
-17-
Page 18

VOTRE CAFETIÈRE (suite)
LE PANNEAU DE COMMANDE :(série DC55TC uniquement)
AFFICHAGE NUMÉRIQUE HORLOGE/MINUTEUR : Affiche l’heure et le réglage du
1.
minuteur. Consultez la section « Réglage de l’horloge » dans ce manuel pour
savoir comment programmer l’horloge.
2.
BOUTON DE PROGRAMMATION : Ce bouton vous permet de programmer la
cafetière jusqu’à 24 heures avant l’heure de préparation désirée. Consultez la
section « Réglage du minuteur » pour plus de détails sur la fonction MINUTEUR.
3. BOUTONS HEURES ET MINUTES : Ces boutons font avancer l’affichage des
heures et des minutes pour l’horloge et le minuteur. Consultez la section
« Réglage de l’horloge ».
4. VOYANT DU MINUTEUR : Lorsqu’il est allumé, il indique que la fonction
MINUTEUR est utilisée.
5. BOUTON MARCHE-ARRÊT/MINUTEUR : Ce bouton permet d’allumer et éteindre
la cafetière et de déclencher la fonction MINUTEUR.
6. VOYANT MARCHE/ARRÊT : Lorsqu’il est allumé, il indique que l’appareil a
commencé le cycle de préparation du café.
7. BOUTON ARÔME : Cela permet d’extraire le meilleur arôme de votre café en
libérant l’eau au bon moment afin que la mouture de café soit progressivement
saturée. Quel que soit le nombre de tasses préparées, votre café a toujours
un arôme parfait et riche.
8. VOYANT ARÔME : Lorsqu’il est allumé, il indique que la fonction ARÔME est
déclenchée.
RÉGLAGE DE L’HORLOGE (Série DC55TC uniquement)
Pour régler l’heure, enfoncez d’abord le bouton HEURES (HOUR) des heures jusqu’à
ce que l’affichage correct des heures soit obtenu. Puis, enfoncez le bouton MIN des
minutes jusqu’à ce que l’affichage correct des minutes soit obtenu. Utilisez
l’indicateur AM/PM dans le coin gauche de l’affichage numérique pour régler
correctement l’heure. REMARQUE : Le débranchement de l’appareil remettra
l’affichage de l’horloge à 12:00.
Bouton HEURES
(HOUR)
Bouton MIN
Bouton PROG
FIGURE 4
Affichage Numerique
Horloge / Minuteur
Bouton ARÔME
-18-
Voyant ARÔME
Voyant MARCHE/
ARRÊT
Bouton MARCHE/
ARRÊT/
MINUTEUR
Voyant DU
MINUTEUR
Page 19

FONCTION DE DÉLAI DU CYCLE DE PRÉPARATION
(FONCTION DE MINUTEUR)
1. Pour régler votre cafetière afin qu’elle prépare le café à une heure ultérieure,
vérifiez d’abord que l’horloge est réglée à l’heure correcte. Consultez la
section « Réglage de l’horloge » pour plus de détails.
2. Enfoncez le bouton PROG et, sans le relâcher, enfoncez le bouton HEURES
(HOUR) jusqu’à ce que les heures de l’heure désirée de préparation soient
obtenues. REMARQUE : Vérifiez l’indicateur AM/PM situé dans le coin gauche
de l’affichage numérique de l’horloge. Puis enfoncez le bouton MIN des minutes
jusqu’à ce que les minutes de l’heure désirée de préparation soient obtenues.
3. Suivez les étapes 1 à 10 de « Utilisation de la cafetière ». Puis appuyez une
seule fois sur le bouton MARCHE-ARRÊT/MINUTEUR (ON-OFF/TIMER), le
voyant MINUTEUR (TIMER) s’allume. Votre cafetière est maintenant prête à
commencer la préparation du café à l’heure programmée. Lorsque le voyant
MARCHE/ARRÊT (ON/OFF) s’allume, cela indique que l’heure de préparation,
que vous avez programmée, a maintenant été déclenchée. REMARQUE : Si
vous désirez éteindre la fonction MINUTEUR (TIMER), appuyez plusieurs fois
sur le bouton MARCHE-ARRÊT/MINUTEUR (ON-OFF/TIMER) jusqu’à ce que le
voyant MINUTEUR (TIMER) s’éteigne.
REMARQUE : Si vous appuyez sur le bouton MARCHE-ARRÊT/MINUTEUR
(ON-OFF/TIMER) avant d’appuyer sur le bouton PROG, la fonction
MINUTEUR (TIMER) ne s’enclenchera pas.
4. NOTE: Si vous souhaitez employer la fonction d'AROME, appuyez sur
le bouton d'AROME juste après que la lumière de TEMPORISATEUR
est élucidée. Quand la fonction d'AROME est activée, l'indicateur
illuminera. NOTE: Si le bouton d'On-off/timer est appuyé sur avant le
bouton de PROG, la fonction de TEMPORISATEUR n'activera pas.
UTILISATION DE VOTRE CAFETIÈRE
PRÉPARATION DE LA CAFETIÈRE POUR SON UTILISATION:
1. Placez la cafetière sur une surface horizontale loin de tout rebord.
2. Branchez l’appareil à une prise de courant de 120 V/60 Hz uniquement.
3. Le couvercle de la verseuse doit être correctement placé sur la verseuse
pendant la préparation du café et la verseuse doit reposer sur la plaque
chauffante.
4. La porte du panier à filtre doit être correctement fermée pendant la
préparation du café. ATTENTION : Si la porte du panier à filtre n’est pas
complètement fermée, la fonction Pauser et Servir (Pause ‘N Serve) ne
fonctionnera pas correctement. Cela pourrait forcer l’eau chaude ou le
café chaud à déborder.
-19-
Page 20

UTILISATION DE VOTRE CAFETIÈRE (suite)
REMPLISSAGE DU RÉSERVOIR D’EAU : FIGURE 5
5. Ouvrez le couvercle à charnière du réservoir d’eau
situé sur le dessus de la cafetière. Remplissez la
verseuse de la quantité désirée d’eau froide.
Versez l’eau de la verseuse dans le réservoir
d’eau.
6. Fermez le couvercle à charnière. Placez la
verseuse avec son couvercle en position sur la
plaque chauffante.
FIGURE 5
REMARQUE : La quantité de café préparé en fin de cycle sera toujours légèrement
inférieure à la quantité d’eau placée dans le réservoir de la cafetière, car la mouture
et le filtre absorbent un peu d’eau. Ajoutez un petit d’eau supplémentaire au début
afin d’obtenir le nombre exact désiré de tasses.
PRÉPARATION DU CAFÉ :
7. Ouvrez la porte du panier à filtre en la tirant vers vous et vers la gauche. Le
filtre permanent fourni peut être utilisé à la place d’un filtre en papier. Avec un
filtre en papier, placez un cornet-filtre no 4 dans le panier à filtre avant de le
remplir de café moulu.
8. Placez le filtre (permanent ou en papier) dans le panier à filtre. Puis, remplissez
le filtre de la quantité désirée de café moulu. Selon les normes de l’industrie du
café, utilisez une mesure ordinaire (2 cuillerées à table rases) de café moulu
pour chaque volume d’eau de six onces. REMARQUE : Nous vous
recommandons d’utiliser un café moulu café moulu préparé spécialement pour
les cafetières automatiques goutte-à-goutte. Après plusieurs utilisations de
votre cafetière, vous pouvez ajuster la quantité de café moulu selon votre
goût.
9. Refermez la porte du panier à filtre (la fermeture correcte est indiquée par un
déclic). ATTENTION : Ne faites pas fonctionner votre cafetière si la porte n’est
pas bien fermée. Si la porte n’est pas complètement fermée, vérifiez si le panier
à filtre est bien inséré dans le porte-filtre et refermez la porte.
10. Refermez le couvercle à charnière du réservoir d’eau. Placez la verseuse
avec son couvercle en position sur la plaque chauffante.
-20-
Page 21

UTILISATION DE VOTRE CAFETIÈRE (suite)
PRÉPARATION DU CAFÉ :
11. Série DC55TC : Appuyez sur le bouton MARCHE-ARRÊT/MINUTEUR (ON-OFF/
TIMER) et le voyant MINUTEUR (TIMER) s’allumera. Appuyez de nouveau sur le
bouton MARCHE-ARRÊT/MINUTEUR (ON-OFF/TIMER) et le voyant MARCHE/
ARRÊT (ON/OFF) s’allume pour indiquer que la cafetière a commencé le cycle
de préparation.
Série DC54TC : Appuyez sur le bouton MARCHE/ARRÊT (ON/OFF). Le voyant
MARCHE/ARRÊT (ON/OFF) s’allume pour indiquer que la cafetière est allumée
et que le cycle de préparation a commencé.
12. REMARQUE : Si vous désirez utiliser la fonction ARÔME (AROMA), appuyez
immédiatement sur le bouton ARÔME (AROMA) après que le voyant MARCHE/
ARRÊT (ON/OFF) s’allume. Lorsque la fonction ARÔME (AROMA) est
enclenchée, le voyant [ ] s’allume.
13. REMARQUE : Si vous désirez vous servir une tasse de café avant la fin de la
préparation complète, la fonction Pauser et Servir (Pause ‘N Serve) vous
permet de le faire. La préparation n’est pas interrompue pendant cette période;
seul l’écoulement du café dans la verseuse l’est. Ne retirez pas la verseuse
pendant plus de trente (30) secondes car le café pourrait déborder du panier.
Bien que nous offrions cette fonction, nous vous recommandons de ne pas
vous verser une tasse de café avant la fin complète du cycle de préparation,
car le café préparé en début de cycle à un arôme différent de celui préparé en
fin de cycle. Le versement d’une tasse de café pendant le cycle de
préparation modifiera le goût du pot final de café.
14. Le café est prêt lorsque le son de « bouillonnement » et l’égouttement ont
complètement cessé. Une fois que le cycle de préparation est terminé,
l’appareil s’éteint automatiquement tout seul.
15. La verseuse thermique maintiendra la température du café après la fin de la
préparation.
16. Appuyez sur le bouton MARCHE-ARRÊT/MINUTEUR (ON-OFF/TIMER) (série
DC55TC) ou sur le bouton MARCHE/ARRÊT (ON/OFF) (série DC54TC) pour
éteindre l’appareil lorsque la verseuse est vide ou lorsque la cafetière n’est
pas utilisée. Une fois que le cycle de préparation est terminé, retirez le panier
à filtre, jetez la mouture de café et rincez le filtre permanent. (Consultez la
section « Nettoyage de la cafetière » dans ce manuel pour plus de détails.) Si
un filtre en papier a été utilisé, veillez à le jeter immédiatement après son
utilisation. Faites attention lorsque vous retirez le panier à filtre ou le
filtre en papier car leur contenu peut être chaud. Débranchez toujours
la cafetière de la prise de courant après chaque utilisation.
17. NOTE: Never operate your coffee maker without the carafe lid in place on the
carafe, doing so will cause your coffee maker to overflow.
-21-
Page 22

CONSEILS POUR UN BON CAFÉ
1. La propreté de la cafetière est essentielle au goût du café. Un nettoyage
régulier, comme le décrit « Nettoyage de votre cafetière », est fortement
recommandé.
2. Utilisez toujours de l’eau douce froide dans votre cafetière.
3. Un café à mouture fine permet une extraction plus poussée et donne un café
riche en goût. Une mouture ordinaire exigera légèrement plus de café moulu
par tasse pour donner la force d’une mouture plus fine.
4. Rangez le café moulu dans un endroit sec et frais. Une fois ouvert, conservez
le café dans un récipient fermé et étanche pour en préserver la fraîcheur.
5. Pour un café optimal, achetez des grains de café et moulez-les juste avant de
préparer le café.
6. Ne réutilisez le café moulu car cela nuira considérablement au goût du café.
7. Il n’est pas recommandé de réchauffer le café. Le goût du café est meilleur
immédiatement après sa préparation.
8. De petites gouttes d’huile sur la surface du café noir sont dues à l’extraction de
l’huile des grains de café. Les cafés plus fortement torréfiés peuvent produire
plus d’huile. Une extraction excessive peut également donner de l’huile,
indiquant alors le besoin de nettoyer votre cafetière.
NETTOYAGE DE VOTRE CAFETIÈRE
1. ATTENTION : Veillez toujours à ce que la cafetière soit débranchée avant
d’essayer de la nettoyer. Pour vous protéger des électrocutions, ne
plongez pas le cordon, la fiche ou la cafetière dans l’eau ou dans un autre
liquide.
2. L’extérieur de votre cafetière peut être nettoyé en essuyant la surface
avec un chiffon doux et humide. ATTENTION : Ne plongez jamais la
cafetière dans l’eau ou dans un autre liquide. La plaque chauffante peut
être nettoyée avec un chiffon propre et humide, le cas échéant. Veillez à
attendre quelques heures après avoir éteint et débranché la cafetière
avant de nettoyer la plaque chauffante pour plus permettre de refroidir.
3. Nettoyez l’intérieur de la verseuse avec un chiffon mouillé et un détergent
doux. N’utilisez pas de produits abrasifs ni de tampons à récurer sur la
verseuse.
4. Le couvercle de la verseuse et le panier à filtre amovible peuvent être
lavés à l’eau tiède et savonneuse à la main ou au lave-vaisselle dans le
panier supérieur. Ne placez aucune autre pièce de la cafetière dans le
lave-vaisselle. Lavez toutes les autres pièces détachables à la main à
l’eau tiède et savonneuse, puis rincez-les et séchez-les bien.
5. Pour laver le filtre permanent, videz-en le café moulu et rincez-le bien.
6. Ne nettoyez pas l’intérieur du réservoir d’eau avec un chiffon car le
chiffon peut avoir des peluches qui pourraient boucher la cafetière.
Rincez-le simplement et régulièrement à l’eau froide.
7. Pour les tâches coriaces, utilisez un tampon en nylon ou en plastique avec
un produit de nettoyage non abrasif. N’utilisez pas de tampons métalliques
ni de produits de nettoyage abrasifs.
-22-
Page 23

NETTOYAGE DE VOTRE CAFETIÈRE (suite)
8. Des dépôts de calcium peuvent s’accumuler dans la cafetière en raison des
minéraux qui se trouvent généralement dans l’eau potable. L’accumulation est
normale et la préparation du café peut en être ralenti. Ce problème peut être
corrigé en décalcifiant régulièrement la cafetière.
9. Pour décalcifier la cafetière, remplissez la verseuse d’eau froide et de deux
cuillerées à soupe de vinaigre blanc. Versez la solution dans le réservoir d’eau,
puis fermez le couvercle. Placez la verseuse sur la plaque de la verseuse et
faites fonctionner la cafetière avec la solution de vinaigre. N’utilisez pas de
filtre dans le panier filtre pendant la décalcification. Lorsque toute la solution de
vinaigre se trouve dans la verseuse, videz-la et rincez-la à l’eau froide.
Remplissez d’eau froide le réservoir d’eau et faites fonctionner de nouveau la
cafetière pour éliminer toute trace de la solution de vinaigre. Répétez la
dernière procédure si nécessaire. Nous vous recommandons de décalcifier
l’appareil quatre (4) fois par an.
-23-
Page 24

ADVERTENCIAS DE SEGURIDAD
Para el manejo de artefactos eléctricos, se deben tomar ciertas precauciones
elementales para disminuir el riesgo de incendio, electrocución y/o lesiones
personales.
1. Leer atentamente todas las instrucciones.
2. No tocar superficies calientes. Tomar la jarra siempre por la manija.
3. Para evitar riesgo de electrocución, no sumergir el cable, ni el enchufe, ni la
cafetera en agua u otro líquido.
4. Vigilar atentamente los niños que estén usando, o estén cerca de un artefacto
eléctrico.
5. Desenchufar el artefacto cuando no esté en uso y antes se limpiarlo o lavarlo.
Dejar que la cafetera se enfríe antes de agregar o quitar partes, y antes de
limpiarla.
6. No poner en funcionamiento artefactos que tengan el cordón o el enchufe
dañado, ni después que se haya producido una falla o el artefacto hubiera
sufrido daños de cualquier naturaleza. En tales casos, llevar o enviar el
artefacto a un taller autorizado de servicios para que sea revisado, reparado o
calibrado.
7. El fabricante no recomienda el uso de accesorios con este artefacto, ya que
podría resultar peligroso y debe evitarse.
8. No usar el artefacto a la intemperie.
9. No dejar el cordón eléctrico colgando sobre el borde de una mesa o una
mesada, ni permitir que entre en contacto con superficies calientes.
10. No dejar el artefacto cerca de (ni sobre) un quemador de gas o eléctrico, ni en
un horno encendido.
11. Enchufar el artefacto antes de activar cualquiera de sus controles. Antes de
quitar el enchufe del tomacorriente, apagar el artefacto con su interruptor.
12. Siempre usar agua fría para hacer café, ya que el uso de agua u otro líquido
caliente podría dañar la cafetera.
13. Hay riesgo de quemarse si se levanta la tapa de la cafetera mientras se está
haciendo el café.
14. No usar este artefacto para propósitos a los que no está específicamente
destinado.
15. No apoyar una jarra caliente sobre una superficie húmeda o fría.
16. No dejar una jarra caliente de café sobre o cerca de un papel, de tela ni de
cualquier otro material combustible.
17. No colocar la jarra sobre un horno común ni en un horno de microondas.
18. No dejar que se evapore el líquido de la jarra. No calentar la jarra cuando está
vacía.
19. No mover la cafetera entera cuando la jarra contiene líquido caliente.
20. Mientras se prepara o se sirve el café, dejar siempre la tapa de la jarra
colocada.
21. Descartar la jarra si la misma estuviera dañada o la manija estuviera floja
debilitada. Una mella o una rajadura podría causar el quiebre repentino de la
jarra o podría hacer caer una astilla de vidrio adentro de la misma.
22. No limpiar la jarra con polvos abrasivos ni con esponjas de lana metálica.
-24-
Page 25

ADVERTENCIAS DE SEGURIDAD (continuación)
24. ADVERTENCIA: Para reducir el riesgo de incendio o electrocución accidental,
no quitar la tapa inferior del artefacto. El usuario no debe efectuar ninguna
reparación de los componentes internos de este artefacto. Las reparaciones deben
ser efectuadas exclusivamente por personal técnico autorizado. PRECAUCIÓN: No
sumergir la cafetera en ningún tipo de líquido.
INSTRUCCIONES CORTAS DE LA CUERDA
La cafetera tiene un cordón eléctrico corto para prevenir accidentes por enredos y
tropiezos. Tomando las precauciones necesarias, se puede usar un cordón eléctrico
prolongador (opcional). En tal caso: (1) la capacidad de corriente del cordón prolongador
debe ser igual o mayor que el consumo de corriente del aparato que está alimentando;
y (2) se deben tomar precauciones para que no quede colgando del borde una mesa
o mesada, adonde los niños puedan arrastrarlo o tropezarse con él accidentalmente.
El consumo nominal de corriente eléctrica de la cafetera se encuentra especificado en
el panel inferior de la misma. Si el enchufe de la cafetera tiene pata de conexión a
tierra, el cordón prolongador también debe tener tres conductores, uno de los cuales
debe servir de conexión a tierra. Por razones de seguridad, este artefacto tiene un
enchufe con patas de polaridad diferenciada (una es más ancha que la otra), que se
puede introducir en una sola posición en un tomacorriente de polaridad diferenciada.
Si hubieran dificultades para introducirlo totalmente en el tomacorriente, llamar a un
electricista profesional para solucionar el problema. No alterar el diseño original del
enchufe por ningún motivo.
ADVERTENCIA: PARA A REDUCIR EL RIESGO DE INCENDIO O ELECTROCUCIÓN
ACCIDENTAL, NO QUITAR LA TAPA INFERIOR DEL ARTEFACTO. EL USUARIO NO
DEBE EFECTUAR NINGUNA REPARACIÓN DE LOS COMPONENTES INTERNOS DE
ESTE ARTEFACTO. LAS REPARACIONES DEBEN SER EFECTUADAS
EXCLUSIVAMENTE POR PERSONAL TÉCNICO AUTORIZADO.
PRECAUCIÓN: NO SUMERGIR EL ARTEFACTO EN NINGÚN TIPO DE LÍQUIDO.
PREPARACIÓN DE LA CAFETERA
Colocar la caja sobre una superficie amplia, firme y plana. Sacar con cuidado la
cafetera y el manual de instrucciones de la caja, y quitar todos los materiales de
embalaje. Quitar las etiquetas y/o calcomanías de la cafetera. Si fuera necesario,
limpiar el polvo con un paño limpio y húmedo. Secar bien la cafetera. No sumergir la
cafetera en agua ni en ningún otro tipo de líquido. Limpiar la jarra, la tapa de la jarra, el
portafiltro y el filtro en una solución de agua y detergente. Enjuagar y secar bien la
cafetera. No usar productos limpiadores abrasivos ni fuertes para limpiar la unidad
(se pueden ver más detalles en la sección de “Limpieza de la cafetera”). No dejar
bolsas plásticas al alcance de los niños.
-25-
Page 26

PREPARACIÓN DE LA CAFETERA (continuación)
NOTA: Antes de preparar café por primera vez, es recomendable hacer funcionar la
cafetera una o dos veces con agua solamente, sin café molido en el filtro. Esto limpiará
el polvo u otros residuos que pudieran haber quedado adentro de la cafetera y que
podrían alterar el sabor del café. IMPORTANTE: Cargar la cafetera con agua fría, ya
que así el sistema de goteo automático funciona mejor.
DETALLES DE LA CAFETERA AUTOMÁTICA
FIGURA 1: SERIE DC54TC
Tapa del depósito de agua
Indicador de nivel de agua
Portafiltro
Tapa de la jarra
Jarra Termal
Base térmica
Botón de encendido
Portafiltro
Giratorio
-26-
Page 27

DETALLES DE LA CAFETERA AUTOMÁTICA
(continuación)
FIGURA 2: SERIE DC55TC
Tapa del depósito de agua
Indicador de nivel de agua
Portafiltro
Tapa de la jarra
Jarra Termal
Base térmica
Temporizador digital y control
electrónico
FUNCIONES Y CARACTERÍSTICAS:
1.
CORTE AUTOMÁTICO: Por razones de seguridad, esta cafetera incluye una
función de corte automático que apaga la máquina cuando se termina de hacer
el café. Para volver a encender la máquina: En el modelo DC55TC, oprimir dos
veces el botón de encendido (ON-OFF / TIMER) y se encenderá la luz
indicadora de activación; en el modelo DC54TC, oprimir una sola vez el botón
de encendido (ON-OFF).
2. PAUSA PARA SERVIR: Permite retirar la jarra para servir una taza de café,
aunque no se haya terminado de hacer toda la cantidad cargada. Al volver a
colocar la jarra en la base térmica, se iniciará automáticamente la circulación
de agua por el filtro de café. Asegurarse de que la jarra quede totalmente
apoyada sobre su base en la cafetera. PRECAUCIÓN: No retirar la jarra por
más de 30 segundos, ya que el filtro se llenará y se derramará café.
3. RELOJ / TEMPORIZADOR DIGITAL (sólo en la Serie DC55TC): El reloj digital
incorporado al panel de control de la cafetera continuará funcionando aun
después que la máquina se haya apagado. El temporizador se puede
programar hasta con 24 horas de anticipación para que se inicie el ciclo de
preparación de café. Asegurarse de que la jarra quede totalmente
apoyada sobre su base en la cafetera.
4. JARRA HERMÉTICA: El borde de la jarra y la tapa forman un cierre hermético
que evita la evaporación rápida, ayudando así a conservar la temperatura y el
sabor natural del café.
-27-
Page 28

DETALLES DE LA CAFETERA AUTOMÁTICA
(continuación)
5. JARRA ESPECIALMENTE DISEÑADA PARA SERVIR: La jarra de diseño
exclusivo tiene reborde perimetral completo y pico vertedor tradicional, con lo
cual se puede servir el café por cualquier lado de la misma. A ambos lados de
la manija se encuentran las marcas indicadoras de la cantidad de tazas,
facilitando notablemente la medición del nivel de agua a cargar en la jarra.
6. BASE DE APOYO DE SUPERFICIE ANTIADHERENTE: La limpieza es mucho más
rápida y simple.
7. COMPARTIMIENTO PARA CORDÓN ELÉCTRICO: La cafetera tiene un
compartimiento para ocultar el tramo de cordón eléctrico sobrante, dando un
aspecto ordenado y prolijo.
8. PORTAFILTRO CON MANIJA: El portafiltro tiene forma cónica, que facilita la
obtención de un café más cargado y con sabor puro. Se incluye un filtro
lavable permanente.
9. INDICATEUR DE NIVEAU D’EAU:Grande fa'cil-a-lea los números indican cuántas
tazas de agua se han vertido en el fabricante del café.
10. PORTAFILTRO GIRATORIO: Se abre fácilmente hacia un lado, simplificando la
carga de café.
11. FILTRO GOLD-TONE (SI VIENE INCLUIDO CON LA UNIDAD): Es un filtro
permanente y lavable, que tiene un diseño especial para filtrar aún los granos
más finos del café molido.
12. JARRA TÉRMICA DE ACERO INOXIDABLE, DE DOBLE PARED: Construida
especialmente con doble pared para mantener el café caliente durante horas.
La tapa de la jarra térmica tiene tres posiciones:
a) Para elaborar cerveza, dé vuelta a la tapa a la derecha a la posición
cerrada. NOTA: Aun después de haber preparado el café, es conveniente
mantener la tapa en la posición cerrada para mantenerlo caliente.
b) Cuando la flecha señala hacia el centro de la manija, la tapa está en la
posición que vierte.
c) Para quitar la tapa, orientar la flecha hacia la posición “destapar”.
FIGURE 3: Tapa de la jarra
-28-
Page 29

DETALLES DE LA CAFETERA AUTOMÁTICA
(continuación)
PANEL DE CONTROL DE LA CAFETERA: (Sólo para la Serie DC55TC)
1. RELOJ / TEMPORIZADOR DIGITAL: En este visor se puede ver la hora y la
calibración del temporizador. Para poner en hora el reloj, consultar la sección
“Cómo poner en hora el reloj” en este manual de instrucciones.
2. BOTÓN DE PROGRAMACIÓN (PROG): Con este botón se puede programar el
inicio del ciclo de preparación de café hasta con 24 horas de anticipación. En
la sección “Programación del temporizador” se pueden consultar más detalles
sobre este procedimiento.
3. BOTONES PARA FIJAR LA HORA Y LOS MINUTOS: Con estos botones se
modifican la hora y los minutos en el reloj y en el temporizador. Consultar más
la sección “Cómo poner en hora el reloj”.
4. LUZ INDICADORA DE TEMPORIZADOR: Cuando esta luz está encendida, indica
que está activado el temporizador (TIMER).
5. BOTÓN DE ENCENDIDO / TEMPORIZADOR: Se usa para activar las funciones
de Encendido / Apagado (ON / OFF) y de Temporizador (TIMER).
6. LUZ DE ENCENDIDO / APAGADO (ON / OFF): Cuando esta luz está encendida,
indica que se ha iniciado el ciclo de preparación de café.
7. BOTÓN DE LA FUNCIÓN “AROMA”: Esta función hace salir el agua a
intervalos, para saturar gradualmente el café molido. Así se obtiene un café de
sabor y aroma óptimos. Independientemente de la cantidad de tazas que se
preparen, el café saldrá siempre sabroso y aromático.
8. : Cuando esta luz está encendida, indica que está activada la función
AROMA.
CÓMO PONER EN HORA EL RELOJ
(Sólo para la Serie DC55TC)
Para poner en hora el reloj, primero pulsar el botón de Hora (HOUR) hasta llegar a la
hora que corresponda. Después, pulsar el botón de Minutos (MIN) hasta llegar a los
minutos que correspondan. A la izquierda del visor digital está el selector de AM /
PM para terminar de programar la hora. NOTA: Si la cafetera se desenchufa, el reloj
volverá a la hora 12:00.
-29-
Page 30

Botón de Hora
Botón de Minutos
FIGURE 4
Visor digital de Reloj /
Temporizador
Luz de AROMA
Luz de encendido
Botón de Programación
Botón de AROMA
Botón de Encendido /
Temporizador
Luz del Temporizador
PROGRAMACIÓN DEL TEMPORIZADOR
(Sólo para la Serie DC55TC)
1. Para programar el inicio de la preparación de café a otra hora, en primer lugar
verificar que el reloj esté marcando la hora correcta. (En la sección “Cómo
poner en hora el reloj” de este manual se pueden consultar las instrucciones
para poner el hora el reloj).
2. Pulsar y mantener oprimido el botón de Programación (PROG). Al mismo
tiempo, pulsar el botón de Hora (HOUR) hasta alcanzar la hora deseada.
NOTA: Verificar que el indicador de AM / PM ubicado a la izquierda del visor del
reloj se encuentre en la posición correcta. Después, pulsar el botón de
Minutos (MIN) llegar a los minutos que correspondan. Soltar el botón de
Programación (PROG).
3. Seguir los pasos 1 a 10 de las instrucciones de “Uso de la cafetera” y luego
pulsar una vez el botón ON-OFF / TIMER. En ese momento se encenderá la luz
del Temporizador (TIMER). Ahora la cafetera está programada para iniciar el
ciclo de preparación a la hora deseada. Cuando llegue la hora programada de
preparación, se encenderá la luz de Encendido / Apagado de la cafetera (ON /
OFF), indicando que se ha iniciado la preparación de café. NOTA: Para
desactivar la programación del Temporizador, pulsar repetidamente el botón
ON-OFF / TIMER ubicado al lado del panel de control, hasta que la luz
4. NOTA: Para activar la función de AROMA, oprimir el botón de AROMA
indicadora se apague.
inmediatamente después que se encienda la luz del Temporizador (TIMER). Al
mismo tiempo que se activa la función, se encenderá la luz de AROMA. NOTA:
Cuando se oprime el botón de Encendido (ON-OFF/ TIMER) sin oprimir antes el
botón de Programación (PROG), no se activará la función de Temporizador (TIMER).
-30-
Page 31

FUNCIONAMIENTO DE SU FABRICANTE DEL CAFÉ
PREPARACIÓN DE LA MÁQUINA PARA HACER CAFÉ:
1. Colocar la cafetera sobre una superficie nivelada,
alejada de los bordes.
2. Enchufar la cafetera en un tomacorriente de 120V /
60Hz.
3. Verificar que la tapa de la jarra esté firmemente
colocada antes de preparar café. La jarra debe
estar bien asentada sobre su base térmica.
4. Es importante cerrar bien el portafiltro antes de que
se empiece a hacer el café. PRECAUCIÓN: Si el
portafiltro no está bien cerrado, la función de Pausa
para Servir no funcionará correctamente. Podría
causar el derrame de agua caliente o de café caliente.
CARGA DE AGUA: Figura 5
5. Abrir la tapa abisagrada del recipiente de agua, ubicada
en la parte superior de la cafetera. Cargar la cantidad deseada de agua fría
en la jarra, y luego descargar la jarra en el recipiente de la máquina.
6. Cerrar la tapa del recipiente de agua. Colocar la jarra con la tapa cerrada en
subase térmica.
CARGA DEL CAFÉ:
7. Abrir el portafiltro, haciéndolo girar hacia la izquierda. Se puede usar el filtro
permanente en lugar de un filtro de papel. Si se prefiere utilizar filtro de papel,
introducir un filtro cónico N° 4 en el portafiltro antes de llenar con granos de
café.
FIGURA 5
8. Colocar el filtro (permanente o de papel) en el portafiltro. Cargar en el filtro la
cantidad deseada de café molido. De acuerdo con lo usual en el rubro, por
cada seis onzas de agua (170 ml) se cargan dos cucharadas a ras de café
molido. NOTA: Es recomendable usar café molido específicamente para
cafeteras automáticas. Después de usar varias veces la cafetera automática,
podrá variar en más o en menos la cantidad de café molido hasta encontrar la
medida exacta que responda a su gusto personal.
9. Llevar el portafiltro a la posición cerrada. PRECAUCIÓN: Verificar que el
portafiltro esté bien cerrado antes de encender la cafetera. Si no se cierra
totalmente, volver a abrirlo y verificar que el filtro esté correctamente asentado
antes de cerrarlo nuevamente.
10. Cerrar la tapa del depósito de agua. Colocar la jarra con la tapa cerrada en su
base térmica.
-31-
Page 32

FUNCIONAMIENTO DE SU FABRICANTE DEL CAFÉ
(continuación)
11. Serie DC55TC: Oprimir el botón de encendido (ON-OFF / TIMER) y se
encenderá la luz de Temporizador (TIMER). Oprimir el botón de encendido (ONOFF / TIMER) por segunda vez y se encenderá la luz ON-OFF indicando que la
máquina ha iniciado el ciclo de preparación de café.
Serie DC54TC: Oprimir el botón de encendido (ON-OFF) y se encenderá la luz
que indica que la máquina está funcionamiento y ha iniciado el ciclo de preparación
de café.
PREPARACIÓN DEL CAFÉ:
12. NOTA: Para activar la función de AROMA, oprimir el botón de AROMA
inmediatamente después que se encienda la luz ON-OFF. Al mismo tiempo que
se activa la función, se encenderá la luz de AROMA.
13. NOTA: La función Pausa para Servir permite servir una taza de café antes de
que se haya terminado de preparar toda la jarra. En este caso, no se
interrumpe la preparación del café, sino que se corta la salida de líquido del
portafiltro. No retirar la jarra durante más de 30 segundos, ya que podría
rebalsar el filtro y derramarse café. Si bien ponemos esta función a
disposición del usuario, aclaramos que no es ideal servirse en estas
condiciones, ya que el sabor del café que sale al inicio del ciclo no es igual al
sabor del café al final del mismo. Al extraer una taza al principio del ciclo de
preparación, se cambiará el sabor del contenido de la jarra al final del mismo.
14. Cuando ya no circule agua y se escuche un sonido de “burbujeo”, es
indicación de que se ha terminado de preparar el café. Cuando se termina de
preparar el café, la máquina de apagará automáticamente.
15. La jarra térmica mantendrá el café caliente durante cierto tiempo.
16. Para apagar la cafetera, pulsar el botón ON / OFF (en la Serie DC54TC) o el
botón ON-OFF / TIMER (en la Serie DC55TC) cuando la jarra está vacía o no
se usa la cafetera. Cuando se termina de preparar el café, quitar el filtro,
desechar el café en él contenido y lavarlo (en la sección “Limpieza de la
cafetera” en este manual, se pueden consultar más detalles sobre el
procedimiento). En caso de usar filtro de papel, desecharlo inmediatamente al
terminar el ciclo de preparación. Abrir el portafiltro y quitar el filtro con
cuidado, ya que el café usado podría estar muy caliente. Al terminar de
usar la cafetera, dejarla desenchufada.
17. NOTA: Usar siempre la cafetera con la tapa de la jarra firmemente colocada para
evitar derrames.
-32-
Page 33

SUGERENCIAS PARA PREPARAR UN CAFÉ
SABROSO
1. Para preparar un café sabroso, es fundamental mantener la cafetera limpia.
Se recomienda llevar a cabo la limpieza regular de la cafetera siguiendo las
instrucciones de la sección “Limpieza de la cafetera” de este manual de
instrucciones.
2. Usar siempre agua potable fría.
3. El grano molido fino facilita la extracción y el café obtenido será más cargado y
sabroso. Con grano de café molido regularmente, será necesario usar una
pequeña cantidad extra para obtener el mismo sabor que con grano molido
fino.
4. Guardar el café en un lugar fresco y seco. Una vez que se abre en envase
de café, conservarlo bien cerrado en el refrigerador para que se mantenga
fresco.
5. Para obtener óptimo sabor, es mejor comprar granos enteros y molerlos antes
de preparar el café.
6. No usar café molido más de una vez, ya que perderá considerablemente el
sabor.
7. No es recomendable recalentar café preparado. El sabor del café es óptimo
inmediatamente después de prepararlo.
8. A veces se notará que hay pequeñas gotas de aceite suspendidas en la
superficie del café recién hecho. Esto se debe a la extracción de aceite del
café molido. Ocurre más frecuentemente con café tostado que con otros tipos
de café. La saturación excesiva también puede dejar estos residuos aceitosos,
en cuyo caso es conveniente lavar la cafetera.
LIMPIEZA DE LA CAFETERA
1. PRECAUCIÓN: Antes de limpiar la cafetera, asegurarse de que esté
desenchufada. Para evitar riesgo de electrocución, no sumergir el cable, ni el
enchufe, ni la cafetera en agua u otro líquido.
2. El exterior de la cafetera se puede limpiar con un paño húmedo y suave.
PRECAUCIÓN: No sumergir la cafetera en agua ni en ningún otro tipo de
líquido. Si fuera necesario, la base térmica de la jarra se puede limpiar con un
paño húmedo y limpio. Antes de limpiar la base térmica, dejar enfriar la
cafetera un par de horas y asegurarse de que esté desenchufada.
3. El interior de la cafetera se puede limpiar con un paño humedecido en una
solución de agua y detergente. No usar productos de limpieza abrasivos ni
esponjas abrasivas para limpiar la jarra.
4. La tapa de la jarra y portafiltro se pueden lavar a mano con una solución
jabonosa tibia o también en la rejilla superior de un lavavajillas automático. No
lavar ninguna otra parte de la cafetera en un lavavajillas automático. Las otras
partes desmontables de la cafetera se pueden lavar a mano con una solución
jabonosa tibia. Enjuagarlas y secarlas bien antes de ponerlas en uso
nuevamente.
-33-
Page 34

LIMPIEZA DE LA CAFETERA (continuación)
5. Después de desechar el café molido, el filtro permanente se puede lavar con
agua antes de dejarlo secar.
6. No limpiar el interior del depósito de agua con un paño, ya que las pelusas que
deje podrían taponar el circuito de agua de la cafetera. Simplemente,
enjuagarlo con agua fría periódicamente.
7. Para limpiar manchas rebeldes, usar una esponja de plástico o de nailon con
un producto de limpieza no abrasivo. No usar esponjas metálicas ni productos
de limpieza abrasivos.
8. Los minerales que normalmente contiene el agua potable pueden formar
depósitos cálcicos en la cafetera. Esto es normal y el resultado será un leve
retardo en la preparación del café. Este retardo se puede eliminar
descalcificando periódicamente la cafetera.
9. Para descalcificar la cafetera, llenar la jarra con agua fría y agregar dos
cucharadas de vinagre blanco. Volcar esta solución en el depósito de agua y
cerrar la tapa del mismo. Colocar la jarra en su base y encender la cafetera
para que circule la solución de vinagre. No usar filtro en la cafetera para este
proceso de descalcificación. Cuando termine de pasar la solución de vinagre,
vaciar la jarra y enjuagarla con agua fría. Cargar agua fría en el depósito y
poner la cafetera en funcionamiento para que circule y limpie los restos de la
solución de vinagre. Si fuera necesario, repetir el procedimiento. Se
recomienda descalcificar la máquina 4 veces por año.
-34-
Page 35

IMPORTANTI MISURE DI SICUREZZA
Quando si maneggiano elettrodomestici si dovrebbero sempre
osservare alcune semplici norme precauzionali di sicurezza per ridurre i
rischi di incendio, di scosse elettriche e/o di danni alle persone.
1. Leggere attentamente tutte le istruzioni.
2. Non toccare le superfici calde. Prendere la caraffa per il manico.
3. Per proteggervi dalle scosse elettriche, evitate di immergere il filo, la spina
4. È necessario esercitare un’attenzione maggiore quando la macchina è
5. Staccare la spina dalla presa quando la macchina non è in uso o prima di
6. Non usate la macchina se il filo o la spina sono danneggiati o se la
7. La Ditta non raccomanda l’uso di accessori, che potrebbero creare pericoli
8. Non usate la machina all’aperto.
9. Non lasciate che il filo sporga dal bordo del tavolo o del banco, o tocchi
10. Non sistemare la macchina su fornelli a gas o elettrici o vicino ad essi, o in
11. Prima di azionare qualsiasi controllo, inserire la spina nella presa. Per
12. Per fare il caffè usate sempre acqua fredda. L’acqua calda o altri liquidi
13. Se sollevate o togliete il coperchio durante il ciclo di preparazione del
14. Non usate questa macchina per uso diverso da quello indicato.
15. Non poggiate la caraffa calda su una superficie bagnata o fredda.
16. Non posate la caraffa calda vicino a carta, panni o altro materiale
infiammabile.
17. Non usate la caraffa sulla cucina economica o nel forno a microonde.
18. Non lasciate che il liquido evapori dalla caraffa. Non riscaldate la caraffa
19. Non spostate la macchina quando la caraffa contiene liquido caldo.
20. Tenete la caraffa chiusa con il coperchio durante il ciclo di preparazione e
21. Eliminate la caraffa se è danneggiata o se ha il manico allentato o debole.
22. Non pulite la caraffa con polveri abrasive, pagliette di lana d’acciaio o altri
o la macchina in acqua o in altri liquidi.
adoperata da bambini o vicino ai bambini.
pulirla. Prima di staccare o aggiungere delle parti o prima di pulire la
macchina, lasciare che si raffreddi.
macchina non funziona a dovere o ha subito un qualsiasi danno. Portate la
macchina presso un centro di assistenza autorizzato per eventuale
esame, riparazione o regolazione.
e devono essere evitati.
superfici calde.
un forno acceso.
disinserire, spegnere l’interruttore (OFF) e quindi staccare la spina dalla
presa.
potrebbero causare dei danni alla macchina.
caffè, potreste scottarvi.
quando è vuota.
quando versate il caffè.
Una scheggiatura o delle incrinature potrebbero causarne la rottura o la
contaminazione del liquido da schegge di vetro.
materiali abrasivi.
-35-
Page 36

IMPORTANTI MISURE DI SICUREZZA (cont.)
23. La caraffa è progettata per essere usata solamente con questa macchina.
24. ATTENZIONE: per ridurre il rischio di incendio o di scosse elettriche, non
scoperchiate la base. All’interno non vi sono parti che l’utente possa
riparare. Eventuali riparazioni devono essere eseguite da personale
tecnico autorizzato. PRUDENZA: evitate l’immersione in liquidi di qualunque
tipo.
ISTRUZIONI CORTE DEL CAVO
La macchina ha in dotazione un filo corto per ridurre il rischio che deriva da eventuali
grovigli o dal pericolo di inciampare. Sono disponibili fili più lunghi staccabili da usarsi
con tutte le attenzioni del caso. Se adoperate un filo elettrico staccabile o una
prolunga: (1) la potenza elettrica della prolunga deve essere almeno la stessa di
quella della macchina, e (2) il filo più lungo dovrebbe essere disposto in modo tale
che non sporga dal piano su cui è sistemata la macchina: i bambini infatti potrebbero
tirarlo o inciamparci. La potenza elettrica della macchina è riportata alla base
dell’unità. Se la macchina prevede l’attacco a terra, anche la prolunga dovrebbe
avere l’attacco a terra di tipo 3. La macchina ha la spina polarizzata, con un polo più
grande dell’altro. Per ridurre il pericolo di scosse elettriche, questo tipo di spina si
adatta ad una presa polarizzata solamente in un modo per cui non è possibile
sbagliare. Se la spina non entra nella presa, contattare un elettricista qualificato. Non
tentate in nessun modo di modificare la spina.
ATTENZIONE: PER RIDURRE IL RISCHIO DI INCENDIO O DI SCOSSE ELETTRICHE,
NON SCOPERCHIARE LA PARTE INFERIORE DELLA MACCHINA. NON VI SONO
ALL’INTERNO PARTI CHE L’UTENTE POSSA RIPARARE. LE RIPARAZIONI
DEVONO ESSERE EFFETTUATE DA PERSONALE TECNICO AUTORIZZATO.
PRUDENZA: NON IMMERGERE L’APPARECCHIO IN LIQUIDI.
PRIMA DELL’USO
Sistemate il pacco su una superficie ampia e solida. Togliete con attenzione la
macchina da caffè dall’imballaggio e rimuovete il materiale di imballo e gli opuscoli.
Rimuovete tutte le etichette e gli adesivi dalla macchina. Per liberare la macchina dalla
polvere eventualmente accumulatasi durante le operazioni di imballo, spolveratela
con un panno umido e pulito, poi aspettare che si asciughi completamente. Non
immergerla in acqua o in altri liquidi. Pulire la caraffa, il coperchio, il filtro e il suo
contenitore in acqua tiepida con detergente leggero. Risciacquare ed asciugare
completamente. Non usare detergenti forti o abrasivi (Per istruzioni dettagliate
vedere la sezione dal titolo “Pulizia della macchina da caffè” in questo manuale).
Tenere lontane le borse di plastica dalla portata dei bambini.
-36-
Page 37

PRIMA DELL’USO (cont.)
NOTA: si raccomanda di far funzionare la macchina una o due volte con la sola
acqua prima di fare il caffè per togliere eventuali residui di polvere che si fossero
depositati all’interno dell’unità e che potrebbero pregiudicare il sapore del primo
caffè.
IMPORTANTE: usate solamente acqua fredda. Il sistema di filtraggio automatico
funziona meglio con acqua fredda.
CARATTERISTICHE DELLA MACCHINA DA CAFFÈ
Illustrazione 1: Serie DC54TC
Coperchio del serbatoio dell’acqua
Indicatore del livello dell’acqua
Contenitore del filtro
Coperchio della caraffa
Termo Caraffa
Piastra riscaldante
Interruttore della corrente
Cestello del filtro
girevole
-37-
Page 38

CARATTERISTICHE DELLA MACCHINA DA CAFFÈ
(cont.)
Illustrazione 2: Serie DC55TC
Coperchio del serbatoio dell’acqua
Indicatore del livello dell’acqua
Contenitore del filtro
Coperchio della caraffa
Termo Caraffa
Piastra riscaldante
Timer digitale e controllo elettronico
CARATTERISTICHE:
1. DISINSERIMENTO AUTOMATICO DEL CICLO. Per sicurezza, questa
2. SOSPENSIONE DEL CICLO. Questa funzione permette di sospendere il
3. OROLOGIO / VISUALIZZATORE DIGITALE DEL TIMER (solamente per le
macchina da caffè è provvista di un interruttore automatico del ciclo di
filtraggio, e si spegne automaticamente una volta completato il ciclo. Per
riaccendere, basta premere (per i modelli della serie DC55TC) per duevolte
il pulsante ON-OFF / TIMER [ACCESO-SPENTO / TIMER] e la spia ACCESO/
SPENTO si illuminerà. Per i modelli della serie DC54TC, basta premere il
pulsante ACCESO-SPENTO una volta sola.
ciclo e servire il caffè prima che si sia riempita la caraffa. Per riattivare il
ciclo, rimettere la caraffa sulla piastra e il caffè riprenderà a filtrare
automaticamente dal cestello del filtro. Assicurarsi che la caraffa sia
posizionata completamente sulla piastra. PRUDENZA: non togliere la
caraffa dalla piastra per più di 30 secondi per non rischiare che il caffè
fuoriesca dal cestello del filtro.
macchine della serie DC55TC). L’orologio digitale disposto sulle 24 ore,
inserito nel pannello di controllo della macchina, continua a segnare l’ora
esatta anche quando l’unità è spenta. Il timer programmatore può essere
programmato fino a 24 ore prima che il caffè cominci a filtrare dal cestello
del filtro. Assicurarsi che la caraffa sia disposta correttamente sulla
piastra.
-38-
Page 39

CARATTERISTICHE DELLA MACCHINA DA CAFFÈ
(cont.)
4. CARAFFA SIGILLATA. Il sigillo del coperchio e dell’orlo della caraffa serve
5. CARAFFA PROGETTATA PER UNA FACILE MESCITA. La caraffa progettata
6. PIASTRA DI RISCALDAMENTO NON ADERENTE. Permette una pulizia facile
7. ALLOGGIAMENTO PER IL FILO ELETTRICO. Permette di nascondere
8. CONTENITORE DEL FILTRO CON MANICO. Il cestello del filtro a forma di
9. INDICATORE DEL LIVELLO DELL’ACQUA Grandi facili leggere i numeri
10. CESTELLO DEL FILTRO GIREVOLE. La porta del cestello è girevole,
11. FILTRO DAL COLORE ORO (SE IN DOTAZIONE). Si tratta di un filtro
12. CARAFFA TERMICA CON PARETI DOPPIE IN ACCIAIO INOSSIDABILE
per tenere il caffè a temperatura naturale e conservarne il sapore,
evitando un’eccessiva evaporazione.
in modo unico, con il suo orlo particolare e il beccuccio di mescita
tradizionale, permettono di mescere il caffè da qualunque parte. I
segnalatori di quantità sistemati da ambedue le parti del manico permettono
di riempire la caraffa al livello voluto.
e svelta.
l’eccessiva lunghezza del filo dando alla macchina un’apparenza ordinata
e conserva il filo al suo posto quando la macchina non è in uso.
cono arricchisce il sapore ed elimina l’amaro. Vi è incluso un filtro lavabile
e riutilizzabile.
indicano quante tazze di acqua sono state versate nel creatore del caffè.
permette di riempire il filtro facilmente.
riutilizzabile e lavabile, progettato in modo particolare per evitare che
anche le più fini particelle di macinato vadano a finire nel caffè.
Il design unico con pareti doppie ad anti-dispersione termica mantiene il
caffè caldo per ore.
Il coperchio della caraffa termica ha tre posizioni:
a) Per fare il caffè, spostare la freccia sulla posizione di “chiuso” (closed).
NOTA: Raccomandiamo di tenere il coperchio chiuso anche dopo che il
caffè è passato, per tenerlo caldo.
b) La freccia posizionata verso il centro del beccuccio indica che potete
versare.
c) Per togliere il coperchio, spostare la freccia sulla posizione “svita”
(unscrew).
Illustrazione 3:
Coperchio della
caraffa
-39-
Page 40

CARATTERISTICHE DELLA MACCHINA DA CAFFÈ
(cont.)
SPIEGAZIONE PER IL QUADRO DI CONTROLLO
(solamente per le macchine della serie DC55TC)
1. OROLOGIO / VISUALIZZATORE DIGITALE DEL TIMER. Visualizza la
2. PULSANTE DI PROGRAMMAZIONE. Questo pulsante permette di
3. PULSANTI DELLE ORE E DEI MINUTI. Questi pulsanti servono
4. SPIA LUMINOSA DEL TIMER. Quando è illuminata, indica che la funzione
5. PULSANTE ON/OFF [ACCESO/SPENTO] DEL TIMER. Accende e spegne la
6. SPIA LUMINOSA ON/OFF [ACCESO/SPENTO]. Quando la spia si accende
7. PULSANTE AROMA. Permette di estrarre tutto il gusto e l’aroma del caffè,
8. Acceso, indica che la funzione AROMA è attivata.
disposizione dell’orologio e del timer. Per quanto riguarda la
programmazione dell’ora, vedere la parte intitolata “Predisposizione
dell’orologio” in questo manuale.
programmare la macchina fino a 24 ore prima dell’ora desiderata. Per
dettagli sull’attivazione della funzione TIMER, vedere la parte dal titolo
“Predisposizione del timer”, contenuta in questo manuale.
all’avanzamento delle ore e dei minuti per l’orologio e il timer. Per i dettagli,
vedere la sezione dal titolo “Predisposizione dell’orologio”, contenuta in
questo manuale.
TIMER è attiva.
macchina [ON/OFF] e attiva e disattiva la funzione del TIMER.
indica che l’unità ha iniziato il ciclo.
rilasciando l’acqua che satura i macinati a poco a poco. Quindi, non
importa quante tazze prepariate, avrete sempre un caffè dal gusto robusto
e perfetto.
PREDISPOSIZIONE DELL’OROLOGIO
(solamente per le macchine della serie DC55TC)
Per predisporre correttamente l’ora del giorno, premere il pulsante ORA fino a che il
visualizzatore indica l’ora voluta. Quindi, premere il pulsante MIN fino a che viene
indicato il minuto. Usare l’indicatore AM/PM alla sinistra del visualizzatore digitale per
predisporre esattamente l’ora. NOTA: quando si stacca l’unità dalla presa l’orario si
riporta alle ore 12:00.
-40-
Page 41

Pulsante ORE
Pulsante MINUTI
Pulsante PROG
Illustrazione 4: Serie DC55TC
Visualizzatore digitale del timer
e dell’orologio
Spia AROMA
Spia ACCESO/SPENTO
Pulsante ACCESO/
SPENTO / TIMER
Pulsante AROMA
Spia del TIMER
PREDISPOSIZIONE DEL TIMER
1. Per predisporre la macchina su un ciclo di preparazione del caffè ad
2. Premere e tenere premuto il pulsante PROG. Tenendo premuto il pulsante
3. Seguire le istruzioni da 1a 10 contenute nella sezione dal titolo
4. NOTA: per attivare la funzione AROMA, premere il pulsante AROMA subito
un’ora desiderata, assicurarsi prima di tutto che l’orologio segni l’ora
esatta. Per dettagli vedere la sezione “Predisposizione dell’orologio” in
questo manuale.
PROG, premere il pulsante HOUR fino a che non appare sul visualizzatore
l’ora desiderata per l’inizio del ciclo.
NOTA: assicurarsi di controllare l’indicatore AM/PM che si trova alla sinistra
del visualizzatore dell’orologio digitale. Quindi premere il pulsante MIN fino
alla visualizzazione del minuto voluto. Rilasciare il pulsante PROG.
“Funzionamento della macchina del caffè”. Quindi, premere il pulsante
ACCESO-SPENTO / TIMER una sola volta e la spia di attivazione del TIMER
si illuminerà, indicando che la macchina è predisposta per fare il caffè
all’ora programmata. Quando si illumina la spia ON/OFF significa che il ciclo
ha inizio. NOTA: se si desidera disattivare la funzione TIMER, premere
ripetutamente il pulsante ACCESO-SPENTO / TIMER che si trova sul quadro
di controllo a lato fino a che la spia luminosa del TIMER sul quadro davanti
non si spegne.
dopo aver acceso la spia del TIMER. Una volta attivata la funzione, si
accende la spia dell’AROMA. NOTA: la funzione TIMER non si attiva se
premete il pulsante ACCESO-SPENTO / TIMER prima del pulsante PROG.
-41-
Page 42
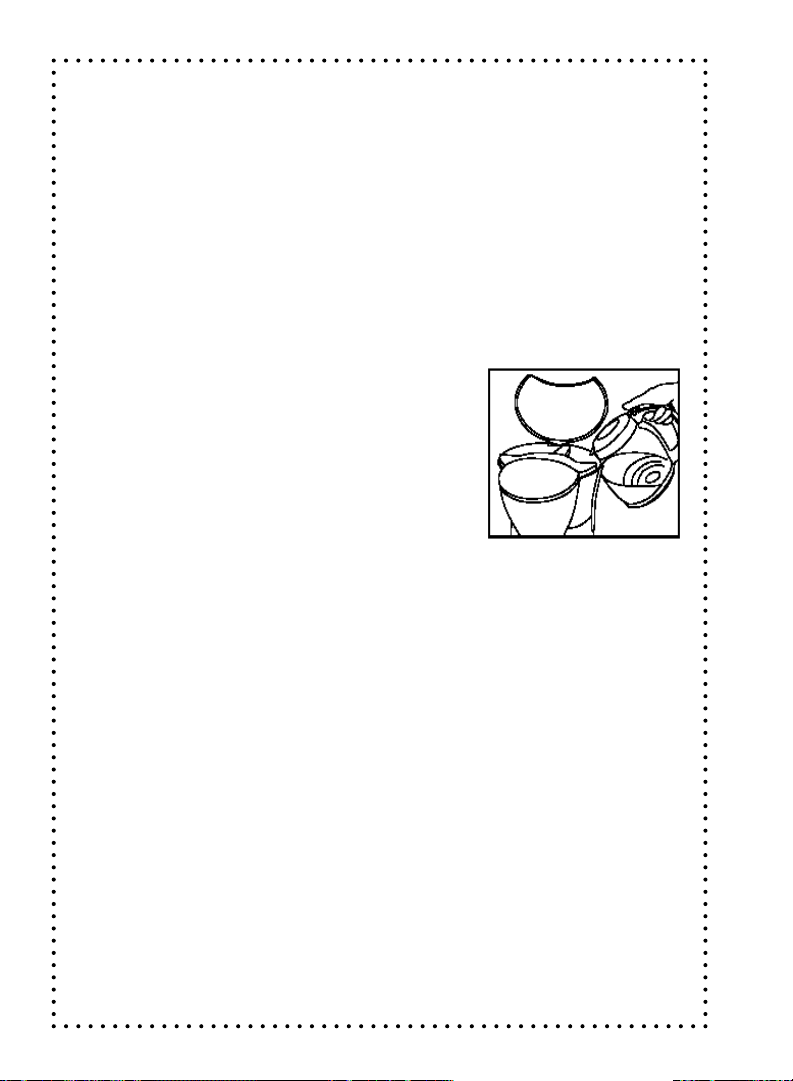
FUNZIONAMENTO DEL VOSTRO CREATORE DEL
CAFFÈ
PREPARAZIONE DELLA MACCHINA PER FARE IL CAFFÈ
1. Posizionare la macchina su una superficie piana e liscia, lontana dai bordi.
2. Inserire la spina in una presa a 120V/60HZ.
3. Il coperchio della caraffa deve essere sistemato correttamente durante il
4. Assicurarsi che durante il ciclo la porta del cestello del filtro sia chiusa a
RIEMPIMENTO DEL SERBATOIO DELL’ACQUA:
Illustrazione 5
5. Sollevare il coperchio a cerniera del serbatoio
ciclo di preparazione del caffè. La caraffa deve poggiare sulla piastra.
dovere. ATTENZIONE: se la porta non è chiusa completamente, la
funzione di sospensione del ciclo non funzionerà a dovere, causando la
fuoriuscita di caffè o di acqua calda.
dell’acqua che si trova nella parte superiore
della macchina. Riempire la caraffa di acqua
fredda nella quantità desiderata. Versare
l’acqua della caraffa nel serbatoio.
6. Chiudere il coperchio del serbatoio e mettere la
NOTA: La quantità di caffè preparato dopo che il processo di fermentazione sia
volontà completa sempre sia un po'di meno che la quantità di acqua disposta nel
serbatoio dell'acqua del creatore del caffè, poiché alcuna dell'acqua è assorbita dai
motivi e dal filtro del caffè. Aggiunga una poca acqua supplementare all'inizio in
modo che abbiate il numero esatto di tazze volute.
PREPARAZIONE DEL CAFFÈ:
7. Aprire la porta del cestello del filtro spostandola in fuori verso la vostra
8. Inserire il filtro (quello riutilizzabile o quello di carta) nel cestello e riempirlo
caraffa con il coperchio al suo posto
sulla piastra.
sinistra. Potete usare il filtro riutilizzabile in dotazione, al posto dei filtri di
carta. Se si utilizzano i filtri di carta, inserire un filtro n. 4 a forma di cono
nel cestello prima di riempirlo di macinato.
di macinato nella quantità desiderata. Si consiglia di usare la misura
standard di due cucchiai rasi di caffè per ogni tazza da sei once. NOTA: si
consiglia di usare caffè macinato in modo specifico per macchine
automatiche per il caffè all’americana.. Dopo aver fatto il caffè alcune
volte, potrete regolare la quantità di macinato secondo il vostro gusto.
-42-
ILLUSTRAZIONE 5
Page 43

FUNZIONAMENTO DEL VOSTRO CREATORE DEL
CAFFÈ
(CON’T)
9. Chiudere la porta del cestello facendola scattare in posizione.
10. Chiudere il coperchio a cerniera del serbatoio d’acqua. Collocare la caraffa
11. Serie DC55TC. Premere il pulsante ACCESO-SPENTO / TIMER. La spia del
12. NOTA: per usare la funzione AROMA, premere il pulsante AROMA appena
13. NOTA: se volete versarvi una tazza di caffè prima che si sia riempita la
ATTENZIONE: non far funzionare la macchina se la porta non è chiusa a
dovere. Se non si chiude del tutto, assicurarsi che il cestello del filtro sia al
suo posto nell’apposito ricettacolo, e far scattare la porta in posizione di
chiuso.
con il suo coperchio sulla piastra.
TIMER si illumina. Premere di nuovo il pulsante ACCESO-SPENTO / TIMER e
la spia di ACCESO-SPENTO si illumina, indicando che il ciclo di
preparazione del caffè è iniziato.
Serie DC54TC. Premere il pulsante ACCESO-SPENTO e la spia ACCESOSPENTO si illumina, indicando che la macchina è accesa e che il ciclo di
preparazione del caffè è iniziato.
si illumina la spia di ACCESO-SPENTO. Una volta attivata la funzione, si
illuminerà l’indicatore dell’AROMA.
caraffa, lo potete fare grazie alla funzione di sospensione del ciclo, che
pur non interrompendo il ciclo, interrompe il fluire del caffè nella caraffa.
Non togliere la caraffa dalla piastra per più di 30 secondi per non rischiare
che il caffè trabocchi dal cestello del filtro. Benché la macchina sia dotata
di questa funzione, non si consiglia di servire il caffè prima che il ciclo sia
terminato, in quanto il caffè filtrato all’inizio ha un gusto molto diverso da
quello filtrato alla fine del ciclo. Togliendo parte del caffè si altera il gusto di
tutta la caraffa.
14. Il caffè è pronto quando ha finito di filtrare e non si sente più l’acqua
15. La caraffa termica mantiene il caffè caldo una volta finito il ciclo.
ribollire. Una volta terminato il ciclo di filtraggio, la macchina si spegne
automaticamente.
-43-
Page 44

FUNZIONAMENTO DEL VOSTRO CREATORE DEL
CAFFÈ (CON’T)
16. Per spegnere la macchina quando la caraffa è vuota o la macchina non è
17. NOTA: non usare mai la macchina senza sigillare la caraffa con il
in uso, premere il pulsante ACCESO-SPENTO / TIMER (per i modelli della
serie DC55TC) o il pulsante ACCESO-SPENTO (per i modelli della
serie DC54TC). Una volta terminato il ciclo, rimuovere il cestello del filtro,
eliminare i fondi del caffè e risciacquare il filtro riutilizzabile. (Vedere
“Pulizia della macchina da caffè” in questo manuale per istruzioni
dettagliate). Se avete usato un filtro di carta, eliminatelo subito dopo l’uso.
Fate attenzione nel togliere il cestello o il filtro di carta, in quanto i
fondi del caffè sono caldi. Assicuratevi di staccare sempre l’unità dalla
presa di corrente ogni volta che non è più in uso.
coperchio apposito, per evitare che trabocchi.
CONSIGLI PER FARE UN OTTIMO CAFFÈ
1. Per ottenere un ottimo caffè, è indispensabile che la macchina sia pulita. Si
consiglia di pulirla regolarmente, seguendo le istruzioni alla sezione “Pulizia
della macchina da caffè” del presente manuale.
2. Usare sempre acqua fredda e corrente.
3. Il caffè macinato fine permette di essere utilizzato al massimo e dà un caffè dal
sapore ricco e robusto. Se usate il caffè macinato regolare, aumentare
leggermente la quantità perché il caffè abbia la stessa robustezza di quello
preparato con il macinato fine.
4. Conservare il caffè al fresco e all’asciutto. Una volta aperto, chiuderlo
ermeticamente e conservare in frigorifero per mantenerne la freschezza.
5. Per un eccellente caffè, comprarlo in grani e macinare prima dell’uso.
6. Non riusare i fondi del caffè, in quanto si otterrà una miscela dal sapore
spento.
7. Non si consiglia di riscaldare il caffè, che è all’apice del suo sapore appena è
preparato.
8. Le piccole gocce di olio visibili in superficie sono prodotti dal macinato. I caffè
ad alta torrefazione presentano un maggior livello di oleosità, che però
potrebbe anche essere causato dalla macchina sporca.
-44-
Page 45

PULIZIA DELLA MACCHINA DEL CAFFÈ
1. PRUDENZA: assicuratevi di aver staccato la spina della corrente prima di
procedere alla pulizia. Per evitare scosse elettriche, non immergere né il filo, né
la spina o la macchina in acqua o in altri liquidi.
2. Pulire la parte esterna della macchina con un morbido panno inumidito.
PRUDENZA: evitare di immergere la macchina in acqua o in altri liquidi. Pulire la
piastra di riscaldamento con un morbido panno inumidito, secondo necessità.
Prima di pulire la piastra, darle il tempo di raffreddarsi, aspettando circa due ore
dopo aver spento la macchina, e staccare la spina.
3. Pulire l’interno della macchina con un panno umido e un detergente leggero.
Evitare l’uso di polveri abrasive o pagliette per pulire la caraffa.
4. Il coperchio e il cestello estraibile del filtro in acqua e sapone tiepida, oppure nel
cestello superiore della lavastoviglie. Non lavare altre parti della macchina nella
lavastoviglie. Lavare le altre parti estraibili a mano in acqua e sapone tiepida,
poi risciacquare e lasciare asciugare completamente.
5. Per pulire il filtro riutilizzabile, svuotarlo dei fondi di caffè e risciacquarlo per
bene, lasciandolo asciugare completamente.
6. Evitare di pulire l’interno del serbatoio dell’acqua con un panno, in quanto i
residui del tessuto potrebbero intasare la macchina. Basta risciacquarlo
periodicamente con acqua fredda.
7. Per macchie difficili, usare una paglietta in nailon o plastica e polvere non
abrasiva. Evitare l’uso di pagliette di lana d’acciaio o di polveri abrasive.
8. I sali minerali presenti nell’acqua potabile possono causare dei depositi calcarei
nella macchina. Si tratta di un processo naturale, che può rallentare il tempo di
preparazione del caffè, e che si può evitare pulendo la macchina
periodicamente dai depositi calcarei.
9. Per togliere i depositi calcarei, riempire la caraffa di acqua fredda e aggiungere
due cucchiai di aceto bianco. Versare la soluzione nel serbatoio, quindi mettere
il coperchio. Mettere la caraffa sulla piastra e accendere la macchina
permettendole di “fare il caffè” con la soluzione di acqua e aceto. Non mettere il
filtro nel cestello. Una volta che la soluzione di acqua e aceto è passata,
svuotare la caraffa e risciacquarla in acqua fredda. Riempire il serbatoio di
acqua fredda (senza aceto) e fare partire di nuovo il ciclo, questa volta senza
aceto, per togliere eventuali residui di aceto. Ripetere secondo necessità. Vi
suggeriamo di eseguire questa pulizia 4 volte all’anno.
-45-
Page 46

••Limited Warranty••
WHAT DOES THE WARRANTY COVER?
We warrant each appliance to be free from defects in material and workmanship. Our
obligation under this warranty is limited to replacement or repair, free of charge at our
factory or authorized service centers of any defective part or parts thereof other than
parts damaged in transit, which shall be returned to us, transportation prepaid. This
warranty shall apply only if the appliance is used in accordance with the factory
directions which accompany it, and on an Alternating Current (AC) circuit.
HOW LONG DOES THE COVERAGE LAST?
This warranty runs for one year from the date of delivery and applies only to the original
purchaser for use.
WHAT IS NOT COVERED BY THE WARRANTY?
The warranty does not cover defects or damage of the appliance which result from
repairs or alterations to the appliance outside our factory or authorized service centers,
nor shall it apply to any appliance which ahs been subject to abuse, misuse, negligence
or accidents. Also, consequential and incidental damage resulting from the use of this
product or arising out of any breach of contract or breach of this warranty are not
recoverable under this warranty. Some states do not allow the exclusion or limitation of
incidental or consequential damage, so the above limitation may not apply to you.
HOW DO YOU GET SERVICE?
If repairs become necessary or spare parts are needed, please contact:
De’ Longhi America Inc. De’ Longhi Canada Inc.
Park 80 West, Plaza One 1040 Ronsa Court
Saddle Brook, NJ 07663 Mississauga, Ontario
Or call us at: 1-800-322-3848 L4W 3Y4 Canada
The above warranty is in lieu of all other express warranties and representations. All
implied warranties are limited to the applicable warranty period set forth above. This
limitation does not apply if you enter into an extended warranty with DeLonghi. Some
states do not allow limitations on how long an implied warranty lasts, so the above
exclusions may not apply to you. DeLonghi does not authorize any othe person or
company to assume for it any liability in connection with the sale or use of its appliance.
HOW DOES STATE LAW APPLY?
This warranty gives you specific legal rights, and you may also have other rights which
vary from state to state.
Page 47
••••
••Garantie limitée
••••
QU’EST-CE QUE CETTE GARANTIE COUVRE?
Nous garantissons que chaque appareil sera exempt de tout vice de matériau ou de maind’œuvre. Notre obligation selon cette garantie est limitée au remplacement ou la
réparation, sans frais, à notre usine ou aux centres de réparation autorisés, de toutes les
pièces défectueuses qui nous seront retournées, port payé, à l’exception des pièces
endommagées pendant le transport. Cette garantie n’entre en vigueur que si l’appareil
est utilisé conformément aux instructions de l’usine qui l’accompagnent et sur un circuit
électrique à courant alternatif (c.a.).
COMBIEN DE TEMPS DURE LA GARANTIE?
Cette garantie dure une année à partir de la date de livraison et s’applique uniquement à
l’acheteur et utilisateur initial.
QU’EST-CE QUE CETTE GARANTIE NE COUVRE PAS?
Cette garantie ne couvre pas les défauts de l’appareil ou les dégâts résultants de travaux
de réparation ou de modifications effectués en dehors de notre usine ou des centres de
réparation autorisés. Elle ne couvre pas non plus les appareils qui ont fait l’objet d’une
utilisation abusive, incorrecte ou négligente ou d’accidents. En outre, les dommages
indirects ou consécutifs résultant de l’utilisation de ce produit ou d’une rupture de
contrat ou de la violation de cette garantie ne sont pas remboursables par cette garantie.
Certains états ou provinces n’autorisent pas l’exclusion ou la limitation des dommages
indirects ou consécutifs; les restrictions ci-dessus peuvent ne pas s’appliquer à votre
cas.
COMMENT OBTENIR DU SERVICE?
S’il faut réparer l’appareil ou obtenir des pièces de rechange, veuillez écrire à :
DeLonghi Canada Inc.
1040 Ronsa Court
Mississauga (Ontario)
L4W 3Y4 Canada
Ou appelez-nous au: 1-888-335-6644
••••
••
••••
La garantie ci-dessus remplace toute autre garantie et représentation expresse. Toute
garantie implicite est limitée à la période de garantie applicable établie ci-dessus. Cette
limitation ne s’applique pas si vous concluez un contrat de garantie prolongée avec
DeLonghi. Certains états ou provinces n’autorisent pas les limitations sur la durée d’une
garantie implicite; les restrictions ci-dessus peuvent ne pas s’appliquer à votre cas.
DeLonghi n’autorise aucune personne ou société à assumer en son nom une
responsabilité liée à la vente ou à l’utilisation de ses appareils.
COMMENT S’APPLIQUE LA LOI DE L’ÉTAT OU DE LA PROVINCE?
Cette garantie vous donne des droits juridiques précis et vous pouvez aussi avoir
d’autres droits qui peuvent varier d’un état ou province à un autre.
Page 48

••••
••Garantía limitada
••••
COBERTURA DE LA GARANTÍA
La cafetera está garantizada por defectos de materiales y de fabricación. Nuestra
obligación bajo los términos de esta garantía se limita al cambio o a la reparación sin
cargo de la parte o partes defectuosas (excepto las partes que resultaran dañadas
accidentalmente durante el transporte), en nuestra fábrica o en un centro autorizado
de servicio. El costo de envío de la parte o partes a reparar es responsabilidad del
propietario. Esta garantía es válida únicamente si el artefacto se utiliza
exclusivamente con corriente alterna y de acuerdo con las instrucciones del
fabricante que se suministran con la unidad.
DURACIÓN DE LA GARANTÍA
Esta garantía es válida por un año a partir de la fecha de entrega de la unidad, y se
aplica exclusivamente al comprador original.
CONDICIONES QUE ANULAN LA VALIDEZ DE ESTA GARANTÍA
La garantía no cubre defectos ni daños que fueran el resultado de reparaciones o
modificaciones efectuadas a la máquina fuera de los centros autorizados de
servicio o de fábrica. La garantía tampoco tendrá validez si el artefacto ha sido
sometido a maltrato, uso indebido o negligencia, ni en el caso de daños por
accidente. Esta garantía tampoco reconoce ni cubre perjuicios directos o indirectos
emergentes del uso de este producto y/o por el incumplimiento de instrucciones y
cláusulas específicamente aclaradas en la garantía. En ciertos estados no se
permite la exclusión ni la limitación de perjuicios directos o indirectos, por lo cual, las
limitaciones mencionadas anteriormente podrían no ser válidas en su caso particular.
OBTENCIÓN DE SERVICIOS DE GARANTÍA
En caso de que sea necesario efectuar reparaciones u obtener partes de repuesto,
comunicarse con:
De’ Longhi America Inc.
Park 80 West, Plaza One
Saddle Brook, NJ 07663
O llamar al número: 1-800-322-3848
••••
••
••••
Esta garantía se ofrece en reemplazo de cualquier otro tipo de garantía expresa y
de otras representaciones hechas por terceros. Todas las garantías implícitas
quedan limitadas al mismo período de validez que corresponde a la garantía
enunciada anteriormente. Esta limitación no tiene validez si el propietario ha
acordado una extensión de garantía con DeLonghi. En ciertos estados, no se
aceptan las limitaciones de duración de las garantías implícitas, por lo cual, las
exclusiones y/o limitaciones mencionadas anteriormente podrían no aplicarse en su
caso particular. DeLonghi no autoriza a ninguna otra persona ni compañía a que
ofrezca garantías o asuma responsabilidades en su nombre, relacionadas a la venta
y/o al uso de sus artefactos.
VALIDEZ DE LEYES ESTATALES
Esta garantía le confiere derechos establecidos por ley, pero usted también podría
tener otros derechos que varían de un estado a otro.
Page 49

·· Garanzia limitata ··
LIMITI DELLA GARANZIA
La Ditta garantisce ogni elettrodomestico privo di difetti per quanto riguarda sia il
materiale sia la lavorazione. La responsabilità della Ditta in materia è limitata alla
sostituzione o riparazione, gratis, presso il nostro stabilimento o presso i nostri centri
di assistenza autorizzati, del pezzo o dei pezzi difettosi, ad eccezione delle parti che
abbiano subito danni durante la spedizione. Il pezzo o l’unità verranno rispediti
all’utente che avrà provveduto in anticipo al pagamento della spedizione. La garanzia
è soltanto valida se l’elettrodomestico è stato usato in osservanza delle istruzioni
dello stabilimento di cui è dotato, e su un circuito elettrico a corrente alternata (AC).
DURATA DELLA GARANZIA
La garanzia ha la durata di un anno a partire dalla data di consegna ed è valida
soltanto per l’acquirente originale.
ESCLUSIONI DELLA GARANZIA
La garanzia non copre difetti o danni causati all’elettrodomestico da riparazioni o
alterazioni che non siano state eseguite nel nostro stabilimento o nei nostri centri di
assistenza autorizzati, né si applica ad elettrodomestici che siano stati oggetto di
abuso, uso incorretto, negligenza o incidenti. Inoltre, la presente garanzia non copre
i danni accessori o indiretti derivanti dall’uso dell’elettrodomestico o da violazione
contrattuale o violazione della presente garanzia. Alcuni stati non permettono
l’esclusione o la limitazione di danni accessori o indiretti: in tal caso, la limitazione di
cui sopra non si applica.
COME OTTENERE ASSISTENZA
Se aveste bisogno di pezzi di ricambio o di riparazioni, vi preghiamo di contattare la
Ditta al seguente indirizzo:
De’ Longhi America Inc.
Park 80 West, Plaza One
Saddle Brook, NJ 07663
O telefonate al: 1-800-322-3848
La presente garanzia sostituisce tutte le altre garanzie e dichiarazioni esplicite. Tutte
le garanzie implicite sono limitate al periodo applicabile sopra descritto. Tale
limitazione non si applica nel caso in cui l’acquirente acquisti dalla DeLonghi
un’estensione di garanzia. Alcuni stati non permettono restrizioni alla durata della
garanzia implicita, nel qual caso le esclusioni di cui sopra non si applicano. La
DeLonghi non ha autorizzato né autorizza nessuna persona fisica o giuridica ad
assumersi per essa qualsiasi responsabilità in merito all’uso o alla vendita degli
elettrodomestici DeLonghi.
APPLICAZIONE DELLE LEGGI STATALI
Questa garanzia concede espliciti diritti legali all’acquirente, il quale potrebbe anche
godere di altri diritti che possono variare da stato a stato.
© DeLonghi 2002
Page 50

DC54TC and DC55TC Series
DC54TC et DC55TC Séries
Series DC54TC y DC55TC
Serie DC54TC e DC55TC
Made in PRC / Fabriqué en RPC
Fabricado en la RPC / Fabbricato nella RPC
Power Requirement: 120 Volts / 60 Hz
Caractéristiques électriques: 120 Volts / 60 Hz
Alimentación eléctrica: 120 Voltios / 60 Hz
Per uso con corrente: 120 Volt / 60 Hz
Power Consumption / Puissance consommée: 650 Watts
Consumo de energía: 650 Vatios / Consumo di corrente: 650 Watt
www.delonghiusa.com
DeLonghi America, Inc.
Park 80 West, Plaza One
Saddle Brook, NJ 07663
1-800-322-3848
DeLonghi Canada, Inc.
1040 Ronsa Court
Mississauga, Ontario
L4W 3Y4 Canada
1-888-335-6644
 Loading...