

Dell OptiPlex Systems, OptiPlex DHS, OptiPlex DHP, OptiPlex DHM Setup And Quick Reference Manual
www.dell.com | support.dell.com
Dell™ OptiPlex™ Systems
Setup and Quick
Reference Guide
Guia de configuração e de referência rápida
Guía de instalación y de referencia rápida
Models DHS, DHP, and DHM

www.dell.com | support.dell.com
Dell™ OptiPlex™ Systems
Setup and Quick
Reference Guide

Notes, Notices, and Cautions
NOTE: A NOTE indicates important information that helps you make better
use of your computer.
NOTICE: A NOTICE indicates either potential damage to hardware or loss of
data and tells you how to avoid the problem.
CAUTION: A CAUTION indicates a potential for property damage,
personal injury, or death.
____________________
Information in this document is subject to change without notice.
© 2000–2002 Dell Computer Corporation. All rights reserved.
Reproduction in any manner whatsoever without the written permission of Dell Computer
Corporation is strictly forbidden.
Tr ademarks used in this text:
Dell, OptiPlex
, and the
DELL
logo are trademarks of Dell Computer
Corporation;
Microsoft
and
Windows
are registered trademarks of Microsoft Corporation.
Other trademarks and trade names may be used in this document to refer to either the entities
claiming the marks and names or their products. Dell Computer Corporation disclaims any
proprietary interest in trademarks and trade names other than its own.
November 2002 P/N 38WYD Rev. A07

Contents 3
Contents
About This Guide . . . . . . . . . . . . . . . . . . . . . . . . . . 5
Finding Information for Your Computer
. . . . . . . . . . . . . . 5
CAUTION: Safety Instructions . . . . . . . . . . . . . . . . . . . 8
General
. . . . . . . . . . . . . . . . . . . . . . . . . . . . . 8
When Using Your Computer
. . . . . . . . . . . . . . . . . . . . 10
When Working Inside Your Computer
. . . . . . . . . . . . . 11
Getting Started/Setup
. . . . . . . . . . . . . . . . . . . . . . . 12
Solving Problems . . . . . . . . . . . . . . . . . . . . . . . . . 16
Using the Drivers and Utilities CD
. . . . . . . . . . . . . . . 17
Dell Diagnostics
. . . . . . . . . . . . . . . . . . . . . . . . . . 18
When to Use the Dell Diagnostics
. . . . . . . . . . . . . . . 18
Starting the Dell Diagnostics
. . . . . . . . . . . . . . . . . . 18
Running the Dell ID E Hard Drive Diagnostics . . . . . . . . . 20
Regulatory Information . . . . . . . . . . . . . . . . . . . . . . 20
Limited Warranties and Return Policy
. . . . . . . . . . . . . . 21
Limited Warranty for the U.S.
. . . . . . . . . . . . . . . . . 21
"Total Satisfaction" Return Policy (U.S. Only)
. . . . . . . . . . 24
Limited Warranty Terms for Canada . . . . . . . . . . . . . . 25
"Total Satisfaction" Return Policy (Canada Only)
. . . . . . . . 28
Dell Software and Peripherals (Canada Only)
. . . . . . . . . . 28
One-Year End-User Manufacturer Guarantee
(Latin America and the Caribbean Only) . . . . . . . . . . . . 29
Intel
®
Warranty Statement for Pentium® and
Celeron
®
Processors Only (U.S. and Canada Only) . . . . . . . 31

4 Contents

Setup and Quick Reference Guide 5
About This Guide
This document contains getting started/setup, solving problems, safety,
regulatory, and warranty information about your Dell™ OptiPlex™
computer.
To obtain the latest versions of the documents on your hard drive, see the
Dell support website at support.dell.com.
Regulatory model numbers appear throughout this document; their chassis
type equivalents are shown below:
Finding Information for Your Computer
Regulatory Model Numbers and Chassis Types
DHS = small desktop (SD) chassis
DHP = small form-factor (SF) chassis
DHM = small mini-tower (SMT) chassis
What Are You Looking For? Find it Here
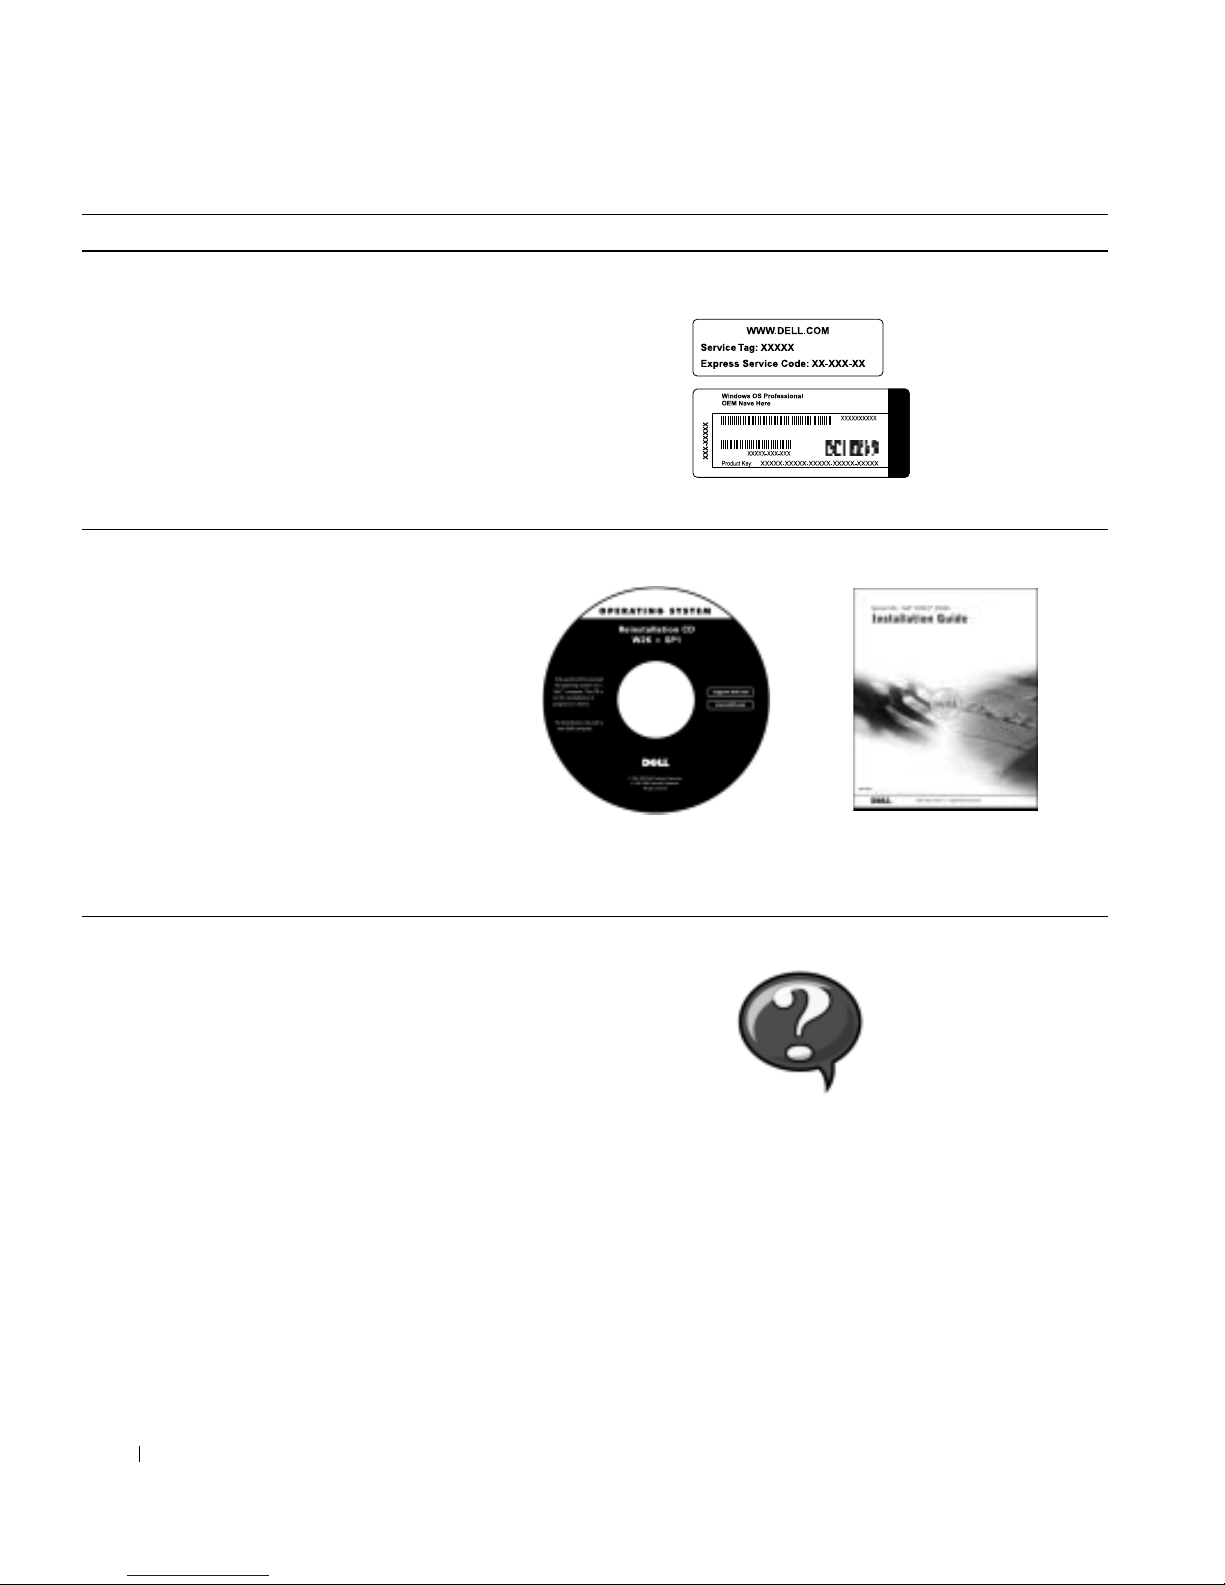
• A diagnostic program for my computer
• Drivers for my computer
• My computer documentation
• My device documentation
Drivers and Utilities CD (also known as the ResourceCD)
You can use this CD to access documentation, reinstall drivers, or run
diagnostics tools.
6 Setup and Quick Reference Guide
www.dell.com | support.dell.com
• Express Service Code and Service Tag
Number
•Microsoft
®
Windows® License Label
(Product Key)
Express Service Code and Product Key
Located on your computer.
• How to reinstall my operating system Operating System CD and Installation Guide
If you reinstall your operating system, use the Drivers and Utilities
CD to reinstall drivers for the devices that came with your computer.
• How to remove and replace parts
• Technical specifications
• How to configure system settings
• How to troubleshoot and solve problems
User’s Guide icon
Depending on your operating system, double-click the User’s Guides
icon on your desktop or click the Start button and then click Help
and Support to access the electronic documentation stored on your
hard drive.
What Are You Looking For? Find it Here

Setup and Quick Reference Guide 7
• Latest drivers for my computer
• Answers to technical service and support
questions
• Online discussions with other users and
technical support
• Documentation for my computer
Dell Support website
The Dell Support website provides several online tools, including:
• Knowledge Base — hints, tips, and online courses
• Customer Forum — online discussion with other Dell customers
• Upgrades — upgrade information for components, such as
memory, the hard drive, and the operating system
• Customer Care — contact information, or der status, warranty, and
repair information
• Downloads — drivers, patches, and software updates
• Reference — computer documentation, product specifications,
and white papers
•Service call status
• Top technical issues for my computer
• Fr eque ntly asked questions
•File downloads
• Details on my computer’s configuration
• Service contract for my computer
Dell Premier Support website
The Dell Premier Support website is customized for corporate,
government, and education customers. This site may not be available
in all regions.
• How to use Windows XP
• Documentation for my computer and
devices
Windows XP Help and Support Center
1 Click the Start button, and then click Help and Support.
2 Type a word or phrase that describes your problem, and then click
the arrow icon.
3 Click the topic that describes your problem.
4 Follow the instructions shown on the screen.
What Are You Looking For? Find it Here
8 Setup and Quick Reference Guide
www.dell.com | support.dell.com
CAUTION: Safety Instructions
Use the following safety guidelines to help ensur e your own personal safety and to help protect
your computer and working environment from potential damage.
General
• Do not attempt to service the computer yourself unless you are a trained service
technician. Always follow installation instructions closely.
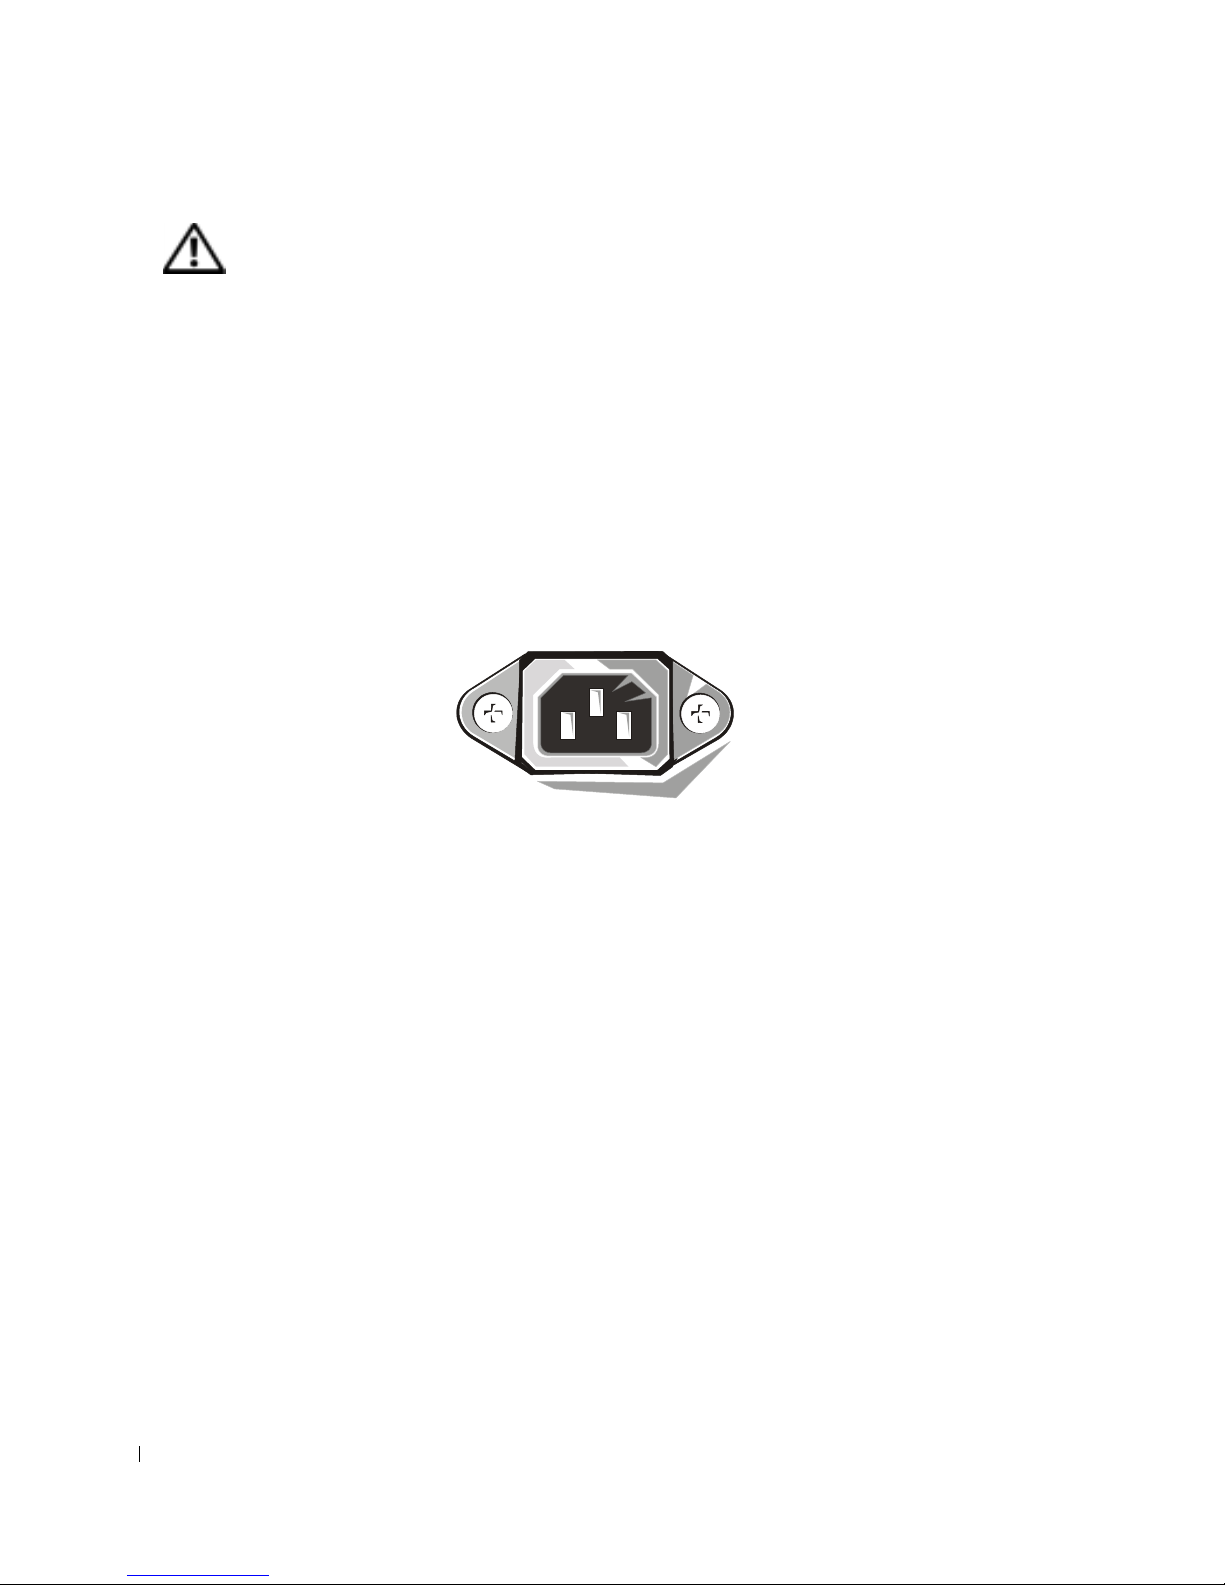
• To help prevent electric shock, plug the computer and device power cables into properly
grounded electrical outlets. These cables are equipped with 3-prong plugs to help ensure
proper grounding. Do not use adapter plugs or remove the grounding prong from a cable .
If you must use an extension cable, use a 3-wire cable with properly grounded plugs.
• To help avoid the potential hazard of electric shock, do not use your computer during an
electrical storm.
• To help avoid the potential hazard of electric shock, do not connect or disconnect any
cables or perform maintenance or reconfiguration of this product during an electrical
storm.
• If your computer includes a modem, the cable used with the modem should be
manufactured with a minimum wire size of 26 American wire gauge (AWG) and an FCCcompliant RJ-11 modular plug.
• Before you clean your computer, disconnect the computer from the electrical outlet.
Clean your computer with a soft cloth dampened with water. Do not use liquid or aerosol
cleaners, which may contain flammable substances.
• To help avoid possible damage to the system board, wait 5 seconds after turning off the
computer before disconnecting a device from the computer.

Setup and Quick Reference Guide 9
• To avoid shorting out your computer when disconnecting a network cable, first unplug
the cable from the network adapter on the back of your computer, and then from the
network jack. When reconnecting a network cable to your computer, first plug the cable
into the network jack, and then into the network adapter.
• To help protect your computer from sudden, transient increases and decreases in
electrical power, use a surge suppressor, line conditioner, or uninterruptible power supply
(UPS).
• Ensure that nothing rests on your computer’s cables and that the cables are not located
where they can be stepped on or tripped over.
• Do not push any objects into the openings of your computer. Doing so can cause fire or
electric shock by shorting out interior components.
• Keep your computer away from radiators and heat sources. Also, do not block cooling
vents. Avoid placing loose papers underneath your computer; do not place your computer
in a closed-in wall unit or on a bed, sofa, or rug.
• Do not spill food or liquids on your computer. If the computer gets wet, consult your
User’s Guide.
CAUTION: Safety Instructions
(continued)
10 Setup and Quick Reference Guide
www.dell.com | support.dell.com
When Using Your Computer
As you use your computer, observe the following safe-handling guidelines.
CAUTION: Do not operate your computer with any cover(s) (including computer
covers, bezels, filler brackets, front-panel inserts, and so on) removed.
• Your computer is equipped with one of the following:
– A fixed-voltage power supply — Computers with a fixed-voltage power supply do not
have a voltage selection switch on the back panel and operate at only one voltage (see
the regulatory label on the outside of the computer for its operating voltage).
– An auto-sensing voltage circuit — Computers with an auto-sensing voltage circuit do
not have a voltage selection switch on the back panel and automatically detect the
correct operating voltage.
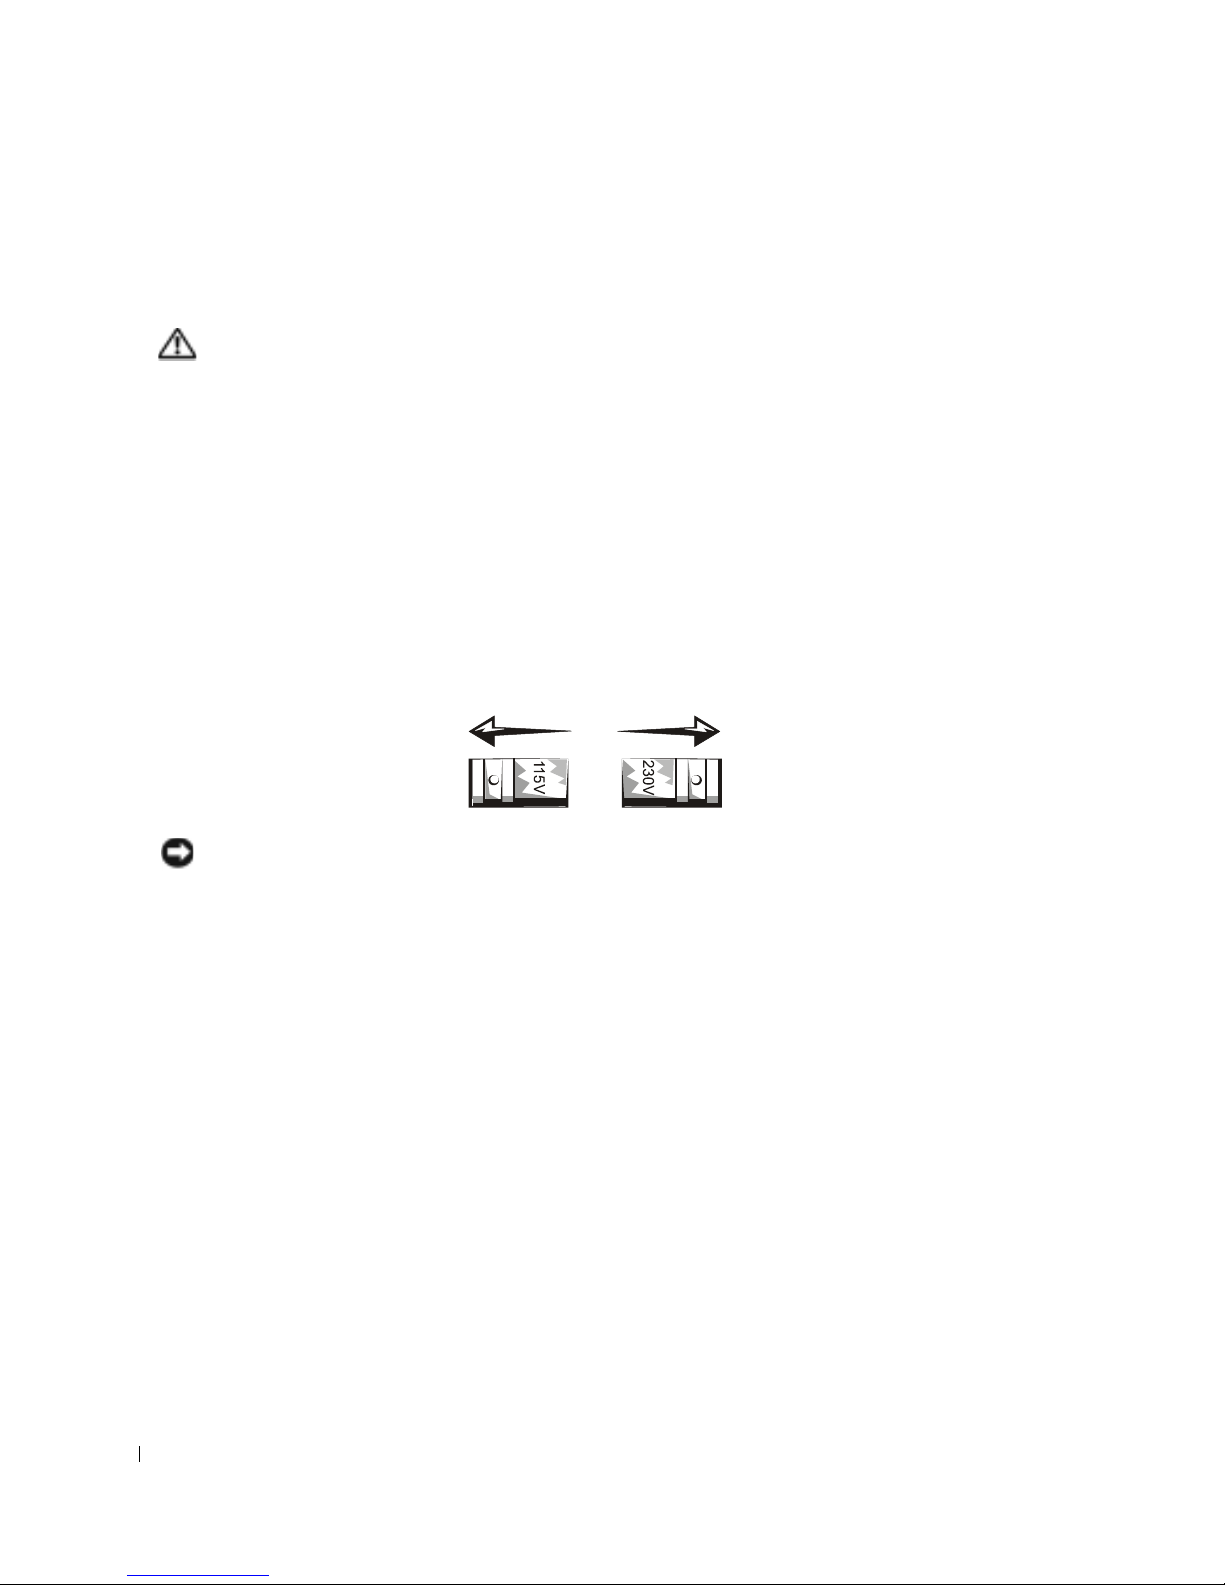
– A manual voltage selection switch — Computers with a voltage selection switch on
the back panel must be manually set to operate at the correct operating voltage.
NOTICE: To help avoid damaging a computer with a manual voltage selection switch, set the
switch for the voltage that most closely matches the AC power available in your location. F or Japan,
the voltage selection switch must be set to the 115- V position even though th e AC power available in
Japan is 100 V. Also, ensure that your monitor and attached devices are electrically rated to
operate with the AC power available in your location.
• Before working inside the computer, unplug the computer to help prevent electric shock
or system board damage. Certain system board components continue to receive power
any time the computer is connected to AC power.

Setup and Quick Reference Guide 11
When Working Inside Your Computer
Before you open the computer cover, perform the following steps in the sequence indicated.
CAUTION: Do not attempt to service the computer yourself, except as explained in
your online Dell documentation or in instructions otherwise provided to you by Dell.
Always follow installation and service instructions closely.
NOTICE: To help avoid possible damage to the system board, wait 5 seconds after turning off the
computer before removing a component from the system board or disconnecting a device from the
computer.
1 Perform an orderly computer shutdown using the operating system menu.
2 Turn off your computer and any devices connected to the computer.
3 Ground yourself by touching an unpainted metal surface on the chassis, such as the metal
around the card-slot openings at the back of the computer, before touching anything
inside your computer.
While you work, periodically touch an unpainted metal surface on the computer chassis
to dissipate any static electricity that might harm internal components.
4 Disconnect your computer and devices, including the monitor, from their electrical
outlets. Also, disconnect any telephone or telecommunication lines from the computer.
Doing so reduces the potential for personal injury or shock.
In addition, take note of these safety guidelines when appropriate:
• When you disconnect a cable, pull on its connector or on its strain-relief loop, not on the
cable itself. Some cables have a connector with locking tabs; if you are disconnecting this
type of cable, press in on the locking tabs before disconnecting the cable. As you pull
connectors apart, keep them evenly aligned to avoid bending any connector pins. Also,
before you connect a cable, ensure that both connectors are correctly oriented and
aligned.
• Handle components and cards with care. Do not touch the components or contacts on a
card. Hold a card by its edges or by its metal mounting bracket. Hold a component such
as a microprocessor chip by its edges, not by its pins.
CAUTION: There is a danger of a new battery exploding if it is incorrectly installed.
Replace the battery only with the same or equivalent type recommended by the
manufacturer. Do no t dispose of the battery along with household waste. Contact
your local waste disposal agency for the ad dress of the nearest battery deposit site.
When Using Your Computer
(continued)
12 Setup and Quick Reference Guide
www.dell.com | support.dell.com
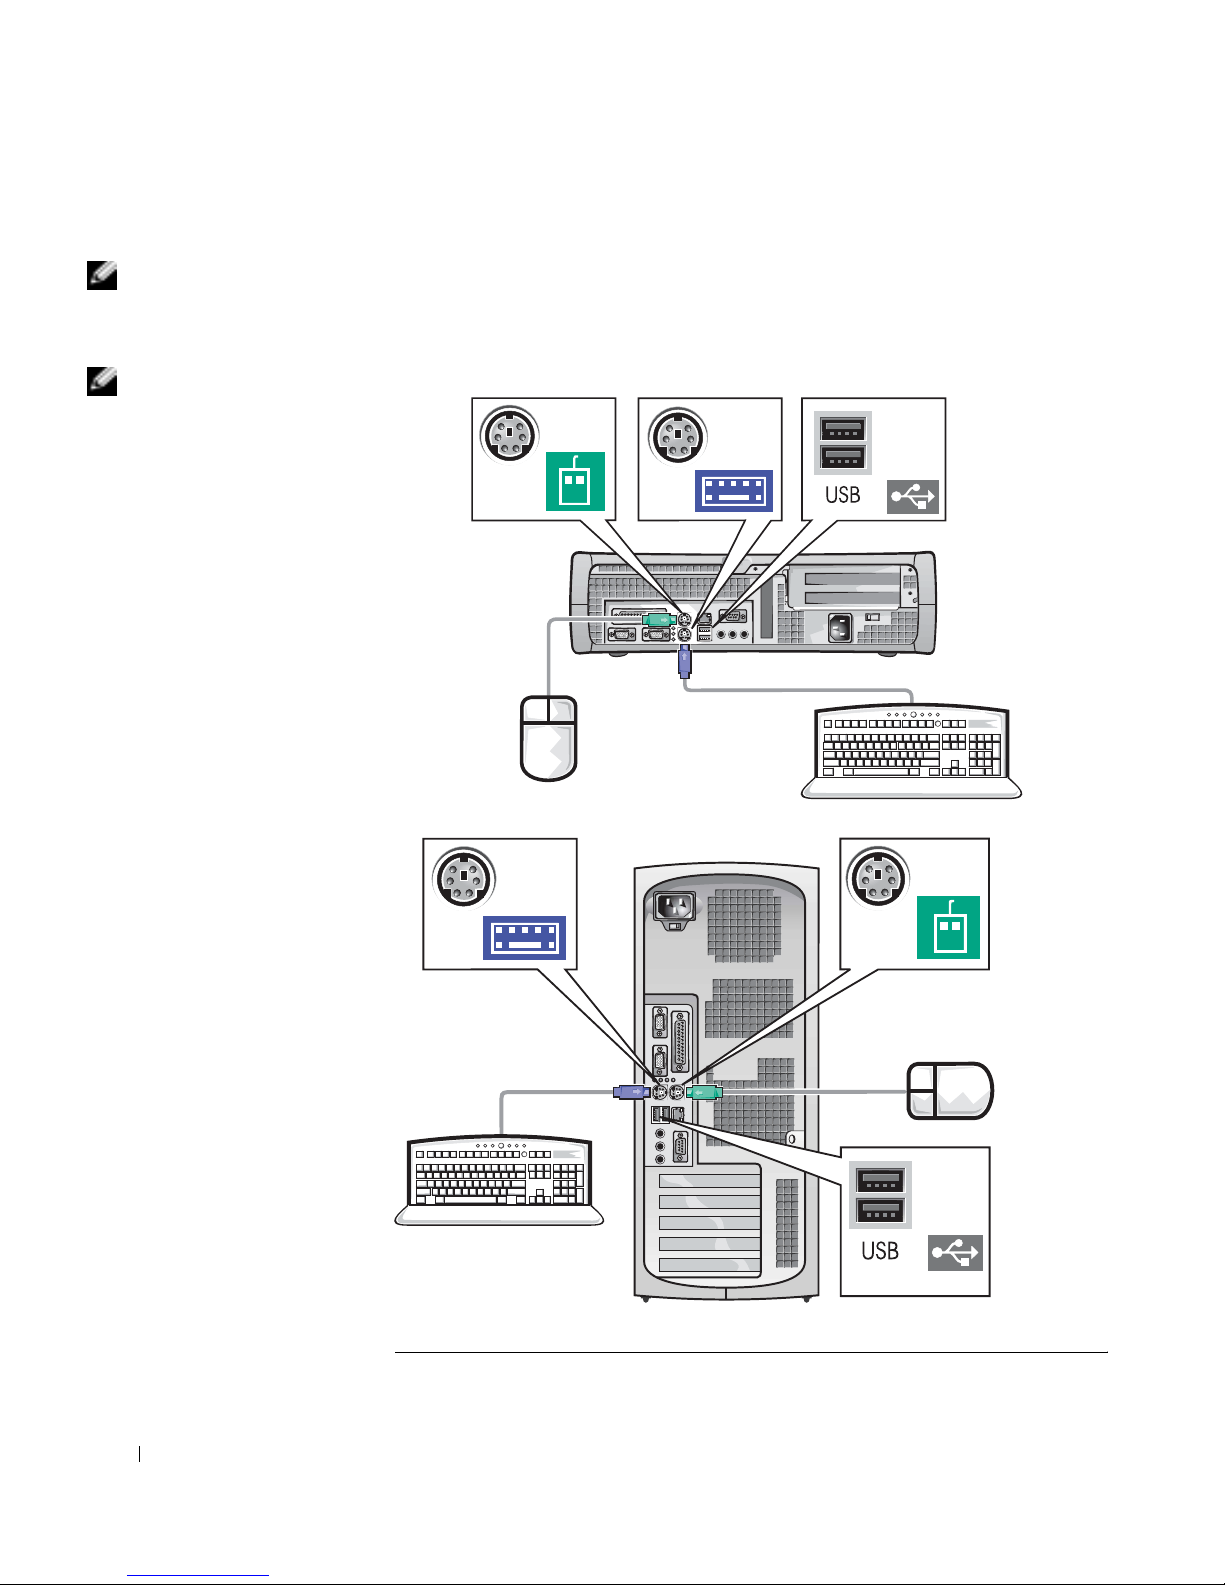
Getting Started/Setup
NOTE: Connect only one
keyboard and one mouse.
Use the following steps to connect e xternal devices to your computer via the
input/output (I/O) panel. The back of your Dell system, including the I/O
panel, may look different from the examples shown here.
NOTE: If you have a
Universal Serial Bus
(USB)-compliant mouse
or keyboard, use the USB
connectors on the back of
your system.
1
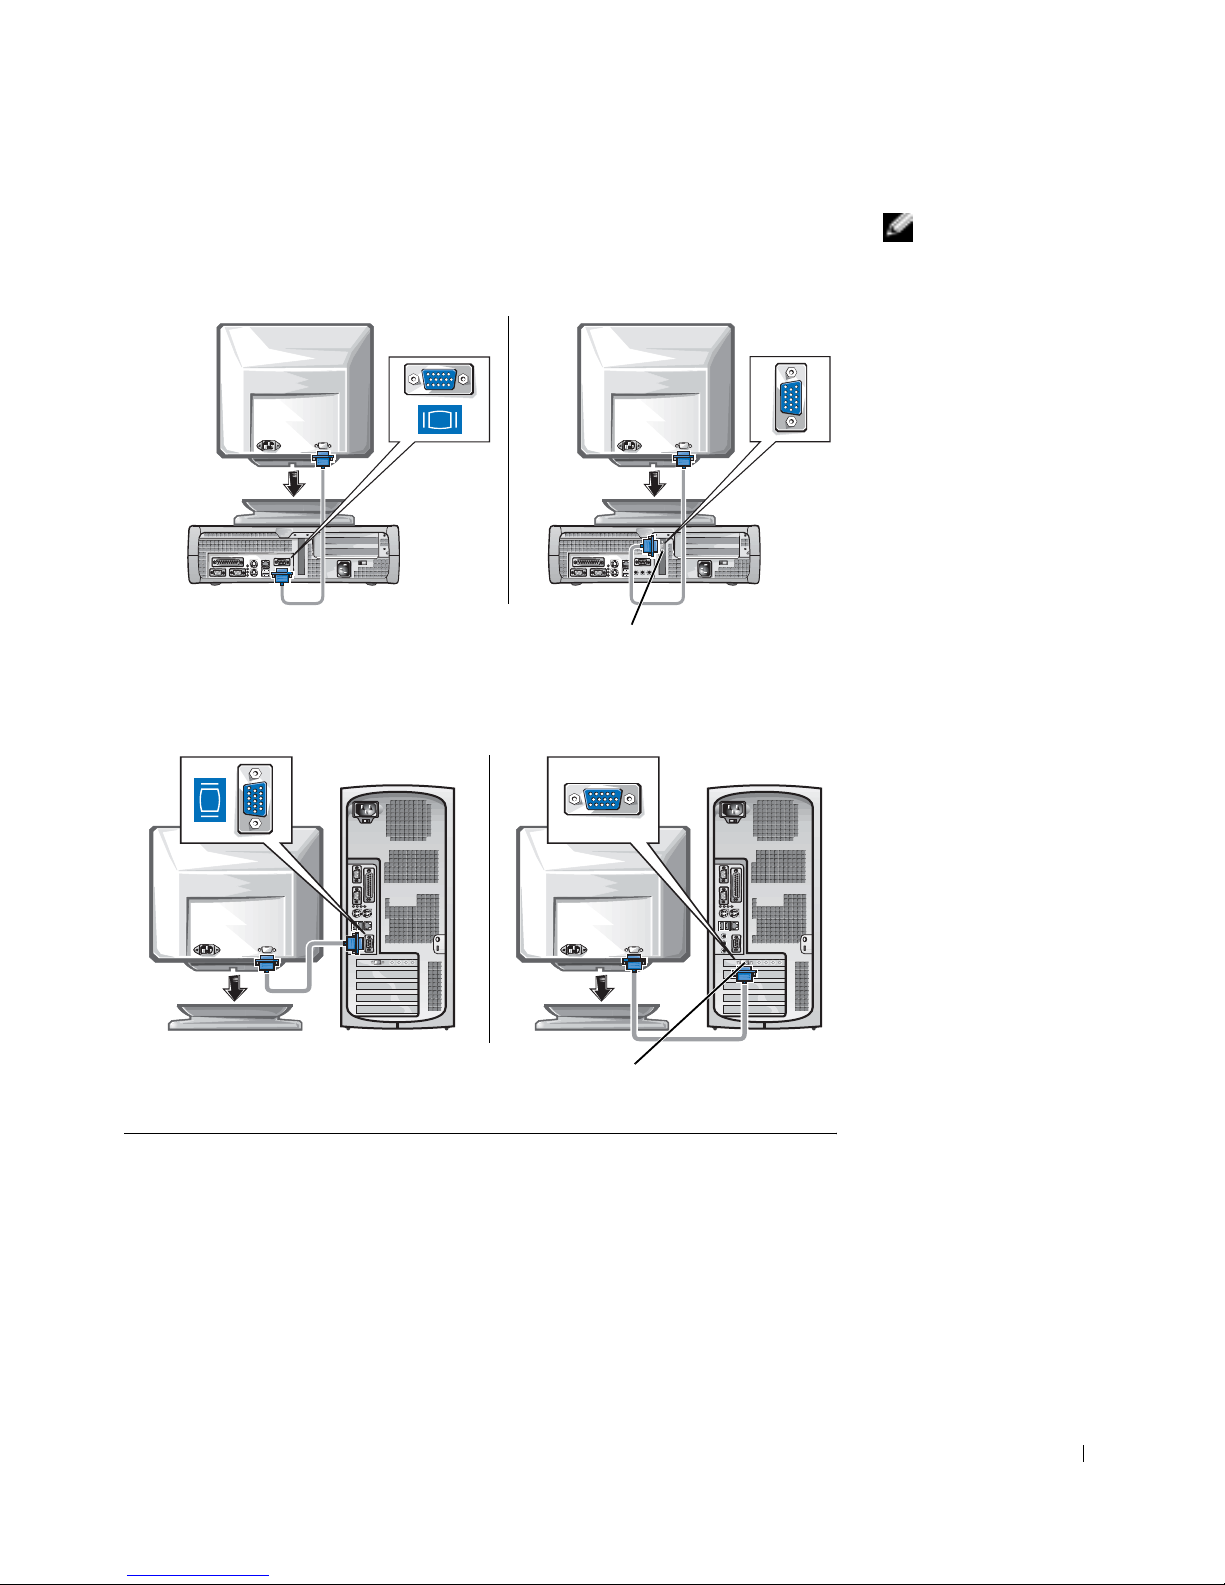
Setup and Quick Reference Guide 13
NOTE: If your system
has two video connectors,
the integrated video
connector is disabled and
has a protective cap on it.
Use the expansion card
connector , as shown in the
illustrations on the right
in step 2.
2
System with
one video connector
System with
two video connectors
video connector on expansion card
System with
one video connector
System with
two video connectors
video connector on expansion card

14 Setup and Quick Reference Guide
www.dell.com | support.dell.com
NOTE: If your system
has two audio connectors,
use the one on the
expansion card, as shown
in the illustrations on the
right in step 3.
NOTE: Auto-select power
supplies do not require a
voltage selection switch.
Your computer may not
have this switch.
3
diagnostic lights diagnostic lights
diagnostic
lights
diagnostic
lights
4
Verify that the voltage selection switch is set correctly for your location.
Fo r more information, see "When Using Your Computer" on page 10.
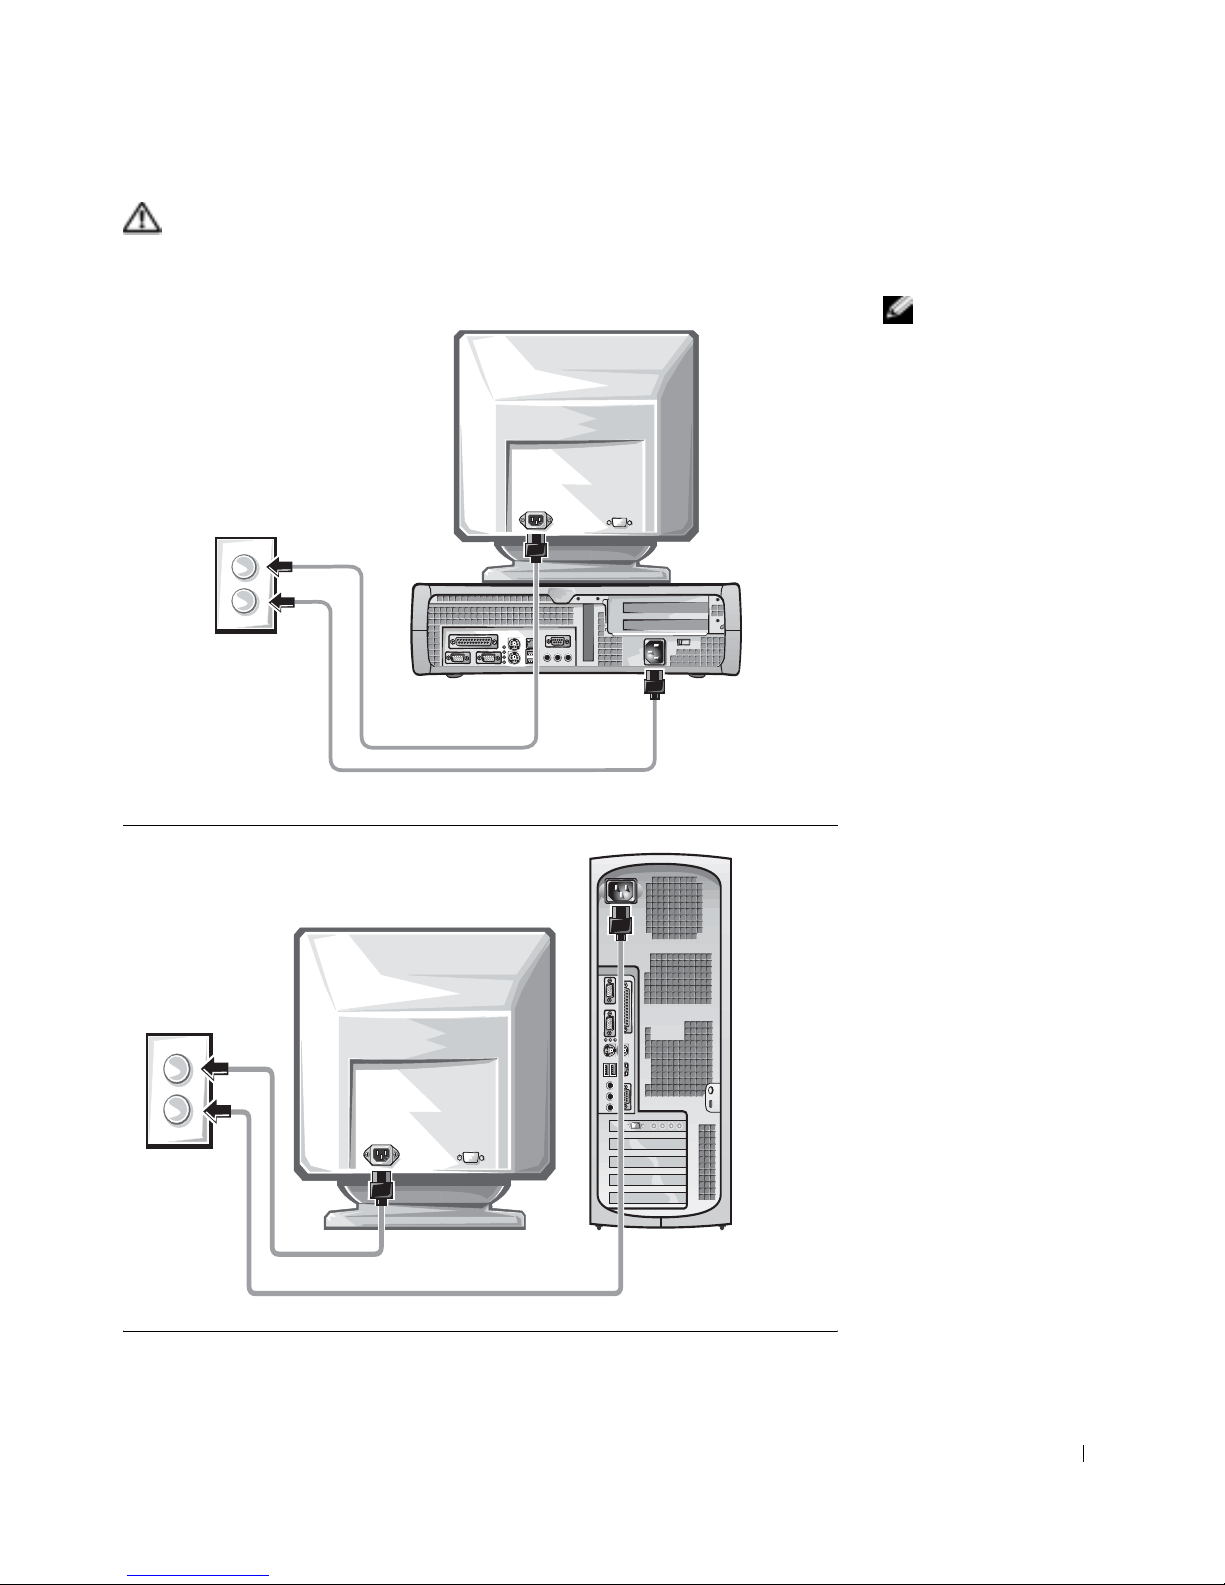
Setup and Quick Reference Guide 15
CAUTION: To help prevent electric shock, use only the power
cable provided and ensure that it is plugged into a properly
grounded power sourc e.
NOTE: Some monitors
have the video connector
underneath the back of
the screen. See the
documentation that came
with your monitor for its
connector locations.
5
16 Setup and Quick Reference Guide
www.dell.com | support.dell.com
Read the software license agreement and follow the operating system setup
instructions on the screen.
Congratulations! You have completed your system setup.
Depending on your operating system, double-click the User’s Guides icon
on your desktop ( ), or click the Start button and then select Help
and Support to access the electronic documentation stored on your hard
drive.
Solving Problems
Dell provides a number of tools to help you if your system does not perform
as expected. For the latest troubleshooting information available for your
system, see the Dell Support website at support.dell.com. You can also find
descriptions of Dell troubleshooting tools in the section titled "Getting
Help" in your online User’s Guide.
If computer problems occur that require help from Dell, write a detailed
description of the error, beep codes, or diagnostics light patterns; record
your Express Service Code and Service Tag Number below; and then
contact Dell from the same location as your computer.
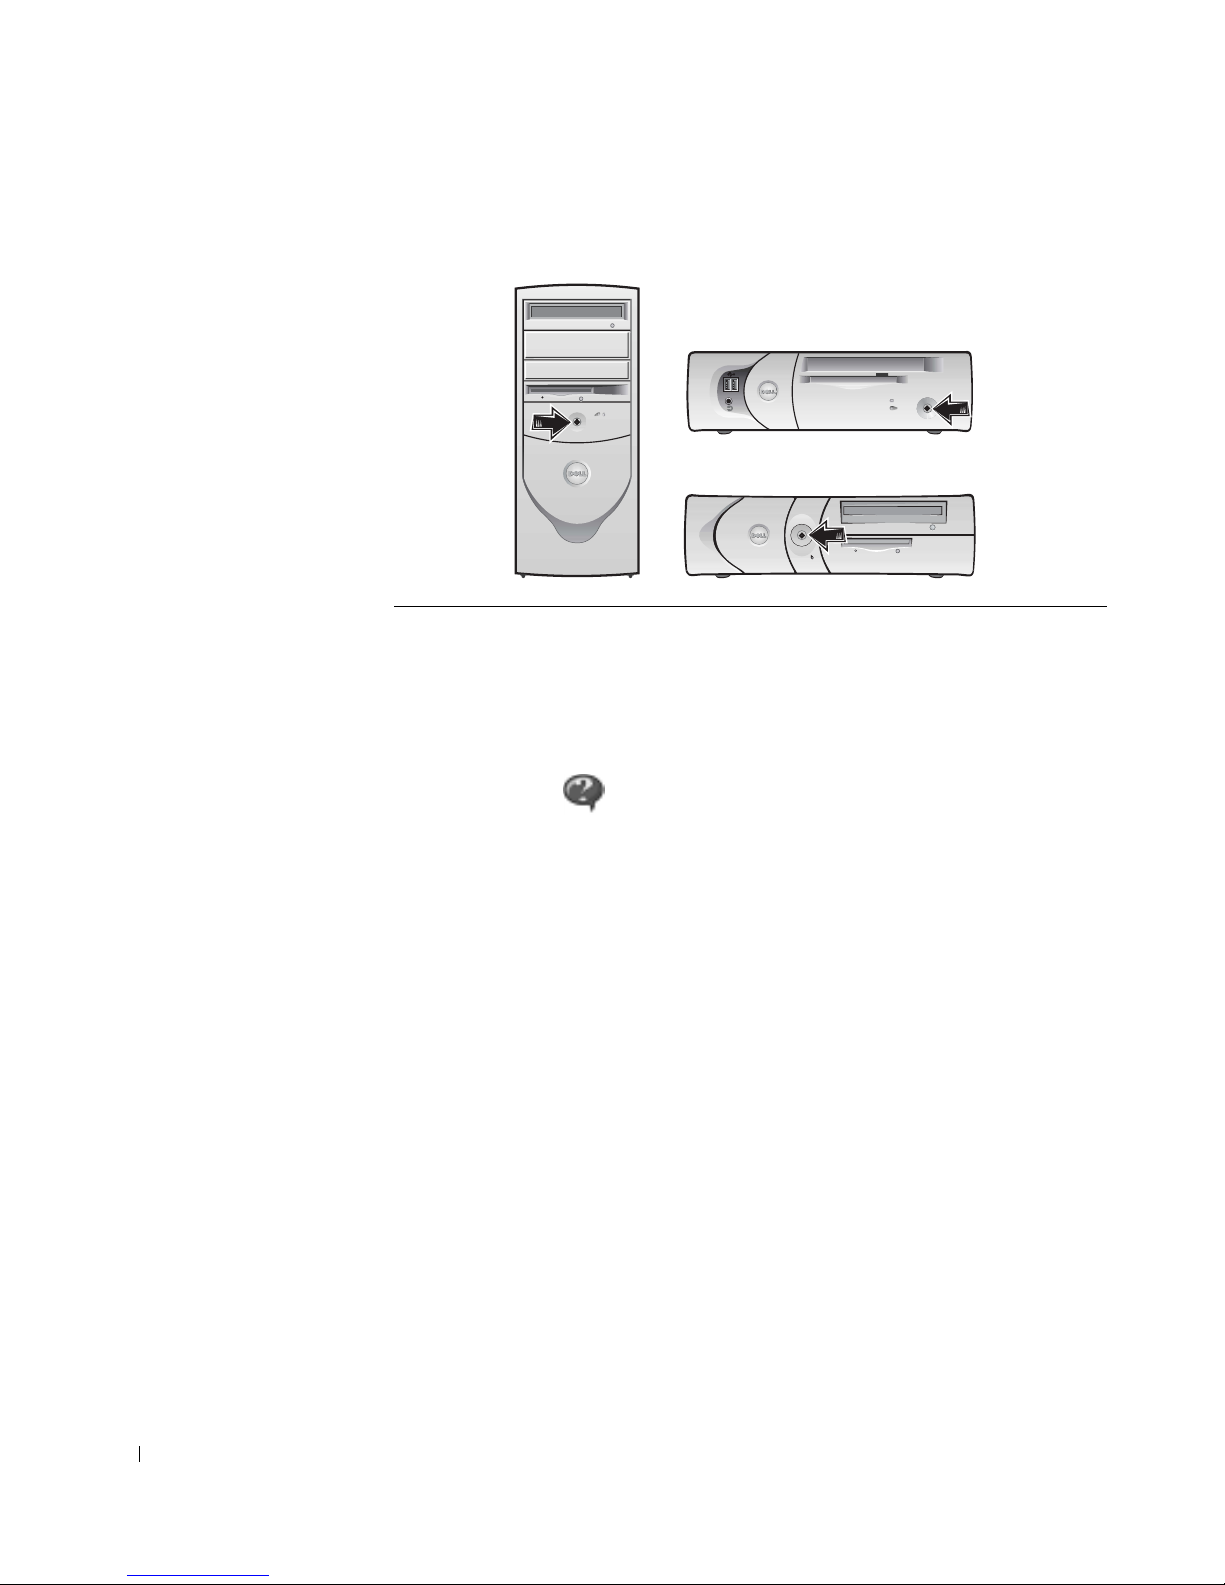
6
Turn on the computer and monitor.

Setup and Quick Reference Guide 17
See "Finding Information for Your Computer" on page 5 for an example of
the express service code and service tag numbers.
Express Service Code:___________________________
Service Tag Number:___________________________
Your computer includes the following tools that can help you solve a
problem:
Using the Drivers and Utilities CD
To use the Drivers and Utilities CD (also known as the ResourceCD) while
you are running the Windows operating system:
NOTE: To access device
drivers and user
documentation, you must
use the
Drivers and
Utilities CD
while you are
running Windows.
1
Turn on the computer and allow it to boot to the Windows desktop.
2 Insert the Drivers and Utilities CD into the CD drive.
If you are using the Drivers and Utilities CD for the first time on this
computer, the ResourceCD Installation window opens to inform you
that the Drivers and Utilities CD is about to begin installation.
3 Click OK to continue.
To complete the installation, respond to the prompts offered by the
installation program.
4 Click Next at the Welcome Dell System Owner screen.
DELL DIAGNOSTICS — The Dell Diagnostics tests various components in
your computer and helps to identify the cause of computer problems. For more
information, see "Starting the Dell Diagnostics" on page 18.
THE FOLLOWI NG FEATURES CAN INDICATE A POSSIBLE FAILURE AND
HELP YOU TROUBLESHOOT A COMPUTER PROBLEM. SEE YOUR
User’s
Guide
FOR MORE INFORMATION —
S
YSTEM LIGHTS — Located on the front of the computer
D
IAGNOSTIC LIGHTS — Located on the back of the computer
S
YSTEM MESSAGES — Appear on your monitor screen
B
EEP CODES — A series of audible beeps emitted by your computer

18 Setup and Quick Reference Guide
www.dell.com | support.dell.com
5 Select the appropriate System Model, Operating System, Device
Type, and Topic.
Drivers for Your Computer
To display a list of device drivers for your computer:
1 Click My Drivers in the Topic pull-down menu.
The Drivers and Utilities CD scans your computer’s hardware and
operating system, and then a list of device drivers for your system
configuration is displayed on the screen.
2 Click the appropriate driver and follow the instructions to download
the driver to your computer.
To view all available drivers for your computer, click Drivers from the Topic
pull-down menu.
Dell Diagnostics
When to Use the Dell Diagnostics
If you experience a problem with your computer, perform the checks in
"Solving Problems" in the User’s Guide and run the Dell Diagnostics before
you contact Dell for technical assistance. Running the Dell Diagnostics may
help you resolve the problem without contacting Dell. If you do contact
Dell, the test results can provide im portant information for Dell's service
and support personnel.
NOTICE: If your hard drive fails, run the Dell IDE Hard Drive Diagnostics
(see "Running the Dell IDE Hard Drive Diagnostics" on page 20).
Starting the Dell Diagnostics
Enter system setup as explained in the User’s Guide, review your computer’s
configuration information, and ensure that the device you want to test
displays in system setup and is active.
Start the Dell Diagnostics from either your hard drive or from the Drivers
and Utilities CD (also known as the ResourceCD).

Setup and Quick Reference Guide 19
Starting the Dell Diagnostics From Your Hard Drive
1 Shut down and restart the computer.
2 When the DELL
®
logo appears, press <F12> immediately.
NOTE: If you receive a
message stating that no
Diagnostics utility
partition has been found,
follow the instructions to
run the Dell Diagnostics
from your
Drivers and
Utilities
CD.
If you wait too long and the Windows logo appears, continue to wait
until you see the Windows desktop. Then shut down your computer
through the Start menu and try again.
3 When the boot device list appears, highlight Boot to Utility P artition
and press <Enter>.
4 When the Dell Diagnostics Main Menu appears, select the test you
want to run.
5 Close the test screen to return to the Main Menu screen. To exit the
Dell Diagnostics and restart the computer, close the Main Menu
screen.
Starting the Dell Diagnostics From the Drivers and Utilities CD
1 Insert the Drivers and Utilities CD into the CD drive.
2 Shut down and restart the computer.
When the DELL logo appears, press <F12> immediately.
If you wait too long and the Windows logo appears, continue to wait
until you see the Windows desktop. Then shut down your computer
through the Start menu and try again.
NOTE: This feature
changes the boot sequence
for one time only. On the
next start-up, the
computer boots according
to the devices specified in
system setup.
3
When the boot device list appears, highlight IDE CD-ROM Device
and press <Enter>.
4 Select the IDE CD-ROM Device option from the CD boot menu.
5 Select the Boot from CD-ROM option from the menu that appears.
6 Type 1 to start the ResourceCD menu.
7 Type 2 to start the Dell Diagnostics.
8 Select Run the 32 Bit Dell Diagnostics from the numbered list. If
multiple versions are listed, select the version appropriate for your
platform.
9 When the Dell Diagnostics Main Menu appears, select the test you
want to run.
10 When the tests are completed, remove the CD.

20 Setup and Quick Reference Guide
www.dell.com | support.dell.com
11 Close the test screen to return to the Main Menu screen. To exit the
Dell Diagnostics and restart the computer, close the Main Menu
screen.
Running the Dell IDE Hard Drive Diagnostics
The Dell IDE Hard Drive Diagnostics is a utility that tests the hard drive to
troubleshoot or confirm a hard drive failure.
1 Turn on your computer (if your computer is already on, restart it).
2 When F2 = Setup appears in the upper-right corner of the screen,
press <Ctrl><Alt><D>.
3 Follow the instructions on the screen.
If a failure is r e ported, see "Hard Drive Problems" in your User’s Guide.
Regulatory Information
NOTE: Additional
regulatory information
regarding your system can
be found in your
User’s
Guide.
Electromagnetic Interference (EMI) is any signal or emission, radiated in
free space or conducted along power or signal leads, that endangers the
functioning of a radio navigation or other safety service or seriously
degrades, obstructs, or repeat edly interrupts a licensed radio
communications service.
Your Dell computer system is designed to comply with applicable
regulations regarding EMI. Changes or modifications not expressly
approved by Dell could void the user’s authority to operate the equipment.

Setup and Quick Reference Guide 21
Limited Warranties and Return Policy
Dell-branded hardware products purchased in the U.S. or Canada come with either a 90-day (U.S. only), one-year,
two-year, three-year, or four-year limited warranty. To determine which warranty you purchased, see the invoice
that accompanied your hardware product(s). The following sections describe the limited warranties and return
policy for the U.S., the limited warranties and return policy for Canada, and the manufacturer guarantee for Latin
America and the Caribbean .
Limited Warranty for the U.S.
What is covered by this limited warranty?
This limited warranty covers defects in materials and workmanship in your—our end-user customer's—Dellbranded hardware products, including Dell-branded peripheral products, such as monitors, keyboards, pointing
devices (mice), and wireless devices.
What is not covered by this limited warranty?
This limited warranty does not cover:
• Software, including the operating system and software added to the Dell-branded hardware products
through our factory-integration system, third-party software, or the re loading of software
• Non-Dell-branded products and accessories
• Problems that result from:
– External causes such as accident, abuse, misuse, or problems with electrical power
– Servicing not authorized by us
– Usage that is not in accordance with product instructions
– Failure to follow the product instructions or failure to perform preventive maintenance
– Problems caused by using accessories, parts, or components not supplied by us
• Products with missing or altered service tags or serial numbers
• Products for which we have not received payment
THIS WARRANTY GIVES YOU SPECIFIC LEGAL RIGHTS, AND YOU MAY ALSO HAVE OTHER
RIGHTS WHICH VARY FROM STATE TO STATE (OR JURISDICTION TO JURISDICTION). DELL'S
RESPONSIBILITY FOR MALFUNCITONS AND DEFECTS IN HARDWARE IS LIMITED TO REPAIR
AND REPLACEMENT AS SET FORTH IN THIS WARRANTY STATEMENT. ALL EXPRESS AND
IMPLIED WARRANTIES FOR THE PRODUCT, INCLUDING BUT NOT LIMITED TO ANY IMPLIED
WARRANTIES AND CONDITIONS OF MERCHANTABILITY AND FITNESS FOR A PARTICULAR
PURPOSE, ARE LIMITED IN TIME TO THE TERM OF THE LIMITED WARRANTY PERIOD
REFLECTED ON YOUR INVOICE. NO WARRANTIES, WHETHER EXPRESS OR IMPLIED, WILL
APPLY AFTER THE LIMITED WARRANTY PERIOD HAS EXPIRED. SOME STATES DO NOT ALLOW
LIMITATIONS ON HOW LONG AN IMPLIED WARRANTY LASTS, SO THIS LIMITATION MAY NOT
APPLY TO YOU.
WE DO NOT ACCEPT LIABILITY BEYOND THE REMEDIES PROVIDED FOR IN THIS LIMITED
WARRANTY OR FOR CONSEQUENTIAL OR INCIDENTAL DAMAGES, INCLUDING, WITHOUT
LIMITATION, ANY LIABILTY FOR THIRD PARTY CLAIMS AGAINST YOU FOR DAMAGES, FOR
PRODUCTS NOT BEING AVAILABLE FOR USE, OR FOR LOST DATA OR LOST SOFTWARE. OUR
LIABILITY WILL BE NO MORE THAN THE AMOUNT YOU PAID FOR THE PRODUCT THAT IS THE
SUBJECT OF A CLAIM. THIS IS THE MAXIMUM AMOUNT FOR WHICH WE ARE RESPONSIBLE.

22 Setup and Quick Reference Guide
www.dell.com | support.dell.com
SOME STATES DO NOT ALLOW THE EXCLUSION OR LIMITATION OF INCIDENTAL OR
CONSEQUENTIAL DAMAGES, SO THE ABOVE LIMITATION OR EXCLUSION MAY NOT APPLY TO
YOU.
How long does this limited warranty last?
This limited warranty lasts for the time period indicated on your invoice, except that the limited warranty on Dellbranded batteries lasts only one year and the limited warranty on the lamps for Dell-branded projectors lasts only
ninety days. The limited warranty begins on the date of the invoice. The warranty period is not extended if we
repair or replace a warranted product o r any parts. Dell may change the availability of limited warranties, at its
discretion, but any changes will not be retroactive.
What do I do if I need warranty service?
Before the warranty expires, please call us at the relevant number listed in the following table. Please also have your
Dell service tag number or order number available.
What will Dell do?
During the first 90 days of the 90-day limited warranty and the first year of all other limited warranties: For the
first 90 days of the 90-day limited warranty and the first year of all other limited warranties, we will repair any Dellbranded h ardwa re products returned to us that prove to be defective in materials or workmanship. If we are not
able to repair the product, we will replace it with a comparable product that is new or refurbished.
When you contact us, we will issue a Return Material Authorization Number for you to include with your return.
You must return the products to us in their original or equivalent packaging, prepay shipping charges, and insure
the shipment or accept the risk if the product is lost or damaged in shipment. We will return the repaired or
replacement products to you. We will pay to ship the repaired or replaced products to you if you use an address in
the United States (excluding Puerto Rico and U.S. possessions and territories). Otherwise, we will ship the product
to you freight collect.
Individual Home Consumers:
Technical Support 1-800-624-9896
Customer Service 1-800-624-9897
Individual Home Consumers who purcha sed through
an Employee Purchase Program:
Technical Support and Customer Service 1-800-822-8965
Home and Small Business Commercial Customers:
Technical Support and Customer Service 1-800-456-3355
Medium, Large, or Global Commercial Customers,
Healthcare Customers, and Value Added Resellers
(VARs):
Technical Support and Customer Service 1-800-822-8965
Government and Education Customers:
Technical Support and Customer Service 1-800-234-1490
Dell-Branded Memory
1-888-363-5150

Setup and Quick Reference Guide 23
If we determine that the product is not covered under this warranty, we will notify you and inform you of service
alternatives that are available to you on a fee basis.
NOTE: Before you ship the product(s) to us, make sure to back up the data on the hard drive(s) and any other
storage device(s) in the product(s). Remove any confidential, proprietary, or personal information and removable
media such as floppy disks, CDs, or PC Cards. We are not responsible for any of your confidential, proprietary, or
personal information; lost or corrupted data; or damaged or lost removable media.
During the remaining years: For the remaining period of the limited warranty, we will replace any defective part
with new or refurbished parts, if we agree that it needs to be replaced. When you contact us, we will require a valid
credit card number at the time you request a replacement part, but we will not charge you for the replacement part
as long as you return the original part to us within thirty days after we ship the replacement part to you. If we do
not receive the orig inal part within thirty days, we will charge to your credit card the then-current standard price for
that part.
We will pay to ship the part to you if you use an address in the United States (excluding Puerto Rico and U.S.
possessions and territories). Otherwise, we will ship the part freight collect. W e will also include a prepaid shipping
container with each replacement part for your use in returning the replaced part to us.
NOTE: Before you replace parts, make sure to back up the data on the hard drive(s) and any other storage
device(s) in the product(s). We are not responsible for lost or corrupted data.
What if I purchased a service contract?
If your on-site service contract is with Dell, on-site service will be provided to you under the terms of the on-site
service agreement. Please refer to that contract for details on how to obtain service.
If you purchased through us a service contract with one of our third-party service providers, please refer to that
contract for details on how to obtain service.
How will you fix my product?
We use new and refurbished parts made by various manufacturers in performing warranty repairs and in building
replacement parts and systems. Refurbished parts and systems are parts or systems that have been returned to Dell,
some of which were never used by a customer. All parts and systems are inspected and tested for quality.
Replacement parts and systems are covered for the remaining period of the limited warranty for the product you
bought.
What do I do if I am not satisfied?
We pride ourselves on our great cu stomer service. If you are not satisfied with the service you receive under this
limited warranty, please let us know. We have found that the best way to resolve issues regarding our limited
warranty is to work together. If, after those discussions, you are still not satisfied, we believe arbitration is the most
expeditious way to resolve your concerns. Therefore, ANY CLAIM, DISPUTE, OR CONTROVERSY
(WHETHER IN CONTRACT, TORT, OR OTHERWISE, WHETHER PREEXISTING, PRESENT, OR
FUTURE, AND INCLUDING STATUTORY, COMMON LAW, INTENTIONAL TORT, AND EQUITABLE
CLAIMS) AGAINST DELL arising from or relating to this limited warranty, its interpretation, or the breach,
termination, or validity thereof, the relationships which result from this limited warranty (including, to the full
extent permitted by applicable law, relationships with third parties), Dell's advertising, or any related purchase
SHALL BE RESOLVED EXCLUSIVELY AND FINALLY BY BINDING ARBITRATION ADMINISTERED
BY THE NATIONAL ARBITRATION FORUM (NAF) under its Code of Procedure then in effect (available via
the Internet at www.arb-forum.com/ or via telephone at 1-800-474-2371). The arbitration will be limited solely to
the dispute or controversy between you and Dell. Any award of t he arbitrator(s) shall be final and binding on each
of the parties, and may be entered as a judgment in any court of competent jurisdiction. Information may be
obtained and claims may be filed with the NAF at P.O. Box 50191, Minneapolis, MN 55405. This pr ovi sio n appl ies

24 Setup and Quick Reference Guide
www.dell.com | support.dell.com
only to individual home consumers and consumers who purchased through an employee purchase program. It does
not apply to small, medium, large, and global commercial customers or government, education, and healthcare
customers.
May I transfer the limited warranty?
Limited warranties on systems may be transferred if the current owner transfers ownership of the system and
records the transfer with us. The limited warranty on Dell-branded memory may not be transferred. You may
record your transfer by going to Dell's website:
• If you are an Individua l Home Consumer, go to www.dell.com/us/en/dhs/topics/sbtopic_015_ccare.htm
• If you are a Small, Medium, Large, or Global Commercial Customer, go to
www.dell.com/us/en/biz/topics/sbtopic_ccare_nav_015_ccare.htm
• If you are a Government, Education, or Healthcare Customer, or an Individual Consumer who purchased
through an employee purchase program, go to www.dell.com/us/en/pub/topics/sbtopic_015_ccare.htm
If you do not have Internet access, call your customer care representative or call 1-800-624-9897.
"Total Satisfaction" Return Policy (U.S. Only)
W e value our relationship with you and want to make sure that you're satisfied with your purchases. That's why we
offer a "Total Satisfaction" return policy for most products that you—the end-user customer—purchase directly
from Dell. Under this policy, you may return to Dell products that you purchased directly from Dell for a credit or
a refund of the purchase price paid, less shipping and handling and applicable restocking fees as follows:
• New Hardware Products and Accessories — All new hardware, accessories, parts, and unopened software
still in its sealed package, excluding the products listed below, may be returned within thirty days from the
invoice date. To return applications software or an operating system that has been installed by Dell, you
must return the entire computer. A different return policy applies to nondefective products purchased
through Dell's Software and Peripherals division by customers of our Small and Medium Business divisions.
Those products may be returned within thirty days from the invoice date, but a fifteen percent (15%)
restocking fee will be deducted from any refund or credit. The "Total Satisfaction" Return Policy and
Software and Peripherals division return policy are not available for Dell | EMC storage products, EMCbranded products, or enterprise software.
• Reconditioned or Refurbished Dell-Branded Hardware Products and Parts — All reconditioned or
refurbished Dell-branded server and storage products may be returned within thirty days from the invoice
date. All other reconditioned or refurbished Dell-branded hardware products and parts may be returned
within fourteen days of the invoice date.
To return products, e-mail or call Dell customer servi c e to receive a Credit Return Authorization Number within
the return policy period applicable to the product you want to return. You must obtain a Credit Return
Authorization Number in order to return the product. See "Getting Help" in your customer documentation (or
www.dell.com/us/en/gen/contact.htm) to find the appropriate contact information for obtaining customer
assistance.
You must ship the products to Dell within five days of the date that Dell issues the Credit Return Authorization
Number. You must also return the products to Dell in their original packaging, in as-new condition along with any
media, documentation, and all other items that were included in the original shipment, prepay shipping charges,
and insure the shipment or accept the risk of loss or damage during shipment.

Setup and Quick Reference Guide 25
Limited Warranty Terms for Canada
What is covered by this limited warranty?
This limited warranty covers defects in materials and workmanship in your—our end-user customer's—Dellbranded hardware products, including Dell-branded monitors, keyboards, wireless access points, and pointing
devices (mice).
What is not covered by this limited warranty?
This limited warranty does not cover:
• Software, including the operating system and software added to the Dell-branded hardware products
through our factory-integration system, or the r eloading of the software
• Non-Dell branded products and accessories
• Problems that result from:
– External causes such as accident, abuse, misuse, or problems with electrical power
– Servicing not authorized by us
– Usage that is not in accordance with product instructions
– Failure to follow the product instructions or failure to perform preventive maintenance
– Problems caused by using accessories, parts, or components not supplied by us
• Products with missing or altered service tags or serial numbers
• Products for which we have not received payment
THIS WARRANTY GIVES YOU SPECIFIC LEGAL RIGHTS, AND YOU MAY ALSO HAVE OTHER RIGHTS
WHICH V ARY FROM PROVINCE TO PROVINCE. DELL'S RESPONSIBILITY FOR MALFUNCTIONS AND
DEFECTS IN PRODUCT IS LIMITED TO REPAIR AND REPLA CEMENT AS SET FORTH IN THIS
WARRANTY STATEMENT, FOR THE TERM OF THE WARRANTY PERIOD REFLECTED ON YOUR
INVOICE. EXCEPT FOR THE EXPRESS WARRANTIES CONTAINED IN THIS WARRANTY STATEMENT,
DELL DISCLAIMS ALL OTHER W ARR ANTIES AND CONDITIONS, EXPRESS OR IMPLIED, INCL UDING
WITHOUT LIMITATION IMPLIED WARRANTIES AND CONDITIONS OF MERCHANTABILITY AND
FITNESS FOR A P ARTICULAR PURPOSE, STATUTORY OR OTHERWISE. SOME PROVINCES DO NOT
ALLOW THE EXCLUSION OF CERTAIN IMPLIED WARRANTIES OR CONDITIONS, OR LIMITATIONS
ON HOW LONG AN IMPLIED WARRANTY OR CONDITION LASTS. THEREFORE, THE FOREGOING
EXCLUSIONS AND LIMITATIONS MAY NOT APPLY TO YOU.
WE DO NOT ACCEPT LIABILITY BEYOND THE REMEDIES PROVIDED FOR IN THIS WARRANTY
STATEMENT OR FOR SPECIAL, INDIRECT, CONSEQUENTIAL, OR INCIDENTAL DAMAGES,
INCLUDING, WITHOUT LIMITATION, ANY LIABILTY FOR THIRD PARTY CLAIMS AGAINST YOU
FOR DAMAGES, FOR PRODUCTS NOT BEING AVAILABLE FOR USE, OR FOR LOST DATA OR LOST
SOFTWARE. OUR LIABILITY WILL BE NO MORE THAN THE AMOUNT YOU PAID FOR THE
PRODUCT THAT IS THE SUBJECT OF A CLAIM. THIS IS THE MAXIMUM AMOUNT FOR WHICH
WE ARE RESPONSIBLE.
SOME PROVINCES DO NOT ALLOW THE EXCLUSION OR LIMITATION OF SPECIAL, INDIRECT,
INCIDENTAL, OR CONSEQUENTIAL DAMAGES, SO THE ABOVE LIMITATION OR EXCLUSION
MAY NOT APPLY TO YOU.

26 Setup and Quick Reference Guide
www.dell.com | support.dell.com
How long does this limited warranty last?
This limited warranty lasts for the time period indicated on your invoice, except that the limited warranty on Dellbranded batteries lasts only one year and the limited warranty on the lamps for Dell-branded projectors lasts only
ninety days. The limited warranty begins on the date of the invoice. The warranty period is not extended if we
repair or replace a warranted product or any parts. Dell may change the terms and availability of limited warranties,
at its discretion, but any changes will not be retroactive (that is, the warranty terms in place at the time of purchase
will apply to your purchase).
What do I do if I need warranty service?
Before the warranty expires, please call us at the relevant number listed in the following table. Please also have your
Dell service tag number or order number available.
What will Dell do?
During the first year of all limited warranties: During the first year of all limited warranties, we will repair any
Dell-branded hardware products returned to us that pro ve to be defective in materials or workmanship. If we are
not able to repair the product, we will replace it with a comparable product that is new or refurbished.
When you contact us, we will issue a Return Material Authorization Number for you to include with your return.
You must return the products to us in their original or equivalent packaging, prepay shipping charges, and insure
the shipment or accept the risk if the product is lost or damaged in shipment. We will return the repaired or
replacement products to you. We will pay to ship the repaired or replaced products to you if you use an address in
Canada. Otherwise, we will ship the product to you freight collect.
If we determine that the problem is not covered under this warranty, we will notify you and inform you of service
alternatives that are available to you on a fee basis.
NOTE: Before you ship the product(s) to us, make sure to back up the data on the hard drive(s) and any other
storage device(s) in the product(s). Remove any confidential, proprietary or personal information, removable
media, such as floppy disks, CDs, or PC Cards. We are not responsible for any of your confidential, proprietary or
personal information; lost or corrupted data; or damaged or lost removable media.
Individual Home Consumers; Home Office and Small
Business Customers:
Technical Support and Customer Service 1-800-847-4096
Medium, Large, and Global Commercial Customers;
Government, Education, and Healthc are Customers;
and Value Added Resellers (VARs):
Technical Support 1-800-387-5757
Customer Service 1-800-326-9463
Government or Education Customers, or Ind ividual
Home Consumers who purchased through an
Employee Purchase Program:
Technical Support 1-800-387-5757
Customer Service 1-800-326-9463 (Extension 8221 for Individual
Consumers)
Dell-Branded Memory
1-888-363-5150
 Loading...