

Dell M5200/W5300 Quick Reference Manual
M5200/W5300
Quick Reference
CAUTION: Before you set up and operate your Dell
printer, read and follow the safety instructions in your
Owner’s Manual
.
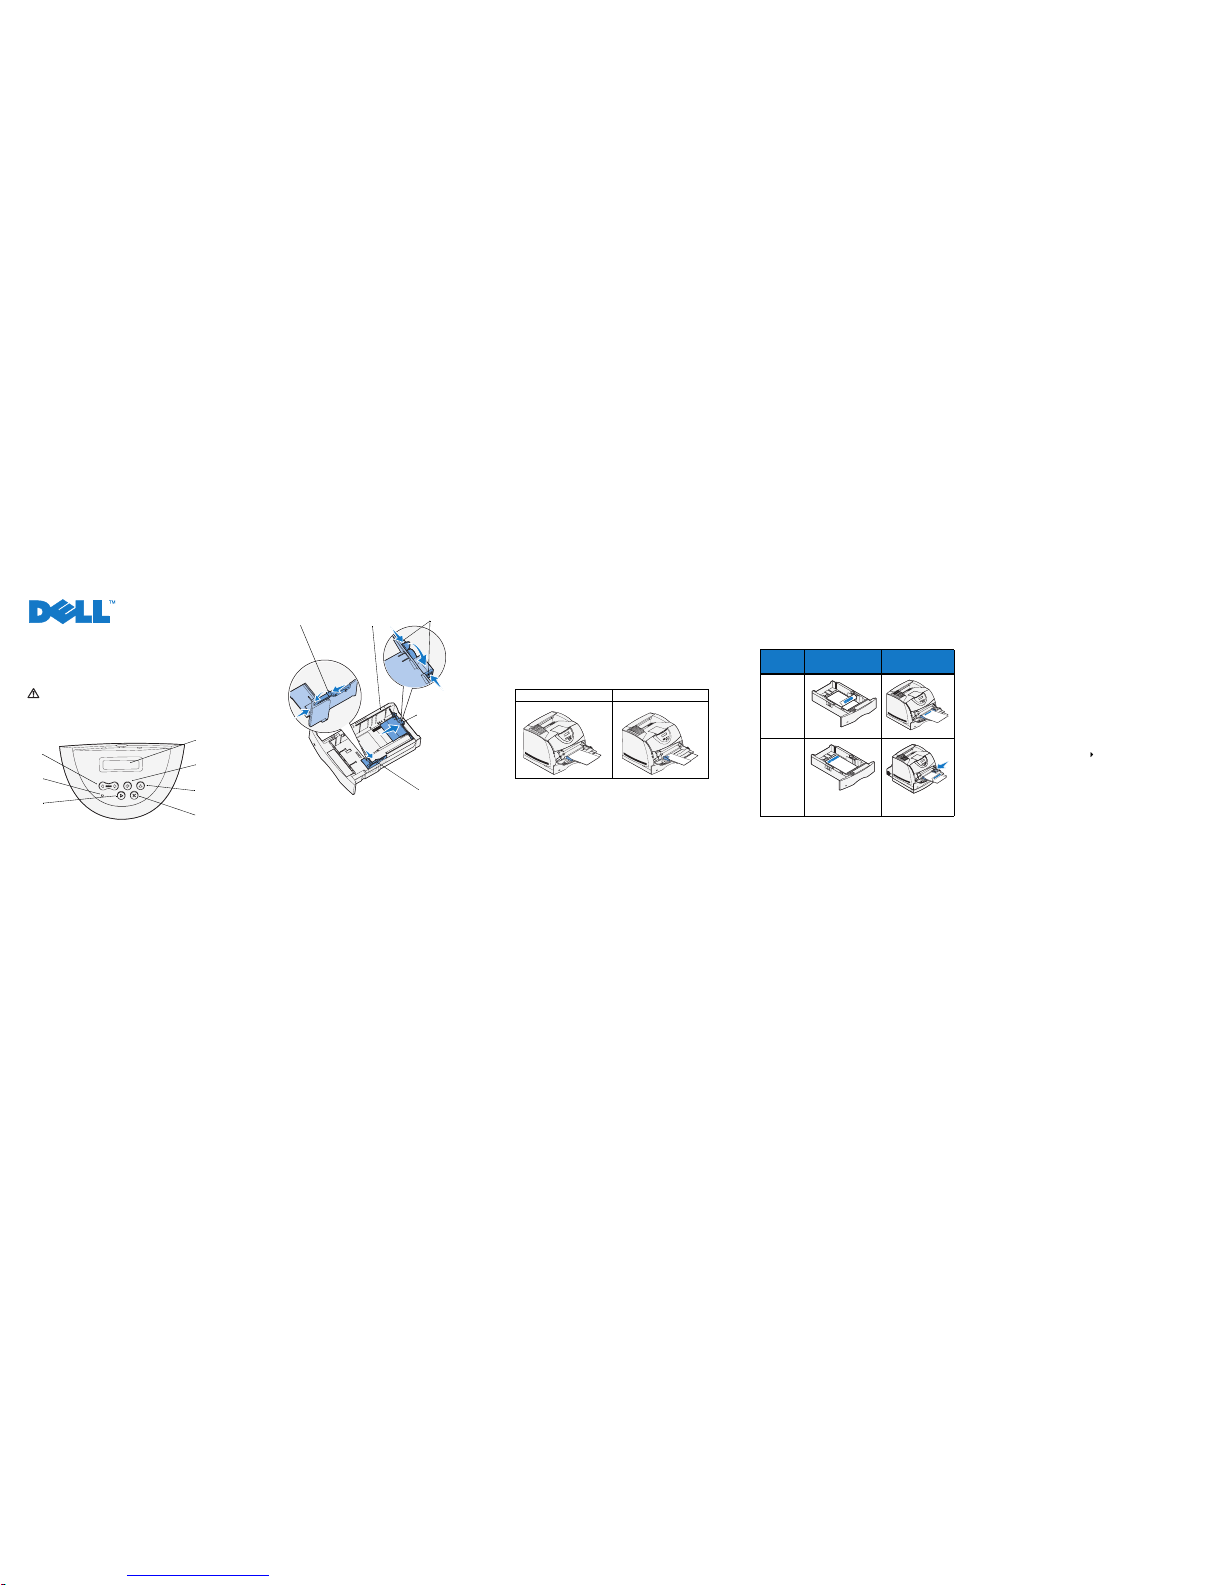
Operator Panel
1 LCD display
2 Select button
• Selects the item on the second line of the display
• Saves the selection as the new default setting
3 Return button
• Returns to the previous menu
4 Stop button
5 Go button
• Exits the menus and returns to
Ready
• Clears messages
6 Power Indicator Light (flashes when busy)
7 Menu button
• Enters and scrolls through the menus
• Takes the printer offline
Loading a Tray
Load print media into any of the standard or optional trays. All
trays are loaded the same way.
1 Remove the tray.
2 Squeeze the width guide tab and the width guide, and slide
the guide to the far right side of the tray.
3 Squeeze the length guide lever, and slide the length guide to
the correct position for the size paper you are loading.
4 Place the print media into the tray with the recommended
print side face down for single-sided printing and face up for
double-sided printing. Do not load print media above the
load line.
5 Squeeze the width guide tab and the width guide, and slide
the width guide to the left until it lightly rests against the
edge of the paper stack.
Loading the Multipurpose Feeder
1 Push the lower release latch and open the multipurpose
feeder door.
2 Pull the metal bar out far enough to support your print
media size.
3 Slide the width guide to the far right.
4 Place the print media in the multipurpose feeder and push
it forward without forcing it.
5 Slide the width guide to the left until it lightly touches the
side of the print media.
Loading Letterhead
Letterhead must be loaded differently depending on whether you
are duplexing and whether you are using the multipurpose feeder
or a tray.
Printing a Menu Settings Page
To verify Paper Size and Paper Type settings, and to check
installed options and memory, print a menu settings page:
1 Press Menu until you see Utilities Menu, and then press
Select.
2 Press Menu until you see Print Menus, and then press
Select. The menu settings page prints.
Canceling a Print Job
To cancel a print job after it has started printing:
1 Press the left arrow on the Menu button once. JOB MENU
and Cancel Job are displayed.
2 Press Select. Cancelin g Job is displayed.
Printing Confidential Jobs
If you want to print a job that you do not want anyone else to see,
the printer can hold your job in memory until you arrive at the
printer.
NOTE: This only works with custom printer drivers. These drivers are
located on the drivers CD that shipped with your printer.
To print a confidential job:
1 In your word processor, spreadsheet, browser, or other
application, select File Print.
2 Click Properties (or Options, Printer, or Setup depending
on the application) to view the printer driver settings.
3 Click Help and refer to the topic “Confidential print” or
“Print and hold.” Follow the instructions.
NOTE: If you send a large file to a shared network printer, it remains in
the printer memory until you print it. This could prevent others from
printing. Retrieve your print jobs as soon as possible. To check the
amount of memory in your printer, see Printing a menu settings page.
1
7
3
5
4
2
6
SqueezeWidth guide tab Size
indicators
Length guide
Width guide
Paper and transparencies Envelopes
In a tray In the multipurpose
feeder
Single-sided
printing
Double-sided
printing
(duplex)
Adjust the width guide after
loading the letterhead.
4 Go to the printer and use the operator panel to access your
confidential print job:
a Press the right arrow on the Menu button once.
Confidential Job is displayed. Press Select.
b Pres s Menu until you see your user name, and then
press Select.
c Enter your four-digit personal identification number
(PIN) using the numbered buttons on the operator
panel. As you enter your PIN, asterisks appear on the
display.
d Pres s Menu until you see Print A Job, and then press
Select. (
Print All Jobs sends all jobs with the s ame
user name and PIN immediately to the printer.)
e Press Menu until you see the job you want to print, and
then press Select.
f Press Go to send the job to the printer.
After the job prints, the job is deleted from printer memory and
the printer returns to the
Ready state.
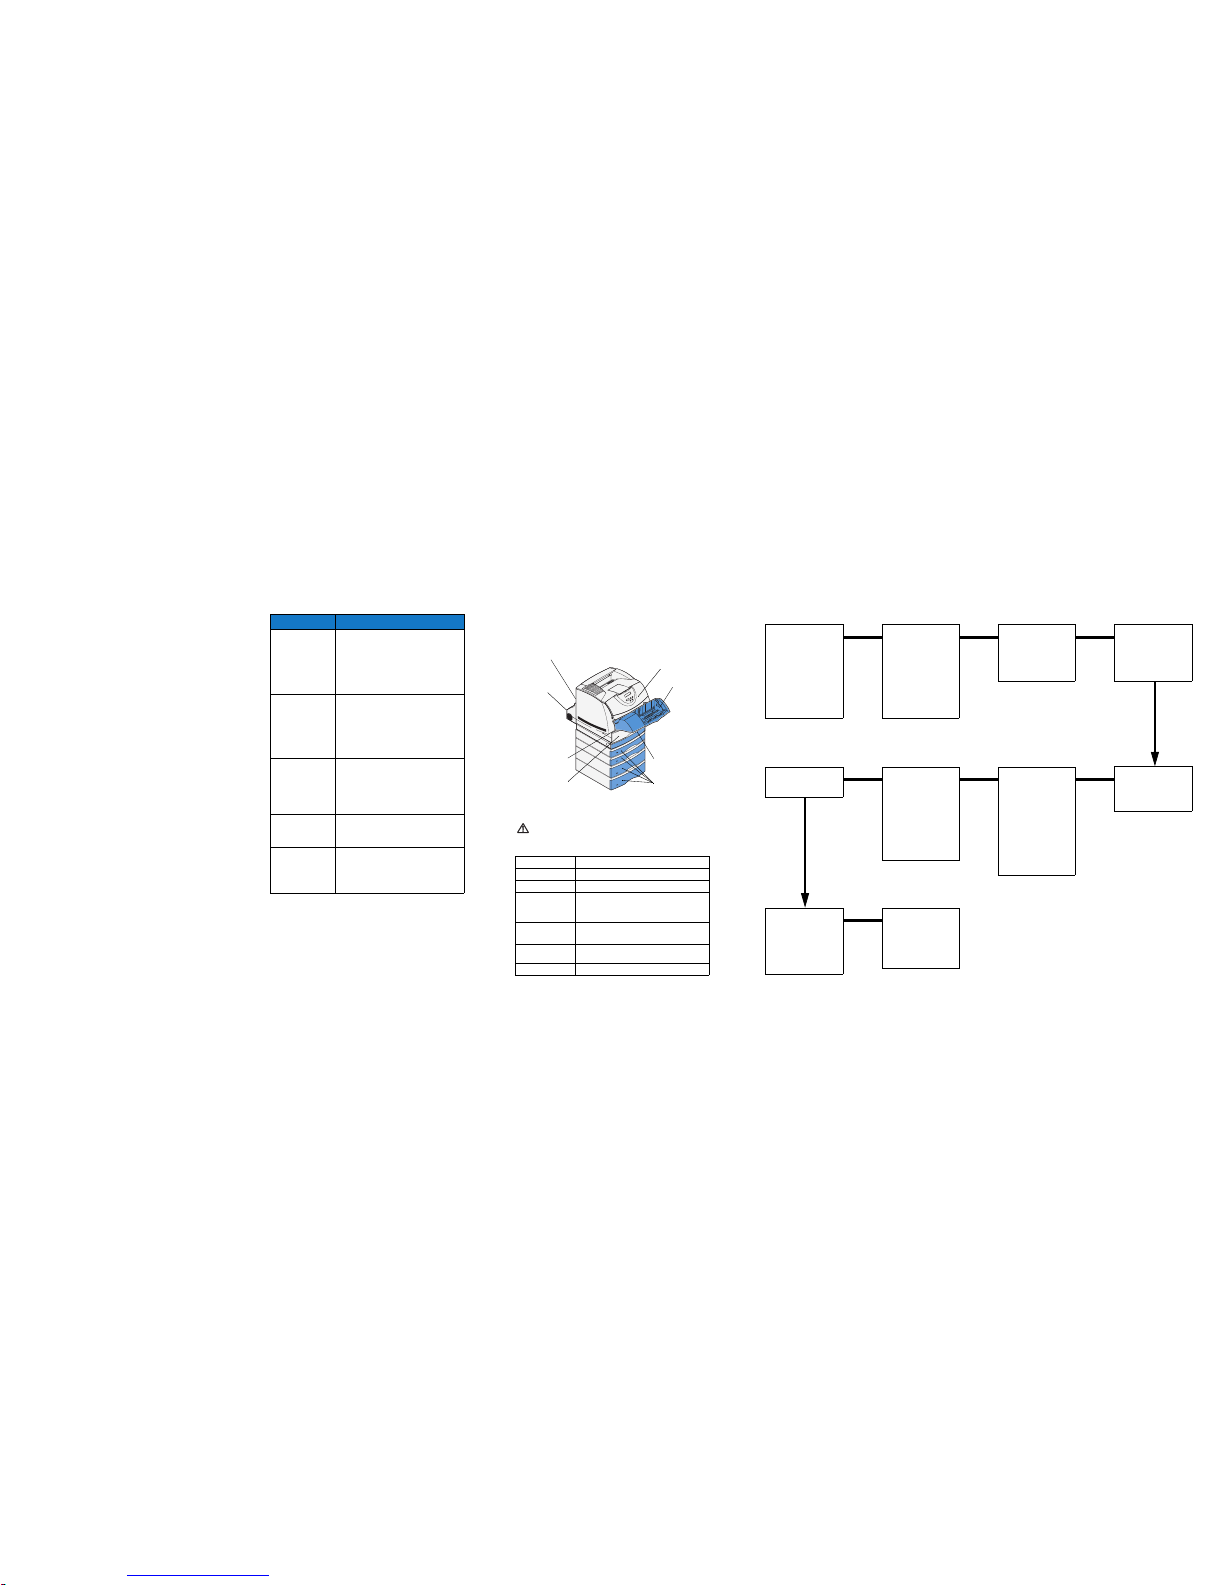
Common Printer Messages Accessing Jam Areas
Open doors and covers, remove trays, and remove options to
access jam areas. The illustration shows the location of sources
and possible jam areas. Be sure to remove any printed paper from
the output area before opening the upper front door.
CAUTION: Do not attempt to clear any jam using tools
or instruments. This may permanently damage the
printer.
Operator Panel Menus
© 2003 Dell Computer Corporation. All rights reserve d.
*DELL296*
L. P/N DELL296
E.C. 548184
8/03
Printed in the U.S.A.
Message Actions
Change Tray x
The printer is
requesting a different
size or type of print
media than what is
loaded.
• Remove the currently loaded print media
from the specified tray, and then load the
requested print media.
•Press
Select to clear the message and print
on the print media currently loaded in the
tray.
• Cancel the current job.
Load Manual
The printer is ready
for print media to be
inserted into the
multipurpose feeder.
• Load the mult ipurpose feeder with the
print media specified on the second line of
the display.
•Press
Select or Go to ignore the manual
feed request and print on print media
already installed in one of the trays.
• Cancel the current job.
Waiting
The printer has
received data to print
but is waiting for a
command or
additional data.
•Press
Go to print the contents of the
buffer.
• Cancel the current job.
Not Ready
The printer is not
ready to process data.
Press
Go to ready the printer to receive jobs.
Flushing Buffer
The printer is
discarding the
current print job.
• Wait for the message to clear.
• Sometimes thi s message means the driver
data did not match what the printer was
expecting. If the situation recurs, try
printing from another printer driver.
200 Paper Jam
Upper front door
201 Paper Jam
Upper front door
202 Paper Jam
Printer rear door
23x Paper Jam
Duplex rear door
Duplex front access cover (remove standard
input tray)
24x Paper Jam
Standard input tray
Paper trays
250 Paper Jam
Lower front door (down when envelope feeder
is installed)
260 Paper Jam
Envelope feeder
202 Paper Jam
23x Paper
Jam
200 Paper Jam
201 Paper Jam
250 Paper Jam
24x Paper Jam
23x Paper Jam
24x Paper Jam
260 Paper Jam
Paper Menu
Paper Source
Paper Size
Paper Type
Custom Types
Universal Setup
Substitute Size
Configure MP
Envelope Enhance
Paper Texture
Paper Weight
Paper Loading*
Finishing Menu
Duplex*
Duplex Bind*
Copies
Blank Pages
Collation
Separator Sheets
Separator Source
Multipage Print
Multipage Order
Multipage View
Multipage Border
Quality Menu
Print Resolution
Toner Darkness
PictureGrade
Job Menu
Confidential Job**
Held Jobs**
Cancel Job**
Reset Printer
Print Buffer**
Utilities Menu
Print Menus
Print Net <x> Setup
Print Fonts
Factory Defaults
Hex Trace
Setup Menu
Printer Language
Power Saver
Quick Start
Resource Save
Print Timeout
Wait Timeout
Auto Continue
Jam Recovery
Page Protect
Print Area
Display Language
Alarm Control
Toner Alarm
PCL Emul Menu
Font Source
Font Name
Point Size
Pitch
Symbol Set
Orientation
Lines per Page
A4 Width
Tray Renumber
Auto CR after LF
Auto LF after CR
PostScript Menu
Print PS Error
Network Menu
Standard Network
PCL SmartSwitch
PS SmartSwitch
NPA Mode
Network Buffer
MAC Binary PS
STD Net Setup
USB Menu
Standard USB
PCL SmartSwitch
PS SmartSwitch
NPA Mode
USB Buffer
MAC Binary PS
* Depending on installed options, not all menu items may be shown .
** Options are only available if a print job has been sent to the printer.
 Loading...