

Page 1

Dell Latitude 12 Rugged Tablet-7202
User’s Guide
Regulatory Model: T03H
Regulatory Type: T03H001
Page 2

Notes, cautions, and warnings
NOTE: A NOTE indicates important information that helps you make better use of your computer.
CAUTION: A CAUTION indicates either potential damage to hardware or loss of data and tells you
how to avoid the problem.
WARNING: A WARNING indicates a potential for property damage, personal injury, or death.
© 2015 Dell Inc. All Rights Reserved.
Trademarks used in this text: Dell™, the DELL logo, Venue™, and Wi-Fi Catcher™ are trademarks of Dell Inc. Intel®,
Xeon®, Core™, and Atom™, are registered trademarks or trademarks of Intel Corporation in the U.S. and other
countries. Microsoft®, Windows®, MS-DOS®, Windows Vista®, the Windows Vista start button, and Office Outlook® are
either trademarks or registered trademarks of Microsoft Corporation in the United States and/or other countries. WiFi® is a registered trademark of Wireless Ethernet Compatibility Alliance, Inc.
2016 -03
Rev. A01
Page 3

Contents
1 Working on Your Tablet.......................................................................................5
Before Working Inside Your Tablet.......................................................................................................5
Turning off Your Tablet.........................................................................................................................6
2 Setting Up Your Tablet.........................................................................................7
Charging the Tablet...............................................................................................................................7
Turning On Your Tablet........................................................................................................................ 8
Turning off the Screen.......................................................................................................................... 8
3 Using Your Tablet................................................................................................. 9
Screen Orientation................................................................................................................................ 9
How to lock / unlock the screen orientation.......................................................................................9
Adjusting the screen brightness......................................................................................................9
Gestures...............................................................................................................................................10
Right-Click..................................................................................................................................... 12
The Windows Start Screen.................................................................................................................. 12
Customizing the Applications....................................................................................................... 12
How to access the Start screen.................................................................................................... 13
Get to know Windows 8.1............................................................................................................. 14
Swipe Right.................................................................................................................................... 14
Swipe Left.......................................................................................................................................14
Swipe Up/Down.............................................................................................................................14
Split Screen.......................................................................................................................................... 15
Using Headphones.............................................................................................................................. 15
Removing the Battery..........................................................................................................................16
Installing the Battery............................................................................................................................ 17
Installing the SIM Card.........................................................................................................................17
4 Managing your tablet settings......................................................................... 19
Wi-Fi setting.........................................................................................................................................19
Mobile broadband setting...................................................................................................................20
Refreshing / Recovering / Re-setting your tablet..............................................................................22
Refresh your PC without affecting your files............................................................................... 23
Remove everything and re-install Windows................................................................................ 23
Advanced startup...........................................................................................................................23
5 Synchronizing your tablet................................................................................ 24
Using Microsoft account.................................................................................................................... 24
3
Page 4

Copying music, photos, and videos............................................................................................. 24
6 Cleaning Your Tablet......................................................................................... 25
7 Troubleshooting................................................................................................. 26
Battery problem.................................................................................................................................. 26
System problem...................................................................................................................................27
Touchscreen problem.........................................................................................................................27
Checking Your Wireless Network Card..............................................................................................28
Network problem................................................................................................................................28
8 System Setup.......................................................................................................30
System Setup (BIOS) Options............................................................................................................. 30
Updating the BIOS ..............................................................................................................................39
9 Specifications......................................................................................................40
10 Contacting Dell.................................................................................................44
4
Page 5
1
Working on Your Tablet
Before Working Inside Your Tablet
Use the following safety guidelines to help protect your tablet from potential damage and to help to
ensure your personal safety. Unless otherwise noted, each procedure included in this document assumes
that the following condition exists:
• You have read the safety information that shipped with your tablet.
WARNING: Before working inside your tablet, read the safety information that shipped with your
tablet. For additional safety best practices information, see the Regulatory Compliance
Homepage at www.dell.com/regulatory_compliance
CAUTION: Many repairs may only be done by a certified service technician. You should only
perform troubleshooting and simple repairs as authorized in your product documentation, or as
directed by the online or telephone service and support team. Damage due to servicing that is
not authorized by Dell is not covered by your warranty. Read and follow the safety instructions
that came with the product.
CAUTION: To avoid electrostatic discharge, ground yourself by using a wrist grounding strap or
by periodically touching an unpainted metal surface, such as a connector on the back of the
tablet.
CAUTION: Handle components and cards with care. Do not touch the components or contacts
on a card. Hold a card by its edges or by its metal mounting bracket.
CAUTION: When you disconnect a cable, pull on its connector or on its pull-tab, not on the cable
itself. Some cables have connectors with locking tabs; if you are disconnecting this type of cable,
press in on the locking tabs before you disconnect the cable. As you pull connectors apart, keep
them evenly aligned to avoid bending any connector pins. Also, before you connect a cable,
ensure that both connectors are correctly oriented and aligned.
NOTE: The color of your tablet and certain components may appear differently than shown in this
document.
To avoid damaging your tablet, perform the following steps before you begin working inside the tablet.
1. Ensure that your work surface is flat and clean to prevent the tablet cover from being scratched.
2. Turn off your tablet.
3. If the tablet is connected to a docking device (docked) such as the optional docking station or
keyboard dock, un-dock it.
4. Disconnect the power adapter from the tablet.
5. Press and hold the power button for a few seconds to remove the flea power from the system board.
CAUTION: To guard against electrical shock, always unplug your tablet from the electrical
outlet.
5
Page 6
CAUTION: Before touching anything inside your tablet, ground yourself by touching an
unpainted metal surface, such as the metal at the back of the tablet. While you work,
periodically touch an unpainted metal surface to dissipate static electricity, which could
harm internal components.
6. Remove the micro-SD card from the tablet.
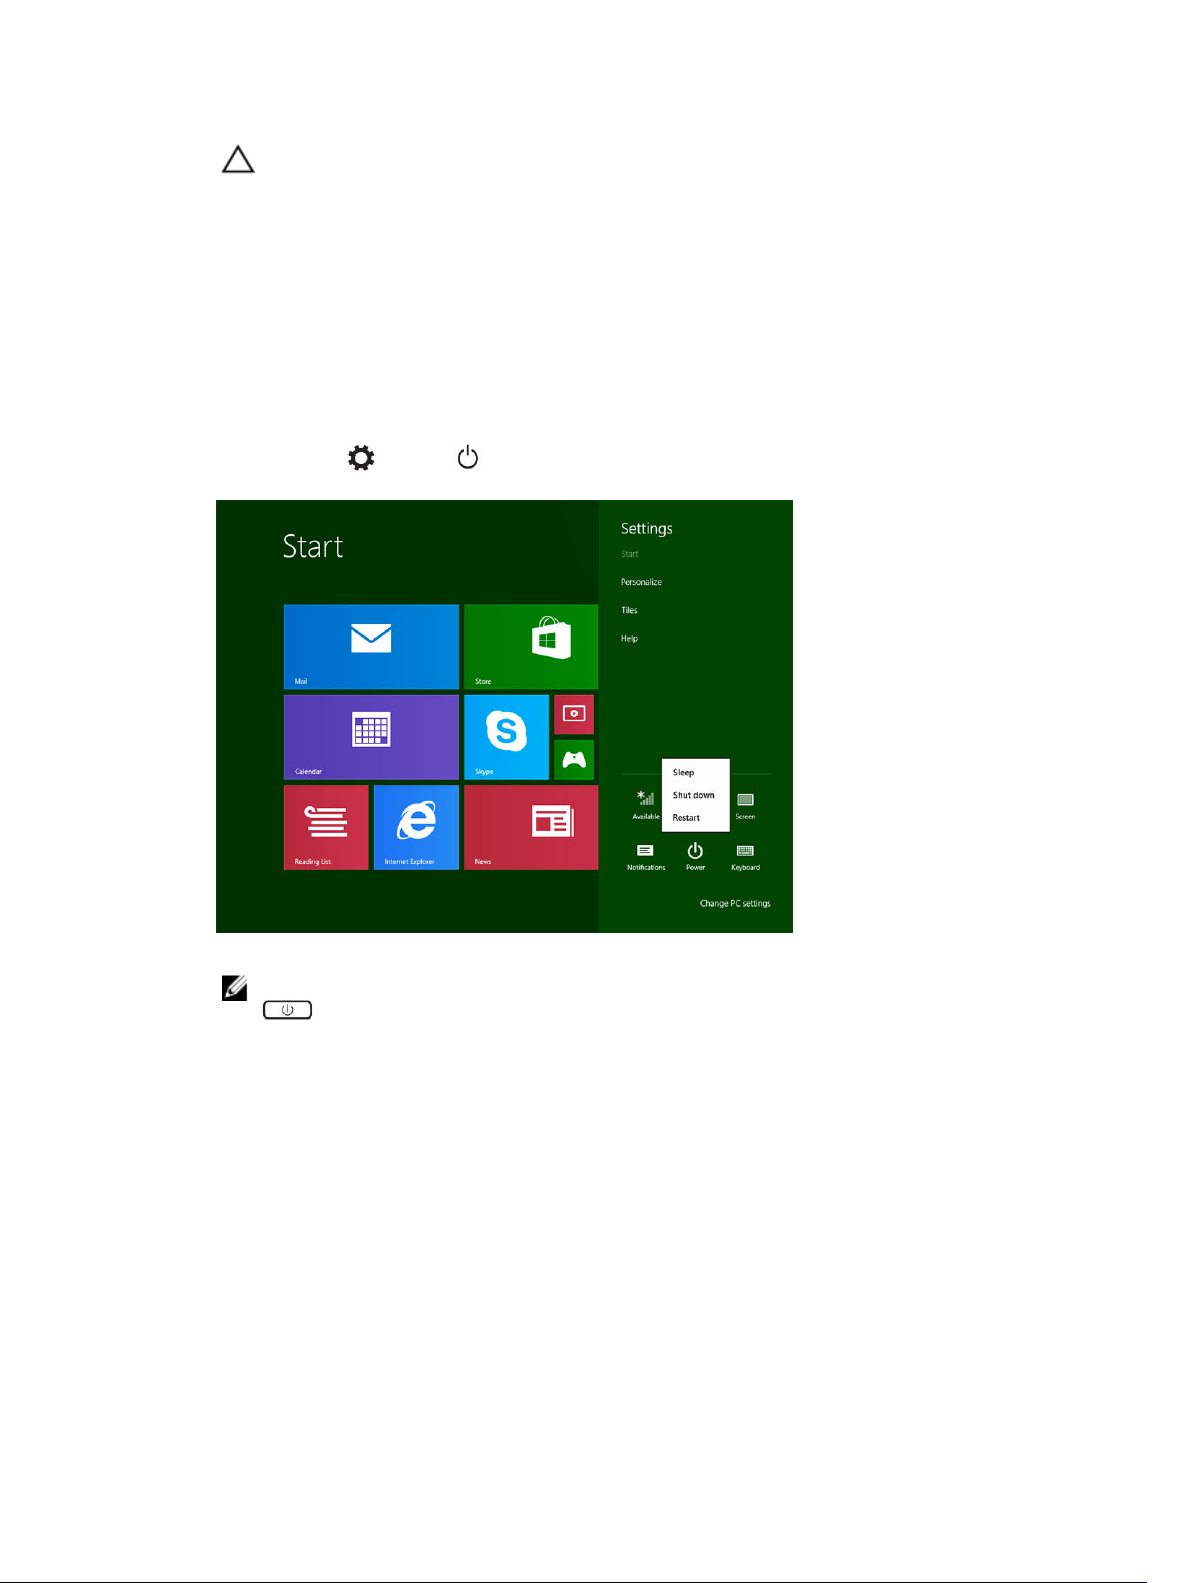
Turning off Your Tablet
Turning off your tablet completely shuts down your tablet. You can turn off your tablet by using the
charms menu:
1. Swipe from the right edge of the display to access the Charms menu.
2. Touch Settings > Power > Shut down to turn off the tablet.
NOTE: You can turn off your tablet without using the charms menu. Press and hold the Power
button for >10 seconds to turn off your tablet. You can perform this force shutdown, if
your tablet is not responding / behaving unexpectedly or touch is not working.
6
Page 7
Setting Up Your Tablet
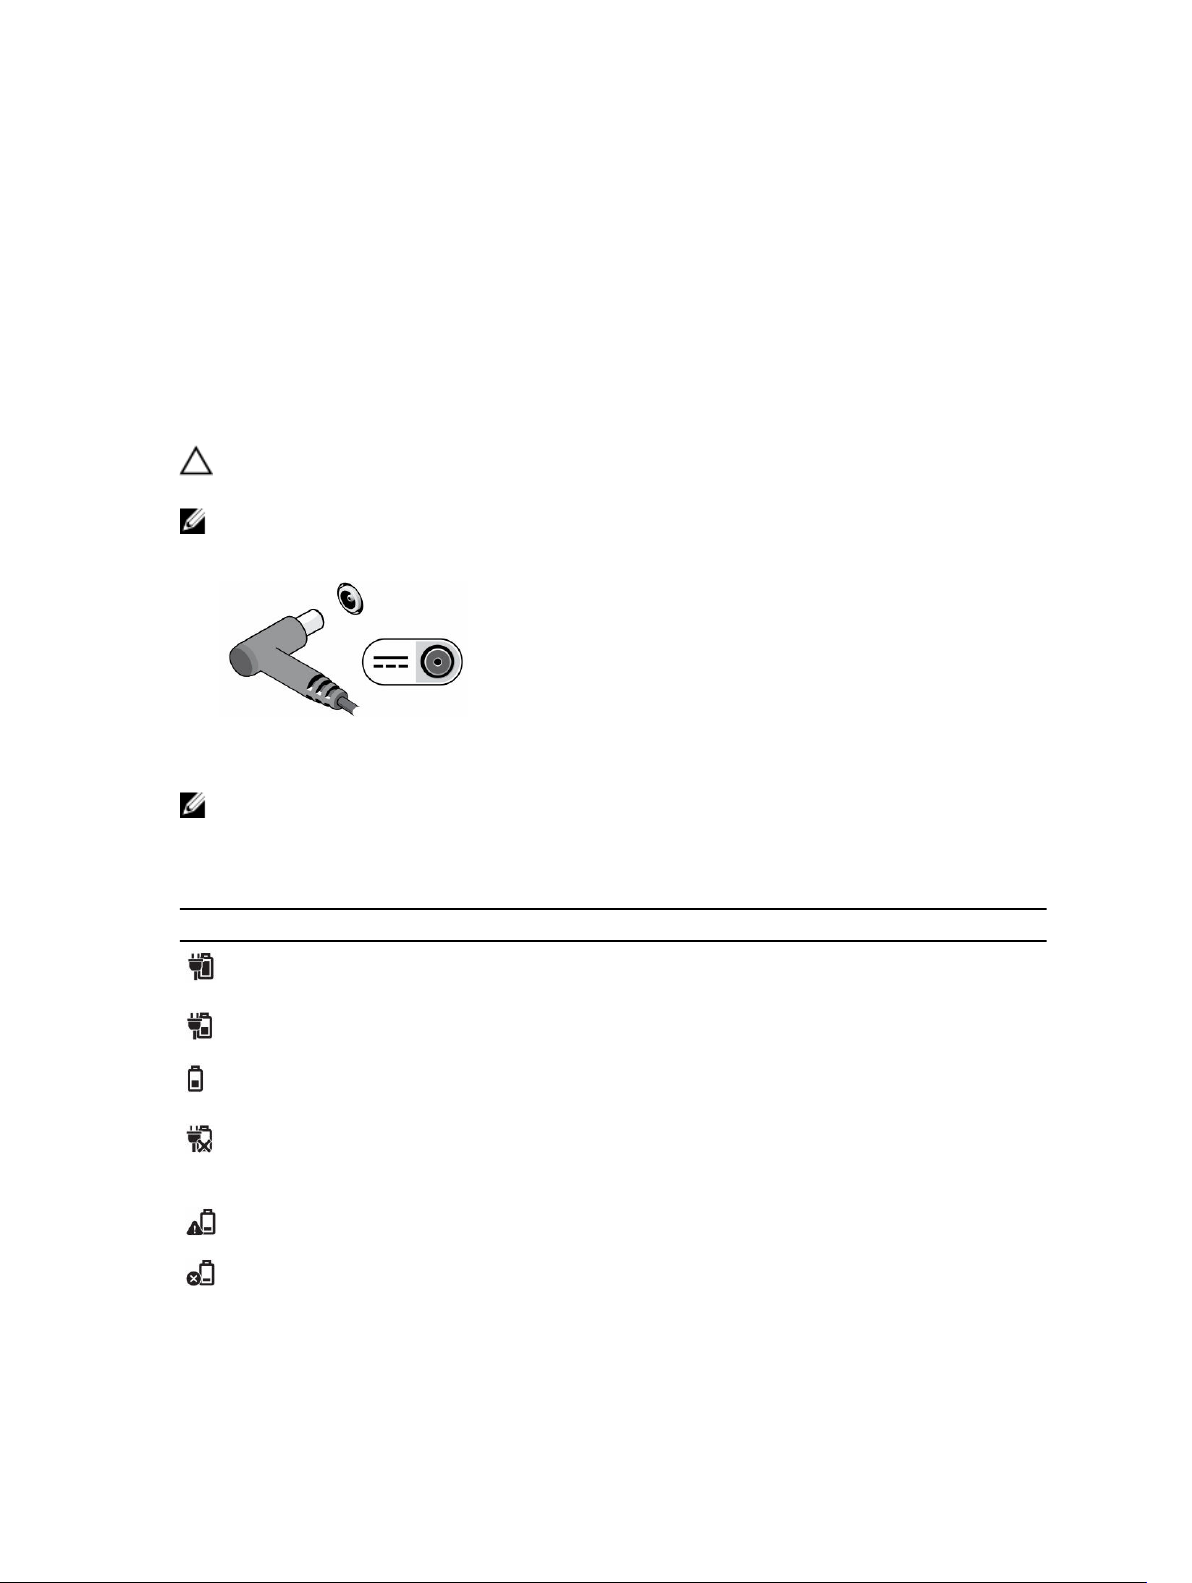
Charging the Tablet
CAUTION: Use only the power adapter and power cable that came with your tablet. Using
unauthorized power adapters or power cables may cause severe damage to your tablet.
NOTE: The battery is not fully charged when you unpack your tablet.
1. Connect the power cable into the power adapter.
2. Connect the power adapter to an electrical outlet and charge the tablet until the battery is fully
charged.
NOTE: The tablet battery requires about 2 hours to fully charge.
2
You can check the tablet battery charge status displayed on the screen.
Table 1. Battery-charge status
Battery icon Description
Battery is fully charged and power adapter is
connected.
Battery is charging with power adapter.
Your tablet is running on battery power and the
battery is discharging.
Your tablet’s power adapter is connected, and
either no battery is detected or the battery is not
working correctly.
Battery is at low level.
Battery is at critical level.
7
Page 8
NOTE: The battery bay has an indicator, showing the battery power-level and the tablet is not
required to be powered on to check the battery power-level. Press the button to know about the
current status of the battery power. However, if you want to know the exact power level, you may
have to power on the tablet and check the power level by:
• Swiping the right edge of the display.
• Accessing the desktop mode.
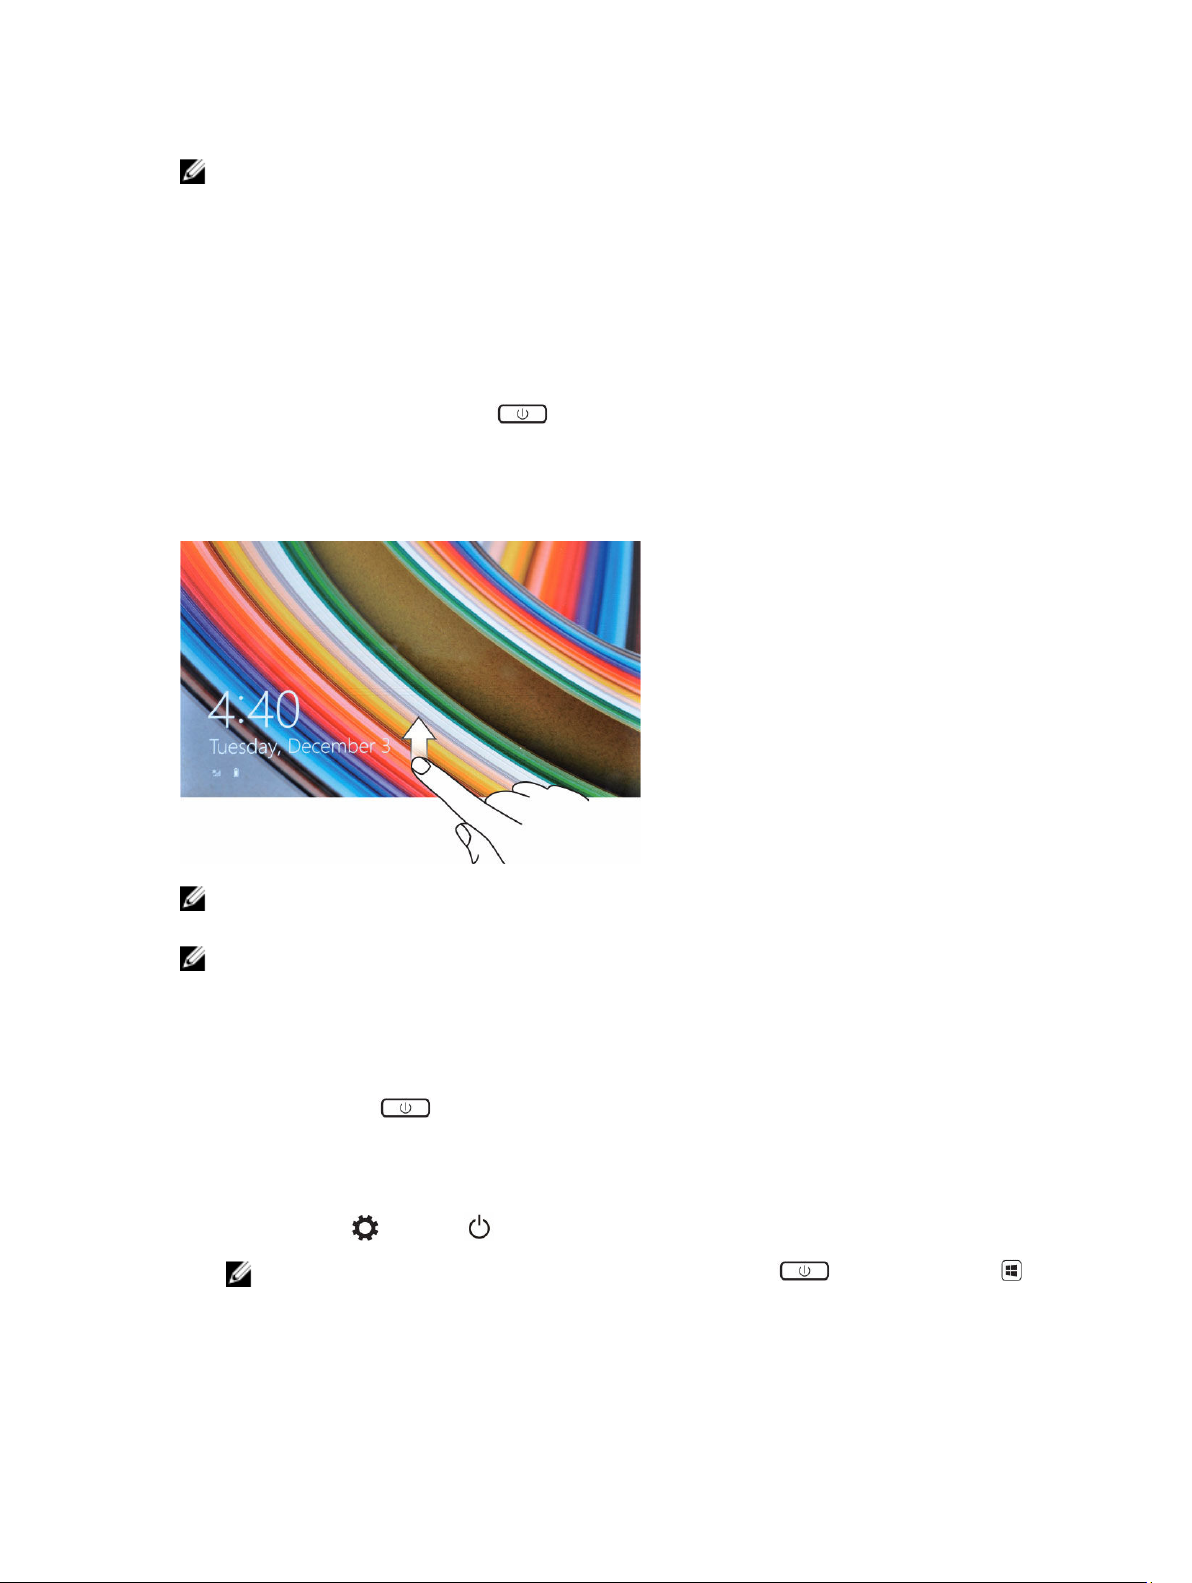
Turning On Your Tablet
1. Press and hold the Power button for 2 seconds to turn on your tablet.
2. If the lock screen image displays, swipe your finger from the bottom of the display to switch to the
login screen, and then enter the password to log in to Windows.
The tablet is ready for use after the Windows Start screen displays.
NOTE: If the login screen is not enabled in Windows 8.1, you will be taken directly from the lock
screen to the start screen.
NOTE: The lock screen displays only when returning from a sleep state.
Turning off the Screen
• Using power button
Press the Power button to turn off the screen.
• Using Charms
1. Swipe from the right edge of the display to access the Charms bar.
2. Touch Settings → Power → Sleep to turn off the screen.
NOTE: If your tablet is in a sleep state, press the Power button or Windows button
once to turn on the screen.
8
Page 9

Using Your Tablet
Screen Orientation
For optimal viewing experience, the screen orientation changes automatically to portrait or landscape
format depending on how you hold the tablet.
NOTE: Some applications may not support automatic screen rotation to portrait or landscape
format.
How to lock / unlock the screen orientation
1. Swipe from the right edge of the display to access the Charms bar.
2. Touch Settings → Screen .
3. Touch toggle to lock the screen orientation, or touch toggle to unlock the screen
orientation.
NOTE: A toggle button is also available at front of the tablet. You can press the toggle button to
lock the screen orientation.
3
Adjusting the screen brightness
You can also adjust the screen brightness here by using the slider under the toggle menu.
9
Page 10
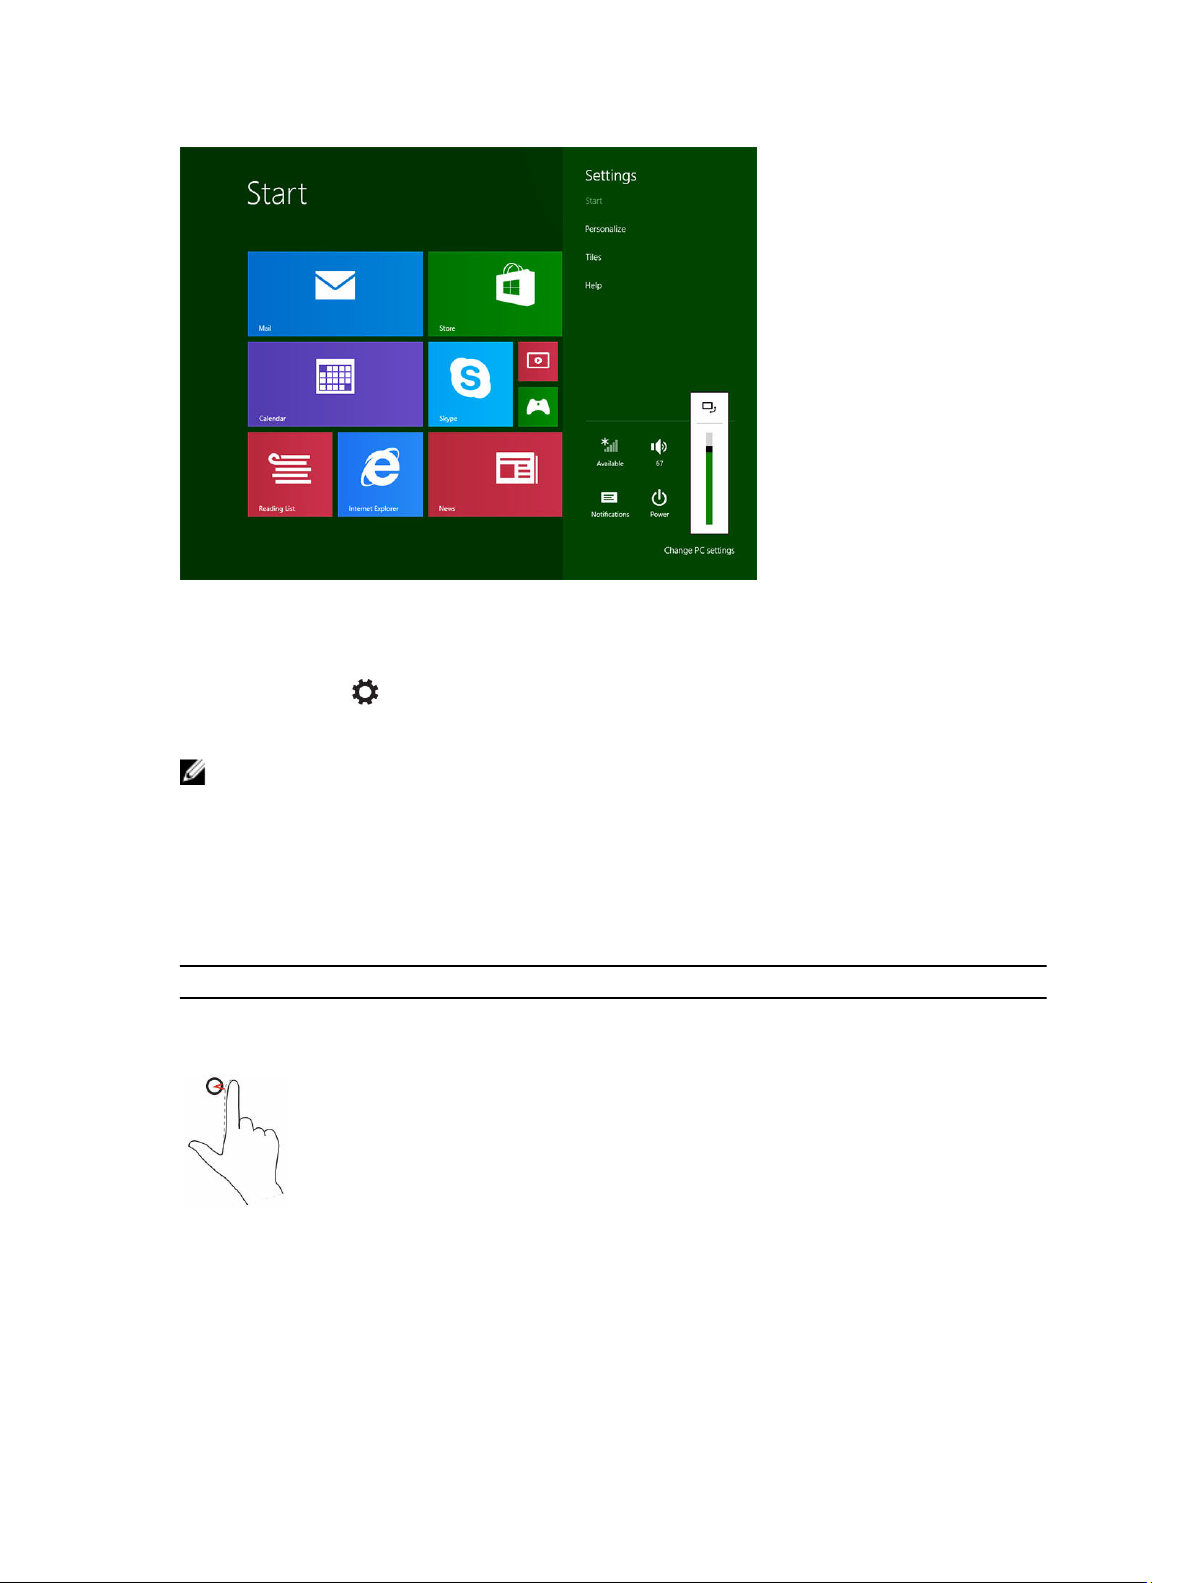
You can also adjust your screen automatically. To adjust the screen brightness automatically:
1. Swipe from the right edge of the display to access the Charms bar.
2. Touch Settings → Change PC settings → PC and devices → Power and sleep.
3. Under Brightness, slide left or right to turn on / turn off the automatic brightness option.
NOTE: You can turn on / turn off the slider to have the screen automatically adjust the brightness,
based on the ambient light.
Gestures
Your tablet has a multi-touch display. You can touch the screen to operate the tablet.
Table 2. Gesture Actions
Gesture Actions Functions
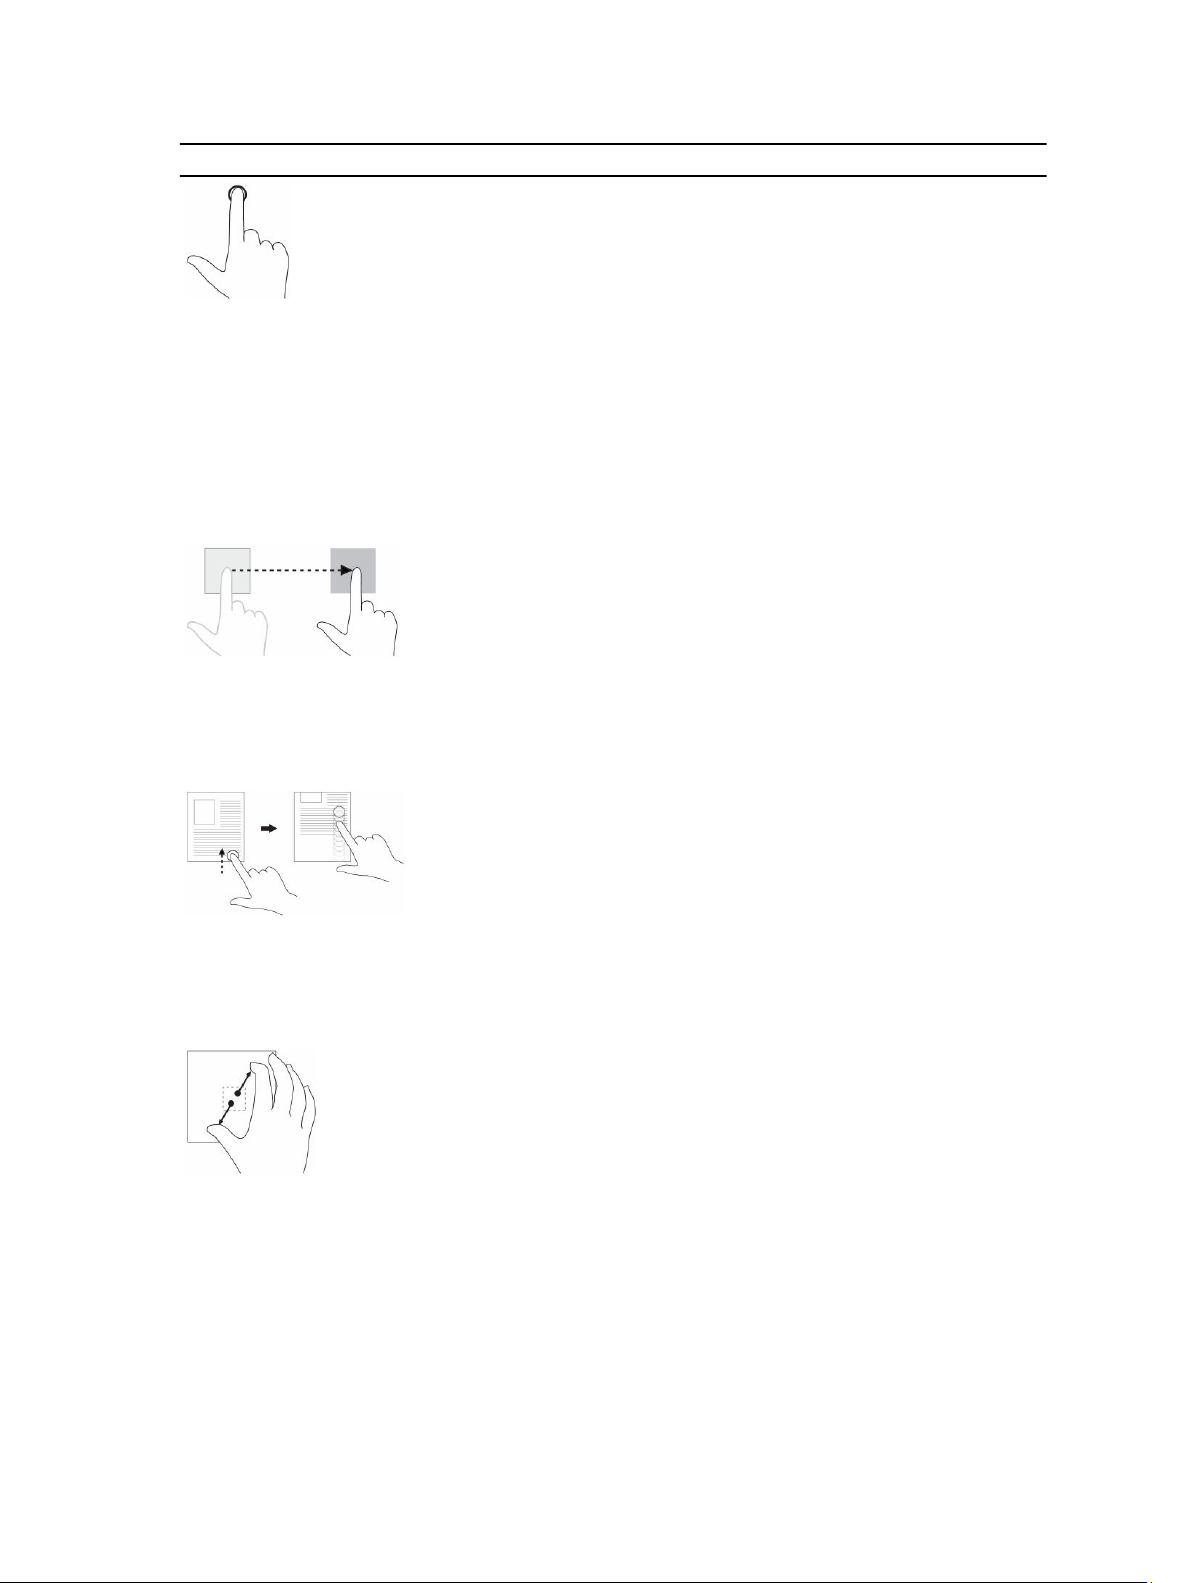
Touch
Tap gently on the display with your fingertip.
• Select items on the screen, including options,
entries, images, and icons
• Start applications
• Touch buttons on the screen
• Input text using the on-screen keyboard
Touch and Hold
Touch and hold your finger on the display
10
• Display detailed information about an item
• Open the context menu of an item to perform
further actions
Page 11
Gesture Actions Functions
Drag and Drop
1. Touch and hold your finger on an item on
the screen
2. Keeping your finger in contact with the
display, move your fingertip to the desired
location
3. Take your finger off the display to drop the
item in the desired location
Swipe or Slide
Move your finger in a vertical or horizontal
direction on the display
Move item such as images and icons on the screen
• Scroll through the Start screen, web pages, lists,
entries, photos, contacts, and so on
• Close an application. (Swipe the application to
the bottom of the display)
Zoom in
Touch the display with two fingers and then
move the fingers apart
Zoom out
Touch the display with two fingers and then
move the fingers closer
Enlarge the view of an image or web page
Reduce the view of an image or web page
11
Page 12

Gesture Actions Functions
Rotate
Touch the display with two or more fingers and
then move the fingers in a clockwise or counterclockwise arc
Rotate an object by 90 degrees
Right-Click
To perform a right-click on your tablet, Touch and Hold your finger for 2 seconds on any section of the
screen or an icon and then release your finger.
The options menu appears on the screen.
The Windows Start Screen
The Windows Start screen displays a list of default and custom Live Tiles, which act as a shortcut to
Control Panel, Windows Explorer, Weather application, RSS, Windows Store, Internet Explorer, and other
installed applications.
Live Tiles on your Start screen change and update in real time so you can get real-time updates about
news or sports, check what your friends are up to, and get the latest weather forecast.
The tile-based user interface gives you direct access to your most recently used applications, Emails,
photos, music, videos, contacts, Facebook & Twitter updates, and frequently viewed websites. You can
pin your favorite or frequently used applications as Live Tiles to customize the Start screen.
You also can personalize the Start screen by setting your favorite picture as a wallpaper.
NOTE: Live Tiles can be added or removed by using Pin or Unpin options.
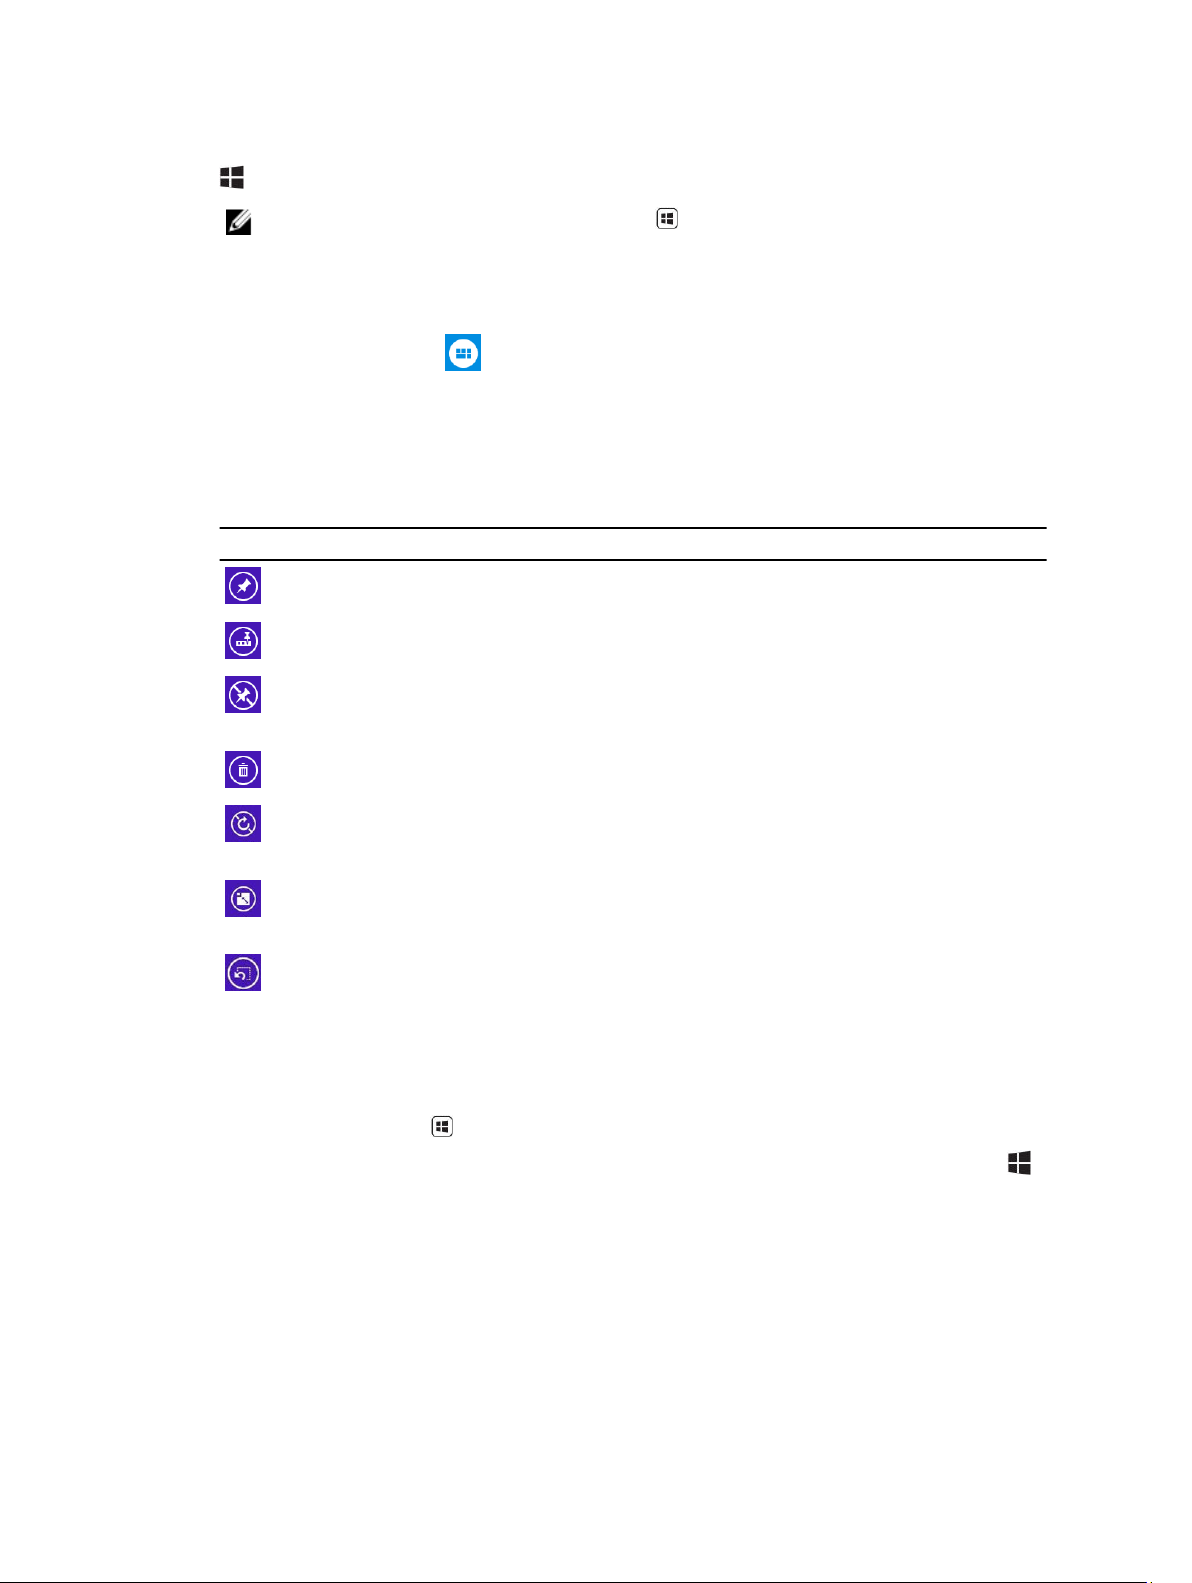
Customizing the Applications
You can customize all the available applications on the Start screen. To customize the applications:
12
Page 13
1. Swipe from the right edge of the display to access the Charms bar, and then touch the Start icon
.
NOTE: You can also press the Windows button to go to the Start screen.
2. Swipe up from the middle of the display to get the Apps view.
3. Swipe from the top or bottom of the display to access the Customize icon at the bottom-right
corner.
4. Touch the Customize icon at the bottom-right corner.
5. Select the application or applications that you want to customize.
After you select the application or applications, the relevant options appear at the bottom. The
options are:
Table 3. Customize application
Options Actions
Enables to view the application in the start screen.
Enables to view the application in the taskbar.
Enables the application to be unpinned from the start
screen.
Enables to uninstall the application.
Enables to turn off the live update on the running
applications. Example: Weather
Enables to resize the application. You can resize the
application to Wide, Medium, and Small sizes.
Enables to clear all the selections made.
How to access the Start screen
Follow either method to access the Start screen:
• Press the Windows button .
Swipe from the right edge of the display to access the Charms bar, and then touch the Start icon .
•
13
Page 14
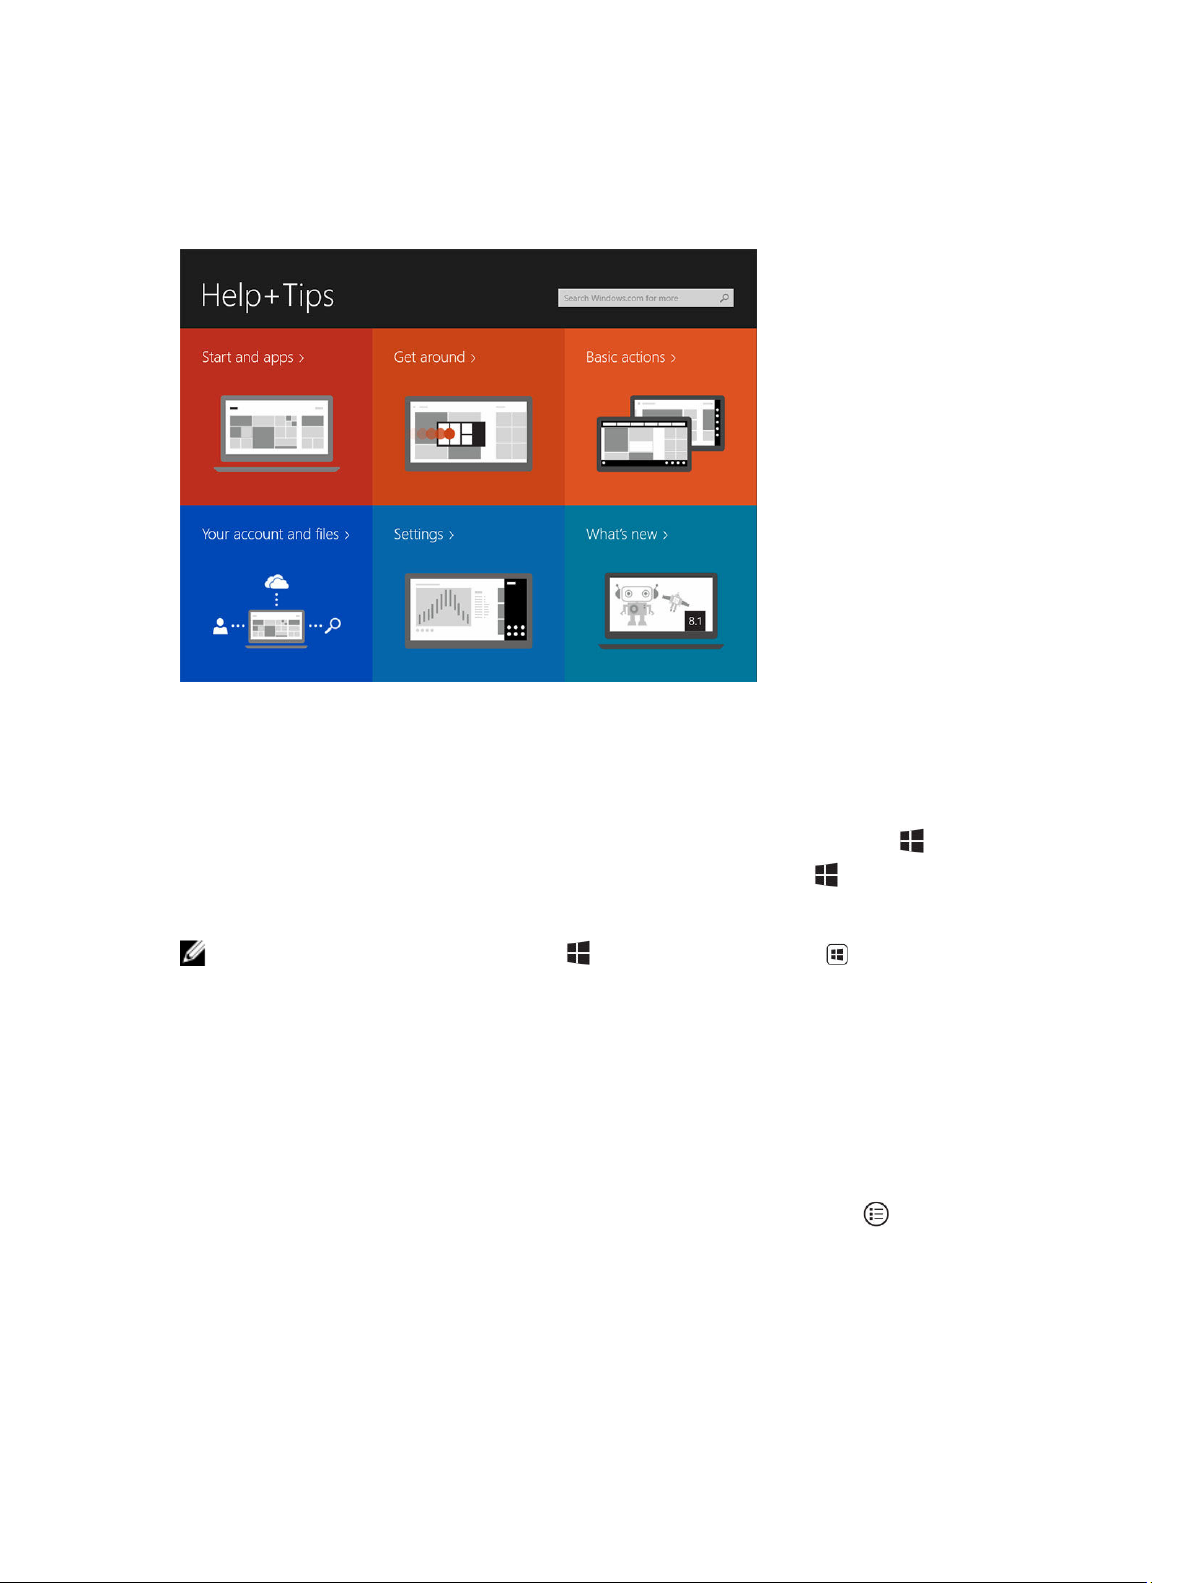
Get to know Windows 8.1
You can touch the Help+Tips tile on the Start screen to get help and tips on using Windows 8.1.
Swipe Right
Swiping-in from the right edge of the display reveals the Charms bar. Charms provide access to the
system commands, such as Start, Search, Share, Devices, and Settings options.
If your tablet is running on an application or performing actions, pressing the Start icon takes you
back to the Start screen. If you are at the Start screen, pressing the Start icon takes you to the most
recently used application or most recently viewed screen.
NOTE: The functionality of the Start icon is same as Windows button .
Swipe Left
• Swiping slowly from the left edge to the right edge of the display reveals thumbnails of the open
applications and cycles the thumbnails of the open applications.
• Swiping-in and out on the left edge of the display brings up a list of the most recently used
applications.
Swipe Up/Down
• Swiping-in from the bottom or top edge of the display reveals the All apps icon . Touch All apps to
show an alphabetical list of all applications installed on your tablet.
• Swiping-in from the top to the bottom of an application docks or closes the application.
For more information on using Windows Start screen, visit windows.microsoft.com/en-us/windows-8/
start-screen-tutorial .
14
Page 15

You can also enable the camera (front), when the screen is in lock mode. To enable the camera when the
screen is in lock mode:
1. Swipe from the right edge of the display to access the Charms bar.
2. Click Settings → Change PC Settings → PC and Devices
3. Scroll down and navigate to Camera.
4. Swipe to turn on, to use the camera during the lock screen mode.
To make sure you can use the camera during the lock screen mode:
1. Press Power button to turn off the screen.
2. Press Power button again to enable the lock screen mode.
3. Swipe down to enable the camera.
Split Screen
The split screen option enables you to open two applications on the same screen, which helps you in
multitasking. To split the screen:
1. Open any two applications that you want to perform the split screen.
2. Swipe from the left to open the second application and hold your finger until the screen splits.
3. Release your finger to drop the second application.
NOTE: Windows 8.1 enables you to split the screen in variable width.
Using Headphones
You can use headphones to listen to music and sounds, record audio, or make calls.
After you connect your device to the audio port, a pop-up window displays with options. Select the
appropriate option and click OK.
15
Page 16

NOTE: These are the default options on the tablet, which display only when you connect a device
to the audio port. Depending upon your device, you can select any of these options.
WARNING: Listening to loud music for extended period of time can lead to hearing loss.
1. Connect the headphones to the audio port (3.5 mm) on the tablet.
2. Insert the earphones in your ears and adjust the volume level to a comfortable level.
NOTE: When you connect a headphone or an external audio device to the audio connector, the
integrated speakers on your tablet are muted automatically.
CAUTION: To prevent damage to the headphones when disconnecting it from the tablet, pull the
connector and not the cable.
NOTE: It is recommended that you turn down the volume level before plugging the headphone,
and then adjust to a comfortable level. Sudden exposure to loud sounds can cause hearing damage.
Removing the Battery
WARNING: Using an incompatible battery may increase the risk of fire or explosion. Replace the
battery only with a compatible battery purchased from Dell. The battery is designed to work with
your Dell tablet. Do not use a battery from any other tablet with your tablet.
WARNING: Before removing or replacing the battery, turn off the tablet, disconnect the power
adapter from the electrical outlet and the tablet, disconnect the modem from the wall connector
and tablet, and remove any other external cables from the tablet.
1. To remove the battery:
a. Unlock the battery release latch by sliding towards the battery.
b. Push the button in a downward direction to unlatch the battery bay.
16
Page 17

NOTE: There are two battery release buttons for removing Battery 1 and Battery 2 on the
tablet.
2. Lift the batteries away from the tablet.
Installing the Battery
1. Slide the battery into its slot until it clicks into place.
2. Lock the battery by sliding the latch away from it.
Installing the SIM Card
NOTE: The SIM card slot is located underneath the battery 2 slot.
1. Remove the battery.
2. To install the SIM card:
a. Press the SIM latch and pull it in an outward direction.
b. Insert the SIM card into the slot.
c. Push the SIM release latch inwards to lock it.
17
Page 18

3. Install the battery into the battery bay.
4. Slide the battery release latch in an upwards direction, and then to the right to lock it.
18
Page 19

Managing your tablet settings
Wi-Fi setting
• Turning On/Off Wi-Fi
1. Swipe from the right edge of the display to access the Charms bar.
2.
Touch Settings → Change PC Settings → Network.
3. Select Wi-Fi to turn Wi-Fi on or off.
4
• Connecting to a network
1. Swipe from the right edge of the display to access the Charms bar.
2. Touch Settings → Available → Select an available network → Connect
19
Page 20

.
Mobile broadband setting
• Turning On/Off mobile broadband
1. Swipe from the right edge of the display to access the Charms bar.
2. Touch Settings →Change PC settings → Networks → Airplane mode.
3. Swipe Mobile broadband icon left or right to turn mobile broadband on or off.
• Connecting to a mobile broadband network
1. Ensure an active SIM card is inserted into the tablet.
20
Page 21

2. Swipe from the right edge of the display to access the Charms bar.
3. Touch Setting → Network → Connections → Your Service Provider → Connect.
4. The estimated data usage will be shown once the mobile broadband network is enabled.
NOTE: You can choose the option Connect automatically to connect the mobile broadband
automatically.
NOTE: Your tablet will automatically prioritize Wi-Fi networks over mobile broadband networks,
when both are available. If your tablet is connected to the mobile broadband and any of saved Wi-Fi
connections comes within range, it will disconnect from the mobile network and connect to the
Wi-Fi automatically.
• Disconnecting from mobile broadband network
1. Swipe from the right edge of the display to access the Charms bar.
2. Touch Setting → Network → Your Service Provider → Disconnect.
NOTE: Once your tablet has disconnected from mobile broadband, the option Connect
automatically will be disabled as well.
• Mobile broadband options
1. Swipe from the right edge of the display to access the Charms bar.
2. Touch Settings →Networks .
3. Touch and hold Your Service Provider or right-click if docked.
• Touch Show estimated data usage/Hide estimated data usage to show or hide your data usage.
• Touch Set as metered connection/Non metered connection to set a particular connection as a
metered/non-metered connection.
• Touch View connection properties to view your connected mobile broadband properties.
NOTE: If the option Set as metered connection is enabled, Windows Update will not download
updates automatically unless it is a high priority, critical security update.
21
Page 22

• Service Provider hardware information
1. Swipe from the right edge of the display to access the Charms bar.
2. Touch Settings → Change PC settings → Network.
3. Touch Your Service Provider to view the hardware information including the subscriber information
and International Mobile Equipment Identity (IMEI) number.
• Enabling PIN lock
1. Swipe from the right edge of the display to access the Charms bar.
2. Touch Settings → Network .
3. Touch and hold Your Service Provider or right-clicked if docked.
4. Touch View connection properties→Security→Use a PIN.
5. Enter your SIM PIN Code.
NOTE: Your Service Provider refers to the network service providers available in your location.
CAUTION: If you enter the incorrect PIN code, your mobile broadband connection will not be
established. If you unsuccessfully enter the code three times, your SIM card will be locked. To
unlock the SIM card, contact your service provider to get a Personal Unblocking Key (PUK) to
unlock the SIM card.
NOTE: Before you contact your carrier, have your IMEI number ready.
Refreshing / Recovering / Re-setting your tablet
You can refresh / recover / restore your tablet to original factory settings.
1. Swipe from the right edge of the display to access the Charms bar.
2. Touch Settings → Change PC Settings → Update and recovery → Recovery.
• Refresh your PC without affecting your files
22
Page 23

• Remove everything and reinstall Windows
• Advanced startup
3. Select any recovery option to complete the task.
Refresh your PC without affecting your files
This option enables you to refresh your tablet without losing your photos, music, videos, and other
personal files. If you want to perform this action:
1. Click Get started. The Refresh your PC window opens.
2. Click Next.
3. Click Refresh.
Click Cancel to cancel this action.
Remove everything and re-install Windows
This option enables you to recycle or start over your tablet completely, and you can reset to its default /
factory settings. If you want to perform this action:
1. Click Get Started. The Reset your PC window opens.
2. Click Next.
After you click Next, you will now have to select any of the two below options to finish the task:
• Just remove my files — If you select this option, Windows removes all your files including your
photos, music, videos, and other personal files.
• Fully clean the drive — If you select this option, Windows resets your tablet.
CAUTION: Resetting your tablet erases all data from your tablet, including your account
configuration, music, pictures, files, and so on. Ensure that you back up all the required data
before you proceed.
Click Cancel to cancel this action.
Advanced startup
This option enables you to start up from a device or compact disc (such as DVD or USB drive) and change
your tablet’s firmware settings, change Windows startup settings, or restore Windows from the system
image. If you want to perform this action, click Restart Now.
NOTE: Third-party applications will be removed.
23
Page 24

5
Synchronizing your tablet
Using Microsoft account
If your computer has Microsoft Windows 8.1 installed, you can synchronize user settings of your tablet
with your computer using a Microsoft account. When you sign in with your Microsoft account on your
tablet, you can automatically synchronize your settings, including internet browser history, application
settings, and personal files etc., with other Windows 8.1 PCs and Windows 8.1 tablets.
NOTE: You need a wireless connection for both your computer and tablet.
1.
Go to Charms bar, then click Settings → Change PC Settings →Accounts → Connect to a
Microsoft account
2. A new option will be added to PC Settings called Sync your settings.
3. Click Settings → Change PC Settings → More PC Settings → Sync your settings to show all kind
of toggles for synchronizing your data and settings.
Copying music, photos, and videos
to switch your computer local account to your Microsoft account.
1. Connect a USB key or a Micro-SD card to the computer and copy the required files.
2. After the copy is complete, use the Safely Remove Hardware wizard to remove your tablet from the
computer.
3. You can also use the SkyDrive feature of Win 8.1 to copy music, photos, and videos.
24
Page 25

6
Cleaning Your Tablet
CAUTION: Before you clean your tablet, disconnect all cables. Clean your tablet with a soft cloth
dampened with water. Do not use liquid or aerosol cleaners, which may contain flammable
substances.
1. Turn off your tablet. For more information on turning off your tablet, see Turning Off Your Tablet.
2. Disconnect any attached devices, headphones, speakers, and keyboard dock from the tablet and
from their electrical outlets.
3. Remove any installed Micro-SD and Micro-SIM card. For more information on removing the MicroSD card and Micro-SIM card, see Remove the Micro-SD card and Remove the Micro-Sim card.
4. Moisten a soft, lint-free cloth with either water or a display cleaner, and wipe the surface of the
tablet until it is clean. Do not allow water from the cloth to seep down to the tablet ports and
surrounding Windows button.
NOTE: To avoid damaging the tablet or display, follow the instructions that are included with the
product.
NOTE: Do not clean the keyboard with a moist cloth.
25
Page 26

Troubleshooting
Battery problem
Table 4. Battery problems
Problems Possible causes Possible solutions
7
Battery does not charge
The tablet's temperature is below 0 °C
or higher than 40 °C.
The battery or power adapter is
damaged.
• Unplug the Dell AC power
adapter from the wall and
verify that the outlet is
functioning.
• Try to connect with
another Dell AC power
adapter (if available).
• Check all cable
connections and plug
back into the wall, then
back into the tablet.
• Check the AC adapter LED
light to ensure if the AC
adapter is working.
• Check all connectors to
ensure proper
connectivity.
NOTE: The tablet battery
requires about 4 hours to
fully charge.
Charge the battery in an
ambient temperature
between 0 °C to 40 °C.
Contact a Dell authorized
reseller to replace the battery
or power adapter.
Battery drains quickly even
when the tablet is in Standby
mode
26
If the tablet is not in the range of a
network it can connect to, the tablet
continues to send out signals to locate
a base station and drains the battery.
• Temporarily turn off the
tablet.
• Move the tablet in range
of a network it can
connect to, or temporarily
turn off the wireless
connection on your tablet.
• Use your tablet in airplane
mode.
Page 27

System problem
Table 5. System problem
Problems Possible causes Possible solutions
Tablet does not turn on The battery is completely
discharged.
Tablet does not turn off Press and hold the Power button
Tablet locks up Press and hold the power button
Tablet is not responding or
behaving unexpectedly
Software or feature is not
working as expected
• Driver failure
• Operating system failure
• Virus/Malware
1. Charge the tablet for at least
4 hours.
2. Press and hold the Power
button for 4 seconds.
for 11 seconds to perform a hard
shut down.
for 11 seconds to perform a hard
shut down.
1. Shut down and restart your
tablet.
2. Refresh the tablet.
3. Contact Dell’s support
service. Go to dell.com/
support or dell.com/
contactdell.
Restart your tablet. Software
updates may have been
downloaded in the background.
Swipe from the right edge of the
display to access the Charms bar
and touch Settings→ Power→
Restart to restart the tablet.
Docking station not working as
expected
• Un-dock / Re-dock your
tablet. If the issue still
continues, power cycle your
tablet on the dock.
• Try to dock your tablet with
another Dell docking station
(if available).
Touchscreen problem
Table 6. Touchscreen problem
Problems Possible causes Possible solutions
Touchscreen responds slowly or
improperly.
Protective cover prevents the
tablet from recognizing your
inputs.
• Shutdown and restart your
tablet.
• Gently wipe the display with a
clean dry cloth.
27
Page 28

• Remove any protective covers
from the touchscreen.
• If the operating system is re-
installed, make sure all the
drivers are installed.
Checking Your Wireless Network Card
You can check in Device Manager if your computer is equipped with a WLAN/WWAN card.
Windows 8
1. Click the Desktop Icon → Computer → Open Control Panel → Device Manager. If you are
prompted for an administrator password or confirmation, type the password or provide
confirmation. The Device Manager window appears.
2. Expand Network Adapters, the wireless network will be listed under network adapter if available.
Also depending on what you selected when you purchased your computer, the computer has a variety of
configurations. To determine your computer configuration, see one of the following:
• Your order confirmation
• Microsoft Windows Help and Support Center
• Under Tools, click My Computer Information → Find information about the hardware installed on
this computer.
To check your Mobile Broadband card in the Windows Help and Support Center:
1. Click Start → Help and Support→ Use Tools to view your computer information and diagnose
problems.
On the My Computer Information - Hardware screen, you can view the type of Mobile Broadband card
installed in your computer as well as other hardware components.
Network problem
Table 7. Network problems
Problems Possible causes Possible solutions
No wireless connection
1. Check if the wireless radio is
on. See Wi-Fi setting.
2. Try to get closer to the
wireless access point.
3. Try to connect to another
known wireless access
point.
4. Reset the wireless router if
using a private network;
open the browser to view
the landing page if using a
public network.
5. Contact your internet
service provider for help.
28
Page 29

No mobile broadband
connection
• The mobile broadband has
been capped.
• No signal from the service
provider.
1. Check if the mobile
broadband is turned on. See
Mobile broadband setting.
2. Move your tablet to a
different location for better
signal reception.
Contact your service provider to
change your broadband plan.
29
Page 30

8
System Setup
System Setup enables you to manage your computer hardware and specify BIOS‐level options. From the
System Setup, you can:
• Change the NVRAM settings after you add or remove hardware
• View the system hardware configuration
• Enable or disable integrated devices
• Set performance and power management thresholds
• Manage your computer security
To access the system setup options (BIOS):
1. Connect your tablet to the keyboard dock or connect a USB enabled keyboard to your tablet.
2. Press the Power button to turn on your tablet or restart your tablet, if you have already turned
on your tablet.
3. Press F2 after the Dell logo appears.
NOTE: You might have to press F2 repeatedly until the Windows redirects to the system setup
options.
To access the setup options (BIOS) without an external keyboard:
1. Press the Power button to turn on your tablet or restart your tablet, if you have already turned
on your tablet.
2. Press and hold the Volume Up button when the Dell logo appears on the screen.
3. Press and hold the Volume Up button to invoke the boot selection menu.
4. Use the Volume Up to select the BIOS setup option.
NOTE: The Volume Up button cycles through the menu options (Boot Options, BIOS Setup,
Diagnostics, and so on. You can select the desired option by pressing the Volume Up button.)
System Setup (BIOS) Options
Table 8. System Information
Option Function
BIOS Version Displays the BIOS revision.
Service Tag Displays the service tag of your tablet.
Asset Tag Displays the asset tag of your tablet.
Ownership Tag Displays the ownership information.
30
Page 31

Option Function
Manufacture Date Displays the date of manufacture
Ownership Date Displays the ownership date.
Express Service Code Displays the Express Service code of the tablet.
Memory Installed Displays the memory installed on the tablet.
Memory Available Displays the memory available on the tablet.
Memory Speed Displays the memory speed.
Memory Channel Mode Displays the memory capacities on the tablet.
Memory Technology Displays new type of device file in Linux for interacting with flash
memory.
DIMM A size Displays the size of the DIMM A
DIMM B size Displays the size of the DIMM B
Processor Type Displays the processor type available on the tablet.
Core Count Displays the core count of the tablet.
Processor ID Displays the processor ID of the tablet.
Current Clock Speed Displays the current clock speed of the tablet.
Minimum Clock Speed Displays the minimum clock speed of the tablet.
Maximum Clock Speed Displays the maximum clock speed of the tablet.
Processor L2 Cache Displays the L2 cache of the tablet.
Processor L3 Cache Displays the L3 cache of the tablet.
HT Capable Displays the tablet is Hyper-Thread capable.
64–bit Technology Displays the tablet functions with 64-bit technology (Intel EM64T).
Video Controller Displays the video controller used in the tablet.
Video BIOS Version Displays the BIOS version number of the tablet.
Video Memory Displays the video memory of the tablet.
Panel Type Displays the panel type used in the tablet.
Native Resolution Displays the resolution of the tablet.
Audio Controller Displays the audio controller used in the tablet.
Wi-Fi Device Displays the Wi-Fi device in the tablet.
Cellular Device Displays the cellular device in the tablet.
Bluetooth Device Displays the Bluetooth device in the tablet.
31
Page 32

Table 9. Battery Information
Option Function
AC Adapter Displays the AC Adapter information.
Battery Status Displays the current battery status.
Battery Charge State Displays if the battery is charging/discharging.
Battery Health Displays the battery health.
Table 10. Boot Sequence
Option Function
Boot Sequence Displays the order that the BIOS searches devices when trying to find
an operating system to boot. The options are:
• Windows Boot Manager
• UEFI
Boot List Option Allows you to change the boot list option.
• Legacy
• UEFI
You can also perform other options. The options are:
• Add Boot Option — This option allows you to add a boot option
• Delete Boot Option — This option allows you to delete an existing
boot option
• View — This option allows you to view a boot option
Table 11. Advanced Boot Options
Option Function
Enable Legacy Option ROMs During the UEFI boot mode, the Enable Legacy Option ROMs option
Enable UEFI Network Stack
Table 12. Date/Time
will allow legacy option ROMs to load. This option is not allowed if
Secure Boot is enabled.
Option Function
System Date Displays the system date and allows you to change the system date.
System Time Displays the system time and allows you to change the system time.
Table 13. System Configuration
Option Function
USB Configuration Allows you to configure the integrated USB controller. The options:
• Enable Boot Support
• Enable USB3.0 Controller
• Enable External USB Port
32
Page 33

Option Function
By default, all the options are enabled.
USB PowerShare Allows you to configure the USB PowerShare feature behavior. Default:
Not enabled
Audio This field allows you to enable or disable the integrated audio
connector.
• Enable Audio. Default: Enabled
Keyboard illumination Allows you to choose the operating mode of the keyboard illumination
feature. The options are:
• Disabled. Default: Enabled
• Dim
• Bright
RGB Keyboard illumination Allows you to configure the RGB keyboard backlight feature.
Stealth Mode Control Allows you to configure the Stealth Mode Feature. The options are:
• Enable Stealth Mode
• Disable onboard LCD screen
• Disable onboard fans
• Disable GPS received
• Disable WiGig radio
• Disable onboard LEDs
• Disable onboard speakers
• Disable Bluetooth radio
• Disable WLAN radio
• Disable WWAN radio
Default: All options are enabled.
Miscellaneous Devices Allows you to enable or disable various on-board devices.
• Enable Microphone. Default: Enabled
• Enable Front Camera. Default: Enabled
• Enable Back Camera. Default: Enabled
• Enable Dedicated GPS Radio. Default: Enabled
• Enable Media Card. Default: Enabled
• Disable Media Card
Table 14. Video
Option Function
LCD Brightness Displays the panel brightness when the ambient light sensor is off.
• Brightness on Battery
• Brightness on AC
33
Page 34

Table 15. Security
Option Description
Admin Password This field lets you set, change, or delete the administrator (admin) password
(also known as the setup password). The admin password enables several
security features.
The drive does not have a password set by default.
To add a new password:
• Enter the old password
• Enter the new password
• Confirm the new password
Click OK after entering the password details.
System Password Allows you to set, change, or delete the tablet password (previously called
the primary password).
The drive does not have a password set by default.
To add a new password:
• Enter the old password
• Enter the new password
• Confirm the new password
Click OK after entering the password details.
Internal HDD Password Allows you to set, change, or delete the password on the tablet’s internal
hard-disk drive.
NOTE: Successful password changes take effect immediately.
Default Setting: Not set
Strong Password
Enable strong password - This option is disabled by default.
Password Configuration This field controls the minimum and maximum number of characters
allowed for the admin and system passwords. Changes to these fields are
not active until they are committed via the apply button or saving changes
before exiting setup.
• Admin Password Min
• Admin Password Max
• System Password Min
• System Password Max
Password Bypass This option lets you bypass the system (Boot) Password and the internal
HDD password prompts during a system restart.
• Disabled
• Reboot Bypass (Default Enabled)
Password Change Allows you to determine whether changes to the system and hard disk
passwords are permitted when an administrator password is set.
34
Page 35

Option Description
• Allow Non-Admin Password Changes (Default)
Non-Admin Setup
Changes
This option lets you determine whether changes to the setup options are
permitted when an administrator password is set.
• Allow Wireless Switch Changes (Default)
TPM Security This option lets you control whether the Trusted Platform Module (TPM) in
the system is enabled and visible to the operating system.
TPM Security (Default)
• TPM ACPI Support
• Deactivate
• Activate
NOTE: Activation, deactivation, and clear options are not affected if
you load the setup program's default values. Changes to this option
take effect immediately.
Computrace (R) This field lets you activate / de-activate or disable the BIOS module
interface of the optional Computrace Service from Absolute Software.
• Deactivate (Default)
• Disable
• Activate
CPU XD Support This option enables or disables the Execute Disable mode of the Processor.
• Enable CPU XD Support (Default Enable)
OROM Keyboard Access This option determines whether you are able to enter Option ROM
Configuration screen through hotkeys, during the system boot. The options
are:
• Enable. Default: Enabled
• One Time Enable
• Disable
Admin Setup Lockout Allows you to enable or disable the option to enter setup when an admin
password is set.
• Enable Admin Setup Lockout (Default)
Table 16. Secure Boot
Option Function
Secure Boot Allows you to enable or disable the secure boot feature. Default :
Disabled
Expert Key Management Allows you to manipulate the security key databases only if the system
is in Custom Mode. The Enable Custom Mode option is disabled by
default. The options are:
• PK
• KEK
35
Page 36

Option Function
• db
• dbx
If you enable the Custom Mode, the relevant options for PK, KEK, db,
and dbx appear. The options are:
• Save to File- Saves the key to a user-selected file
• Replace from File- Replaces the current key with a key from a userselected file
• Append from File- Adds a key to the current database from a userselected file
• Delete- Deletes the selected key
• Reset All Keys- Resets to default setting
• Delete All Keys- Deletes all the keys
NOTE: If you disable the Custom Mode, all the changes made will
be erased and the keys will restore to default settings.
Table 17. Performance
Option Description
Multi Core Support Specifies whether the processor will have one or all cores enabled. The
performance of some applications will improve with the additional cores.
Intel SpeedStep Allows you to enable or disable the Intel SpeedStep mode of the processor.
• Enable Intel(R) SpeedStep (Default)
C-States Control Allows you to enable or disable the additional processor sleep states.
• C states (Default)
Intel TurboBoost Allows you to enable or disable Intel TurboBoost mode of the processor.
• Enable Intel TurboBoost (Default) — Allows the Intel TurboBoost driver
to increase the performance of the CPU or graphics processor.
HyperThread control Allows you to enable or disable the HyperThreading in the processor.
Default: Enabled
Table 18. Power Management
Option Description
AC Behavior Allows the tablet to power-on automatically, when AC adapter is plugged.
The option is disabled.
• Wake on AC
Auto On Time Allows you to set the time at which the system must turn on
automatically. The options are:
• Disabled (Default)
• Every Day
• Weekdays
36
Page 37

Option Description
• Select Days
USB Wake Support Allows you to enable the USB devices to wake the system from standby.
This option is disabled by default.
Wake on LAN/WLAN Allows you to power on the system from the off-state, when triggered by
a special LAN signal or from the hibernate state, when triggered by a
special wireless LAN signal. The options are:
• Disabled (Default)
• LAN Only
• WLAN Only
• LAN or WLAN
Peak Shift Allows you to minimize the AC power usage during the peak hours. This
option is disabled by default.
Advanced Battery Charge
Configuration
Primary Battery Charge
Configuration
Dock Battery Charger
Mode
Table 19. POST Behavior
This option places batteries in the system advanced battery charging
mode to maximize battery health.
• Monday
• Tuesday
• Wednesday
• Thursday
• Friday
• Saturday
• Sunday
• Adaptive
• Standard
• ExpressCharge
• Primary AC Use
• Custom
NOTE: Some of the battery settings may not be available for all
battery types. To enable this option, you should disable the Advanced
Battery Charge Configuration Mode.
• Standard
• ExpressCharge
Option Description
Adapter Warnings Allows you to activate the adapter warning messages when certain power
adapters are used. The option is enabled by default.
• Enable Adapter Warnings
MEBx Hotkey Allows you to specify whether the MEBx Hotkey function should be
enabled when the system boots. This option is enabled by default.
37
Page 38

Option Description
Fastboot This option can speed up the boot process by bypassing some
compatibility steps.
• Minimal
• Thorough
• Auto (Default Enable)
NOTE: Enabling the Fastboot will prevent F2 BIOS access through
USB or Thin / Travel keyboard. You can still access the BIOS Setup,
by pressing the Volume Up button after the Dell logo screen
appears.
Extended BIOS POST Time Allows you to create an additional pre-boot delay. The options are:
• 0 seconds. This option is enabled by default.
• 5 seconds
• 10 seconds
Table 20. Virtualization Support
Option Description
Virtualization This option specifies whether a Virtual Machine Monitor (VMM) can utilize
the additional hardware capabilities provided by Intel Virtualization
technology.
• Enable Intel Virtualization Technology (Default)
VT for Direct I/O This option specifies whether a Virtual Machine Monitor (VMM) can utilize
the additional hardware capabilities provided by Intel Virtualization
Technology for Direct I/O.
• Enable VT for Direct I/O (Default)
Trusted Execution This option specifies whether a Measured Virtual Machine Monitor
(MVMM) can utilize the additional hardware capabilities provided by Intel
Trusted Execution Technology. Default: disabled
Table 21. Wireless
Option Description
Wireless Device Enable Allows you to enable or disable the wireless devices
• WWAN (Default Enable)
• WLAN / WiGig
Table 22. Maintenance
Option Description
Service Tag Displays the service tag of your tablet.
Asset Tag Allows you to create a system asset tag if an asset tag is not already set.
This option is not set by default.
38
Page 39

Option Description
BIOS Downgrade Allows you to control flashing of the system firmware to the previous
versions. This option is enabled by default.
Table 23. System Logs
Option Description
BIOS events Displays the system event log and allows you to clear the log.
• Clear Log
Thermal events Allows you to view and clear the thermal events log.
• Clear Log
Power events Displays the power event log and allows you to clear the log.
• Clear Log
Updating the BIOS
It is recommended to update your BIOS (system setup), on replacing the system board or if an update is
available. For tablet, ensure that the battery is fully charged and connected to a power outlet.
1. Restart the tablet.
2. Go to dell.com/support.
3. Enter the Service Tag or Express Service Code and click Submit.
NOTE: To locate the Service Tag, click Where is my Service Tag?
NOTE: If you cannot find your Service Tag, click Detect My Product. Proceed with the
instructions on screen.
4. If you are unable to locate or find the Service Tag, you can select your product from the products list
under the
5. Choose the Product Type from the list.
6. Select your product model and the Product Support page of your product appears.
7. Click Get Drivers and click View All Drivers.
The Drivers and Downloads page opens.
8. On the Drivers and Downloads screen, under the Operating System drop-down list, select BIOS.
9. Identify the latest BIOS file and click Download File.
You can also analyze which drivers need an update. To do this for your product, click Analyze
System for Updates and follow the instructions on the screen.
10. Select your preferred download method in the Please select your download method below
window; click Download File.
The File Download window appears.
11. Click Save to save the file on your tablet.
12. Click Run to install the updated BIOS settings on your tablet.
Follow the instructions on the screen.
General Support.
39
Page 40

Specifications
NOTE: Offerings may vary by region. The following specifications are only those required by law to
ship with your computer. For more information about the configuration of your computer, go to
Help and Support in your Windows operating system and select the option to view information
about your computer.
Table 24. System Information
Chipset Integrated in the CPU
DRAM bus width 128 bit (64–bits x 2 channels)
Flash EPROM 128 Mbit Quad-SPI
Table 25. Processor
Type Intel Broadwell Y SOC
External bus frequency SOC no external bus connected chipset
Table 26. Memory
Memory capacity 4 GB / 8 GB
Memory type LPDDR3
9
Memory speed 1600 MHz
Minimum memory 4 GB
Maximum memory 8 GB
Table 27. Audio
Type Side firing
Stereo conversion 24-bit
Speakers AAC 25 x 9 x 3 mm, 1 W, speaker
Table 28. Video
Video type integrated
Data bus integrated
Video controller iGPU GT2 graphics
40
Page 41

Table 29. Communications
Network adapter WLAN, LTE, HSPA+
Wireless BT, NFC
• Bluetooth 4.0 LE
NOTE: The optional I/O expansion module, if purchased with the tablet, comes equipped with an
additional Network port (Ethernet).
Table 30. Ports and Connectors
Audio one 3.5 mm jack
Video one mini HDMI connector
USB one USB 3.0 connector
Memory-card reader one microSD card reader
Docking port
• one docking port
• one WWAN RF passthrough
• one WLAN RF passthrough
Subscriber Identity Module (SIM)
one micro SIM slot
port
Smart card one smart card reader
Serial one micro serial connector
Modular Expansion one pogo pin modular expansion port
NOTE: The optional expansion dock, if purchased with the tablet comes equipped with two
additional USB 3.0 ports.
Table 31. Display
Feature Specification
Type white Light Emitting Diode (WLED) display, HD (1366 x 768)
Size 11.6 inches
Dimensions:
Height 158.5 mm (6.24 inches)
Width 268.0 mm (10.59 inches)
Diagonal 29.38 mm (1.15 inches)
Active area (X/Y) 256.12 mm×144 mm
Maximum resolution 1366 x 768 pixels
Maximum Brightness 730 nits
Operating angle 0° (closed) to 180°
Refresh rate 60 Hz
41
Page 42

Feature Specification
Minimum viewing angles:
Horizontal
• +/- 40° for HD
• +/- 60° for FHD
Vertical
• +10°/-30° for HD
• +/-50° for FHD
Pixel pitch 0.2265 mm
Table 32. Front camera
Type OV 2724 (2 MP)
Resolution 1366 x 768 pixels
Table 33. Rear camera
Type IMX 134 (8 MP)
Resolution 3264 pixels x 2448 pixels
Table 34. Storage
Storage M.2 SSD 128 GB / 256 GB / 512 GB
Table 35. Battery
Type 2-cell lithium ion (26 WHr)
Dimensions
Length 103.60 mm (4.08 inches)
Height 15.00 mm (0.59 inch)
Width 62.70 mm (2.47 mm)
Weight 145.50 g (typical) (0.32 lb)
Voltage
• 7.4 VDC (nominal)
• 8.7 VDC (maximum)
Temperature range
Operating 0 °C to 50 °C (32° F to 158 °F)
Non-Operating –20 °C to 65 °C (4 °F to 149 °F)
Coin-cell battery 3 V CR2025 lithium ion
Table 36. AC Adapter
Type
Input voltage 100 VAC to 240 VAC
42
Page 43

Input current (maximum) 0.60 A
Input frequency 50 Hz to 60 Hz
Output power 45 W
Output current (45 W) 2.31 A
Rated output voltage 19.5 VDC
Temperature range:
Operating 0 °C to 40 °C (32 °F to 104 °F)
Non-operating –40 °C to 70 °C (–40 °F to 158 °F)
Table 37. Physical
Typical
Width 312.20 mm (12.29 inches)
Height 203.00 mm (7.99 inches)
Thickness 24.40 mm (0.96 inch)
Maximum
Width 318.20 mm (12.53 inches)
Height 209.00 mm (8.23 inches)
Thickness 28.90 mm (1.14 inches)
Weight (minimum) 1620 grams (3.57 lb)
Table 38. Environmental
Temperature:
Operating -29 °C to 63 °C
Storage -51 °C to 71 °C
Relative humidity (maximum):
Operating Operating 10% to 90% (noncondensing)
Storage Storage 5% to 95% (noncondensing)
Altitude (maximum):
Operating – 16 m to 12192 m (– 50 ft to 40000 ft)
Non-operating –15.20 m to 12192 m (–50 ft to 40,000 ft)
Airborne contaminant level G1 as defined by ISA-71.04–1985
43
Page 44

10
Contacting Dell
NOTE: If you do not have an active Internet connection, you can find contact information on your
purchase invoice, packing slip, bill, or Dell product catalog.
Dell provides several online and telephone-based support and service options. Availability varies by
country and product, and some services may not be available in your area. To contact Dell for sales,
technical support, or customer service issues:
1. Go to support.dell.com.
2. Select your support category.
3. Verify your country or region in the Choose a Country/Region drop-down list at the bottom of the
page.
4. Select the appropriate service or support link based on your need.
44
 Loading...