

Page 1

Dell™ Latitude™ 110L
Quick Reference Guide
Model PP10S
www.dell.com | support.dell.com
Page 2

Notes, Notices, and Cautions
NOTE: A NOTE indicates important information that helps you make better use of your computer.
NOTICE: A NOTICE indicates either potential damage to hardware or loss of data and tells you how to avoid the
problem.
CAUTION: A CAUTION indicates a potential for property damage, personal injury, or death.
Abbreviations and Acronyms
For a complete list of abbreviations and acronyms, see the
double-click the
and Support Center
User’s Guide
, and then click
icon on your Microsoft® Windows® desktop, or click the
User and system guides
If you purchased a Dell™ n Series computer, any references in this document to Microsoft
User’s Guide
).
(depending on your operating system,
Start
button, click
®
Windows®
Help
operating systems are not applicable.
The
Drivers and Utilities
CD and
Operating System
CD are optional and may not ship with all computers.
_________________
Information in this document is subject to change without notice.
© 2005 Dell Inc. All rights reserved.
Reproduction in any manner whatsoever without the written permission of Dell Inc. is strictly forbidden.
Trademarks used in this text: Dell, the DELL logo, and Latitude are trademarks of Dell Inc.; Microsoft and Windows are registered trademarks
of Microsoft Corporation; Intel, Celeron, and Pentium are registered trademarks of Intel Corporation.
Other trademarks and trade names may be used in this document to refer to either the entities claiming the marks and names or their products.
Dell Inc. disclaims any proprietary interest in trademarks and trade names other than its own.
Model PP10S
January 2005 P/N D8854 Rev. A00
Page 3

Contents
Finding Information . . . . . . . . . . . . . . . . . . . . . . . . . . . . . . . . 5
Setting Up Your Computer
About Your Computer
Front View
Left View
Right View
Back View
. . . . . . . . . . . . . . . . . . . . . . . . . . . . . . . . . . 11
. . . . . . . . . . . . . . . . . . . . . . . . . . . . . . . . . . 12
. . . . . . . . . . . . . . . . . . . . . . . . . . . . . . . . . . 12
. . . . . . . . . . . . . . . . . . . . . . . . . . . . . . . . . . 12
Bottom View
Using a Battery
. . . . . . . . . . . . . . . . . . . . . . . . . . . . . . . . . . 13
Battery Performance
Checking the Battery Charge
Dell™ QuickSet Battery Meter
Microsoft
Low-Battery Warning
Charging the Battery
Recalibrating a Battery
. . . . . . . . . . . . . . . . . . . . . . . . . . . . . 8
. . . . . . . . . . . . . . . . . . . . . . . . . . . . . . . 10
. . . . . . . . . . . . . . . . . . . . . . . . . . . . . . . . 13
. . . . . . . . . . . . . . . . . . . . . . . . . . . . 13
. . . . . . . . . . . . . . . . . . . . . . . . 14
. . . . . . . . . . . . . . . . . . 14
®
Windows® Power Meter . . . . . . . . . . . . . . 15
. . . . . . . . . . . . . . . . . . . . . . 15
. . . . . . . . . . . . . . . . . . . . . . . . . . . . 15
. . . . . . . . . . . . . . . . . . . . . . . . . . . 16
Recalibrating a Battery When the Recalibrating Message Appears
Recalibrating a Battery Using the System Setup Utility
Removing a Battery
Installing a Battery
Storing a Battery
Solving Problems
Notebook System Software (NSS)
Lockups and Software Problems
The computer does not start up
The computer stops responding
A program stops responding
A program crashes repeatedly
A program is designed for an earlier Microsoft
Windows
A solid blue screen appears
Other software problems
Running the Dell Diagnostics
. . . . . . . . . . . . . . . . . . . . . . . . . . . . . 17
. . . . . . . . . . . . . . . . . . . . . . . . . . . . . 18
. . . . . . . . . . . . . . . . . . . . . . . . . . . . . . 18
. . . . . . . . . . . . . . . . . . . . . . . . . . . . . . . . 18
. . . . . . . . . . . . . . . . . . . . . 18
. . . . . . . . . . . . . . . . . . . . . . 19
. . . . . . . . . . . . . . . . . 19
. . . . . . . . . . . . . . . . . 19
. . . . . . . . . . . . . . . . . . . 19
. . . . . . . . . . . . . . . . . 19
®
operating system . . . . . . . . . . . . . . . . . . 20
. . . . . . . . . . . . . . . . . . . 20
. . . . . . . . . . . . . . . . . . . . 20
. . . . . . . . . . . . . . . . . . . . . . . . 21
. . . 16
. . . . . . . . . . 17
®
Contents 3
Page 4

When to Use the Dell Diagnostics . . . . . . . . . . . . . . . . 21
Starting the Dell Diagnostics From Your Hard Drive
. . . . . . . 21
Starting the Dell Diagnostics From the Optional
Drivers and Utilities CD
Dell Diagnostics Main Menu
. . . . . . . . . . . . . . . . . . . . . 22
. . . . . . . . . . . . . . . . . . . 23
Index . . . . . . . . . . . . . . . . . . . . . . . . . . . . . . . . . . . . . . . . . 25
4 Contents
Page 5
FILE LOCATION: J:\DL\DL044469\DTP\D8854eb0.fm
Finding Information
NOTE: Some features may not be available for your computer or in certain countries.
NOTE: Additional information may ship with your computer.
What Are You Looking For? Find It Here
• A diagnostic program for my computer
• Drivers for my computer
• My computer documentation
• My device documentation
• Notebook System Software (NSS)
Drivers and Utilities CD (also known as ResourceCD)
Documentation and drivers are already installed on your
computer. You can use the CD to reinstall drivers, run the
Dell Diagnostics, or access your documentation.
Readme files may be
included on your CD to
provide last-minute
updates about technical
changes to your
computer or advanced
technical-reference
material for technicians
or experienced users.
• Warranty information
• Terms and Conditions (U.S. only)
• Safety instructions
• Regulatory information
• Ergonomics information
• End User License Agreement
DELL CONFIDENTIAL – PRELIMINARY 1/27/05 – FOR PROOF ONLY
NOTE: Drivers and documentation updates can be found at
support.dell.com.
NOTE: The Drivers and Utilities CD is optional and may not
ship with your computer.
Dell™ Product Information Guide
Quick Reference Guide 5
Page 6
FILE LOCATION: J:\DL\DL044469\DTP\D8854eb0.fm
What Are You Looking For? Find It Here
• How to remove and replace parts
• Specifications
• How to configure system settings
• How to troubleshoot and solve problems
User’s Guide
Microsoft
1
2
The User’s Guide is also available on the
Utilities
NOTE: The Drivers and Utilities CD is optional and may not
ship with your computer.
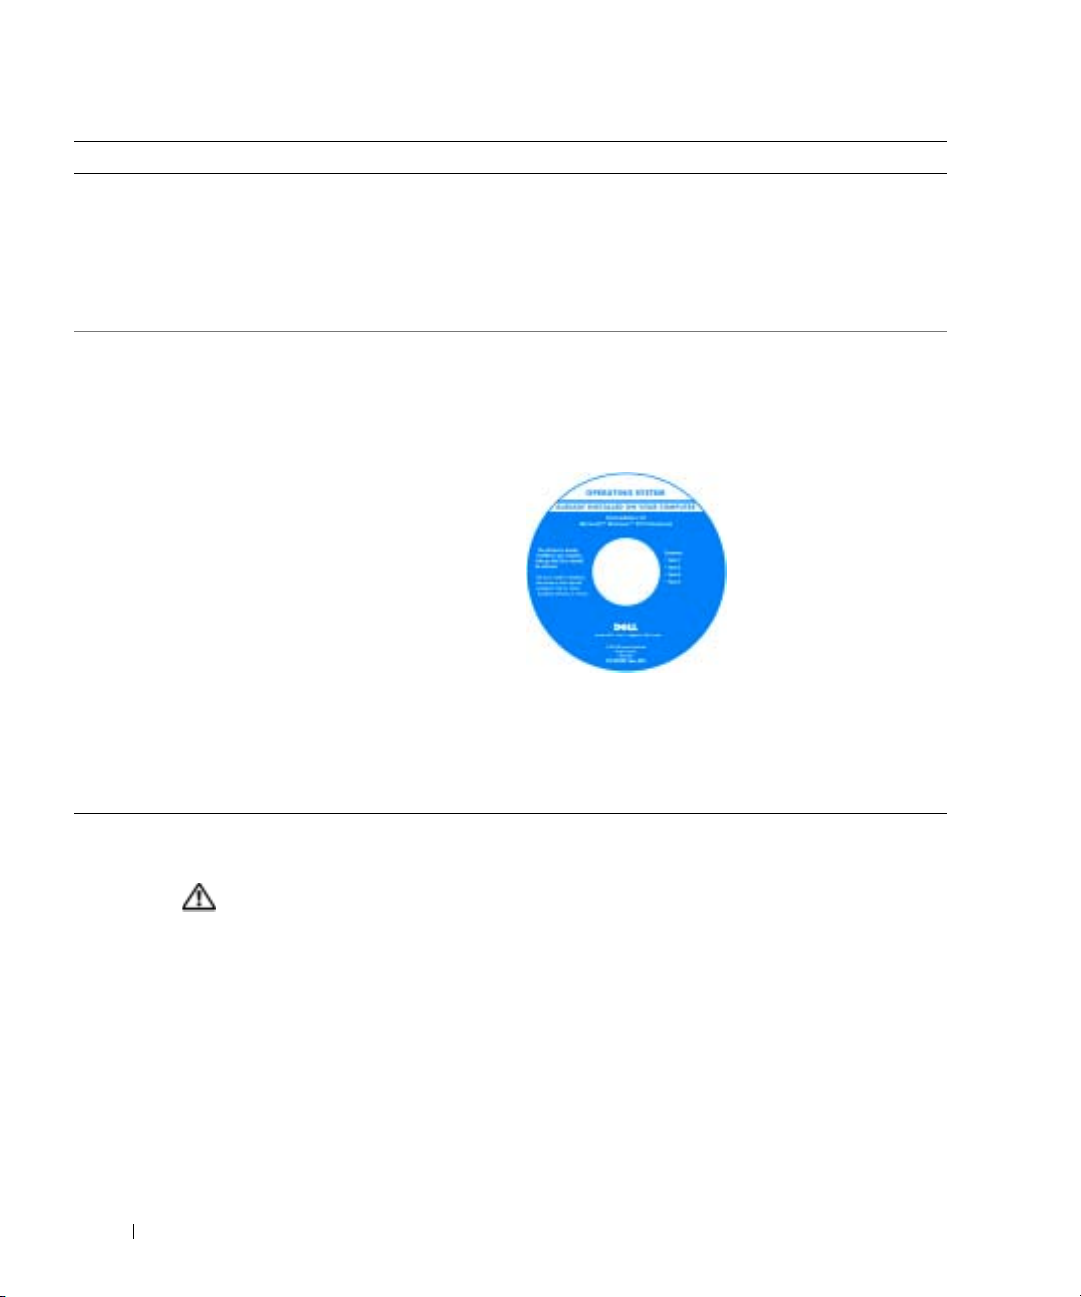
• Service Tag and Express Service Code
• Microsoft Windows License Label
www.dell.com | support.dell.com
Service Tag and Microsoft Windows License
These labels are located on
• Use the Service Tag to
• Enter the Express Service Code to direct your call when
®
Windows® XP Help and Support Center
Click the
Click
Start
button and click
User’s and system guides
Help and Support
and click
User’s guides
.
.
Drivers and
CD
.
the bottom of
your computer.
identify your
computer when you
support.dell.com
use
or contact technical
support.
contacting technical support. The Express Service Code
may not be available in certain countries.
DELL CONFIDENTIAL – PRELIMINARY 1/27/05 – FOR PROOF ONLY
6 Quick Reference Guide
Page 7

FILE LOCATION: J:\DL\DL044469\DTP\D8854eb0.fm
What Are You Looking For? Find It Here
• Solutions — Troubleshooting hints and tips, articles
from technicians, online courses, frequently asked
questions
• Community — Online discussion with other Dell
customers
• Upgrades — Upgrade information for components, such
as memory, the hard drive, and the operating system
Dell Support Website — support.dell.com
NOTE: Select your region to view the appropriate
support site.
NOTE: Corporate, government, and education customers
can also use the customized Dell Premier Support website
at premier.support.dell.com. The website may not be
available in all regions.
• Customer Care — Contact information, service call and
order status, warranty, and repair information
• Service and support — Service call status and support
history, service contract, online discussions with
technical support
• Reference — Computer documentation, details on my
computer configuration, product specifications, and
white papers
• Downloads — Certified drivers, patches, and software
updates
• Notebook System Software (NSS)— If you reinstall the
operating system for your computer, you should also
reinstall the NSS utility. NSS provides critical updates
for your operating system and support for Dell™
3.5-inch USB floppy drives, Intel
processors, Intel Celeron
®
®
Pentium®M
M processors, optical drives,
and USB devices. NSS is necessary for correct operation
of your Dell computer. The software automatically
detects your computer and operating system and installs
the updates appropriate for your configuration.
To download Notebook System Software:
1. Go to
support.dell.com
and click
Downloads
2. Enter your Service Tag or product model.
3. In the
All
Download Category
.
drop-down menu, click
4. Select the operating system and operating system
language for your computer, and click
5. Under Select a Device, scroll to
Configuration Utilities
System Software
, and click
.
DELL CONFIDENTIAL – PRELIMINARY 1/27/05 – FOR PROOF ONLY
Submit
System and
Dell Notebook
.
.
Quick Reference Guide 7
Page 8
FILE LOCATION: J:\DL\DL044469\DTP\D8854eb0.fm
What Are You Looking For? Find It Here
• How to use Windows XP
• Documentation for my computer
• Documentation for devices (such as a modem)
• How to reinstall my operating system
www.dell.com | support.dell.com
Windows Help and Support Center
1
2
3
4
Operating System CD
The operating system is already installed on your
computer. To reinstall your operating system, use the
Operating System CD. See your User’s Guide for
instructions.
Click the
Type a word or phrase that describes your problem and
click the arrow icon.
Click the topic that describes your problem.
Follow the instructions on the screen.
Start
button and click
Help and Support
After you reinstall your
operating system, use the
Drivers and Utilities
to reinstall drivers for the
devices that came with
your computer.
Your operating system
product key label is
located on your
computer.
.
CD
Setting Up Your Computer
CAUTION: Before you perform the following procedures, see the safety instructions in the Product
Information Guide.
1
Unpack the accessories box.
2
Set aside the contents of the accessories box, which you will need to complete your computer
setup.
The accessories box also contains user documentation and any software or additional
hardware (such as PC Cards, drives, or batteries) that you have ordered.
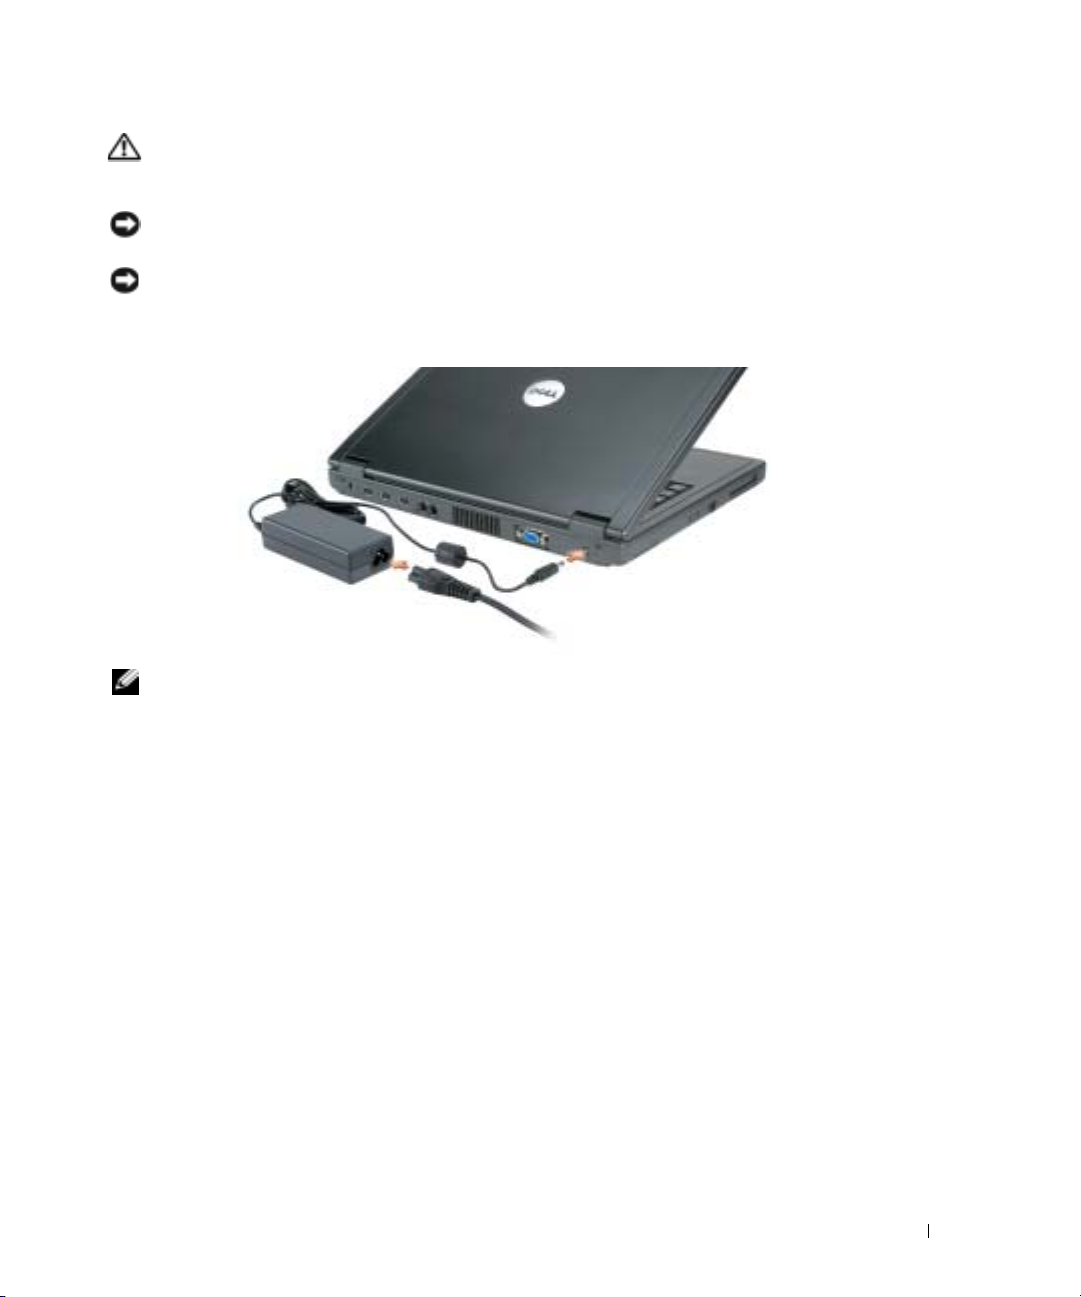
3
Connect the AC adapter to the AC adapter connector on the computer and to the electrical
outlet.
DELL CONFIDENTIAL – PRELIMINARY 1/27/05 – FOR PROOF ONLY
8 Quick Reference Guide
NOTE: The color of your CD varies based on the operating
system you ordered.
NOTE: The Operating System CD is optional and may not
ship with your computer.
Page 9
FILE LOCATION: J:\DL\DL044469\DTP\D8854eb0.fm
CAUTION: The AC adapter works with electrical outlets worldwide. However, power connectors and
power strips vary among countries. Using an incompatible cable or improperly connecting the cable to
the power strip or electrical outlet may cause fire or equipment damage.
NOTICE: When using the AC adapter, secure the cable so that the cable is not pulled, tangled, stepped
on, or crushed by objects such as chair legs or desk supports.
NOTICE: When you disconnect the AC adapter cable from the computer, grasp the connector, not the
cable itself, and pull firmly but gently to avoid damaging the cable. When you wrap the AC adapter cable,
ensure that you follow the angle of the connector on the AC adapter to avoid damaging the cable.
NOTE: Do not connect the computer to the USB port replicator until the computer has been turned on
and shut down at least once.
4
Open the computer display and press the power button to turn on the computer.
DELL CONFIDENTIAL – PRELIMINARY 1/27/05 – FOR PROOF ONLY
Quick Reference Guide 9
Page 10
FILE LOCATION: J:\DL\DL044469\DTP\D8854eb0.fm
www.dell.com | support.dell.com
About Your Computer
See your online
(depending on your operating system), either double-click the
click the
following items address some of the more commonly asked questions about the computer.
•
•
Start
Modem and network adapter:
Ethernet network adapter on the system board. For connector locations, see "Back View" on
page 12. For more information on ports and connectors, see "About Your Computer" in your
online
User’s Guide
Battery life and usage:
certain types of operations, such as extended wireless operation, can significantly reduce
battery life and operating time.
For more information about battery performance and usage, see "Using a Battery" on page 13.
User’s Guide
button, click
.
power button
for detailed information about your computer. To access the
Help and Support Center
User’s Guide
, and then click
icon on your desktop, or
User and system guides
User’s Guide
. The
The computer may include both a v.90 56K modem and a 10/100
Various batteries are available for use with your computer. Performing
For more information about conserving power, see your
DELL CONFIDENTIAL – PRELIMINARY 1/27/05 – FOR PROOF ONLY
10 Quick Reference Guide
User’s Guide
.
Page 11
FILE LOCATION: J:\DL\DL044469\DTP\D8854eb0.fm
•
Port Replicator:
NOTE: Docking devices may not be available in all countries.
Your computer supports the USB Mobile Advanced port replicator.
– For information on your optional docking device, see the documentation that
accompanied the device.
– For information on obtaining optimal performance when using a docking device with this
computer, see "Solving Problems" in your
User’s Guide
.
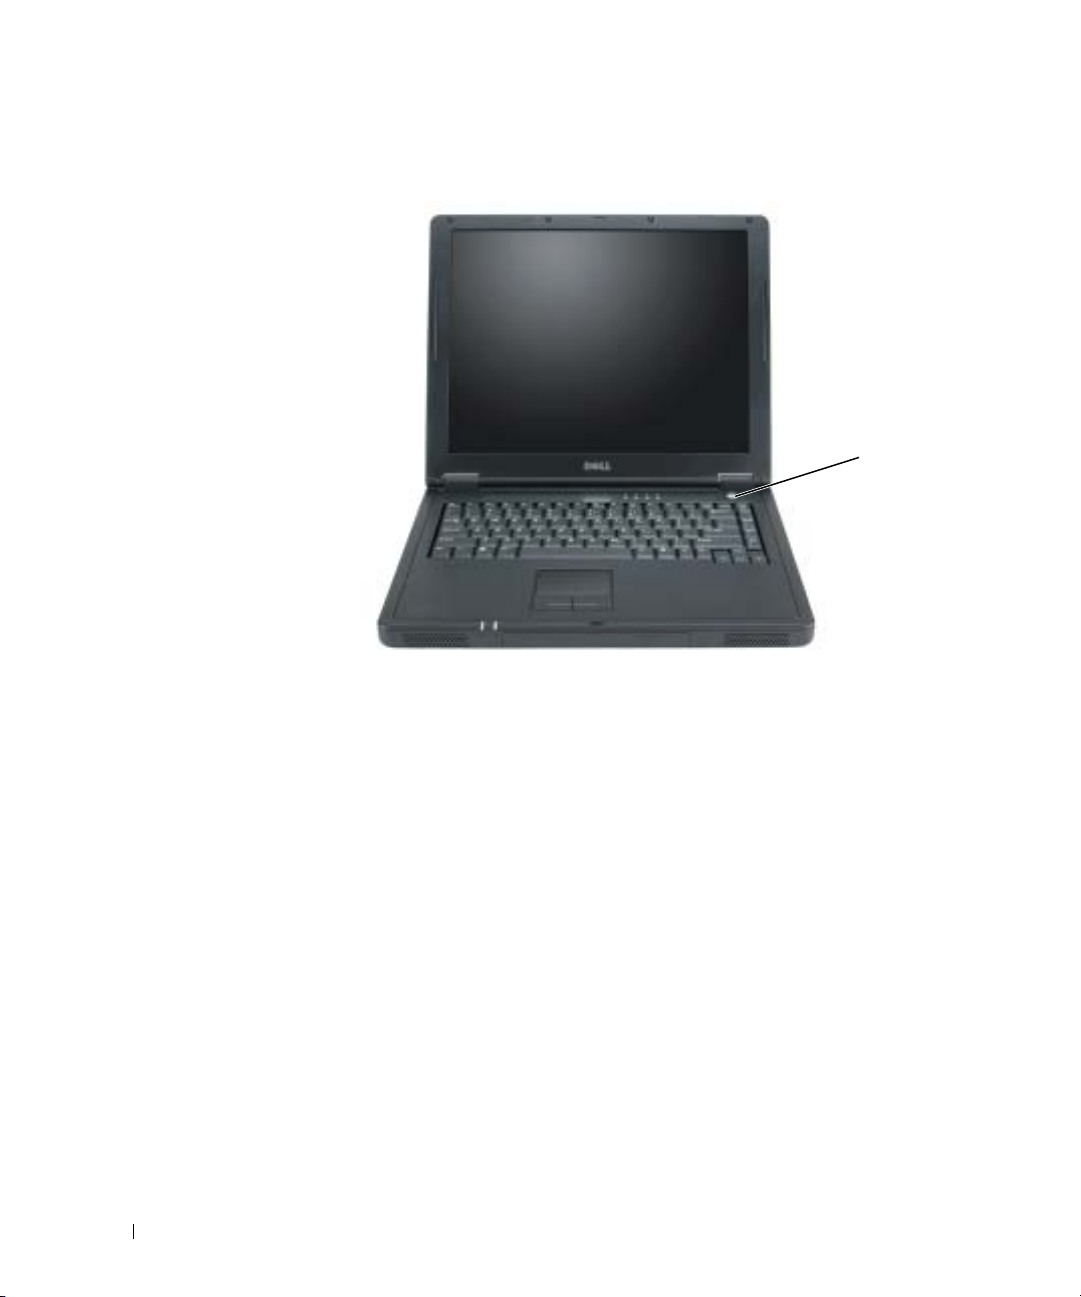
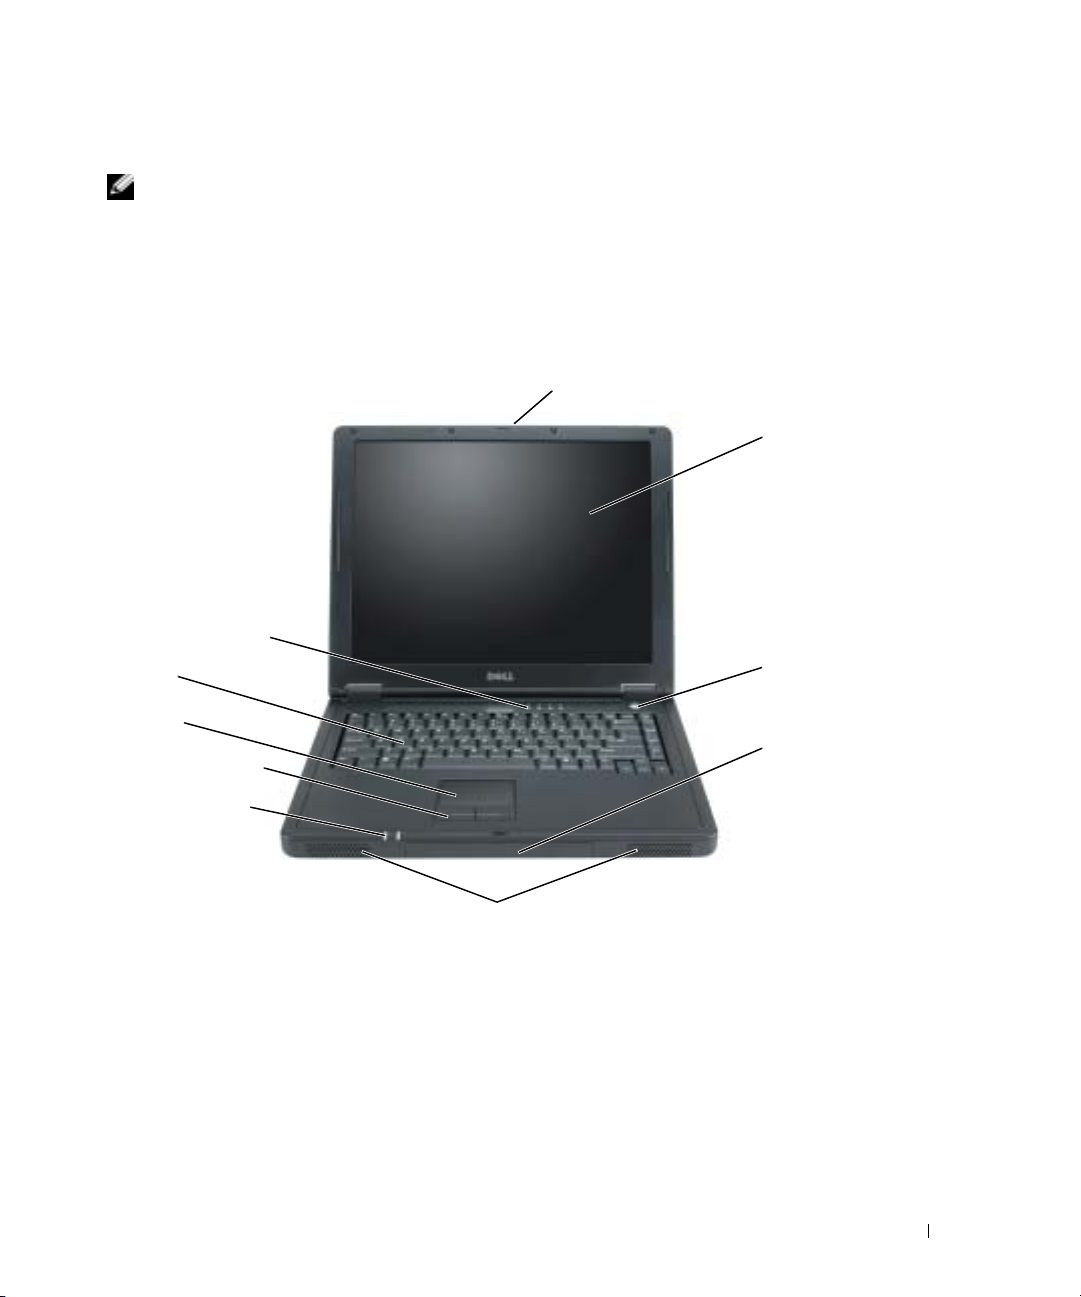
Front View
display latch release
display
hard drive and
keyboard status lights
keyboard
power button
touch pad
touch pad buttons (2)
device status lights
hard drive
speakers (2)
DELL CONFIDENTIAL – PRELIMINARY 1/27/05 – FOR PROOF ONLY
Quick Reference Guide 11
Page 12
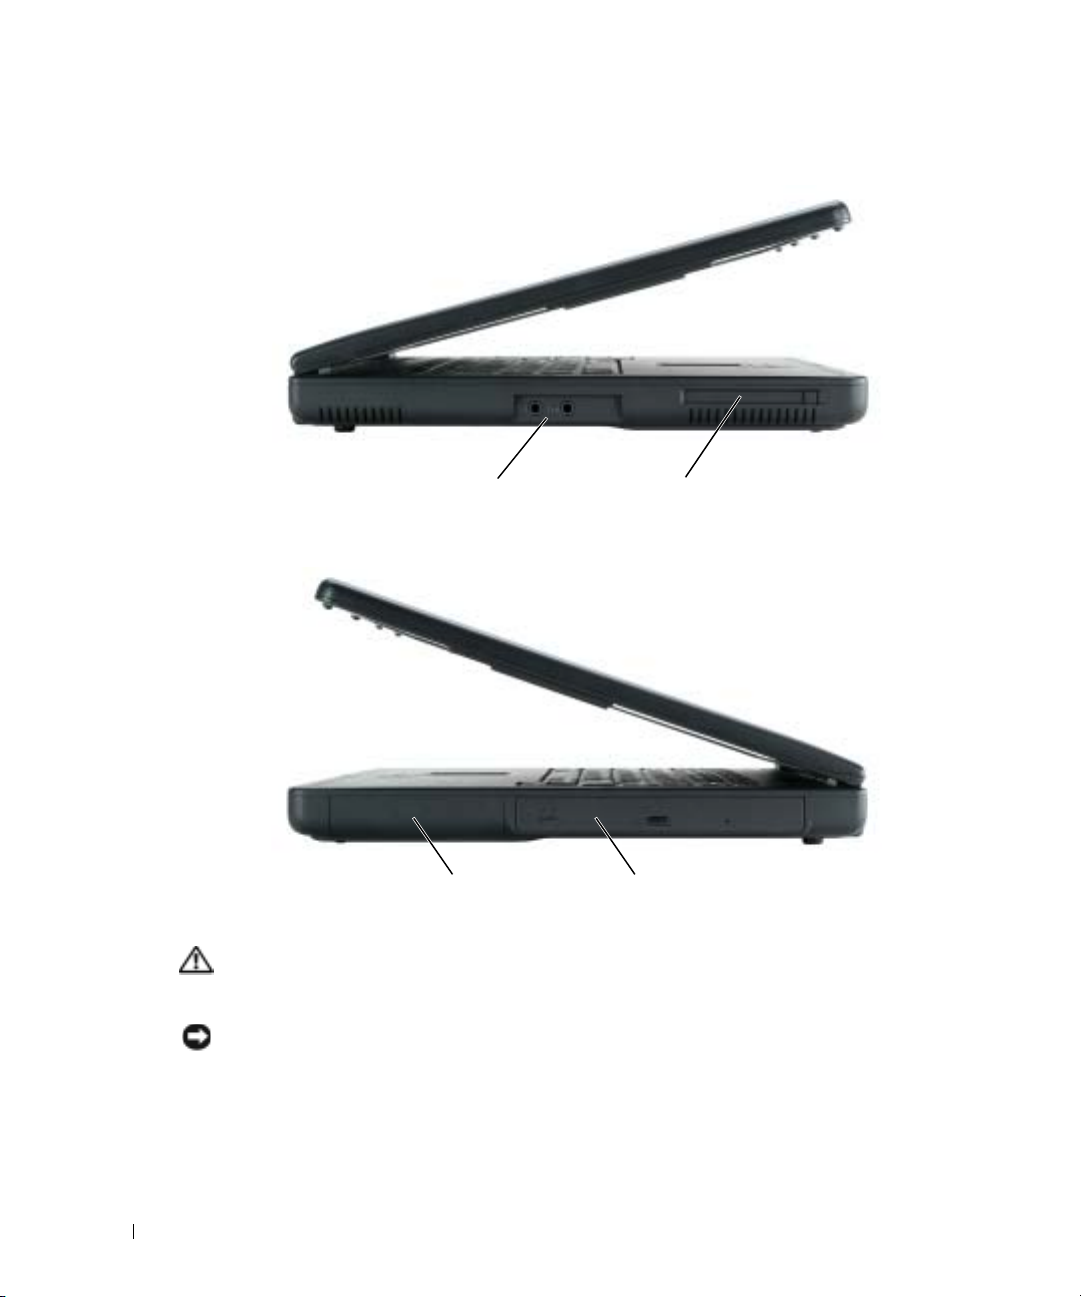
Left View
www.dell.com | support.dell.com
Right View
FILE LOCATION: J:\DL\DL044469\DTP\D8854eb0.fm
audio connectors (2) PC Card slot
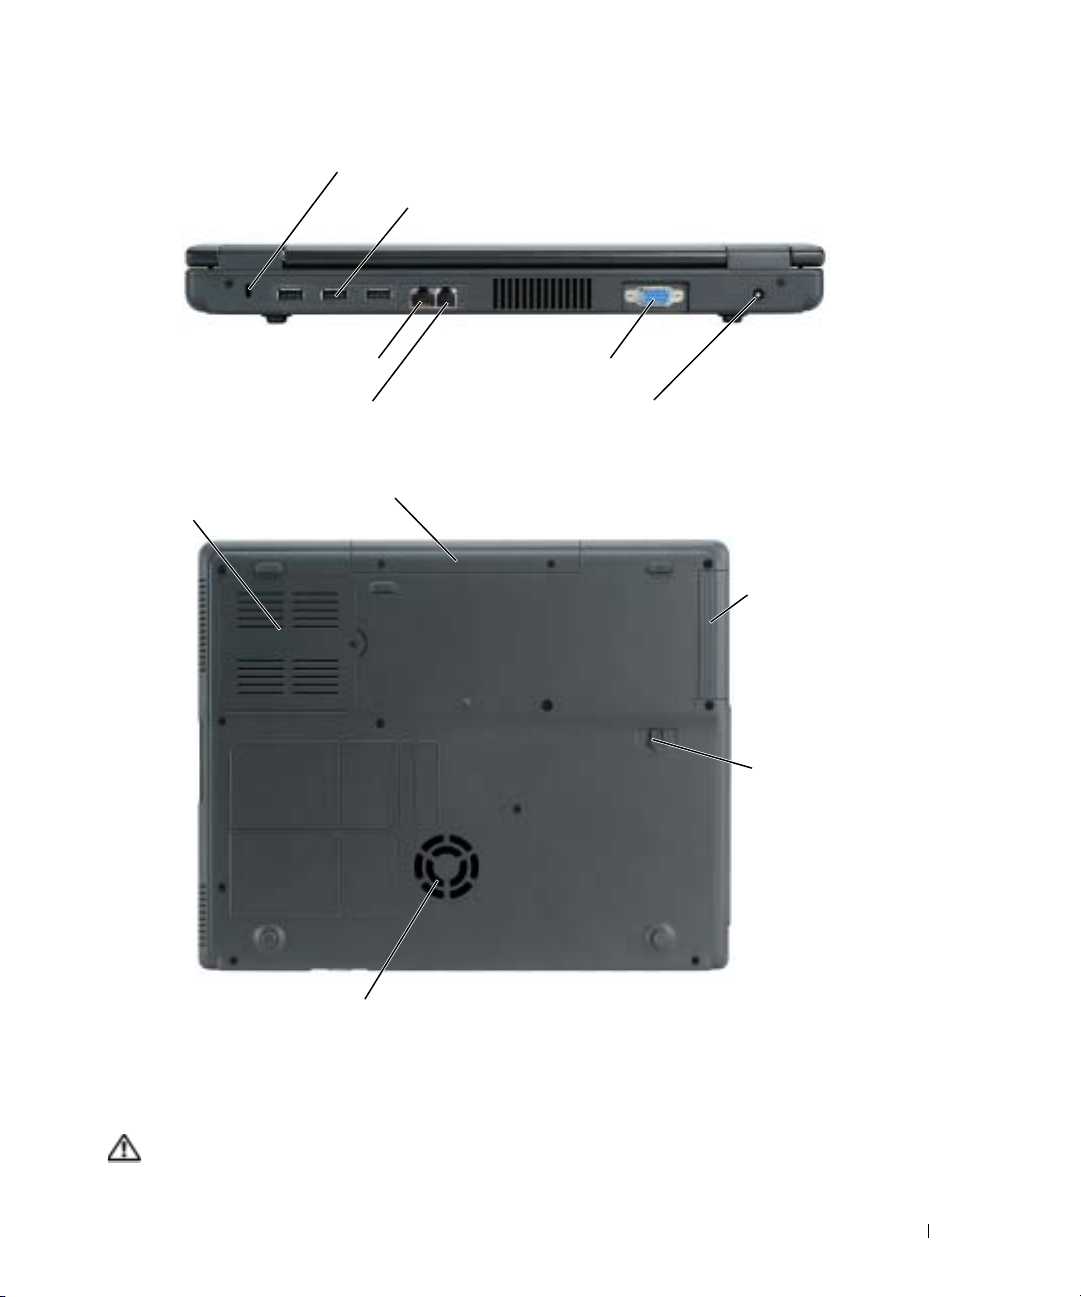
Back View
CAUTION: Do not block, push objects into, or allow dust to accumulate in the air vents. Do not store
your computer in a low-airflow environment, such as a closed briefcase, while it is running. Restricting
the airflow can damage the computer or cause a fire.
NOTICE: To avoid damaging the computer, wait 5 seconds after you turn off the computer before you
disconnect an external device.
DELL CONFIDENTIAL – PRELIMINARY 1/27/05 – FOR PROOF ONLY
12 Quick Reference Guide
battery optical drive
Page 13
FILE LOCATION: J:\DL\DL044469\DTP\D8854eb0.fm
security cable slot
USB connectors (3)
network connector (RJ-45)
modem connector (RJ-11)
Bottom View
memory module
cover
video connector
AC adapter connector
hard drive
battery
battery-bay
latch release
fan
Using a Battery
Battery Performance
CAUTION: Before you perform the following procedures, see the safety instructions in the Product
Information Guide.
DELL CONFIDENTIAL – PRELIMINARY 1/27/05 – FOR PROOF ONLY
Quick Reference Guide 13
Page 14
NOTE: For more information about the Dell warranty for your computer, see the Product Information
Guide or separate paper warranty document that shipped with your computer.
For optimal computer performance and to help preserve BIOS settings, operate your Dell™
computer with the battery installed at all times. Use a battery to run the computer when it is not
connected to an electrical outlet. One battery is supplied as standard equipment in the battery bay.
Battery operating time varies depending on operating conditions.
NOTE: Battery operating time (the time it can hold a charge) decreases over time. Depending on how
often the battery is used and the conditions under which it is used, you may need to purchase a new
battery during the life of your computer.
Operating time is significantly reduced when you perform operations including, but not limited to,
the following:
www.dell.com | support.dell.com
• Using optical drives, such as DVD or CD drives
• Using wireless-network communications devices, PC Cards, or USB devices
• Using high-brightness display settings, 3D screen savers, or other power-intensive programs
such as 3D games
• Running the computer in maximum performance mode
NOTE: It is recommended that you connect your computer to an electrical outlet when it is writing to a
CD or DVD.
CAUTION: Using an incompatible battery may increase the risk of fire or explosion. Replace the
battery only with a compatible battery purchased from Dell. The lithium-ion battery and the NiMH are
designed to work with your Dell computer. Do not use a battery from other computers with your
computer.
FILE LOCATION: J:\DL\DL044469\DTP\D8854eb0.fm
CAUTION: Do not dispose of batteries with household waste. When your battery no longer holds a
charge, call your local waste disposal or environmental agency for advice on disposing of a lithium-ion
or a NiMH battery. See "Battery Disposal" in the Product Information Guide.
CAUTION: Misuse of the battery may increase the risk of fire or chemical burn. Do not puncture,
incinerate, disassemble, or expose the battery to temperatures above 65°C (149°F). Keep the battery
away from children. Handle damaged or leaking batteries with extreme care. Damaged batteries may
leak and cause personal injury or equipment damage.
Checking the Battery Charge
The Dell QuickSet Battery Meter, the Microsoft® Windows®
and the low-battery warning provide information on the battery charge.
Dell™ QuickSet Battery Meter
If Dell QuickSet is installed, press <Fn><F3> to display the QuickSet Battery Meter.
Battery Meter
The
in your computer.
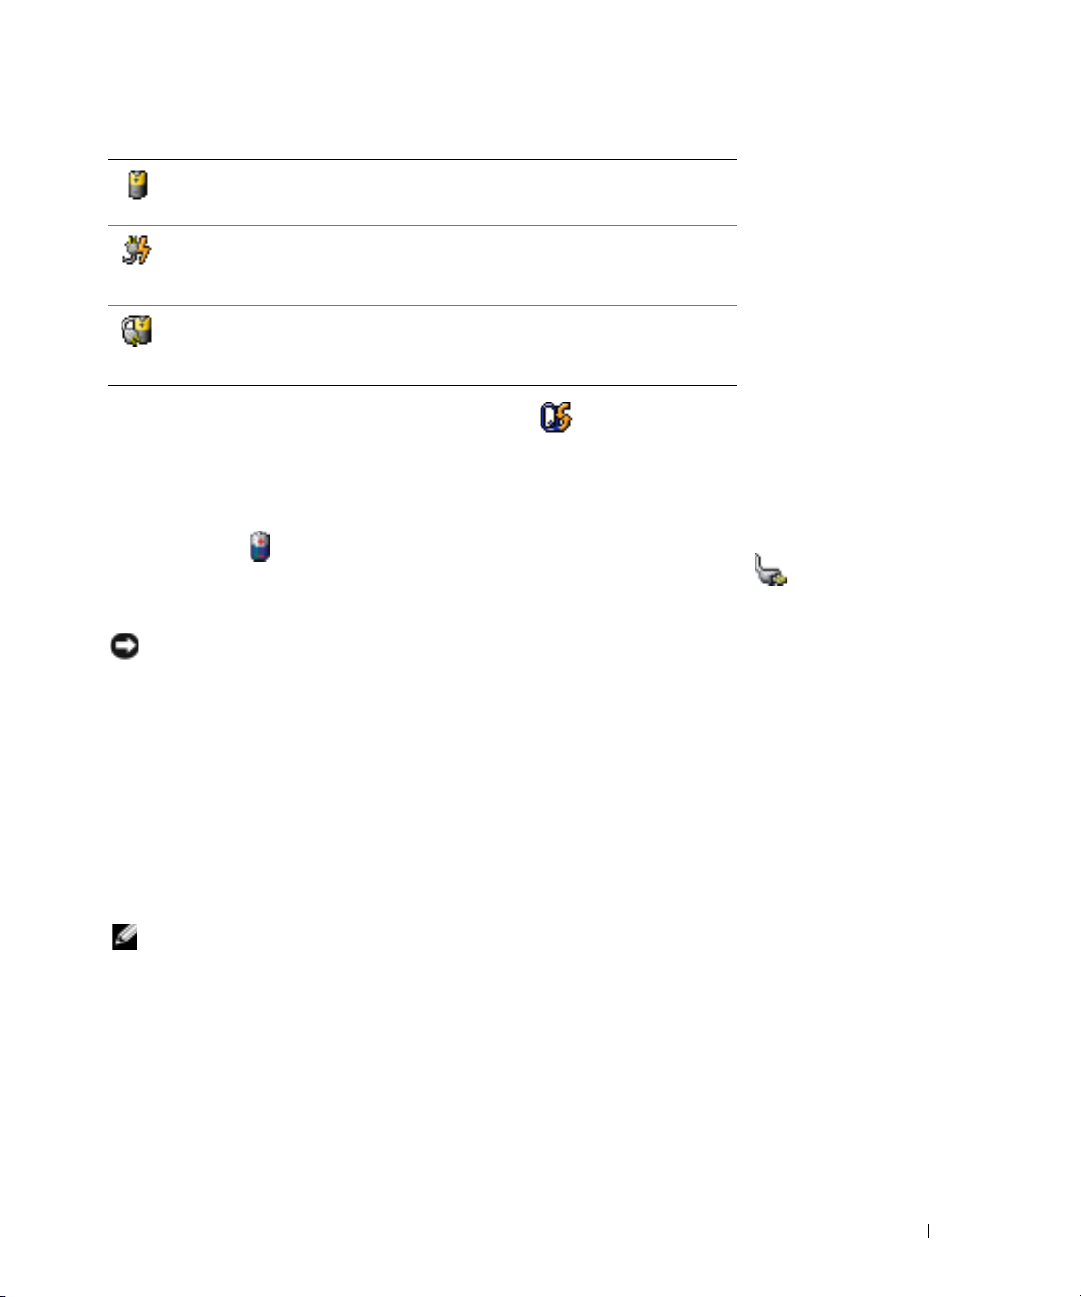
The following icons appear in the
DELL CONFIDENTIAL – PRELIMINARY 1/27/05 – FOR PROOF ONLY
14 Quick Reference Guide
Power Meter
window and icon,
window displays status, charge level, and charge completion time for the battery
Battery Meter
window:
Page 15
FILE LOCATION: J:\DL\DL044469\DTP\D8854eb0.fm
• The computer is running on battery power.
• The battery is discharging.
• The computer is connected to an electrical outlet and running on AC
power.
• The battery is charging.
• The computer is connected to an electrical outlet and running on AC
power.
• The battery is fully charged and idle.
For more information about QuickSet, right-click the icon in the notification area (located in
Help
the lower-right corner of the Windows desktop), and click
Microsoft® Windows® Power Meter
.
The Windows Power Meter indicates the remaining battery charge. To check the Power Meter,
double-click the icon in the notification area. For more information about the
tab, see your
Low-Battery Warning
NOTICE: To avoid losing or corrupting data, save your work immediately after a low-battery warning.
Then connect the computer to an electrical outlet. If the battery runs completely out of power, hibernate
mode begins automatically.
User’s Guide
. If the computer is connected to an electrical outlet, a icon appears.
Power Meter
A pop-up window warns you when the battery charge is approximately 90 percent depleted. For
more information about low-battery alarms, see your
User’s Guide
.
A low-battery warning occurs when the battery charge is approximately 90 percent depleted. The
computer beeps once, indicating that minimal battery operating time remains. During that time,
the speaker beeps periodically. The computer enters hibernate mode when the battery charge is at a
critically low level.
Charging the Battery
NOTE: The AC adapter charges a completely discharged battery in approximately 2 hours with the
computer turned off. Charge time is longer with the computer turned on. You can leave the battery in the
computer as long as you like. The battery’s internal circuitry prevents the battery from overcharging.
When you connect the computer to an electrical outlet or install a battery while the computer is
connected to an electrical outlet, the computer checks the battery charge and temperature. If
necessary, the AC adapter then charges the battery and maintains the battery charge.
If the battery is hot from being used in your computer or being in a hot environment, the battery
may not charge when you connect the computer to an electrical outlet.
DELL CONFIDENTIAL – PRELIMINARY 1/27/05 – FOR PROOF ONLY
Quick Reference Guide 15
Page 16

The battery is too hot to start charging if the light flashes alternately green and orange.
Disconnect the computer from the electrical outlet and allow the computer and the battery to cool
to room temperature. Then connect the computer to an electrical outlet to continue charging the
battery.
Recalibrating a Battery
If your computer is configured with a nickel-metal hydride (NiMH) battery, you can recalibrate the
battery by running the Battery Recalibration software. Recalibrating the battery ensures that the
Power Meter indicator is accurate.
Recalibrate your NiMh battery when one of the following occurs:
• A message appears, prompting you to recalibrate your battery.
www.dell.com | support.dell.com
• The typical battery operating time decreases.
When you recalibrate your NiMH battery, do not remove the battery. Allow several hours for the
procedure to complete.
Recalibrating a Battery When the Recalibrating Message Appears
If your computer displays a message that prompts you to recalibrate your battery:
1
Shut down the computer through the
2
Connect the computer to an electrical outlet and turn it back on.
FILE LOCATION: J:\DL\DL044469\DTP\D8854eb0.fm
Start
menu.
The battery recalibration message should appear on the screen immediately following the
DELL logo.
3
To skip the battery recalibration process and continue the system boot, press <Esc>.
4
To start the battery recalibration procedure, press <F1>.
The battery recalibration begins and the AC adapter charges the battery until the battery
gauge (shown on the Battery Info screen) states 100% charged.
A message appears, prompting you to remove the AC adapter when the battery is fully
charged.
5
When prompted, disconnect the computer from the electrical outlet.
The battery discharges until the battery gauge states 0% charged. When the battery is
completely discharged, the computer automatically turns off.
6
Connect the AC adapter to your computer.
7
Allow the AC adapter to charge the battery until the battery light turns off.
NOTE: You can operate your computer while the battery is charging. However, do not operate your
computer using battery power until the battery is fully charged.
DELL CONFIDENTIAL – PRELIMINARY 1/27/05 – FOR PROOF ONLY
16 Quick Reference Guide
Page 17

FILE LOCATION: J:\DL\DL044469\DTP\D8854eb0.fm
Recalibrating a Battery Using the System Setup Utility
1
Connect the computer to an electrical outlet.
2
Turn on (or restart) the computer.
3
When the DELL logo appears, press <F2> immediately. If you wait too long and the logo for
the Microsoft
Windows desktop. Then shut down your computer and try again.
NOTE: For information about a specific item on a system setup screen highlight the item and see the
Help area on the screen.
4
Using the down-arrow key, select
• The
Discharge
screen.
• The AC adapter begins charging the battery. The
highlighted on the left of the screen. The percent charged information is displayed on the
right of the screen.
• The AC adapter charges the battery until the battery gauge states 100% charged. The
battery light turns off after the battery is fully charged.
5
Ensure that the battery light is off.
6
Disconnect the computer from the electrical outlet.
®
Windows® operating system appears, continue to wait until you see the
Battery Info
Battery Recalibration Process
) on the left of the screen, and the
.
screen appears, showing the functions (
Battery Info
charge status on the right of the
Charge Battery to Full
Charge
option is
or
The battery discharges until the battery gauge states 0% charged. The
option is highlighted on the left of the screen. When the battery is completely
Empty
Discharge Battery to
discharged, the computer automatically turns off.
7
Connect the computer to the electrical outlet.
8
Allow the AC adapter to charge the battery until the battery light turns off.
NOTE: You can operate your computer while the battery is charging. However, do not operate your
computer using battery power until the battery is fully charged.
Removing a Battery
CAUTION: Before performing these procedures, remove all peripheral connectors such as phone cord,
network cable, external monitor cable, or USB cables and devices.
1
Ensure that the computer is turned off and disconnected from the electrical outlet.
2
If the computer is connected to the USB port replicator, disconnect it. See the
documentation that came with your USB port replicator for instructions.
DELL CONFIDENTIAL – PRELIMINARY 1/27/05 – FOR PROOF ONLY
Quick Reference Guide 17
Page 18
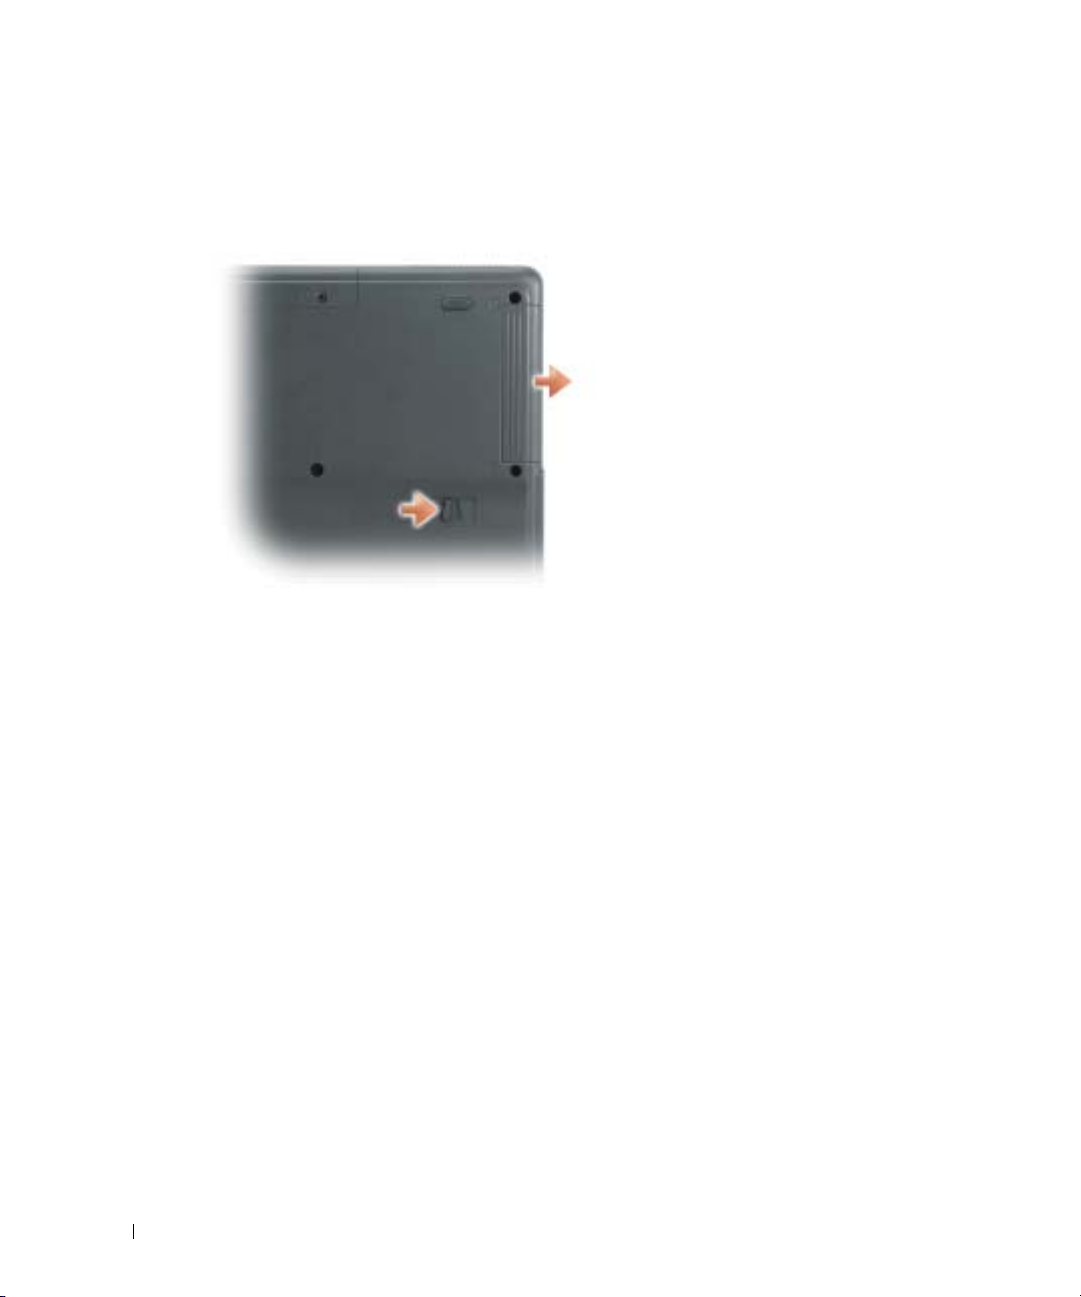
3
Slide the battery-bay latch release on the bottom of the computer, and then remove the
battery from the bay.
www.dell.com | support.dell.com
Installing a Battery
Ensure that the computer is turned off. Slide the battery into the bay until the latch release clicks.
FILE LOCATION: J:\DL\DL044469\DTP\D8854eb0.fm
Storing a Battery
Remove the battery when you store your computer for an extended period of time. A battery
discharges during prolonged storage. After a long storage period, recharge the battery fully before
you use it.
Solving Problems
Notebook System Software (NSS)
If you reinstall the operating system for your Dell™ computer, it is also recommended to reinstall
the NSS utility. The utility is available on the optional
Support website at
To download the utility, go to
from the drop-down menu. Under
Configuration Utilities
instructions.
DELL CONFIDENTIAL – PRELIMINARY 1/27/05 – FOR PROOF ONLY
18 Quick Reference Guide
Drivers and Utilities
support.dell.com
, select your operating system and language, and then follow the
.
Downloads
at
support.dell.com
Select Your Download Category
and select your computer model
, select
CD and on the Dell
System and
Page 19
FILE LOCATION: J:\DL\DL044469\DTP\D8854eb0.fm
NSS provides critical updates for your operating system and support for Dell 3.5-inch USB floppy
drives, Intel
®
Pentium®M processors, Intel Celeron®M processors, optical drives, and USB
devices. NSS is necessary for the correct operation of your Dell computer. The software
automatically detects your computer and operating system and installs the updates appropriate for
your configuration.
NOTE: NSS is critical for the correct operation of USB devices.
Lockups and Software Problems
CAUTION: Before you perform the following procedures, see the safety instructions in the Product
Information Guide.
The computer does not start up
ENSURE THAT THE AC ADAPTER IS FIRMLY CONNECTED TO THE COMPUTER AND TO THE ELECTRICAL
OUTLET
The computer stops responding
NOTICE: You might lose data if you are unable to perform an operating system shutdown.
TURN THE COMPUTER OFF — If you are unable to get a response by pressing a key on your keyboard or
moving your mouse, press and hold the power button for at least 8 to 10 seconds until the computer
turns off. Then restart your computer.
A program stops responding
END THE PROGRAM —
1
Press <Ctrl><Shift><Esc> simultaneously.
2
Click
Applications
3
Click the program that is no longer responding.
4
Click
End Task
.
.
A program crashes repeatedly
NOTE: Software usually includes installation instructions in its documentation or on a floppy or CD.
CHECK THE SOFTWARE DOCUMENTATION — If necessary, uninstall and then reinstall the program.
DELL CONFIDENTIAL – PRELIMINARY 1/27/05 – FOR PROOF ONLY
Quick Reference Guide 19
Page 20

FILE LOCATION: J:\DL\DL044469\DTP\D8854eb0.fm
A program is designed for an earlier Microsoft® Windows® operating system
IF YOU ARE USING WINDOWS XP, RUN THE PROGRAM COMPATIBILITY WIZARD — The Program
Compatibility Wizard configures a program so that it runs in an environment similar to nonWindows XP operating system environments.
1
Click the
Wizard
2
In the welcome screen, click
3
Follow the instructions on the screen.
Start
button, point to
.
All Programs→ Accessories
Next
.
, and then click
Program Compatibility
www.dell.com | support.dell.com
TURN THE COMPUTER OFF — If you are unable to get a response by pressing a key on your keyboard or
moving your mouse, press and hold the power button for at least 8 to 10 seconds until the computer
turns off. Then restart your computer.
Other software problems
CHECK THE SOFTWARE DOCUMENTATION OR CONTACT THE SOFTWARE MANUFACTURER FOR
A solid blue screen appears
TROUBLESHOOTING INFORMATION —
• Ensure that the program is compatible with the operating system installed on your computer.
• Ensure that your computer meets the minimum hardware requirements needed to run the software. See
the software documentation for information.
• Ensure that the program is installed and configured properly.
• Verify that the device drivers do not conflict with the program.
• If necessary, uninstall and then reinstall the program.
BACK UP YOUR FILES IMMEDIATELY
USE A VIRUS-SCANNING PROGRAM TO CHECK THE HARD DRIVE, FLOPPIES, OR CDS
SAVE AND CLOSE ANY OPEN FILES OR PROGRAMS AND SHUT DOWN YOUR COMPUTER THROUGH THE
MENU
Start
SCAN THE COMPUTER FOR SPYWARE — If you are experiencing slow computer performance, you
frequently receive pop-up advertisements, or you are having problems connecting to the Internet, your
computer might be infected with spyware. Use an anti-virus program that includes anti-spyware
protection (your program may require an upgrade) to scan the computer and remove spyware. For more
information, go to support.dell.com and search for the keyword spyware.
DELL CONFIDENTIAL – PRELIMINARY 1/27/05 – FOR PROOF ONLY
20 Quick Reference Guide
Page 21

FILE LOCATION: J:\DL\DL044469\DTP\D8854eb0.fm
RUN THE DELL DIAGNOSTICS — If all tests run successfully, the error condition is related to a software
problem.
Running the Dell Diagnostics
CAUTION: Before you perform the following procedures, see the safety instructions located in the
Product Information Guide.
When to Use the Dell Diagnostics
If you experience a problem with your computer, perform the checks in "Solving Problems" (see
your online
User’s Guide
assistance.
NOTICE: The Dell Diagnostics works only on Dell™ computers.
Start the Dell Diagnostics from either your hard drive or from the optional
(also known as the
Starting the Dell Diagnostics From Your Hard Drive
The Dell Diagnostics is located on a hidden diagnostic utility partition on your hard drive.
NOTE: If your computer cannot display a screen image, contact Dell.
1
Shut down the computer.
2
If the computer is connected to a docking device (docked), undock it. See the documentation
that came with your docking device for instructions.
3
Connect the computer to an electrical outlet.
4
Turn on the computer. When the DELL™ logo appears, press <F12> immediately. The
One -Time boot menu displays with a list of bootable devices.
) and run the Dell Diagnostics before you contact Dell for technical
Drivers and Utilities
ResourceCD
).
CD
NOTE: If you see a message stating that no diagnostics utility partition has been found, run the Dell
Diagnostics from your optional Drivers and Utilities CD.
If you wait too long and the operating system logo appears, continue to wait until you see the
Microsoft
5
When the boot device list appears, highlight
®
Windows® desktop. Then shut down your computer and try again.
Diagnostics
and press <Enter>.
The computer runs the Pre-boot System Assessment, a series of initial tests of your system
board, keyboard, hard drive, and display.
NOTE: If the boot device list does not display, press the <End> key and <Enter> to begin the Dell
Diagnostics.
• During the assessment, answer any questions that appear.
DELL CONFIDENTIAL – PRELIMINARY 1/27/05 – FOR PROOF ONLY
Quick Reference Guide 21
Page 22

FILE LOCATION: J:\DL\DL044469\DTP\D8854eb0.fm
• If a failure is detected, the computer stops and beeps. To stop the assessment and restart
the computer, press <n>; to continue to the next test, press <y>; to retest the
component that failed, press <r>.
• If failures are detected during the Pre-boot System Assessment, write down the error
code(s) and contact Dell before continuing on to the Dell Diagnostics.
If the Pre-boot System Assessment completes successfully, you receive the message
Dell Diagnostic Utility Partition. Press any key to continue
6
Press any key to start the Dell Diagnostics from the diagnostics utility partition on your hard
Booting
.
drive.
www.dell.com | support.dell.com
Starting the Dell Diagnostics From the Optional Drivers and Utilities CD
1
Insert the
2
Shut down and restart the computer.
When the DELL logo appears, press <F12> immediately.
If you wait too long and the Windows logo appears, continue to wait until you see the
Windows desktop. Then shut down your computer and try again.
NOTE: The next steps change the boot sequence for one time only. On the next start-up, the computer
boots according to the devices specified in system setup.
3
When the boot device list appears, highlight
4
Select the
5
Select the
6
Ty p e 1 to start the
7
Ty p e 2 to start the Dell Diagnostics.
8
Select
Run the 32 Bit Dell Diagnostics
select the version appropriate for your computer.
9
When the Dell Diagnostics
Drivers and Utilities
CD.
CD/DVD/CD-RW Drive
Boot from CD-ROM
ResourceCD
option from the menu that appears.
menu.
Main Menu
CD/DVD/CD-RW Drive
and press <Enter>.
option from the CD boot menu.
from the numbered list. If multiple versions are listed,
appears, select the test you want to run.
DELL CONFIDENTIAL – PRELIMINARY 1/27/05 – FOR PROOF ONLY
22 Quick Reference Guide
Page 23

FILE LOCATION: J:\DL\DL044469\DTP\D8854eb0.fm
Dell Diagnostics Main Menu
1
After the Dell Diagnostics loads and the
Main Menu
screen appears, click the button for the
option you want.
Option Function
Express Test Performs a quick test of devices. This test typically takes 10 to 20 minutes
and requires no interaction on your part. Run Express Test first to increase
the possibility of tracing the problem quickly.
Extended Test Performs a thorough check of devices. This test typically takes 1 hour or
more and requires you to answer questions periodically.
Custom Test Tests a specific device. You can customize the tests you want to run.
Symptom Tree Lists the most common symptoms encountered and allows you to select a
test based on the symptom of the problem you are having.
2
If a problem is encountered during a test, a message appears with an error code and a
description of the problem. Write down the error code and problem description and follow
the instructions on the screen.
If you cannot resolve the error condition, contact Dell.
NOTE: The Service Tag for your computer is located at the top of each test screen. If you contact Dell,
technical support will ask for your Service Tag.
3
If you run a test from the
Custom Test
or
Symptom Tree
option, click the applicable tab
described in the following table for more information.
Tab Function
Results Displays the results of the test and any error conditions encountered.
Errors Displays error conditions encountered, error codes, and the problem
description.
Help Describes the test and may indicate requirements for running the test.
Configuration Displays your hardware configuration for the selected device.
The Dell Diagnostics obtains configuration information for all devices from
system setup, memory, and various internal tests, and it displays the
information in the device list in the left pane of the screen. The device list
may not display the names of all the components installed on your
computer or all devices attached to your computer.
Parameters Allows you to customize the test by changing the test settings.
DELL CONFIDENTIAL – PRELIMINARY 1/27/05 – FOR PROOF ONLY
Quick Reference Guide 23
Page 24

4
When the tests are completed, if you are running the Dell Diagnostics from the
Utilities
5
When the tests are completed, close the test screen to return to the
exit the Dell Diagnostics and restart the computer, close the
www.dell.com | support.dell.com
FILE LOCATION: J:\DL\DL044469\DTP\D8854eb0.fm
CD, remove the CD.
Main Menu
Main Menu
Drivers and
screen. To
screen.
DELL CONFIDENTIAL – PRELIMINARY 1/27/05 – FOR PROOF ONLY
24 Quick Reference Guide
Page 25

Index
A
about your computer
back view, 12
bottom view, 13
front view, 11
left view, 11-12
right view, 12
B
battery
charging, 15
checking the charge, 14
installing, 18
low-battery warning, 15
performance, 13
power meter, 15
removing, 17
storing, 18
C
CD
operating system, 8
computer, 10
crashes, 19-20
slow performance, 20
stops responding, 19
D
Dell
support website, 7
Dell Premier Support
website, 5, 7
Diagnostics
Dell, 21
diagnostics
Drivers and Utilities CD, 5
documentation
device, 5
online, 7
System Information Guide, 5
User’s Guide, 6
drivers
ResourceCD, 5
Drivers and Utilities CD, 5
F
Finding Information
documentation, 5
L
labels
Microsoft Windows, 6
Service Tag, 6
M
Microsoft Windows label, 6
O
Operating System
Installation Guide, 8
operating system
CD, 8
operating system CD, 8
P
problems
blue screen, 20
computer crashes, 19-20
computer does not start up, 19
computer stops responding, 19
lockups, 19
program crashes, 19
program stops responding, 19
programs and Windows
compatibility, 20
slow computer
performance, 20
software, 19-20
solving, 18
spyware, 20
left view, 12
Index 25
Page 26

S
safety instructions, 5
Service Tag, 6
software
problems, 20
spyware, 20
U
User’s Guide, 6
W
warranty, 5
Windows XP
Program Compatibility
Wizard, 2 0
wizards
Program Compatibility
Wizard, 2 0
26 Index
Page 27

Dell™ Latitude™ 110L
Guide de référence rapide
Modèle PP10S
www.dell.com | support.dell.com
Page 28

Remarques, avis et précautions
REMARQUE : Une REMARQUE fournit des informations importantes qui vous aident à mieux utiliser votre ordinateur.
AVIS : Un AVIS vous avertit d’un risque de dommage matériel ou de perte de données et vous indique comment éviter le
problème.
PRÉCAUTION : Une PRÉCAUTION indique un risque potentiel d'endommagement du matériel, de blessure corporelle
ou de mort.
Abréviations et sigles
Pour obtenir la liste complète des abréviations et sigles, reportez-vous au
d'exploitation, double-cliquez sur l'icône
sur le bouton
Démarrer
Si vous avez acheté un ordinateur Dell™ Série n, les références du présent document concernant les systèmes
d'application Microsoft
Les CD
Drivers and Utilities
, puis sur
®
Windows® ne sont pas applicables.
Centre d'aide et de support
et
Operating System
Guide d'utilisation
sont en option et peuvent ne pas être expédiés avec tous les
du bureau Microsoft® Windows® , ou bien cliquez
, et enfin sur
Guide d'utilisation
(selon votre système
Guides d'utilisation du système
).
ordinateurs.
_________________
Les informations contenues dans ce document sont sujettes à modification sans préavis.
© 2005 Dell Inc. Tous droits réservés.
La reproduction de ce document, de quelque manière que ce soit, sans l'autorisation écrite de Dell Inc. est strictement interdite.
Marques utilisées dans ce document : Dell, le logo DELL et Latitude sont des marques de Dell Inc. ; Microsoft et Windows sont des marques
déposées de Microsoft Corporation ; Intel, Celeron et Pentium sont des marques déposées d'Intel Corporation.
D'autres marques et noms commerciaux peuvent être utilisés dans ce document pour faire référence aux entités se réclamant de ces marques
et de ces noms ou à leurs produits. Dell Inc. rejette tout intérêt propriétaire dans les marques et les noms commerciaux autres que les siens.
Modèle PP10S
Janvier 2005 Réf. D8854 Rév. A00
Page 29

Table des matières
Recherche d'informations . . . . . . . . . . . . . . . . . . . . . . . . . . . . 31
Configuration de votre ordinateur
À propos de votre ordinateur
Vue frontale
Vue de gauche
Vue de droite
Vue arrière
Vue de dessous
. . . . . . . . . . . . . . . . . . . . . . . . . . . . . . . . . 37
. . . . . . . . . . . . . . . . . . . . . . . . . . . . . . . 38
. . . . . . . . . . . . . . . . . . . . . . . . . . . . . . . . 38
. . . . . . . . . . . . . . . . . . . . . . . . . . . . . . . . . 38
. . . . . . . . . . . . . . . . . . . . . . . . . . . . . . . 39
Utilisation d'une batterie
Performances de la batterie
Vérification de la charge de la batterie
Jauge de batterie Dell™ QuickSet
Jauge d'alimentation de Microsoft
Alerte de batterie faible
Chargement de la batterie
Recalibrage d'une batterie
. . . . . . . . . . . . . . . . . . . . . . . . 34
. . . . . . . . . . . . . . . . . . . . . . . . . . 36
. . . . . . . . . . . . . . . . . . . . . . . . . . . . 39
. . . . . . . . . . . . . . . . . . . . . . . . 39
. . . . . . . . . . . . . . . . . . . 40
. . . . . . . . . . . . . . . . 40
®
Windows
. . . . . . . . . . . . . . . . . . . . . 41
. . . . . . . . . . . . . . . . . . . . . . . . . 41
. . . . . . . . . . . . . . . . . . . . . . . . . 42
Recalibrage d'une batterie lorsque le message de recalibrage
apparaît
. . . . . . . . . . . . . . . . . . . . . . . . . . . . . . . . . . . 42
Recalibrage de la batterie à l'aide de l'utilitaire de configuration
du système
Retrait de la batterie
Installation d'une batterie
Stockage de la batterie
. . . . . . . . . . . . . . . . . . . . . . . . . . . . . . . . . 43
. . . . . . . . . . . . . . . . . . . . . . . . . . . . 43
. . . . . . . . . . . . . . . . . . . . . . . . . 44
. . . . . . . . . . . . . . . . . . . . . . . . . . . 44
®
. . . . . . . . 41
Résolution des problèmes
. . . . . . . . . . . . . . . . . . . . . . . . . . . . 44
NSS (Notebook System Software)
Problèmes de blocage et problèmes logiciels
L'ordinateur ne démarre pas
L'ordinateur ne répond plus
Un programme ne répond plus
Un programme se bloque fréquemment
Un programme est conçu pour une version antérieure
du système d'exploitation Microsoft
Un écran bleu uni apparaît
Autres problèmes logiciels
. . . . . . . . . . . . . . . . . . . . . 44
. . . . . . . . . . . . . . . 45
. . . . . . . . . . . . . . . . . . . 45
. . . . . . . . . . . . . . . . . . . 45
. . . . . . . . . . . . . . . . . 45
. . . . . . . . . . . . . 45
®
Windows® . . . . . . . 46
. . . . . . . . . . . . . . . . . . . . 46
. . . . . . . . . . . . . . . . . . . 46
Table des matières 29
Page 30

Exécution de Dell Diagnostics . . . . . . . . . . . . . . . . . . . . . . . 47
Quand utiliser Dell Diagnostics
. . . . . . . . . . . . . . . . . 47
Démarrage de Dell Diagnostics à partir de votre disque
. . . . . . . . . . . . . . . . . . . . . . . . . . . . . . . . 47
dur
Démarrage de Dell Diagnostics à partir du CD Drivers and
Utilities en option
Menu principal de Dell Diagnostics
. . . . . . . . . . . . . . . . . . . . . . . . . 48
. . . . . . . . . . . . . . . 49
Index . . . . . . . . . . . . . . . . . . . . . . . . . . . . . . . . . . . . . . . . . 51
30 Table des matières
Page 31

FILE LOCATION: J:\DL\DL044469\DTP\D8854fb0.fm
Recherche d'informations
REMARQUE : Certaines fonctionnalités peuvent ne pas être disponibles sur votre ordinateur ou dans certains
pays.
REMARQUE : Il est possible que des informations supplémentaires soient livrées avec votre ordinateur.
Que recherchez-vous ? Cherchez ici.
• Un programme de diagnostic pour mon ordinateur
• Pilotes pour mon ordinateur
• La documentation de mon ordinateur
• Documentation concernant mon périphérique
• NSS (Notebook System Software)
CD Drivers and Utilities (Pilotes et utilitaires) (également
appelé CD ResourceCD)
La documentation et les pilotes sont déjà installés sur
l'ordinateur. Vous pouvez utiliser ce CD pour réinstaller
les pilotes, exécuter Dell Diagnostics, ou accéder à la
documentation.
Des fichiers Lisez-moi
peuvent être inclus sur
votre CD afin de fournir
des informations sur les
modifications
techniques apportées en
dernière minute à votre
système ou des
informations de
référence destinées aux
techniciens ou aux
utilisateurs
expérimentés.
• Informations sur les garanties
• Termes et Conditions (États-Unis uniquement)
• Consignes de sécurité
• Informations sur les réglementations
• Informations relatives à l'ergonomie
• Contrat de licence pour utilisateur final
DELL CONFIDENTIEL – PRÉLIMINAIRE 1/27/05 – POUR AVANT-PROJET SEULEMENT
REMARQUE : Les dernières mises à jour des pilotes et de
la documentation se trouvent à l'adresse support.dell.com.
REMARQUE : Le CD Drivers and Utilities est en option et
n'est pas obligatoirement expédié avec tous les
ordinateurs.
Guide d'information sur le produit Dell™
Guide de référence rapide 31
Page 32

FILE LOCATION: J:\DL\DL044469\DTP\D8854fb0.fm
Que recherchez-vous ? Cherchez ici.
• Comment retirer et remplacer des pièces
• Caractéristiques
• Comment configurer les paramètres du système
• Comment déterminer et résoudre des problèmes
Guide d'utilisation
Centre d'aide et de support Microsoft
1
Cliquez sur le bouton
support
2
Cliquez sur
Guides d'utilisation
Le Guide d'utilisation est aussi disponible sur le CD
Drivers and Utilities
REMARQUE : Le CD Drivers and Utilities est en option et
www.dell.com | support.dell.com
• Numéro de service et code de service express
• Étiquette de licence Microsoft Windows
n'est pas obligatoirement expédié avec tous les
ordinateurs.
Numéro de service et licence Microsoft Windows
Ces étiquettes sont situées sur
• Utilisez le numéro de
service pour identifier
votre ordinateur
lorsque vous accédez
au site Web
support.dell.com
lorsque vous contactez le service de support technique.
• Entrez le code de service express pour orienter votre
appel lorsque vous contactez le service de support
technique. Le code de service express n'est pas
nécessairement disponible dans tous les pays.
Démarrer
, puis sur
.
Guides d'utilisation du système
.
.
la base de
ou
®
Windows® XP
Aide et
, puis sur
votre ordinateur.
DELL CONFIDENTIEL – PRÉLIMINAIRE 1/27/05 – POUR AVANT-PROJET SEULEMENT
32 Guide de référence rapide
Page 33

FILE LOCATION: J:\DL\DL044469\DTP\D8854fb0.fm
Que recherchez-vous ? Cherchez ici.
• Solutions — Astuces de dépannage, articles de
techniciens, cours en ligne, questions fréquemment
posées
• Communauté — Discussion en ligne avec d'autres
clients Dell
• Mises à niveau — Informations sur les mises à niveau
des composants, comme la mémoire, le disque dur et le
système d'exploitation
• Service clientèle — Personnes-ressources, appels de
Site Web de support de Dell — support.dell.com
REMARQUE : Sélectionnez votre région pour afficher le
site de support approprié.
REMARQUE : Les représentants des grandes entreprises,
du gouvernement et du domaine de l'éducation peuvent
également utiliser le site Web Premier Support de Dell à
l'adresse premier.support.dell.com. Ce site Web peut ne
pas être disponible dans toutes les régions.
service et état des commandes, garanties et informations
sur les réparations
• Service et support — Historique de l'état des appels de
service et du support, contrat de service, discussions en
ligne avec le support technique
• Référence — Documentation de l'ordinateur, détails sur
la configuration de l'ordinateur, caractéristiques de
produit et livres blancs
• Téléchargements — Pilotes, correctifs et mises à jour
logicielles agréés
• NSS (Notebook System Software)— Si vous réinstallez
le système d'exploitation de votre ordinateur, vous devez
également réinstaller l'utilitaire NSS. NSS fournit des
mises à jour essentielles pour le système d'exploitation et
la prise en charge des lecteurs de disquette USB Dell™
de 3,5 pouces, des processeurs Intel
processeurs Intel
®
Celeron®M, des lecteurs optiques et
®
Pentium®M, des
des périphériques USB. NSS est requis pour le bon
fonctionnement de votre ordinateur Dell. Ce logiciel
détecte automatiquement votre ordinateur et son
système d'exploitation, et installe les mises à jour
appropriées à votre configuration.
Pour télécharger NSS :
1. Allez à l'adresse
Téléchargements
support.dell.com
.
et cliquez sur
2. Saisissez votre numéro de service ou le modèle de
l'appareil.
3. Dans le menu déroulant
catégorie
, cliquez sur
Télécharger une
All
(Toutes).
4. Sélectionnez le système d'exploitation et la langue
du système d'exploitation de votre ordinateur, puis
cliquez sur
Soumettre
.
5. Sous Select a Device (Sélectionner un
périphérique), descendez jusqu'à
et Configuration
System Software
, puis cliquez sur
(Logiciel système pour portables
Utilitaires Système
Dell Notebook
Dell).
DELL CONFIDENTIEL – PRÉLIMINAIRE 1/27/05 – POUR AVANT-PROJET SEULEMENT
Guide de référence rapide 33
Page 34

FILE LOCATION: J:\DL\DL044469\DTP\D8854fb0.fm
Que recherchez-vous ? Cherchez ici.
• Comment utiliser Windows XP
• Documentation sur mon ordinateur
• Documentation pour les périphériques (pour un
modem, par exemple)
• Comment réinstaller mon système d'exploitation
www.dell.com | support.dell.com
Centre d'aide et de support de Windows
1
Cliquez sur le bouton
support
2
Tapez un mot ou une expression qui décrit votre
problème, puis cliquez sur l'icône en forme de flèche.
3
Cliquez sur la rubrique qui décrit votre problème.
4
Suivez les instructions qui s'affichent à l'écran.
CD Operating System (système d'exploitation)
Le système d'exploitation est déjà installé sur votre
ordinateur. Pour réinstaller le système d'exploitation,
utilisez le CD Operating System. Pour des instructions
supplémentaires, reportez-vous au Guide d'utilisation.
Démarrer
.
, puis sur
Après avoir réinstallé
votre système
d'exploitation, utilisez le
CD
pour réinstaller les pilotes
des périphériques livrés
avec votre ordinateur.
L'étiquette de la Product
key (Clé de produit) de
votre système
d'exploitation se trouve
sur l'ordinateur.
Aide et
Drivers and Utilities
Configuration de votre ordinateur
PRÉCAUTION :
sécurité du Guide d'information sur le produit.
Déballez la boîte d'accessoires.
1
Mettez de côté le contenu de la boîte d'accessoires ; vous en aurez besoin ultérieurement pour
2
configurer votre ordinateur.
Cette boîte contient également la documentation utilisateur et tout autre logiciel ou matériel
supplémentaire (PC Cards, lecteurs, batteries, etc.) que vous avez commandé.
3
Reliez l'adaptateur secteur au connecteur de l'adaptateur secteur de l'ordinateur et à la prise
secteur.
DELL CONFIDENTIEL – PRÉLIMINAIRE 1/27/05 – POUR AVANT-PROJET SEULEMENT
34 Guide de référence rapide
REMARQUE : La couleur du CD varie selon le système
d'exploitation que vous avez commandé.
REMARQUE : Le CD Operating System est en option et
n'est pas obligatoirement expédié avec tous les
ordinateurs.
Avant d'effectuer les procédures suivantes, consultez et respectez les consignes de
Page 35

FILE LOCATION: J:\DL\DL044469\DTP\D8854fb0.fm
PRÉCAUTION : L'adaptateur secteur fonctionne avec les tensions secteur disponibles dans le monde
entier. Cependant, les connecteurs et les rampes d'alimentation varient selon les pays. Le fait d'utiliser
un câble incompatible, ou de mal brancher le câble aux prises peut endommager l'équipement ou
causer un incendie.
AVIS : Lorsque vous utilisez l'adaptateur secteur, vérifiez que le câble n'est pas étiré, coincé ou écrasé
par des objets tels que des pieds de chaise ou de bureau, et qu'on ne peut pas marcher dessus.
AVIS : Lorsque vous déconnectez l'adaptateur secteur de l'ordinateur, tenez le connecteur du câble de
l'adaptateur, pas le câble lui-même, et tirez dessus fermement mais sans forcer, afin d'éviter de
l'endommager. Lorsque vous enroulez le câble de l'adaptateur secteur, vérifiez que vous suivez l'angle
du connecteur de l'adaptateur secteur afin d'éviter d'endommager le câble.
REMARQUE : Ne raccordez pas l'ordinateur au réplicateur de port USB tant que l'ordinateur n'a pas été
mis sous tension et arrêté au moins une fois.
4
Pour mettre l'ordinateur sous tension, ouvrez le moniteur et appuyez sur le bouton
d'alimentation.
DELL CONFIDENTIEL – PRÉLIMINAIRE 1/27/05 – POUR AVANT-PROJET SEULEMENT
Guide de référence rapide 35
Page 36

FILE LOCATION: J:\DL\DL044469\DTP\D8854fb0.fm
www.dell.com | support.dell.com
À propos de votre ordinateur
Pour plus d'informations sur l'ordinateur, reportez-vous au
Guide d'utilisation
système d'exploitation, sur le bouton
(Guides d'utilisation du système). Vous trouverez ci-dessous des réponses aux questions les plus
guides
fréquemment posées concernant l'ordinateur.
•
Carte réseau et modem :
56K et une carte réseau Ethernet 10/100/. Pour des informations sur les emplacements des
connecteurs, reportez-vous à la section «Vue arrière» à la page 38. Pour plus d'informations sur
les ports et les connecteurs, reportez-vous à la section «À propos de votre ordinateur» du
Guide d'utilisation
•
Durée de vie et utilisation de la batterie :
ordinateur. Certaines opérations, comme l'utilisation prolongée de périphériques sans fil,
peuvent réduire considérablement la durée de vie et l'autonomie de la batterie .
Pour en savoir plus sur les performances et l'utilisation de la batterie, reportez-vous à la
section «Utilisation d'une batterie» à la page 39.
, double-cliquez sur l'icône
Démarrer
La carte système de l'ordinateur peut comprendre un modem v.90
en ligne.
bouton
d'alimentation
Guide d'utilisation
Guide d'utilisation
,
Centre d'aide et de support
du bureau, ou encore, selon votre
en ligne. Pour accéder au
, puis sur
User and system
Diverses batteries sont disponibles pour votre
Pour des informations supplémentaires concernant l'économie d'énergie, reportez-vous à
votre
Guide d'utilisation
DELL CONFIDENTIEL – PRÉLIMINAIRE 1/27/05 – POUR AVANT-PROJET SEULEMENT
36 Guide de référence rapide
.
Page 37

FILE LOCATION: J:\DL\DL044469\DTP\D8854fb0.fm
•
Réplicateur de port :
Votre ordinateur prend en charge le réplicateur de port avancé USB
mobile.
REMARQUE : Il se peut que les stations d'accueil ne soient pas disponibles dans tous les pays.
– Pour des informations sur votre station d'accueil optionnelle, reportez-vous à la
documentation qui accompagne la station.
– Pour savoir comment obtenir des performances optimales lors de l'utilisation d'une
station d'accueil avec cet ordinateur, reportez-vous à la section «Résolutions des
problèmes» du
Guide d'utilisation
.
Vue frontale
loquet de fermeture de l'écran
écran
voyants d'état du
disque dur et du clavier
clavier
tablette tactile
boutons de la tablette
tactile (2)
voyants d'état de
l'appareil
DELL CONFIDENTIEL – PRÉLIMINAIRE 1/27/05 – POUR AVANT-PROJET SEULEMENT
bouton
d'alimentation
unité de disque
dur
haut-parleurs (2)
Guide de référence rapide 37
Page 38

Vue de gauche
www.dell.com | support.dell.com
FILE LOCATION: J:\DL\DL044469\DTP\D8854fb0.fm
connecteurs audio (2)
logement de PC Card
Vue de droite
batterie lecteur optique
Vue arrière
PRÉCAUTION : Ne bloquez pas les entrées d'air de l'ordinateur et n'insérez pas d'objets dedans ;
évitez également toute accumulation de poussière. Ne placez pas l'ordinateur dans un environnement
peu aéré, tel qu'une mallette fermée, lorsque celui-ci fonctionne. Le manque de ventilation risquerait
de causer un incendie ou d'endommager l'ordinateur.
AVIS : Pour éviter d'endommager l'ordinateur, après l'avoir éteint, attendez 5 secondes avant de
déconnecter tout périphérique externe.
DELL CONFIDENTIEL – PRÉLIMINAIRE 1/27/05 – POUR AVANT-PROJET SEULEMENT
38 Guide de référence rapide
Page 39

FILE LOCATION: J:\DL\DL044469\DTP\D8854fb0.fm
emplacement pour câble de sécurité
connecteurs USB (3)
connecteur réseau (RJ-45)
connecteur modem (RJ-11)
Vue de dessous
cache du module
de mémoire
connecteur vidéo
connecteur d'adaptateur secteur
unité de disque dur
batterie
loquet de
fermeture de
la baie de
batterie
ventilateur
Utilisation d'une batterie
Performances de la batterie
PRÉCAUTION : Avant d'effectuer les procédures suivantes, consultez et respectez les consignes de
sécurité du Guide d'information sur le produit.
DELL CONFIDENTIEL – PRÉLIMINAIRE 1/27/05 – POUR AVANT-PROJET SEULEMENT
Guide de référence rapide 39
Page 40

REMARQUE : Pour plus d'informations sur la garantie Dell relative à votre ordinateur, reportez-vous au
Guide d'information sur le produit ou au document de garantie livré avec votre ordinateur.
Pour un fonctionnement optimal et afin de préserver les paramètres du BIOS, laissez la batterie
principale installée en permanence dans votre ordinateur portable Dell™. Utilisez une batterie
pour alimenter l'ordinateur lorsqu'il n'est pas branché sur une prise secteur. Votre ordinateur est
livré avec une batterie, installée dans la baie. L'autonomie de la batterie varie en fonction des
conditions de fonctionnement.
REMARQUE : L'autonomie de la batterie (la période durant laquelle la batterie reste chargée) diminue
avec le temps. Selon la fréquence d'utilisation et les conditions de fonctionnement de la batterie, il est
possible que vous deviez en acheter une autre au cours de la durée de vie de votre ordinateur.
Cette durée est considérablement réduite par l'exécution de certaines opérations, notamment, sans
que cela soit limitatif :
www.dell.com | support.dell.com
• Utilisation de lecteurs optiques, tels que des lecteurs de DVD et CD
• Utilisation de périphériques de communication sans fil, de PC Cards ou de périphériques
USB
• Utilisation de paramètres élevés d'affichage et de luminosité, d'économiseurs d'écran en 3D
ou d'autres programmes gourmands en ressources, tels que des jeux en 3D
• Utilisation de l'ordinateur en mode Performances maximales
REMARQUE : Il est recommandé de connecter l'ordinateur à une prise électrique lorsque vous gravez
un CD ou un DVD.
PRÉCAUTION : L'utilisation d'une batterie non compatible peut accroître le risque d'incendie ou
d'explosion. Ne remplacez la batterie que par une batterie compatible achetée auprès de Dell. Cette
batterie au lithium-ion ou NiMH est conçue pour fonctionner avec votre ordinateur Dell. N'utilisez pas
de batterie provenant d'un autre ordinateur.
FILE LOCATION: J:\DL\DL044469\DTP\D8854fb0.fm
PRÉCAUTION : Ne jetez pas les batteries avec les ordures ménagères. Lorsque votre batterie ne tient
plus la charge, contactez votre service municipal de traitement des déchets pour savoir comment vous
débarrasser d'une batterie au lithium-ion ou NiMH. Consultez la section «Mise au rebut de la batterie»
du Guide d'information sur le produit.
PRÉCAUTION : Une utilisation inadéquate de la batterie peut augmenter le risque d'incendie ou de
brûlure chimique. Prenez soin de ne pas la percer, l'incinérer, la démonter ou l'exposer à une
température supérieure à 65° C (149° F). Rangez la batterie hors de portée des enfants. Manipulez les
batteries endommagées ou percées avec d'extrêmes précautions. Les batteries endommagées peuvent
fuir et causer des dommages personnels ou matériels.
Vérification de la charge de la batterie
La jauge de batterie Dell QuickSet, la fenêtre de l'
l'icône et l'alerte en cas de niveau de batterie faible fournissent des informations sur le niveau
de charge de la batterie.
Jauge de batterie Dell™ QuickSet
Si Dell QuickSet est installé, appuyez sur <Fn><F3> pour afficher la jauge de batterie QuickSet.
La fenêtre
batterie de votre ordinateur.
DELL CONFIDENTIEL – PRÉLIMINAIRE 1/27/05 – POUR AVANT-PROJET SEULEMENT
40 Guide de référence rapide
Jauge de batterie
indicateur de charge
Microsoft® Windows®,
affiche l'état, le niveau de charge et le temps de chargement de la
Page 41

FILE LOCATION: J:\DL\DL044469\DTP\D8854fb0.fm
Les icônes suivantes s'affichent dans la fenêtre
• L'ordinateur fonctionne sur batterie.
• La batterie perd sa charge.
• L'ordinateur est connecté et alimenté par la prise secteur.
• La batterie est en cours de charge.
• L'ordinateur est connecté et alimenté par la prise secteur.
• La batterie est entièrement chargée et inactive.
Jauge de batterie
:
Pour des informations supplémentaires sur QuickSet, effectuez un clic droit sur l'icône de la
Barre d'état système (située dans le coin du bureau Windows en bas à droite), puis cliquez sur
Aide
.
Jauge d'alimentation de Microsoft® Windows
®
La jauge de Windows indique la charge de batterie restante. Pour vérifier la jauge d'alimentation,
double-cliquez sur l'icône de la Barre d'état système. Pour des informations supplémentaires
concernant l'onglet
Jauge d'alimentation
, reportez-vous à votre
Guide d'utilisation
. Si l'ordinateur
est branché sur le secteur, l'icône apparaît.
lerte de batterie faible
A
AVIS : Pour éviter la perte ou la corruption de vos données, enregistrez votre travail immédiatement
après avoir reçu une alerte de niveau de batterie faible. Connectez ensuite l'ordinateur à une prise
secteur. Si la batterie est complètement déchargée, l'ordinateur passe automatiquement en mode Mise
en veille prolongée.
Une alerte s'affiche lorsque la batterie est déchargée à environ 90 %. Pour des informations
supplémentaires concernant les alertes niveau de batterie faible, reportez-vous à votre
d'utilisation
.
Guide
Une alerte de batterie déchargée a lieu lorsque la batterie est déchargée à environ 90 pour cent.
L'ordinateur émet un signal sonore pour indiquer que la limite de durée minimale de
fonctionnement est atteinte. Pendant ce délai, le haut-parleur émet régulièrement des bips.
L'ordinateur passe en mode Mise en veille prolongée lorsque la charge de la batterie est
extrêmement faible.
Chargement de la batterie
REMARQUE : L'adaptateur secteur charge une batterie complètement déchargée en 2 heures environ,
si l'ordinateur est éteint. La durée de chargement est plus longue lorsque l'ordinateur est sous tension.
Vous pouvez laisser la batterie dans l'ordinateur aussi longtemps que vous le souhaitez. Les circuits
internes de la batterie préviennent toute surcharge.
Lorsque vous branchez l'ordinateur sur une prise secteur ou installez une batterie pendant que
l'ordinateur est branché sur une prise secteur, l'ordinateur vérifie le niveau de charge et la
température de la batterie. Au besoin, l'adaptateur secteur charge alors la batterie et maintient le
niveau de charge.
DELL CONFIDENTIEL – PRÉLIMINAIRE 1/27/05 – POUR AVANT-PROJET SEULEMENT
Guide de référence rapide 41
Page 42

Si la batterie est chaude parce qu'elle se trouvait dans l'ordinateur ou en raison de la température
extérieure, il est probable qu'elle ne se charge pas lorsque vous branchez l'ordinateur sur une prise
secteur.
La batterie est trop chaude pour démarrer le processus de recharge si le voyant clignote
affichant alternativement les couleurs vert et orange. Débranchez l'ordinateur de la prise secteur et
laissez refroidir l'ordinateur et la batterie jusqu'à ce qu'ils atteignent la température ambiante.
Branchez alors l'ordinateur sur une prise secteur et continuez à charger la batterie.
Recalibrage d'une batterie
Si votre système est configuré pour une batterie à l'hydrure de nickel métallique (NiMH), vous
pouvez recalibrer la batterie en exécutant le logiciel de recalibrage de batterie. Le recalibrage de la
www.dell.com | support.dell.com
batterie permet au voyant de jauge de s'afficher correctement.
Recalibrez votre batterie NiMH lorsque l'un des problèmes suivants se produit :
• Un message s'affiche, vous invitant à recalibrer votre batterie.
• La charge normale de la batterie diminue.
Ne retirez pas la batterie NiMH pendant que vous la recalibrez. La procédure prend plusieurs
heures.
Recalibrage d'une batterie lorsque le message de recalibrage apparaît
Si votre ordinateur affiche un message vous invitant à recalibrer votre batterie :
1
Arrêtez l'ordinateur à l'aide du menu
2
Branchez l'ordinateur à une prise secteur, puis allumez-le de nouveau.
FILE LOCATION: J:\DL\DL044469\DTP\D8854fb0.fm
Démarrer
.
Le message de recalibrage de la batterie devrait s'afficher à l'écran immédiatement après le
logo DELL.
3
Pour sauter l'étape de recalibrage de la batterie et poursuivre l'amorçage du système, appuyez
sur <Échap>.
4
Pour commencer la procédure de recalibrage de la batterie, appuyez sur <F1>.
Le recalibrage de la batterie commence et l'adaptateur secteur recharge la batterie jusqu'à ce
que la jauge de batterie (visible dans l'écran d'informations sur la batterie) indique 100 %.
Un message apparaît, vous invitant à retirer l'adaptateur secteur, lorsque la batterie est
entièrement chargée.
5
Lorsque vous y êtes invité, débranchez l'ordinateur de la prise secteur.
La batterie se décharge jusqu'à ce que la jauge de batterie indique 0 %. Lorsque la batterie est
totalement déchargée, l'ordinateur s'éteint automatiquement.
6
Connectez l'adaptateur secteur à votre ordinateur.
7
Laissez l'adaptateur secteur recharger la batterie jusqu'à l'extinction du voyant de la batterie.
REMARQUE : Vous pouvez faire fonctionner votre ordinateur lorsque la batterie se recharge, mais
faites-le fonctionner sur batterie uniquement lorsque celle-ci est totalement rechargée.
DELL CONFIDENTIEL – PRÉLIMINAIRE 1/27/05 – POUR AVANT-PROJET SEULEMENT
42 Guide de référence rapide
Page 43

FILE LOCATION: J:\DL\DL044469\DTP\D8854fb0.fm
Recalibrage de la batterie à l'aide de l'utilitaire de configuration du système
1
Connectez l'ordinateur à une prise secteur.
2
Allumez (ou redémarrez) l'ordinateur.
3
Lorsque le logo DELL apparaît, appuyez immédiatement sur <F2>. Si vous attendez trop
longtemps et que le logo du système d'exploitation Microsoft
jusqu'à ce que le bureau Windows s'affiche. Éteignez alors votre ordinateur et faites une
nouvelle tentative.
REMARQUE : Pour afficher des informations sur un élément spécifique d'un écran du programme de
configuration du système, sélectionnez l'élément et consultez la zone d'Aide à l'écran.
4
Sélectionnez
•L'écran
ou
Battery Info
(Infos batterie) avec la flèche bas.
Processus de recalibrage de la batterie
Décharge
) à gauche de l'écran et l'état de la charge dans
apparaît, affichant les fonctions (
l'écran.
• L'adaptateur secteur commence à charger la batterie. L'option
(Recharger complètement la batterie) est sélectionnée à gauche de l'écran. Les
informations sur le pourcentage de la charge sont affichées à droite de l'écran.
• L'adaptateur secteur charge la batterie jusqu'à ce que la jauge indique une charge de
100%. Lorsque la batterie est complètement chargée, le voyant de batterie s'éteint.
5
Assurez-vous que le voyant de la batterie est éteint.
6
Débranchez l'ordinateur de la source d'alimentation électrique.
®
Windows® apparaît, patientez
Info Batterie
à droite de
Charge Battery to Full
Charge
La batterie se décharge jusqu'à ce que la jauge de batterie indique 0 %. L'option
Battery to Empty
(Décharger complètement la batterie) est sélectionnée à gauche de l'écran.
Discharge
Lorsque la batterie est totalement déchargée, l'ordinateur s'éteint automatiquement.
7
Branchez l'ordinateur à sa prise électrique.
8
Laissez l'adaptateur secteur recharger la batterie jusqu'à l'extinction du voyant de la batterie.
REMARQUE : Vous pouvez faire fonctionner votre ordinateur lorsque la batterie se recharge, mais
faites-le fonctionner sur batterie uniquement lorsque celle-ci est totalement rechargée.
Retrait de la batterie
PRÉCAUTION : Avant d'effectuer ces procédures, retirez tous les connecteurs de périphériques tels
que les câbles de téléphone, de réseau, de moniteur externe ou les câbles ou périphériques USB.
1
Assurez-vous que l'ordinateur est éteint et qu'il n'est pas branché à une prise électrique.
2
Si l'ordinateur est connecté à un réplicateur de port mobile USB, déconnectez-le. Pour
obtenir des instructions, consultez la documentation qui accompagne le réplicateur de port
USB.
DELL CONFIDENTIEL – PRÉLIMINAIRE 1/27/05 – POUR AVANT-PROJET SEULEMENT
Guide de référence rapide 43
Page 44

3
Faites glisser le loquet de la baie de batterie situé sur le dessous de l'ordinateur, puis retirez la
batterie de la baie.
www.dell.com | support.dell.com
Installation d'une batterie
Assurez-vous que l'ordinateur est éteint. Faites glisser la batterie dans la baie jusqu'à ce que le
loquet s'enclenche.
FILE LOCATION: J:\DL\DL044469\DTP\D8854fb0.fm
Stockage de la batterie
Retirez la batterie de l'ordinateur lorsque vous rangez ce dernier pendant une période prolongée.
Sinon, la batterie finira par se décharger. Après une longue période de stockage, rechargez
complètement la batterie avant de l'utiliser.
Résolution des problèmes
NSS (Notebook System Software)
Si vous réinstallez le système d'exploitation de votre ordinateur Dell™, vous devez également
réinstaller l'utilitaire NSS. Cet utilitaire est disponible sur le CD
sur le site Web de support de Dell à l'adresse
Pour télécharger l'utilitaire à partir de
Web et sélectionnez le modèle de votre ordinateur dans le menu déroulant. Sous
catégorie de téléchargement
d'exploitation et la langue, puis suivez les instructions qui s'affichent.
DELL CONFIDENTIEL – PRÉLIMINAIRE 1/27/05 – POUR AVANT-PROJET SEULEMENT
44 Guide de référence rapide
support.dell.com
, sélectionnez
Drivers and Utilities
www.support.dell.com
, allez à la section
Utilitaires Système et Configuration
.
Téléchargements
en option et
du site
Sélectionnez la
, le système
Page 45

FILE LOCATION: J:\DL\DL044469\DTP\D8854fb0.fm
NSS fournit des mises à jour essentielles pour le système d'exploitation et la prise en charge des
lecteurs de disquette USB Dell™ de 3,5
processeurs Intel
®
Celeron®M, des lecteurs optiques et des périphériques USB. NSS est requis
pouces, des processeurs Intel® Pentium®M, des
pour le bon fonctionnement de votre ordinateur Dell. Ce logiciel détecte automatiquement votre
ordinateur et son système d'exploitation, et installe les mises à jour appropriées à votre
configuration.
REMARQUE : NSS est indispensable au bon fonctionnement des périphériques USB.
Problèmes de blocage et problèmes logiciels
PRÉCAUTION : Avant d'effectuer les procédures suivantes, consultez et respectez les consignes de
sécurité du Guide d'information sur le produit.
L'ordinateur ne démarre pas
ASSUREZ-VOUS QUE L'ADAPTATEUR SECTEUR EST SOLIDEMENT BRANCHÉ SUR L ' ORDINATEUR ET
SUR LA PRISE SECTEUR
L'ordinateur ne répond plus
AVIS : Vous pouvez perdre des données si vous n'arrivez pas à arrêter correctement le système
d'exploitation.
ÉTEIGNEZ L'ORDINATEUR — Si vous n'obtenez aucune réponse lorsque vous appuyez sur une touche
du clavier ou lorsque vous déplacez la souris, appuyez sur le bouton d'alimentation et maintenez-le
enfoncé pendant au moins 8 à 10 secondes jusqu'à ce que l'ordinateur s'éteigne. Redémarrez
l'ordinateur.
Un programme ne répond plus
FIN DE TÂCHE —
1
Appuyez simultanément sur <Ctrl><Maj><Échap>.
2
Cliquez sur
3
Cliquez sur le programme qui ne répond plus.
4
Cliquez sur
Applications
Fin de tâche
.
.
Un programme se bloque fréquemment
REMARQUE : La documentation de tout logiciel, la disquette ou le CD qui l'accompagne incluent
généralement des instructions d'installation.
CONSULTEZ LA DOCUMENTATION DU LOGICIEL — Le cas échéant, supprimez, puis réinstallez le
programme.
DELL CONFIDENTIEL – PRÉLIMINAIRE 1/27/05 – POUR AVANT-PROJET SEULEMENT
Guide de référence rapide 45
Page 46

Un programme est conçu pour une version antérieure du système d'exploitation Microsoft® Windows®
SI VOUS UTILISEZ WINDOWS XP, EXÉCUTEZ L'ASSISTANT COMPATIBILITÉ DES PROGRAMMES —
L'Assistant Compatibilité des programmes configure un programme pour qu'il fonctionne dans un
environnement similaire aux environnements des systèmes d'exploitation non Windows XP.
1
Cliquez sur le bouton
Assistant Compatibilité des programmes
2
Dans l'écran d'accueil, cliquez sur
3
Suivez les instructions qui s'affichent à l'écran.
Un écran bleu uni apparaît
www.dell.com | support.dell.com
ÉTEIGNEZ L'ORDINATEUR — Si vous n'obtenez aucune réponse lorsque vous appuyez sur une touche
du clavier ou lorsque vous déplacez la souris, appuyez sur le bouton d'alimentation et maintenez-le
enfoncé pendant au moins 8 à 10 secondes jusqu'à ce que l'ordinateur s'éteigne. Redémarrez
l'ordinateur.
Autres problèmes logiciels
CONSULTEZ LA DOCUMENTATION DU LOGICIEL OU CONTACTEZ LE FABRICANT POUR OBTENIR DES
INFORMATIONS DE DÉPANNAGE —
• Assurez-vous que le programme est compatible avec le système d'exploitation installé sur votre
ordinateur.
• Assurez-vous que l'ordinateur est conforme aux exigences matérielles requises pour que le logiciel
fonctionne. Consultez la documentation du logiciel pour de plus amples informations.
• Assurez-vous que le programme est correctement installé et configuré.
• Assurez-vous que les pilotes de périphérique n'entrent pas en conflit avec le programme.
• Le cas échéant, supprimez, puis réinstallez le programme.
FILE LOCATION: J:\DL\DL044469\DTP\D8854fb0.fm
Démarrer
, pointez sur
Tous les programmes→ Accessoires
.
Suivant
.
, puis cliquez sur
SAUVEGARDEZ IMMÉDIATEMENT VOS FICHIERS
UTILISEZ UN PROGRAMME DE RECHERCHE DES VIRUS POUR VÉRIFIER LE DISQUE DUR, LES
DISQUETTES OU LES CD
ENREGISTREZ LES FICHIERS OUVERTS ET QUITTEZ TOUS LES PROGRAMMES, PUIS ÉTEIGNEZ
L 'ORDINATEUR VIA LE MENU Démarrer
DELL CONFIDENTIEL – PRÉLIMINAIRE 1/27/05 – POUR AVANT-PROJET SEULEMENT
46 Guide de référence rapide
Page 47

FILE LOCATION: J:\DL\DL044469\DTP\D8854fb0.fm
ANALYSEZ VOTRE ORDINATEUR POUR VOIR S 'IL CONTIENT DES LOGICIELS ESPIONS — Si vous
observez un ralentissement des performances de votre ordinateur, si des fenêtres publicitaires s'affichent
fréquemment sur votre écran ou si vous avez des problèmes pour vous connecter sur Internet, votre
ordinateur est peut-être infecté par un logiciel espion. Utilisez un programme anti-virus qui inclut une
protection contre les logiciels espions (une mise à niveau de votre programme sera peut-être nécessaire)
afin d'analyser votre ordinateur et de supprimer les logiciels espions. Pour plus d'informations, allez sur
le site support.dell.com et lancez une recherche avec le mot-clé espion.
EXÉCUTEZ DELL DIAGNOSTICS — Si tous les tests s'exécutent correctement, la condition d'erreur est
liée à un problème logiciel.
Exécution de Dell Diagnostics
PRÉCAUTION : Avant de commencer toute procédure de cette section, reportez-vous aux consignes
de sécurité du Guide d´information sur le produit.
Quand utiliser Dell Diagnostics
Si vous rencontrez un problème avec l'ordinateur, effectuez les vérifications indiquées dans la
section «Résolution des problèmes» (reportez-vous au
Guide d'utilisation
Diagnostics avant de contacter Dell pour obtenir une assistance technique.
en ligne) et exécutez Dell
AVIS : Dell Diagnostics ne fonctionne qu'avec les ordinateurs Dell™.
Démarrez Dell Diagnostics à partir du disque dur ou du
(également appelé CD
Démarrage de Dell Diagnostics à partir de votre disque dur
ResourceCD
).
CD Drivers and Utilities
en option
Dell Diagnostics se trouve dans une partition cachée (utilitaire de diagnostics) de votre disque dur.
REMARQUE : Si aucune image ne s'affiche, contactez Dell.
1
Éteignez l'ordinateur.
2
Si l'ordinateur est connecté à une station d'accueil (amarré), déconnectez-le. Pour obtenir des
instructions, consultez la documentation qui accompagne la station d'accueil.
3
Connectez l'ordinateur à une prise secteur.
4
Allumez l'ordinateur. Lorsque le logo DELL™ apparaît, appuyez immédiatement sur <F12>.
Le menu de la séquence d'amorçage ponctuelle affiche une liste de périphériques
amorçables.
REMARQUE : Si un message indique qu'aucune partition d'utilitaire de diagnostics n'a été détectée,
exécutez Dell Diagnostics depuis votreCD Drivers and Utilities.
Si vous attendez trop longtemps et que le logo du système d'exploitation apparaît, patientez
jusqu'à ce que le bureau de Microsoft
®
Windows® s'affiche. Ensuite, arrêtez votre ordinateur
et faites une nouvelle tentative.
DELL CONFIDENTIEL – PRÉLIMINAIRE 1/27/05 – POUR AVANT-PROJET SEULEMENT
Guide de référence rapide 47
Page 48

5
Lorsque la liste des périphériques d'amorçage apparaît, sélectionnez
sur <Entrée>.
L'ordinateur lance l'évaluation du système de préamorçage avec une série de diagnostics
intégrés qui effectue un test préalable de la carte système, du clavier, du disque dur et de
l'écran.
REMARQUE : Si la liste du périphérique d'amorçage ne s'affiche pas, appuyez sur la touche <Fin> puis
sur <Entrée> pour lancer Dell Diagnostics.
• Répondez à toutes les questions qui s'affichent pendant l'évaluation.
• Si une défaillance de composant est détectée, l'ordinateur s'arrête et émet un signal
sonore. Pour arrêter l'évaluation et redémarrer l'ordinateur, appuyez sur <n> ; pour
passer au test suivant, appuyez sur <y> ; pour retester le composant défectueux,
www.dell.com | support.dell.com
appuyez sur <r>.
• Si des défaillances sont détectées lors de l'évaluation de préamorçage du système, notez
les codes d'erreur et contactez Dell avant de continuer.
Si l'évaluation de préamorçage du système se déroule sans problème, vous recevez le message
Booting Dell Diagnostic Utility Partition. Press any key to continue.
(Amorçage de la partition d'utilitaires de diagnostics. Appuyez sur une
touche pour continuer
6
Appuyez sur une touche pour démarrer Dell Diagnostics à partir de la partition de diagnostics
du disque dur.
FILE LOCATION: J:\DL\DL044469\DTP\D8854fb0.fm
.)
Diagnostics
et appuyez
Démarrage de Dell Diagnostics à partir du CD Drivers and Utilities en option
1
Insérez le
2
Éteignez et redémarrez l'ordinateur.
CD Drivers and Utilities
Lorsque le logo DELL apparaît, appuyez immédiatement sur <F12>.
Si vous attendez trop longtemps et que le logo Windows apparaît, attendez encore jusqu'à ce
que le bureau Windows s'affiche. Éteignez alors votre ordinateur et faites une nouvelle
tentative.
REMARQUE : Les étapes suivantes ne modifient la séquence d'amorçage qu'une seule fois. Au
démarrage suivant, l'ordinateur démarre en fonction des périphériques définis dans la configuration du
système.
3
Lorsque la liste des périphériques d'amorçage apparaît, sélectionnez
CD/DVD/CD-RW
4
Sélectionnez l'option
5
Sélectionnez l'option
6
Ta p e z 1 pour démarrer le menu du CD
7
Saisissez 2 pour démarrer Dell Diagnostics.
8
Sélectionnez
Exécuter Dell Diagnostics 32 bits
sont répertoriées, sélectionnez la version appropriée à votre ordinateur.
9
Lorsque le
DELL CONFIDENTIEL – PRÉLIMINAIRE 1/27/05 – POUR AVANT-PROJET SEULEMENT
menu principal
48 Guide de référence rapide
.
et appuyez sur <Entrée>.
Lecteur de CD/DVD/CD-RW
Amorcer à partir du CD-ROM
ResourceCD
de Dell Diagnostics s'affiche, sélectionnez le test à effectuer.
Lecteur de
dans le menu d'amorçage du CD.
dans le menu qui s'affiche.
.
dans la liste numérotée. Si plusieurs versions
Page 49

FILE LOCATION: J:\DL\DL044469\DTP\D8854fb0.fm
Menu principal de Dell Diagnostics
1
Une fois Dell Diagnostics chargé et l'écran du
menu principal
affiché, cliquez sur le bouton
correspondant à l'option souhaitée.
Option Fonction
Express Test (Test
rapide)
Extended Test (Test
approfondi)
Custom Test (Test
personnalisé)
Symptom Tree
(Arborescence des
symptômes)
2
Si un problème survient pendant un test, un message indiquant le code d'erreur et une
Exécute un test rapide des périphériques. Ce test dure généralement entre
10 et 20 minutes et n'exige pas d'action de votre part. Effectuez tout
d'abord un Test rapid e pour trouver le problème plus rapidement.
Exécute un test approfondi des périphériques. En règle générale, ce test
prend une heure ou plus et nécessite que vous répondiez régulièrement à
des questions.
Teste un périphérique spécifique. Vous pouvez personnaliser les tests à
exécuter.
Répertorie les symptômes couramment rencontrés et permet de
sélectionner un test en fonction du symptôme du problème.
description du problème s'affiche. Notez le code d'erreur et la description du problème et
suivez les instructions.
Si vous ne pouvez pas résoudre le problème, contactez Dell.
REMARQUE : Le numéro de service de votre ordinateur s'affiche dans la partie supérieure de chaque
écran de test. Lorsque vous contacterez le support technique de Dell, ce numéro de service vous sera
demandé.
3
Si vous exécutez un test à partir de l'option
symptômes
, cliquez sur l'onglet approprié décrit dans le tableau suivant pour en savoir plus.
Test personnalisé
ou
Arborescence des
Onglet Fonction
Résultats Affiche les résultats du test et les conditions d'erreur rencontrées.
Erreurs Affiche les conditions d'erreur rencontrées, les codes d'erreur et la
description du problème.
Aide Décrit le test et peut indiquer les conditions requises pour exécuter le test.
Configuration Affiche la configuration matérielle du périphérique sélectionné.
Dell Diagnostics obtient vos informations de configuration de tous les
périphériques à partir de la configuration du système, de la mémoire et de
divers tests internes, et les affiche dans la liste des périphériques située dans
le volet gauche de l'écran. La liste des périphériques risque de ne pas afficher
les noms de tous les composants installés sur votre ordinateur ou de tous les
périphériques reliés à celui-ci.
Paramètres Vous permet de personnaliser le test en modifiant ses paramètres.
DELL CONFIDENTIEL – PRÉLIMINAIRE 1/27/05 – POUR AVANT-PROJET SEULEMENT
Guide de référence rapide 49
Page 50

4
Une fois les tests terminés, si vous exécutez Dell Diagnostics à partir du
Utilities
5
Une fois les tests terminés, fermez l'écran test pour revenir à l'écran du
quitter Dell Diagnostics et redémarrer l'ordinateur, fermez l'écran du
www.dell.com | support.dell.com
FILE LOCATION: J:\DL\DL044469\DTP\D8854fb0.fm
, retirez le CD.
CD Drivers and
menu principal
menu principal
. Pour
.
DELL CONFIDENTIEL – PRÉLIMINAIRE 1/27/05 – POUR AVANT-PROJET SEULEMENT
50 Guide de référence rapide
Page 51

Index
A
à propos de votre ordinateur
vue arrière, 38
vue de dessous, 39
vue de gauche, 38
vue du côté droit, 38
vue du côté gauche, 37
vue frontale, 37
assistants
Assistant Compatibilité des
programmes, 46
B
batterie
alerte de batterie faible, 41
chargement, 41
installation, 44
jauge d'alimentation, 41
performances, 39
retrait, 43
stockage, 44
vérification de la charge, 40
C
CD
Operating System, 34
CD Drivers and Utilities, 31
CD Operating System, 34
consignes de sécurité, 31
D
Dell
site de support, 33
Diagnostics
Dell, 47
diagnostics
CD Drivers and Utilities, 31
documentation
en ligne, 33
Guide d'information sur le
système, 31
Guide d'utilisation, 32
périphérique, 31
E
étiquette Microsoft
Windows, 32
étiquettes
Microsoft Windows, 32
numéro de service, 32
G
garantie, 31
Guide d'utilisation, 32
L
logiciel
problèmes, 46
logiciel espion, 47
N
numéro de service, 32
O
ordinateur, 36
blocages, 45-46
ne répond plus, 45
performances lentes, 47
P
pilotes
CD ResourceCD, 31
problèmes
blocage d'ordinateur, 45-46
blocages, 45
blocages programme, 45
compatibilité des programmes
et de Windows, 46
écran bleu, 46
l'ordinateur ne démarre pas, 45
l'ordinateur ne répond plus, 45
le programme ne répond
plus, 45
logiciel, 45-46
Index 51
Page 52

logiciel espion, 47
logiciels, 45-46
performances lentes de
l'ordinateur, 47
résolution, 44
R
Recherche d'informations
documentation, 31
S
site Web «Dell Premier
Support» (Support
Premier de Dell), 31
Site Web Premier Support de
Dell, 33
système d'exploitation
CD, 34
Guide d'installation, 34
V
vue de gauche, 38
W
Windows XP
Assistant Compatibilité des
programmes, 46
52 Index
Page 53

Dell™ Latitude™ 110L
Schnellreferenzhandbuch
Modell PP10S
www.dell.com | support.dell.com
Page 54

Anmerkungen, Hinweise und Vorsichtshinweise
ANMERKUNG: Eine ANMERKUNG macht auf wichtige Informationen aufmerksam, mit denen Sie den Computer besser
einsetzen können.
HINWEIS: Ein HINWEIS warnt vor möglichen Beschädigungen der Hardware oder Datenverlust und zeigt, wie diese
vermieden werden können.
VORSICHT: Durch VORSICHT werden Sie auf Gefahrenquellen hingewiesen, die materielle Schäden, Verletzungen
oder sogar den Tod von Personen zur Folge haben können.
Abkürzungen und Akronyme
Ein vollständiges Verzeichnis der Abkürzungen und Akronyme finden Sie im
Sie – je nach Betriebssystem – auf das Symbol
oder im
Wenn Sie einen Dell™-Computer der Serie n besitzen, treffen alle Referenzen in diesem Dokument auf die
Microsoft
Die
Startmenü
®
Windows®-Betriebssysteme nicht zu.
auf
Drivers and Utilities
Hilfe- und Supportcenter
CD sowie die
Betriebssystem
Benutzerhandbuch
und anschließend auf
-CD sind optional und möglicherweise nicht bei allen
auf Ihrem Microsoft® Windows® -Desktop
Benutzerhandbuch
(Doppelklicken
Benutzer- und Systemhandbücher
).
Computern im Lieferumfang enthalten.
_________________
Die in diesem Dokument enthaltenen Informationen können sich ohne vorherige Ankündigung ändern.
© 2005 Dell Inc. Alle Rechte vorbehalten.
Die Vervielfältigung oder Wiedergabe in jeglicher Weise ist ohne schriftliche Genehmigung von Dell Inc. strengstens untersagt.
Markenzeichen in diesem Text: Dell, das Dell Logo und Latitude sind Marken der Dell Inc.; Microsoft und Windows sind eingetragene Marken
der Microsoft Corporation; Intel, Celeron, und Pentium sind eingetragene Marken der Intel Corporation.
Andere in diesem Dokument möglicherweise verwendete Markenzeichen und Handelsbezeichnungen dienen ausschließlich der Identifikation
der Firmen, denen diese Marken und Namen gehören, oder ihrer Produkte. Dell Inc. verzichtet auf alle Besitzrechte an Markenzeichen und
Handelsbezeichnungen, die nicht Eigentum von Dell sind.
Modell PP10S
Januar 2005 Teilenr. D8854 Rev. A00
Page 55

Inhalt
Informationsquellen . . . . . . . . . . . . . . . . . . . . . . . . . . . . . . . 57
Einrichten des Computers
Wissenswertes über Ihren Computer
Vorderansicht
Linke Seitenansicht
Rechte Seitenansicht
Rückansicht
Unterseite
Akkubetrieb
. . . . . . . . . . . . . . . . . . . . . . . . . . . . . . . . . . 66
. . . . . . . . . . . . . . . . . . . . . . . . . . . . . . . . . . . 66
Akkuleistung
Prüfen des Akkuladezustands
Akkuanzeige von Dell™ QuickSet
Microsoft
Warnung „Akku niedrig”
Aufladen des Akkus
Rekalibrieren eines Akkus
. . . . . . . . . . . . . . . . . . . . . . . . . . . . 61
. . . . . . . . . . . . . . . . . . . . . . 62
. . . . . . . . . . . . . . . . . . . . . . . . . . . . . . . . 63
. . . . . . . . . . . . . . . . . . . . . . . . . . . . . 64
. . . . . . . . . . . . . . . . . . . . . . . . . . . . 64
. . . . . . . . . . . . . . . . . . . . . . . . . . . . . . . . . 65
. . . . . . . . . . . . . . . . . . . . . . . . . . . . . . . . 66
. . . . . . . . . . . . . . . . . . . . . . . 67
. . . . . . . . . . . . . . . . 67
®
Windows®-Energieanzeige. . . . . . . . . . . . . 68
. . . . . . . . . . . . . . . . . . . . . 68
. . . . . . . . . . . . . . . . . . . . . . . . . . . . . 68
. . . . . . . . . . . . . . . . . . . . . . . . . 68
Rekalibrieren eines Akkus, wenn die Meldung zum Rekalibrieren
angezeigt wird
. . . . . . . . . . . . . . . . . . . . . . . . . . . . . . . 69
Rekalibrieren eines Akkus über das System-SetupDienstprogramm
Entfernen eines Akkus
Einsetzen eines Akkus
Lagern des Akkus
. . . . . . . . . . . . . . . . . . . . . . . . . . . . . . 70
. . . . . . . . . . . . . . . . . . . . . . . . . . . 71
. . . . . . . . . . . . . . . . . . . . . . . . . . . 71
. . . . . . . . . . . . . . . . . . . . . . . . . . . . . . 71
Beheben von Störungen
. . . . . . . . . . . . . . . . . . . . . . . . . . . . . 72
Notebook Systemsoftware (NSS)
Probleme mit Absturz und Software
Der Computer startet nicht
Der Computer reagiert nicht mehr
Ein Programm reagiert nicht mehr
Ein Programm stürzt wiederholt ab
Ein Programm ist für ein früheres Microsoft
Betriebssystem konzipiert.
Ein blauer Bildschirm wird angezeigt
Sonstige Probleme mit der Software
. . . . . . . . . . . . . . . . . . . . . . 72
. . . . . . . . . . . . . . . . . . . . 72
. . . . . . . . . . . . . . . . . . . . 72
. . . . . . . . . . . . . . . . 72
. . . . . . . . . . . . . . . . 73
. . . . . . . . . . . . . . . 73
®
Windows®-
. . . . . . . . . . . . . . . . . . . . 73
. . . . . . . . . . . . . . 73
. . . . . . . . . . . . . . 74
Inhalt 55
Page 56

Verwenden des Programms „Dell Diagnostics” . . . . . . . . . . . . . . 74
Wann wird Dell Diagnostics eingesetzt?
Starten von Dell Diagnostics vom Festplattenlaufwerk
. . . . . . . . . . . . 74
. . . . . 75
Starten der Dell Diagnose von der optionalen
Drivers and Utilities CD
Hauptmenü des Programms „Dell Diagnostics”
. . . . . . . . . . . . . . . . . . . . . 76
. . . . . . . . 76
Index . . . . . . . . . . . . . . . . . . . . . . . . . . . . . . . . . . . . . . . . . 79
56 Inhalt
Page 57

SPEICHERORT DER DATEI: J:\DL\DL044469\DTP\D8854gb0.fm
Informationsquellen
ANMERKUNG: Einige Funktionen können für Ihren Computer oder in bestimmten Ländern nicht zur Verfügung
stehen.
ANMERKUNG: Zusätzliche Informationen werden eventuell mit dem Computer geliefert.
Welche Informationen benötigen Sie? Hier finden Sie die gewünschten Informationen
• Ein Diagnoseprogramm für Ihren Arbeitsplatz
• Treiber für Ihren Arbeitsplatz
• Dokumentation zu Ihrem Arbeitsplatz
• Dokumentation zu dem Gerät
• Notebook Systemsoftware (NSS)
Drivers and Utilities CD (auch bezeichnet als
ResourceCD)
Dokumentation und Treiber sind bereits auf dem Computer installiert. Mithilfe der CD können Sie Treiber
neu installieren, das Programm
oder auf die Dokumentation zugreifen.
Dell Diagnostics ausführen
Möglicherweise finden
Sie auf der CD Infodateien. Diese Dateien enthalten Angaben zu den
neuesten technischen
Änderungen bzw. Detailinformationen zu technischen Fragen für erfahrene Benutzer oder Techniker.
ANMERKUNG: Treiber und Dokumentationsaktualisie-
rungen finden Sie unter support.dell.com.
ANMERKUNG: Die Drivers and Utilities CD ist optional
und ist möglicherweise nicht bei allen Computern im Lieferumfang enthalten.
• Garantie-Informationen
• Verkaufs- und Lieferbedingungen für die USA
• Sicherheitshinweise
• Zulassungsinformationen
• Informationen zur Ergonomie
• Enduser-Lizenzvereinbarung
VERTRAULICHE INFORMATIONEN VON DELL –VORLÄUFIGER STATUS 1.27.05 – NUR ZUR DURCHSICHT
Dell™ Produktinformationshandbuch
Dell Premier Support-Website
Schnellreferenzhandbuch 57
Page 58

SPEICHERORT DER DATEI: J:\DL\DL044469\DTP\D8854gb0.fm
Welche Informationen benötigen Sie? Hier finden Sie die gewünschten Informationen
• Anweisungen zum Entfernen und Austauschen von Teilen
• Technische Daten
• Anweisungen zum Konfigurieren von Systemeinstellungen
• Anweisungen zum Beheben von Störungen und Lösen von
Problemen
Benutzerhandbuch
Hilfe- und Supportcenter
1
Klicken Sie auf die Schaltfläche
und Support
2
Klicken Sie auf
.
anschließend auf
von
Benutzer- und Systemhandbücher
Benutzerhandbücher
Microsoft® Windows® XP
Start
Das Benutzerhandbuch steht auch auf der
CD
Utilities
zur Verfügung.
ANMERKUNG: Die Drivers and Utilities CD ist optional
www.dell.com | support.dell.com
• Service-Tag-Nummer und Express-Servicecode
• Microsoft Windows-Lizenzetikett
und ist möglicherweise nicht bei allen Computern im Lieferumfang enthalten.
Service-Tag-Nummer und Microsoft Windows Lizenz
Die Aufkleber befinden sich auf
der Unterseite des
Computers.
• Geben Sie die Service-Tag-Nummer
auf der Website
support.dell.com
oder beim Anruf
beim Technischen
Support an, um den Computer zu identifizieren.
• Geben Sie beim Anruf beim Technischen Support den
Express-Servicecode an, um zum geeigneten Ansprechpartner weitergeleitet zu werden. In bestimmten
Ländern kann der Express-Servicecode nicht zur Verfügung stehen.
und auf
.
Drivers and
Hilfe
und
VERTRAULICHE INFORMATIONEN VON DELL –VORLÄUFIGER STATUS 1.27.05 – NUR ZUR DURCHSICHT
58 Schnellreferenzhandbuch
Page 59

SPEICHERORT DER DATEI: J:\DL\DL044469\DTP\D8854gb0.fm
Welche Informationen benötigen Sie? Hier finden Sie die gewünschten Informationen
• Lösungen – Tipps und Hinweise zum Beheben von Störungen, Artikel von Technikern, Online-Kurse, häufig gestellte
Fragen
• Kundenforum – Online-Diskussion mit anderen Dell-Kunden
• Aufrüstungen – Aufrüstungsinformationen für Komponenten
wie Speicher, die Festplatte und das Betriebssystem
• Kundenbetreuung – Kontaktinformationen, Status von Serviceanfragen und Bestellung, Informationen zu Garantie und
Dell Support-Website – support.dell.com
ANMERKUNG: Wählen Sie Ihre Region, um die passen-
de Support- Website anzuzeigen.
ANMERKUNG: Kunden aus den Bereichen Unterneh-
men, Regierung und Bildungswesen können auch die individuelle Dell Premier Support-Website
www.premier.support.dell.com verwenden. Die Website
ist möglicherweise nicht in allen Ländern verfügbar.
Reparatur
• Service und Support – Status der Serviceanfrage und Support-Verfolgung, Service-Vertrag, Online-Diskussionen mit
dem Technischen Support
• Referenzmaterial – Computerdokumentationen, Einzelheiten
zur Arbeitsplatzkonfiguration, Produktangaben und Whitepapers
• Downloads – Zertifizierte Treiber, Patches und Softwareaktualisierungen
• Notebook Systemsoftware (NSS) – Wenn Sie das Betriebssystem auf Ihrem Computer neu installieren, sollten Sie auch
das NSS- Dienstprogramm neu installieren. NSS- sorgt dafür,
dass wichtige Aktualisierungen für Ihr Betriebssystem durchgeführt werden und bietet Unterstützung für Dell™ 3,5-ZollUSB-Diskettenlaufwerke, Intel
Intel Celeron
®
-M-Prozessoren, optische Laufwerke und
®
Pentium®-M-Prozessoren,
USB-Geräte. NSS ist für den ordnungsmäßigen Betrieb des
Dell Computers erforderlich. Die Software erkennt automatisch Ihren Computertyp und das Betriebssystem und installiert die für Ihre Konfiguration geeigneten Aktualisierungen.
So laden Sie die Notebook-Systemsoftware herunter:
1. Gehen Sie auf die Website
ken Sie auf
Downloads
support.dell.com
.
und klic-
2. Geben Sie Ihre Service-Tag-Nummer oder das Produktmodell ein.
3. Klicken Sie im Drop-Down-Menü
All
(Download-Kategorie) auf
(Alle).
Download Category
4. Wählen Sie das Betriebssystem und die Betriebssystemsprache für Ihren Computer aus und klicken Sie auf
Submit
(Abschicken).
5. Wählen Sie unter „Select a Device” (Gerät auswählen)
die Option
System and Configuration Utilities
(Sys-
tem- und Konfigurationsprogramme) aus und klicken
Dell Notebook System Software
Sie auf
(Dell Note-
book-Systemsoftware).
VERTRAULICHE INFORMATIONEN VON DELL –VORLÄUFIGER STATUS 1.27.05 – NUR ZUR DURCHSICHT
Schnellreferenzhandbuch 59
Page 60

SPEICHERORT DER DATEI: J:\DL\DL044469\DTP\D8854gb0.fm
Welche Informationen benötigen Sie? Hier finden Sie die gewünschten Informationen
• Anleitungen zum Arbeiten unter Windows XP
• Dokumentation zu Ihrem Arbeitsplatz
• Dokumentation für Komponenten (z. B. Modem)
Windows Hilfe- und Supportcenter
1
Klicken Sie auf die Schaltfläche
und Support
2
Geben Sie ein Wort oder einen Ausdruck ein, das bzw.
.
Start
der Ihr Problem beschreibt, und klicken Sie anschließend auf das Pfeilsymbol.
3
Klicken Sie auf das Thema, das Ihr Problem beschreibt.
4
Befolgen Sie die Anweisungen im Bildschirm.
• Anleitungen zur Neuinstallation des Betriebssystems
www.dell.com | support.dell.com
Betriebssystem-CD
Das Betriebssystem ist bereits auf dem Computer installiert. Um das Betriebssystem neu zu installieren, verwenden Sie die Betriebssystem-CD. Anweisungen finden
Sie in Ihrem Benutzerhandbuch.
Verwenden Sie die
vers and Utilities
um Treiber für die mit
Ihrem Computer ausgelieferten Geräte erneut
zu installieren, wenn
Sie das Betriebssystem
Ihres Computers neu
installieren.
Das Etikett mit dem
Product Key des Betriebssystems finden Sie am
Computer.
und auf
Hilfe
Dri-
CD
,
ANMERKUNG: Die Farbe der CD hängt von dem von Ih-
nen bestellten Betriebssystem ab.
ANMERKUNG: Die CD für das Betriebssystem ist optio-
nal und möglicherweise nicht bei Ihrem Computer im Lieferumfang enthalten.
VERTRAULICHE INFORMATIONEN VON DELL –VORLÄUFIGER STATUS 1.27.05 – NUR ZUR DURCHSICHT
60 Schnellreferenzhandbuch
Page 61

SPEICHERORT DER DATEI: J:\DL\DL044469\DTP\D8854gb0.fm
Einrichten des Computers
VORSICHT: Bevor Sie die folgenden Verfahren durchführen, lesen Sie zunächst die Sicherheitshin-
weise im Produktinformationshandbuch.
1
Nehmen Sie das Zubehör aus der Verpackung.
2
Legen Sie die für das Einrichten des Computers erforderlichen Zubehörteile bereit.
Der Lieferumfang des Zubehörs umfasst ferner die Benutzerdokumentation sowie die Soft-
ware oder zusätzliche Hardware (wie z. B. PC Cards, Laufwerke oder Batterien), die Sie bestellt haben.
3
Schließen Sie den Netzadapter an den Netzadapteranschluss am Computer und an die Steckdose an.
VORSICHT: Der Netzadapter funktioniert mit allen Steckdosen weltweit. Die Stecker oder Steckdosen-
leisten können jedoch unterschiedlich sein. Wird ein falsches Kabel verwendet oder dieses nicht ordnungsgemäß an die Steckerleiste oder die Steckdose angeschlossen, können ein Brand oder Schäden
im System verursacht werden.
HINWEIS: Bei Verwendung des Netzadapters verlegen Sie das Kabel trittsicher und so, dass es nicht
gezogen, verwickelt oder durch Gegenstände wie z. B. Stuhl- oder Tischbeine gequetscht werden kann.
HINWEIS: Ziehen Sie beim Trennen des Netzadapters vom Computer am Kabelstecker und nicht am Ka-
bel selbst, und ziehen Sie diesen fest, aber nicht ruckartig ab, damit das Kabel nicht beschädigt wird.
Knicken Sie das Kabel beim Aufwickeln nicht.
ANMERKUNG: Verbinden Sie den Computer erst dann mit dem USB-Port-Replicator, wenn er mindes-
tens einmal gestartet und heruntergefahren wurde.
VERTRAULICHE INFORMATIONEN VON DELL –VORLÄUFIGER STATUS 1.27.05 – NUR ZUR DURCHSICHT
Schnellreferenzhandbuch 61
Page 62

4
Öffnen Sie zum Einschalten des Computers den integrierten Bildschirm und betätigen Sie
den Netzschalter.
www.dell.com | support.dell.com
SPEICHERORT DER DATEI: J:\DL\DL044469\DTP\D8854gb0.fm
Netzschalter
Wissenswertes über Ihren Computer
Weitere Informationen zu Ihrem Computer finden Sie im Onlineres
Benutzerhandbuchs
Symbol
auf
User’s Guide
Help and Support Center
doppelklicken Sie (je nach Betriebssystem) entweder auf Ihrem Desktop auf das
(Benutzerhandbuch) oder klicken Sie auf die Schaltfläche
(Hilfe- und Supportcenter) und dann auf
nutzer- und Systemhandbücher). Im Folgenden werden einige der häufiger gestellten Fragen über den
Computer beantwortet.
•
Modem und Netzwerkadapter:
Auf der Systemplatine des Computers können sowohl ein v.90
56K-Modem als auch ein 10/100-Ethernet-Netzwerkadapter enthalten sein. Informationen
wo sich die Steckplätze befinden erhalten Sie unter „Rückansicht” auf Seite 65. Weitere Informationen zu Schnittstellen und Anschlüssen finden Sie unter „Wissenswertes über Ihren
Computer” im Online-
VERTRAULICHE INFORMATIONEN VON DELL –VORLÄUFIGER STATUS 1.27.05 – NUR ZUR DURCHSICHT
Benutzerhandbuch
.
62 Schnellreferenzhandbuch
Benutzerhandbuch
Start
User and system guides
. Zum Öffnen Ih-
, anschließend
(Be-
Page 63

SPEICHERORT DER DATEI: J:\DL\DL044469\DTP\D8854gb0.fm
•
Betriebsdauer und Verwendung des Akkus:
Für Ihren Computer stehen verschiedene Akkus zur
Verfügung. Bestimmte Funktionen, wie zum Beispiel längere Wireless-Übertragungen, können die Akkubetriebsdauer stark verkürzen.
Weitere Informationen über Akkuleistung finden Sie unter „Akkubetrieb” auf Seite 66.
Weitere Informationen zum Stromsparen finden Sie im
Port-Re plicato r:
•
ANMERKUNG: Docking-Geräte sind in bestimmten Ländern möglicherweise nicht verfügbar.
Ihr Computer unterstützt den USB Mobile Advanced-Port-Replicator.
Benutzerhandbuch
.
– Informationen zum optionalen Docking-Gerät finden Sie in der mitgelieferten Doku-
mentation zum Gerät.
– Informationen zum Erzielen der optimalen Leistung bei Verwendung eines Docking-Ge-
räts bei Ihrem Computer finden Sie unter „Problemlösung” im
Benutzerhandbuch
Vorderansicht
Freigabetaste der Bildschirmverriegelung
Bildschirm
Festplattenlaufwerk und
Tastaturstatus-anzeigen
Tastatur
Netzschalter
.
Touchpad
Festplatte
Touchpad-Tasten (2)
Gerätestatusanzeigen
Lautsprecher (2)
VERTRAULICHE INFORMATIONEN VON DELL –VORLÄUFIGER STATUS 1.27.05 – NUR ZUR DURCHSICHT
Schnellreferenzhandbuch 63
Page 64

Linke Seitenansicht
www.dell.com | support.dell.com
Rechte Seitenansicht
SPEICHERORT DER DATEI: J:\DL\DL044469\DTP\D8854gb0.fm
Audioanschlüsse (2) PC Card-Steckplatz
Akku Optisches Laufwerk
VERTRAULICHE INFORMATIONEN VON DELL –VORLÄUFIGER STATUS 1.27.05 – NUR ZUR DURCHSICHT
64 Schnellreferenzhandbuch
Page 65

SPEICHERORT DER DATEI: J:\DL\DL044469\DTP\D8854gb0.fm
Rückansicht
VORSICHT: Die Lüftungsschlitze dürfen nicht verdeckt werden, auch nicht durch Staubansammlungen.
Führen Sie keine Gegenstände in die Lüftungsschlitze ein. Bewahren Sie den Computer während des
Betriebs nicht in schlecht durchlüfteten Umgebungen wie einer geschlossenen Tragetasche auf. Ohne
Luftzirkulation kann der Computer Schaden nehmen oder sogar ein Brand entstehen.
HINWEIS: Um Schäden am Computer zu vermeiden, sollten Sie nach dem Ausschalten des Computers
fünf Sekunden warten, bevor Sie ein externes Gerät davon trennen.
Sicherheitskabeleinschub
USB-Anschlüsse (3)
Netzwerkanschluss (RJ-45)
Modemanschluss (RJ-11)
Monitoranschluss
Netzadapteranschluss
VERTRAULICHE INFORMATIONEN VON DELL –VORLÄUFIGER STATUS 1.27.05 – NUR ZUR DURCHSICHT
Schnellreferenzhandbuch 65
Page 66

Unterseite
SPEICHERORT DER DATEI: J:\DL\DL044469\DTP\D8854gb0.fm
Speichermodulabdeckung
www.dell.com | support.dell.com
Akkubetrieb
Festplatte
Akku
AkkufachFreigabevorrichtung
Lüfter
Akkuleistung
VORSICHT: Bevor Sie die folgenden Verfahren durchführen, lesen Sie zunächst die Sicherheitshinwei-
se im Produktinformationshandbuch.
ANMERKUNG: Weitere Informationen zur Dell-Garantie für den Computer finden Sie im Produktinfor-
mationshandbuch bzw. im Garantieschein, der im Lieferumfang des Computers enthalten ist.
Für eine optimale Leistung Ihres Computers und zur Beibehaltung der BIOS-Einstellungen verwenden Sie Ihren Computer von Dell™ immer mit eingebautem Akku. Verwenden Sie den Akku,
um den Computer mit Strom zu versorgen, wenn kein Netzstrom zur Verfügung steht. Bei Auslieferung ist standardmäßig bereits ein Akku im Akkufach installiert. Die Akkubetriebsdauer hängt
von den Betriebsbedingungen ab.
ANMERKUNG: Die Betriebsdauer eines Akkus (Zeit, wie lange eine Akkuladung vorhält) nimmt mit der
Zeit ab. Je nachdem, wie oft und unter welchen Bedingungen der Akku verwendet wird, müssen Sie
möglicherweise noch vor Ende der Laufzeit Ihres Computers den Akku ersetzen.
Die Betriebsdauer wird stark beeinträchtigt, wenn Sie bestimmte Vorgänge durchführen. Dazu gehören u. a.:
VERTRAULICHE INFORMATIONEN VON DELL –VORLÄUFIGER STATUS 1.27.05 – NUR ZUR DURCHSICHT
66 Schnellreferenzhandbuch
Page 67

SPEICHERORT DER DATEI: J:\DL\DL044469\DTP\D8854gb0.fm
• Verwenden von optischen Laufwerken wie DVD- oder CD-Laufwerken
• Verwenden von Wireless-Netzwerk-Geräten, PC Cards oder USB-Geräten
• Verwenden von sehr hellen Anzeigeeinstellungen, von 3D-Bildschirmschonern oder anderen
Programmen, die viel Energie benötigen, z. B. 3D-Spielen
• Betrieb des Computers mit maximaler Leistung
ANMERKUNG: Es wird empfohlen, den Computer während des Brennens von CDs oder DVDs an eine
Steckdose anzuschließen.
VORSICHT: Bei Verwendung inkompatibler Akkus besteht Brand- oder Explosionsgefahr. Ersetzen Sie
die Akkus nur mit einem kompatiblen Akku von Dell. Der Lithium-Ionen-Akku und der NiMH-Akku sind
speziell für den Einsatz im Dell™-Computer vorgesehen. Setzen Sie keine Akkus aus anderen Computern in Ihren Computer ein.
VORSICHT: Entsorgen Sie Akkus nicht im Hausmüll. Wenn der Akku die Ladung nicht mehr speichern
kann, wenden Sie sich an Ihren örtlichen Entsorgungsbetrieb oder an eine Umweltbehörde und fragen,
wie ein Lithium-Ionen-Akku oder ein NiMH-Akku sachgerecht entsorgt werden. Informationen zur Batterieentsorgung finden Sie im entsprechenden Abschnitt im Produktinformationshandbuch.
VORSICHT: Unsachgemäße Verwendung von Akkus kann zu Feuer oder chemischen Bränden führen.
Sie dürfen den Akku nicht aufstechen, verbrennen, auseinander nehmen oder Temperaturen über 65 °C
aussetzen. Bewahren Sie den Akku außerhalb der Reichweite von Kindern auf. Handhaben Sie beschädigte oder auslaufende Akkus mit äußerster Vorsicht. Beschädigte Akkus können auslaufen und Personen- oder Sachschäden verursachen.
Prüfen des Akkuladezustands
Die Akkuanzeige von Dell QuickSet, die
-Symbol und die Warnung für niedrigen Akkuladezustand informieren Sie über den Ladezu-
stand des Akkus.
Akkuanzeige von Dell™ QuickSet
Ist Dell QuickSet installiert, drücken Sie <Fn><F3>, um die Akkuanzeige von QuickSet anzuzeigen.
Im Fenster
Battery Meter
(Akkuanzeige) werden Status, Ladezustand und Ladedauer des Akkus
Ihres Computers angezeigt.
Folgende Symbole sind im Fenster
• Der Computer wird mit Akkustrom betrieben.
• Der Akku wird entladen.
• Der Computer ist an eine Steckdose angeschlossen und wird mit Netzstrom betrieben.
• Der Akku wird aufgeladen.
• Der Computer ist an eine Steckdose angeschlossen und wird mit Netzstrom betrieben.
• Der Akku ist vollständig geladen und spannungslos.
VERTRAULICHE INFORMATIONEN VON DELL –VORLÄUFIGER STATUS 1.27.05 – NUR ZUR DURCHSICHT
Energieanzeige
Akkuanzeige
zu sehen:
von Microsoft® Windows® sowie das
Schnellreferenzhandbuch 67
Page 68

Weitere Informationen zu QuickSet erhalten Sie durch Rechtsklicken auf das Symbol im Infobereich (rechts unten auf dem Windows-Desktop) unter
Microsoft® Windows®-Energieanzeige
Die Energie- bzw. Akkuanzeige von Windows zeigt die verbleibende Akkuladung an. Die Energieanzeige können Sie durch Doppelklicken auf das Symbol im Infobereich überprüfen.
Informationen über das Register
Computer an eine Steckdose angeschlossen ist, wird das Symbol
Warnung „Akku niedrig”
HINWEIS: Um den Verlust oder die Beschädigung von Daten zu vermeiden, sollten Sie Ihre Arbeit bei
www.dell.com | support.dell.com
einer Warnung „Akku niedrig” unverzüglich speichern. Schließen Sie den Computer anschließend an
eine Steckdose an. Ist der Akku vollständig entladen, wird automatisch der Ruhezustand aktiviert.
Ein Popup-Fenster mit einer Warnung wird angezeigt, wenn der Ladezustand bei etwa 10 % liegt.
Weitere Informationen zu Warnhinweisen bei niedrigem Batterieladezustand finden Sie in Ihrem
Benutzerhandbuch
Die Warnung über einen niedrigen Ladezustand wird angezeigt, wenn der Akku zu ungefähr
90 Prozent entladen ist. Es wird ein Signalton ausgegeben, der darauf hinweist, dass nur noch die
Mindestbetriebsdauer verbleibt. Während dieser Zeit gibt der Lautsprecher in regelmäßigen Abständen Signaltöne aus. Der Computer geht in den Ruhezustand über, wenn die Akkuladung ein
kritisch niedriges Niveau erreicht hat.
SPEICHERORT DER DATEI: J:\DL\DL044469\DTP\D8854gb0.fm
Help
(Hilfe).
Energieanzeige
finden Sie in Ihrem
.
Benutzerhandbuch
angezeigt.
Weitere
. Wenn der
Aufladen des Akkus
ANMERKUNG: Der Netzadapter lädt einen vollständig entladenen Akku bei ausgeschaltetem Computer
innerhalb von etwa zwei Stunden wieder auf. Bei eingeschaltetem Computer verlängert sich die Ladezeit
entsprechend. Der Akku kann beliebig lange im Computer verbleiben. Der interne Schaltkreis des Akkus
verhindert ein Überladen.
Wenn der Computer an das Stromnetz angeschlossen oder ein Akku in einen daran angeschlossenen Computer eingesetzt wird, prüft der Computer den Ladezustand und die Temperatur des Akkus. Der Netzadapter lädt gegebenenfalls den Akku auf und erhält die Akkuladung.
Falls der Akku durch Betrieb in Ihrem Computer oder aufgrund hoher Umgebungstemperaturen
heiß ist, wird der Akku bei Anschluss des Computers an eine Steckdose unter Umständen nicht geladen.
Bei abwechselnd grün und gelb blinkender Anzeige ist die Akkutemperatur zu hoch, und der
Ladevorgang kann nicht erfolgen. Ziehen Sie den Netzstecker aus der Steckdose, und lassen Sie
Computer und Akku auf Zimmertemperatur abkühlen. Schließen Sie den Computer anschließend
wieder an eine Steckdose an, und setzen Sie den Ladevorgang fort.
Rekalibrieren eines Akkus
Wenn Ihr System mit einem NiMH-Akku (Nickel-Metal-Hydride) ausgestattet ist, können Sie den
Akku mithilfe der Software zur Akku-Rekalibrierung neu einstellen. Durch das Rekalibrieren des
Akkus stellen Sie sicher, dass die Energieanzeige richtige Werte anzeigt.
VERTRAULICHE INFORMATIONEN VON DELL –VORLÄUFIGER STATUS 1.27.05 – NUR ZUR DURCHSICHT
68 Schnellreferenzhandbuch
Page 69

SPEICHERORT DER DATEI: J:\DL\DL044469\DTP\D8854gb0.fm
Sie sollten den NiMh-Akku rekalibrieren, wenn einer der folgenden Fälle eintritt:
• Eine Meldung wird angezeigt, die Sie zum Rekalibrieren des Akkus auffordert.
• Die durchschnittliche Akkulaufzeit verringert sich.
Wenn Sie den NiMH-Akku rekalibrieren, dürfen Sie den Akku nicht entfernen. Das Verfahren kann
mehrere Stunden in Anspruch nehmen.
Rekalibrieren eines Akkus, wenn die Meldung zum Rekalibrieren angezeigt wird
Wenn der Computer eine Meldung anzeigt, die Sie zum Rekalibrieren des Akkus auffordert:
1
Fahren Sie den Computer über das Menü
2
Schließen Sie den Computer an das Stromnetz an und schalten Sie ihn ein.
Die Aufforderung zur Akku-Rekalibrierung sollte sofort nach dem Dell Logo auf dem Bildschirm angezeigt werden.
3
Wenn Sie die Akku-Rekalibrierung überspringen und mit dem Systemstart fortfahren möchten, drücken Sie <Esc>.
Start
herunter.
VERTRAULICHE INFORMATIONEN VON DELL –VORLÄUFIGER STATUS 1.27.05 – NUR ZUR DURCHSICHT
Schnellreferenzhandbuch 69
Page 70

4
Drücken Sie zum Starten des Akku-Rekalibrierungsvorgangs die Taste <F1>.
Die Akku-Rekalibrierung beginnt, und der Netzadapter lädt den Akku so lange auf, bis der Ladestatus auf der Akkuinformation 100 Prozent erreicht hat.
Wenn der Akku vollständig aufgeladen ist, wird eine Meldung angezeigt, dass Sie die Verbindung vom Akku zum Netzadapter trennen können.
5
Trennen Sie nach Aufforderung den Computer von der Steckdose.
Der Akku wird entladen, bis der Ladestand 0 Prozent anzeigt. Wenn der Akku vollständig entladen ist, schaltet sich der Computer automatisch aus.
6
Verbinden Sie den Netzadapter mit dem Computer.
7
www.dell.com | support.dell.com
Lassen Sie den Netzadapter den Akku so lange aufladen, bis die Akkuanzeige erlischt.
ANMERKUNG: Sie können mit dem Computer arbeiten, während sich der Akku auflädt. Sie können die
Akkuversorgung jedoch erst dann wieder nutzen, wenn der Akku vollständig geladen ist.
Rekalibrieren eines Akkus über das System-Setup-Dienstprogramm
1
Schließen Sie den Computer an eine Steckdose an.
2
Schalten Sie den Computer ein oder führen Sie einen Neustart durch.
3
Wenn das Dell Logo angezeigt wird, drücken Sie sofort <F2>. Falls Sie zu lange gewartet haben, und das Logo von Microsoft
Windows-Desktop angezeigt wird. Fahren Sie danach den Computer herunter und starten
Sie ihn erneut.
ANMERKUNG: Um Informationen zu einer bestimmten Option im System-Setup-Bildschirm anzuzeigen,
markieren Sie die Option, und lesen Sie die Anzeige im Bereich „Hilfe”.
4
Wählen Sie mithilfe der Nach-unten-Taste die
• Der Bildschirm für den
tionen (
an. Auf der rechten Seite des Bildschirms wird über die
der Ladestatus des Akkus angezeigt.
• Der Netzadapter beginnt mit dem Aufladen des Akkus. Die Option
Full
wird der Ladestatus des Akkus in Prozent angezeigt.
• Der Netzadapter lädt den Akku so lange auf, bis ein Ladestand von 100 Prozent angezeigt
wird. Die Akkuanzeige erlischt, nachdem der Akku vollständig geladen ist.
5
Stellen Sie sicher, dass die Akkuanzeige erloschen ist.
6
Trennen Sie den Computer von der Steckdose.
SPEICHERORT DER DATEI: J:\DL\DL044469\DTP\D8854gb0.fm
®
Windows® angezeigt wird, warten Sie noch, bis der
Charge
Akku-Rekalibrierungsvorgang
(Laden) oder
Discharge
Battery Info
(Entladen)) auf der linken Seite des Bildschirms
(Akkuinformationen).
wird angezeigt und zeigt die Funk-
Battery Info
(Akkuinformation)
Charge Battery to
(Akku vollständig laden) links auf dem Bildschirm ist aktiviert. Auf der rechten Seite
Der Akku wird entladen, bis der Ladestand 0 Prozent anzeigt. Die Option
to Empty
(Akku vollständig entladen) wird auf der linken Seite des Bildschirms angezeigt.
Discharge Battery
Wenn der Akku vollständig entladen ist, schaltet sich der Computer automatisch aus.
VERTRAULICHE INFORMATIONEN VON DELL –VORLÄUFIGER STATUS 1.27.05 – NUR ZUR DURCHSICHT
70 Schnellreferenzhandbuch
Page 71

SPEICHERORT DER DATEI: J:\DL\DL044469\DTP\D8854gb0.fm
7
Schließen Sie den Computer an das Stromnetz an.
8
Lassen Sie den Netzadapter den Akku so lange aufladen, bis die Akkuanzeige erlischt.
ANMERKUNG: Sie können mit dem Computer arbeiten, während der Akku geladen wird. Sie können die
Akkuversorgung jedoch erst dann wieder nutzen, wenn der Akku vollständig geladen ist.
Entfernen eines Akkus
VORSICHT: Bevor Sie die folgenden Schritte durchführen, entfernen Sie sämtliche peripheren An-
schlüsse wie z. B. Telefonkabel, Netzwerkkabel, externe Monitorkabel oder USB-Kabel und USB-Geräte.
1
Stellen Sie sicher, dass der Computer ausgeschaltet und ausgesteckt ist.
2
Wenn der Computer mit einem USB-Port-Replicator verbunden ist, trennen Sie diese Verbindung. Anweisungen dazu finden Sie in der Dokumentation zum USB-Port-Replicator.
3
Schieben Sie die Akkufachfreigabevorrichtung auf der Unterseite des Computers zur Seite
und nehmen Sie anschließend den Akku aus dem Akkufach heraus.
Einsetzen eines Akkus
Stellen Sie sicher, dass der Computer ausgeschaltet ist. Schieben Sie den Akku in den Schacht ein,
bis die Freigabevorrichtung hörbar einrastet.
Lagern des Akkus
Entfernen Sie den Akku, wenn Sie den Computer für längere Zeit lagern möchten. Akkus entladen
sich während einer längeren Lagerzeit. Laden Sie den Akku nach längerer Lagerzeit vollständig auf,
bevor Sie ihn verwenden.
VERTRAULICHE INFORMATIONEN VON DELL –VORLÄUFIGER STATUS 1.27.05 – NUR ZUR DURCHSICHT
Schnellreferenzhandbuch 71
Page 72

Beheben von Störungen
Notebook Systemsoftware (NSS)
Wenn Sie das Betriebssystem auf Ihrem Dell™-Computer neu installieren, sollten Sie auch das
NSS-Dienstprogramm neu installieren. Dieses Dienstprogramm steht Ihnen auf der optionalen
Drivers and Utilities
Laden Sie das Dienstprogramm von der Website
Downloads
Your Download Category
Configuration Utilities
www.dell.com | support.dell.com
Betriebssystem und Ihre Betriebssystemsprache und folgen Sie anschließend den weiteren Anweisungen.
NSS- sorgt dafür, dass wichtige Aktualisierungen für Ihr Betriebssystem durchgeführt werden und
bietet Unterstützung für Dell 3,5-Zoll-USB-Diskettenlaufwerke, Intel
Intel Celeron
mäßigen Betrieb des Dell Computers notwendig. Die Software erkennt automatisch Ihren Computertyp und das Betriebssystem und installiert die für Ihre Konfiguration geeigneten Aktualisierungen.
Ihr Computer-Modell aus dem Drop-Down-Menü auswählen. Wählen Sie unter
ANMERKUNG: NSS ist für den ordnungsmäßigen Betrieb der USB-Geräte zwingend erforderlich.
SPEICHERORT DER DATEI: J:\DL\DL044469\DTP\D8854gb0.fm
-CD und auf der Dell Support-Website unter
support.dell.com
(Wählen Sie Ihre Download-Kategorie aus) die Kategorie
support.dell.com
zur Verfügung.
herunter, indem Sie unter
System and
(System- und Konfigurations-Dienstprogramme) aus, bestimmen Sie Ihr
®
®
-M-Prozessoren, optische Laufwerke und USB-Geräte. NSS-ist für den ordnungs-
Pentium®-M-Prozessoren,
Select
Probleme mit Absturz und Software
VORSICHT: Bevor Sie die folgenden Verfahren durchführen, lesen Sie zunächst die Sicherheitshinwei-
se im Produktinformationshandbuch.
Der Computer startet nicht
STELLEN SIE SICHER, DASS DAS NETZKABEL RICHTIG COMPUTER UND AN DER STECKDOSE ANGE-
SCHLOSSEN IST.
Der Computer reagiert nicht mehr
HINWEIS: Wenn Sie das Betriebssystem nicht ordnungsgemäß herunterfahren, können Daten verloren
gehen.
TURN THE COMPUTER OFF (SCHALTEN SIE DEN COMPUTER AUS)—Wenn der Computer nicht mehr
reagiert und auch nicht durch Drücken einer Taste auf der Tastatur bzw. Bewegen der Maus aktiviert
werden kann, halten Sie den Netzschalter mindestens acht bis zehn Sekunden lang gedrückt, bis der
Computer ausgeschaltet wird. Starten Sie anschließend den Computer neu.
VERTRAULICHE INFORMATIONEN VON DELL –VORLÄUFIGER STATUS 1.27.05 – NUR ZUR DURCHSICHT
72 Schnellreferenzhandbuch
Page 73

SPEICHERORT DER DATEI: J:\DL\DL044469\DTP\D8854gb0.fm
Ein Programm reagiert nicht mehr
END THE PROGRAM (PROGRAMM BEENDEN)—
1
Drücken Sie <Strg><Umschlt><Esc> gleichzeitig.
2
Klicken Sie auf
3
Klicken Sie auf das Programm, das nicht mehr reagiert.
4
Klicken Sie auf
Anwendungen
Task beenden
.
.
Ein Programm stürzt wiederholt ab
ANMERKUNG: Anweisungen für die Installation von Software finden Sie im Allgemeinen in der jeweili-
gen Dokumentation oder auf einer mitgelieferten Diskette oder CD.
SOFTWAREDOKUMENTATION LESEN — Deinstallieren Sie gegebenenfalls das Programm und installieren Sie es anschließend erneut.
Ein Programm ist für ein früheres Microsoft® Windows®-Betriebssystem konzipiert.
WENN SIE WINDOWS XP VERWENDEN, FÜHREN SIE DEN PROGRAMMKOMPATIBILITÄTS-
SSISTENTEN AUS — Der Programmkompatibilitäts-Assistent konfiguriert ein Programm für
A
Windows XP, sodass es auch in ähnlichen Betriebssystemumgebungen eingesetzt werden kann.
1
Klicken Sie auf
Programmkompatibilitäts-Assistent
2
Klicken Sie auf der Begrüßungsseite auf
3
Befolgen Sie die Anweisungen auf dem Bildschirm.
Start
, zeigen Sie auf
Alle Programme → Zubehör
.
Weit er
.
, und klicken Sie anschließend auf
Ein blauer Bildschirm wird angezeigt
TURN THE COMPUTER OFF (SCHALTEN SIE DEN COMPUTER AUS)—Wenn der Computer nicht mehr
reagiert und auch nicht durch Drücken einer Taste auf der Tastatur bzw. Bewegen der Maus aktiviert
werden kann, halten Sie den Netzschalter mindestens acht bis zehn Sekunden lang gedrückt, bis der
Computer ausgeschaltet wird. Starten Sie anschließend den Computer neu.
VERTRAULICHE INFORMATIONEN VON DELL –VORLÄUFIGER STATUS 1.27.05 – NUR ZUR DURCHSICHT
Schnellreferenzhandbuch 73
Page 74

SPEICHERORT DER DATEI: J:\DL\DL044469\DTP\D8854gb0.fm
Sonstige Probleme mit der Software
LESEN SIE DIE DOKUMENTATION ZU DEM JEWEILIGEN PROGRAMM ODER SETZEN SIE SICH MIT DEM
ERSTELLER DER SOFTWARE IN VERBINDUNG —
H
• Stellen Sie sicher, dass das Programm mit dem auf Ihrem Computer installierten Betriebssystem kompatibel ist.
• Stellen Sie sicher, dass Ihr Computer die Mindesthardwareanforderungen erfüllt, die für die Software
erforderlich sind. Informationen dazu finden Sie in der Softwaredokumentation.
• Stellen Sie sicher, dass das Programm ordnungsgemäß installiert und konfiguriert wurde.
• Stellen Sie sicher, dass die Gerätetreiber nicht mit dem Programm in Konflikt stehen.
• Deinstallieren Sie gegebenenfalls das Programm und installieren Sie es anschließend erneut.
www.dell.com | support.dell.com
LEGEN SIE SOFORT EINE SICHERUNGSKOPIE IHRER DATEIEN AN.
VERWENDEN SIE FÜR DIE ÜBERPRÜFUNG VON FESTPLATTENLAUFWERK, DISKETTEN BZW. CDS EIN
IRENTESTPROGRAMM.
V
SPEICHERN UND SCHLIEßEN SIE ALLE GEÖFFNETEN DATEIEN ODER PROGRAMME UND FAHREN SIE
HREN COMPUTER ÜBER DAS StartMENÜ HERUNTER.
I
DEN COMPUTER NACH SPYWARE SCANNEN — Wenn Sie eine langsame Computerleistung wahrneh-
men, häufige Pop-Up-Werbungen erhalten oder wenn Sie Probleme haben, eine Verbindung mit dem
Internet herzustellen, könnte es sein, dass Ihr Computer mit Spyware infiziert ist. Benutzen Sie ein
Anti-Virus Program, dass einen Anti-Spyware Schutz hat (Ihr Programm braucht möglicherweise ein
Upgrade), um den Computer zu scannen und die Spyware zu entfernen. Weitere Informationen erhalten Sie auf der Webseite support.dell.com. Suchen Sie dort nach dem Schlagwort Spyware.
FÜHREN SIE DELL DIAGNOSE AUS — Wenn alle Tests erfolgreich ausgeführt wurden, liegt der Fehler
in der Software begründet.
Verwenden des Programms „Dell Diagnostics”
VORSICHT: Konsultieren Sie die Sicherheitshinweise im Produktinformationshandbuch, ehe Sie die
folgenden Schritte ausführen.
Wann wird Dell Diagnostics eingesetzt?
Wenn eine Störung am Computer auftritt, führen Sie zuerst die Tests unter „Beheben von Störungen” (in Ihrem Onlineaus, bevor Sie Dell kontaktieren, um technische Hilfe zu erhalten.
Benutzerhandbuch
) durch und führen Sie das Programm „Dell Diagnostics”
HINWEIS: „Dell Diagnostics” funktioniert nur für Dell™-Computer.
Starten Sie die „Dell Diagnostics” entweder von Ihrem Festplattenlaufwerk oder von der optionalen
Drivers and Utilities
VERTRAULICHE INFORMATIONEN VON DELL –VORLÄUFIGER STATUS 1.27.05 – NUR ZUR DURCHSICHT
-CD (diese wird auch als
ResourceCD
bezeichnet).
74 Schnellreferenzhandbuch
Page 75

SPEICHERORT DER DATEI: J:\DL\DL044469\DTP\D8854gb0.fm
Starten von Dell Diagnostics vom Festplattenlaufwerk
Das Programm „Dell Diagnostics” befindet sich auf der Festplatte auf einer verborgenen Partition.
ANMERKUNG: Wenn auf dem Bildschirm nichts angezeigt werden kann, wenden Sie sich an Dell.
1
Fahren Sie den Computer herunter.
2
Falls der Computer mit einem Docking-Gerät verbunden ist, trennen Sie die Verbindung.
Weitere Anweisungen hierzu finden Sie in der Dokumentation zum Docking-Gerät.
3
Schließen Sie den Computer an eine Steckdose an.
4
Schalten Sie den Computer ein. Wenn das DELL™-Logo angezeigt wird, drücken Sie sofort
<F12>. Das einmalig angezeigte Startmenü zeigt eine Liste von startfähigen Geräten an.
ANMERKUNG: Wenn die Meldung angezeigt wird, dass keine Partition des Diagnose-Dienstprogramms
gefunden wurde, führen Sie Dell Diagnostics von Ihrer optionalen Drivers and Utilities CD aus.
Falls zu lange gewartet wurde und das Betriebssystem-Logo erscheint, warten Sie, bis der
Microsoft
®
Windows®-Desktop angezeigt wird. Fahren Sie danach den Computer herunter
und versuchen Sie es erneut.
5
Wenn die Liste der Startgeräte erscheint, markieren Sie
Diagnose
und drücken Sie die EIN-
GABETASTE.
Der Computer führt die Überprüfung vor dem Systemstart durch, d. h. eine Reihe von Tests
der Platine, Tastatur, Festplatte und dem Bildschirm.
ANMERKUNG: Wenn die Liste von startfähigen Geräten nicht angezeigt wird, drücken Sie die Tasten
<Ende> und <Enter>, um das Programm „Dell Diagnostics” zu starten.
• Beantworten Sie alle Fragen, die während der Überprüfung angezeigt werden.
• Wird bei einer Komponente eine Fehlfunktion festgestellt, unterbricht der Computer die
Überprüfung und gibt einen Signalton aus. Um die Überprüfung zu unterbrechen und
den Computer neu zu starten, drücken Sie <n>. Um mit dem nächsten Test fortzufahren, drücken Sie <y>. Um die Komponente, bei der eine Fehlfunktion aufgetreten ist, erneut zu testen, drücken Sie <r>.
• Werden bei der Überprüfung vor dem Systemstart Fehlfunktionen festgestellt, notieren
Sie sich die Fehlercodes, und wenden Sie sich an Dell, bevor Sie mit dem Dell-Diagnostics-Programm fortfahren.
Wenn der Systemtest vor Hochfahren des Computers erfolgreich abgeschlossen wird, erhalten
Sie die Meldung
continue.
Booting Dell Diagnostic Utility Partition. Press any key to
(Starten der Dell Dia-gnostic-Dienstprogrammpartition. Drücken Sie eine
beliebige Taste, um fortzufahren.)
6
Drücken Sie eine beliebige Taste, um das Programm „Dell Diagnostics” von der entsprechenden Diagnostic-Dienstprogrammpartition auf der Festplatte zu starten.
VERTRAULICHE INFORMATIONEN VON DELL –VORLÄUFIGER STATUS 1.27.05 – NUR ZUR DURCHSICHT
Schnellreferenzhandbuch 75
Page 76

Starten der Dell Diagnose von der optionalen Drivers and Utilities CD
1
Legen Sie die
2
Fahren Sie den Computer herunter und führen Sie einen Neustart aus.
Wenn das Dell Logo angezeigt wird, drücken Sie sofort <F12>.
Falls so lange gewartet wurde, bis das Windows-Logo erscheint, noch warten, bis der
Windows-Desktop angezeigt wird. Fahren Sie danach den Computer herunter und starten
Sie ihn erneut.
ANMERKUNG: Die nächsten Schritte ändern die Startsequenz nur einmal. Bei dem nächsten System-
start startet der Computer entsprechend den im System-Setup angegebenen Geräten.
3
www.dell.com | support.dell.com
Wenn die Liste der Startgeräte erscheint, markieren Sie
drücken Sie die EINGABETASTE.
4
Wählen Sie die
5
Wählen Sie die Option
6
Geben Sie 1 ein, um das
7
Geben Sie 2 ein, um „Dell Diagnostics” zu starten.
8
Wählen Sie
Nummernliste. Wählen Sie die für Ihren Computer zutreffende Version aus, wenn mehrere
Versionen aufgelistet werden.
9
Wenn das
wünschten Test aus.
SPEICHERORT DER DATEI: J:\DL\DL044469\DTP\D8854gb0.fm
Drivers and Utilities
CD.
CD/DVD/CD-RW-Laufwerk
CD/DVD/CD-RW-Laufwerk
Boot from CD-ROM
ResourceCD-Menü
Run the 32 Bit Dell Diagnostics
Hauptmenü
des Programms „Dell Diagnostics” erscheint, wählen Sie den ge-
aus dem CD-Startmenü.
(Start von CD-ROM) im angezeigten Menü.
aufzurufen.
(32-Bit-Dell Diagnostics ausführen) aus der
und
Hauptmenü des Programms „Dell Diagnostics”
1
Klicken Sie nach dem Laden der Dell Diagnose und nachdem das
Hauptmenü
angezeigt wird
auf die Schaltfläche für die von Ihnen gewünschte Option.
Option Funktion
Express Test
(Schnelltest)
Extended Test
(Erweiterter Test)
Custom Test
(Benutzerdefinierter Test)
Symptom Tree
(Problemübersicht)
VERTRAULICHE INFORMATIONEN VON DELL –VORLÄUFIGER STATUS 1.27.05 – NUR ZUR DURCHSICHT
Es wird ein Schnelltest der Geräte durchgeführt. Dieser Test dauert normalerweise etwa 10 bis 20 Minuten. Es ist keine Benutzeraktion erforderlich.
Führen Sie den Schnelltest zuerst aus, um die Möglichkeit zum schnellen
Auffinden des Problems zu erhöhen.
Es wird ein ausführlicher Test der Geräte durchgeführt. Dieser Test nimmt
normalerweise mindestens eine Stunde in Anspruch. Dabei muss der Benutzer in regelmäßigen Abständen Informationen eingeben.
Es wird ein bestimmtes Gerät geprüft. Die auszuführenden Tests können
vom Benutzer angepasst werden.
Listet die am häufigsten vorkommenden Symptome auf und lässt zu, dass Sie
einen Test wählen, der auf dem Symptom der vorliegenden Störung basiert.
76 Schnellreferenzhandbuch
Page 77

SPEICHERORT DER DATEI: J:\DL\DL044469\DTP\D8854gb0.fm
2
Wenn beim Test eine Störung gefunden wird, wird eine Meldung mit dem Fehlercode und
eine Beschreibung der Störung angezeigt. Notieren Sie den Fehlercode und die Problembeschreibung und folgen Sie den Anweisungen auf dem Bildschirm.
Kann das Problem nicht gelöst werden, wenden Sie sich an Dell.
ANMERKUNG: Die Service-Tag-Nummer des Computers befindet sich oben auf jedem Testbildschirm.
Wenn Sie bei Dell anrufen, fragt Sie der Technische Support nach der Service-Tag-Nummer.
3
Klicken Sie beim Ausführen eines Tests im
Symptom Tree
(Problemübersicht) auf das in der folgenden Tabelle beschriebene zutreffende
benutzerdefinierten Test
oder mit der Option
Register, um weitere Informationen zu erhalten.
Registerkarte Funktion
Results (Ergebnisse) Es werden die Testergebnisse und möglicherweise gefundene Probleme
angezeigt.
Errors (Fehler) Es werden die gefundenen Fehler, die Fehlercodes und eine Beschreibung
des Problems angezeigt.
Help (Hilfe) Beschreibt den Test und verweist auf mögliche Voraussetzungen für die
Durchführung des Tests.
Configuration
(Konfiguration)
Parameters (Parameter) Der Test kann durch Änderungen an den Einstellungen an Ihre Bedürf-
Die Hardwarekonfiguration der ausgewählten Geräte wird angezeigt.
Das Programm „Dell Diagnostics” sammelt über das System-Setup-Pro-
gramm, den Speicher und verschiedene interne Tests Konfigurationsinformationen für alle Geräte. Diese Informationen werden in der Geräteliste
auf der linken Seite des Bildschirms angezeigt. In der Geräteliste werden
möglicherweise nicht alle Namen von Geräten angezeigt, die im Computer installiert oder daran angeschlossen sind.
nisse angepasst werden.
4
Nachdem die Tests abgeschlossen sind, wenn Sie „Dell Diagnostics” von der
lities
CD ausführen, entfernen Sie die CD.
5
Schließen Sie nach Abschluss der Tests den Testbildschirm und kehren Sie zum
Drivers and Uti-
Hauptmenü
zurück. Schließen Sie zum Beenden der Dell Diagnose und zum Neustart des Computers das
Hauptmenü
VERTRAULICHE INFORMATIONEN VON DELL –VORLÄUFIGER STATUS 1.27.05 – NUR ZUR DURCHSICHT
.
Schnellreferenzhandbuch 77
Page 78

www.dell.com | support.dell.com
SPEICHERORT DER DATEI: J:\DL\DL044469\DTP\D8854gb0.fm
VERTRAULICHE INFORMATIONEN VON DELL –VORLÄUFIGER STATUS 1.27.05 – NUR ZUR DURCHSICHT
78 Schnellreferenzhandbuch
Page 79

Index
A
Akku
Aufladen, 68
Einsetzen, 71
Energieanzeige, 68
Entfernen, 71
Lagern, 71
Leistung, 66
Prüfen des Ladezustands, 67
Warnung „Akku niedrig“, 68
Assistenten
Programmkompatibilitäts-
Assistent, 73
B
Benutzerhandbuch, 58
Betriebssystem
CD, 60
Installationshandbuch, 60
Betriebssystem-CD, 60
C
CD
Betriebssystem, 60
Computer, 62
langsame Leistung, 74
reagiert nicht mehr, 72
stürzt ab, 72-73
D
Dell
Support-Website, 59
Dell Premier Support-
Website, 57, 59
Diagnose
ausführen, 74
Drivers and Utilities CD, 57
Dokumentation
Benutzerhandbuch, 58
Gerät, 57
online, 59
Systeminformationshandbuch,
57
Drivers and Utilities CD, 57
E
Etikett
Microsoft Windows, 58
Service-Tag-Nummer, 58
G
Garantie, 57
I
Informationsquellen
Dokumentation, 57
L
Linke Seitenansicht, 64
M
Microsoft Windows, 58
P
Probleme
Blauer Bildschirm, 73
Computer reagiert nicht
mehr, 72
Computer startet nicht, 72
Computer stürzt ab, 72-73
langsame
Computerleistung, 74
Programm reagiert nicht
mehr, 73
Programm stürzt ab, 73
Programme und Windows-
Kompatibilität, 73
Software, 72-74
Spyware, 74
S
Service-Tag-Nummer, 58
Sicherheitshinweise, 57
Software
Probleme, 73-74
Spyware, 74
Index 79
Page 80

Störungen
Beheben, 72
T
Trei be r
ResourceCD, 57
W
Windows XP
Programmkompatibilitäts-
Assistent, 73
Wissenswertes über Ihren
Computer
Linke Seitenansicht, 63-64
Rechte Seitenansicht, 64
Rückansicht, 65
Unterseite, 66
Vorderansicht, 63
80 Index
Page 81

Dell™ Latitude™ 110L
Guida di consultazione rapida
Modello PP10S
www.dell.com | support.dell.com
Page 82

N.B., avvisi e attenzione
N.B. Un N.B. indica informazioni importanti che contribuiscono a migliorare l'utilizzo del computer.
AVVISO: Un AVVISO indica un danno potenziale all'hardware o perdita di dati e spiega come evitare il problema.
ATTENZIONE: Un messaggio di ATTENZIONE indica un rischio di danni materiali, lesioni personali o morte.
Abbreviazioni ed acronimi
Per un elenco completo di abbreviazioni ed acronimi, consultare la
operativo, fare doppio clic sull'icona
pulsante
Start
, su
Guida in linea e supporto tecnico
Guida dell'utente
nel desktop di Microsoft® Windows® o fare clic sul
, quindi fare clic su
Guida dell'utente
(a seconda del sistema
Guide dell'utente e di sistema
).
Se si è acquistato un computer Dell™ Serie n, qualsiasi riferimento in questo documento ai sistemi operativi
Microsoft
I CD
®
Windows® non è applicabile.
Drivers and Utilities
e
Operating System
sono opzionali e potrebbero non essere spediti con tutti i
computer.
_________________
Le informazioni contenute in questo documento sono soggette a modifica senza preavviso.
© 2005 Dell Inc. Tutti i diritti riservati.
È severamente vietata la riproduzione, con qualsiasi strumento, senza l'autorizzazione scritta di Dell Inc.
Marchi commerciali usati nel presente documento: Dell, il logo DELL e Latitude sono marchi commerciali di Dell Inc.; Microsoft e Windows
sono marchi depositati di Microsoft Corporation; Intel, Celeron e Pentium sono marchi depositati di Intel Corporation.
Altri marchi e nomi commerciali possono essere utilizzati in questo documento sia in riferimento alle aziende che rivendicano il marchio e i
nomi che ai prodotti stessi. Dell Inc. nega qualsiasi partecipazione di proprietà relativa a marchi e nomi commerciali diversi da quelli di sua
proprietà.
Modello PP10S
Gennaio 2005 N/P D8854 Rev. A00
Page 83

Sommario
Ricerca di informazioni . . . . . . . . . . . . . . . . . . . . . . . . . . . . . 85
Installazione del computer
Informazioni sul computer
Vista frontale
Vista sinistra
Vista destra
. . . . . . . . . . . . . . . . . . . . . . . . . . . . . . . . 92
. . . . . . . . . . . . . . . . . . . . . . . . . . . . . . . . 92
. . . . . . . . . . . . . . . . . . . . . . . . . . . . . . . . . 93
Vista posteriore
Vista inferiore
Uso della batteria
. . . . . . . . . . . . . . . . . . . . . . . . . . . . . . . . 95
Rendimento della batteria
Controllo della carica della batteria
Misuratore di alimentazione Dell™ QuickSet
Misuratore di alimentazione di Microsoft
Avviso di batteria scarica
Ricarica della batteria
Ricalibratura della batteria
. . . . . . . . . . . . . . . . . . . . . . . . . . . 89
. . . . . . . . . . . . . . . . . . . . . . . . . . . . 91
. . . . . . . . . . . . . . . . . . . . . . . . . . . . . . . 93
. . . . . . . . . . . . . . . . . . . . . . . . . . . . . . . . 94
. . . . . . . . . . . . . . . . . . . . . . . . . 95
. . . . . . . . . . . . . . . . . . . . 96
. . . . . . . . . . 96
®
Windows
. . . . . . . . . . . . . . . . . . . . 96
. . . . . . . . . . . . . . . . . . . . . . . . . . . 97
. . . . . . . . . . . . . . . . . . . . . . . . . 97
Ricalibratura della batteria quando viene visualizzato il messaggio
di ricalibratura
. . . . . . . . . . . . . . . . . . . . . . . . . . . . . . . 97
Ricalibratura della batteria utilizzando l'utilità Installazione
del sistema
Rimozione della batteria
Installazione della batteria
Conservazione della batteria
. . . . . . . . . . . . . . . . . . . . . . . . . . . . . . . . . 98
. . . . . . . . . . . . . . . . . . . . . . . . . . 99
. . . . . . . . . . . . . . . . . . . . . . . . . 99
. . . . . . . . . . . . . . . . . . . . . . . 100
®
. . . . . 96
Soluzione dei problemi
. . . . . . . . . . . . . . . . . . . . . . . . . . . . 100
Notebook System Software (NSS)
Blocchi e problemi del software
Il computer non si avvia
Il computer smette di rispondere
Un programma smette di rispondere
Un programma si interrompe ripetutamente
Un programma è stato progettato per una versione
precedente del sistema operativo
Microsoft
®
Windows
. . . . . . . . . . . . . . . . . . . . 100
. . . . . . . . . . . . . . . . . . . . . 100
. . . . . . . . . . . . . . . . . . . . 100
. . . . . . . . . . . . . . . 100
. . . . . . . . . . . . . 101
. . . . . . . . . 101
®
. . . . . . . . . . . . . . . . . . . . 101
Sommario 83
Page 84

Appare una schermata blu. . . . . . . . . . . . . . . . . . . 101
Altri problemi relativi al software
Esecuzione del programma Dell Diagnostics
Quando utilizzare il programma Dell Diagnostics
Avvio del programma Dell Diagnostics dal disco rigido
. . . . . . . . . . . . . . . 102
. . . . . . . . . . . . . . . 103
. . . . . . . 103
. . . . 103
Avvio del programma Dell Diagnostics dal CD opzionale
Drivers and Utilities
Menu principale del programma Dell Diagnostics
. . . . . . . . . . . . . . . . . . . . . . 104
. . . . . . 105
Indice analitico . . . . . . . . . . . . . . . . . . . . . . . . . . . . . . . . 107
84 Sommario
Page 85

POSIZIONE DEL FILE: J:\DL\DL044469\DTP\D8854ib0.fm
Ricerca di informazioni
N.B. Alcune funzioni potrebbero non essere disponibili sul computer o in alcuni Paesi.
N.B. Informazioni supplementari potrebbero essere fornite assieme al computer.
Cosa si ricerca? Si trova qui
• Un programma diagnostico per il computer
• Driver per il computer
• Documentazione del computer
• Documentazione delle periferiche
• Notebook System Software (NSS)
CD Drivers and Utilities (noto anche come ResourceCD)
La documentazione e i driver sono già installati sul
computer. È possibile utilizzare il CD per reinstallare
driver, eseguire la diagnostica della Dell o accedere alla
documentazione.
I file Leggimi possono
essere compresi nel CD
per fornire gli ultimi
aggiornamenti a
proposito di modifiche
tecniche operate sul
computer o materiale di
riferimento tecnico
avanzato per assistenti
tecnici o utenti esperti.
• Informazioni sulla garanzia
• Clausole e condizioni (solo per gli Stati Uniti)
• Istruzioni di sicurezza
• Avvisi normativi
• Informazioni sull'ergonomia
• Contratto di licenza con l'utente finale
RISERVATO DELL – PRELIMINARE 1/27/05 – SOLO PER IL CONTROLLO
N.B. Aggiornamenti dei driver e della documentazione sono
disponibili all'indirizzo support.dell.com.
N.B. Il CD Drivers and Utilities è opzionale e potrebbe non
essere spedito con il computer.
Guida alle informazioni sul prodotto Dell™
Guida di consultazione rapida 85
Page 86

POSIZIONE DEL FILE: J:\DL\DL044469\DTP\D8854ib0.fm
Cosa si ricerca? Si trova qui
• Come rimuovere e sostituire i componenti
• Specifiche
• Come configurare le impostazioni del sistema
• Come individuare e risolvere i problemi
Guida dell'utente
Guida in linea e supporto tecnico di Microsoft
XP
1
2
La Guida dell'utente è disponibile anche sul CD Drivers
and Utilities
N.B.
www.dell.com | support.dell.com
• Numero di servizio e codice del servizio espresso
• Etichetta di licenza di Microsoft Windows
essere spedito con il computer.
Numero di servizio e licenza di Microsoft Windows
Queste etichette si trovano sul
• Usare il Numero di
• Immettere il codice del servizio espresso per smistare la
®
Windows®
Fare clic sul pulsante
linea e supporto tecnico
Fare clic su
dell'utente
Guide dell'utente e di sistema
.
Start
, quindi scegliere
.
Guida in
e su
Guide
.
Il CD Drivers and Utilities è opzionale e potrebbe non
fondo del
servizio per
identificare il
computer quando si
utilizza
support.dell.com
o
rivolgersi al supporto
tecnico.
telefonata quando ci si rivolge al supporto tecnico. Il
Codice del servizio espresso potrebbe non essere
disponibile in tutti i Paesi.
computer.
RISERVATO DELL – PRELIMINARE 1/27/05 – SOLO PER IL CONTROLLO
86 Guida di consultazione rapida
Page 87

POSIZIONE DEL FILE: J:\DL\DL044469\DTP\D8854ib0.fm
Cosa si ricerca? Si trova qui
• Soluzioni — suggerimenti per la risoluzione dei problemi,
articoli di tecnici, corsi in linea, domande frequenti
• Forum clienti — discussione in linea con altri clienti Dell
• Aggiornamenti — informazioni di aggiornamento per
componenti, quali ad esempio la memoria, il disco rigido e il
sistema operativo
• Assistenza tecnica clienti — informazioni di contatto, sullo
stato dell'ordine e della richiesta di servizio, sulla garanzia e
sulle riparazioni
Sito Web del supporto tecnico della Dell —
support.dell.com
N.B. Selezionare il proprio Paese per visualizzare il sito di
supporto adeguato.
N.B. Aziende, entità governative e istituzioni scolastiche
possono anche utilizzare il sito Web personalizzato Dell
Premier Supportall'indirizzo premier.support.dell.com.
Questo sito Web potrebbe non essere disponibile in tutti i
Paesi.
• Servizio e supporto — stato della richiesta di servizio,
contratto di servizio, discussioni in linea con il supporto
tecnico
• Riferimenti — documentazione per il computer, dettagli
sulla configurazione del computer, specifiche dei prodotti e
white paper
• Download — aggiornamenti di driver certificati, patch e
software
• Notebook System Software (NSS) — Se si reinstalla il
sistema operativo per il computer, va anche reinstallata
l'utilità NSS. NSS fornisce aggiornamenti critici per il
sistema operativo ed il supporto per unità disco floppy USB
da 3,5 pollici Dell™, processori Intel
processori Intel Celeron
®
M, unità ottiche e periferiche
®
Pentium®M,
USB. l'utilità è necessario per il corretto funzionamento del
computer Dell. Il software rileva automaticamente il
computer ed il sistema operativo e installa gli aggiornamenti
appropriati per la propria configurazione.
Per scaricare Notebook System Software:
1. Visitare l'indirizzo
Downloads
.
support.dell.com
e fare clic su
2. Immettere il Numero di servizio o il modello del
prodotto.
3. Nel menu a discesa
download), fare clic su
Download Category
All
(Tutte).
(Categoria di
4. Scegliere il sistema operativo e la lingua del sistema
operativo per il computer e fare clic su
Submit
(Invia).
5. Sotto Select a Device (Seleziona un computer),
scorrere fino a
System and Configuration Utilities
(Utilità di configurazione e di sistema) e fare clic su
Notebook System Software
(Software di sistema per
portatili Dell).
RISERVATO DELL – PRELIMINARE 1/27/05 – SOLO PER IL CONTROLLO
Dell
Guida di consultazione rapida 87
Page 88

POSIZIONE DEL FILE: J:\DL\DL044469\DTP\D8854ib0.fm
Cosa si ricerca? Si trova qui
• Come usare Windows XP
• Documentazione per il computer
Guida in linea e supporto tecnico di Windows
1
• Documentazione per periferiche (per esempio un modem)
2
3
4
• Come reinstallare il sistema operativo
CD Operating System
Il sistema operativo è già installato nel computer.
www.dell.com | support.dell.com
Utilizzare il CD Operating System per reinstallare il
sistema operativo. Consultare la Guida dell'utente per
istruzioni.
Fare clic sul pulsante
linea e supporto tecnico
Start
, quindi scegliere
.
Guida in
Digitare una parola o una frase che descriva il problema
e fare clic sull'icona della freccia.
Fare clic sull'argomento che descrive il problema.
Seguire le istruzioni visualizzate.
Dopo aver installato il
sistema operativo,
utilizzare il CD
and Utilities
Drivers
per
reinstallare i driver per le
periferiche fornite
assieme al computer.
L'etichetta della product
key del sistema operativo
è ubicata sul computer.
RISERVATO DELL – PRELIMINARE 1/27/05 – SOLO PER IL CONTROLLO
88 Guida di consultazione rapida
N.B. Il colore del CD varia in base al sistema operativo
ordinato.
N.B. Il CD Operating System è opzionale e potrebbe non
essere spedito con il computer.
Page 89

POSIZIONE DEL FILE: J:\DL\DL044469\DTP\D8854ib0.fm
Installazione del computer
ATTENZIONE: Prima di eseguire le procedure seguenti, consultare le istruzioni di sicurezza nella
Guida alle informazioni sul prodotto.
1
Disimballare la scatola degli accessori.
2
Mettere da parte il contenuto della scatola degli accessori, che sarà necessario per completare
l'installazione del computer.
La scatola degli accessori contiene anche la documentazione per l'utente ed eventuali
software o hardware aggiuntivi (quali ad esempio schede PC, unità o batterie) ordinati.
3
Collegare l'adattatore c.a. al relativo connettore sul computer e alla presa elettrica.
ATTENZIONE: L'adattatore c.a. è compatibile con le prese elettriche di qualsiasi Paese. I connettori
per l'alimentazione e le ciabatte variano invece da Paese a Paese. L'uso di un cavo incompatibile o non
correttamente collegato alla ciabatta o alla presa elettrica potrebbe provocare incendi o il
danneggiamento dell'apparecchiatura.
AVVISO: Quando si utilizza l'adattatore c.a., fissare il cavo in modo che non possa essere tirato,
aggrovigliato, calpestato o schiacciato da oggetti come le gambe di una sedia o i supporti per scrivania.
AVVISO: Quando si scollega l'adattatore c.a. dal computer, fare presa sul connettore (non sul cavo) e
tirare con decisione ma delicatamente, per non danneggiarlo. Quando si avvolge il cavo dell'adattatore
c.a., accertarsi di seguire l'angolazione del connettore sull'adattatore c.a. per evitare di danneggiare il
cavo.
N.B. Non collegare il computer a un replicatore di porte USB prima di averlo acceso e spento almeno
una volta.
RISERVATO DELL – PRELIMINARE 1/27/05 – SOLO PER IL CONTROLLO
Guida di consultazione rapida 89
Page 90

4
Aprire lo schermo del computer e premere il pulsante di alimentazione per accendere il
computer.
www.dell.com | support.dell.com
POSIZIONE DEL FILE: J:\DL\DL044469\DTP\D8854ib0.fm
pulsante di
alimentazione
RISERVATO DELL – PRELIMINARE 1/27/05 – SOLO PER IL CONTROLLO
90 Guida di consultazione rapida
Page 91

POSIZIONE DEL FILE: J:\DL\DL044469\DTP\D8854ib0.fm
Informazioni sul computer
Consultare la
Guida dell'utente
desktop o fare clic sul pulsante
dell'utente e di sistema
Guida dell'utente
in linea per informazioni dettagliate sul computer. Per accedere alla
(a seconda del sistema operativo), fare doppio clic sull'icona
Start
, fare clic su
Guida in linea e supporto tecnico
. I seguenti elementi rispondono ad alcune delle domande più frequenti sul
Guida dell'utente
e poi su
Guide
computer.
Adattatore modem e di rete:
•
Il computer potrebbe includere sia un modem da 56K v.90 sia un
adattatore di rete Ethernet 10/100/ sulla scheda di sistema. Per le ubicazioni dei connettori,
consultare "Vista posteriore" a pagina 93. Per maggiori informazioni sulle porte e sui
connettori, consultare "Informazioni sul computer" nella
•
Durata e utilizzo della batteria:
Sono disponibili varie batterie che possono essere utilizzate
Guida dell'utente
in linea.
col computer. L'esecuzione di determinati tipi di funzionamento, come il funzionamento
senza fili prolungato, possono ridurre notevolmente la durata ed il tempo di funzionamento
della batteria.
Per maggiori informazioni sul rendimento e l'utilizzo della batteria, consultare "Uso della
batteria" a pagina 95.
Per maggiori informazioni sul risparmio di energia, consultare la
Replicatore di porte:
•
Il computer supporta l'Advanced Port Replicator (Replicatore di porta
Guida dell'utente
.
avanzato) mobile USB.
N.B. Le periferiche di inserimento nell'alloggiamento di espansione potrebbero non essere disponibili in
tutti i Paesi.
– Per informazioni sulla periferica opzionale di inserimento nell'alloggiamento di
espansione, consultare la documentazione di accompagnamento della periferica.
– Per informazioni su come ottenere prestazioni ottimali quando si utilizza una periferica
di inserimento nell'alloggiamento di espansione con questo computer, consultare
"Soluzione dei problemi" nella
Guida dell'utente
.
sul
RISERVATO DELL – PRELIMINARE 1/27/05 – SOLO PER IL CONTROLLO
Guida di consultazione rapida 91
Page 92

Vista frontale
hi
disco rigido e indicatori
di stato della tastiera
POSIZIONE DEL FILE: J:\DL\DL044469\DTP\D8854ib0.fm
usura a scatto dello schermo
c
schermo
www.dell.com | support.dell.com
tastiera
touchpad
pulsanti del touchpad (2)
indicatori di stato
del computer
Vista sinistra
pulsante di
alimentazione
disco rigido
altoparlanti (2)
connettori audio (2) slot per schede PC
RISERVATO DELL – PRELIMINARE 1/27/05 – SOLO PER IL CONTROLLO
92 Guida di consultazione rapida
Page 93

POSIZIONE DEL FILE: J:\DL\DL044469\DTP\D8854ib0.fm
Vista destra
batteria unità ottica
Vista posteriore
ATTENZIONE: Non ostruire le prese d'aria, non introdurvi oggetti ed evitare l'accumulo di polvere.
Non riporre il computer in un ambiente con insufficiente aerazione, ad esempio una valigetta chiusa,
durante il funzionamento, in quanto ciò potrebbe provocare incendi o il danneggiamento del computer.
AVVISO: Per evitare danni al computer, attendere 5 secondi dallo spegnimento del computer prima di
scollegare una periferica esterna.
slot per cavo di sicurezza
connettori USB (3)
connettore di rete (RJ-45)
connettore del modem (RJ-11)
RISERVATO DELL – PRELIMINARE 1/27/05 – SOLO PER IL CONTROLLO
connettore video
connettore dell'adattatore c.a.
Guida di consultazione rapida 93
Page 94

Vista inferiore
POSIZIONE DEL FILE: J:\DL\DL044469\DTP\D8854ib0.fm
coperchio
dei moduli
di memoria
www.dell.com | support.dell.com
disco rigido
batteria
chiusura a scatto
dell'alloggiamento
della batteria
ventola
RISERVATO DELL – PRELIMINARE 1/27/05 – SOLO PER IL CONTROLLO
94 Guida di consultazione rapida
Page 95

POSIZIONE DEL FILE: J:\DL\DL044469\DTP\D8854ib0.fm
Uso della batteria
Rendimento della batteria
ATTENZIONE: Prima di eseguire le procedure seguenti, consultare le istruzioni di sicurezza nella
Guida alle informazioni sul prodotto.
N.B. Per maggiori informazioni sulla garanzia di Dell per il computer, consultare la Guida alle
informazioni sul prodotto o il documento di garanzia, su un foglio di carta separato, forniti con il
computer.
Per mantenere prestazioni ottimali e le impostazioni del BIOS, usare sempre il computer Dell™
con la batteria installata. Usare la batteria per alimentare il computer quando non è collegato a una
presa elettrica. Come dotazione standard viene fornita una batteria nell'apposito alloggiamento.
L'autonomia della batteria varia a seconda delle condizioni di funzionamento.
N.B. L'autonomia della batteria (il tempo per cui può conservare una carica) diminuisce col tempo. A
seconda della frequenza di utilizzo della batteria e delle condizioni in cui viene utilizzata, può essere
necessario acquistare una nuova batteria nel corso della durata del computer.
L'autonomia della batteria risulta notevolmente ridotta se si eseguono operazioni che comportano
un alto consumo di energia. A titolo esemplificativo, di seguito sono elencate alcune di queste
operazioni:
• Uso di unità ottiche, quali unità DVD o CD
• Uso di periferiche per comunicazioni di rete senza fili, Schede PC o periferiche USB
• Uso di impostazioni di valori elevati di luminosità dello schermo, screen saver con grafica 3D
o altri programmi che usano intensivamente le risorse del computer quali i giochi 3D
• Utilizzo del computer in modalità Maximum Performance
N.B. Si consiglia di collegare il computer a una presa elettrica quando si eseguono operazioni di
scrittura su CD o DVD.
ATTENZIONE: L'uso di un tipo di batteria incompatibile potrebbe provocare incendi o esplosioni.
Sostituire la batteria esclusivamente con una compatibile acquistata da Dell. La batteria agli ioni di
litio e la batteria al NiMH sono progettate per funzionare con il computer Dell. Non utilizzare una
batteria proveniente da altri computer.
ATTENZIONE: Non smaltire le batterie insieme ai rifiuti domestici. Quando la batteria non è più in
grado di mantenere il livello di carica, contattare l'ente locale preposto allo smaltimento dei rifiuti o
alla protezione dell'ambiente per ottenere suggerimenti su come smaltire la batteria agli ioni di litio o
al NiMH. Consultare "Smaltimento della batteria" nella Guida alle informazioni sul prodotto.
ATTENZIONE: L'uso improprio della batteria potrebbe provocare incendi o ustioni da sostanze
chimiche. Non perforare, incenerire o disassemblare la batteria, né esporla a temperature superiori a
65 °C. Tenere la batteria lontano dalla portata dei bambini. Maneggiare con molta attenzione una
batteria danneggiata o dalla quale si è verificata una perdita. Nelle batterie danneggiate può
verificarsi una perdita di elettroliti con conseguenti possibili lesioni personali o danni
all'apparecchiatura.
RISERVATO DELL – PRELIMINARE 1/27/05 – SOLO PER IL CONTROLLO
Guida di consultazione rapida 95
Page 96

Controllo della carica della batteria
Il Misuratore di alimentazione Dell QuickSet, l'icona e la finestra
di Microsoft
carica della batteria.
Misuratore di alimentazione Dell™ QuickSet
Se Dell QuickSet è installato, premere <Fn><F3> per visualizzare il Misuratore di alimentazione
di QuickSet.
Nella finestra
completamento della carica per la batteria installata nel computer.
www.dell.com | support.dell.com
Nella schermata
®
• Il computer è alimentato dalla batteria.
• La batteria si sta scaricando.
• Il computer è collegato ad una presa elettrica ed è alimentato da una alimentazione c.a..
• significa che è in corso la carica della batteria.
• Il computer è collegato ad una presa elettrica ed è alimentato da una alimentazione c.a..
• La batteria è completamente carica e inattiva.
POSIZIONE DEL FILE: J:\DL\DL044469\DTP\D8854ib0.fm
Misuratore alimentazione
Windows®, e l'avviso di batteria scarica, forniscono informazioni relative al livello di
Misuratore di alimentazione
Misuratore alimentazione
sono visualizzati lo stato, il livello di carica e il tempo di
sono visualizzate le seguenti icone:
Per maggiori informazioni su QuickSet, fare clic con il pulsante destro del mouse sull'icona
nell'area di notifica (ubicata nell'angolo inferiore destro del desktop di Windows) e fare clic su
(Guida in linea).
Misuratore di alimentazione di Microsoft® Windows
Il Misuratore di alimentazione di Windows indica il livello di carica residua della batteria. Per
controllare il Misuratore di alimentazione, fare doppio clic sull'icona nell'area di notifica. Per
maggiori informazioni sulla scheda
computer è collegato a una presa elettrica, apparirà l'icona .
Avviso di batteria scarica
AVVISO: Per evitare che i dati vengano persi o danneggiati, salvare il lavoro immediatamente non
appena si riceve un messaggio che avvisa che la batteria è scarica. Collegare quindi il computer a una
presa elettrica. Se la batteria si scarica completamente, la modalità di sospensione viene avviata
automaticamente.
Quando il livello di carica della batteria si è ridotto approssimativamente del 90 percento verrà
visualizzata una finestra a comparsa. Consultare la
sugli avvisi sul livello di carica batteria basso.
RISERVATO DELL – PRELIMINARE 1/27/05 – SOLO PER IL CONTROLLO
96 Guida di consultazione rapida
®
Misuratore alimentazione
Guida dell'utente
, consultare la
Guida dell'utente
per maggiori informazioni
Help
. Se il
Page 97

POSIZIONE DEL FILE: J:\DL\DL044469\DTP\D8854ib0.fm
L'avviso del livello di carica batteria basso viene emesso quando la batteria è scarica al 90% circa.
Viene emesso un segnale acustico per indicare che l'autonomia residua della batteria è minima.
Durante tale intervallo di tempo l'altoparlante emetterà periodicamente ulteriori segnali acustici.
Quando la batteria è quasi scarica, il computer entrerà in modalità di sospensione.
Ricarica della batteria
N.B. L'adattatore c.a. consente di caricare una batteria completamente scarica in circa 2 ore con il
computer spento. Il tempo di carica risulta più lungo se il computer è acceso. La batteria può essere
lasciata nel computer per tutto il tempo desiderato. I circuiti interni della batteria ne impediscono il
sovraccarico.
Quando si collega il computer a una presa elettrica oppure si installa una batteria in un computer
collegato a una presa elettrica, viene automaticamente eseguito il controllo del livello di carica e
della temperatura della batteria. Se necessario, l'adattatore c.a. carica la batteria e la mantiene
carica.
Se la temperatura della batteria è elevata a causa dell'utilizzo o perché si trova in un ambiente
caldo, la ricarica potrebbe non avere luogo quando si collega il computer ad una presa elettrica.
La batteria è troppo calda per essere caricata se l'indicatore lampeggia alternativamente in
verde e arancione. Scollegare il computer dalla presa elettrica, quindi lasciare raffreddare il
computer e la batteria finché non raggiungono la temperatura ambiente. Collegare quindi il
computer a una presa elettrica per continuare a caricare la batteria.
Ricalibratura della batteria
Se il computer è configurato con una batteria all'idruro di nichel metallico (NiMH), è possibile
ricalibrare la batteria eseguendo il software Battery Recalibration (Ricalibratura della batteria). La
ricalibratura garantisce che l'indicatore del Misuratore di alimentazione sia preciso.
Ricalibrare la batteria al NiMh quando si verifica uno degli eventi seguenti:
• appare un messaggio che richiede all'utente di ricalibrare la batteria;
• diminuisce l'autonomia tipica della batteria.
Quando si ricalibra la batteria al NiMH, non rimuovere la batteria. Concedere diverse ore alla
procedura per completarsi.
Ricalibratura della batteria quando viene visualizzato il messaggio di ricalibratura
Se il computer visualizza un messaggio che richiede all'utente di ricalibrare la batteria:
1
Arrestare il sistema tramite il menu
2
Collegare il computer ad una presa elettrica e riaccenderlo.
Il messaggio di ricalibratura della batteria dovrebbe essere visualizzato sullo schermo
immediatamente dopo il logo Dell.
RISERVATO DELL – PRELIMINARE 1/27/05 – SOLO PER IL CONTROLLO
Avvio
.
Guida di consultazione rapida 97
Page 98

POSIZIONE DEL FILE: J:\DL\DL044469\DTP\D8854ib0.fm
3
Per saltare il processo di ricalibratura della batteria e procedere con l'avvio del sistema,
premere <ESC>.
4
Per avviare la procedura Battery Recalibration (Ricalibratura batteria), premere <F1>.
La ricalibratura della batteria comincia e l'adattatore c.a. ricarica la batteria finché l'indicatore
della batteria (mostrato sulla schermata di informazioni relative alla batteria) dichiara che è
carica al 100%.
Viene visualizzato un messaggio che richiede all'utente di rimuovere l'adattatore c.a. quando
la batteria è completamente ricaricata.
5
Quando è richiesto, scollegare il computer dalla presa elettrica.
www.dell.com | support.dell.com
La batteria si scarica finché l'indicatore della batteria dichiara che è carica allo 0%. Quando la
batteria è completamente scarica, il computer si spegne automaticamente.
6
Collegare l'adattatore c.a. al computer.
7
Consentire all'adattatore c.a. di ricaricare la batteria finché l'indicatore di stato della batteria
si spegne.
N.B. È possibile utilizzare il computer mentre la batteria si sta ricaricando. Tuttavia, non utilizzare il
computer alimentandolo a batteria finché la batteria non si sia completamente ricaricata.
Ricalibratura della batteria utilizzando l'utilità Installazione del sistema
1
Collegare il computer a una presa elettrica.
2
Accendere (o riavviare) il computer.
3
Quando viene visualizzato il logo DELL™, premere immediatamente <F2>. Se si attende
troppo a lungo e viene visualizzato il logo del sistema operativo Microsoft
attendere la visualizzazione del desktop di Windows. Arrestare quindi il sistema e riprovare.
N.B. Per informazioni su una voce specifica in una schermata di configurazione del sistema, selezionare
la voce e consultare l'area della schermata relativa alla Guida in linea.
4
Utilizzando il tasto freccia GIÙ, scegliere
• La schermata
visualizzata mostrando le funzioni (
della schermata e lo stato di carica
della schermata.
• L'adattatore c.a. comincia la ricarica della batteria. L'opzione
(Carica batteria al massimo) viene evidenziata a sinistra della schermata. Le informazioni
relative alla percentuale di ricarica vengono visualizzate a destra della schermata.
• L'adattatore c.a. ricarica la batteria finché l'indicatore della batteria dichiara che è carica
al 100%. L'indicatore della batteria si spegne dopo che la batteria si è completamente
ricaricata.
5
Accertarsi che l'indicatore della batteria sia spento.
Battery Info
Battery Recalibration Process
Charge
Battery Info
®
Windows®,
(Informazioni sulla batteria).
(Processo di ricalibratura batteria) viene
[Carica] o
Discharge
[Scarica]) a sinistra
(Informazioni sulla batteria) a destra
Charge Battery to Full
RISERVATO DELL – PRELIMINARE 1/27/05 – SOLO PER IL CONTROLLO
98 Guida di consultazione rapida
Page 99

POSIZIONE DEL FILE: J:\DL\DL044469\DTP\D8854ib0.fm
6
Scollegare il computer dalla presa elettrica.
La batteria si scarica finché l'indicatore della batteria dichiara che è carica allo 0%. L'opzione
Discharge Battery to Empty
(Scarica batteria al minimo) viene evidenziata a sinistra della
schermata. Quando la batteria è completamente scarica, il computer si spegne
automaticamente.
7
Collegare il computer alla presa elettrica.
8
Consentire all'adattatore c.a. di ricaricare la batteria finché l'indicatore di stato della batteria
si spegne.
N.B. È possibile utilizzare il computer mentre la batteria si sta ricaricando. Tuttavia, non utilizzare il
computer alimentandolo a batteria finché la batteria non si sia completamente ricaricata.
Rimozione della batteria
ATTENZIONE: Prima di eseguire queste procedure, rimuovere tutti i connettori delle periferiche quale
il cavo telefonico, il cavo di rete, il cavo del monitor esterno o i cavi e le periferiche USB.
1
Verificare che il computer sia spento o scollegato dalla presa elettrica.
2
Se il computer è collegato al replicatore di porte USB, scollegarlo. Per istruzioni, consultare la
documentazione fornita col replicatore di porte USB.
3
Fare scorrere la chiusura a scatto dell'alloggiamento della batteria situata sotto il computer,
quindi rimuovere la batteria dall'alloggiamento.
Installazione della batteria
Accertarsi che il sistema sia spento. Fare scorrere la batteria nell'alloggiamento fino a quando la
chiusura a scatto scatta in posizione.
RISERVATO DELL – PRELIMINARE 1/27/05 – SOLO PER IL CONTROLLO
Guida di consultazione rapida 99
Page 100

Conservazione della batteria
Se non si intende usare il computer per un certo periodo di tempo, rimuovere la batteria. Una
batteria si scarica se non la si usa per un periodo prolungato, sarà pertanto necessario ricaricare
completamente la batteria prima di utilizzarla.
Soluzione dei problemi
Notebook System Software (NSS)
Se si reinstalla il sistema operativo del computer Dell™, si consiglia anche di reinstallare l'utilità
NSS. Questa utilità è disponibile nel CD opzionale
www.dell.com | support.dell.com
supporto tecnico della Dell all'indirizzo
Per scaricare l'utilità, passare a
del computer dal menu a discesa. Scegliere in
categoria di download),
configurazione), scegliere il sistema operativo e la lingua, quindi seguire le istruzioni visualizzate.
NSS fornisce aggiornamenti critici per il sistema operativo ed il supporto per unità disco floppy
USB da 3,5 pollici Dell, processori Intel
e periferiche USB. NSS è necessario per il corretto funzionamento del computer Dell. Il software
rileva automaticamente il computer ed il sistema operativo e installa gli aggiornamenti appropriati
per la propria configurazione.
POSIZIONE DEL FILE: J:\DL\DL044469\DTP\D8854ib0.fm
Drivers and Utilities
support.dell.com
Downloads
nell'indirizzo
.
support.dell.com
Select Your Download Category
System and Configuration Utilities
®
Pentium®M, processori Intel Celeron®M, unità ottiche
(Utilità di sistema e di
e sul sito Web del
e selezionare il modello
(Seleziona la
N.B. NSS è fondamentale per il corretto funzionamento delle periferiche USB.
Blocchi e problemi del software
ATTENZIONE: Prima di eseguire le procedure seguenti, consultare le istruzioni di sicurezza nella
Guida alle informazioni sul prodotto.
Il computer non si avvia
ACCERTARSI CHE L'ADATTATORE C.A. SIA SALDAMENTE COLLEGATO AL COMPUTER E ALLA PRESA
ELETTRICA
Il computer smette di rispondere
AVVISO: È possibile perdere dati se non si effettua l'arresto del sistema operativo.
SPEGNERE IL COMPUTER — Se il computer non risponde alla pressione di un tasto o al movimento del
mouse, premere il pulsante di alimentazione e tenerlo premuto per almeno 8-10 secondi fino a quando
il computer si spegne. Riavviare il computer.
RISERVATO DELL – PRELIMINARE 1/27/05 – SOLO PER IL CONTROLLO
100 Guida di consultazione rapida
 Loading...