

Dell E Series Installation Instructions Manual
Dell® E Series Monitor VESA
Mounting Bracket Installation
Instructions
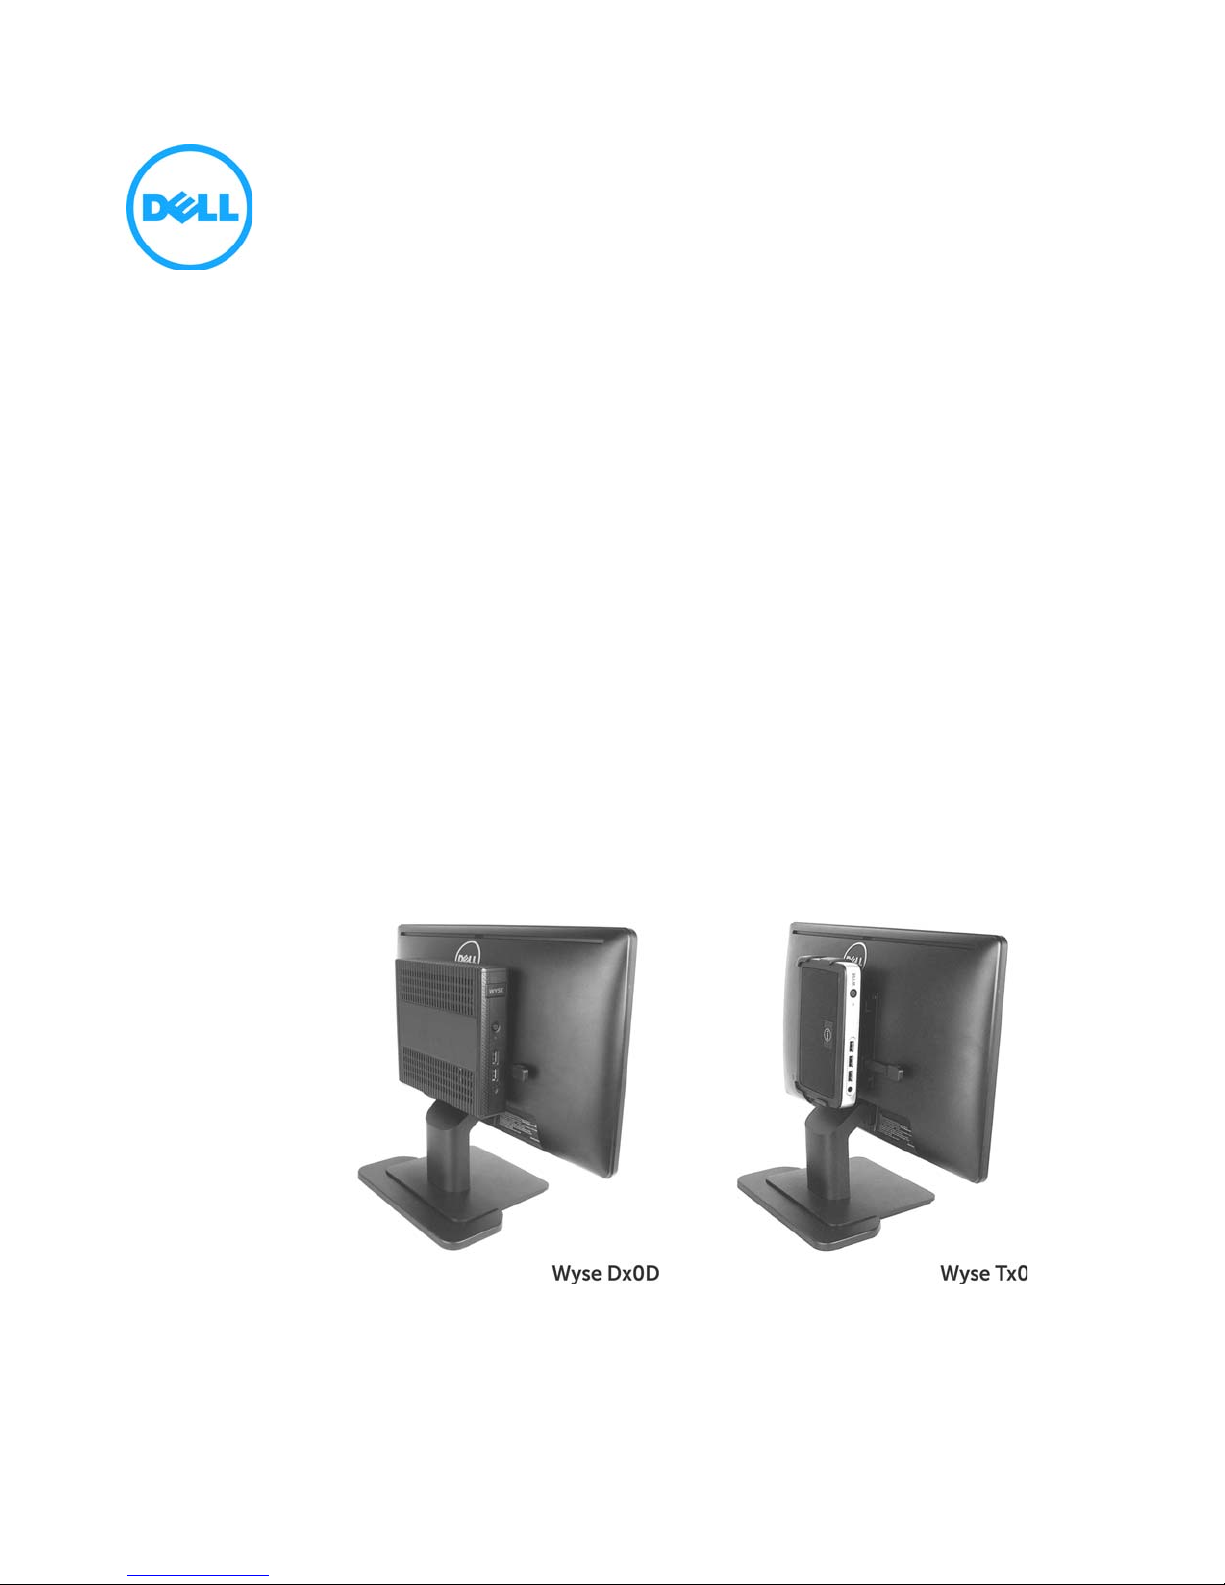
The VESA mounting bracket enables a Wyse cloud client to be mounted to the Dell E
Series Monitor. The bracket attaches to the monitor (a #1 Phillips-head screwdriver is
required), the cloud client is inserted in a vertical position, and then cables are
attached.
Note: If using a 22- or 23-inch Dell E Series Monitor, the monitor base extension must
be used.
Note: If using an E2414 Monitor, the P series mounting bracket must be used.
Wyse Cloud Clients Using this Bracket
Wyse models D class, P25, and T class may use the Dell E Series Monitor VESA
Mounting Bracket. (Shown below are D and T class on monitors having the attached
base extension.)
Note: Mount the cloud client only as shown; improper orientation (where the back
panel or front panel is facing down) could restrict the airflow of heat from the device
and damage it.
Note: Do not enclose the cloud client in a confined environment without proper
ventilation.
2
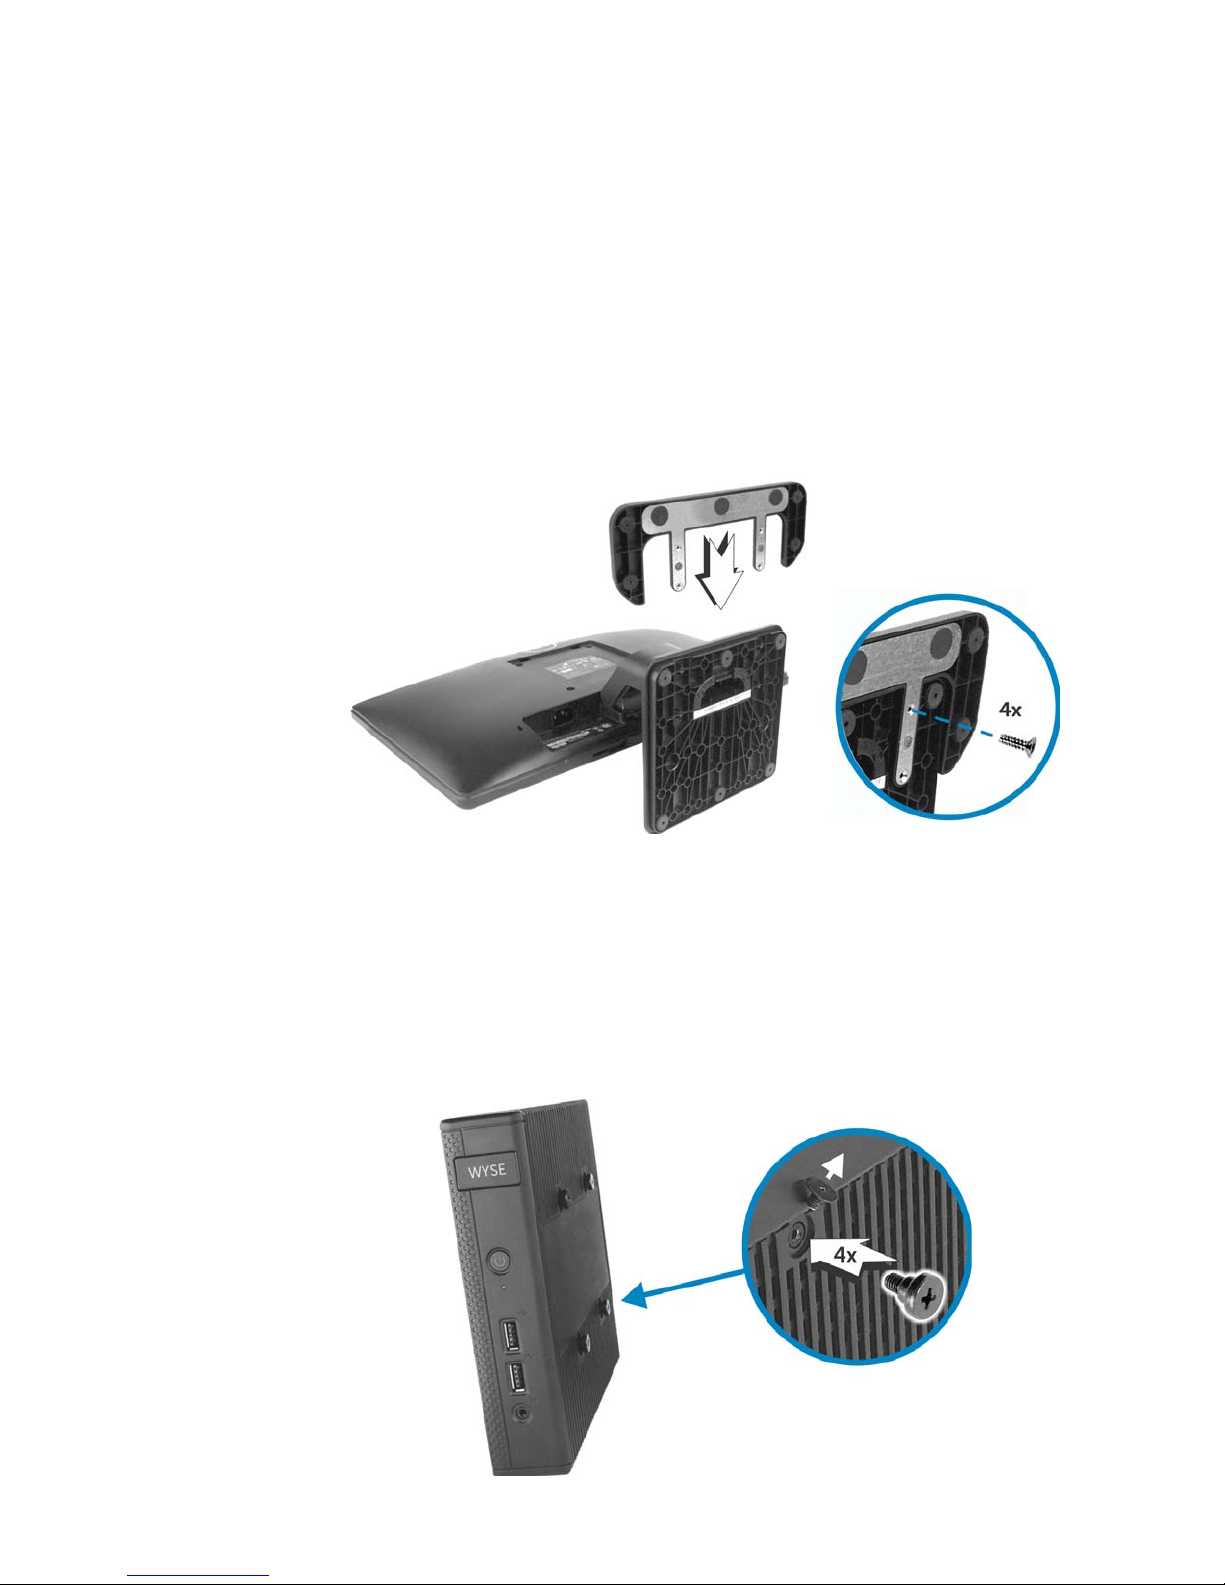
Mounting the Base Extension to the 22- and 23-inch
E Series Monitor
You can skip this step if you are using an E Series Monitor of a different size.
1. Place the E Series Monitor face down on a padded table, with the foot of the stand
hanging over the table’s edge.
2. Slide the Base Extension onto the monitor stand as shown and firmly attach the
provided screws.
Important: The bottom of the stand has either a plastic base (as shown) or a metal
base. If your stand has the metal base, use the longer screws from the Base
Extension kit. If your stand has the plastic base, use the shorter screws.
Mounting the D Class to the E Series Monitor
Use the following instructions to mount the D class cloud client to the Dell E Series
Monitor VESA Mounting Bracket.
1. Remove the cloud client from its horizontal or vertical stand. Using a Phillips-head
screwdriver, remove the four (4) filler screws from the side of the cloud client and
replace them with the provided four (4) shoulder screws. Discard the filler screws.
 Loading...