

Dell DX6104-CSN, DX6104-SN, DX6104-SCN Getting Started Manual

Dell DX6104-CSN, DX6104-SN, And DX6104-SCN
Object Storage Solutions
Getting Started Guide
Regulatory Model: E18S Series
Regulatory Type: E18S001

Notes, Cautions, and Warnings
NOTE: A NOTE indicates important information that helps you make better use of your computer.
CAUTION: A CAUTION indicates either potential damage to hardware or loss of data and tells you how to avoid the
problem.
WARNING: A WARNING indicates a potential for property damage, personal injury, or death.
© 2012 Dell Inc.
Trademarks used in this text: Dell™, the Dell logo, Dell Boomi™, Dell Precision™ , OptiPlex™, Latitude™, PowerEdge™, PowerVault™,
PowerConnect™, OpenManage™, EqualLogic™, Compellent™, KACE™, FlexAddress™, Force10™ and Vostro™ are trademarks of Dell
Inc. Intel®, Pentium®, Xeon®, Core® and Celeron® are registered trademarks of Intel Corporation in the U.S. and other countries. AMD
®
is a registered trademark and AMD Opteron™, AMD Phenom™ and AMD Sempron™ are trademarks of Advanced Micro Devices, Inc.
Microsoft®, Windows®, Windows Server®, Internet Explorer®, MS-DOS®, Windows Vista® and Active Directory® are either trademarks
or registered trademarks of Microsoft Corporation in the United States and/or other countries. Red Hat® and Red Hat
®
Enterprise Linux® are registered trademarks of Red Hat, Inc. in the United States and/or other countries. Novell® and SUSE® are
registered trademarks of Novell Inc. in the United States and other countries. Oracle® is a registered trademark of Oracle Corporation
and/or its affiliates. Citrix®, Xen®, XenServer® and XenMotion® are either registered trademarks or trademarks of Citrix Systems, Inc. in
the United States and/or other countries. VMware
®
,
Virtual SMP
®
,
vMotion
®
,
vCenter
®
and
vSphere
®
are registered trademarks or
trademarks of VMware, Inc. in the United States or other countries.
IBM
®
is a registered trademark of International Business Machines
Corporation.
2012 - 11
Rev. A01
Installation And Configuration
WARNING: Before performing the following procedure, review the safety instructions that came with the system.
Unpacking A Rack System
Unpack your system and identify each item.
Assemble the rails and install the system in the rack following the safety instructions and the rack installation
instructions provided with your system.
Figure 1. Installing the Rails and System in a Rack
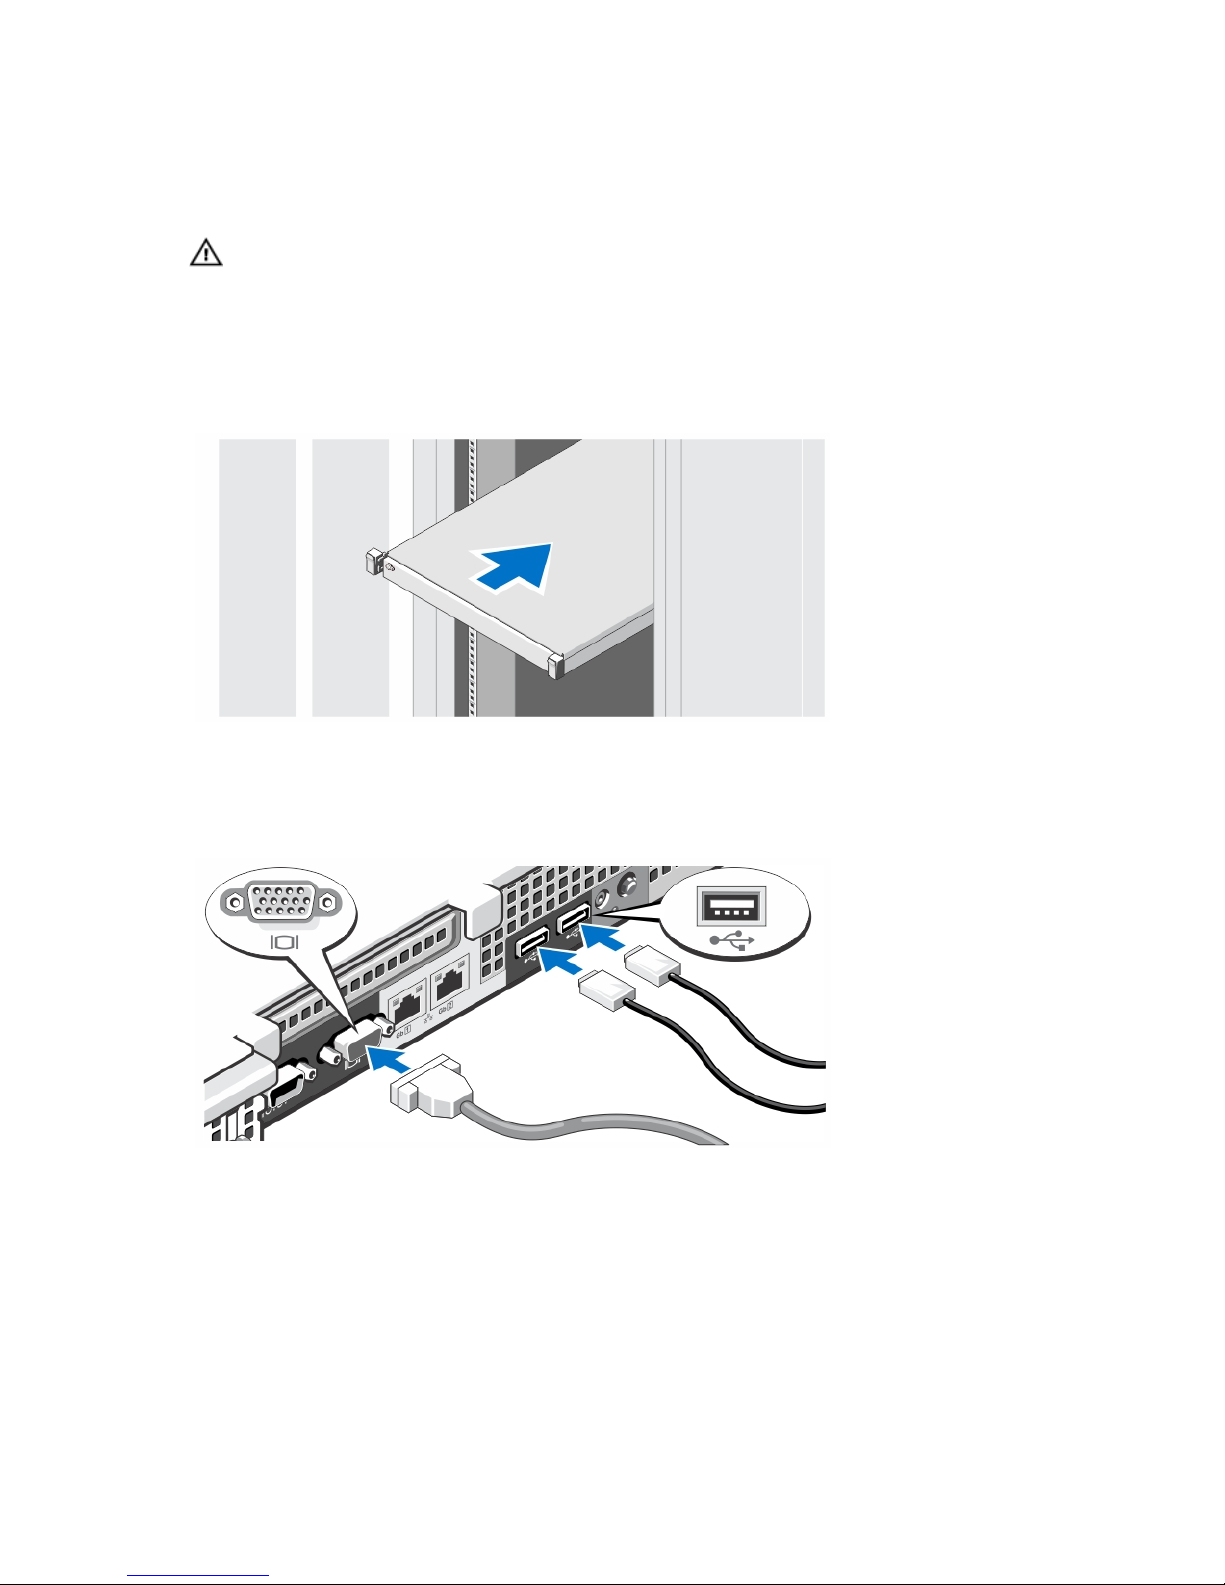
Optional—Connecting The Keyboard, Mouse, And Monitor
Figure 2. Optional—Connecting the Keyboard, Mouse, and Monitor
Connect the keyboard, mouse, and monitor (optional).
The connectors on the back of your system have icons indicating which cable to plug into each connector. Be sure to
tighten the screws (if any) on the monitor's cable connector.
3
 Loading...